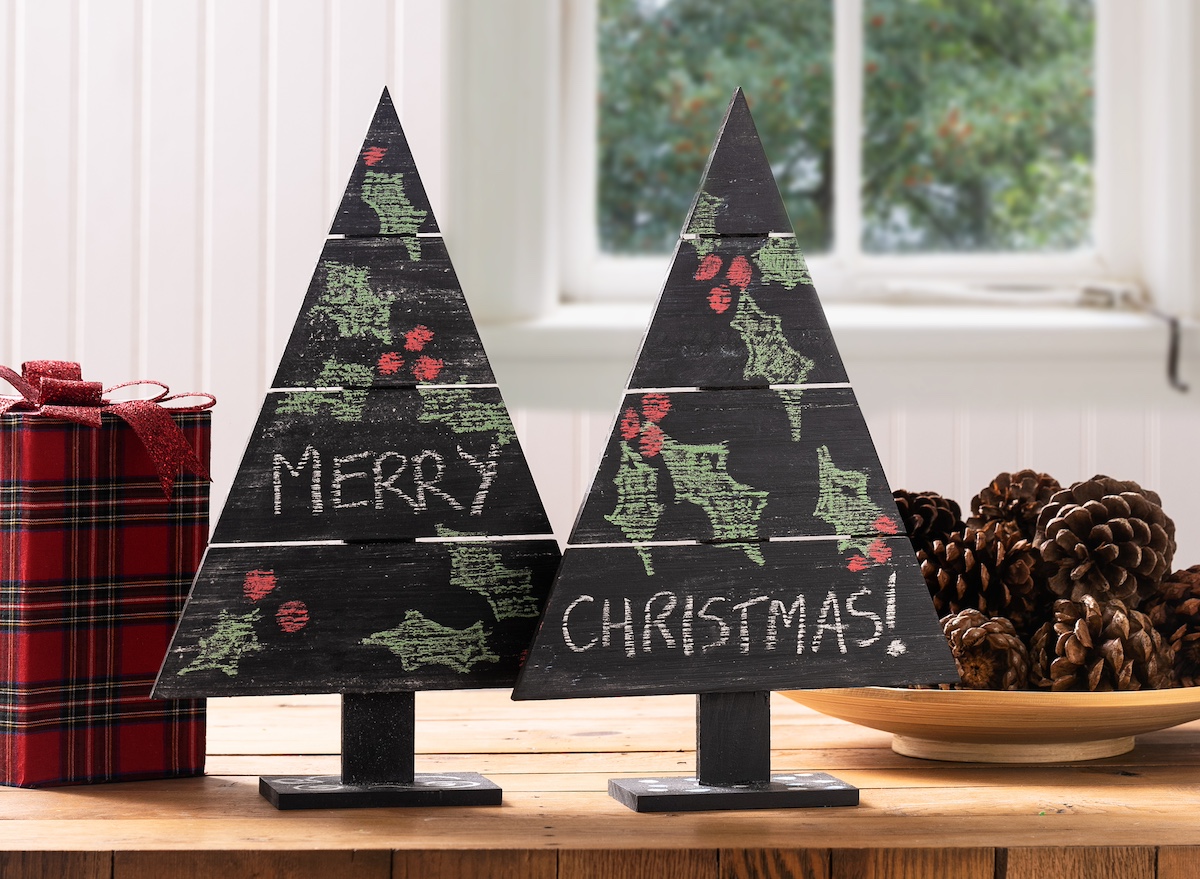
Learn how to make chalkboard Christmas trees using supplies from the craft store! This is an easily holiday decor project that looks great on a mantel or with a table display.
Skills Required: Beginner. You don’t need any crafting experience to make this homemade decor. You’ll be applying paint with a brush . . . there are some tips.
As the holiday season approaches, lots of us load up our homes with the “spirit of Christmas”. The decorations turn to reds and greens, and there are garlands everywhere.
Amidst the twinkling lights and the aroma of freshly baked cookies, there’s always room for a touch of DIY charm.
This year I decided it was going to be with chalkboard paint. I really love chalkboard paint, and turning simple surfaces into writeable ones.
It was time to incorporate this paint into Christmas crafts. I’m talking about crafting your very own chalkboard Christmas trees – a project that’s as easy to make as it is to display.
These trees are a blend of rustic charm and contemporary flair, a testament to your creativity for anyone who sees them. They can also be a nod to traditional holiday motifs if you choose.

These trees are a canvas for your holiday cheer. Whether you’re writing festive quotes, counting down the days to Christmas, or just doodling away, they’re a fun creative surface.
Each day can bring a new design, a new message, making these trees a living part of your holiday celebration. Kinda fun, right?
To make these, you don’t need to be a crafting guru or spend a fortune on supplies. I got these wood trees on Amazon and the chalkboard paint from the craft store.
During the Christmas season, you’ll see a lot of wood trees of various sizes at craft stores, so if you’re looking for a surface then that’s another option.
Once you have the supplies, this project is wonderfully easy. It’s perfect for a cozy winter evening or as a fun activity to do with the kids or friends.
There’s something deeply satisfying about creating your own holiday decor, a feeling of accomplishment that nothing store-bought can match. To start off, here’s what you’ll need:
- Unfinished wood trees – 14.5″ x 9.5″
- Chalkboard paint – any color you desire – I used black
- Sponge paint
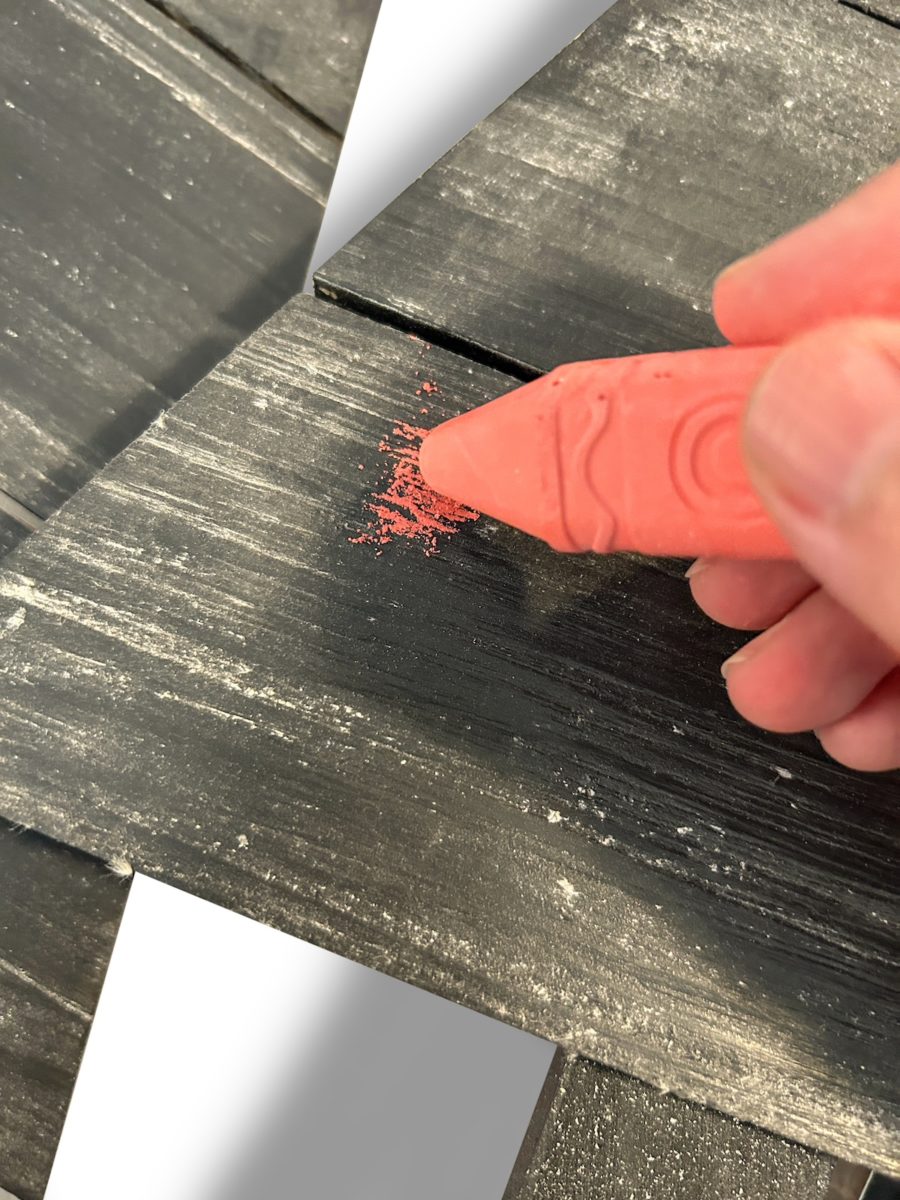
- Chalk – I used white, red, and green
- Sandpaper (optional)
Note: make sure to follow the instructions on the bottle of chalkboard paint. Usually it involves applying two layers of paint, letting dry between each layer. Then you’ll prep the surface with chalk:
These are going to look so cute on my winter mantel. I love the contrast of the black with the red and green in a Christmas craft. 🙂 I hope you all have a very Merry Christmas!
Thank you so much for having me over Amy! If you try a chalkboard Christmas tree, let me know in the comments.

Chalkboard Christmas Trees
Equipment
- Detail brush
Materials
- 2 Unfinished wood trees – 14.5″ x 9.5″
- Chalk
- Sandpaper optional
Instructions
- If necessary, you can sand the trees with fine grit sandpaper and wipe away the dust. I used mine without sanding.

- Paint the wood trees with chalkboard paint using a foam brush, and following the instructions on the bottle. Make sure to paint the base. Let dry.
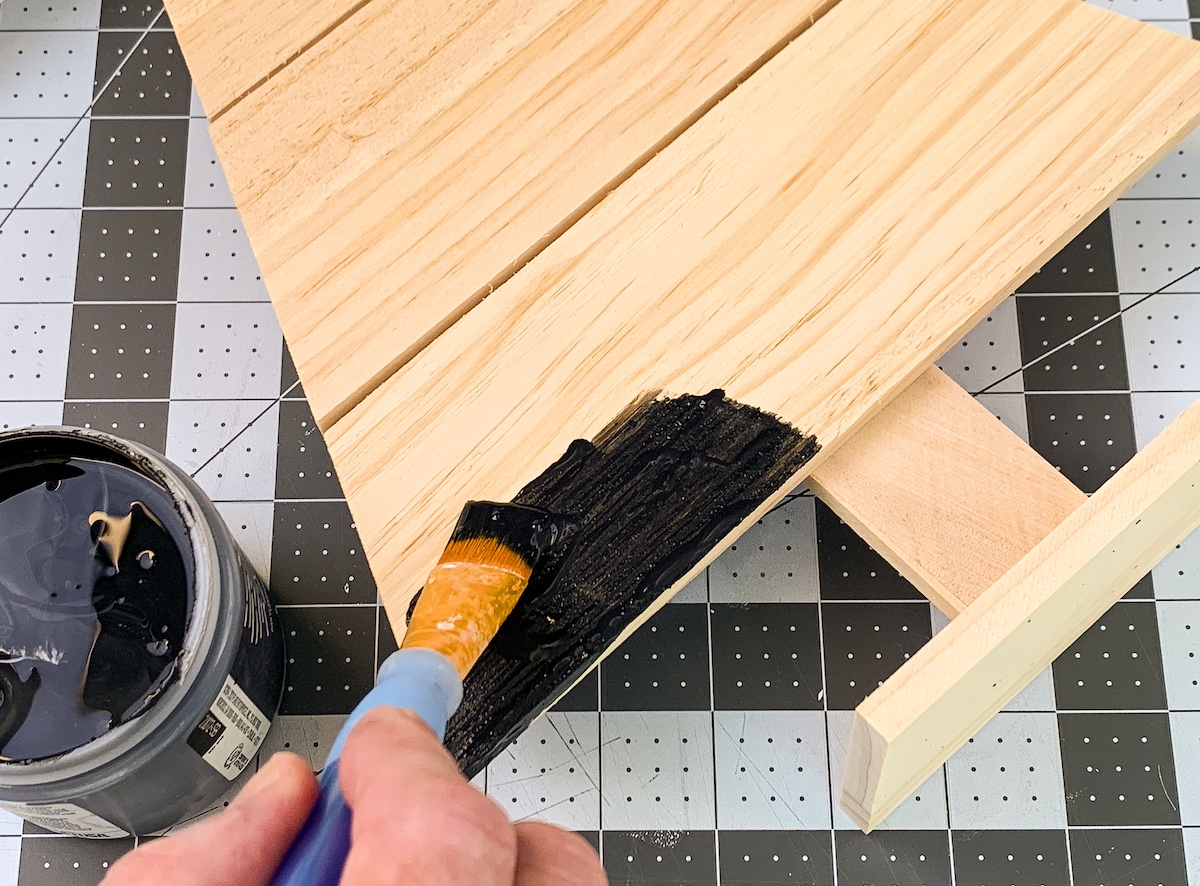
- To get the paint in between the slats of the trees, I used a small detail brush. Let dry.

- Use chalk to prep the surface according to bottle instructions.

- Use chalk in various colors to draw on quotes, deigns, and more.
I would love to hear what you think about these trees. If you want to see some additional Christmas decor projects I’ve done, check these out: