Learn how to decorate a Dollar Tree wood star for Christmas, using basic supplies from the craft store! This is fun and easy decor for the holidays.
Skills Required: Intermediate. To make this Christmas craft, it helps to have experience with paint and Mod Podge. You’ll be applying both, ironing a napkin, then adding pom pom trim.

It’s the holiday season! That time of year when the air is crisp, the hot cocoa is steaming, and our creative spirits are as high as the star atop the Christmas tree.
Speaking of stars, have you ever wandered through the holiday section of Dollar Tree and noticed the potential of those unfinished wood stars? That happened to me recently.
And today, I’m super excited to share with you a delightful Christmas decor project that will transform an inexpensive wood star into a festive masterpiece.
It’s perfect for crafters of all levels, whether you’re a seasoned DIYer or someone who usually just sticks to wrapping presents.
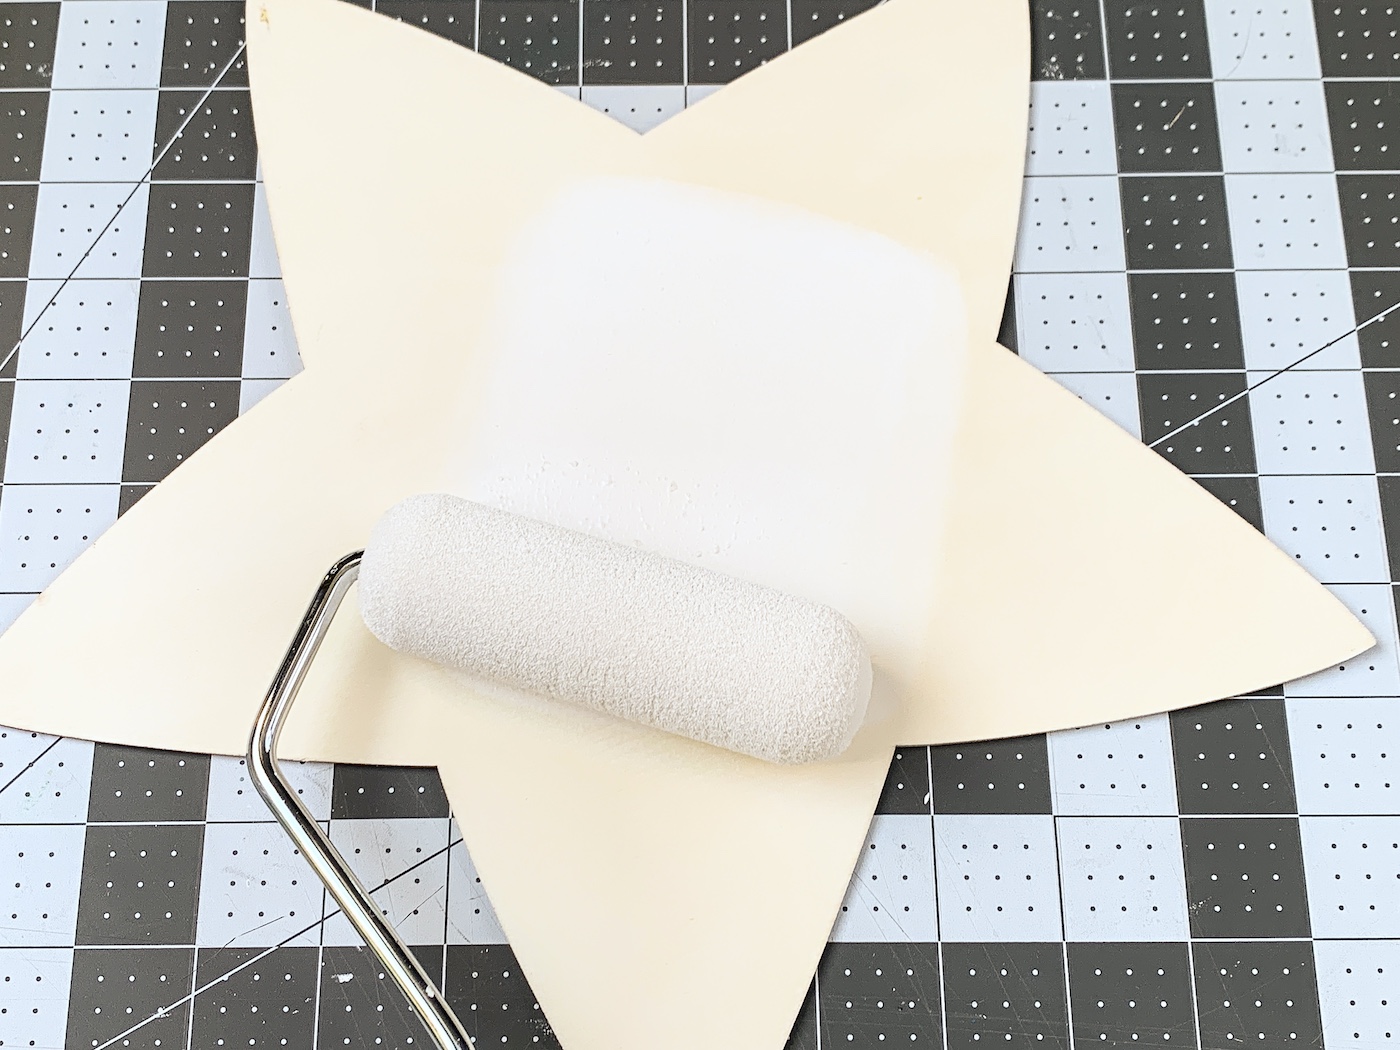
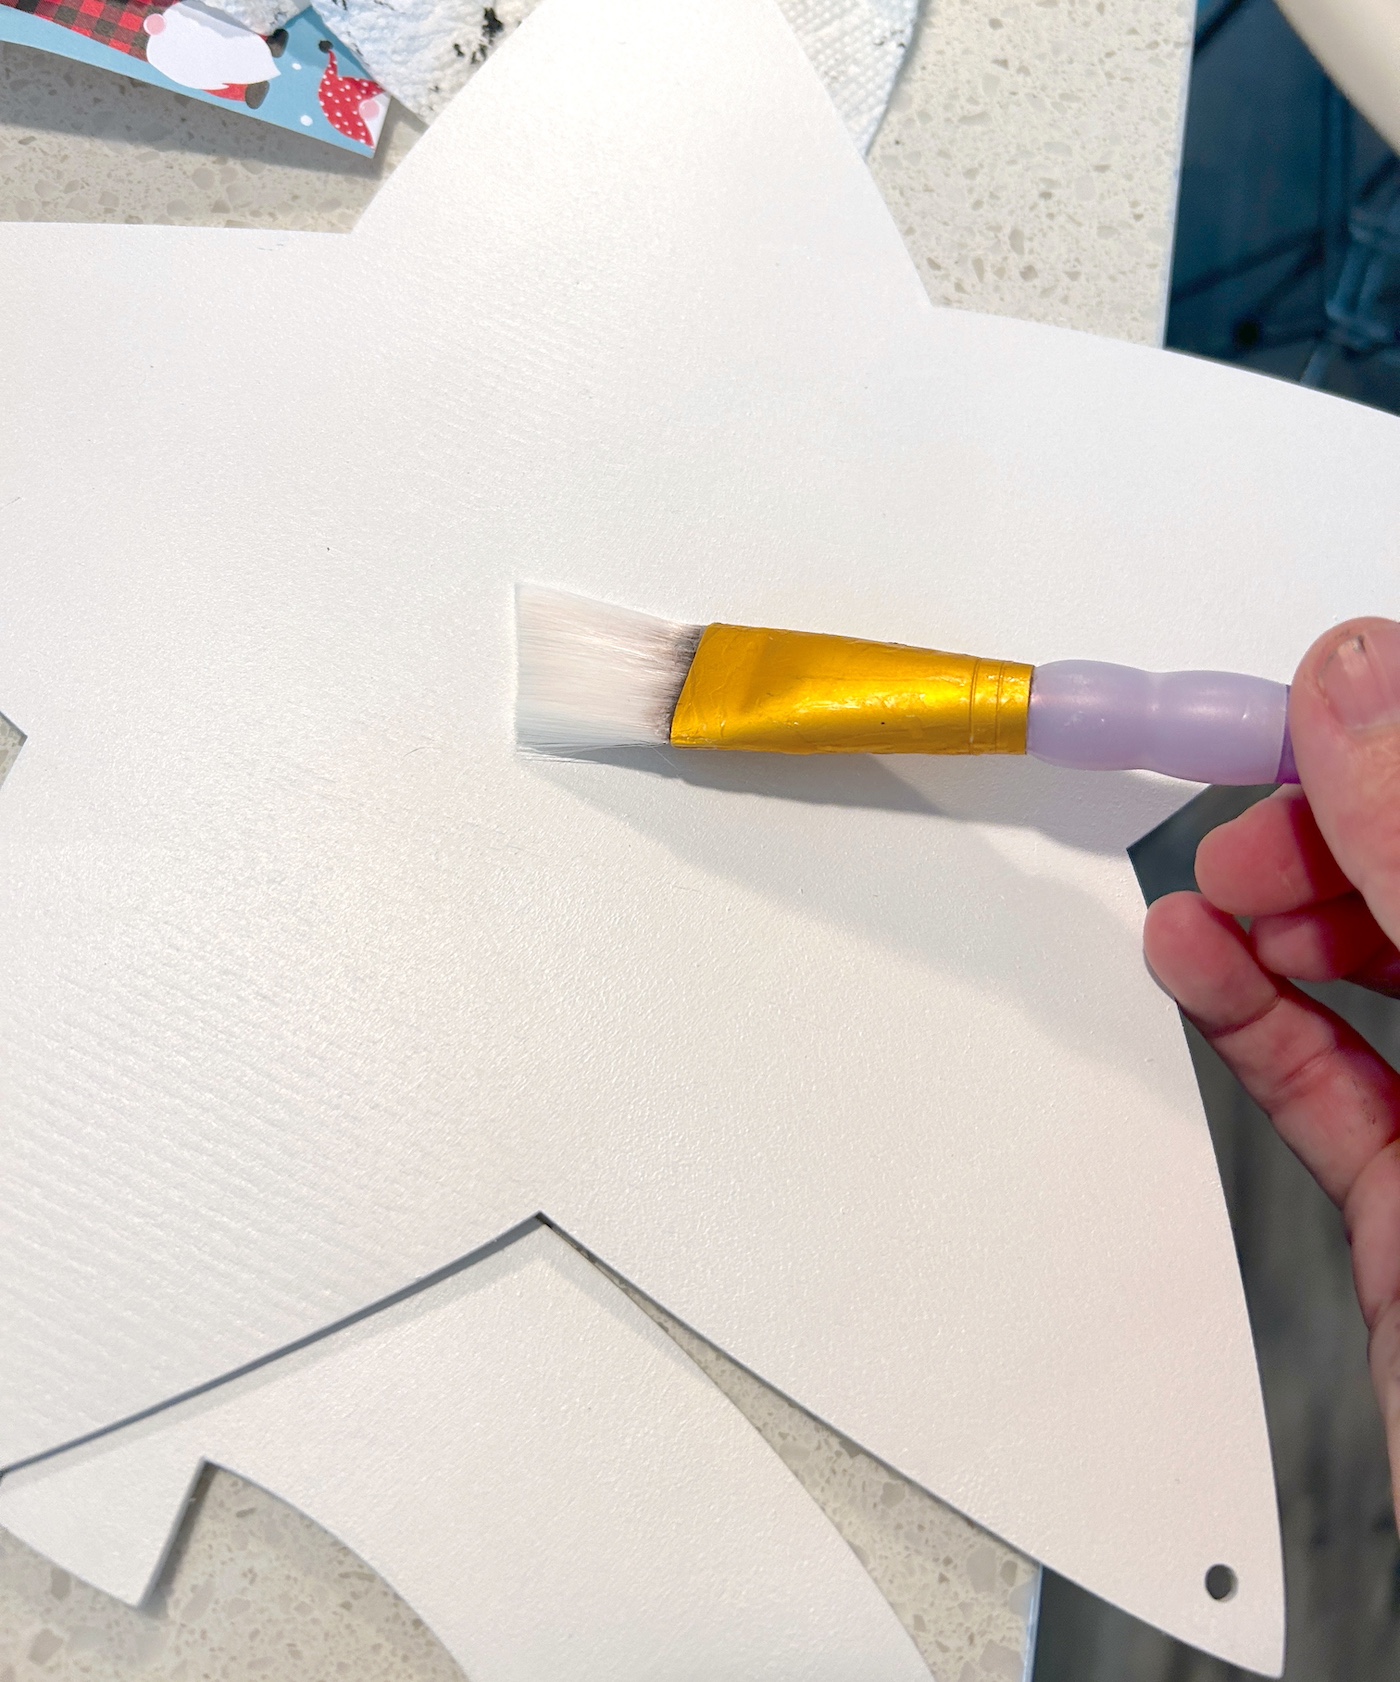
Our project begins with a simple wood star from our beloved Dollar Tree. This star, while unassuming at first glance, is about to get a dazzling makeover. First you’re going to paint it.
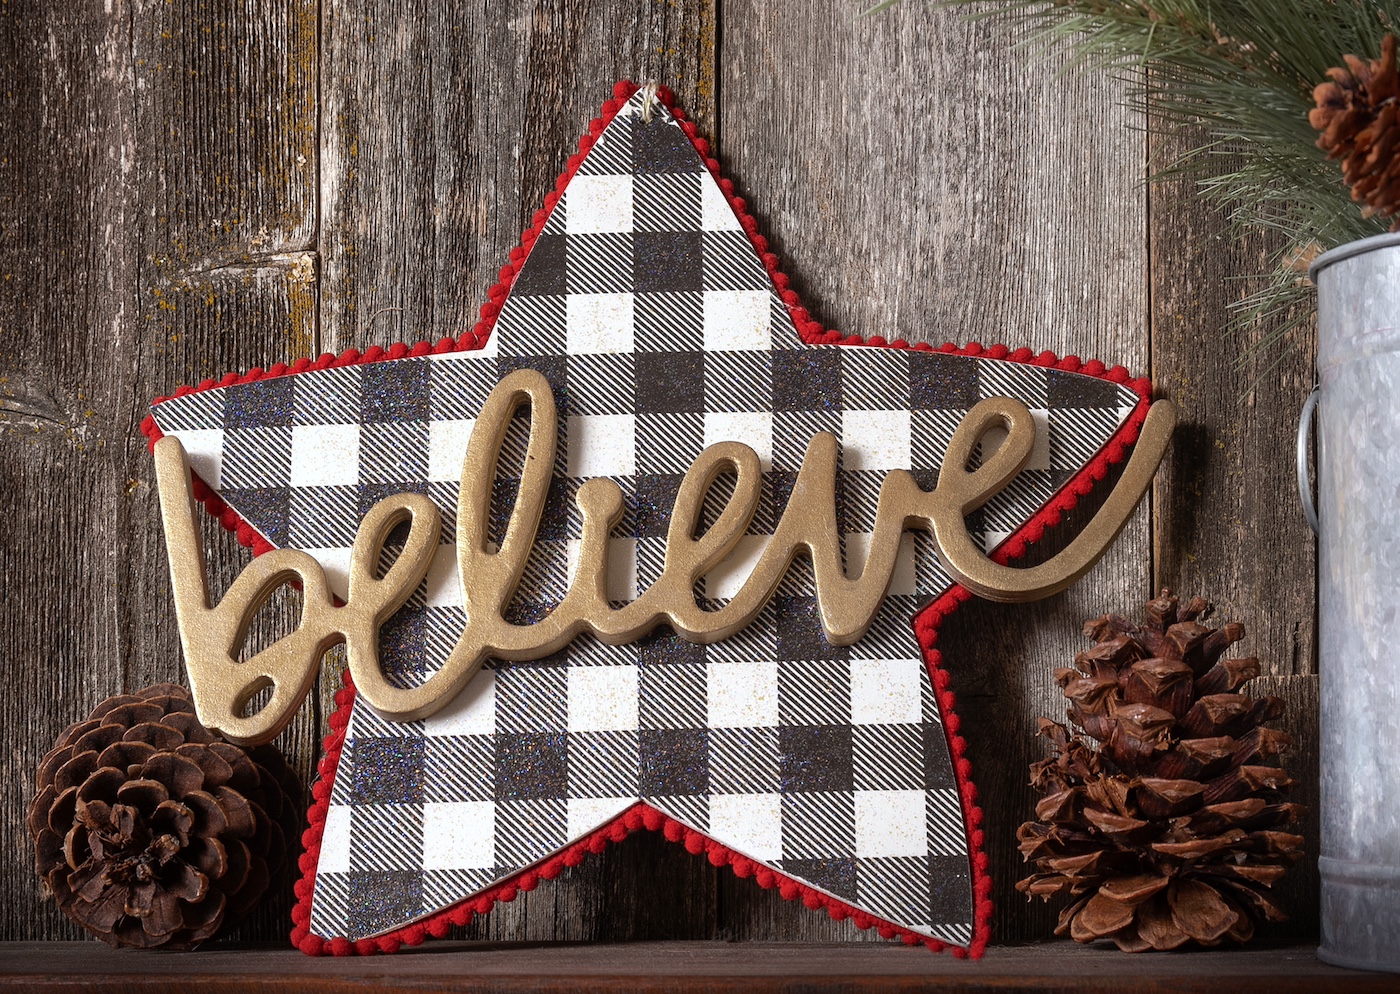
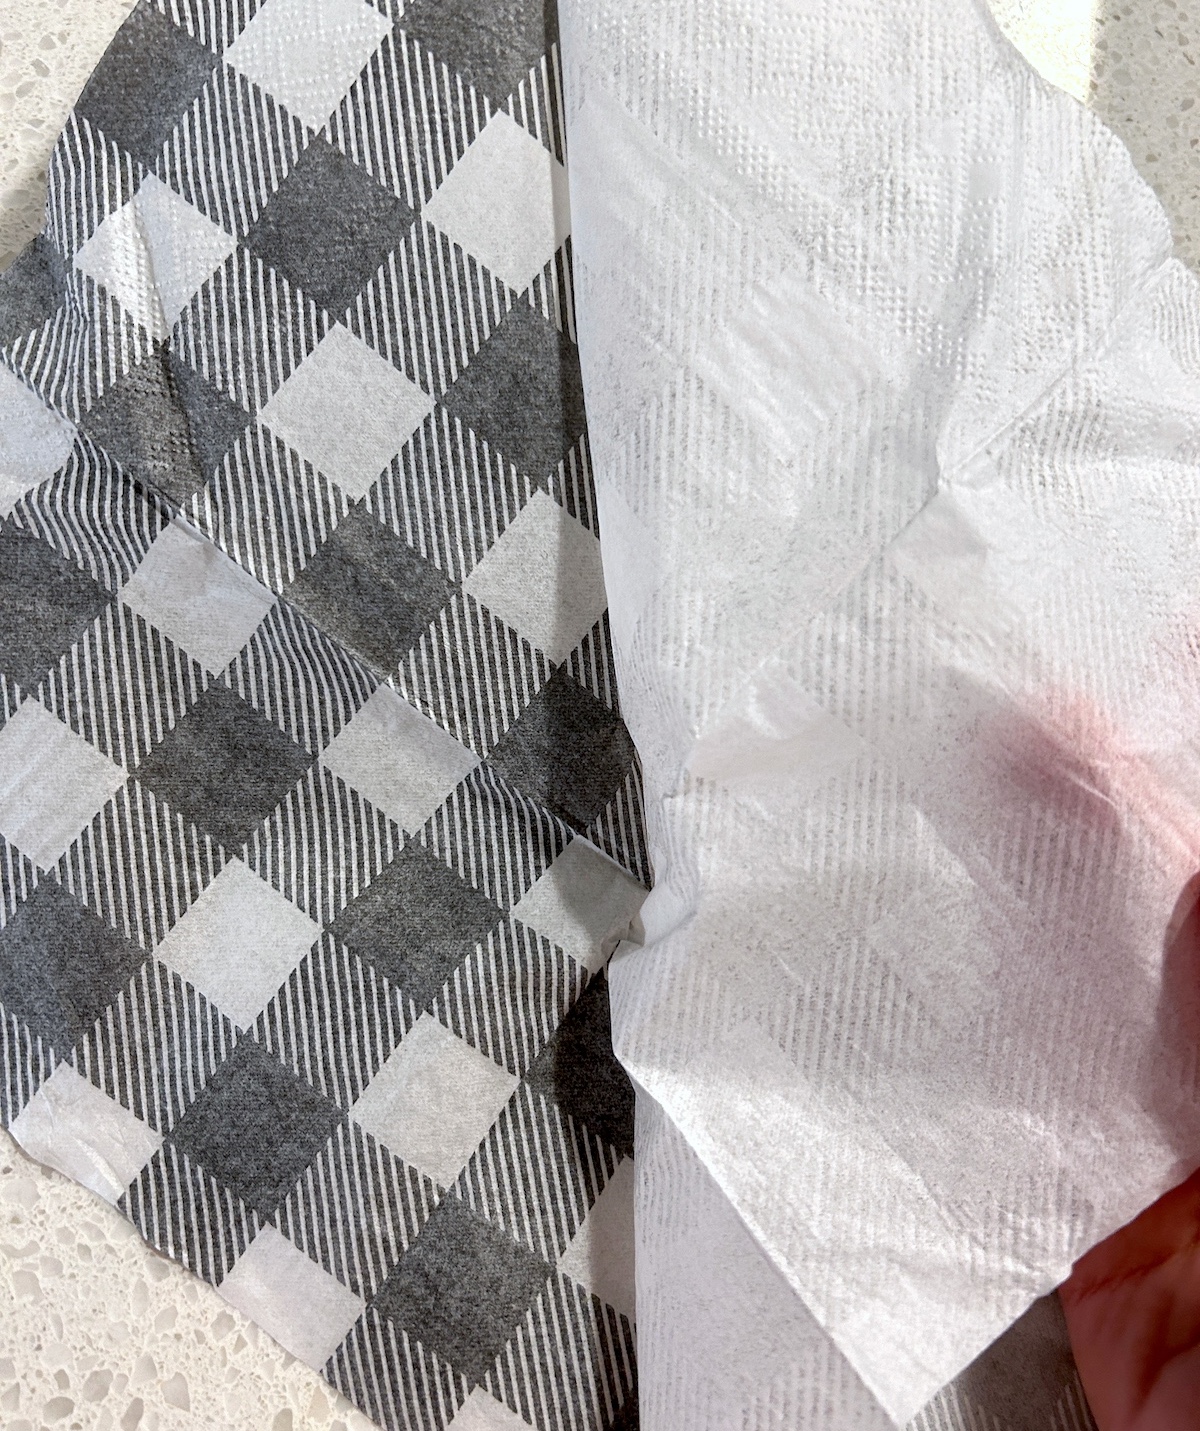
Then you’ll add the napkin, which will bring an elegant touch to our star. I used a plaid napkin and applied it to the top with Mod Podge. You can use any napkin design!
And don’t worry if you’ve never decoupaged before; it’s just a fancy word for gluing paper in a way that makes you feel like an accomplished crafter.
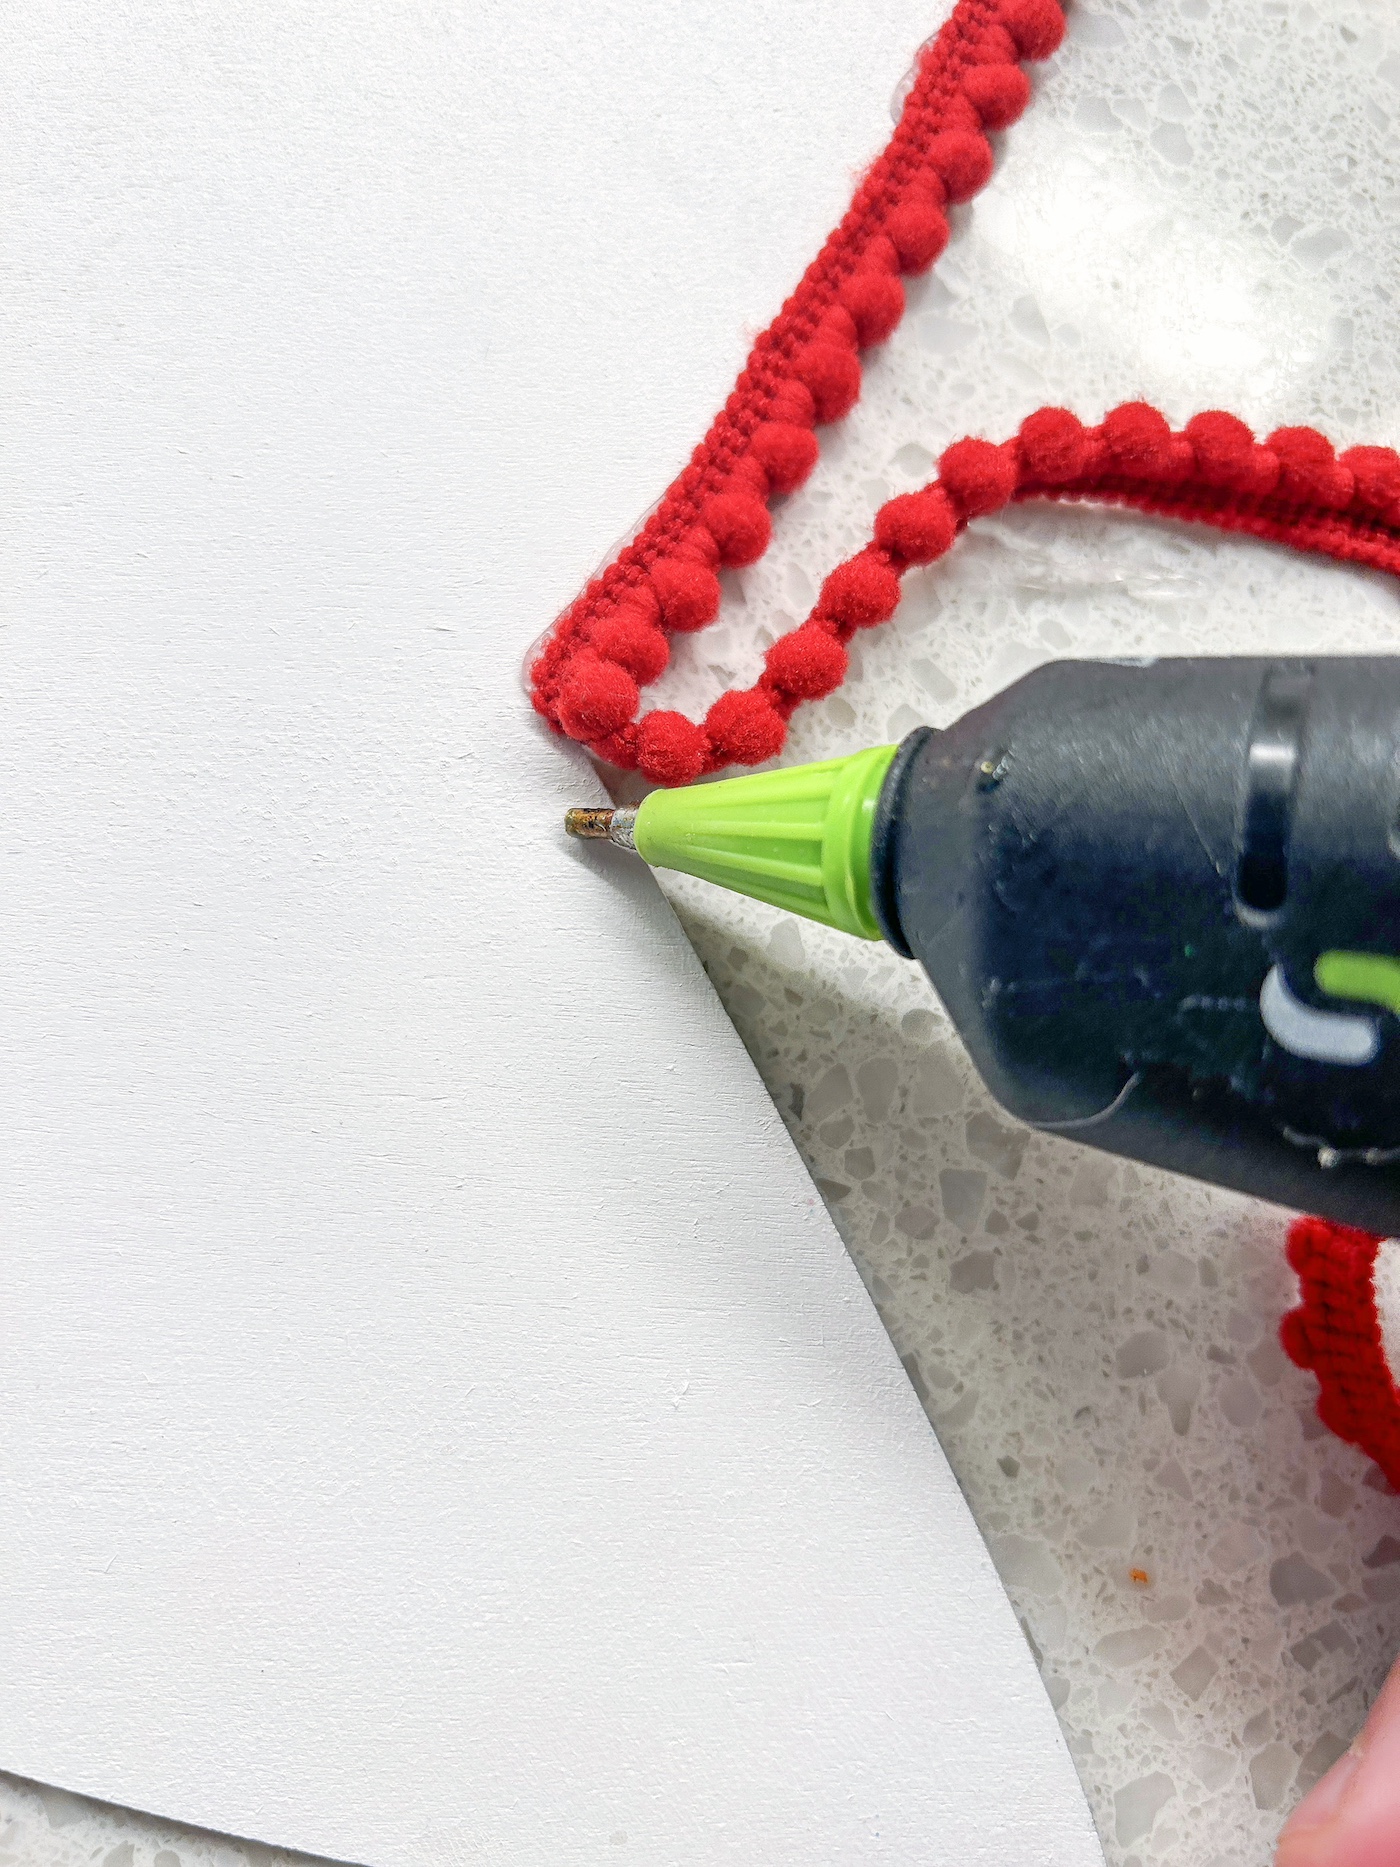
But wait, there’s more! To add that extra pop of festive cheer, we’re going to outline our star with red pom-pom trim. It’s like giving our star a cute little holiday sweater.
The pom-poms bring texture and a dash of whimsy to our creation.
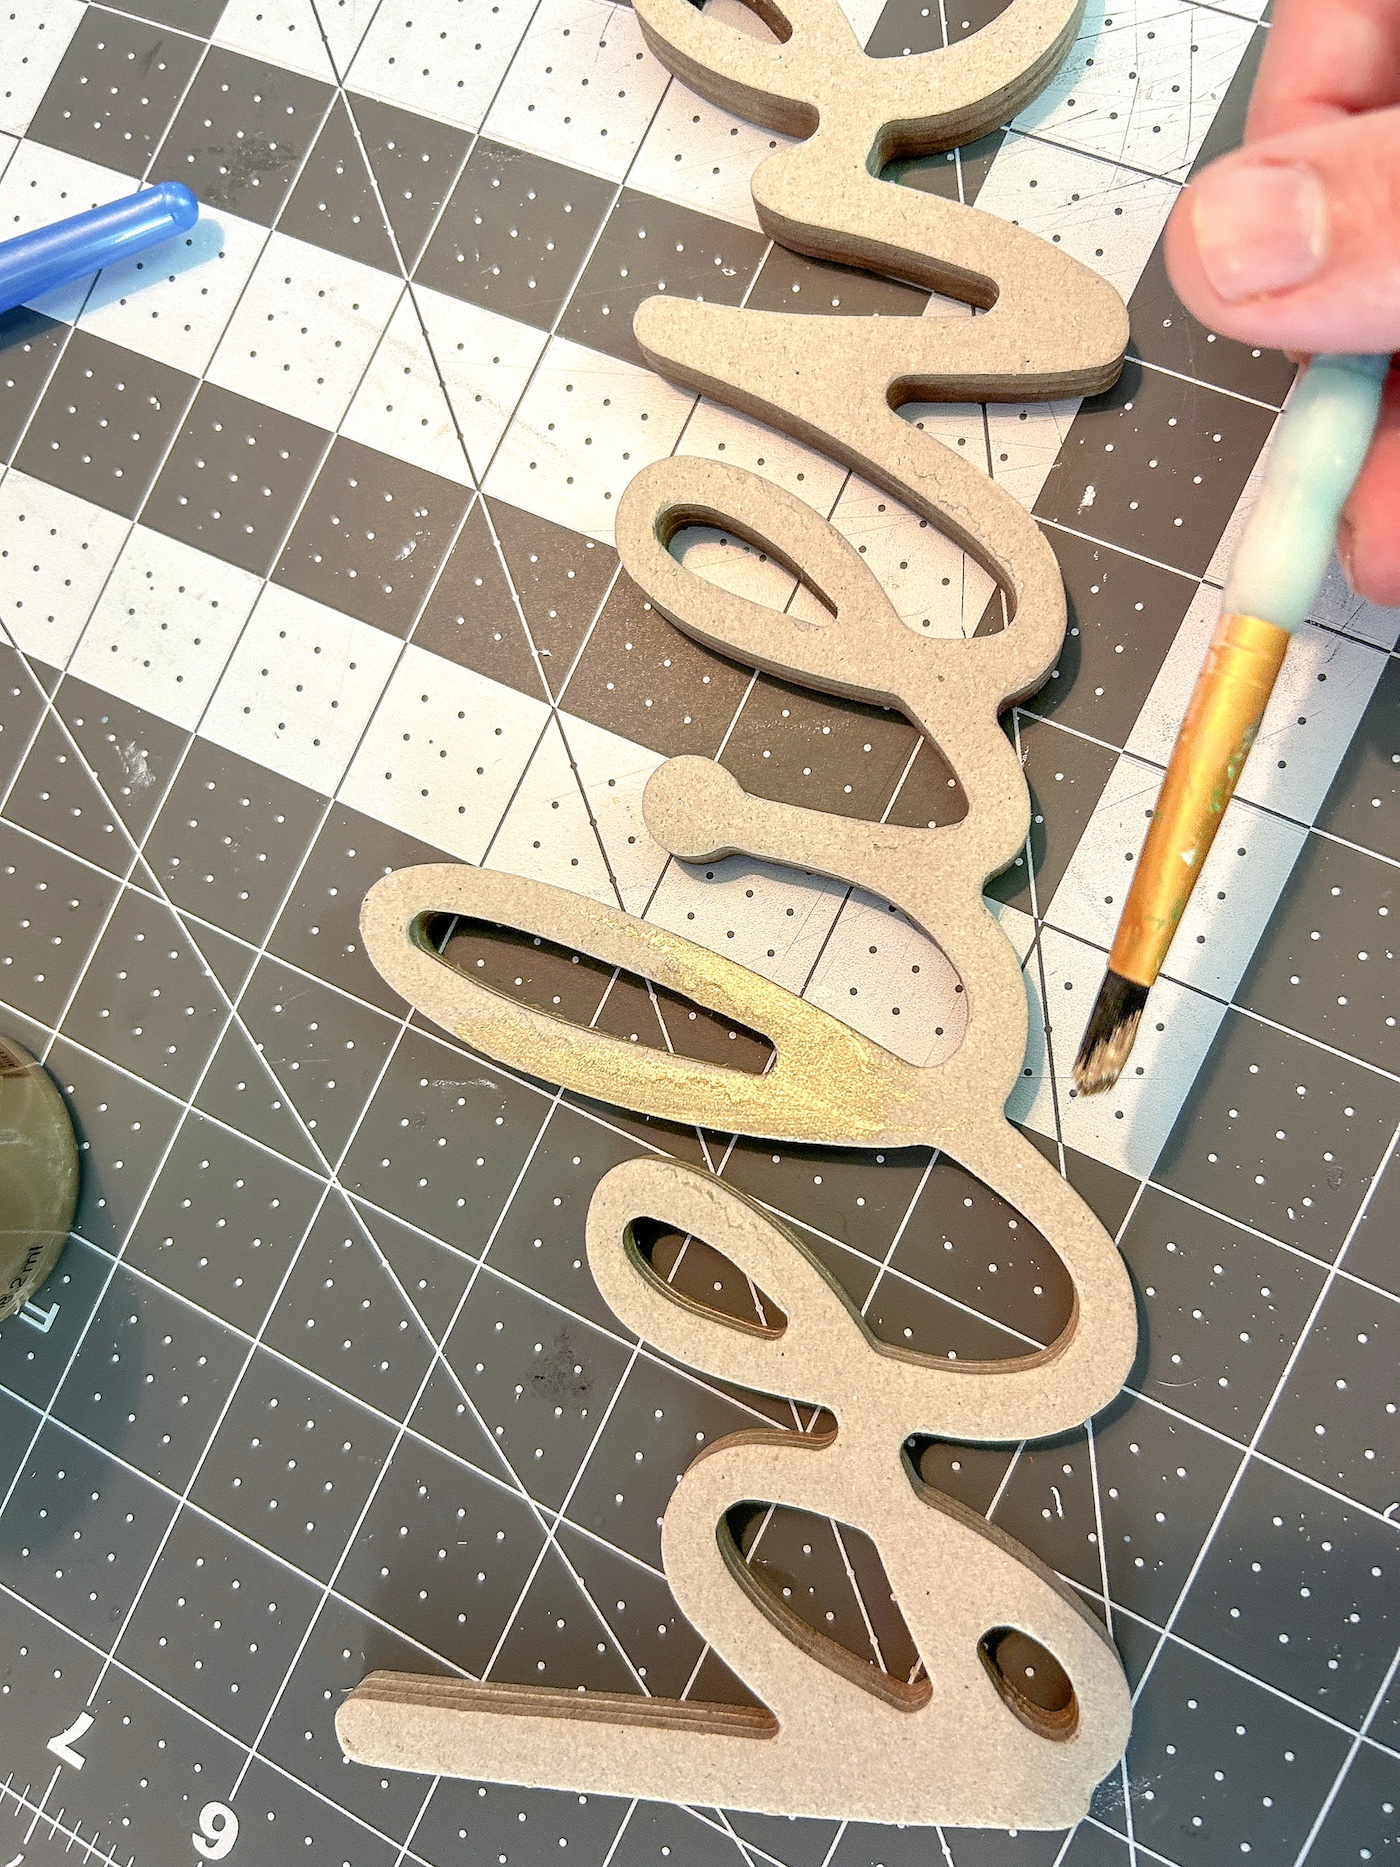
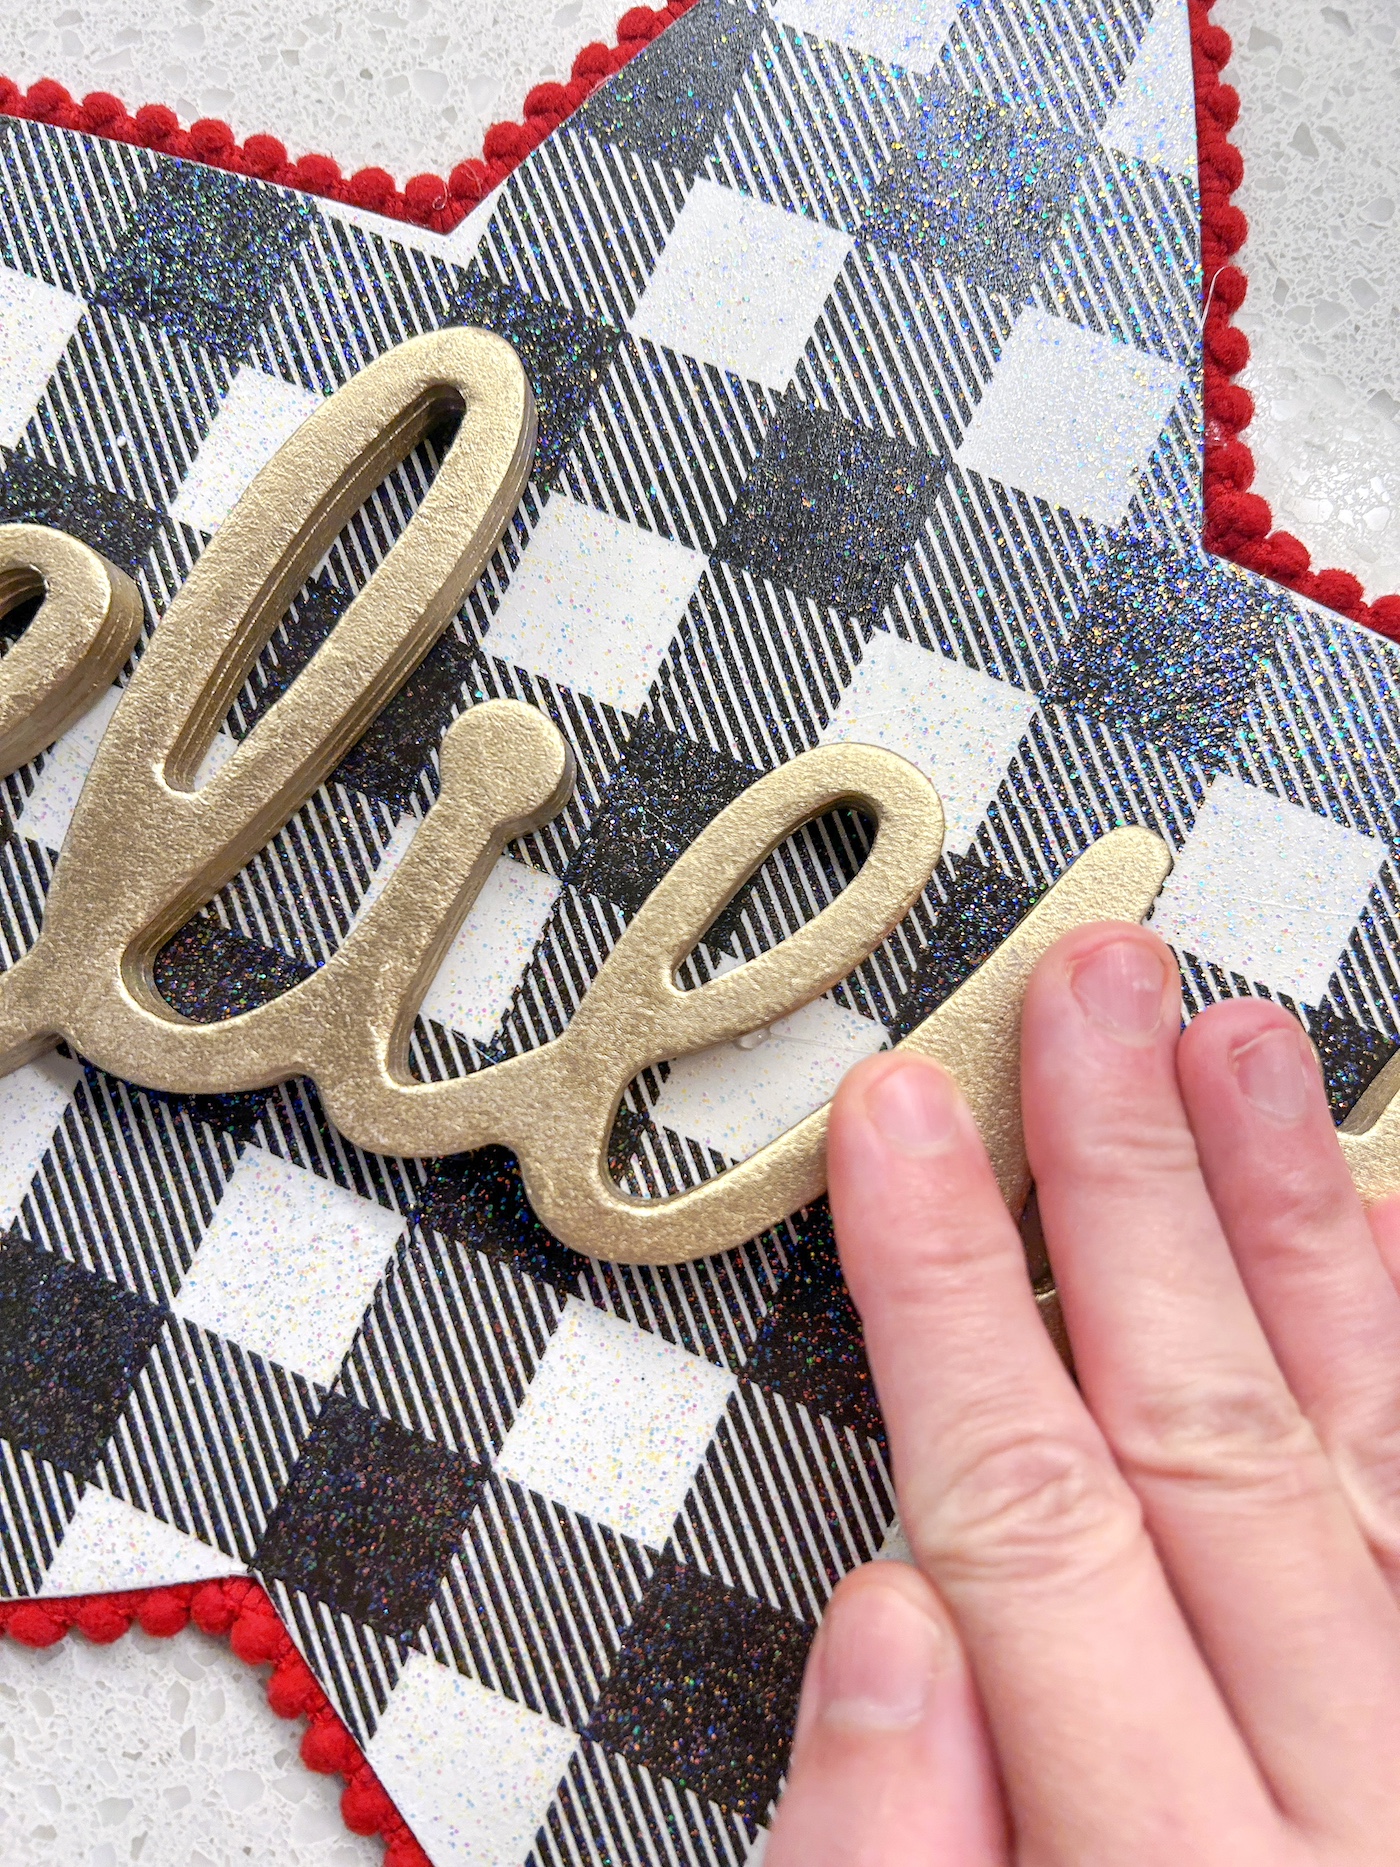
Finally, to complete our crafting masterpiece, we’ll glue the word “believe” (painted with my favorite gold paint) on top.
This isn’t just any word; it’s about believing in the joy of giving, the warmth of family gatherings, and, of course, the fun of crafting.
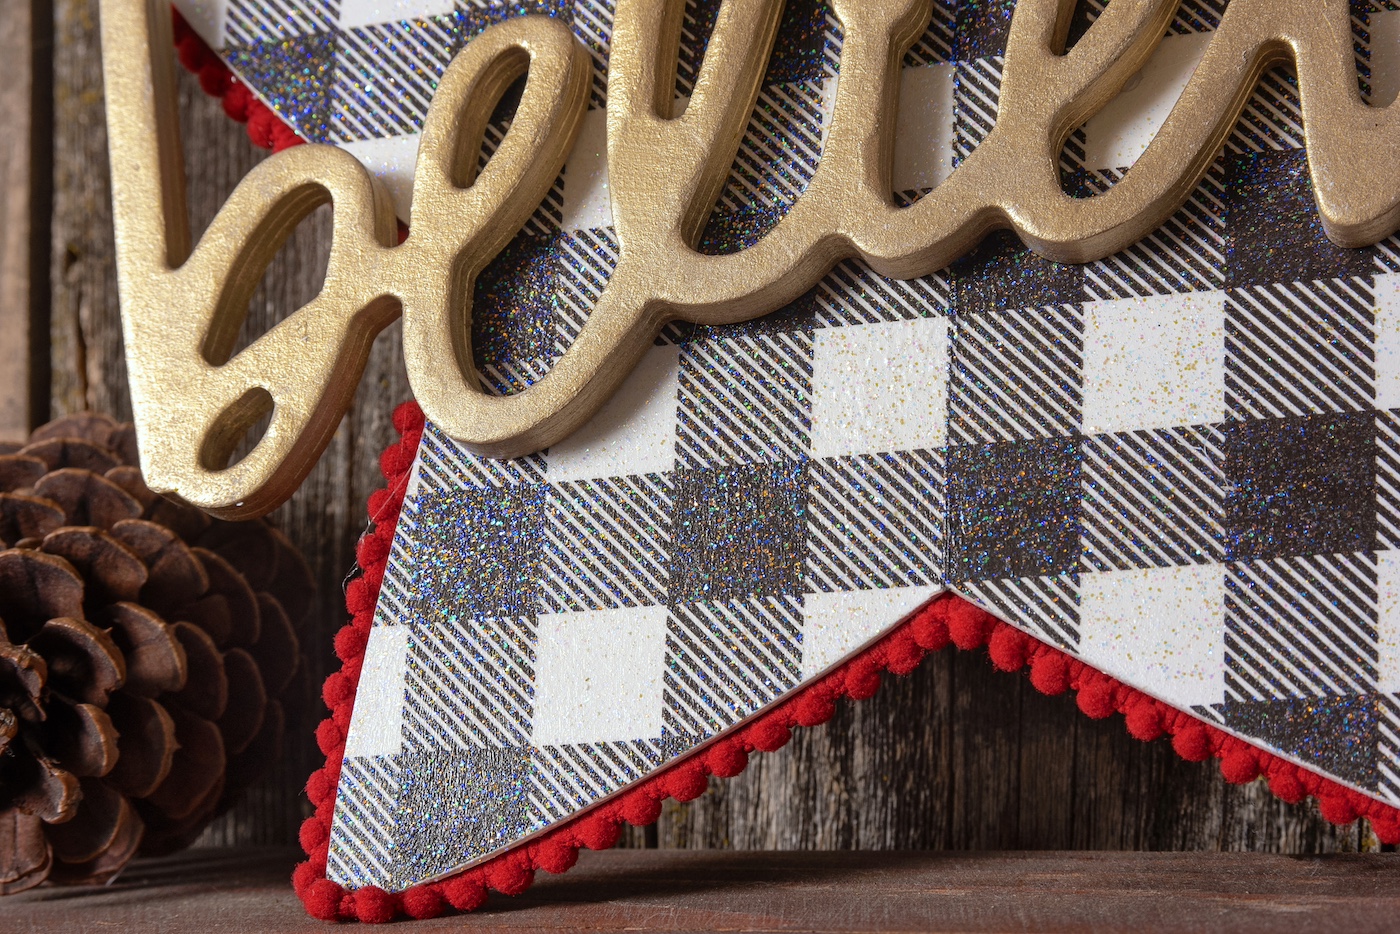
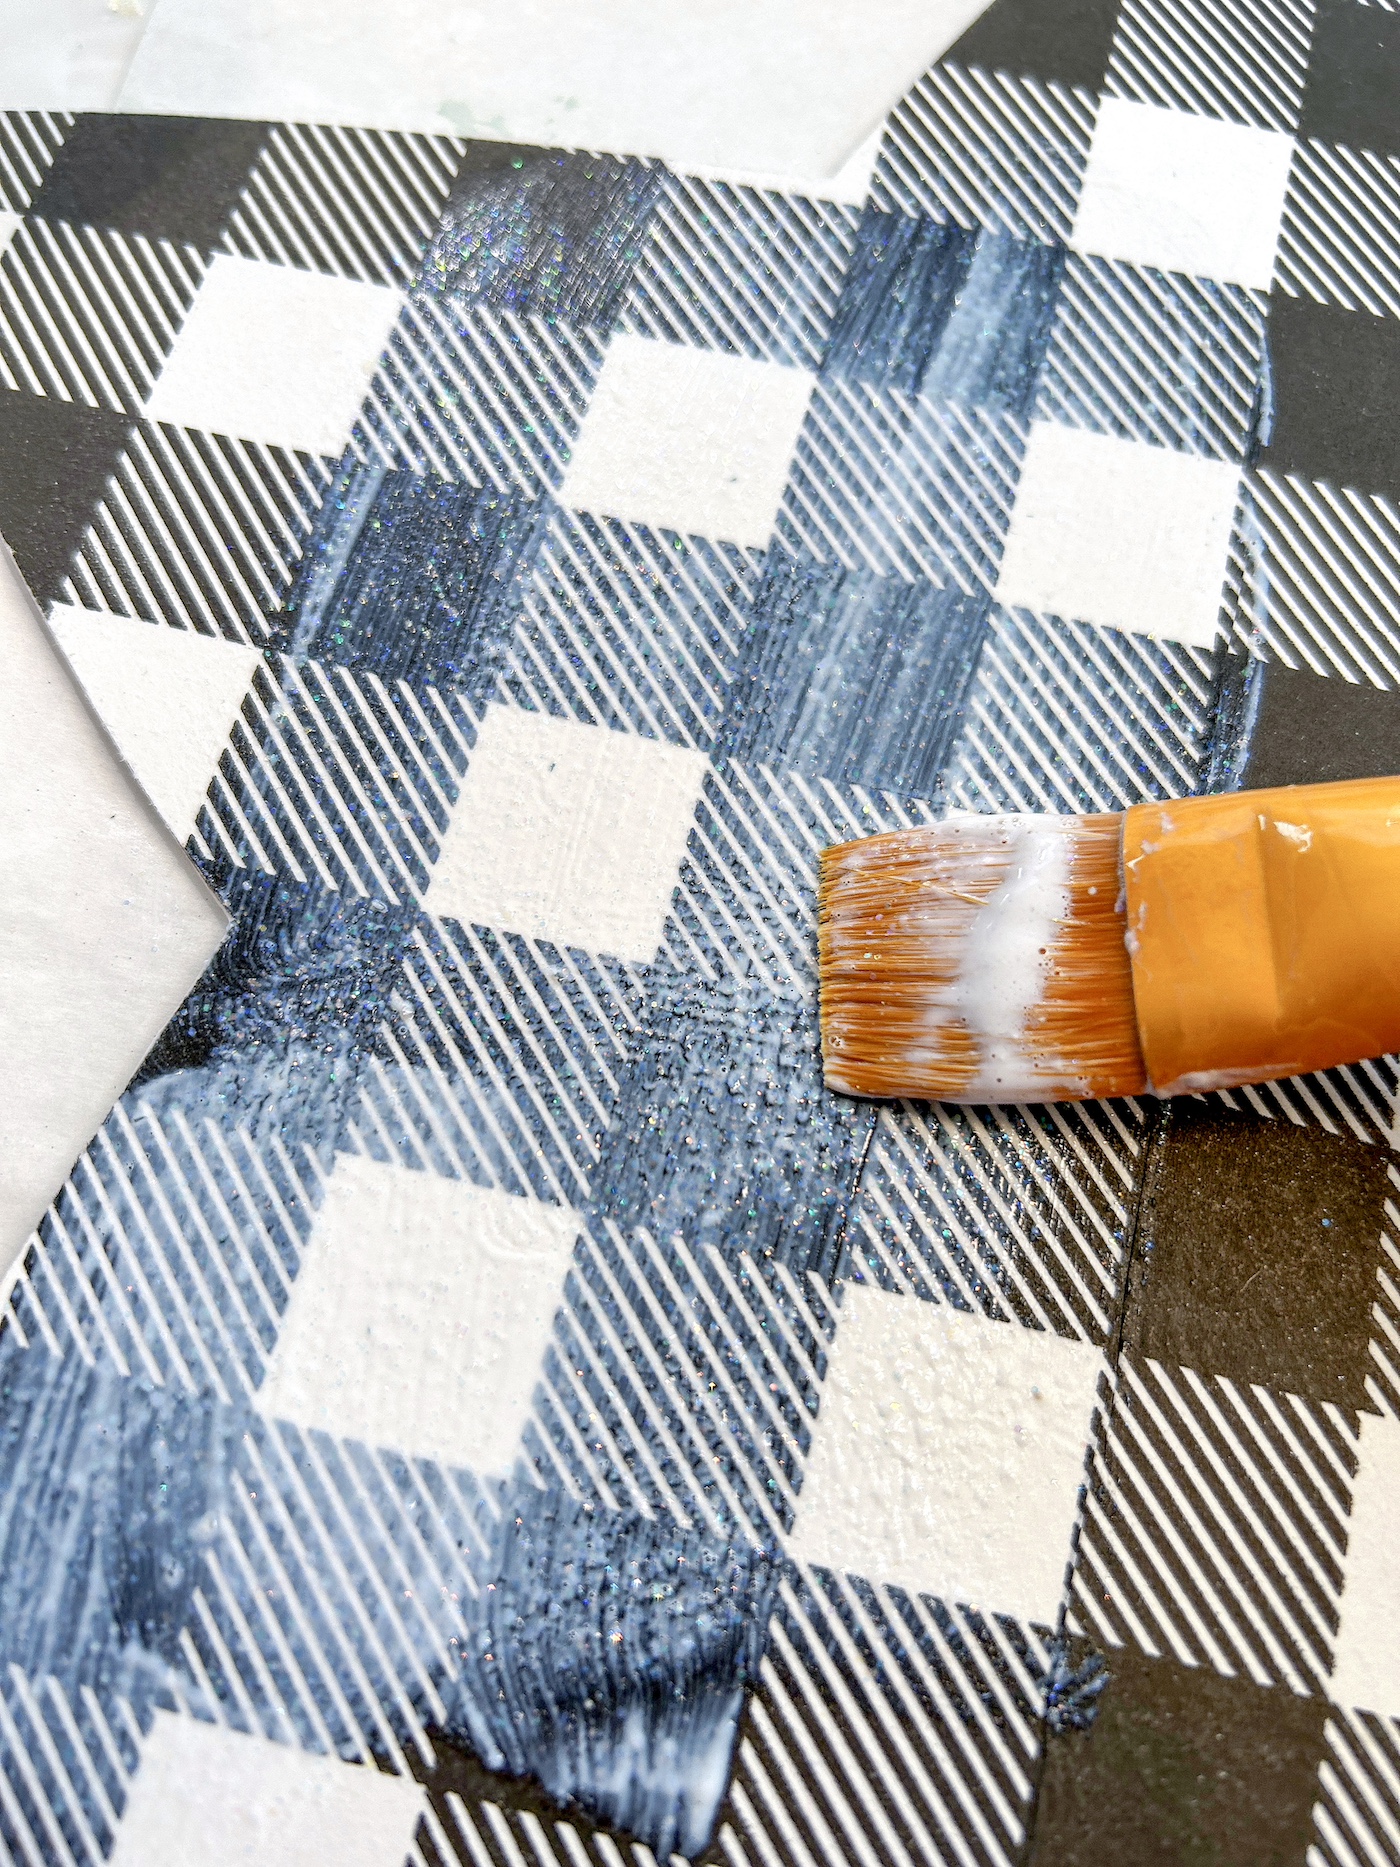
I will also explain the glitter finish on top in the tutorial. It adds such a fabulous touch!
Do you want to make this project? Grab your crafting tools, put on your favorite holiday tunes, and let’s embark on this festive crafting journey
Let’s get creative and spread some DIY Christmas cheer! Let me know what you think in the comments.
Gather These Supplies
- Unfinished wood star – Dollar Tree
- Christmas napkins – I got mine at Dollar Tree (tissue paper works also)
- Mod Podge – any formula
- Mod Podge Extreme Glitter
- White craft paint
- Treasure Gold or other gold paint
- Pom pom trim
- Paper chipboard word – “believe”
- Hot glue gun and glue sticks
- Emery board
- Paintbrushes
- Small iron
- Parchment paper
Tips and Thoughts for This Project
You don’t *have* to paint the star white, however, it makes the colors of the napkin pop. It’s also easy to do, so I always do it. You can use spray paint, but craft paint is cheaper and just as fast with a roller.
I don’t use the Mod Podge Extreme Glitter underneath the napkin. With the glitter particles and how thin the napkin is, you’d be able to see the particles and texture through the napkin.
To line up the napkin, I simply made the line go from the middle base of the star to the point on top (I didn’t do any fancy measuring).
My favorite gold paint in the whole world is Treasure Gold. The gold finish is like no other and I’m not even kidding. It’s got great coverage and I just love the sparkle. Highly recommended!
My wood star had a hole at the top, so I can hang this anywhere with baker’s twine! It can also be used as part of a larger project (the center of a wreath, for example).
Get the printable how to card for this project below:

Decorate a Wood Star for Christmas
Equipment
- Parchment paper
Materials
- Wood star(s)
- Christmas napkins
- Mod Podge any formula
- Mod Podge Extreme Glitter
- Craft paint white
- Treasure Gold or other gold paint
- Pom pom trim
- Paper chipboard word "believe"
Instructions
- Paint the wood star using white craft paint. Roll on one side, let dry, and flip over. Paint other side and let dry.
- Apply a coat of Mod Podge to the wood; don't do the edges. Let dry 15-20 minutes and repeat.
- While the Mod Podge is drying, separate the napkin from the bottom layers. You can use tape to help. You just want the top layer with the design.
- Place the napkin down onto the star. Place a piece of parchment paper on top of the napkin, and run the craft iron across the top several times. While you are doing this, the Mod Podge is melting below the napkin, and the napkin is adhering. Keep going until the napkin is fully adhered, including the edges.

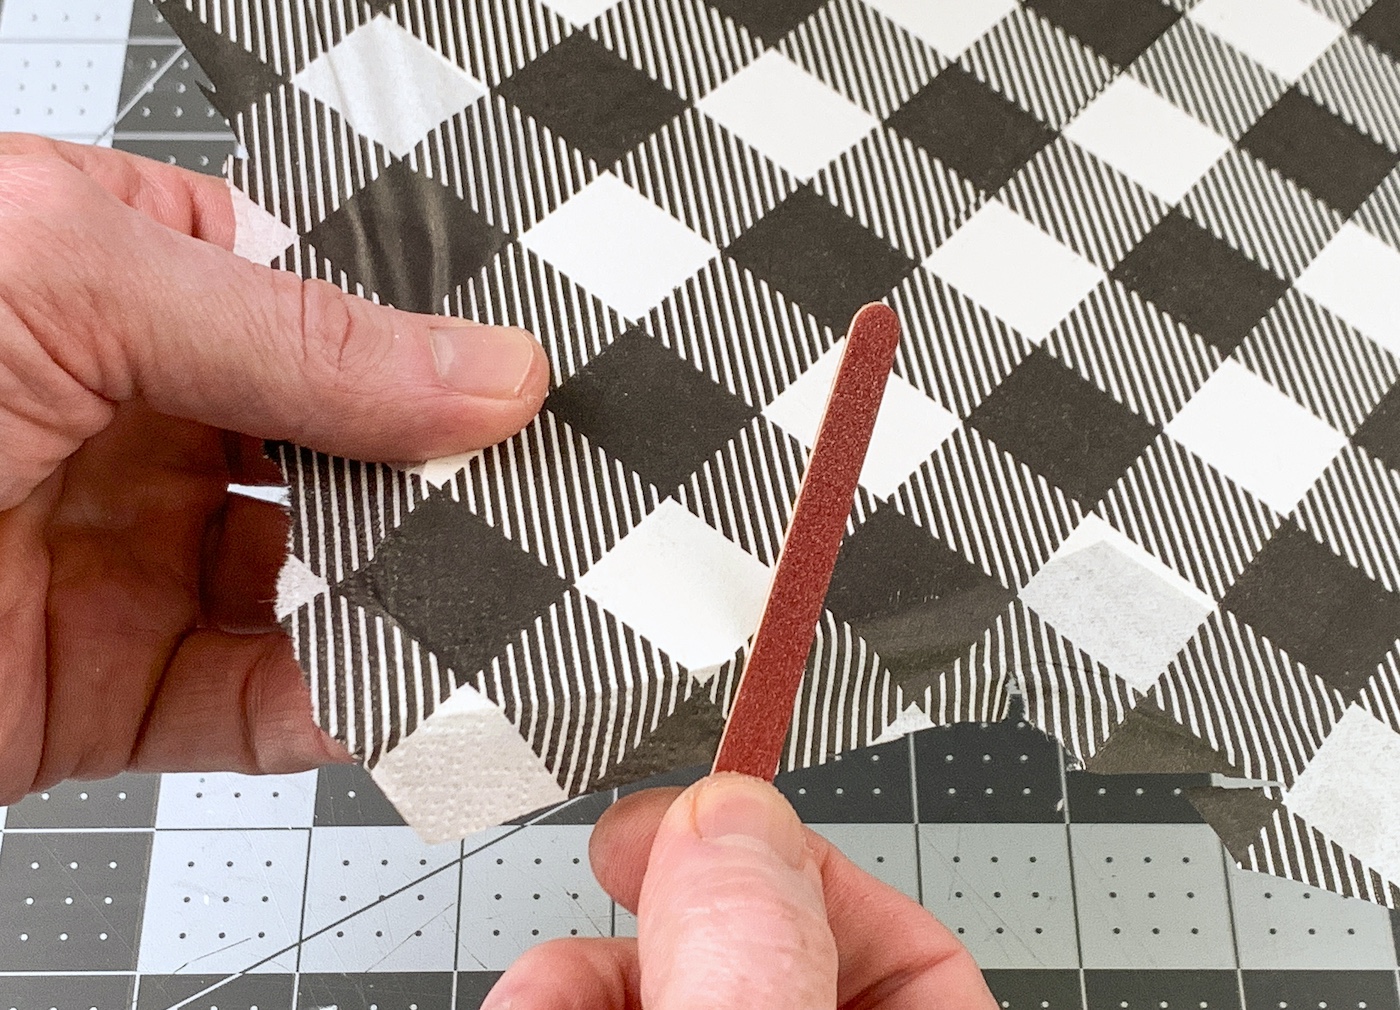
- Let the star cool after ironing. Use an emery board to gently sand away the excess napkin. Sanding at an angle works very well. Continue until all the extra napkin is removed.
- Paint a coat of Mod Podge Extreme Glitter over the top of the napkin. Let dry. You can apply two coats if desired (I applied one).
- Using the hot glue gun, glue the trim on the back of the star around the edges. I like to start at the bottom. Glue a few inches at a time. Let cool and trim the final length with scissors.
- Use the Treasure Gold to paint the word "believe." A smaller brush will help you get into tight areas. Give it a few coats and let dry.
- Use hot glue to attach the word to the front of the star to finish.
If you enjoyed this Dollar Tree wood star decor, let me know in the comments! I’d also love for you to check out these other posts: