
Create DIY wrapping paper that wows! This easy tutorial shows you how to make unique, impactful gift wrap for any occasion. It’s budget friendly, too.
Skills Required: Beginner. You’ll be doing relatively easy stamping as well as covering tags with Mod Podge and glitter. You don’t need prior crafting experience to accomplish this project.
Happy holidays everyone!!
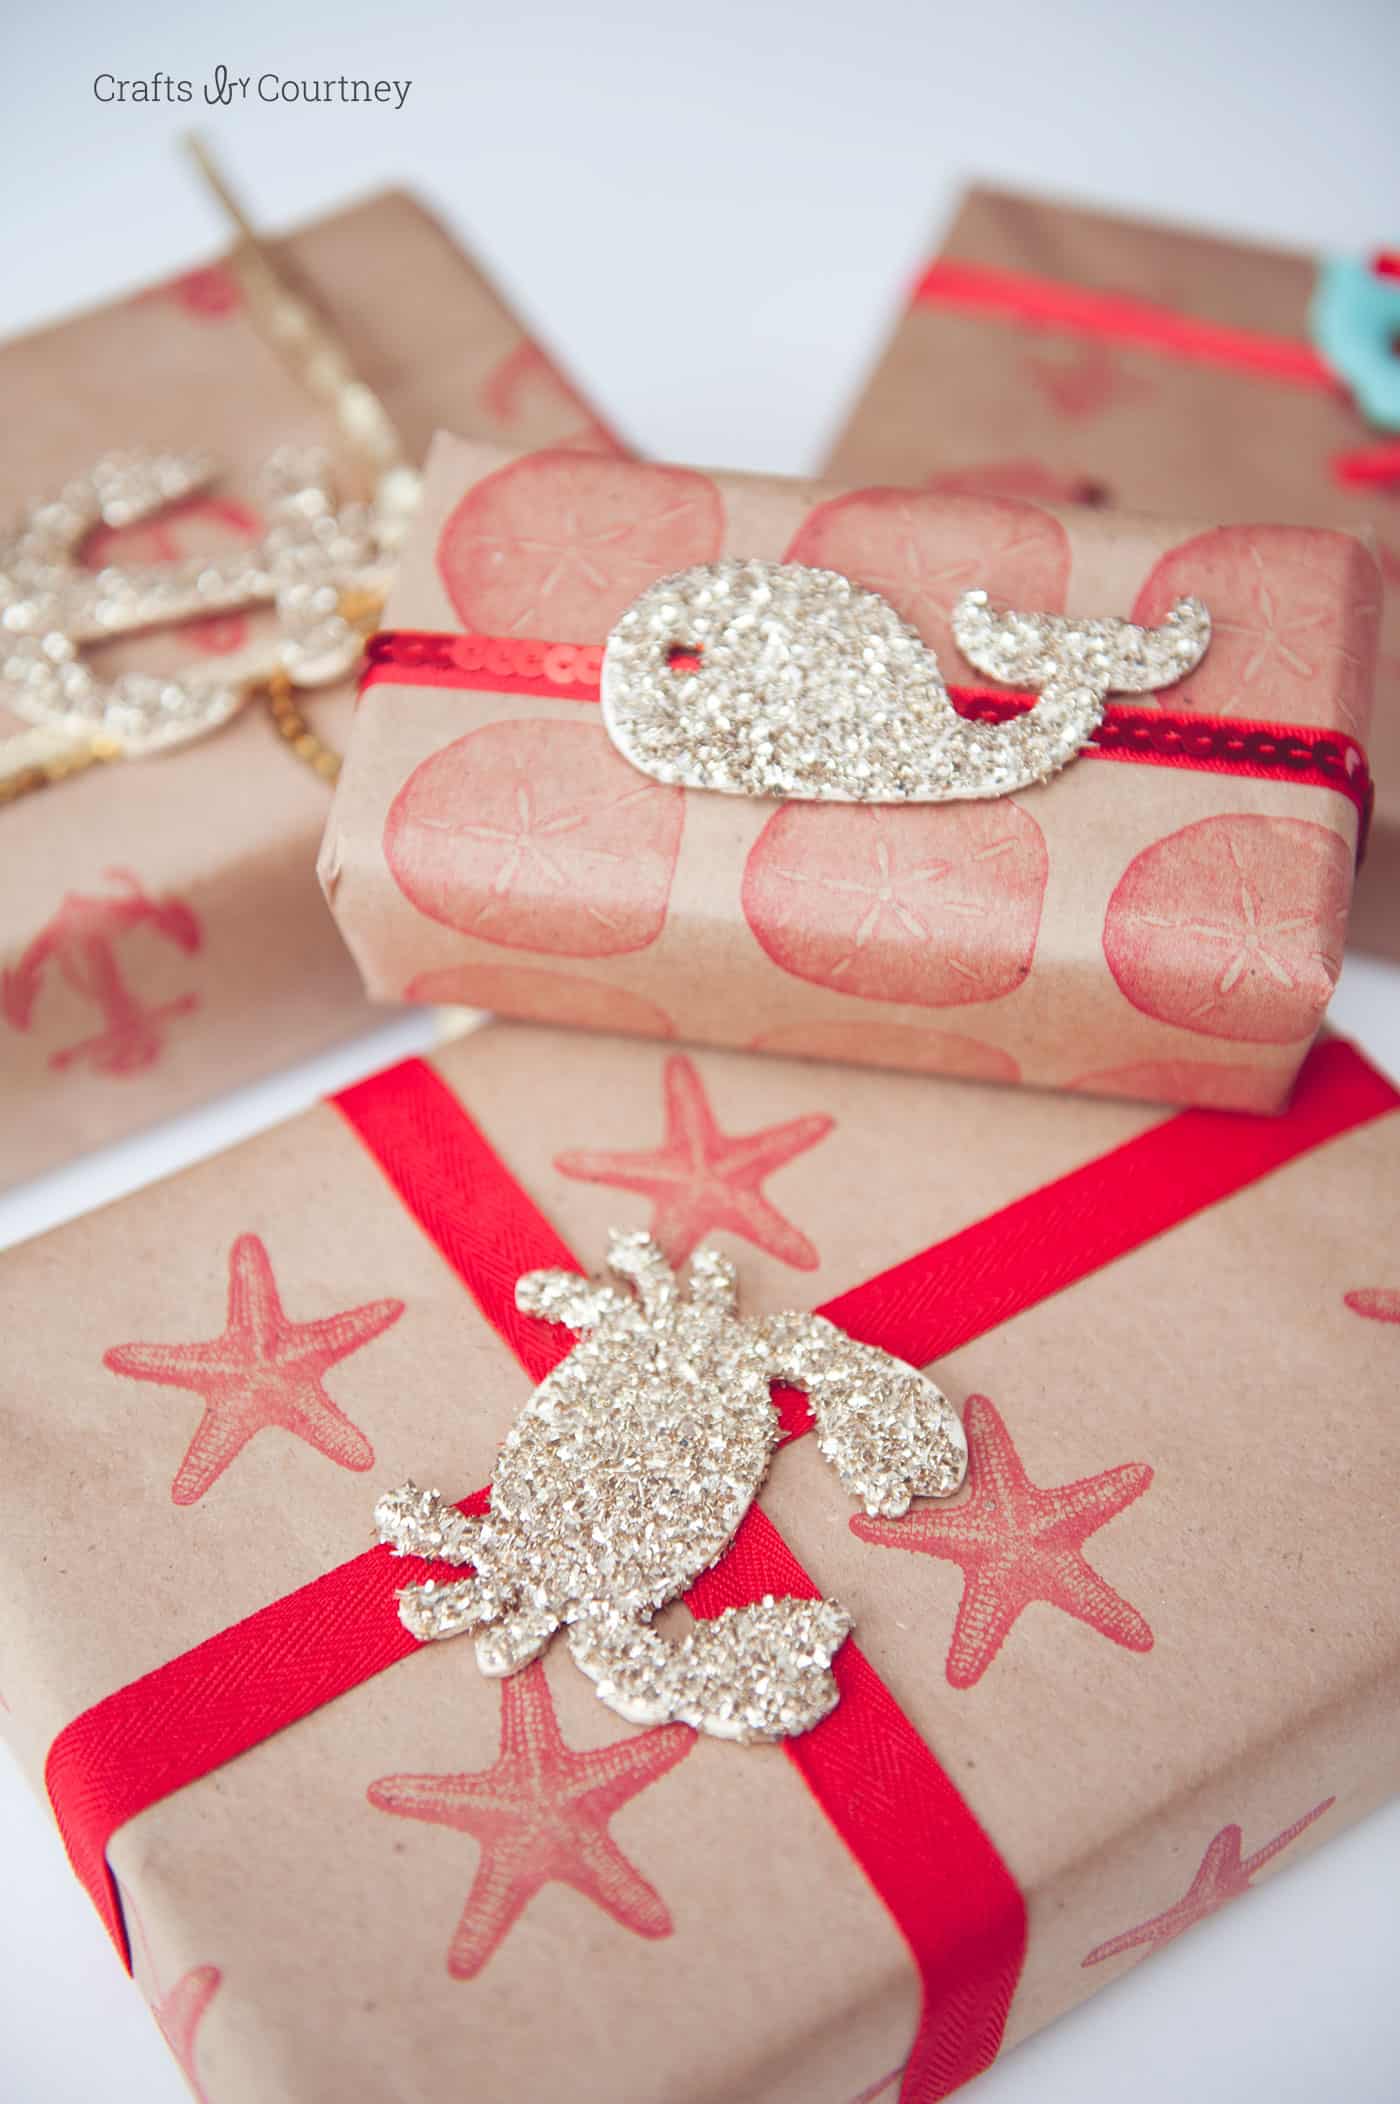
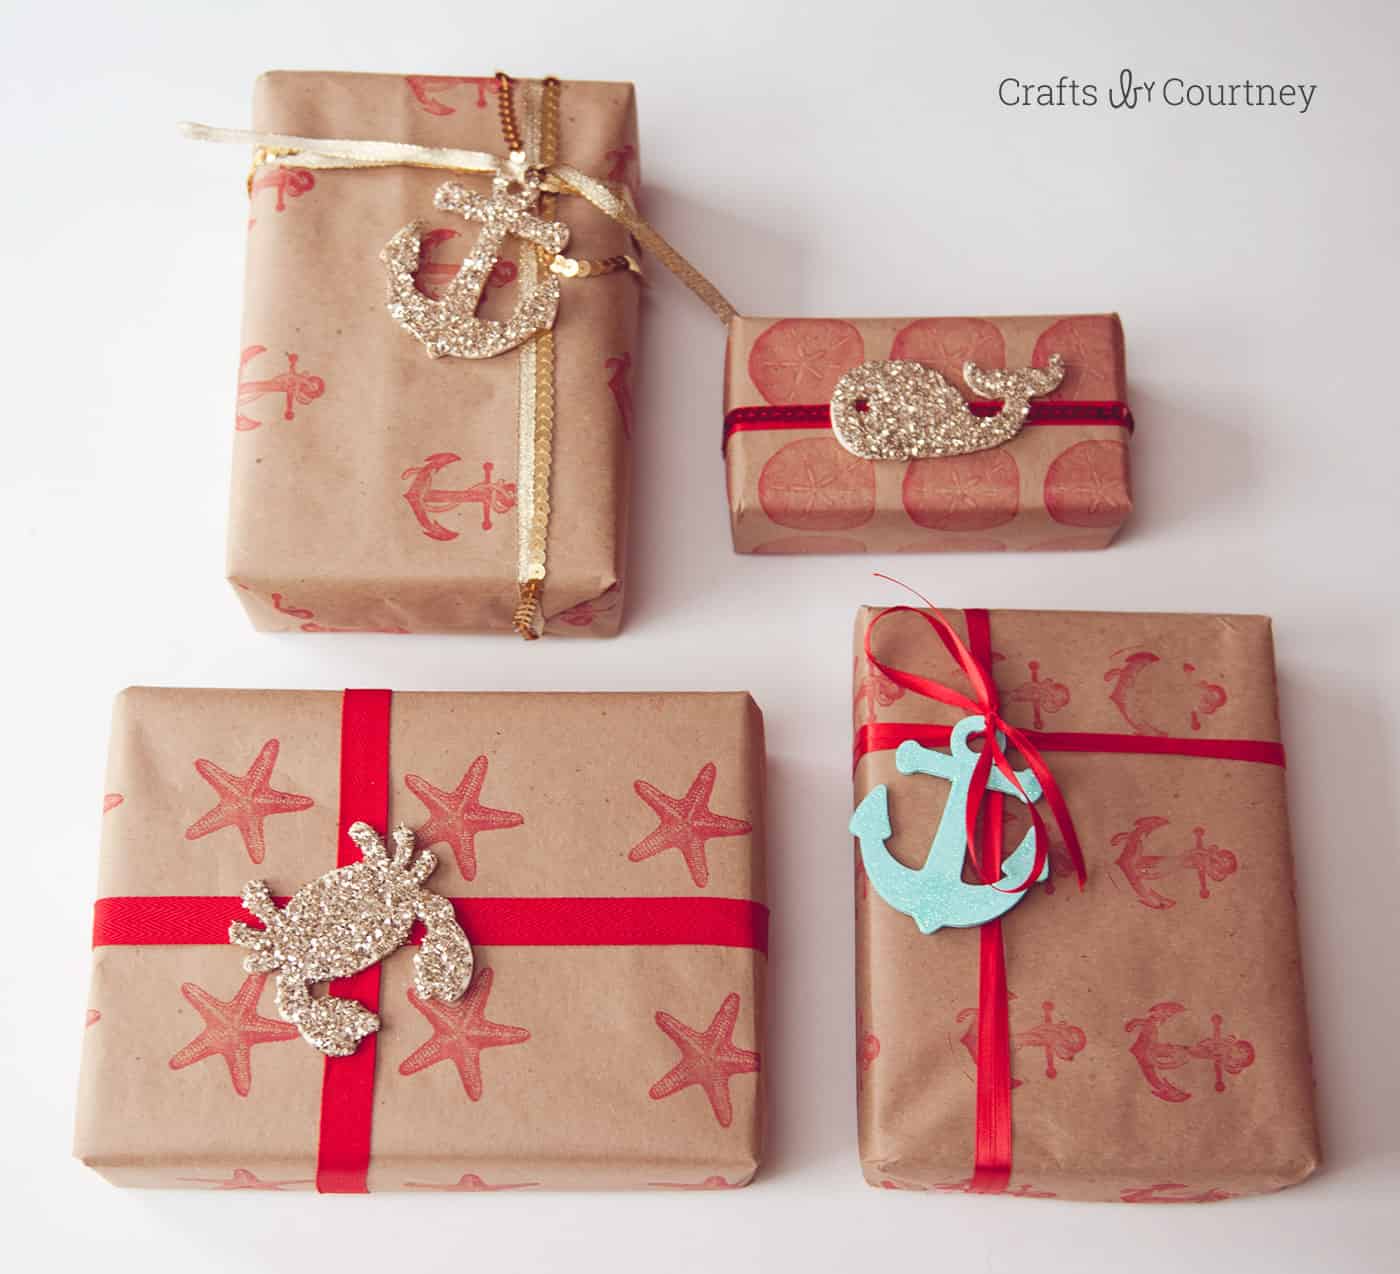
Last year I started working on my coastal Christmas decor with some coastal ornaments for my tree. This year I have added my coastal glittery Christmas trees. I still have a couple more things to do to complete my look this year.
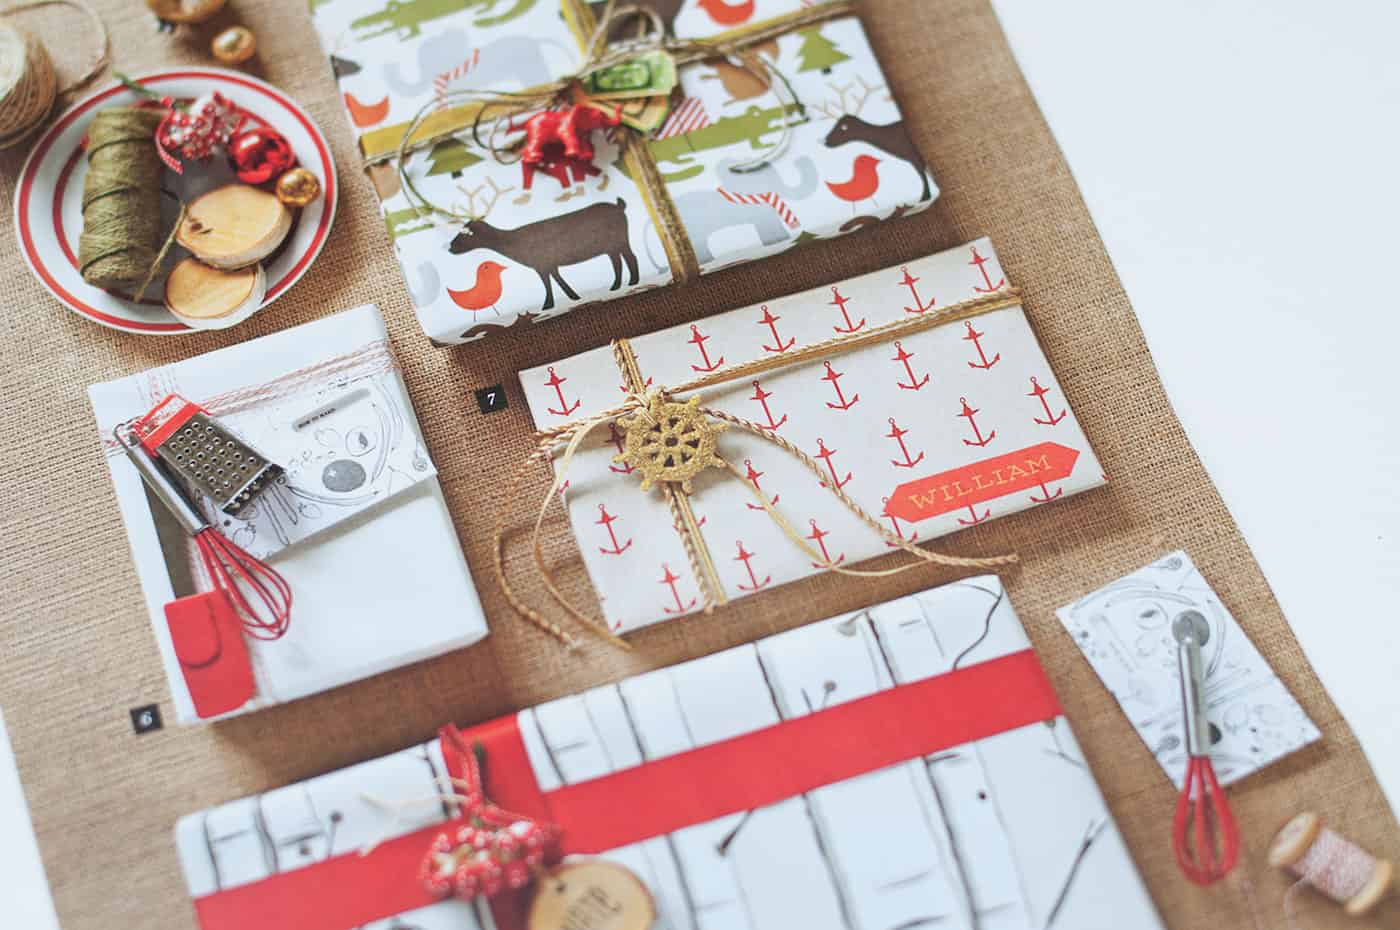
This year, I got a Southern Living Holiday Magazine. While flipping through the pages I spotted this beautiful nautical inspired Christmas wrapping paper. I fell in LOVE!
BUT it was getting close to Christmas and I didn’t want to order it. I wouldn’t have had the time to receive and wrap presents as well.
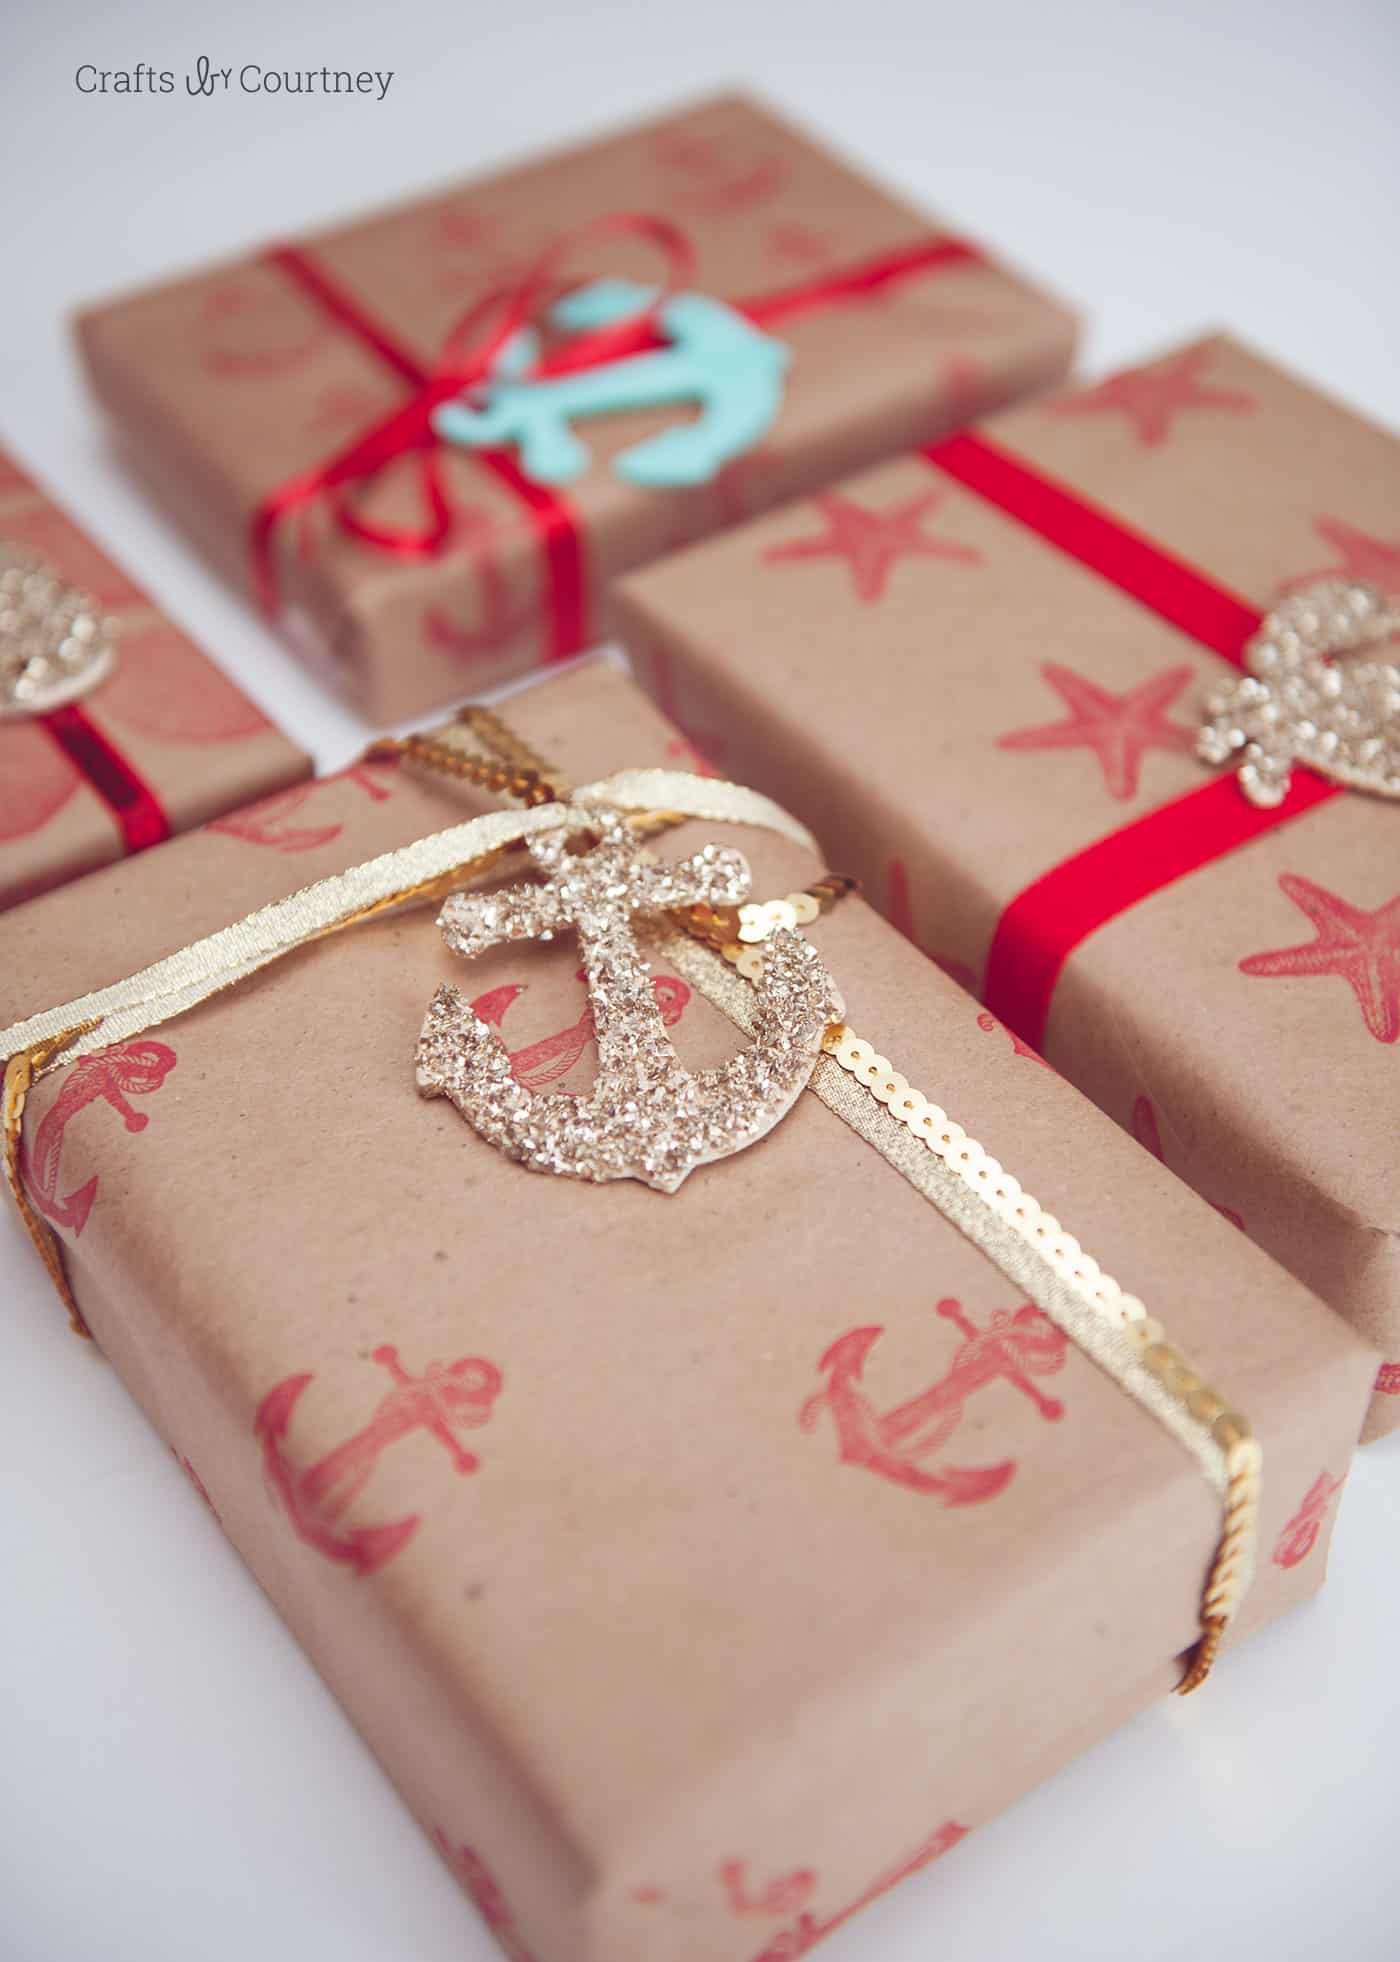
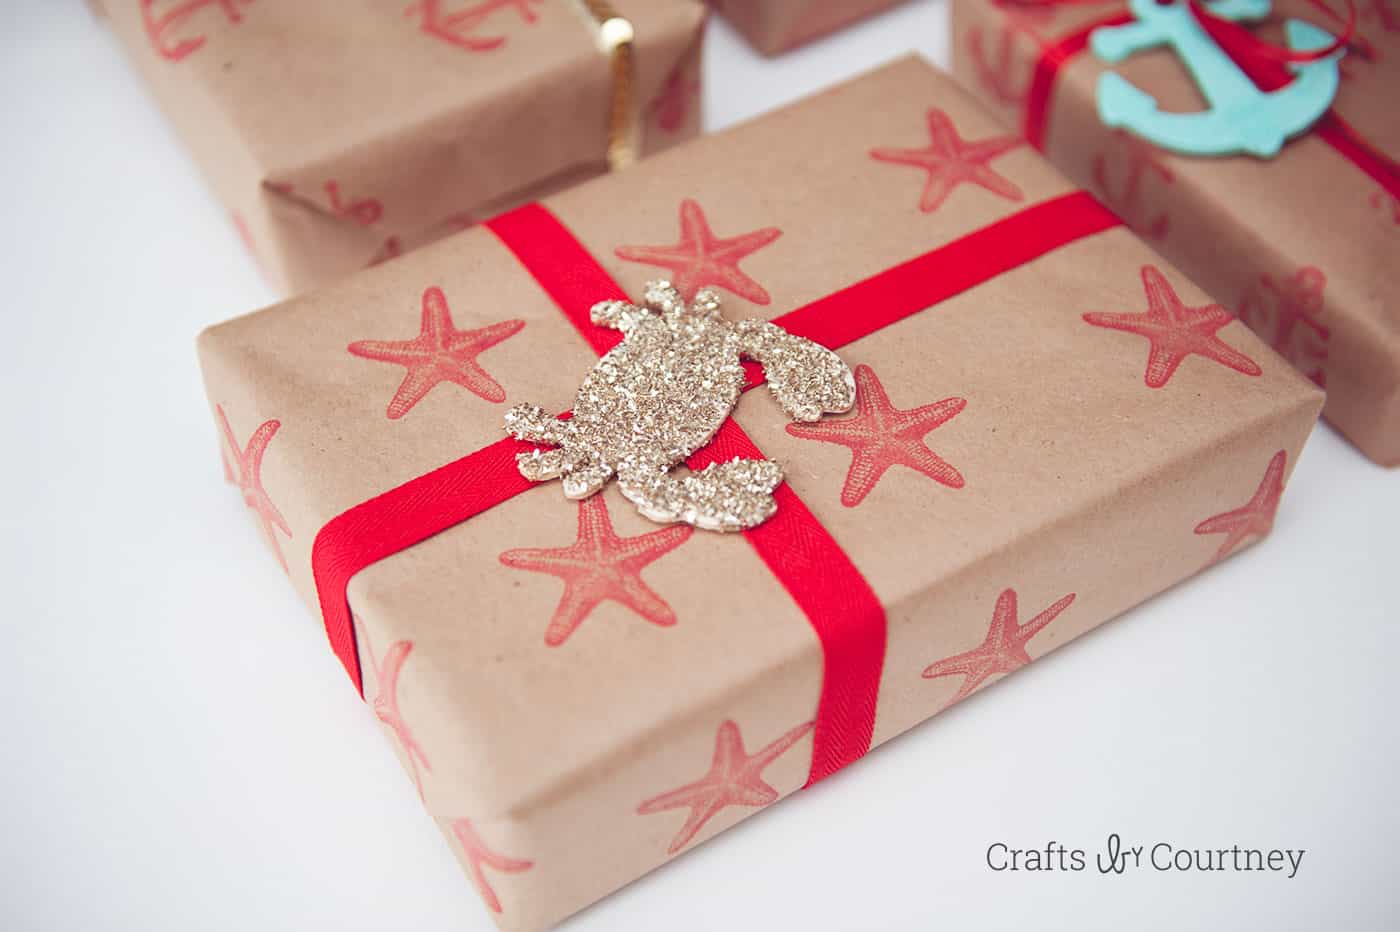
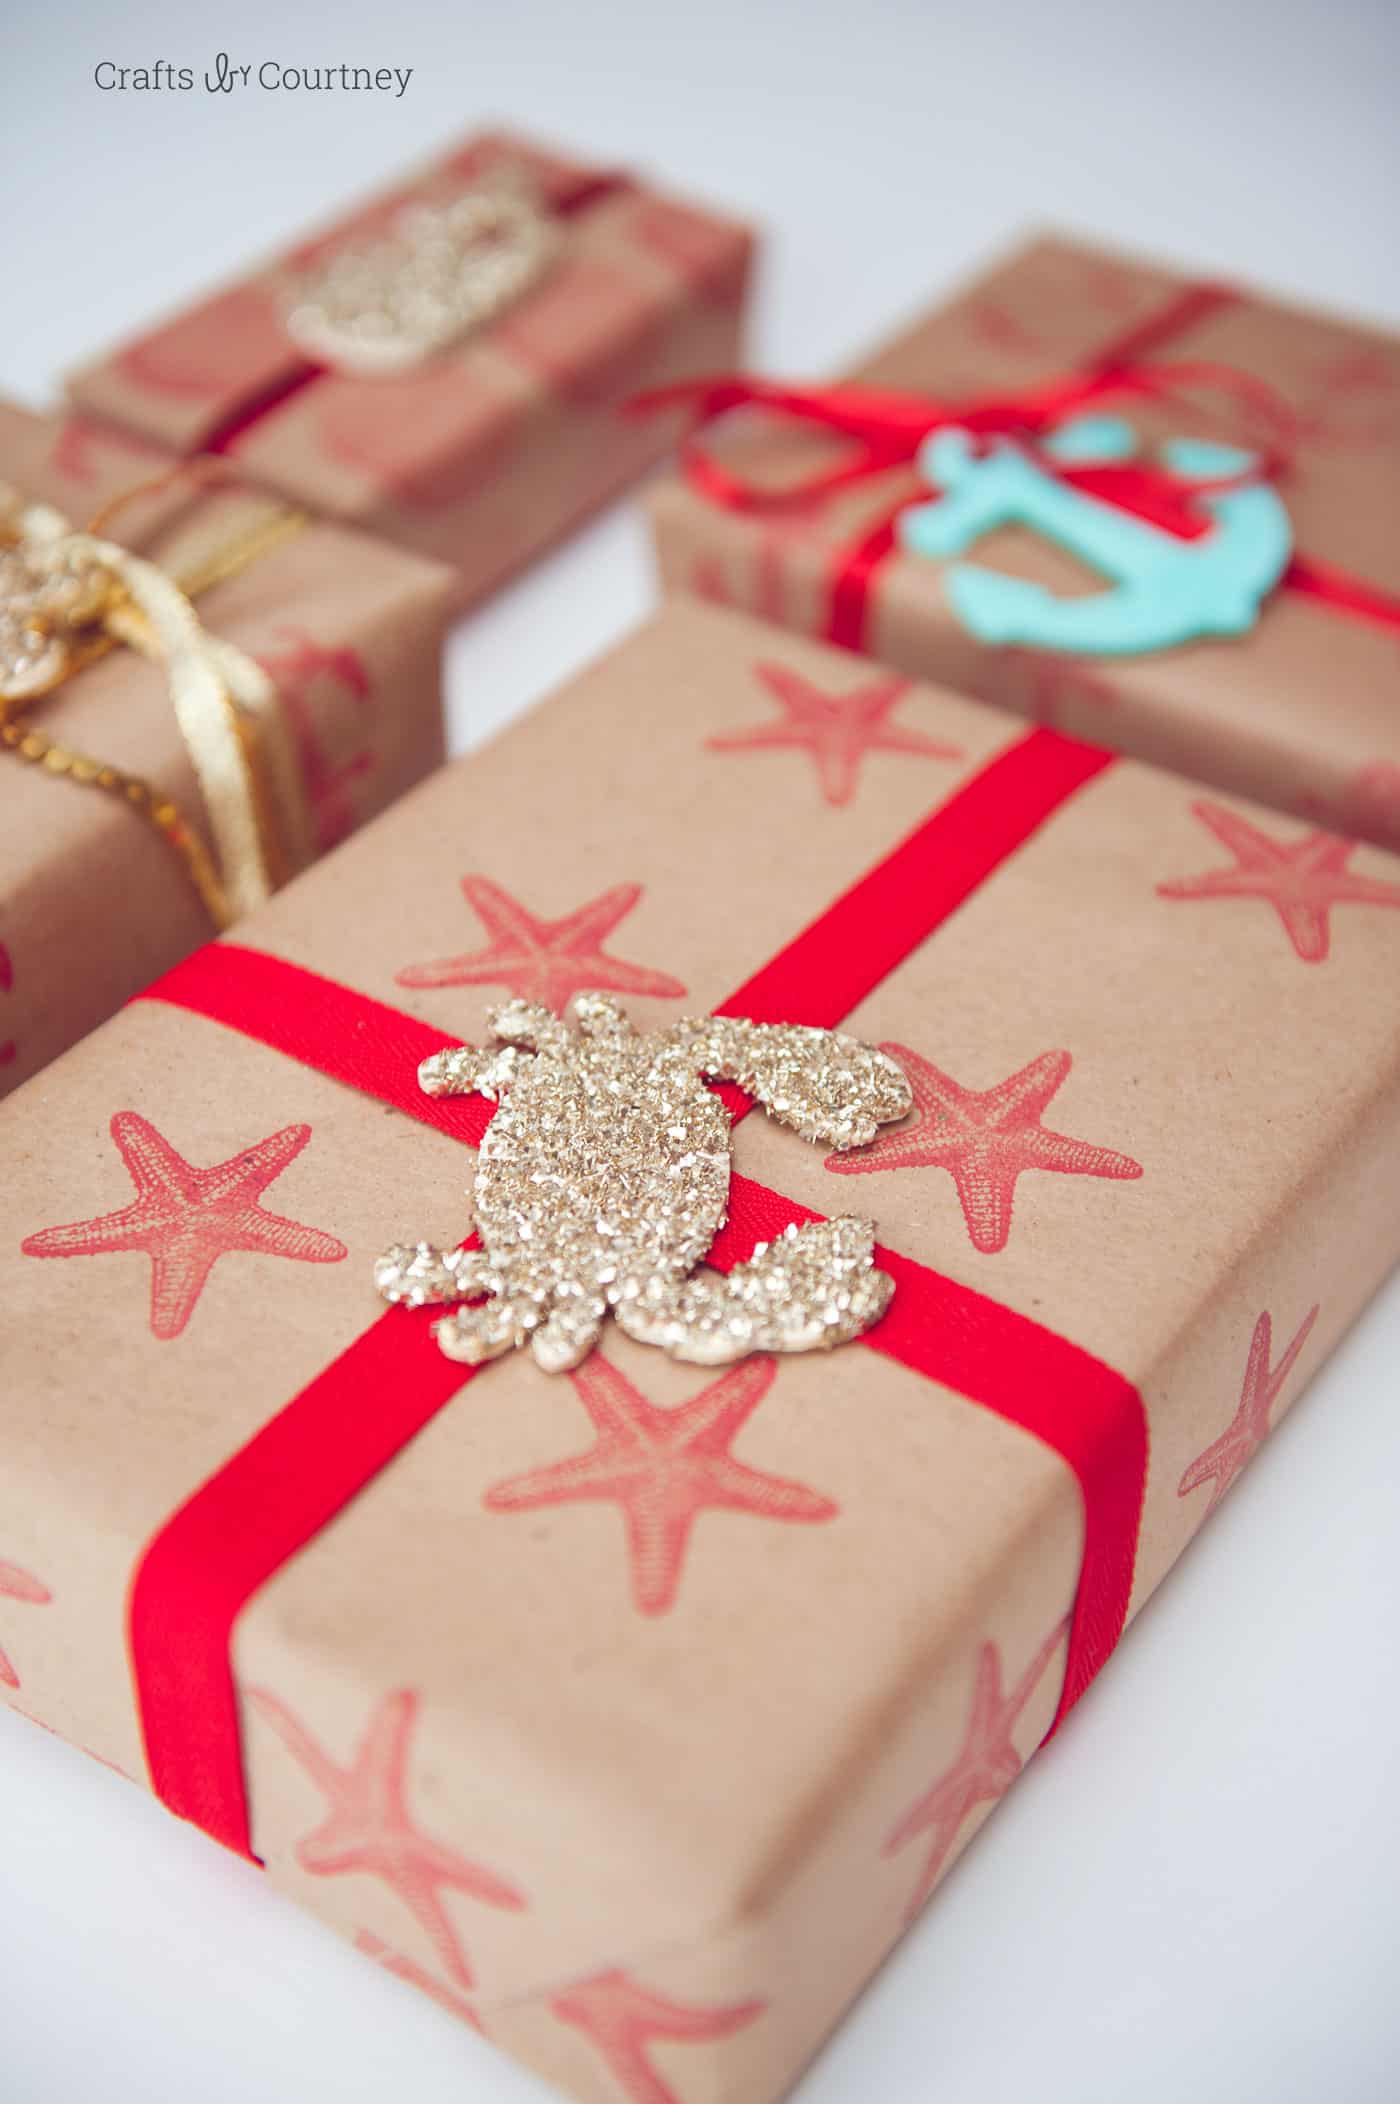
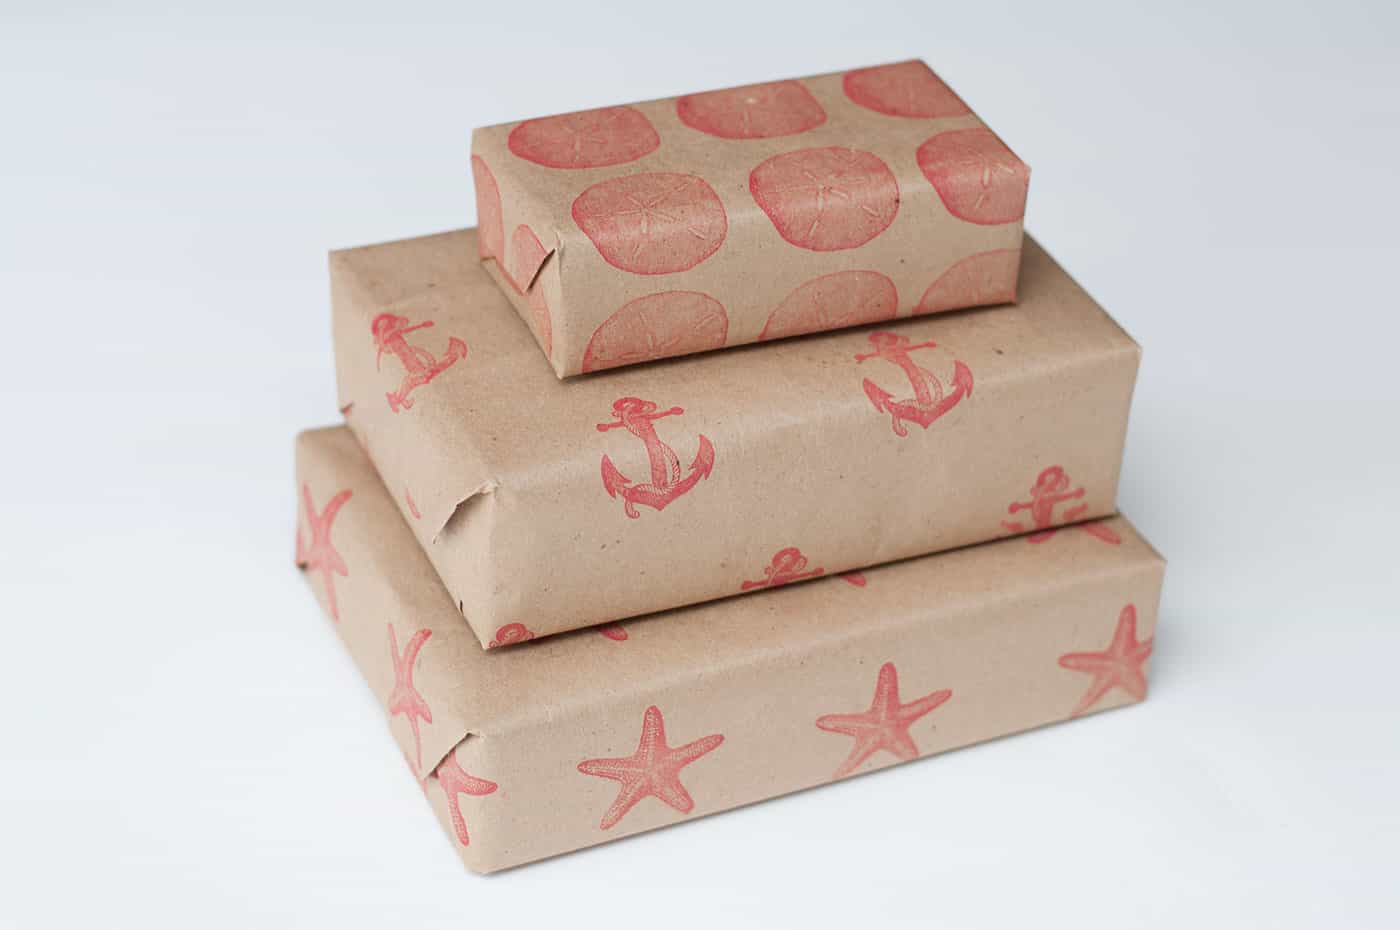
So I decided to save this homemade gift wrap idea. This past year, I bought some great nautical stamps that I’ve been saving to make something. You can use any kind of stamps you want and customize this DIY wrapping paper to your style.
The biggest question I get about this project is, “what should I use as the base?” I love using the packing paper from the Dollar Tree that comes on a roll. Last year I wrapped all my gifts in it.
You’ll hear this brown paper referred to as “kraft paper” and “butcher paper” as well. You can purchase it from a variety of places, like The UPS Store, WalMart, Target, Michaels . . . or even online.
In addition, kraft paper comes in white if you aren’t digging the brown. You can also use packing paper that comes in the sheets – however, that’s more like newsprint.
The stamps won’t be as vibrant on the newsprint. My personal favorite is the brown kraft paper, but you do have options!
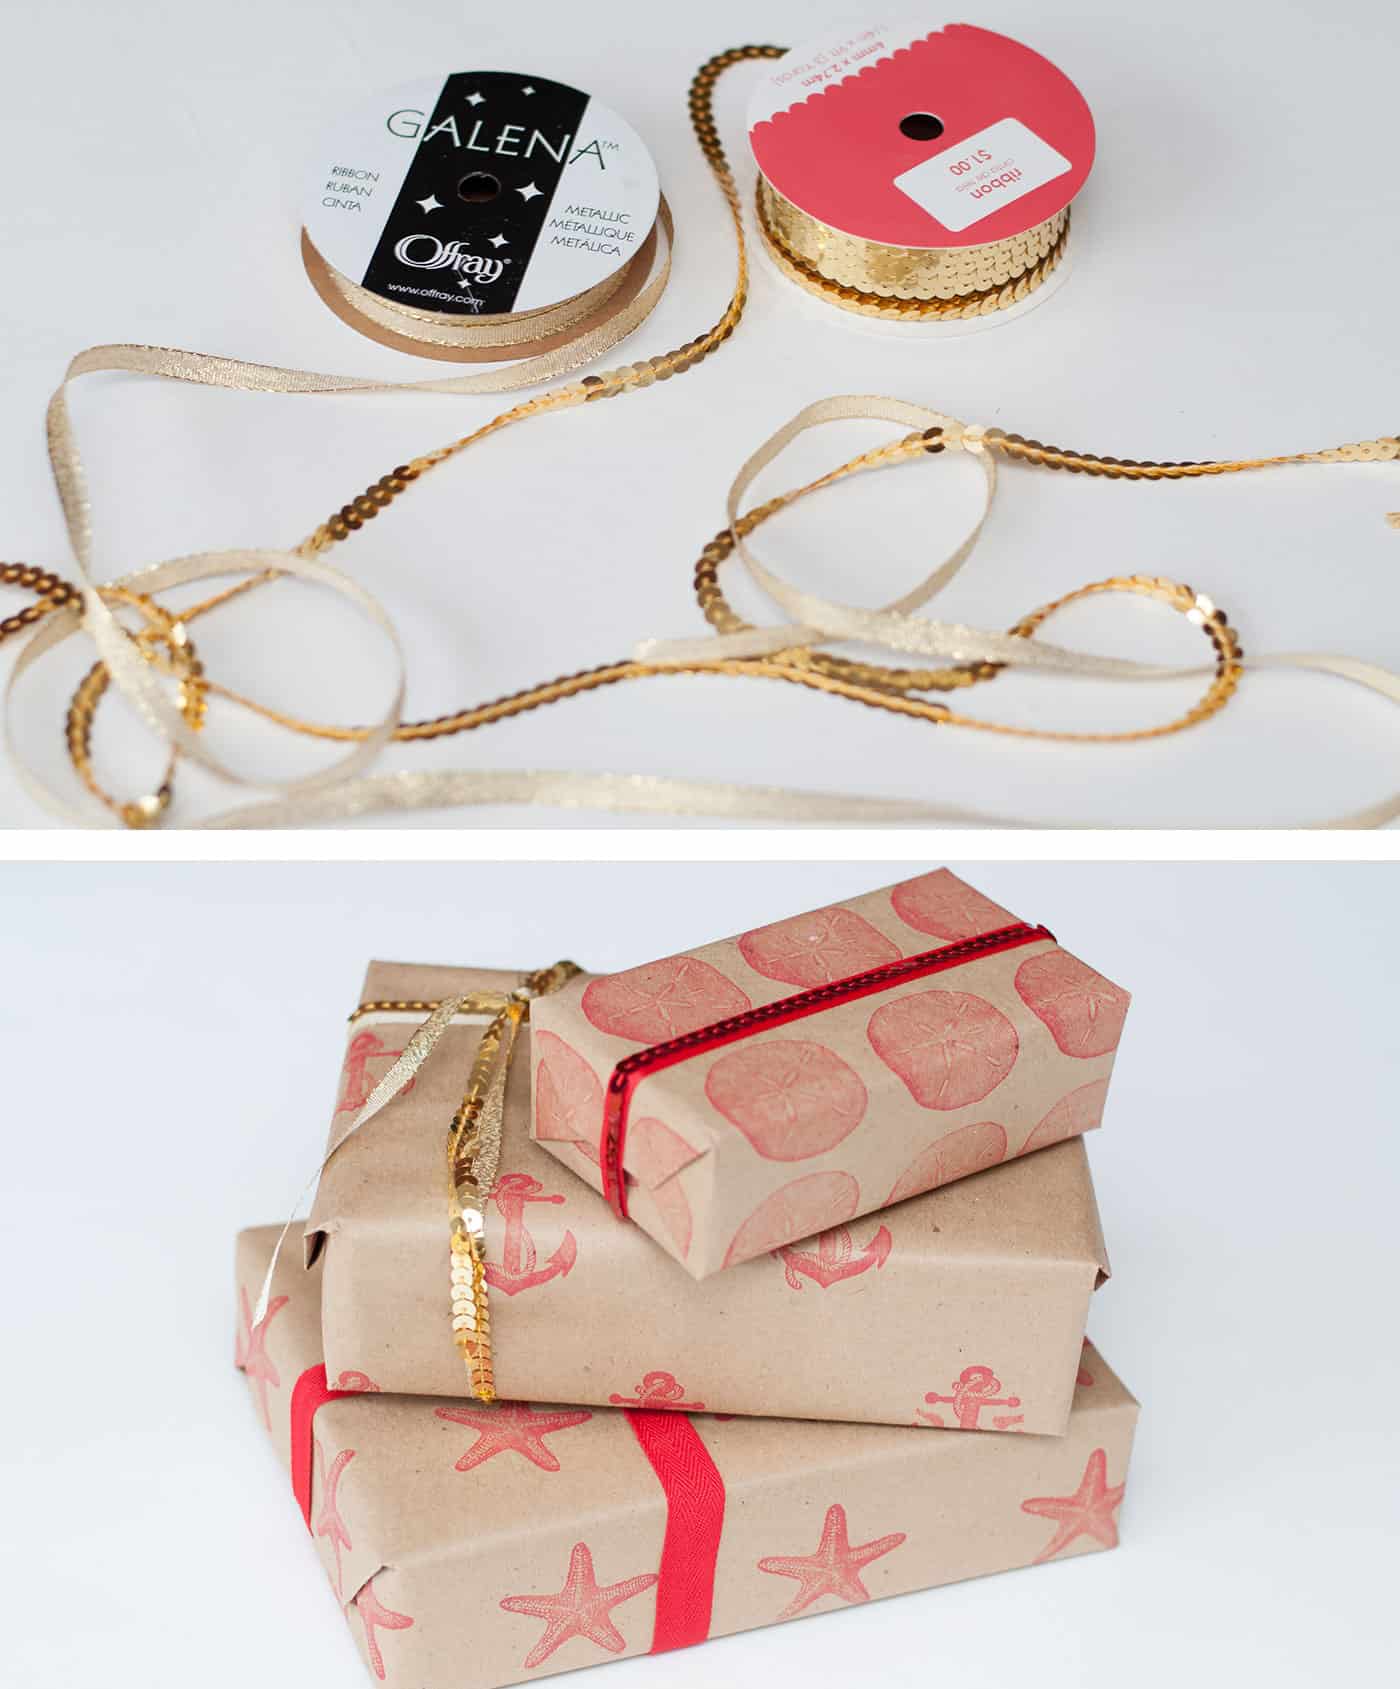
When you head to the craft store, select several different ribbons for your packages. But what are you going to Mod Podge, you ask? Well, the embellishments for the wrapping! You’ll choose wood shapes (going along with the theme of your wrapping).
In addition, you’ll want to grab glitter, which you’ll adhere to the shapes with the Mod Podge. Use a thicker, chunky glitter if you don’t want to paint the wood shapes, so the coverage is better.
Are you ready to learn how to make your own gift wrap? Keep reading.
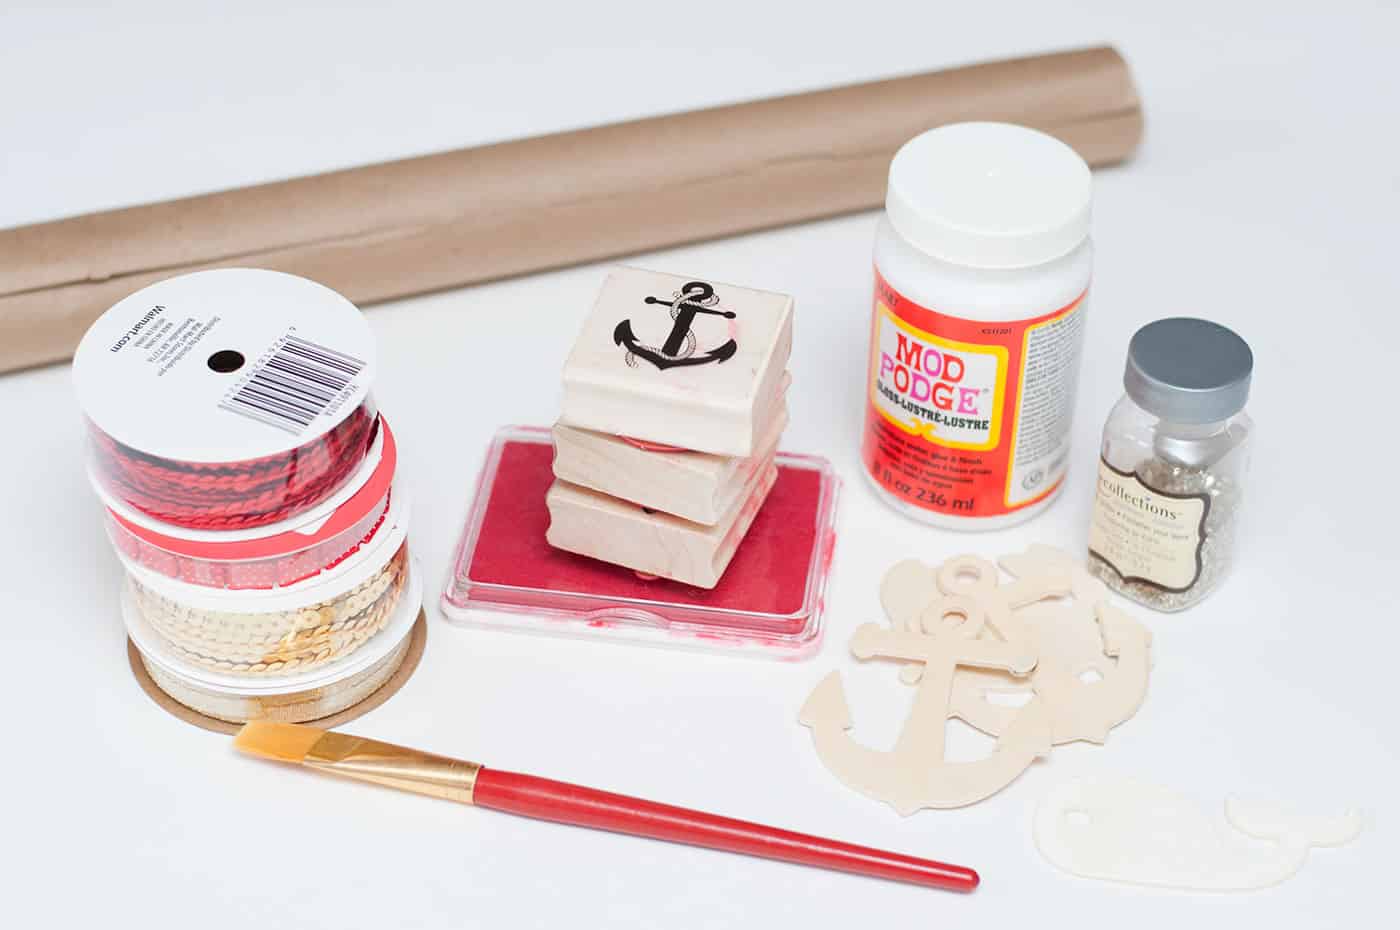
Gather These Supplies
- Mod Podge Gloss
- Kraft Paper or Packing Paper
- Stamps
- Glitter
- Ribbon
- Stamp Ink
- Wooden Embellishments
- Scissors
- Paintbrushes
- Tape
What stamp pattern and wood pieces will you use? Let me know in the comments!
This process was so easy; I’ll be doing all my gifts like this. Now that you know how to make your own wrapping paper, you can style yours any way you like.
Don’t you think Martha Stewart would be proud? I heard she has a room devoted strictly to gift wrapping . . . get the how to below:

DIY Gift Wrapping Paper
Materials
- Mod Podge Gloss
- Kraft paper or Packing Paper
- Stamps
- Glitter
- Ribbon
- Stamp Ink
- Wooden Embellishments
Video
Instructions
- Lay out the paper on a working surface. Cut the paper to fit the size of your gifts so you know the size of the area you need to stamp.
- Select your stamps and figure out the pattern you would like. Ink your stamps and firmly stamp them on them onto the paper.
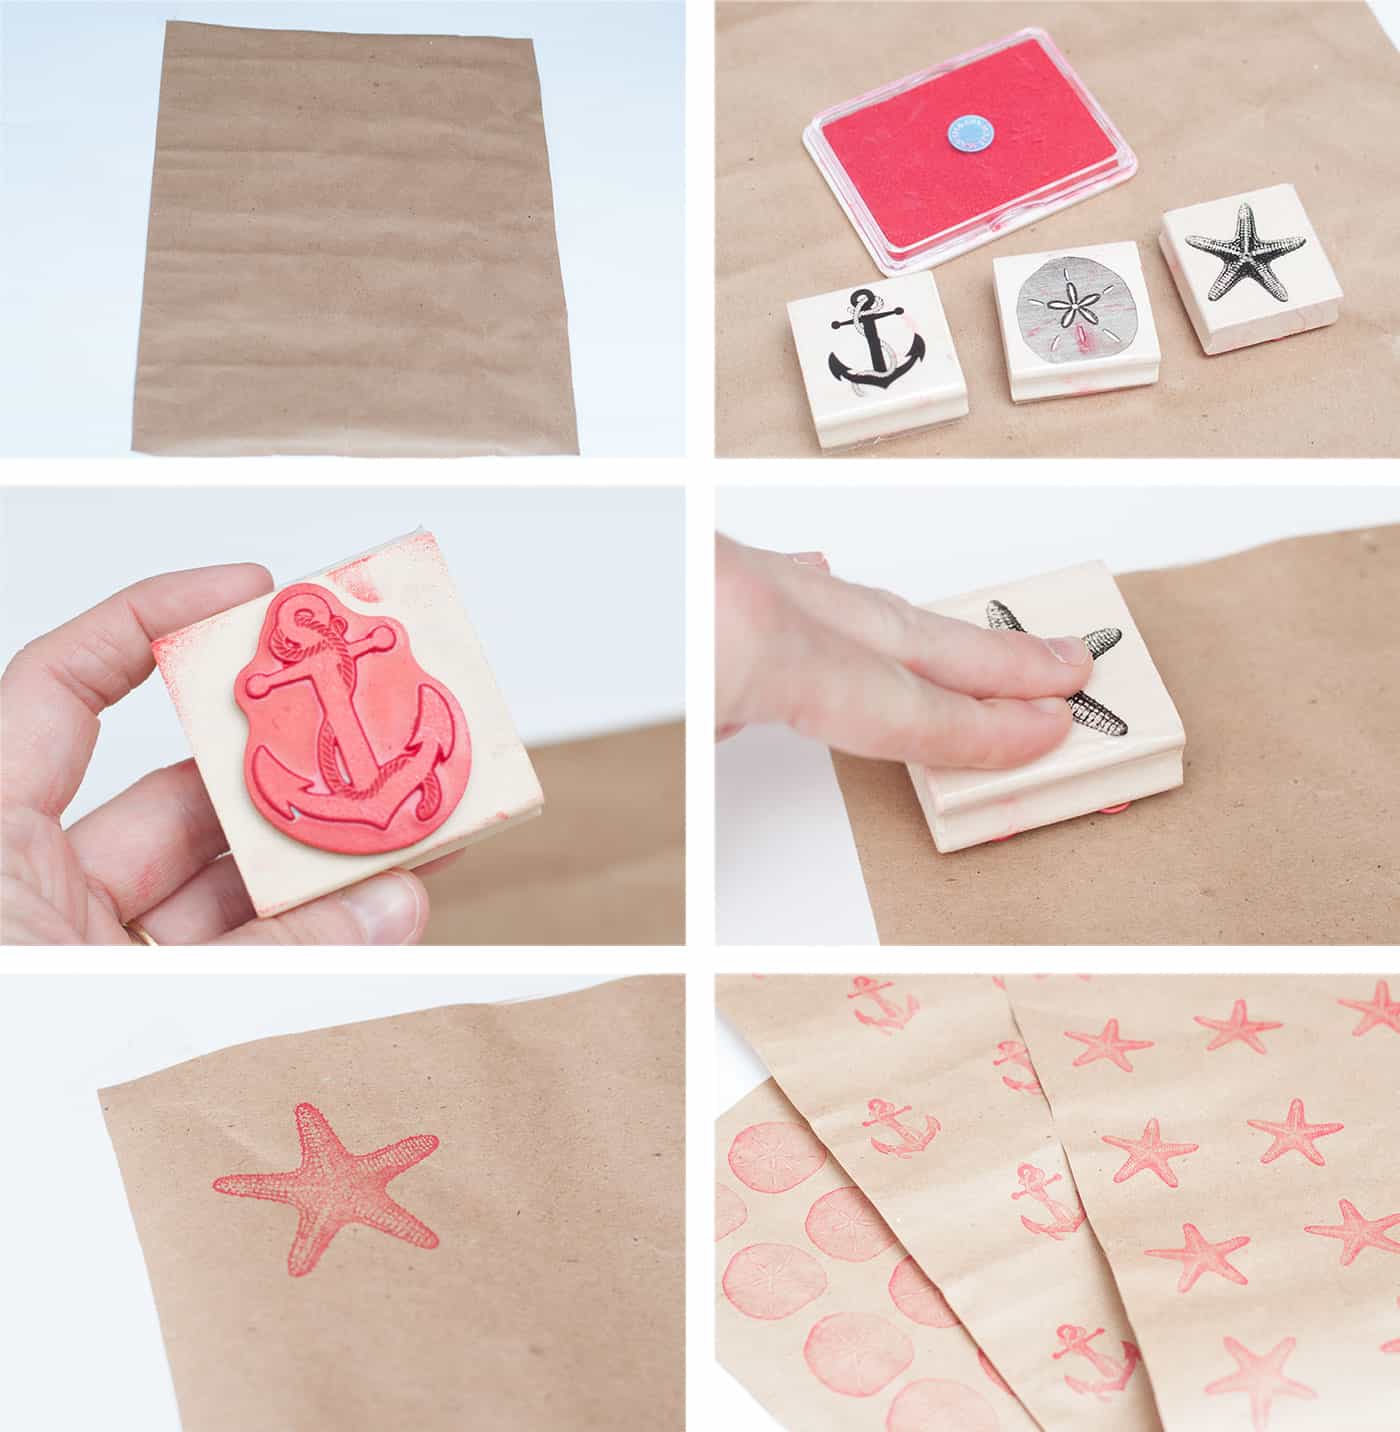
- Wrap the gifts with the stamped kraft paper. Hot glue the ends to seal.
- Measure the decorative ribbon, cut with scissors, and wrap around the packages. Combine textures and styles.
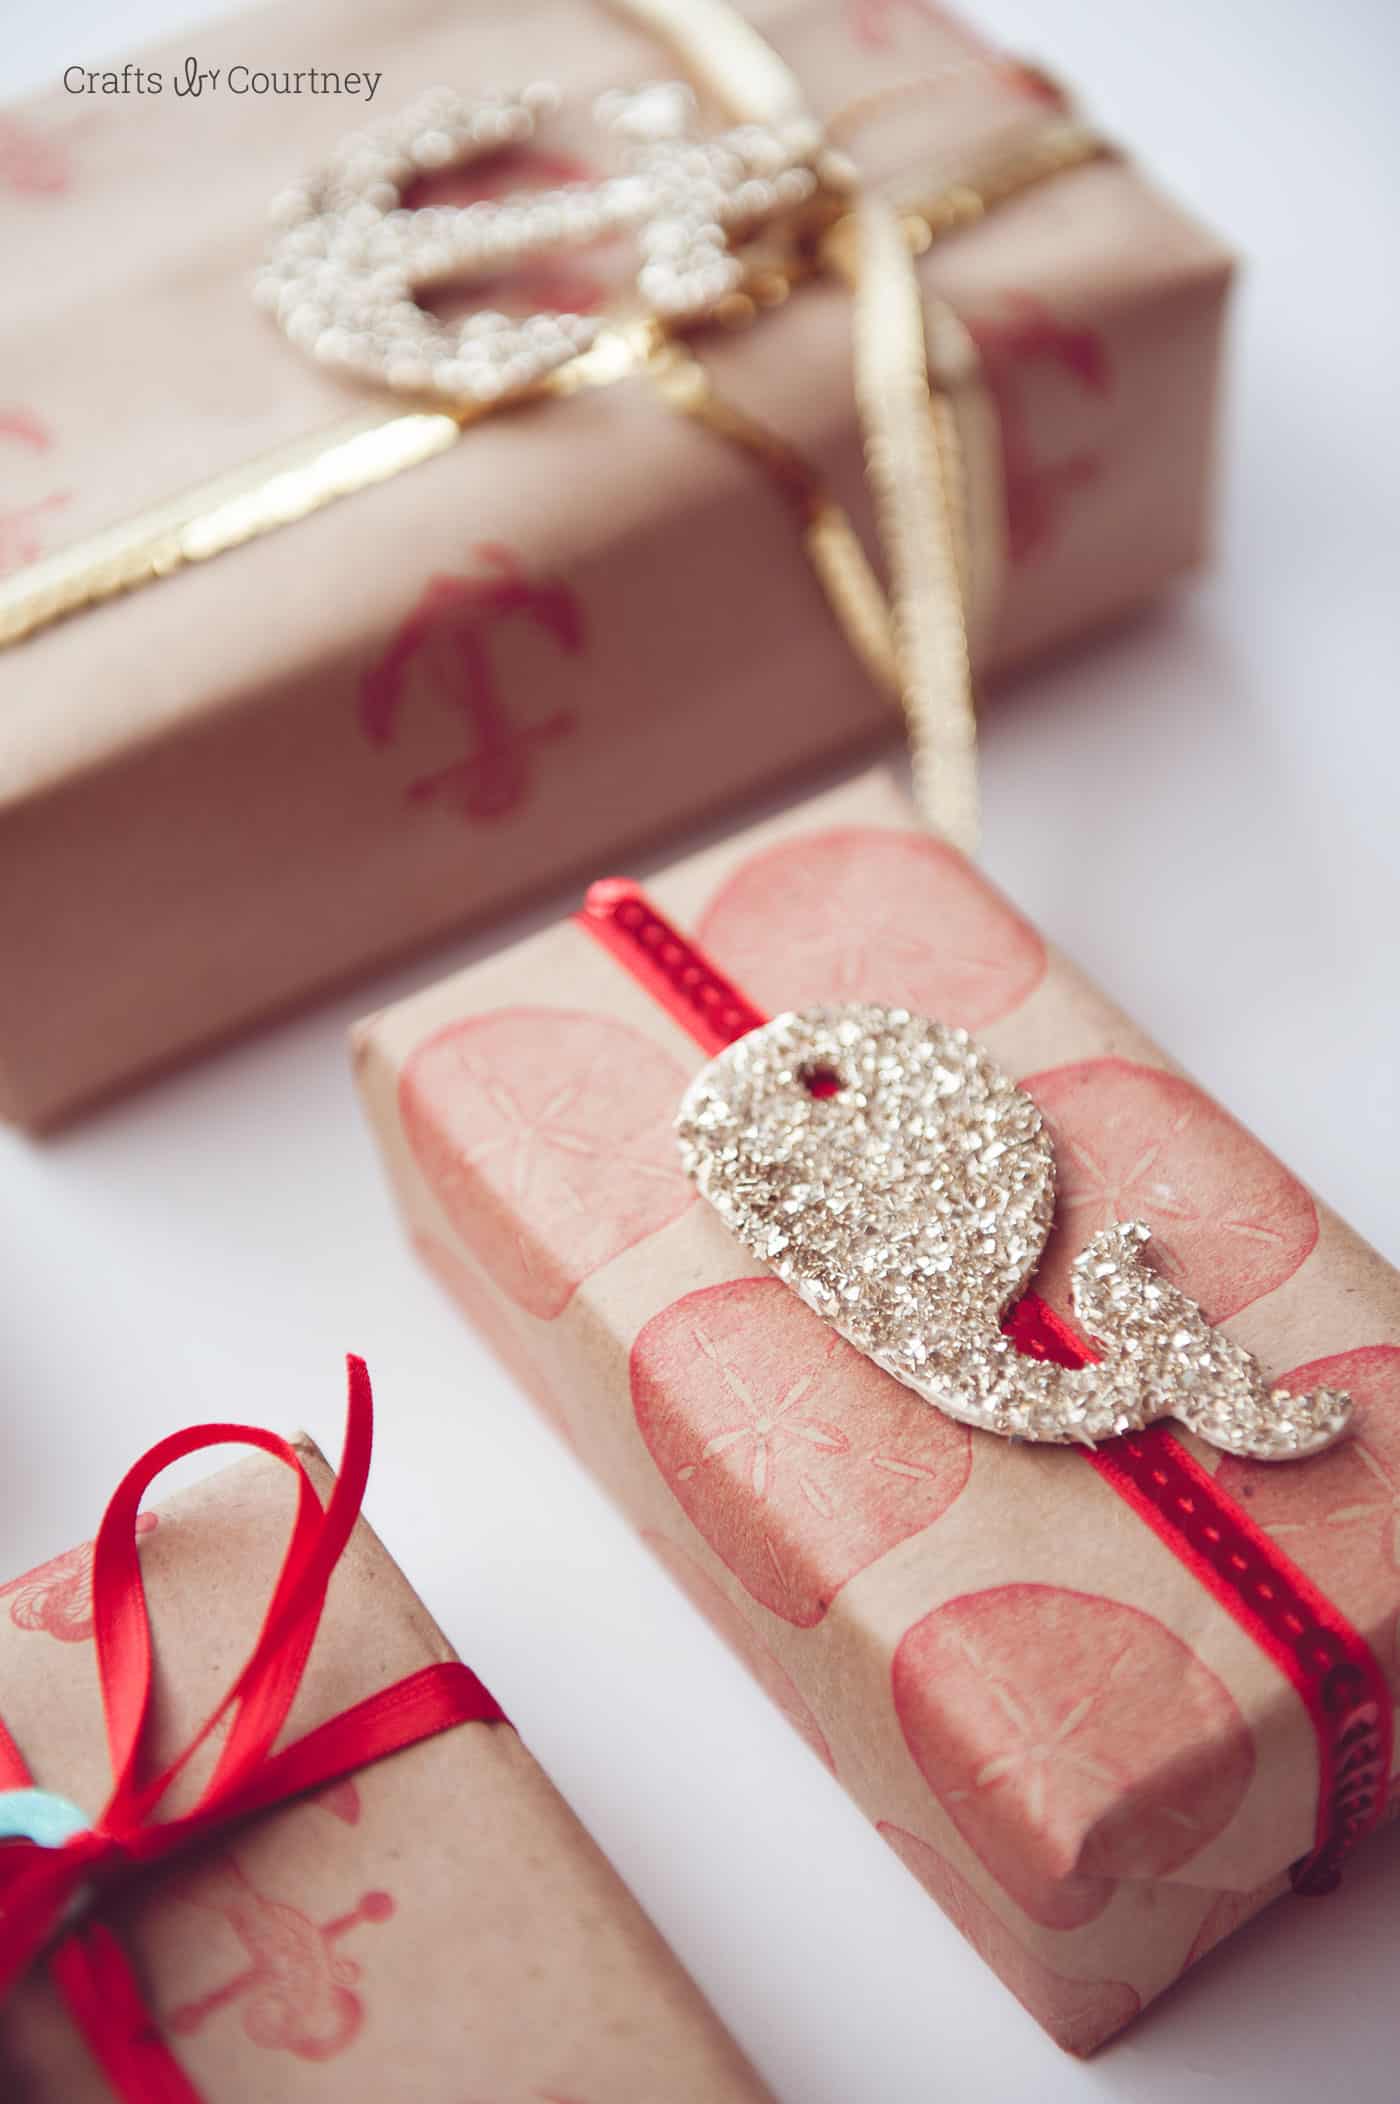
- Apply Mod Podge to a wood shape and sprinkle on glitter. Let dry. Repeat to fill in any areas that are sparse. Let dry completely.
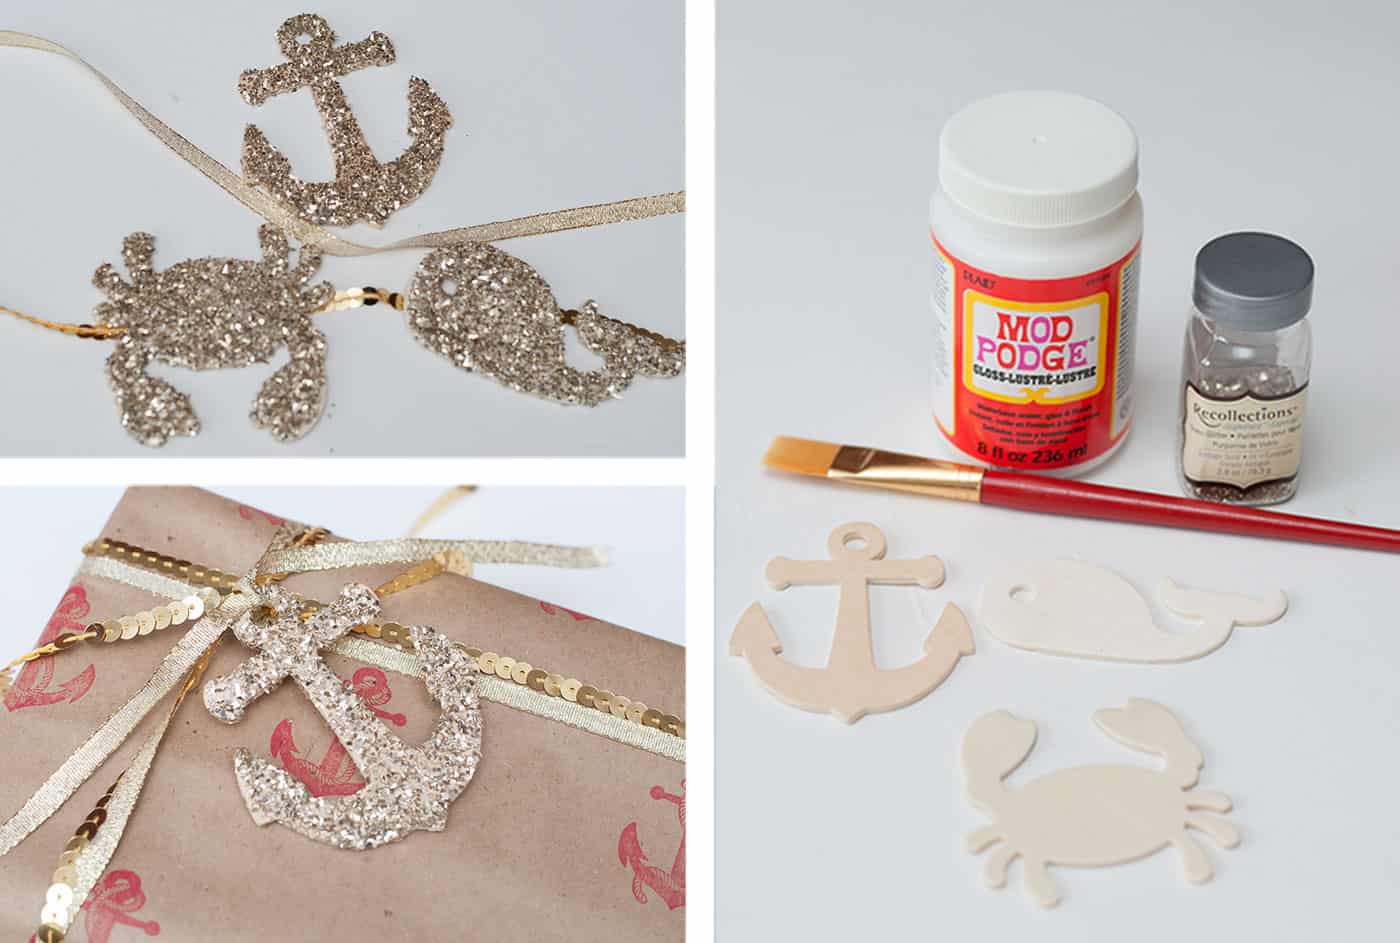
- Add the embellishments to the packages using additional ribbon or a hot glue gun.
If you want to get even more crafting inspiration, be sure and visit the following posts:
Believe Wood Star • Brown Paper Bag Ornaments • Chalkboard Trees • Countdown Chalkboard • DIY Christmas Village • Fabric Christmas Bowl • Farmhouse Sign • Frosted Mason Jar Luminaries • Gnome Wood Gift Tag • Hang Stockings Without a Mantel • Holiday Door Hangers • JOY Plaque • Merry Christmas Decor • Peace Wood Decor • Salt Dough Ornaments • Tree Mantel Decor • Wood Ornament Decor • Wood Tree Centerpiece • Wood Trees with Book Pages • Wrapping Paper to Frame

This wrapping paper is super cute! I love it!
Paige
https://www.thehappyflammily.com/
These are just way too cute! It’s a great way to stick with the nautical theme even through the holiday season.
This is awesome. Great idea 🙂