
Try a seasonal craft that is a bit different with these unique Mod Podge pumpkins! These DIY pumpkins are SO easy to make.
Skills Required: Beginner. It helps to have some experience with Mod Podge simply because you’ll be decoupaging paper down on a round surface (as opposed to flat).
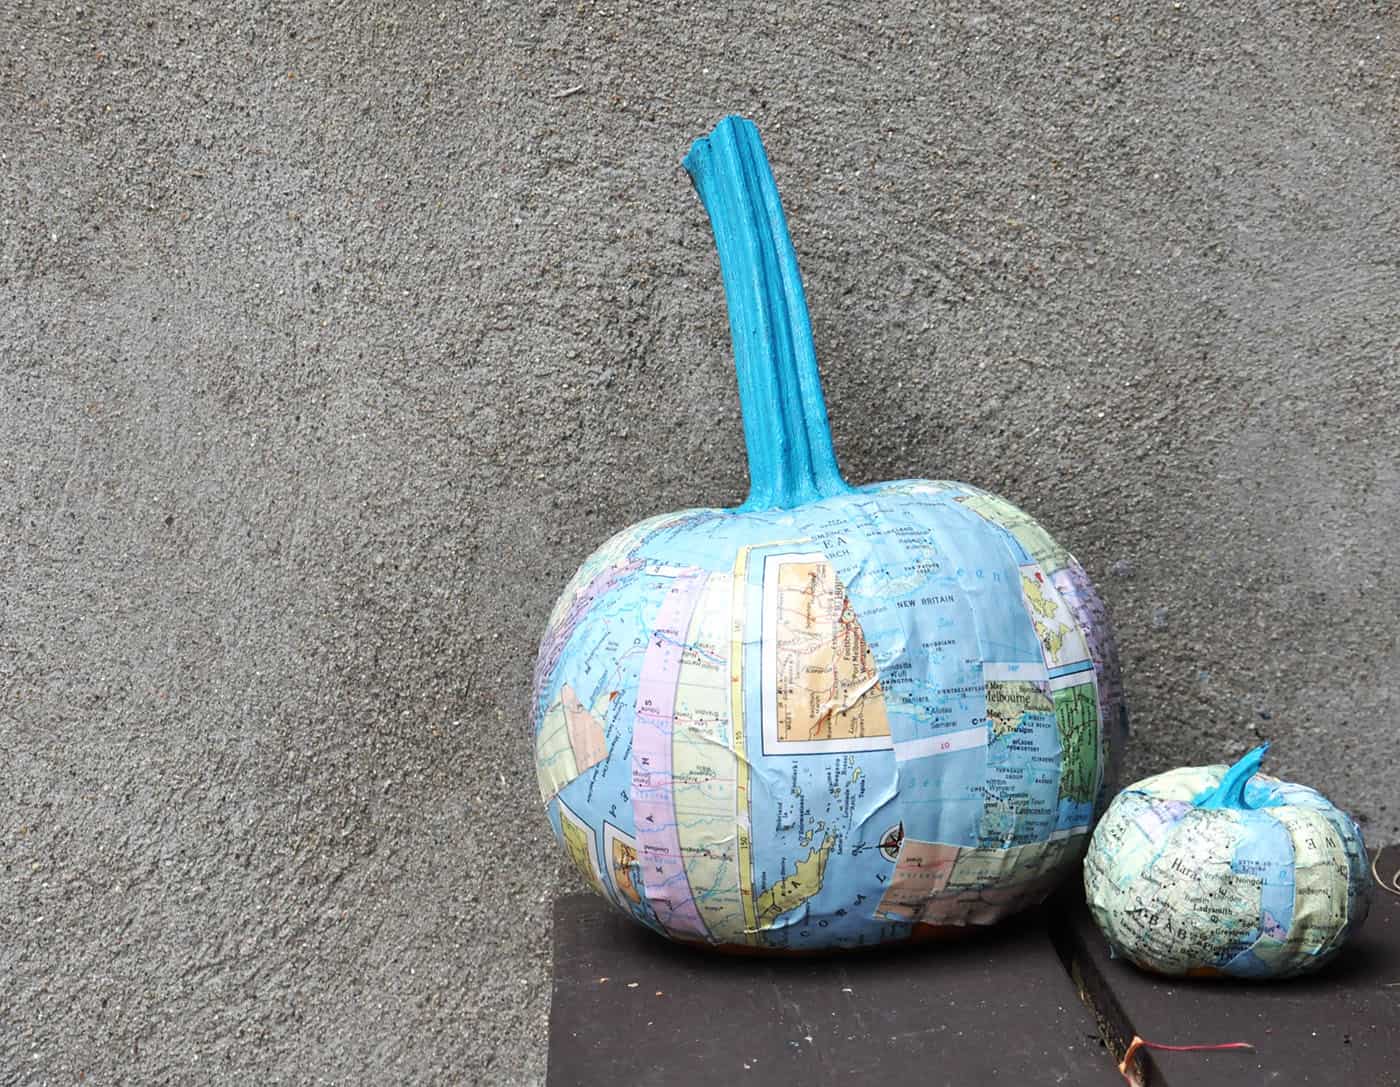
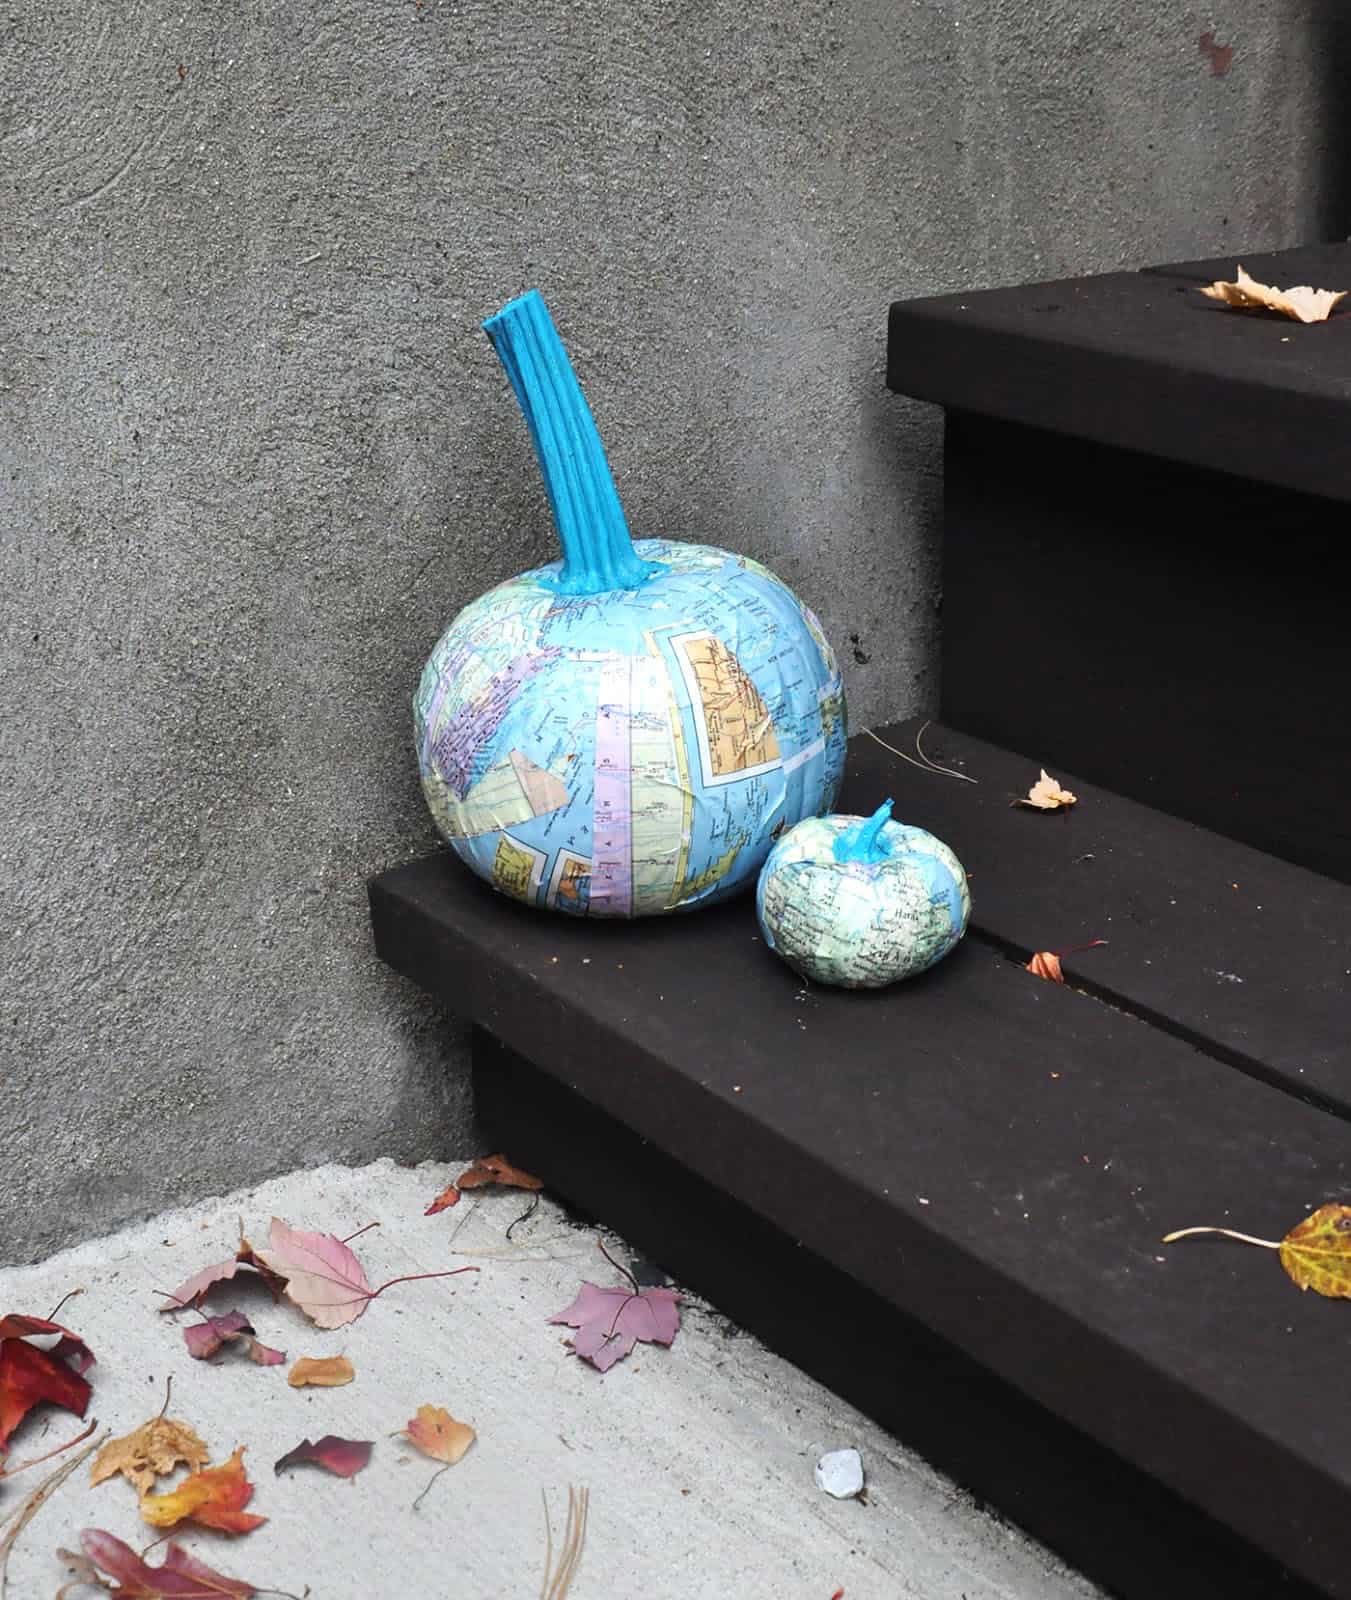
There are so many creative ways out there to decorate pumpkins, and I’m going to show you one of my favorites that is no-carve. I’ve shared painted pumpkins before, so you’re familiar with that – but have you ever covered a pumpkin in maps?
This map wrapped Mod Podge pumpkin is fun and easy to put together. Plus it’s an amazing addition to any fall decor.
Mod Podging on Pumpkins
Before we dive into this project, I wanted to address a few commonly asked questions/issues you might have about how to make this cute fall craft. I hope these help you in your pumpkin decorating journey!
Real vs. Fake
Should you use real or fake when making Mod Podge pumpkins? It’s something that people are always wondering and good news . . . the answer is you can use both! It doesn’t matter if you use a real pumpkin or a fake pumpkin. Either will work.
The advantage of fake pumpkins is that they last for years. The best place I’ve found to get them is in the craft stores during the holidays, or online. A real pumpkin can only be used for a season and will have to be tossed, though it will be cheaper.
Preparing the Maps
There’s nothing that you need to do to the maps to get them ready for this DIY pumpkins project, aside from cutting them into either strips or small squares. If you decide to photocopy a map, it’s ideal to use laserjet instead of inkjet to avoid ink smearing everywhere.
Having said that, you can print them on inkjet, spray both sides of the printouts with clear acrylic sealer, and then let dry overnight. You should then be able to Mod Podge them without as much bleeding.
Dealing with Wrinkles
If you apply the map to the pumpkin in strips, you’re likely going to get wrinkles in the map. That’s because of the round shape of the pumpkin vs. the flat paper. There are a few pieces of advice I have for you if this is frustrating.
First, you can cut the map into smaller pieces and apply it that way. Second, you could cut darts in the paper (cut a “V” like you would in a sewing pattern) and overlap as you’re Mod Podging. Third, you can simply love the wrinkles.
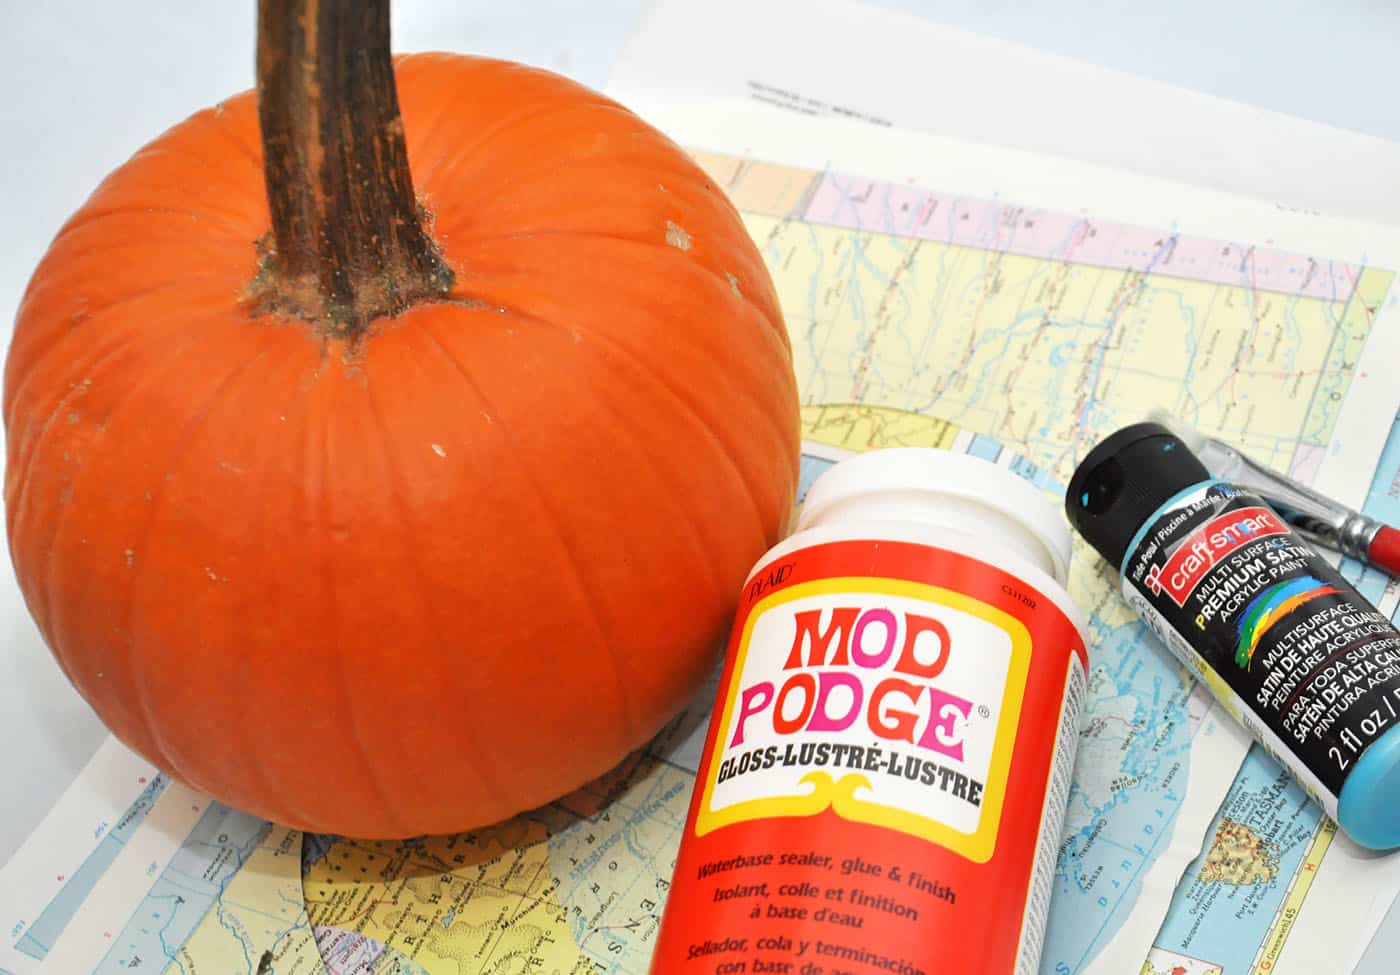
Gather These Supplies
- A pumpkin (real or fake; mine was real)
- Old maps
- Mod Podge Gloss
- Scissors
- Acrylic Paint (I chose blue)
- Brush
I love how modern and cool my map pumpkin looks! Tip: if you’d like to display this pumpkin outside during the fall months and live in a very sunny or rainy climate, use Outdoor Mod Podge.
Get the printable how to card below:

Mod Podge Pumpkins
Equipment
Materials
- Pumpkin real or fake
- Old maps
- Mod Podge Gloss
- Acrylic paint
Video
Instructions
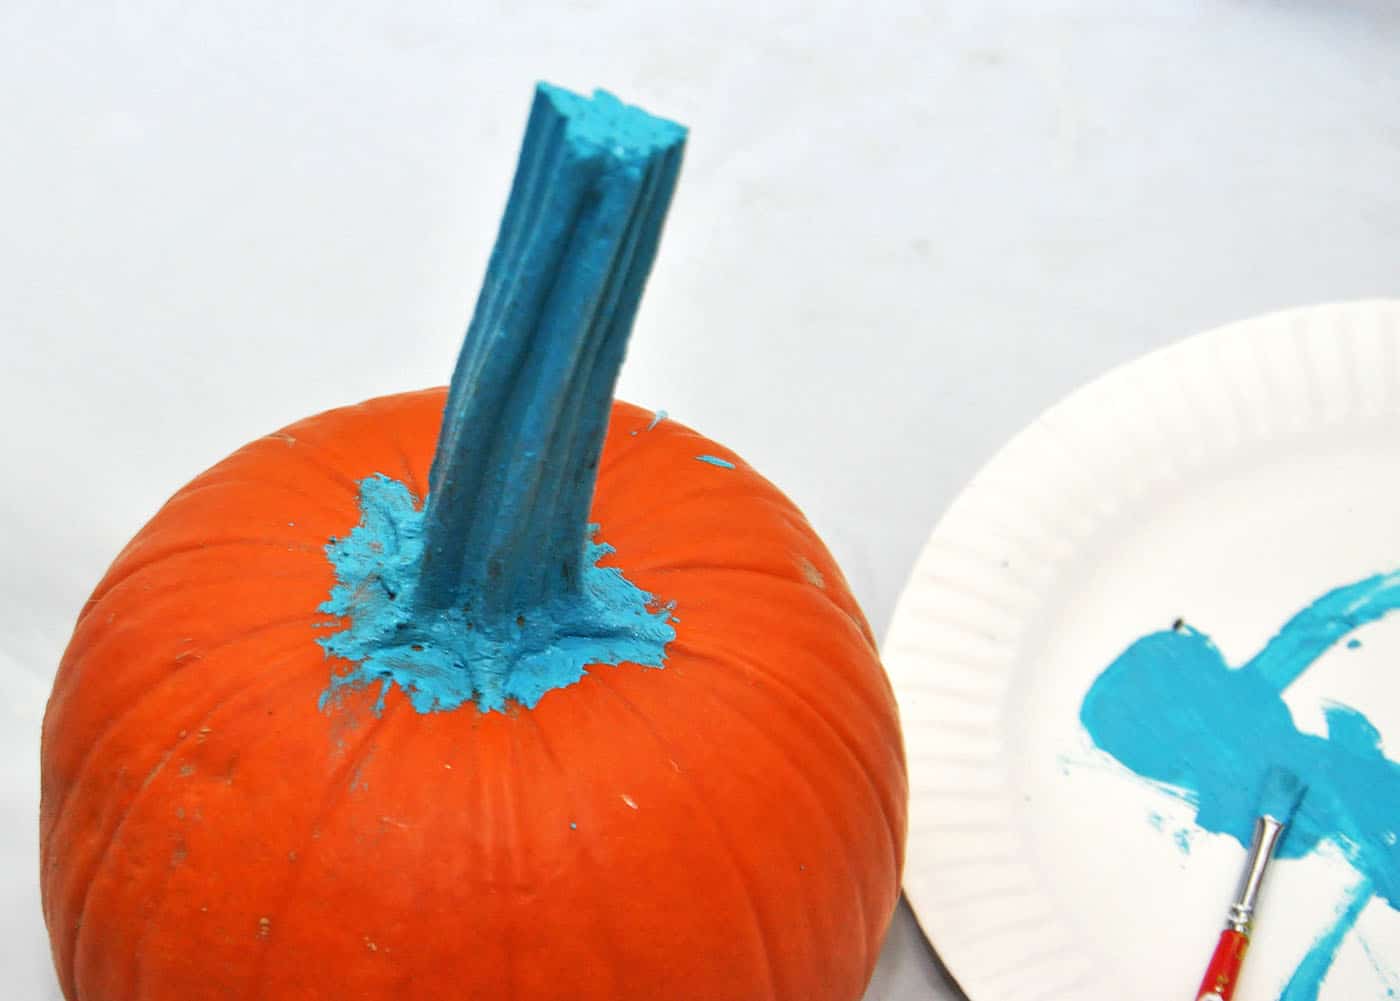
- First, wipe down the pumpkin with a damp paper towel to make sure all the dirt is removed and let dry. Then paint the stem with your desired craft paint color and allow to dry.
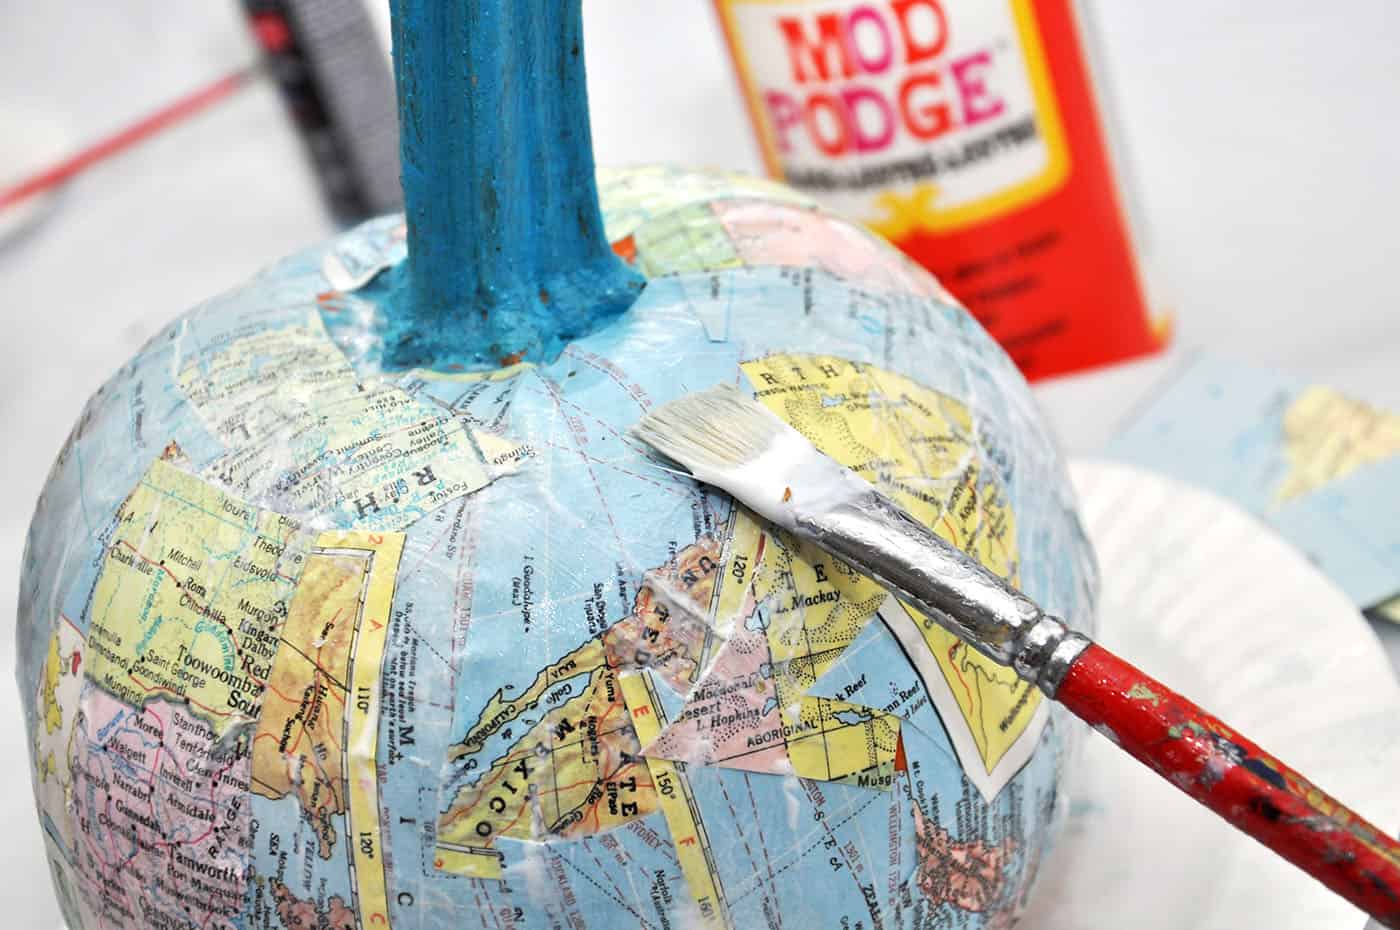
- Cut the map into random strips. Brush a medium layer of Mod Podge down onto the pumpkin. Lay down the map strips and allow to dry for a few minutes.
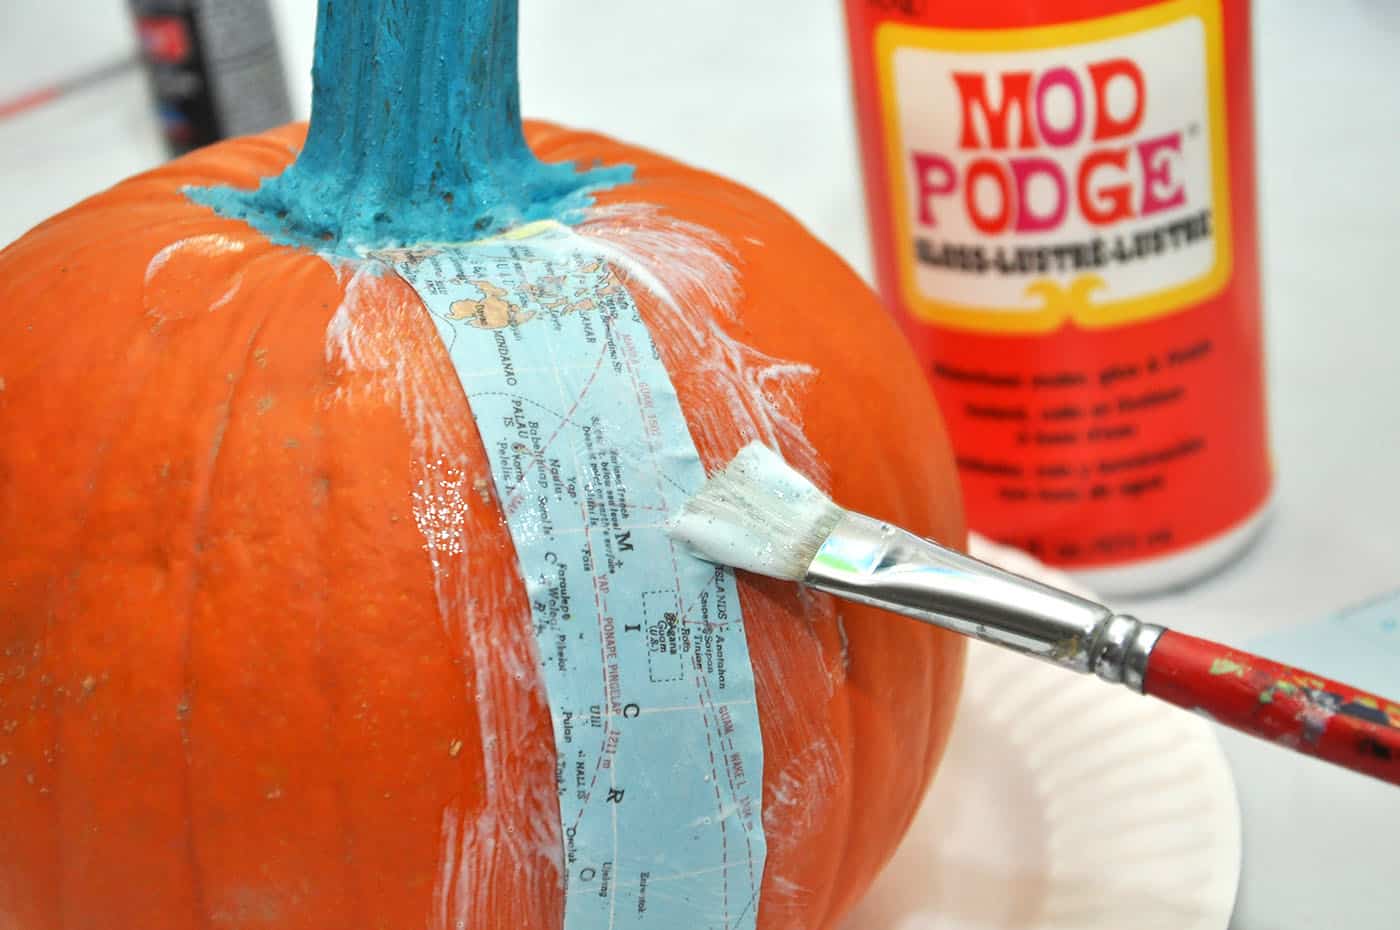
- Brush a thick layer of Mod Podge on top of the strips. Continue to overlap the map strips and secure with Mod Podge.
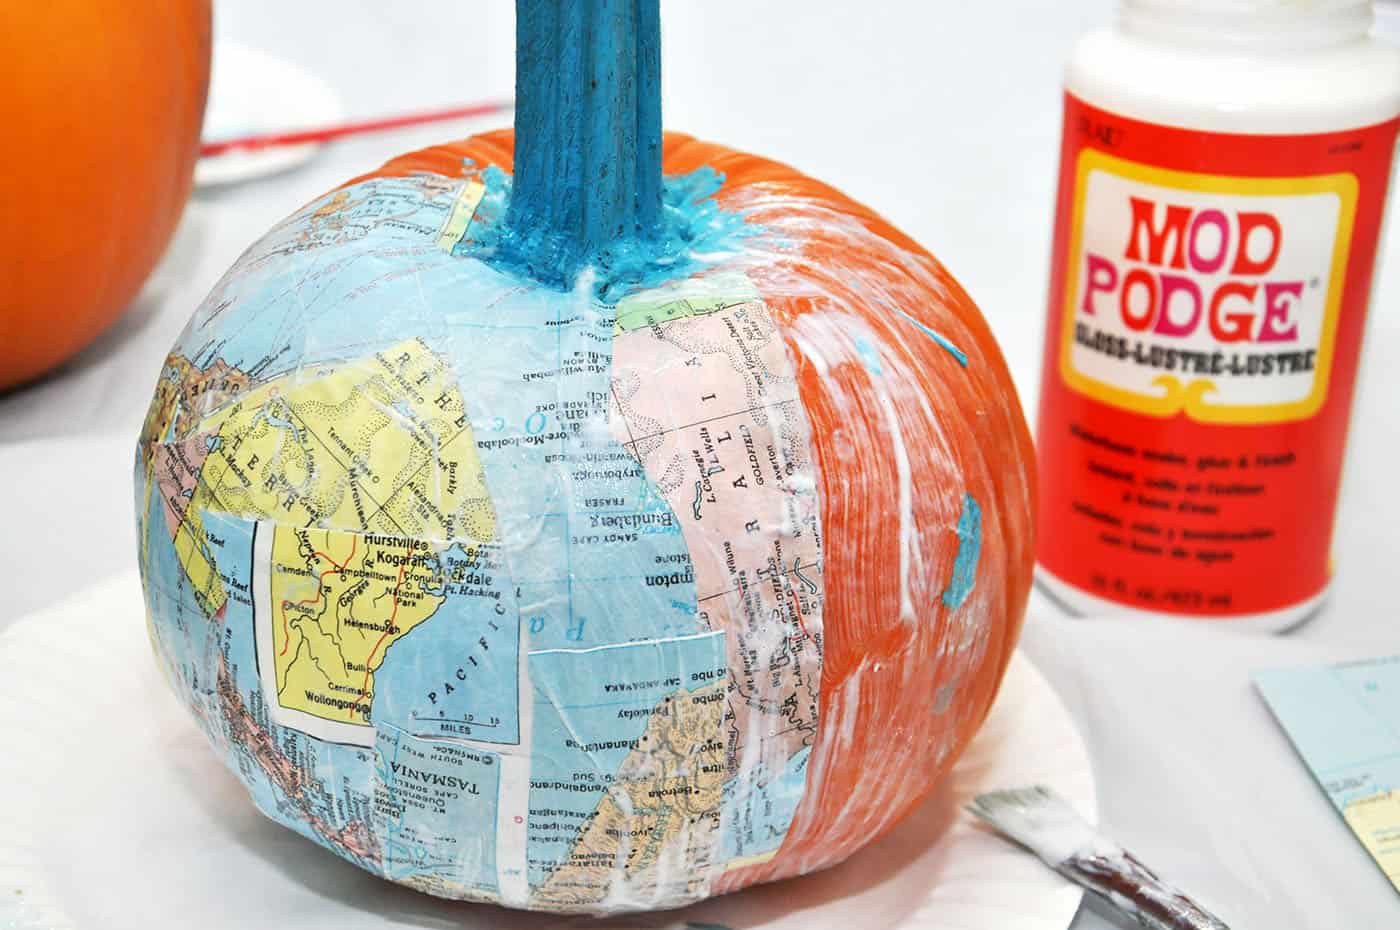
- Allow the pumpkin to dry to the touch and then add another layer of Mod Podge over the top to secure the map completely.
Notes
This craft is part of our fall crafts for adults and Dollar Tree fall crafts! Let me know what you think in the comments. I’d also love for you to check out the following ideas:
Confetti Pumpkins • Decorate Paper Craft Pumpkins • DIY Nautical Pumpkin • DIY Pumpkin Seed Art • Wood Block Pumpkins • Fall Leaves Frame • Glitter Acorn Decor • How to Preserve Leaves • Paper Mache Pumpkins • Wood Pumpkin Decor


Does the Modge Podge glue affect the real pumpkin and make it mushy or rot? I am doing this for a work pumpkin decorating contest and it’s going to sit in the office for a week for people to vote on. Thank you!
It won’t make it mushy! The biggest thing that makes pumpkins mushy is allowing air to get to the innards. You’ll be fine, at least for the Mod Podge part.