Did you know you can transfer INKJET printed images onto wood? Yes . . . this inkjet photo transfer to wood is easy with Mod Podge and regular school glue.
Skills Required: Intermediate Beginner. You should have prior crafting experience before attempting this craft; preferably with Mod Podge. It’s not necessarily hard, but it can get tricky so it’s best if you have experience with the materials.
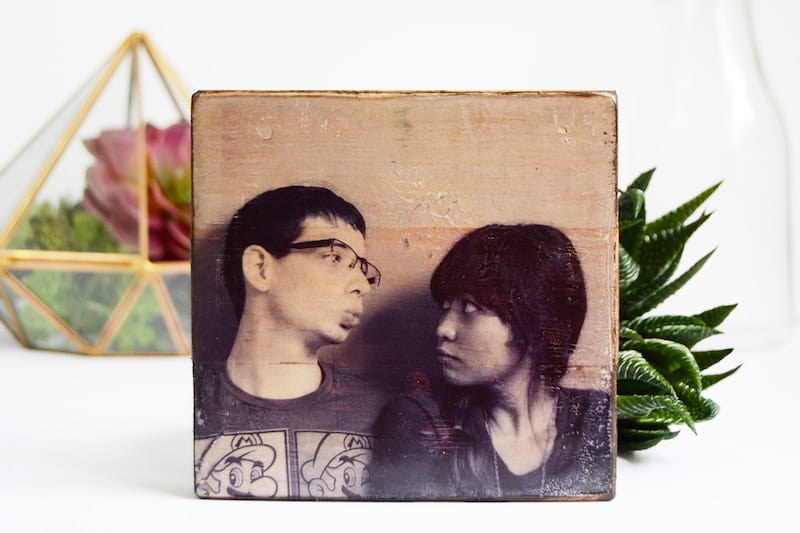
Yep, you heard right! You can do an inkjet photo transfer to wood with just Mod Podge. I love transferring images to wood – they make these personalized rustic little pieces that are perfect to just sprinkle around the house or to give as a small personalized gift.
You don’t need a laser printer or photo transfer medium for this tutorial. It’s different from the Mod Podge photo transfer medium in that it gives your image a clear background.
You might be wondering how the image goes from the inkjet printer/whatever you print out, and onto the wood. It’s magic! It’s actually not magic though.
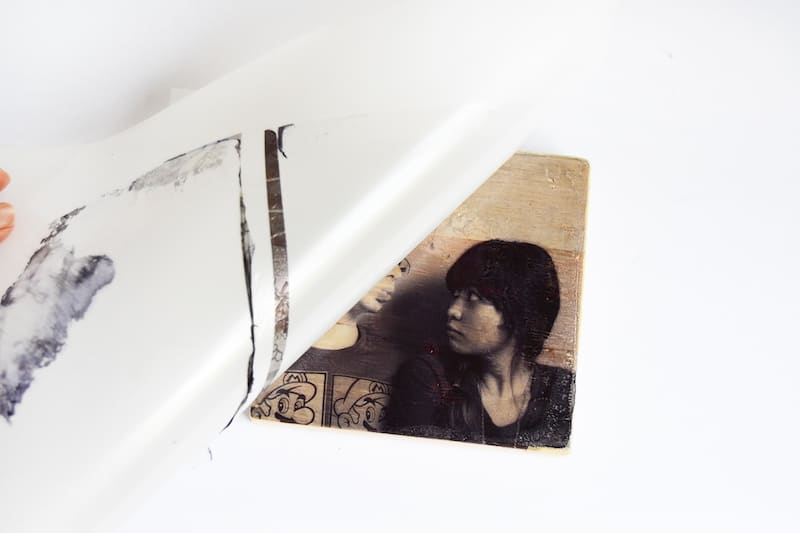
The basic process is that you will print an image onto a stencil sheet (not photo paper) that has dried glue on top. You will apply Mod Podge to wood, then place the photo/stencil sheet face down into the Podge. 24 hours later, you’ll peel the stencil sheet from the wood and the photo will be left behind!
And this is how you transfer inkjet images to wood using Mod Podge.
Mod Podge Formula to Use
There are several Mod Podge formulas you can use – I recommend sticking with the basic formulas of Gloss, Matte, or Satin. It really doesn’t matter which, it’s all about the finish you like.
Stay away from the Outdoor and Fabric formulas, or any Mod Podge that’s a bit thicker. You want regular consistency medium for this project.
In addition, don’t get confused by the photo transfer formula. It’s not the same thing as regular Mod Podge at all. The transfer medium uses laserjet images and can’t be used decoupage.
Are you interested to see how I did this craft? I know you’ll use this technique for transferring photos all the time after I teach you. So read on!
Gather These Supplies
- Plastic stencil sheet
- PVA Glue (normal school glue)
- Mod Podge Matte or Gloss
- Sponge brush
- Ink Jet Printer
- Wood block
- Wood stain
- Sandpaper
This project does take time, but it gives fantastic image transfer results without the hassle of wetting the image and rubbing the paper off. The stencil sheet can also be used again!
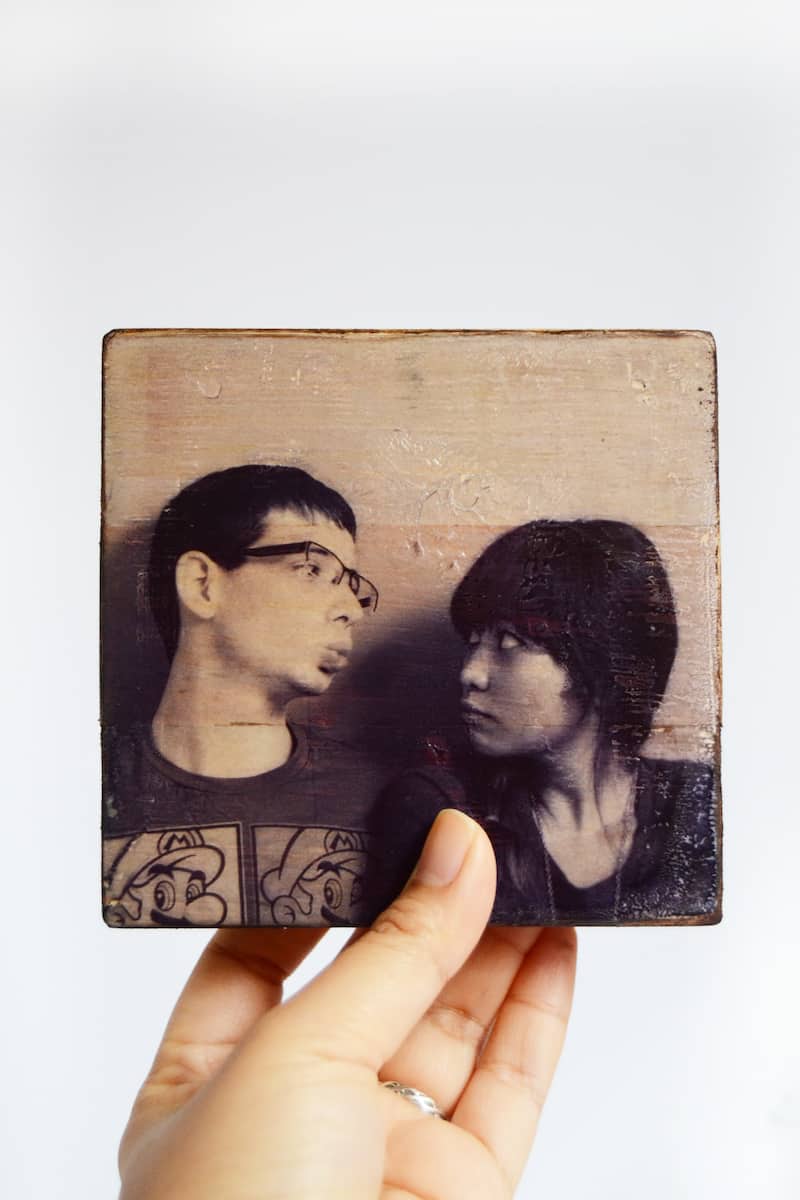
What image would you transfer? Have fun crafting and don’t forget to follow me on social media or my blog for more ideas, freebies and tutorials!
Mod Podge Photo Transfer with Inkjet
Equipment
- Printer and paper
- Sandpaper
Materials
- Plastic stencil sheet
- PVA glue normal school glue
- Mod Podge Matte or Gloss
- Wood block(s)
- Wood stain
Video
Instructions
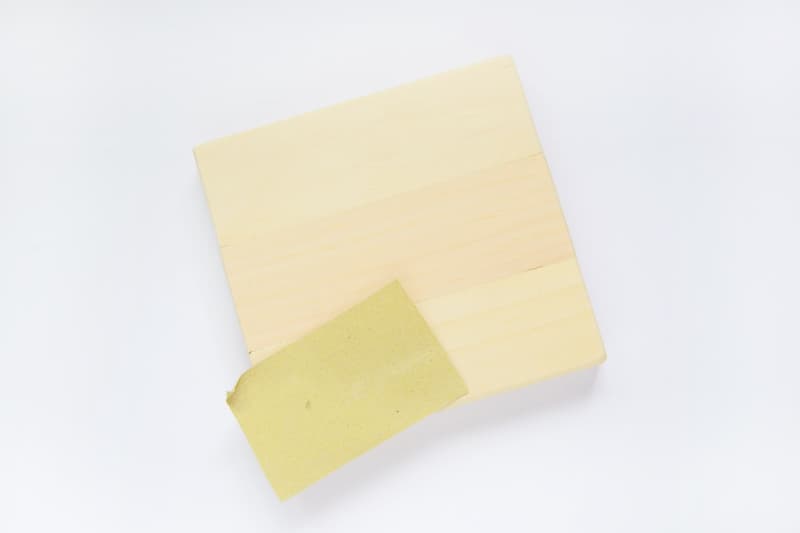
- Sand the wood block – you want the surface to be as smooth as possible for better image transfer. Wipe away any dust with a tack cloth or wet cloth.
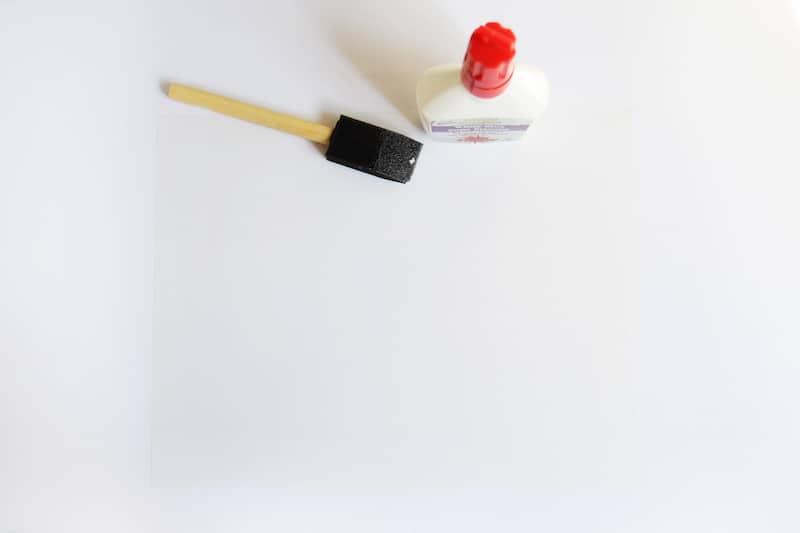
- Paint two thin layers of glue onto the shiny side of the stencil sheet. You can use transparency films as well, if that is what you have on hand.
- Once fully dry, print the image onto the glue covered stencil sheet with the printer. Allow the printed image to FULLY DRY before proceeding to the next step.
- Paint a layer of Mod Podge onto the wood block and carefully lay the image on top. Using the stencil sheet will allow you to align it much easier with the wood edges. Smooth slightly with your hands.
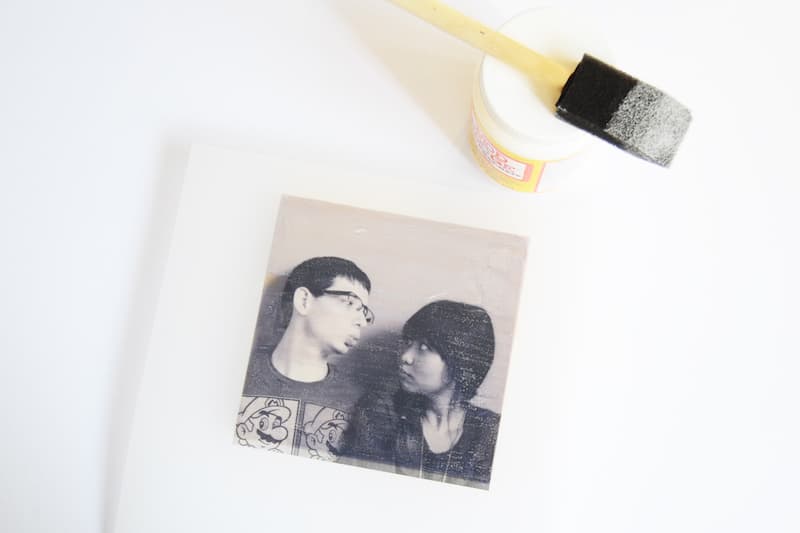
- Wait until the Mod Podge is dry on the inkjet transfer to wood (I let mine dry overnight – 24 hours is recommended). Lightly run the tip of a craft knife onto the sides of the wood before peeling to separate the image from the rest of the glue that dried. Peel carefully, again making sure the image is fully dry or it won’t transfer perfectly.
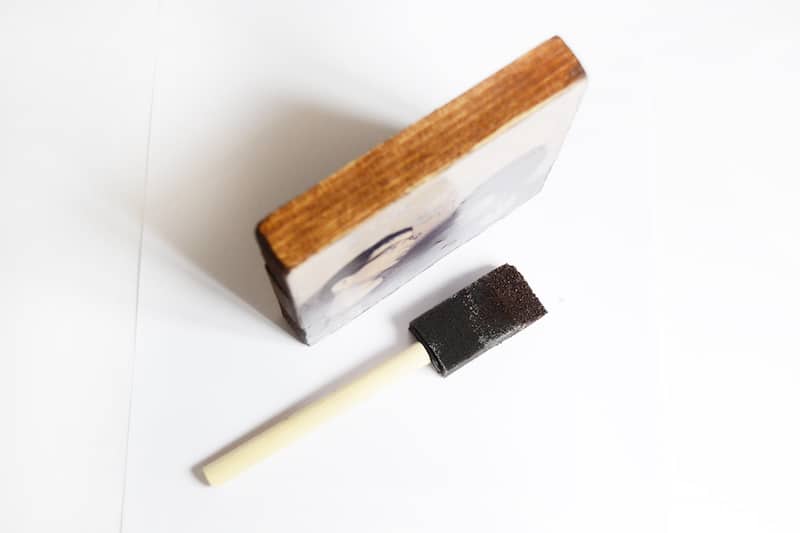
- Stain the sides and the back of the wood block and let that dry to finish.
Notes
This was inspired by another inkjet photo transfer we spotted at Photojojo! If you enjoyed this craft idea, let me know in the comments! Plus check out these other photo ideas here:
Breakfast in Bed Tray • Family Reunion Centerpiece • How to Transfer Photos to Wood • Modern Photo Blocks • Photo Keychain • Transfer Paper to Fabric • Transfer Photos to Fabric • Transfer to Canvas • Transfer to Furniture • Transfer to Glass • Transfer to Metal • Wooden Photo Blocks



This is such a great idea. Thank you for sharing this one. But there are a few things that I am not clear about…..
In Step 3, do we need to *press* the image flat, or use a roller, brayer, or even our hands or anything like that? How do you ensure that the entire image is making contact with the Mod Podged surface?
Step 4: I guess I just don’t understand at all. Can you post a photo of what you mean by running a craft knife “onto the sides of the wood” means? I must be slow, but I am not getting this concept.
Thanks!
Hi Lyone! Step 3 yes just smooth out with your hands a little bit. And for Step 4, you’ll just take your craft knife and run it right along where the page attaches to the wood block if there is dried glue there keeping you from pulling the sheet up. You might not need a craft knife, but you’ll know if you do the project if you need something to help you release the sheet. You can probably use another household tool as well 😀
Could you use freezer paper this way instead of stencil paper?
I like really the idea of this project, but I think you need to edit the instructions so they make more sense. Thanks much!
Hi. I really like the idea of this… Stupid question… I assume we print onto the glued side side of the stencil paper, but does the image need to be reversed? I’m guessing yes, similar to the paper transfer methods. It looks like it would leave better image than paper does.
Hi Crys – yes, you can reverse the image if you want it to show up the same way on screen OR you have text 😀
Love this, Amy! Great project!
Does it only work on wood or can you transfer onto tiles etc?
Is this the stencil film I would need for the project ?
ORAMASK 811 Stencil Film 1
White dyed stencil film (special PVC, 80 micron)
Matte finish, Opaque
For all paint and spray techniques on smooth, flat surfaces
Due to its high degree of stiffness especially suitable for large formats
Great for creating painted signs
Polyacrylate, Removable
Developed for use in stencil applications that require a more rigid film. Best for use with etching and painted backgrounds, as you paint will be not be pulled up!. Oramask 811 has a clear, low tack and water soluble adhesive. Best for use with water based and latex paints.
I don’t think it will work on this – this film is used as like a vinyl stencil and not a reusable stencil sheet (transparency sheets would work best as substitute).
I do not understand the stencil step. Why mod podge it? It dries…then does it stick to photo which you also let the photo dry before laying it down?
Hi Bette! You are Mod Podging the image then placing it face down on the block while still wet – when it dries, the image will transfer to the block and you can peel it up and leave the image behind. The stencil sheet is slick, enabling the sheet to be peeled up and leaving the image behind on the wood block.
What is a stencil sheet? Where do I find one?
This is the link to the stencil sheets in the post: https://amzn.to/3auGowJ
You can probably get them at an office supply store and at craft stores as well! WalMart may also have them.
INKJET PHOTO TRANSFER TO WOOD WITH MOD PODGE
Do you have Video how to do this it would much easier following a step by step video on how to do all that thanks Elaine
Elaine, I think that’s a great idea! I’ll do one before the end of the year.
Can this be transferred onto metal surfaces?
Hi Cynthia! It’s not going to transfer well onto a smooth surface with a coating – so if the metal has a coating, it won’t work.
I have a question about printing the photo onto the stencil sheet. Does the stencil sheet go easily through your printer with dried glue on it? I’m worried about it getting caught and jamming.
Hi Marcie! I think you are definitely taking a risk putting paper painted with glue into any machine, but . . . I’ve never seen it “not” work. The glue just has to be dry enough and it won’t clog up or ruin your machine.
Can I use glue spray on the stencil or is it better to use children’s glue?
We’ve never tried with glue spray. You’d have to do a test!
Is Elmers regular school glue? I am 68 and the regular school glue I had in school was a small brown glass bottle with a dark dark red slanted rubber tip on it and the glue clear. I know showing my age. Another question, do you absolutely have to use laser printer? I practiced with inkjet printer and it seemed to work okay.
Hi Jennifer! The brown glass bottle was usually rubber cement but I’m not sure? Regular school glue would work too. And for this particular tutorial, you do use inkjet!
@Amy, I’m the same age as Jennifer and the glue she remembers was definitely a paper glue, not rubber cement. My Mom told me it was made out of horse’s hoofs.
@Joan M., wow I’ve not seen that! But I believe you, it just might have been before my time 🙂
@Joan M., the stuff in the brown bottles was mucilage and was used to glue paper. According to Wikipedia, it was made from plants. You’re right, though. We were always told that old horses were sent to the Glue Factory.
Great for modeling!
Nice video with easy instructions. Not a big fan of the text colors (partial colors) it’s a bit over done.
I always thought you had to use a laser printer so never tried this technique as only have an inkjet. Thank you for showing this, definitely going to try it.
Great Idea – this would be perfect for the kids to make a Father’s Day gift
Great stuff for transfers. I tried so many times with my Inkjet printer, then finally found modge podge
love this project
I love using it on my crafting projects
Really cool!
I am definitely going to do this!
Glad there are options according to the type of printer you have!
Good project for art class!!
Fun
Interesting approach I’ve tried different ways of transferring but never this one. Thank you for sharing this is now on my list of test and try
Another lovely year round gift, great instructions
Have not done this one. Doesn’t seem too scary to try.
I really want to be able to do this. I do all kinds of wood working so the thought of putting a picture on wood is unique. I am going to try one today. I have seen so many beautiful pictures and wedding pictures on wood. awesome.
These make great personalized gifts. You can gift these to absolutely anyone.
Love the idea, the look, and the fact the transfer material can be reused!
I am new to all this arts and Crafts stuff but I have fallen in love with it all. I have also found out I am really good at it. Thank you for breaking everything down. You are awesome
I love this project. A great way to preserve memories.
fab another idea with lots of options for gifts
Looks amazing. I have no experience, but I’d like to try it and get experience.
Definitely will try this. Great instructions!
Wow I can paint picture right off the printer and Modge Podge to wood. Love it.
WOULD MAKE GREAT COASTERS
Doesn’t seem as simple as the other photo transfer, but I’m willing to give it a try.
I do pvc pipe lamps and will try this on the pipe as well as on wood. This is great. Thank you so very much.
I love the look of the final product!
A good project to try, thanks for sharing.
What a neat tutorial, I definitely want to try this!
Have to grab some stencil sheets and get to work! Great idea!
not so excited about this, needs more color
inkjet photo transfer
What a great idea! I can’t wait to try this one!
Definitely trying this one. I have been doing lots of photo transfers but have been using laser prints. I have to have these printed at Office Depot because I have an inkjet printer. Would be nice just to see something and be able to do it.
4 stars
I can’t wait to try this method. I already have the photo in mind. I live your projects.
Who knew!
Future craft ideas maybe?
I tried this method several times but could not get the picture to completely stick to the wood. Pretty disappointed as I wanted to do this for Christmas gifts.
Welp – I can’t help you if I don’t know what happened. This project has been completed by many people and we have a community on FB that’s there to answer questions. The resources are there to be successful but you have to use them. Not every craft is a winner right out of the gate, especially depending on the person.
Easy to follow tutorial. Great results.
Better than white background and so simple
I’ve got to try this! It will make great little spring gifts for my family and friends … just because.
Good idea
Simple directions on how to transfer an inkjet picture onto a surface.
will have to try that
Terrific gift idea.
Easy Awesome Project .
This was a new technique for me. Anxious to try.
I finally got myself an inkjet printer and needed ideas to show some people on why I just had to have yet another printer when I already had a reliable working one already and I’m going to try this transfer today, wish me luck and thanks for the article that makes sure I don’t mess this up!
Have not tried yet, Can’t wait to try
Wish this had been a video tutorial.. I do think I”ll try it though
This was a good lesson I found it easy to follow and the results were very good others should try it
Another great idea for gifts or personal items. Thank you!
great idea!!
great idea!!
Easy craft with clear instructions
Thanks for this idea. I have this great photo of my husband and me kissing that I’m going to do this Modge Podge project!
This looks a little complicated but I hope to try it someday when I have all the supplies. My printer is an inkjet printer.
Quick and easy way to make keepsakes with your family photos. Imagine them as place cards, then gifts to take home from Xmas dinner. Get started right now.
Easy to do and looks great
Great way to make a personalized keepsake or gift
I need more practice. The two I tried didn’t come out clean, but I think my glue wasn’t dry enough. Love the idea and the tutorial is really helpful.
another fantastic idea for photo display, and I don’t have to go downstairs tot he laser printer. Makes a very special gift!
Awesome idea!
Why didn’t I think of that? Fantastic!
Mod Podge, really are wonderful products.
How easy was that! I’ll be making a lot of these.
What a great way to create a wonderful keepsake! Love it
This would have to be my favorite mod podge project to do. Have practiced on one to make a peg hanger for outside.
Injet Photo Transfer
LOVING THIS!!
I am busy trying out this project..using a family photo for this..
Great for gifts they turned out so pretty and professional looking
I would love to try this idea. Nice that it is a inkjet printed since it is difficult to find somewhere to print something with a laser printer.
Thanks for the info! I had to take my pictures to a printer. Can’t wait to try it.
Wish there was video
I’ve used this several times for gifts.
I just learned a new skill! yay!
Going to try this on polymer clay. I use Mod Podge to finish some clay pieces already, so am curious to try this technique.
It is way easier than what you would think.
This is very cool I have never thought of doing it like this. You are very thorough & very detailed in your instructions.
I have tried a few times the laser jet transfer but have failed. I am trying this ..this weekend!!!
What a simple yet amazing gift for someone
This makes for such an original gift idea.
Wonder of wonders!!!!! I never thought you could use regular Mod Podge to do this and have the effect shown….sounds like a project for later this spring.
Well written with pictures. Easy to follow directions. Have to try this.
Easy directions to transfer paper photos to wood.
I have been looking for something different to do. I saw this and gave it a try. It came out so good and I am so excited about my project. I am on a roll transferring photos. I just have to make sure that I have enough ink! Thanks for making crafting so much fun and easy!
Another great idea with photos. Love this idea for gift giving. Mod podge is amazing!!
I just got a wedding save the date so I am going to try this out! Sounds easy and looks really cool. Thanks!
This looks quite easy to do.
Can you use this technique on anything other than wood?
Great idea! I can’t wait to try this one. Thank you!
So excited to give it a try. Looks BEAUTUFUL.
I am so glad to be able to use my own printer to make things. I have done coasters and even place pictures on artist canvas using my printer and Mod Podge.
Seems easier than transferring the photo image. I’ll have to try this method too.
Another great craft to try with thorough instructions.
I would love to try this. Nice to have instructions handy here. I can think of all sorts of uses for this.
wow this is another great one – gonna try this one
Very helpful. Great idea.
I would appreciate clarity on some of this….or options for other ways ( like instead of a stencil sheet)
Use your ink jet printer to create one of a kind gifts. As usual, their instructions are easy to follow and not expensive.
Can’t wait to give this a try. Love your example picture
What a great idea! I never knew you could transfer pictures onto wood. Does it have to be an inkjet printer?
I haven’t used this one as yet but am looking forward to doing so looks amazing and easy instructions too
I was worried about the printing but following the instructions it came out quite well will give it another go to make a set of photo blocks
This is such a great idea – rather than one photo prepare a collage of favourite photos and print this on the stencil sheet.
Neat idea!
I was always afraid to try this, but these directions make it sound like I can do it. Horray!!!
I’d love to give this a try. No inkjet printer, though.
Another fun project by Amy from Mod Podge Rocks! A nice way of preserving memories! They would make a nice gift for a friend, family etc.
I am definitely putting this on my list of crafts to try. I love the way the finished product looks.
Wow! Who knew photo transferring could be so easy. Can’t wait to try this out!
i love this and think on wood coasters they would be amazing
Thanks so much!
I can’t wait to try this method.
I had NO idea what you could do this to a transfer photo! I cannot wait to try this idea! We are stuck in the house today [due to wonderful Corona virus] and I plan to experiment today! Thanks for the detailed info on this project. What a fun idea!
Easy instructions for a more complicated project.
The options are boundless with Mod Podge!!
Works great for inkjet prints. Laser printers work well too. Made several of these for gifts.
!!
It looks like a great project, but not something I would personally make.
Can’t wait to try this for a special project.
cant wait to try this
I love this idea!!! My mom loves family pictures and frames can get pretty pricey! I’m going to be snitching scrap pieces from hubby’s woodworking pile for this project….after all it’s eco friendly 😉
Firstly, I’m really grateful to have these tutorials as a creativity resource. I was really excitedto see a photo transfer that didn’t require the Modge Podge Photo Transfer Medium (because I always forget to buy it). This particular craft takes time and requires lots of patience: You’ve Been Warned! For me, the waiting part wasn’t difficult. I did get a little confused with the whole “stencil” use, though it’s listed in the ‘materials needed’ listing. However, since this is a unique way of doing a photo transfer, I think having a video showing step-by-step instructions would have been very helpful. Still, it worked and I’m happy.
would love to do but looks little more difficult and dont have all i need to do it
So simple and looks great!
think this would work on a plastic page devider? its what I use as stencil sheets.
looks really easy – great directions!
I love this transfer method for Inkjet – the resolution of the final image is SO GOOD! Inkjet images are typically a nightmare to transfer, and even when you do get it to work, sometimes you can barely tell what the image is. Using the plastic sheet covered in PVA as the printing substrate is also a genius move – I would never have thought it would work, but it totally does. Awesome tutorial, well written, easy to follow, genius. ?
Thank you so much-great idea!
This is the project I was looking for. I do not own a laser printer. It worked! Thank you
Amazing
I just read this whole article from top to bottom. I read all the comments and it looks like no one is reading the article. All the questions being asked have been answered all you need to do is read for the love of God people.
Hahaha it’s okay Deb! I’m happy to answer questions. Thank you for your support xo
Can I stain the whole wood piece before doing the transfer? Also what thickness of the plastic sheets did you use? When I go to amazon I see a lot of 4mil and 7 mil. I’m guessing the 4 since it would be thinner so easier to put in printer?
I recommend 4mil for sure – and yes you can stain! Use acrylic based stain – as opposed to oil based (like for a deck).
Hello!
I’m just curious what the purpose of applying the layers of glue to the stencil sheet before printing? Could you explain why that’s necessary and what would happen if you eliminate that step?
Thanks!
Hi Dawn! You’re printing on the glue. Then you’re releasing the glue onto the other surface. If you eliminate that step and print directly on the stencil sheet, the ink would smear like crazy. The ink needs something to stick to.
I have printed on to transparency film and waited for it to dry, then placement it on to the wet mod pog glue, but the ink started to bleed.
What am I doing wrong?
I know this is from 4 years ago but hoping someone sees it. Am I putting the mod podge on the picture itself or the wood I’m transferring it too?
You’re putting it on the wood. Then, when transferred, you can seal it with Mod Podge!
Some of my images didn’t wanna transfer. 6 out of 16 transferred. And I kinda don’t like the shiny finish of the pictures. Ugh but awesome idea. Wish it would’ve been a better outcome.
Sorry you had difficulty! I will say that it takes some practice. At least, it’s taken me time to perfect the technique.
Will clear acetate sheet (from Michaels) work?
🙏🏼
Thank you.
Hi M! I’m thinking it would work though I’m not for sure. But I don’t think the ink would stick to it and that’s the important part. What I would do is take one for the team and try it out. 😀 Thank you!
I’m a little confused on how to print the photo. Your instructions say to print onto the stencil once the glue has dried, but on Amazon through the link you gave says the stencil cannot be put through an ink jet printer. Am I misunderstanding that step? Thanks! 🙂
Hi Stephanie! The reason it says that on Amazon is because the ink wil smear if you just put the stencil in by itself. BUT you want the ink to be able to be released off of the stencil sheet! So if you were trying to print directly onto the sheet and wanted it to stick . . . it wouldn’t work. In this case we want to print onto the glue on the stencil sheet and have it come off. So honestly we’re using these in a way that they aren’t intended, but it works 🙂
Hi! Love this idea, thanks so much.
Quick question, when printing, what paper type setting should I use? Since my printer doesn’t have a “dried glue stencil” setting. 😆
Thanks so much!!
Amanda
Hahaha! Just the regular paper setting is what Aki used in the tutorial. You may need to play with the settings but that should work.
Will this work on reverse decoupage onto clear plate?
Hi Sheryl! I think I have seen this done on glass but I have not tried it personally. If you give it a try let me know!
I wanted to ask, if when I transfer the picture (I’m doing a flower) to a wooden house, with the exception of the flower, will the glue on the non-printed area of the paper transfer to the wood as well? Also, they are 12×12 sheets, do we cut them down to letter size? Thank you!
Hi Margo! Yes every portion that has the glue will transfer . . . so you definitely want to cut down to the size of exactly what you want transferred.
@Amy,
Hi this is not related to Margo’s question but this is the only way I can comment. What can I use instead of Stencil paper? i really don’t feel like buying much for the project. I don’t care if I can’t use whatever it is again. Is it possible to use something like wax paper or parchment paper or plastic wrap?
Hi Lisa! I’d take a peek at this: https://www.youtube.com/watch?v=6VF57Ni75mw
Looks like you can!
Hi, I have a quick question- once the image has been transferred does it need to be sealed , or can it be sealed with mod podge?
No it doesn’t need to be sealed, and yes it can be sealed with Mod Podge! Let it dry 24 hours after the transfer though. And do a test in the corner before just swiping the Mod Podge over it. Just in case!
Hi Amy! Thanks for this tutorial but I do have a question or two. You said no laser printer is necessary but you also refer to the pictures being printed on a laser printer so I’m a bit confused. I’ve got brain fog from chronic migraines so if I have read your article wrong and missed something I do apologize. I love this idea for Christmas gifts and only have an inkjet printer so if a laser print is required for this craft could you recommend where to get laser printed photos from? I’m excited to do this project and look forward to a little help. Thanks and have a great day 😊
Hi Jessica! No worries. In the article I mention that if you have a laserjet printer, you would use the photo transfer medium, not regular Mod Podge. This is what the photo transfer medium looks like, a completely different bottle: https://www.amazon.com/Mod-Podge-Transfer-8-Ounce-CS15067/dp/B00CHQ8IJA/
For this, yes you will use an inkjet printer. Follow the instructions with your printer and you should be totally fine! The reason laserjet is mentioned is so that people understand there is a difference and that this tutorial is for INKJET. Thank you!
I see that you can seal this with mod podge when transferred. Can you also use polycrylic instead? Also do you know if this will work on ceramic tiles?
Hi Gina! Yes you can use polycrylic. Ceramic tiles often have a smooth coating on top. You’d probably want to sand the tile first. I *think* it would work.
Is this type of stencil sheet OK for image transfer?
Yes that should work!
FEVERWORK 20Pcs A4 Inkjet Film Screen Printing Paper Transparent PCB Print Stencil https://www.amazon.co.uk/dp/B07FDZYY7H/ref=cm_sw_r_awdo_navT_g_RRCA4FWGK4FG8EA3T76B
Love the idea!!! I have an inkjet printer so all the other instructions/videos haven’t worked for me. I want this to work.
I just finished my project using your instructions, except I didn’t stain the wood (is that an issue? I did sand it though). I used the stencil from Amazon (10 Pack 4 Mil CLEAR Mylar Stencil Sheets, 12″ x 12″ Blank Stencils, Reusable Template Material, Make Your Own Stencil Compatible for Cricut Vinyl Cutting Machine).
I let it sit overnight. Not quite 24 hours. It was totally dried to the wood.
I tried peeling the stencil sheet away from the wood, first, it takes time to peel it off. I still have some on the wood – I am peeling all the sheet off the wood??,
Second, it took some of the picture off the wood and you could hardly see the transferred picture.
What am I doing wrong?
@Terry,
I’m kinda wondering the same thing?
I peeled off the stencil sheet and then am I peeling off the glue layer or no? Is the glue layer the layer that transfers onto the wood?? As opposed to the image colours embedding themselves into the wood like it would with a fabric?
Is this right?
PS very new to modpodge but loving the idea of what it is capable of. I use to decoupage with my mum when I was little and id love to be able to do that with my little girl.
Hi there! I have this:
Uinkit Inkjet Transparency Film 20 Sheets 8.5×11 OHP Overhead Projector Film for DIY Crafting 20 Pack For Inkjet Printer Clear https://a.co/d/3arvWwH
I attempted the project following your instructions, but part of the kids glue stayed intact and part of it peeled off. On some of the parts that did peel off, some of the ink stayed and some didn’t.
I’m wondering if I can print directly on the transparency film (without the glue) and just put that on the wet Mod Podge so just the ink transfers as I don’t like the shiny look of the kids glue?
It was so simple and it came out beautifully thank you! Plus it is a cheap but beautiful piece you can’t beat that .
Hello. I tried this method, but when I went to separate the stencil sheet and the wood, the glue/print layer stuck more to the stencil than to the wood, and some did not stick to either. What I wound up with was mostly a separated layer that was sticking to neither. What was i doing wrong. I used 6 mil stencil sheets with 2 layers of Elmer’s School glue that had dried for 24 hours after the last application. I printed onto this (it look like a good print) and let dry for 24 hours. I coated my wood (sanded 150 grit poplar) liberally with the regular mod pudge and also let sit for over 24 hours.
What did I do wrong?
After transferring your pictures and let dry, can you use a glossy coat over the front of your wood (and pictures) if you want a glossy look to your work or would it smear the picture?
Hi I have finished this project and it worked really well on clear plastic projector paper with a thin layer of pva glue. Then once dried transferred onto wood with a layer of watered down pva glue. Once dried I peeled the clear plastic film off. I am wondering if I need to spray a clear sealer over the top to protect it now?
Question about the printer – does putting through the transfer sheet w glue mess up your printer?
I have an expensive inkjet that I don’t want to ruin. I realize this is an old post but hopefully you get this.
Thanks
I’m not even sure if these comments are still open, but (just to dumb it down for me) when I peel up the clear transfer… The glued image stays on the wood, so there’s a shiny film on top… Did I do that correctly? And how do I make it to where it’s not shiny lol do I need to seal the actual photo after it’s on the wood with mod podge? That’s the only confusing part to me is it looks like I have a shiny acetate top to the photo… It stayed on the Wood great but I just don’t care for the shine of it.