
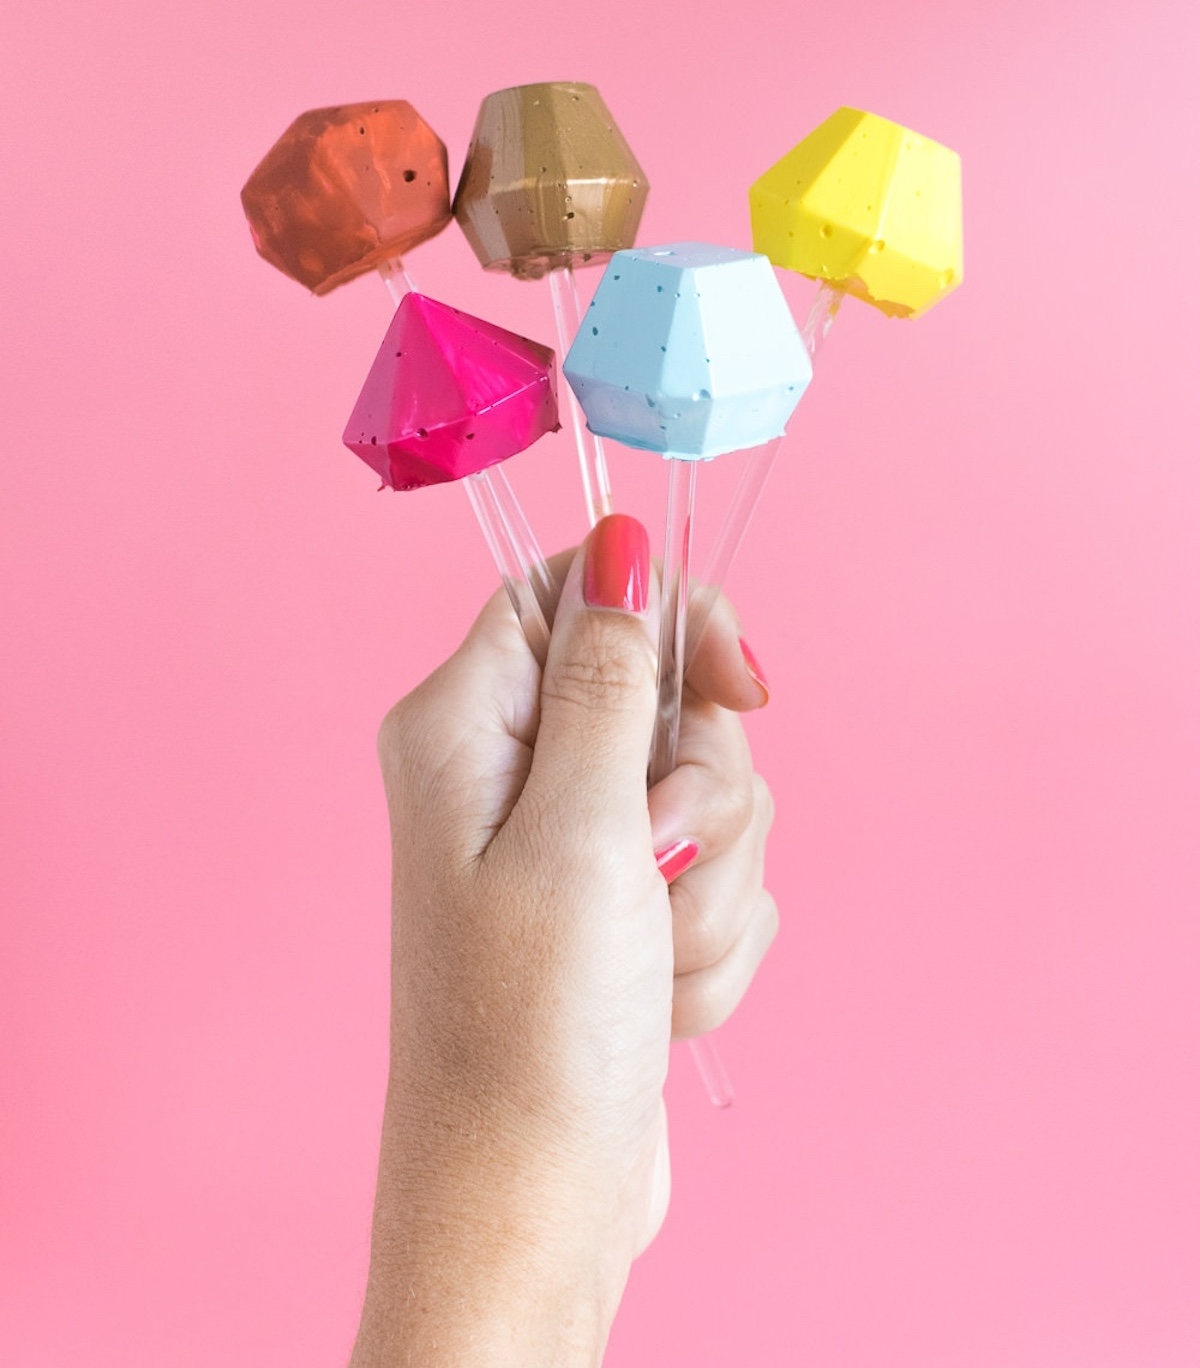
Get ready for the holidays or just add to your bar cart decor with these color DIY drink stirrers that look like gems! So easy to make.
Skills Required: Beginner. These drink stirrers are made with hot glue! If you can use a hot glue gun, you can do this project.
Hey there, cocktail connoisseurs and party planners! It’s Holly from Club Crafted, back with a gem of a DIY that’s sure to elevate your mixology game and add some sparkle to your soirées.
Get ready to jazz up your bar cart and stir things up at your next bash with these dazzling 3D DIY drink stirrers.
These aren’t your average swizzle sticks; they’re mini masterpieces, crafted with nothing more than hot glue and a gem-shaped mold. Yes, you read that right – who knew hot glue could look so chic?
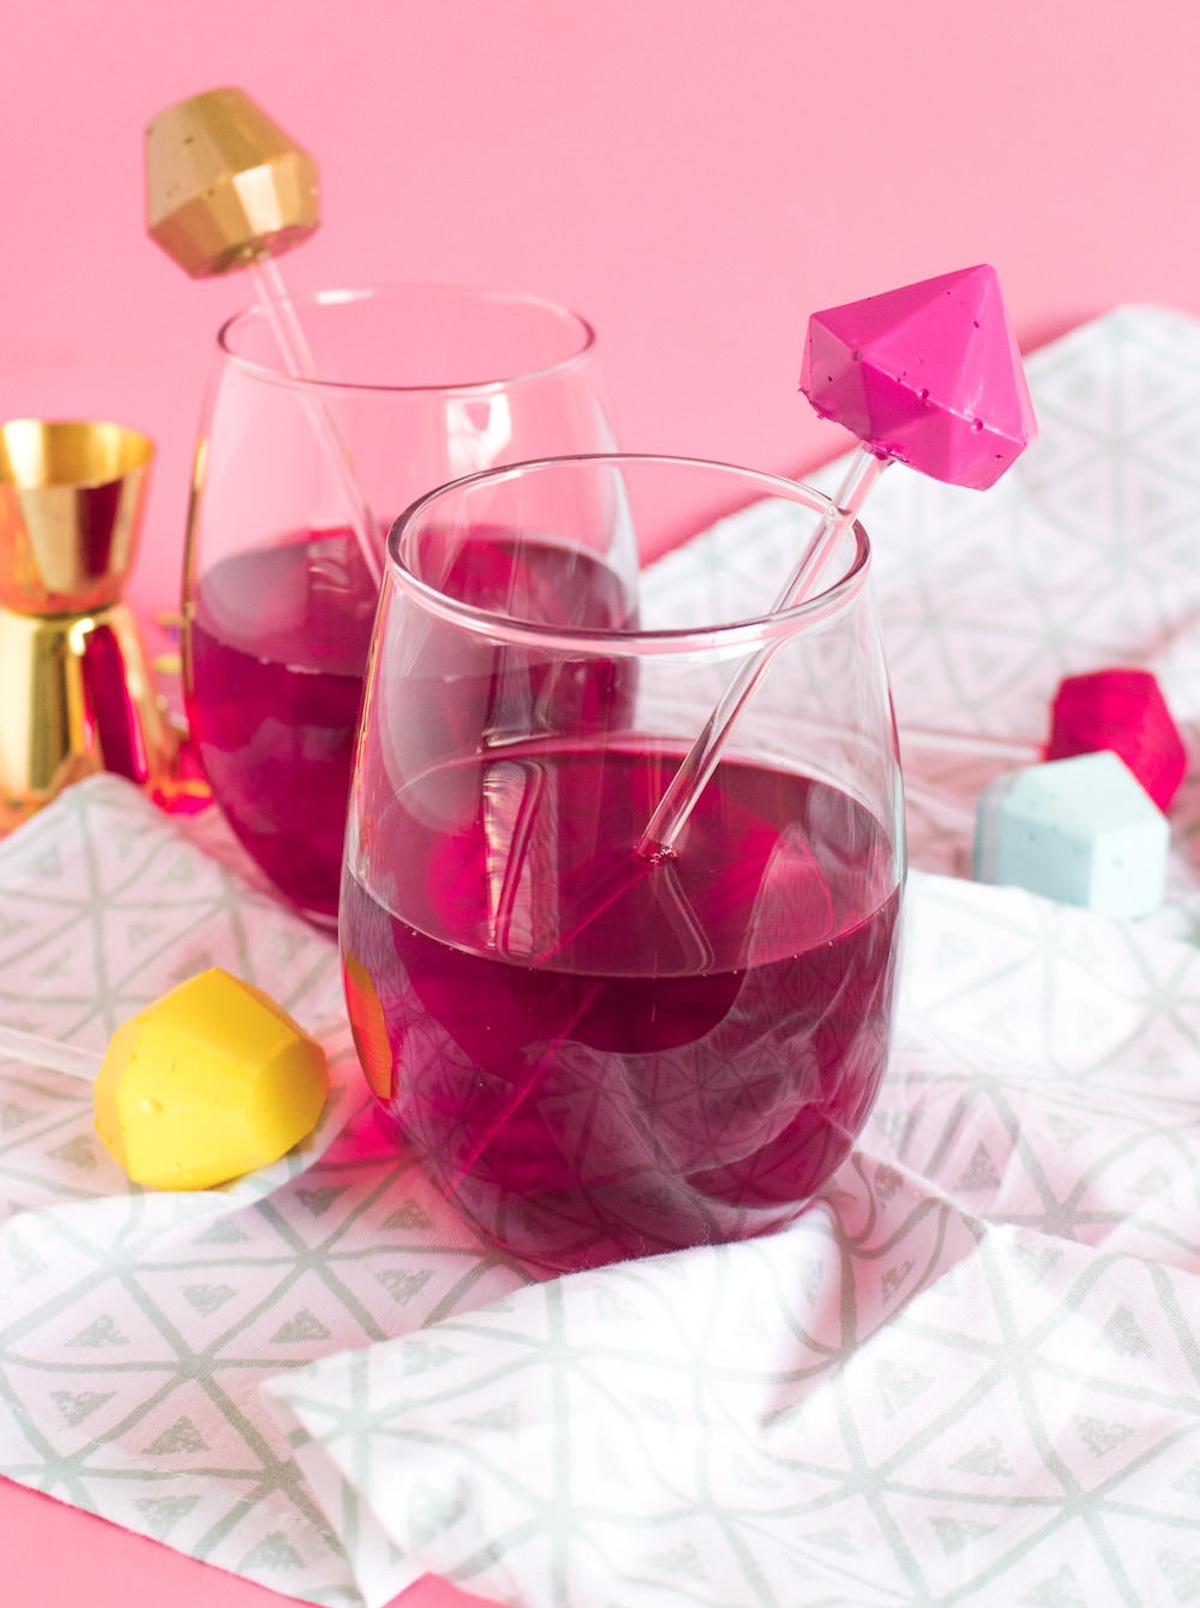
Not only do these stylish accessories make mixing drinks more fun, but they also double as drink markers. Say goodbye to the ‘Is that my drink or yours?’ dilemma!
If you’ve already aced my DIY hair pins, then you’re in for a smooth ride with this project. With just a dab of hot glue, a dash of paint, and a sprinkle of creativity, you’ll be whipping up these must-have bar accessories in no time.
And the best part? You get to play alchemist, turning simple materials into something that looks straight out of a fancy mixology magazine.
So, grab your glue gun, unleash your inner craft wizard, and let’s create some stirrers that are sure to be the talk of the town.
Whether you’re looking to add a personal touch to your home bar or searching for a unique party craft, these DIY cocktail stirrers are just the ticket. Let’s stir up some fun!
Gather These Supplies
- Hot glue gun
- Glue sticks, white – you can use regular glue sticks as well
- 3D gem mold
- Clear stir sticks
- Paint
- Paint brushes
Tips and Thoughts for This Project
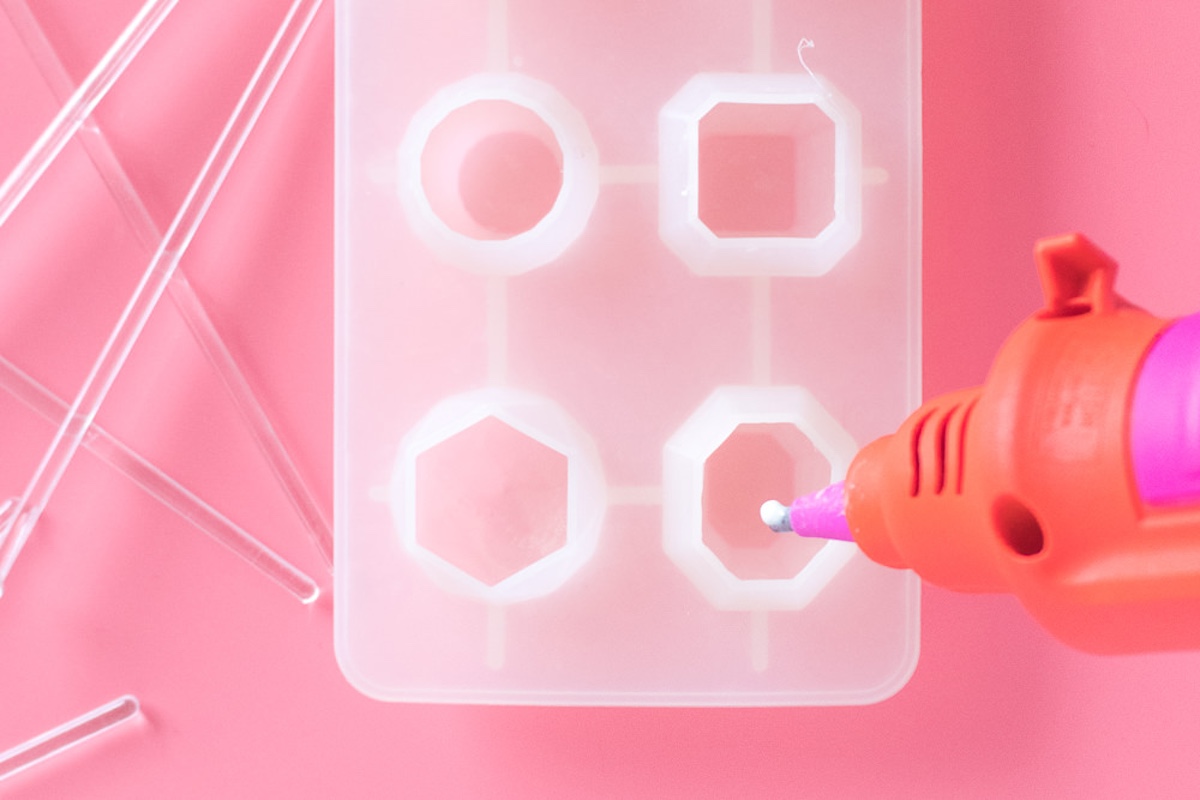
If you’re using a silicone mold, the hot glue should pop out just fine. You don’t need to prepare the mold.
Go slowly with the glue gun and be sure to fill in every crevice, tapping the mold on a hard surface every few minutes to settle the glue. You don’t want any air bubbles!
You can reuse them as long as you hand wash the plastic stick portion thoroughly between uses.
They’re useful, but they’ll also add a pretty pop of color to your drink – whether it’s a party or just a Friday night at home. Get the printable how to below:
DIY Drink Stirrers
Equipment
Materials
- White glue sticks
- 3D silicone gem mold
- Acrylic paint
- Clear stir sticks
Instructions
- Heat up the hot glue gun. Slowly dispense the glue around the inside of the gem mold. Go slowly and tap the mold on a hard surface every few minutes to settle the glue.
- Wait a few minutes until the top is still tacky, but not fluid. Insert a plastic stir stick into the middle of the gem shape. Use something like a clothespin to hold it straight.
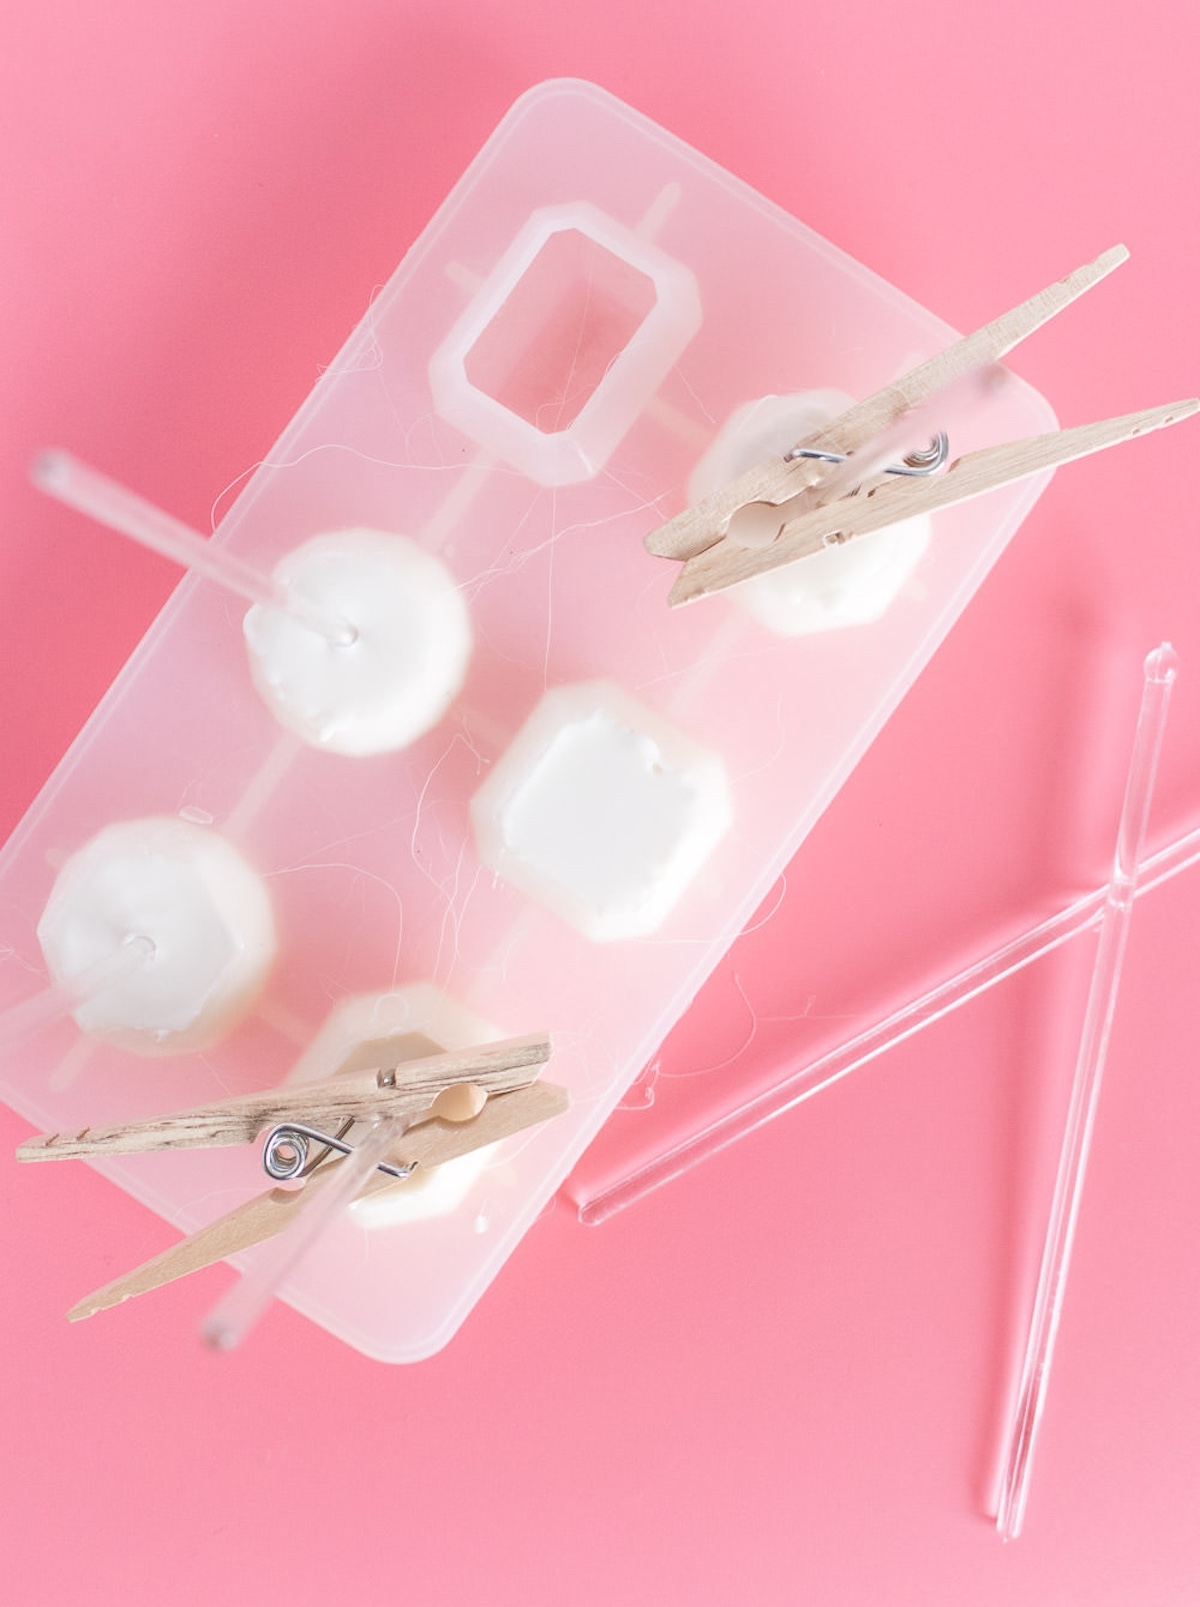
- After 30 minutes, the top should feel completely dry and hardened. Carefully remove from the mold.
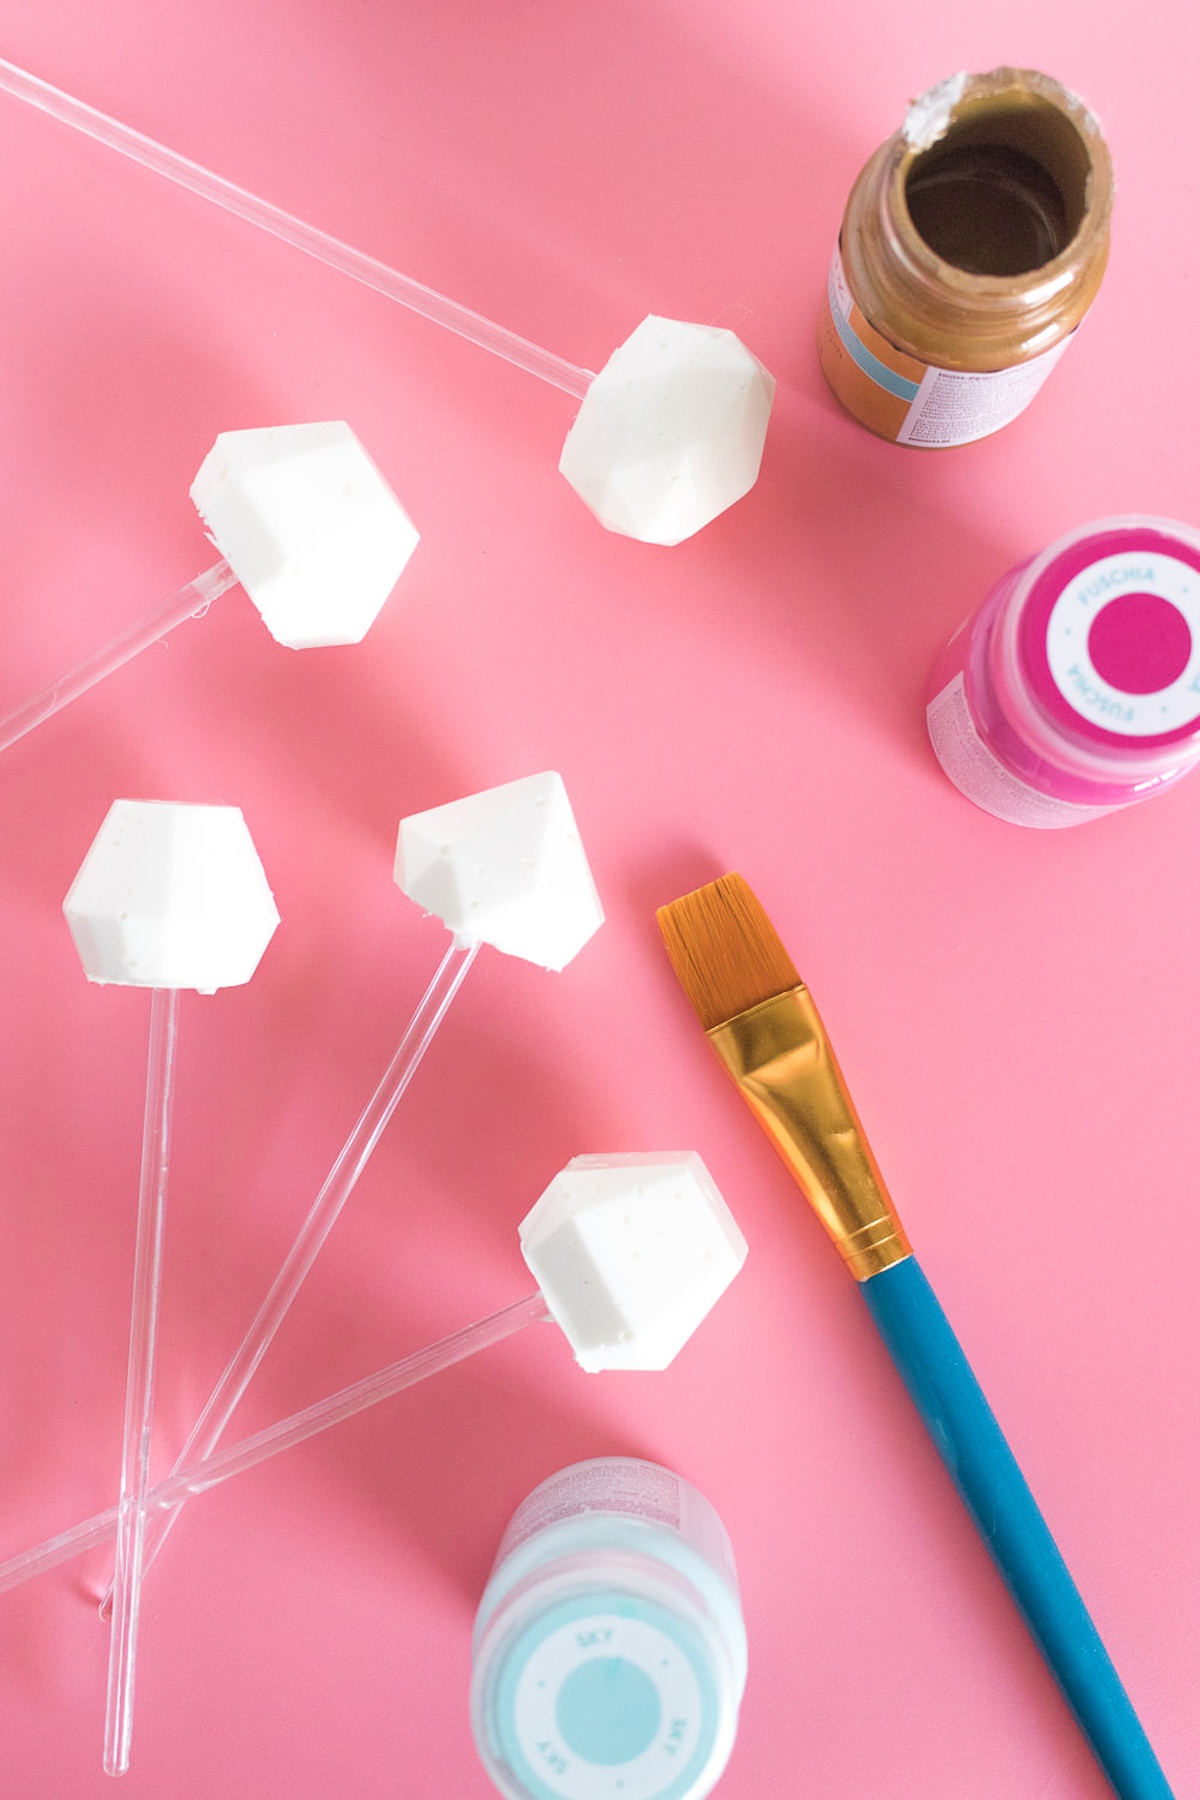
- Paint at least two coats of paint on the gem portion of your DIY drink stirrers and let dry.
Notes
Did you know you can use the same gem mold to make jewelry? Get the tutorial in this post about DIY glittery gem rings! You should also check out these other party projects:
Confetti Balloons • Confetti Candle Holders • Confetti Coasters • Confetti Party Favors • Confetti Tray • Confetti Shoes • Decorate a Champagne Bottle • DIY Cupcake Stand • DIY Food Picks • DIY Glitter Glasses • DIY Lace Crowns • DIY Paper Banner • DIY Paper Garland • DIY Place Cards • Glitter Candle Holders • Glitter Champagne Bottles • Make a Cake Stand • Pineapple Centerpiece


About mod podging, I am brand new and I have a pair of shoes that are fabric material and the design is coming off (either vinyl or heat pressed, not sure). I’m thinking about using mod podge to seal it on there but I’m not sure which one to use and how much of it to use. I would like some tips. Thank you.
Hi Kaneki! That material looks like a fabric with a coating (very smooth), so I doubt you’d be able to Mod Podge it. You could give it a try, but my guess is that it wouldn’t work :/
Okay. Do you know which product would act as the best sealer for this kind of material?