
Create a DIY cupcake stand or cake stand with supplies from the dollar store. This is an easy party craft to make and inexpensive to boot!
Skills Required: Beginner. You will use Mod Podge and hot glue to assemble some basic items to form the stand.
You know what is the oft overlooked, routinely underestimated, and unsung hero of any self-respecting party table? The stands! When they aren’t there, you definitely notice. They add serious visual interest.
And today, I’m going to show you how to make one (or many). I’m excited to share my DIY cupcake stand tutorial. AND it’s made with Dollar Tree supplies.
Get ready to channel your inner craft god or goddess on a budget!
Let’s face it, those dainty frosted cupcakes deserve more than just a boring old plate; they’re practically begging for a pedestal to elevate their status from mere pastry to the belle of the ball.

You’ll be transforming the mundane into the magnificent with nothing more than some Dollar Tree signs, candle holders, that magical Mod Podge, a bit of scrapbook paper, and the trusty ol’ hot glue.
Whether you’re looking to create a cupcake stand for your bestie’s bridal shower, a chic centerpiece for your cousin’s graduation party, or just something snazzy to jazz up your Thursday night book club, this project is your ticket to hostess-with-the-mostess status.
This project is as beginner-friendly as it gets, which means even if your crafting experience is limited to sticking googly eyes on random objects around your home (an admirable pastime, no judgment here), you’ll be able to tackle this.
So, why should you care about making this yourself? Because in the era of Pinterest and Instagram, it’s not just the taste of the cupcakes that matters – it’s how you present them.
And let’s not forget the satisfaction of responding to the inevitable “Where did you get that adorable cupcake stand?” with a casual “Oh, this old thing? I made it myself.”

Buckle up, buttercup, because by the end of this post, you’ll be ready to transform your kitchen table into a DIY wonderland. Grab your glue gun, and let’s make some magic happen. Who knows? This could be the start of a beautiful crafting journey. Here’s what you’re going to need.
Gather These Materials
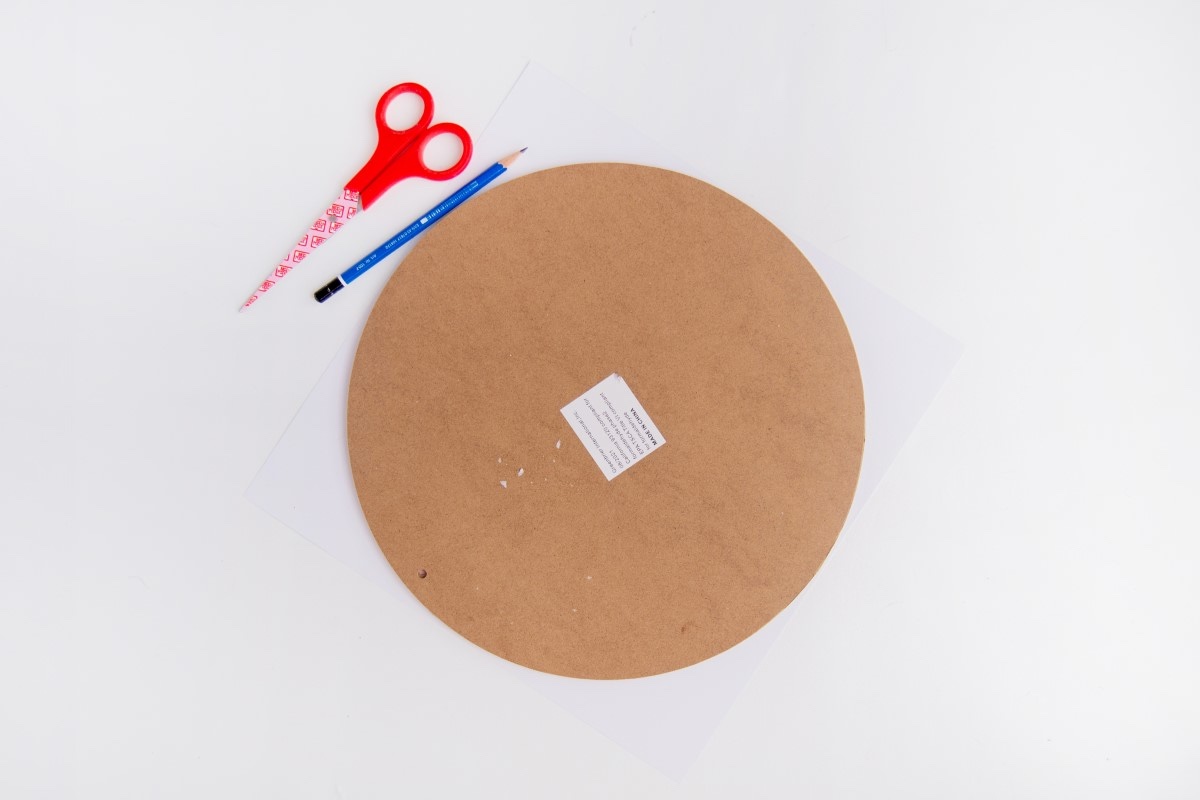
- Round signs or MDF circles
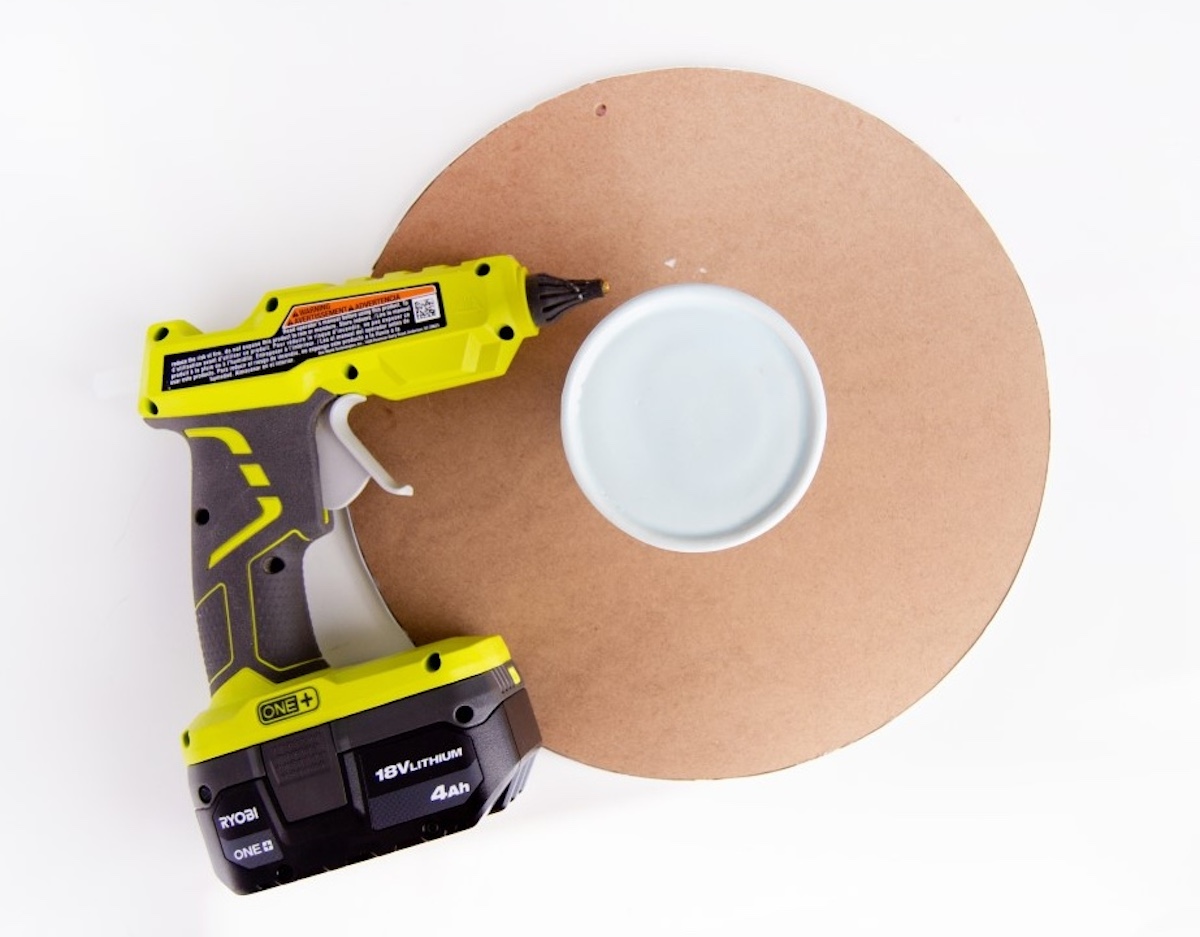
- Candleholders
- Mod Podge Gloss
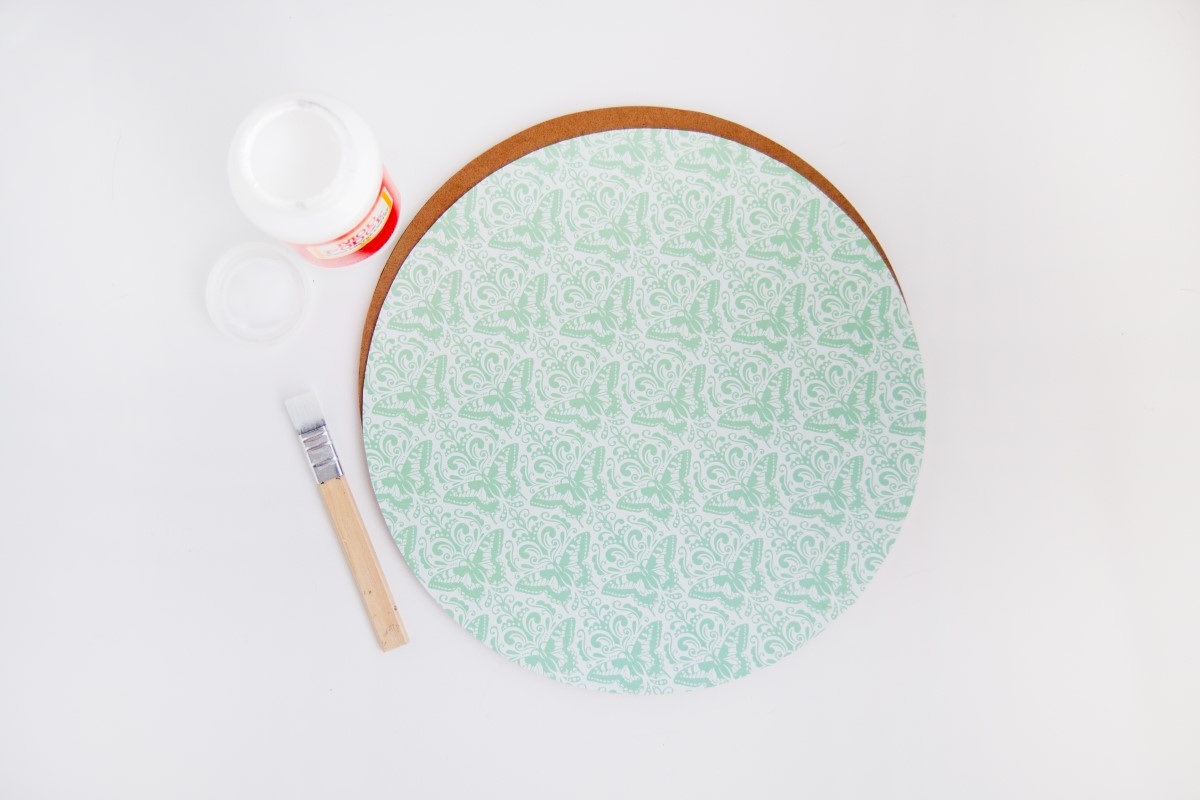
- Scrapbook paper
- Paintbrush
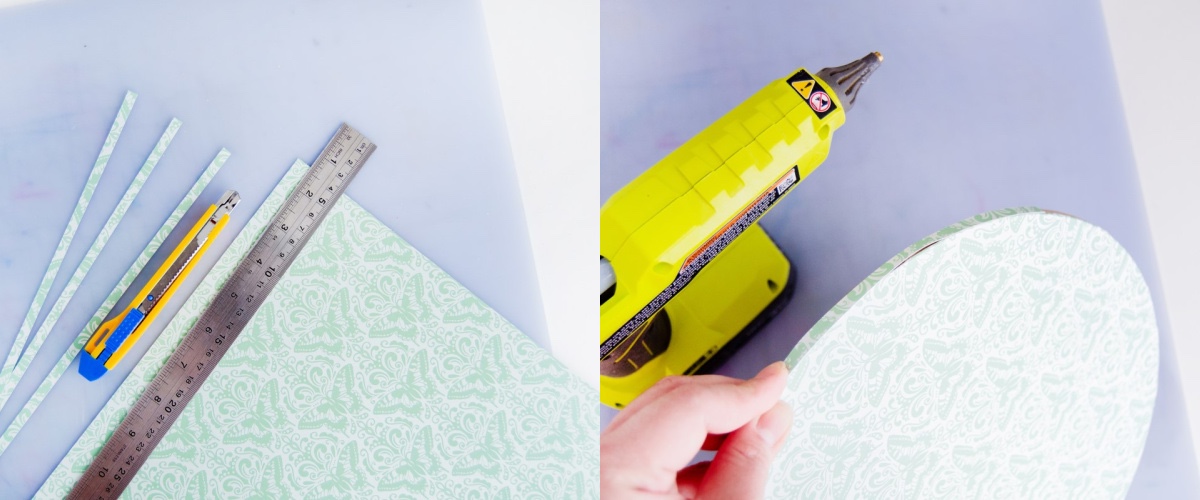
- Hot glue gun
- Scissors
- Pencil
Tips and Tricks for This Project
Mod Podge isn’t food safe. It’s non toxic and waterbase, but it’s not rated for food safety which is a different type of designation that requires FDA approval. My point: make sure the cupcakes are in wrappers.
Make sure to center the candlestick so your cupcake stand is balanced and won’t tip when you put your cupcake, cake or other treats on it.
You can use candlestick holders, candle holders, plastic goblets, or coupe glasses – just make sure they’re at least 2” high.
Get the printable how to card below:

DIY Cupcake Stand
Materials
- Round signs or MDF circles 2 to 3 per stand
- Candleholders
- Mod Podge Gloss
- Scrapbook paper
Instructions
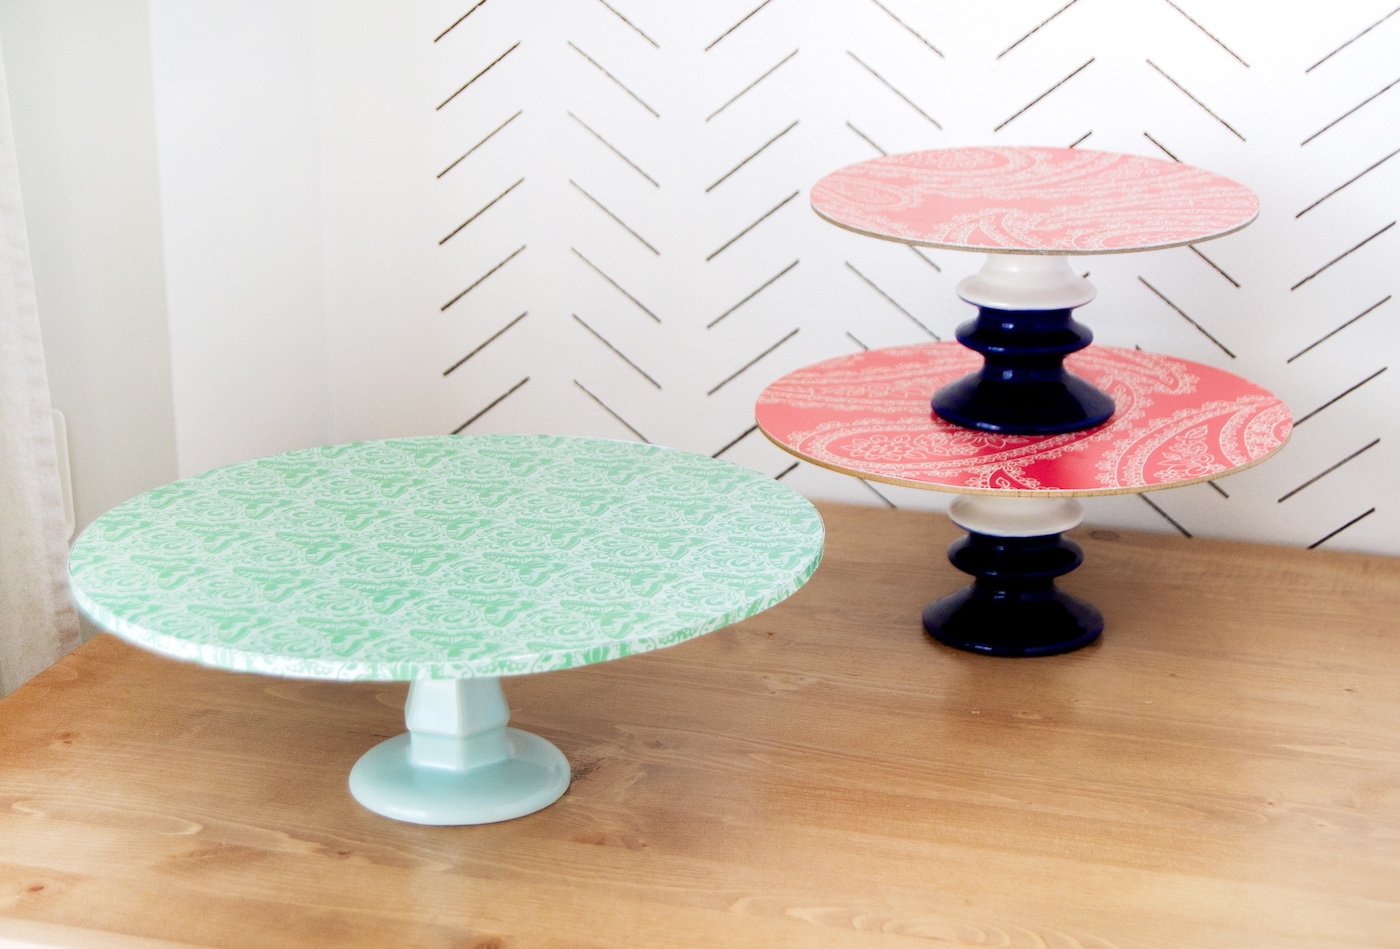
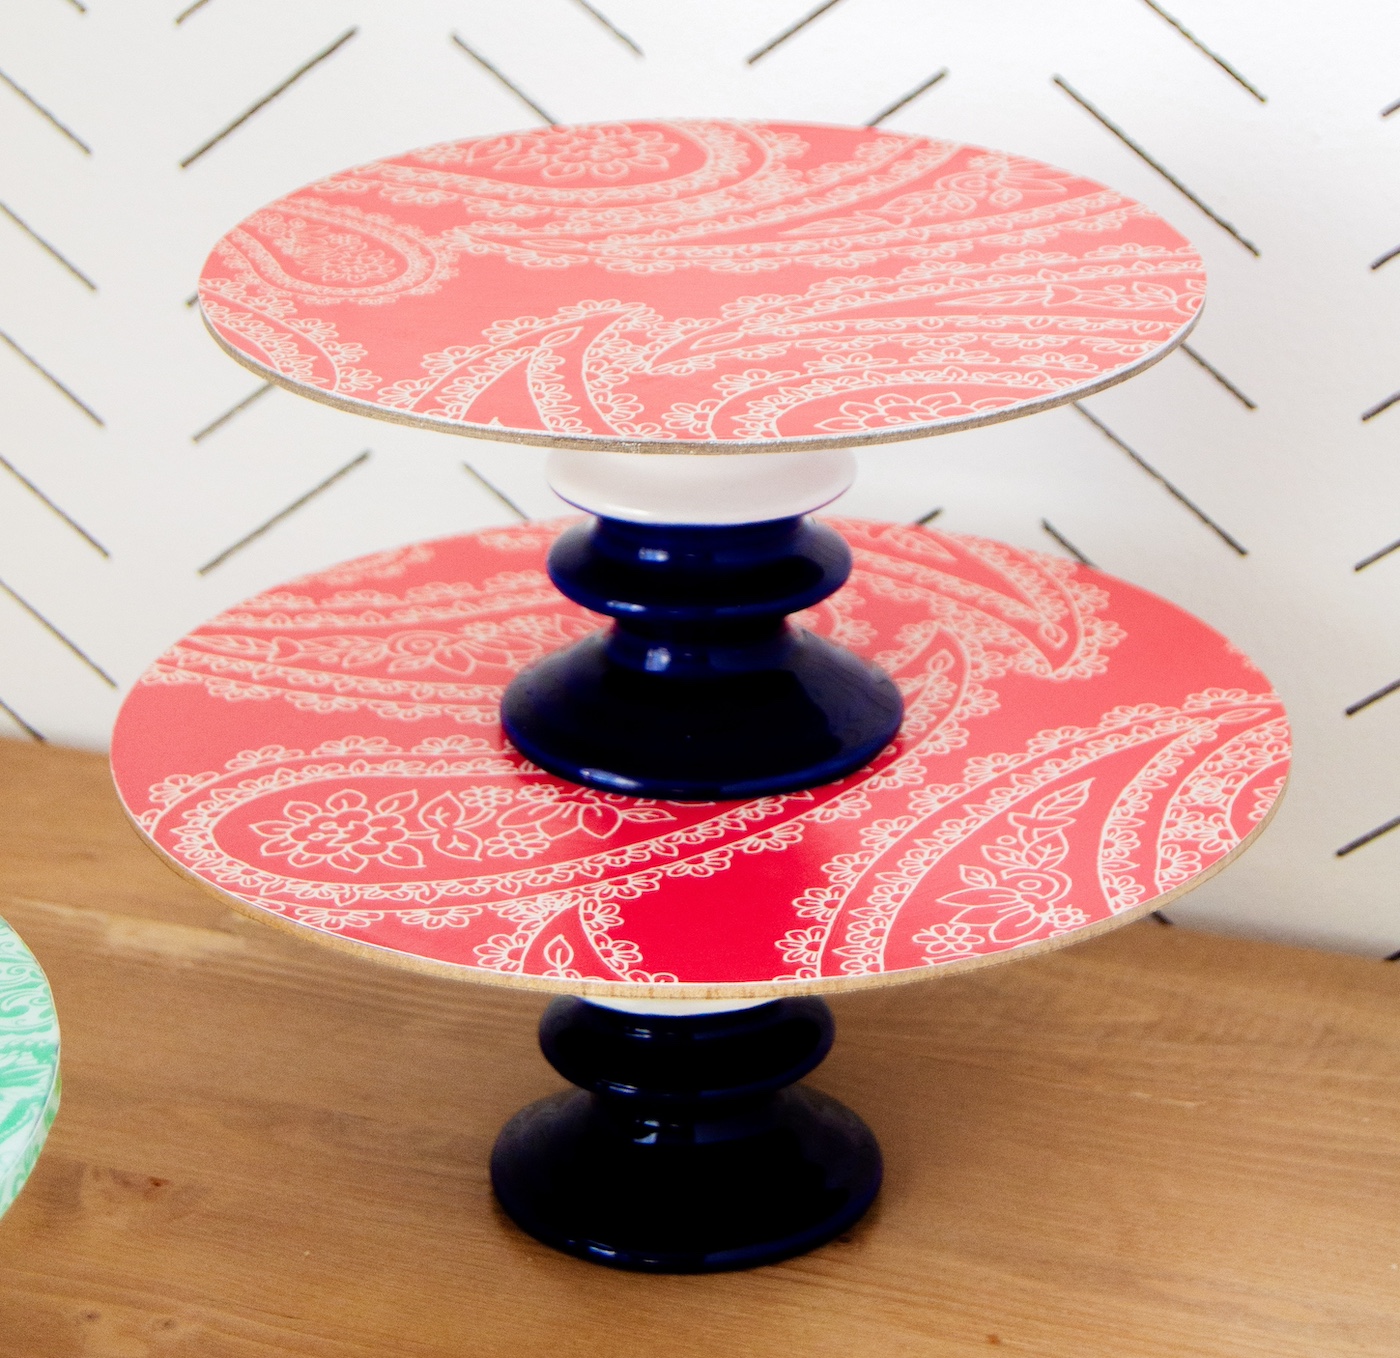
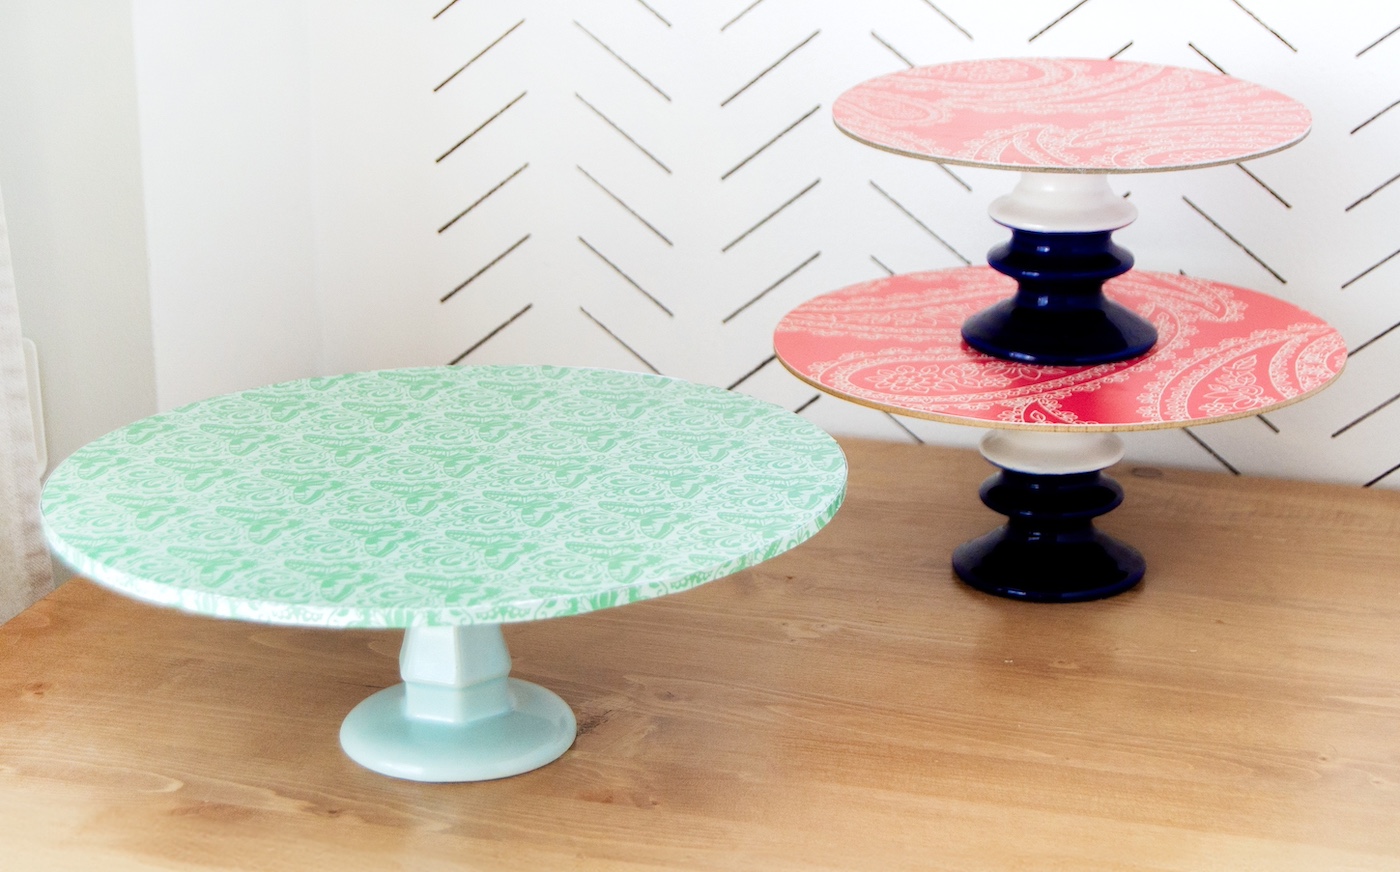
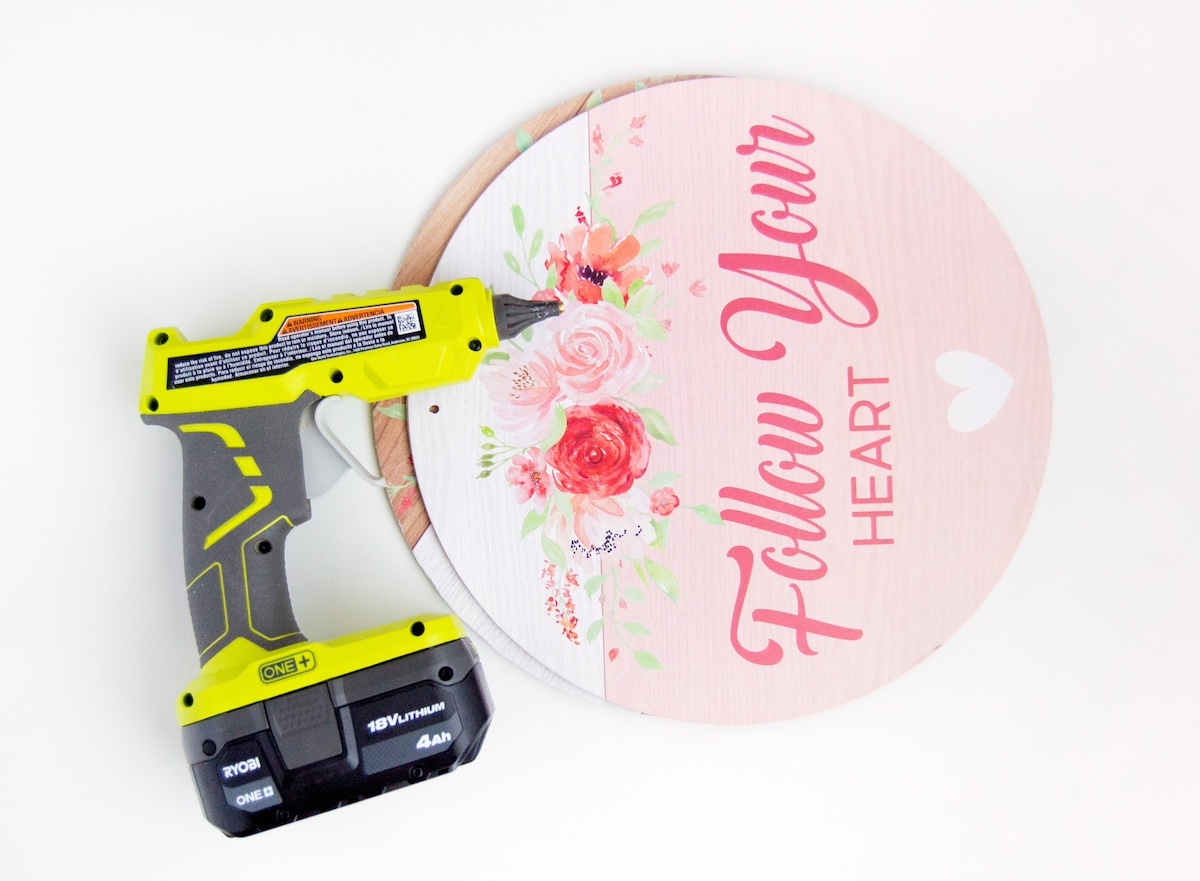
- Use round signs or MDF circles of the same size to create a top for your cupcake stand. Using hot glue, attach two (or three) round signs together to create a thicker, sturdier top. Use a heavy book on top to ensure a secure bond as everything sets.
- Trace and cut your scrapbook paper down to the size of the round sign.
- Mod Podge the scrapbook paper of your choice to the surface of your round sign. Use a brayer or a squeegee tool to help push down and flatten the paper or fabric and squeeze out any excess Mod Podge trapped underneath. Wait for the Mod Podge to dry.
- Cut and glue the trim you would like to use for your cupcake stand – for mine, I cut strips and attached it using hot glue. Wait for it to dry.
- Protect your scrapbook paper surface by using Mod Podge to seal it. Brush a thin layer, ensuring you cover the whole surface and edge and let it dry. Repeat three or four times.
- Attach the stand part of your cupcake stand using hot glue. Let set before using.
Notes
If you enjoyed this party craft, let me know in the comments. I’d also love for you to check out some of these other celebration ideas:
Confetti Coasters • Confetti Tray • Confetti Shoes • Decorate a Champagne Bottle • Decorate a Cooler • DIY Cake Pop Stand • DIY Cake Stands • DIY Drink Stirrers • DIY Food Picks • DIY Glitter Glasses • DIY Place Cards • DIY Wine Charms • Glitter Candle Holders • Glitter Champagne Bottles • Glittered Paper Lantern • Lace Mason Jars • Make a Cake Stand


Thank you for sharing with us incredible ideas. I like them all
Where do you get the round signs or mdf board circles?
These were from Dollar Tree. You can look on Amazon or in the craft stores too. You can use a wood plaque also!
Excellent post (and hilariously written)! I love a cute pedestal but can’t buy all that I’d like to. This is perfect! Think I might teach this at my church craft night.