
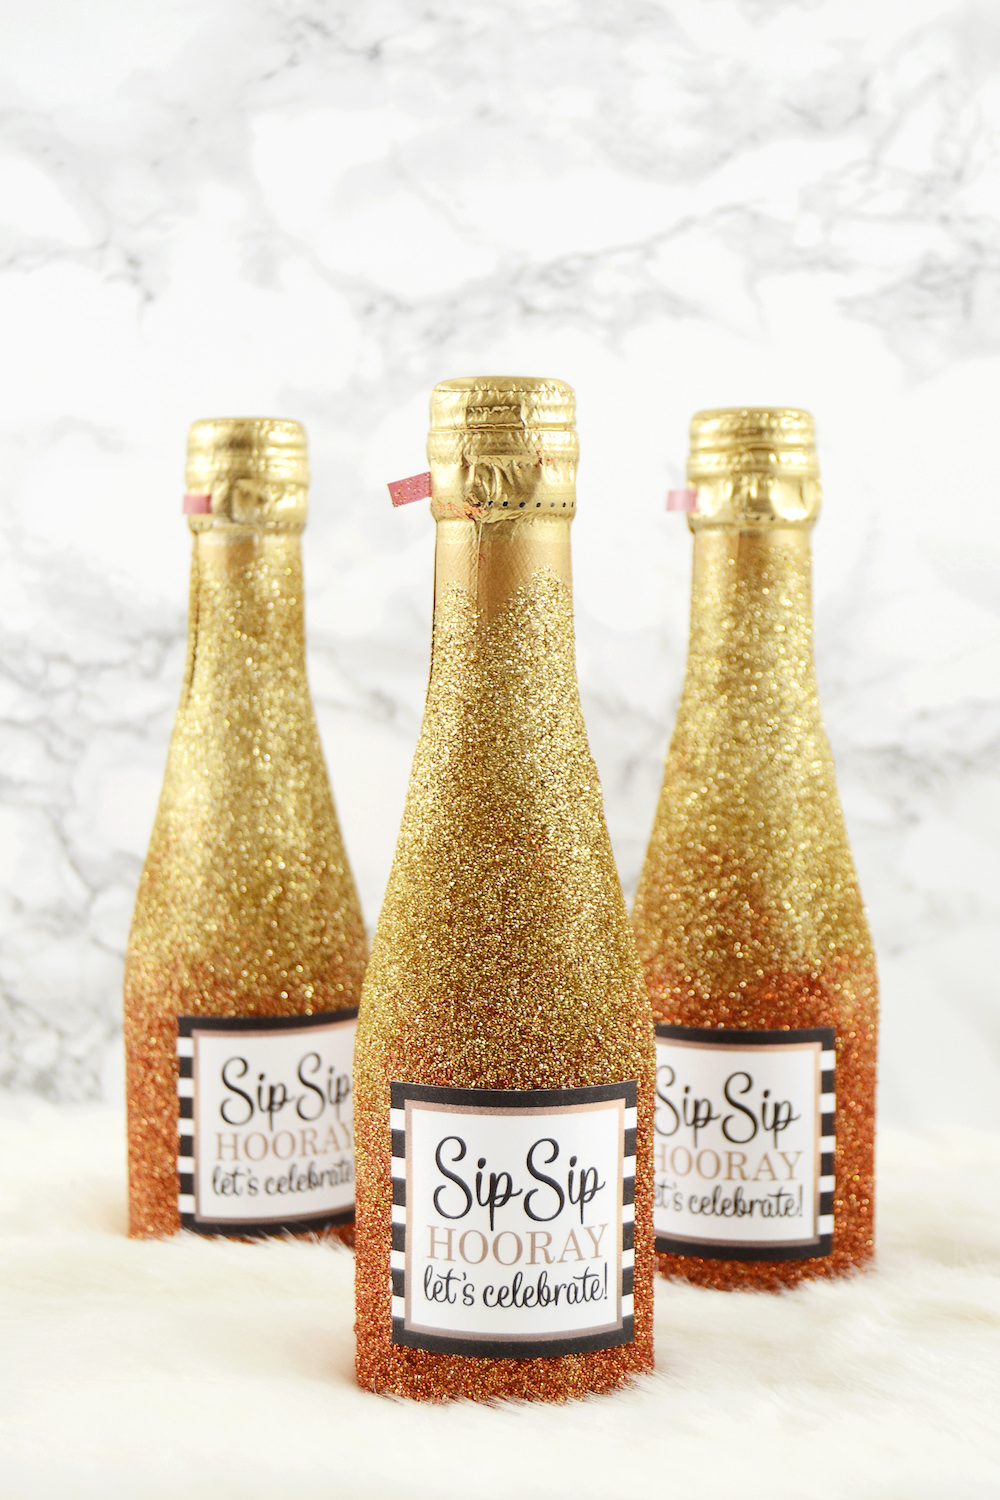
These DIY glitter champagne bottles make perfect favors for party, wedding, or New Years! Use this technique to glitter any alcohol bottles. It’s easy!
Skills Required: Beginner. Anyone can do this project, even with no prior crafting experience. Learning how to glitter bottles is a fun group activity for a girl’s night.
Wedding season is in high swing, and we definitely need to celebrate the special occasion (for you or your friends!) If you like glitter crafts, you’re going to love this idea!
These sparkly glitter champagne bottles are just perfect for New Year’s Eve, as party favors, wedding favors, shower favors or even as part of a gift basket to give to a bridal party.
This party craft can be easily done on a weekend afternoon! Join me as I share how I created these glittery favors.
How to Glitter a Bottle
Before we jump into the tutorial, I wanted to answer a few questions you might have that I frequently get about this type of a project.
How do I prepare my champagne bottles?
There isn’t much you have to do to prepare your bottles for glittering. Just make sure the bottles are relatively clean and don’t have a bunch of greasy fingerprints on them (which affects Mod Podge sticking).
You should remove any oils and dirt with either rubbing alcohol and a cotton ball or just wash with mild soap and water and then dry.
You don’t have to remove the labeling at all (just avoid it while washing), and you should leave the top intact. You may be wondering why you spray paint the bottles, and I’m going to explain that now.
There are actually a few reasons to paint the bottles first: 1) so you don’t see the label through the glitter and 2) so the glitter color “pops” off the surface.
If you don’t add a solid color background that compliments the glitter to a project like this, the background will show through and your glittering won’t look nearly as good.

Can I do this with any alcohol bottles?
Absolutely! This project works well with liquor bottles, wine bottles, airplane bottles, etc. The only issue you might have is with plastic bottles.
Sometimes Mod Podge doesn’t adhere so well to plastic. Having said that, if you paint your bottles with a spray paint made for plastic, Mod Podge should go on top of that just fine.
Can I mix the Mod Podge and glitter to apply it?
You can. Remember that Mod Podge (or any other acrylic medium) dulls glitter slightly. So when you apply an acrylic sealer and glitter mixture to your bottles, it won’t be as sparkly as it would be if you didn’t mix it. But it also won’t get glitter everywhere, so that’s the trade off.
Can I do this with Sparkle or Glitter Mod Podge?
Yes. You’ll have to do several coats of these formulas on top of the paint though. You should still paint the bottles with either spray paint or acrylic paint made for glass before you paint any Mod Podge on top. I do believe the effect would be beautiful with any of the glitter formulas.
Are you ready? Learn how to make sparkle champagne bottles below! First, here’s what you’re going to need.
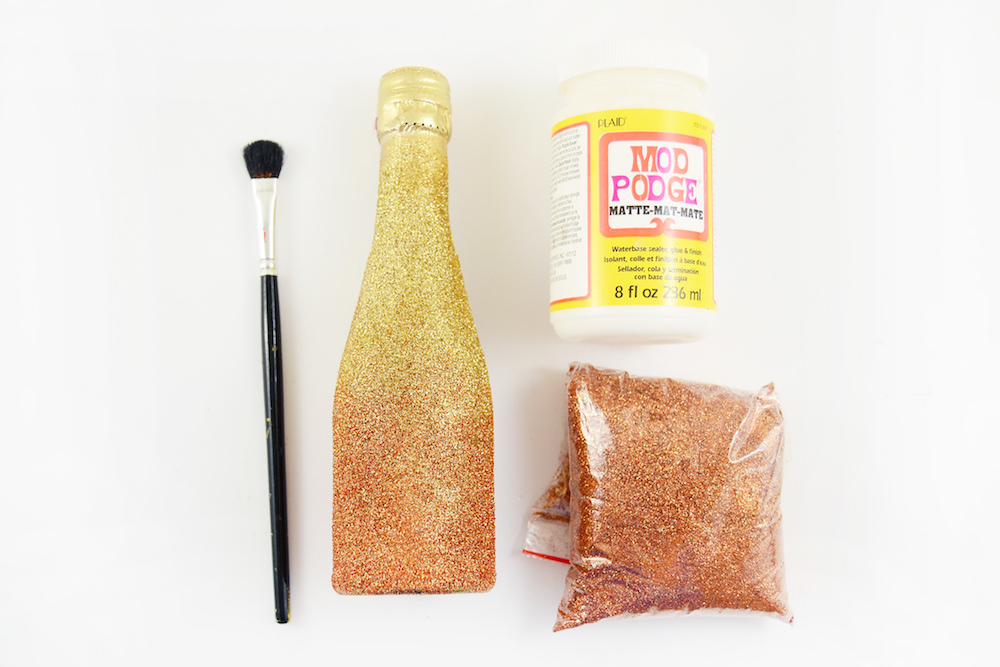
Gather These Supplies
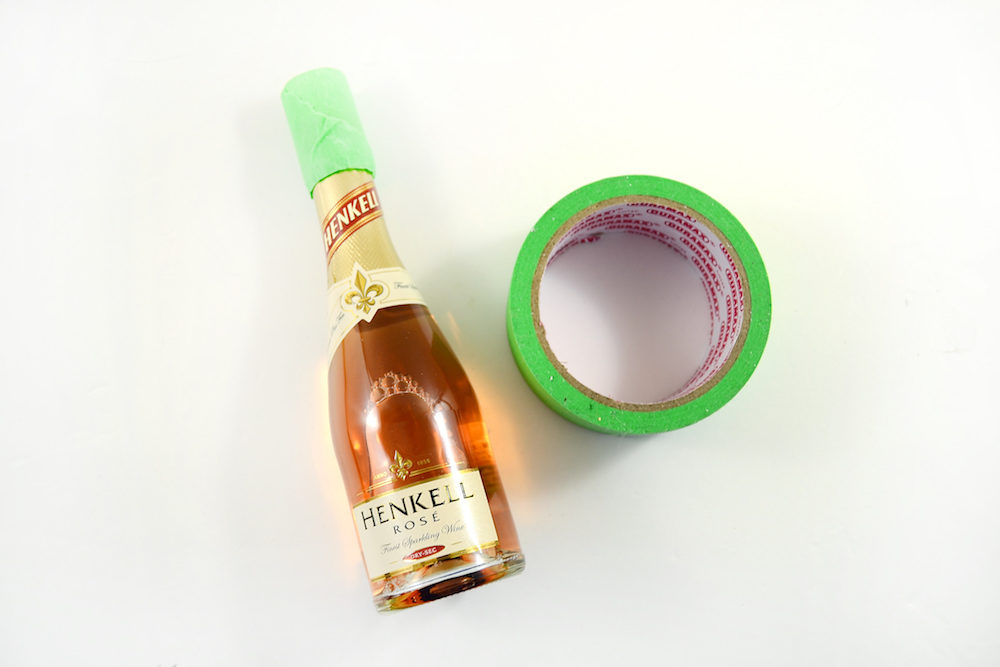
- Champagne bottle (or wine, liquor, etc)
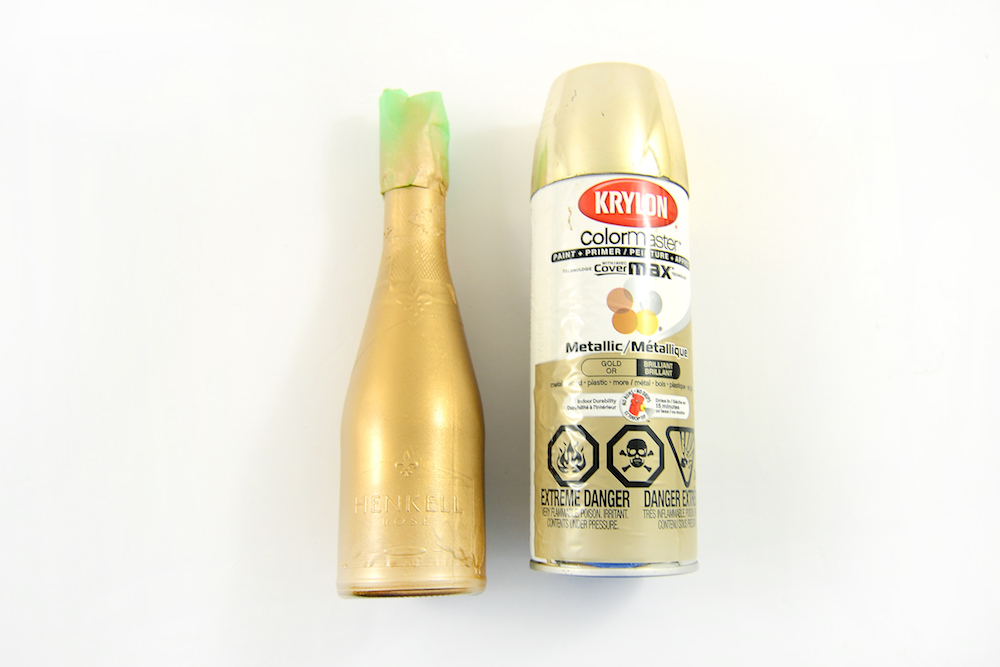
- Spray paint in gold
- Glitter in gold & copper (or the colors of your choice)
- Mod Podge Gloss or Matte
- Paintbrush
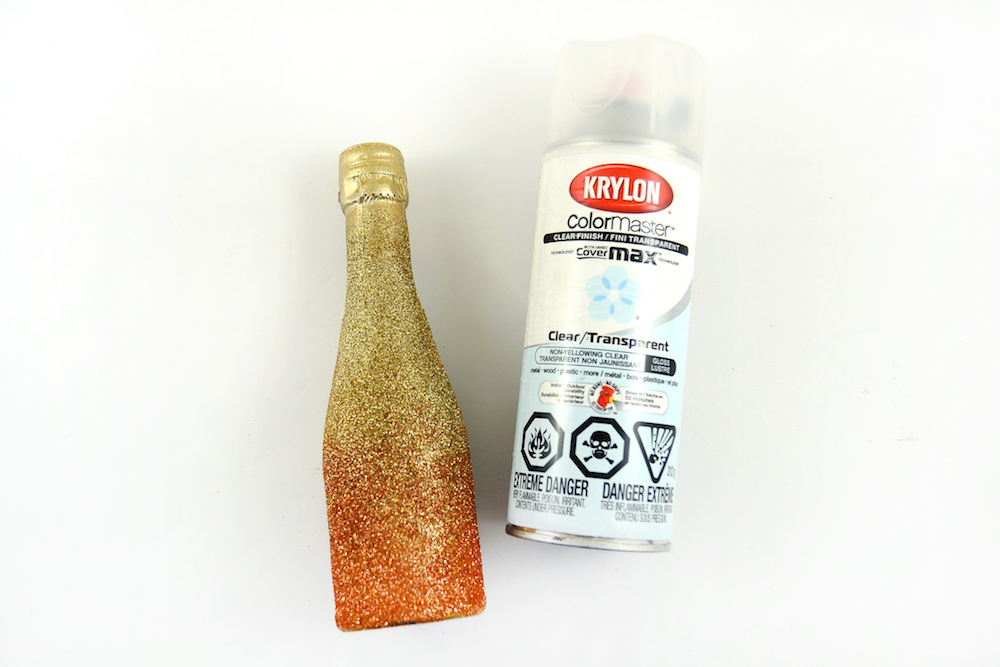
- Clear acrylic sealer with a gloss finish
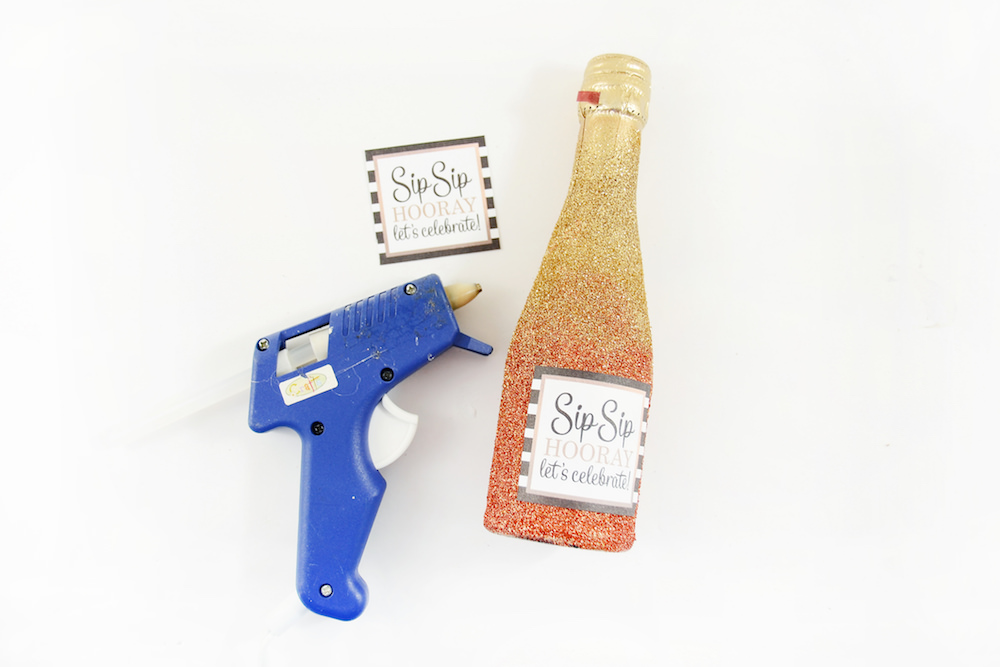
- Hot glue gun
- Painter’s tape
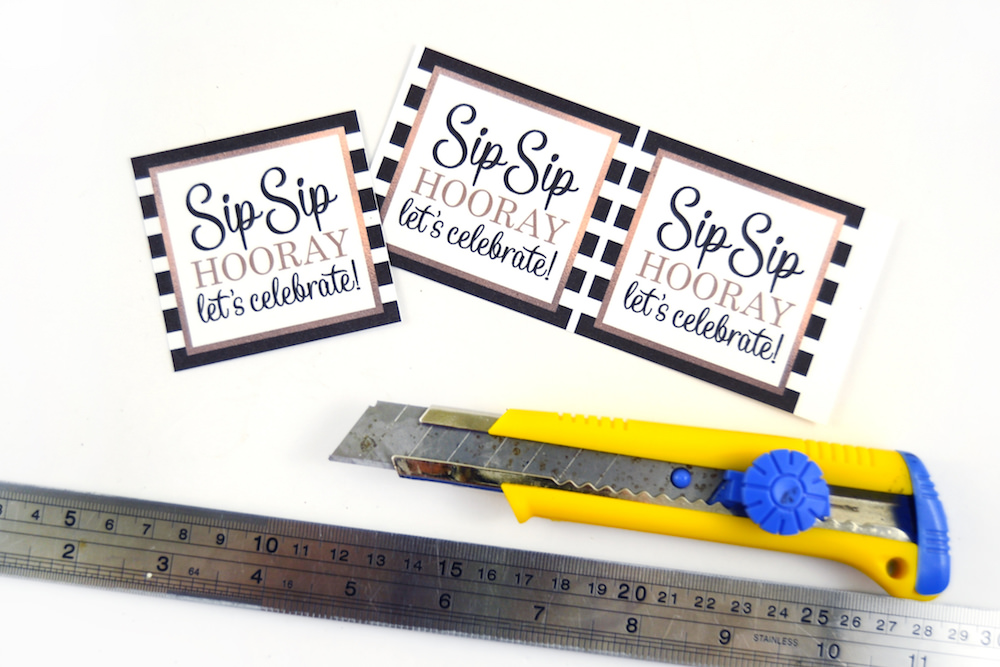
- Printable label (download here)
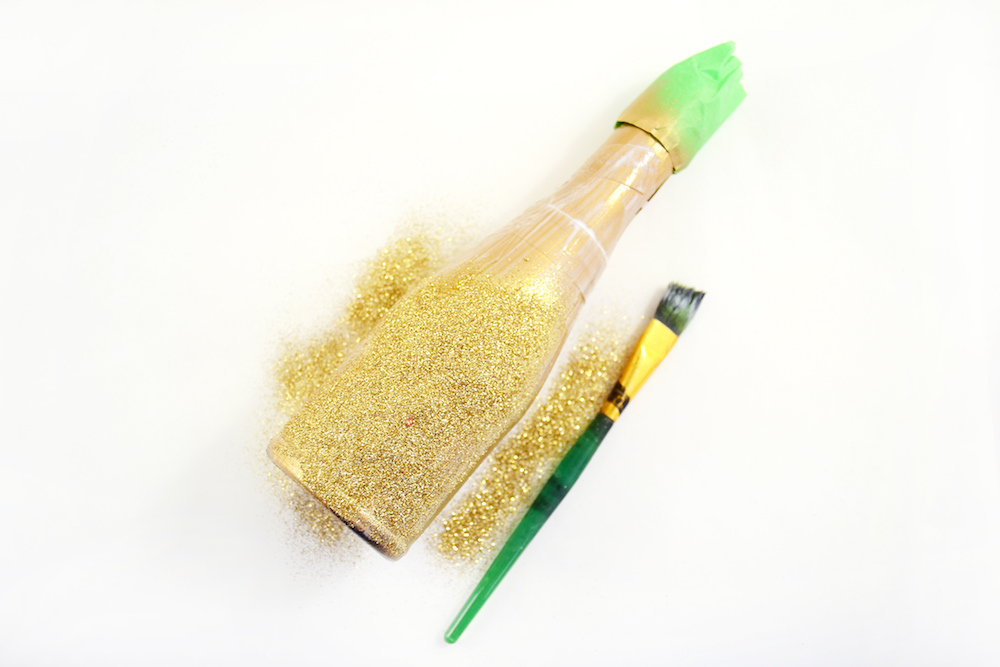
Note: if you find that some areas were missed when you glitter, use a tiny brush to fill in areas with a light coat of Podge and sprinkle more. You never want to use too much Mod Podge with glitter because it will clump.
Not only did you glitter a bottle, but you made beautiful decor and favors for any celebration.
These babies are ready to be given away as favors or enjoyed on a night to celebrate you or a friend’s upcoming wedding, shower, anniversary, or more!

Glitter Champagne Bottles
Materials
- Small champagne bottles
- Spray paint gold
- Glitter in gold & copper, or the colors of your choice
- Mod Podge
- Clear acrylic spray sealer
- Painter’s tape
- Printable labels optional
Video
Instructions
- Prepare the bottles by taping them up the top near where the opening seal is located.
- Spray paint the bottles with one light coat of gold spray paint and wait for it to dry.
- Start with one bottle, then repeat with the others. Apply a thin coat of Mod Podge, and sprinkle a coat of gold glitter on it as you go. Wait for it to dry as well.
- Apply a second coat of glitter or create a gradient using a different color of glitter – in my case, I used a coppery orange. Wait for that to dry as well, and apply a light coat of Mod Podge and a sprinkling of gold glitter in between the two colors to create a nice gradient.
- Spray the glittered areas with a clear acrylic spray to prevent glitter fallout. Be sure to get a gloss spray paint so that the glitter isn't too dulled.
- If you choose to use the printable labels, print them out and cut.
- Attach the label to the bottles with a hot glue gun to finish.
If you enjoyed making these champagne glitter bottles, you’re going to love this confetti dipped champagne bottle as well! I also think you’ll like our wine bottle decor. Let me know what you think of this project in the comments!


It works for.me.and having orders already. Thanks
wow amazing, this looks so luxurious