
Turn ordinary mason jars into gorgeous stained-glass-style decor with just Mod Podge and food coloring! This DIY is easy, budget-friendly, and beautiful.
Skills Required: None. Even if you’ve never Mod Podged before or have little crafting experience, you should have success with this project.
Ever wanted to tint glass jars in dreamy shades of ocean blue or forest green — without splurging on specialty paints? Good news: all you need is Mod Podge, food coloring, and a little crafty curiosity.
In this easy tutorial, I’ll show you exactly how to color glass at home using a foolproof method that creates gorgeous, translucent color with a glossy finish.
Whether you’re dyeing glass for wedding centerpieces, shelf decor, or a fun upcycling project, this is a beginner-friendly craft that actually works.
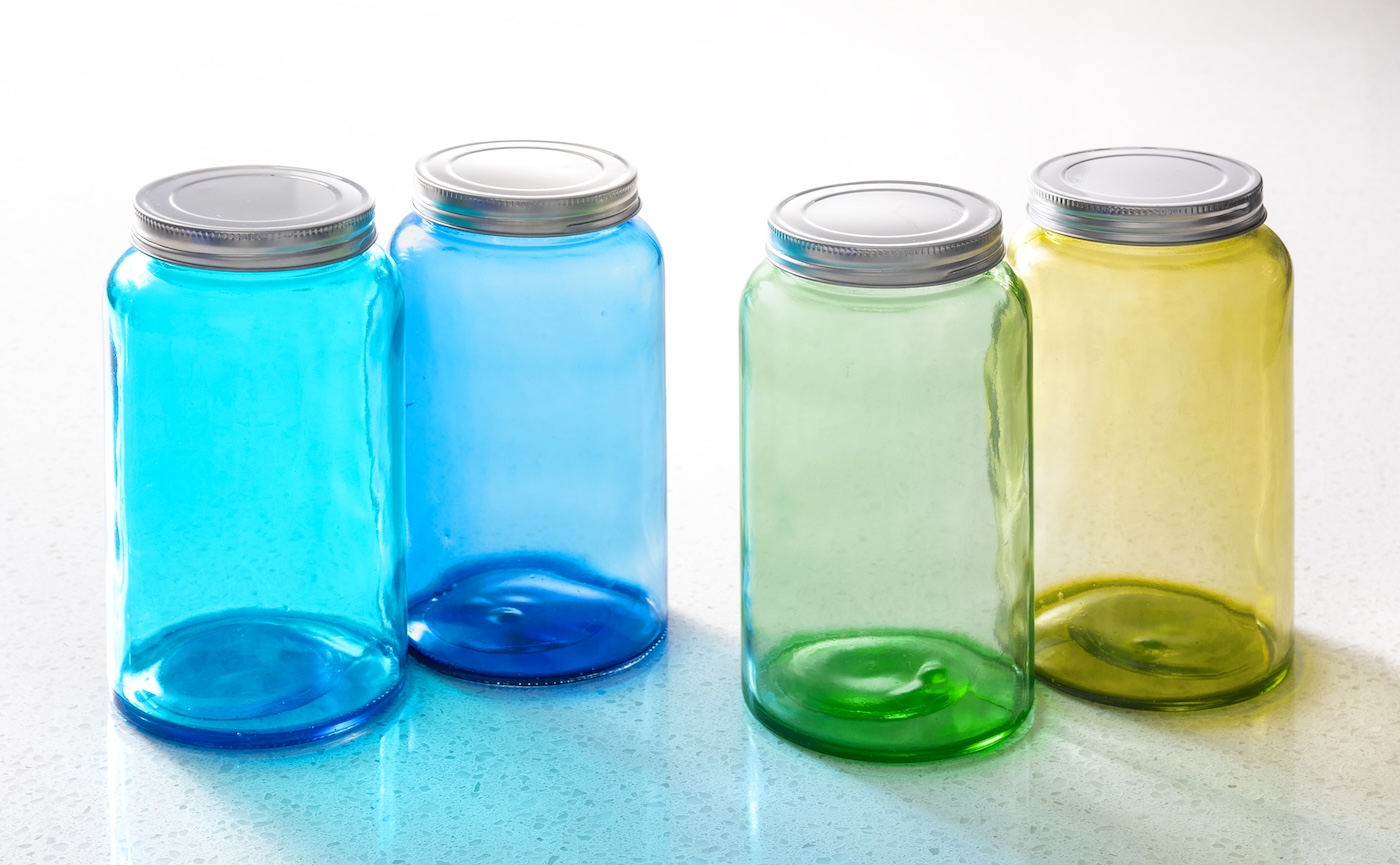
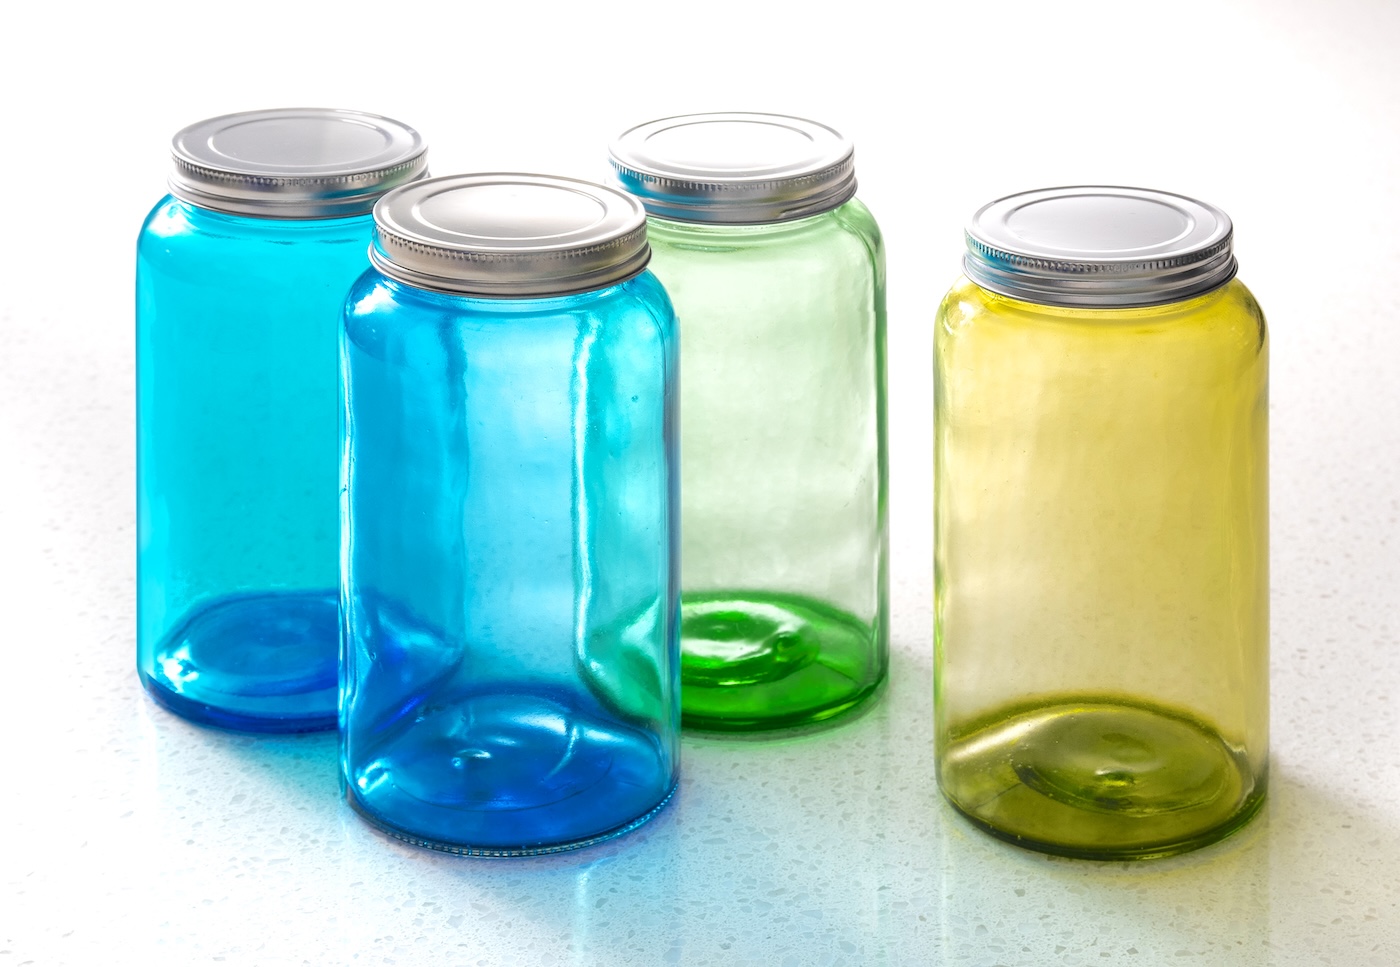
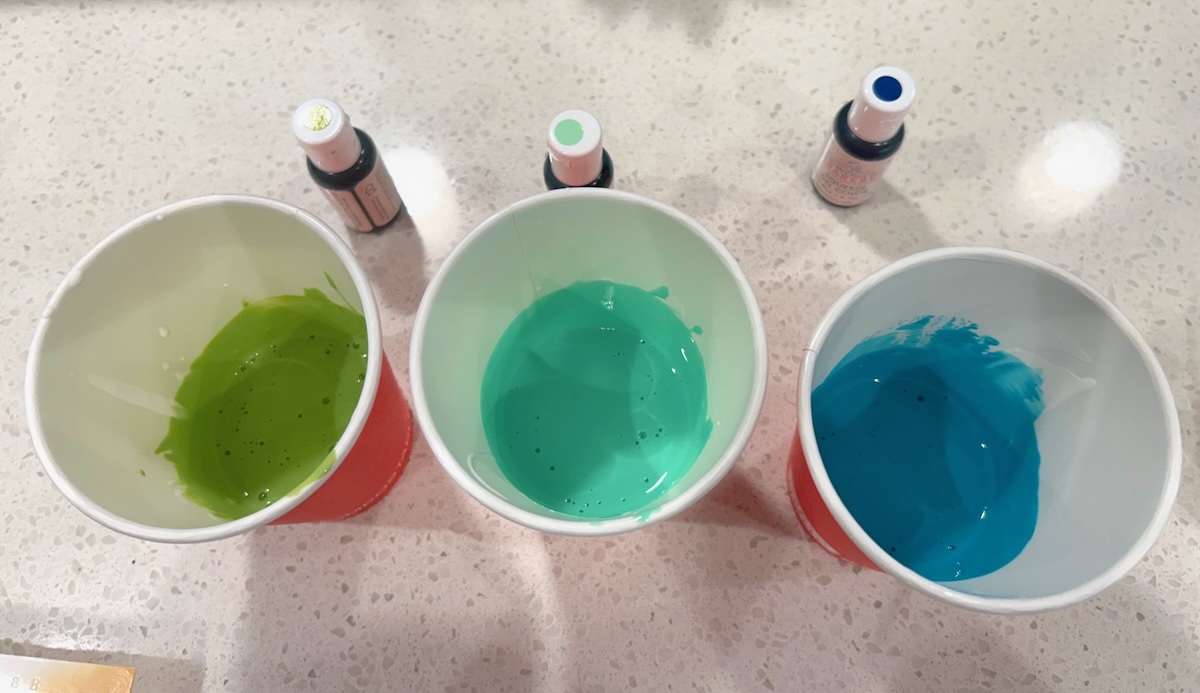
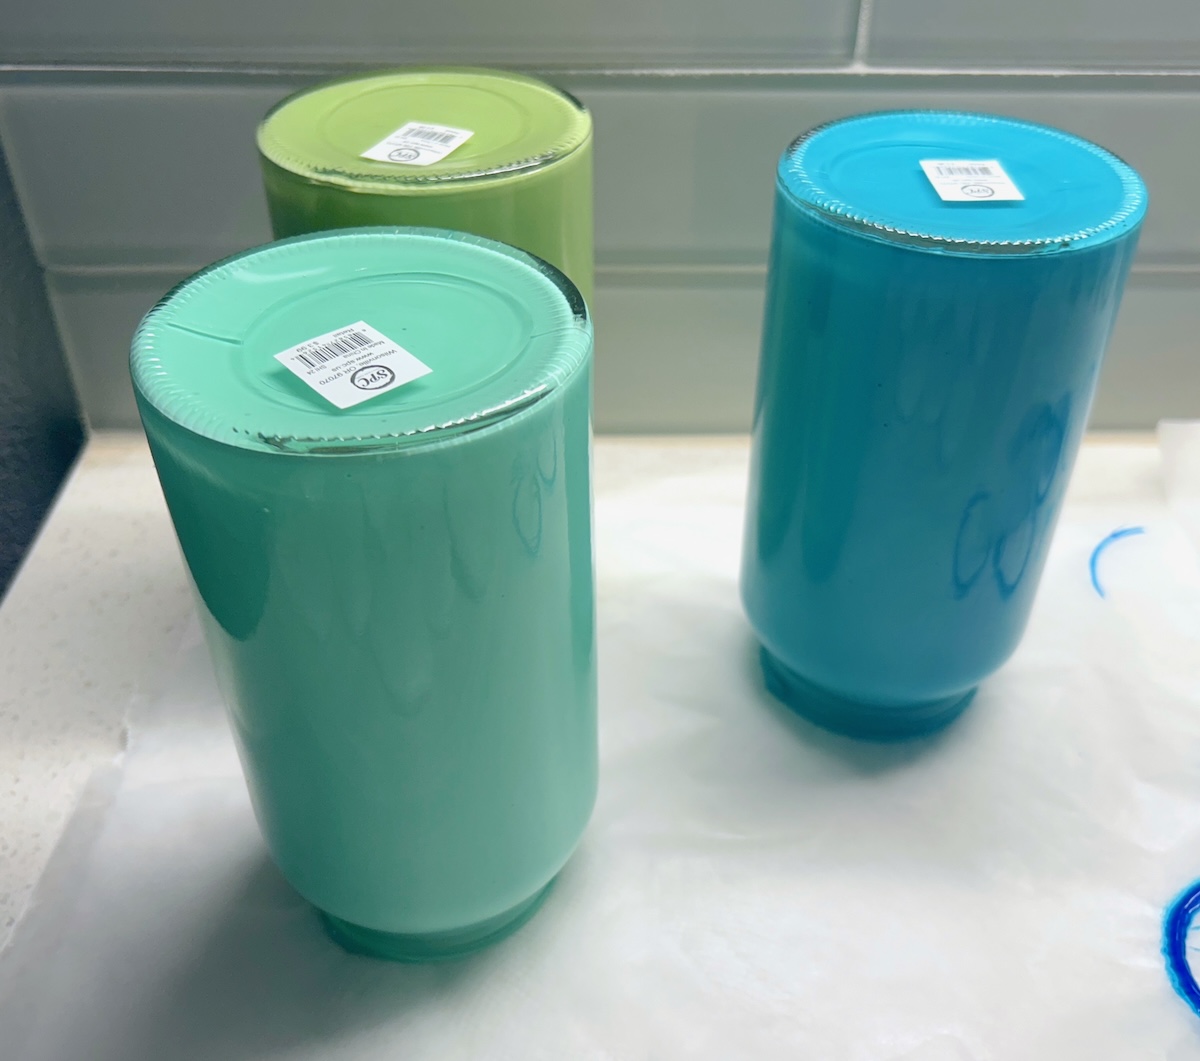
I tested four mason jars—two in vibrant blue, two in lush green—and found the magic combo: 4 drops of gel food coloring to 1/4 cup of Mod Podge. The result? Stained-glass-style jars that look custom, expensive, and totally stunning in the sunlight.
You can see the beautiful shades I achieved above.
FAQs you might be wondering:
- Can you use Mod Podge and food coloring to dye glass? → Yes, and it creates a beautiful stained glass effect.
- What type of Mod Podge works best? → Gloss formula gives the prettiest sheen and works best with glass.
- Will the color stay? → Yep! The color holds strong. Be careful about putting them in windows though, with bright sun. Regular Mod Podge isn’t UV resistant (the Outdoor formula is).
- Can I make other colors? → Absolutely—just tweak your food coloring drops for endless custom shades.
So if you’re searching for a way to tint glass bottles, stain mason jars, or create faux colored glass on a budget, you’re in the right place.
Let’s get into the exact steps I followed (including a tip or two from my earlier “oops” moments) so you can get stunning results without the trial and error.
NOTE BEFORE BEGINNING . . . these can’t be used with water. The Mod Podge is on the inside of the jar, and is water soluble. If you would like to make jars that can hold water, you can use the spouncing method on the outside like I do here.
Are you ready to begin? Get the printable how to card below:
How to Dye Glass
Equipment
- Cups 1 per color
- Stirring stick(s)
- Scraping tool
Materials
- 4 Mason jar(s) mine are 32 oz
- Mod Podge Gloss
- 4 drops Gel food coloring this is per jar – double for regular food coloring
- Wax paper to cover work surface
Video
Instructions
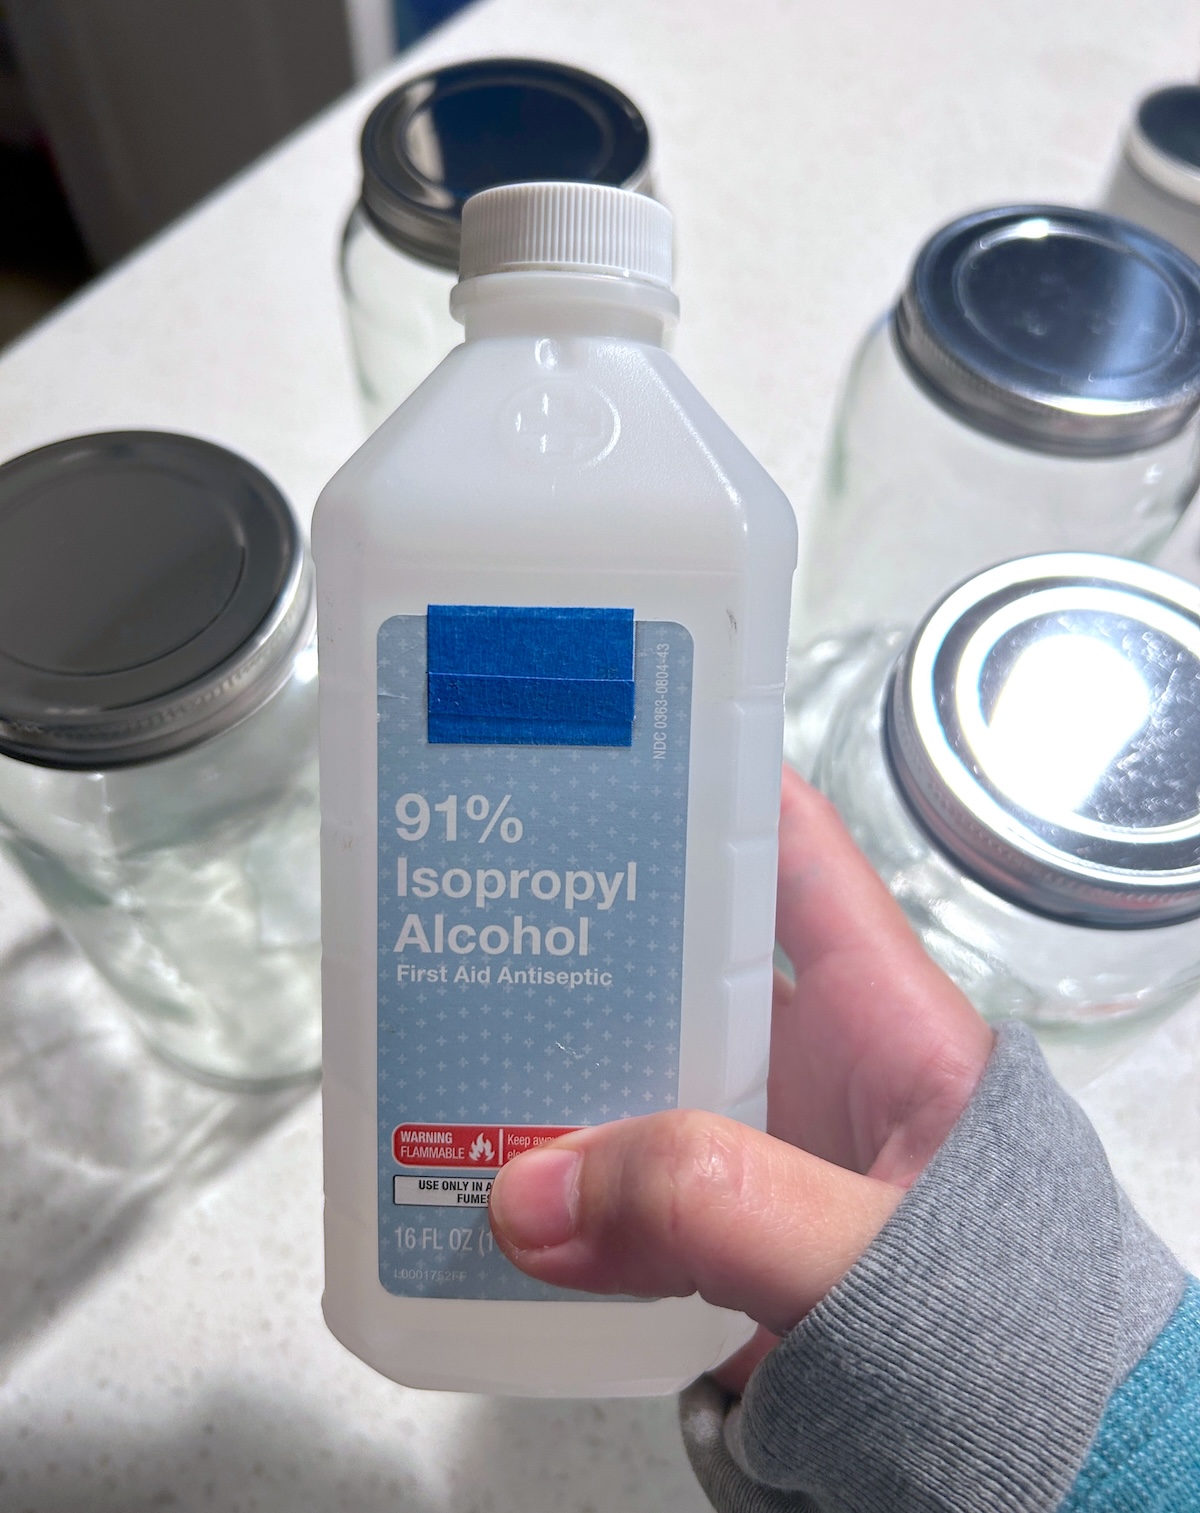
- Clean the jars with soap and water or rubbing alcohol. If you use rubbing alcohol, swirl around and pour the excess back into the container. Let dry.
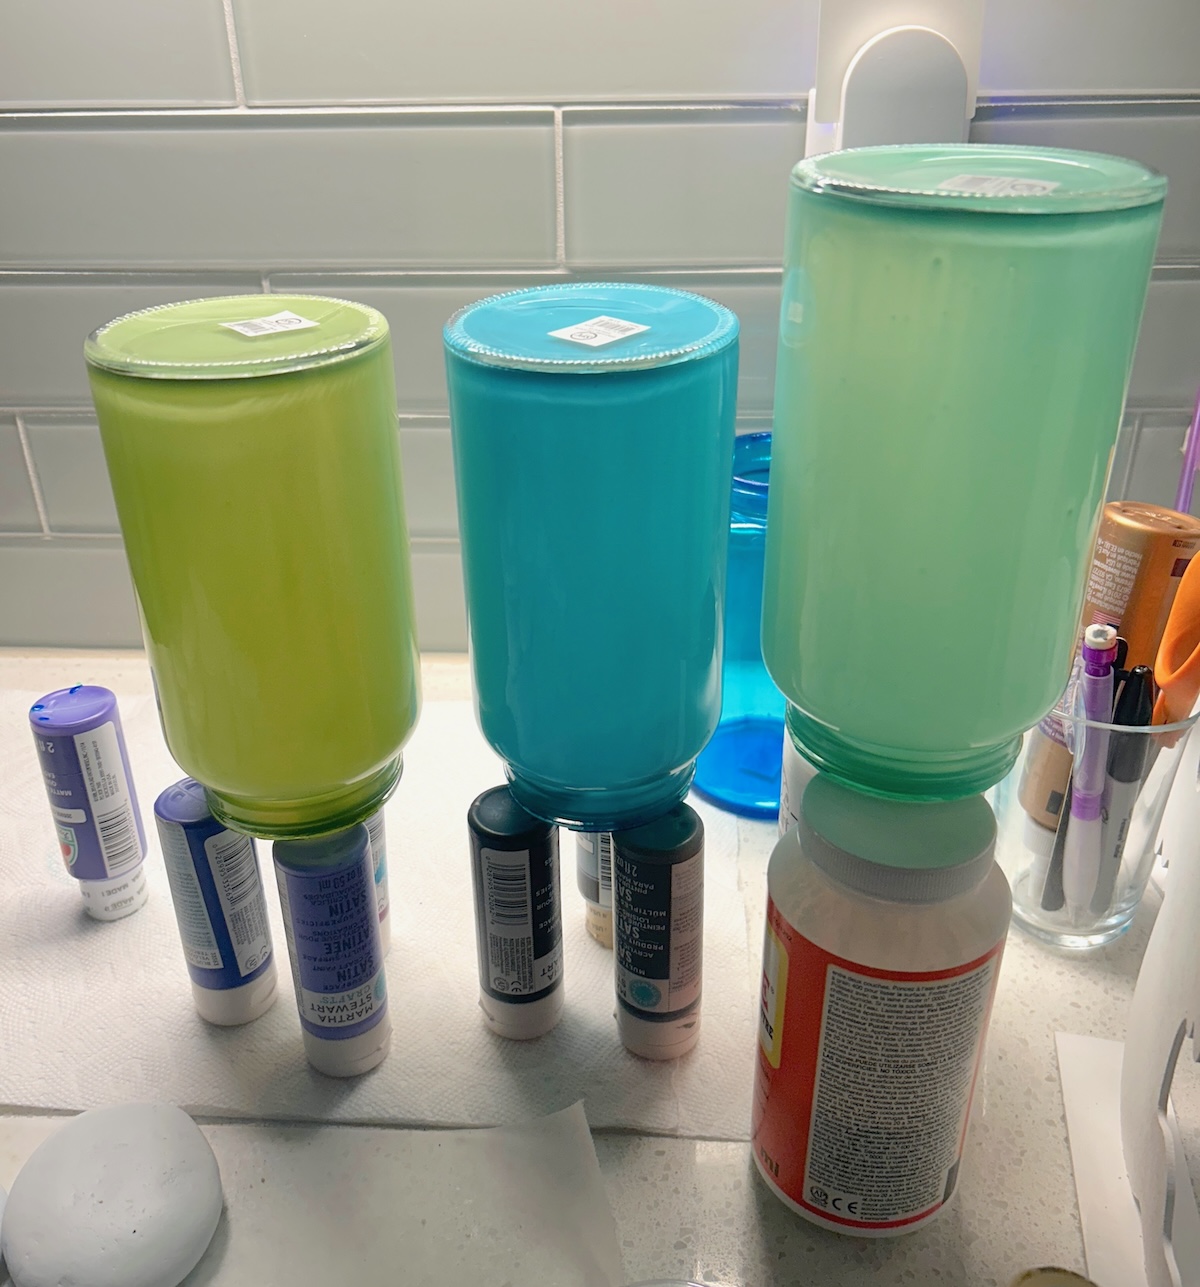
- For each color you want to make, add 1/4 cup of Mod Podge Gloss to a cup.
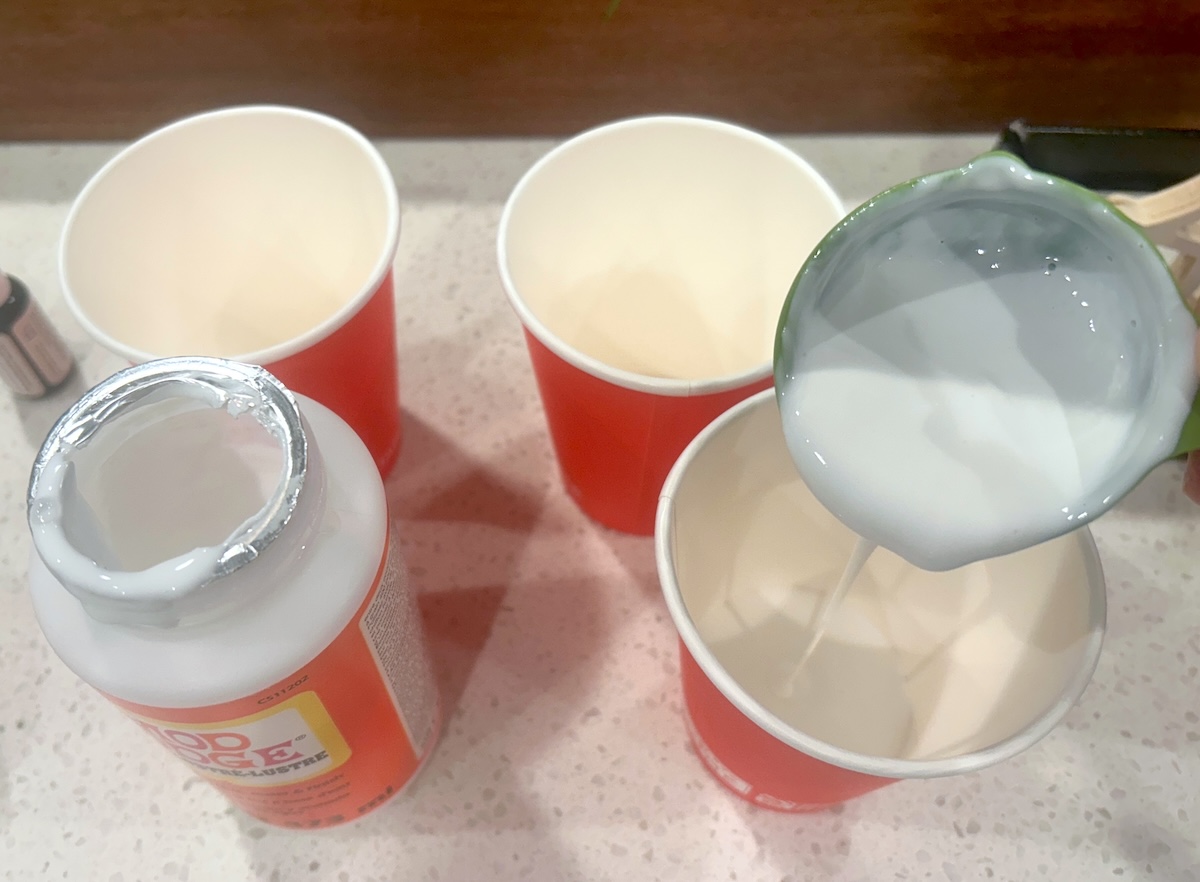
- Add four drops of gel food coloring per color to each cup. If you're using regular food coloring, you'll want to double that to eight drops.
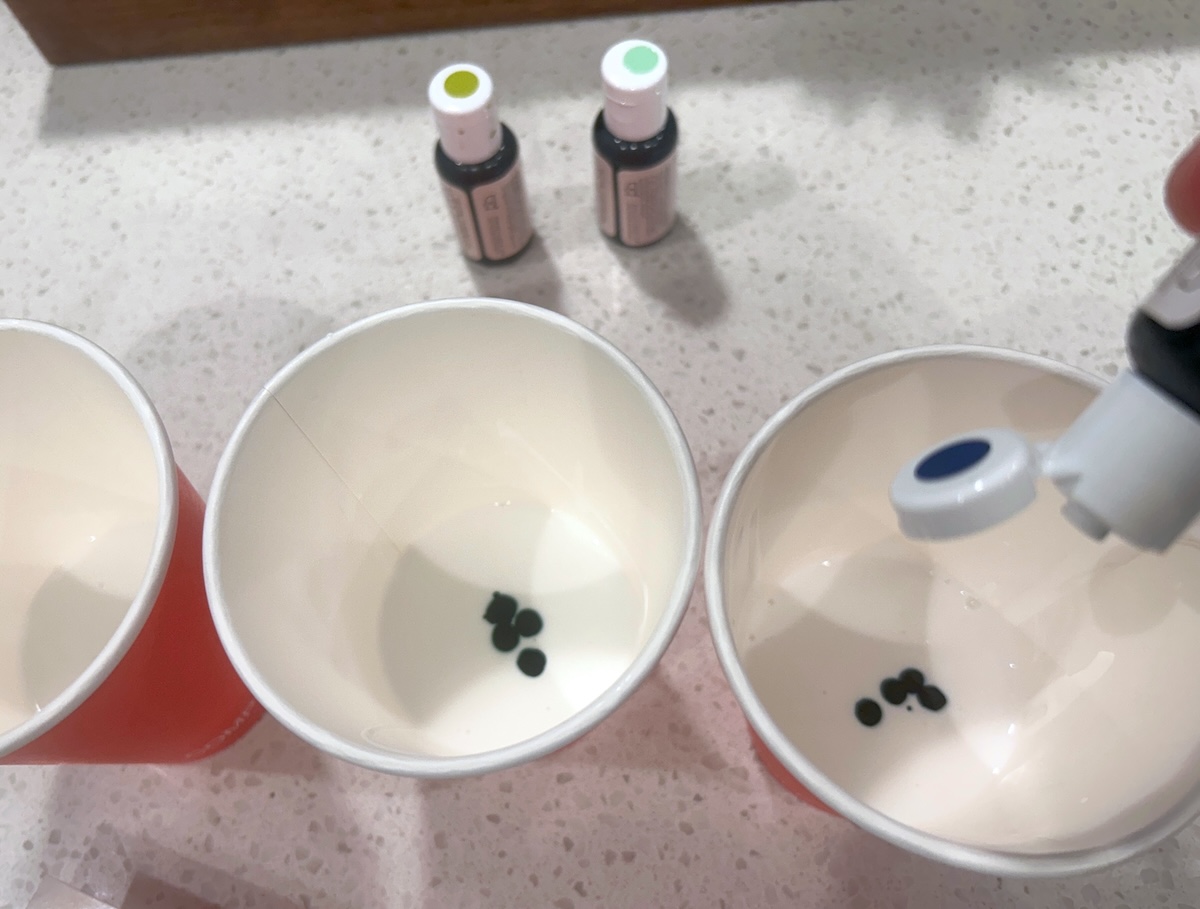
- Stir each cup completely, or until all the color is dispersed throughout the Mod Podge.
- Working one jar at a time, pour the Mod Podge into the jar. Scrape the excess out of the cup with a tool, so that you get all of it into the jar.
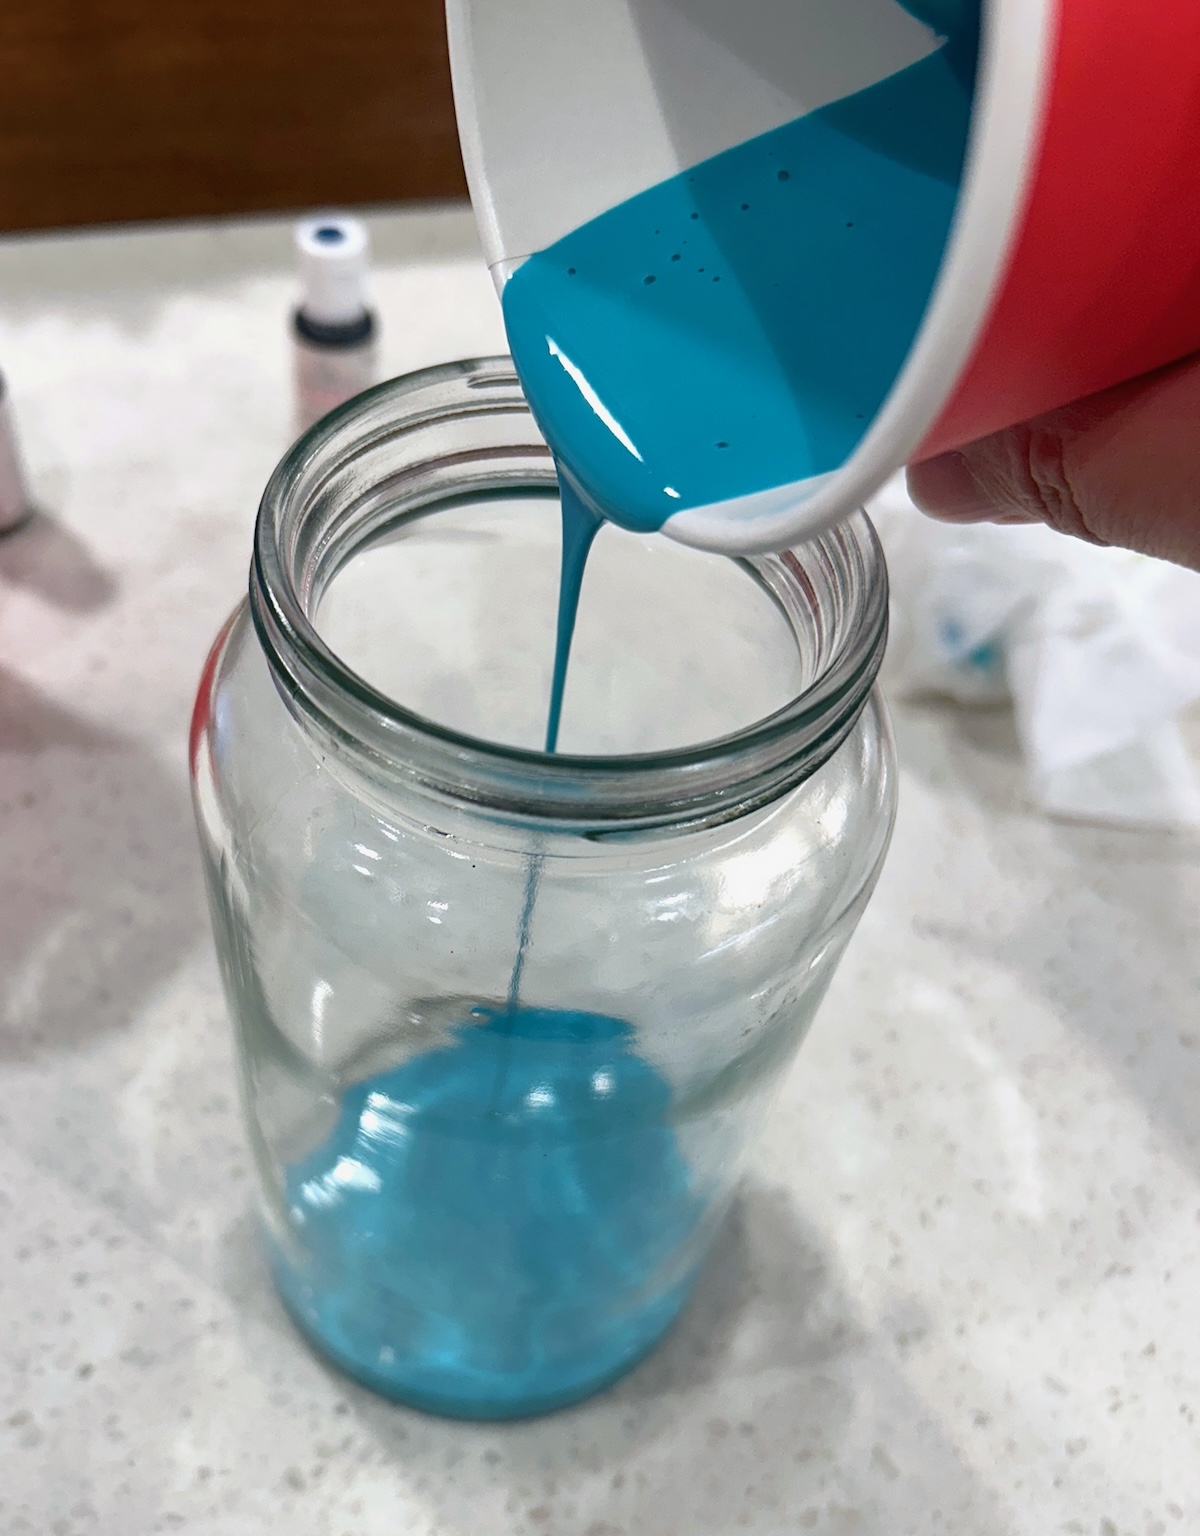
- Swirl to coat. It can take a minute to completely coat the inside.If you notice the mixture doesn't reach certain areas, you can use a paintbrush to assist.

- Place upside down on your work surface to let drain. Allow to sit until all excess Mod Podge is fully drained.
- Prop up (to allow air in) and let dry for 24 hours. Alternatively, you can place in a 200 degree oven and bake until dry (do not leave unattended).
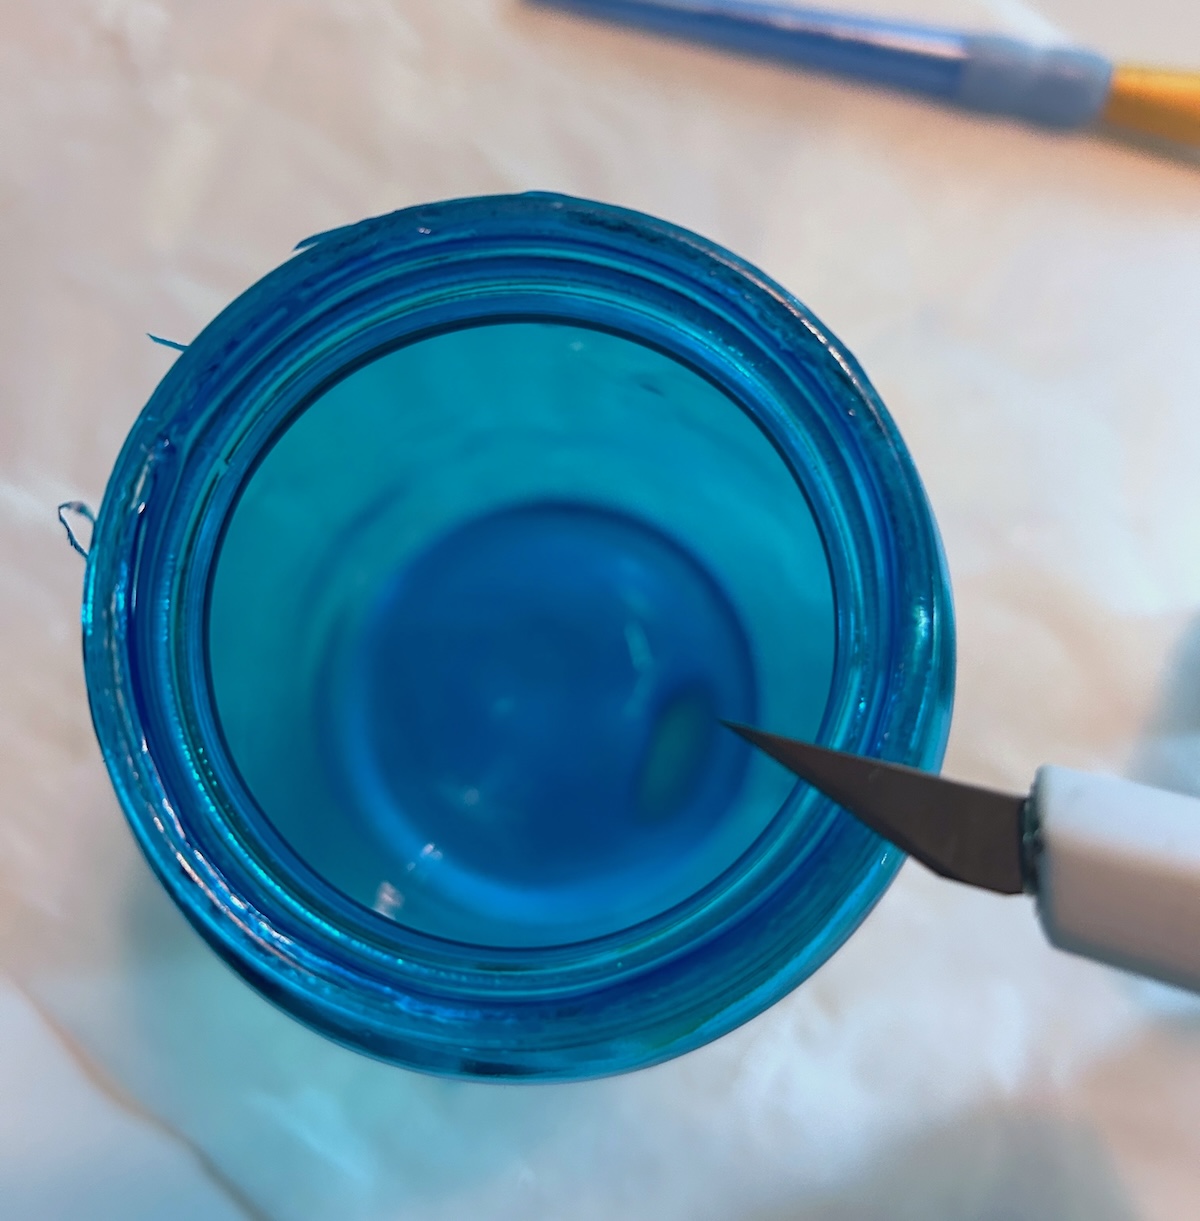
- Use the craft knife to trim any excess Mod Podge from around the lips of the jars.
Notes
Did you enjoy this project? Let me know in the comments! I’d also love for you to check out these other ideas:


Thank you for sharing this project!
Hello,
How do you prevent the dripping after baking? Also do you recommend placing these jars in the oven face up or face down?
You really have to drain the excess well by leaving them for several hours with the open part facing down. They should be fully drained before placing them in the oven, so then you would have them open top up. Because I drain for so long, I don’t have any drips.
Hi, I am wondering if I can modpodge a poster to the back of a glass oven backsplash? I have a large poster made from a painting my son did. Can I modpodge it to a clear glass oven backsplash? Would I need to coat it with anything due to the heat? I’m afraid that I will ruin both the backsplash and the poster. Any suggestions and help are greatly appreciated.
Hi!
I just used acrylic paint and mod podge and painted the outside of a cake stand. I let it dry, not for 24 hours but it was dry. I then put it in the oven and turned the oven on to 350 and left it in there for 34 minutes. Then I turned the oven off and let it cool. It did not stain the glass. What did I do wrong?!
Hi I am looking to see if it is possible to use this on my bathroom glass vanity light shades. They are plain frosted glass that I would like to color for a updated look, but still keep the transparency? So was wondering if this food color/mod podge method could be painted on the outside portion of the shade. And how would the shades be cleaned after they cure dry? Just wipe with a damp cloth? I have never worked with this product before, but I am intrigued. Thank you in advance for any suggestions/advice you can provide!
Hi Amy,
I am trying to look forward to my first jar(s) for Christmas items within my online store. Want to have a snow affect on inside of jar and stickers on outside. Do I remove the glue on outside of jar as they are Christmas decorations and variety of winter/ Christmas decor? Would like to use food coloring on inside of jars, and then have a crystal look of snow with Decoupage on outside. My hopes are that small chains of clear christmas lights are on inside. Is all of this possible and am I on the correct path? Any assistance would be greatly appreciated. Newbie here and hoping for the best!
Sincerely,
Pam
Can I do this to a glass lamp shade
Yes you can, though I’d check how hot the glass gets. You might want to use an LED bulb with it if the glass is getting really (Mod Podge is not flammable but you don’t want it bubbling or melting off).