
Learn how to Mod Podge pictures on canvas the easy way. I did this with a few of my favorite prints – you can do it with your favorites too!
Skills Required: Beginner. It helps to have experience with Mod Podge to avoid wrinkles. You’ll be painting canvases and then decoupaging printed images to the fronts of them.
I’m a huge fan of wall art! One of my favorite things about Mod Podge is that it’s so easy to put image to canvas, and on a budget.
You can pick prints you love (from anything really), and turn them into something you can hang on your wall. I particularly love scanning things and turning them into projects (not for re-sale, but for personal use).
This is one of those DIY canvas art projects that uses a scanner . . . and it’s *really* beginner. For those of you who have done decoupage before, you may roll your eyes at this one . . . but just bear with me.
There are a few newbies out there who have never used the Podge before, and this is about the easiest place to begin. I mean it!
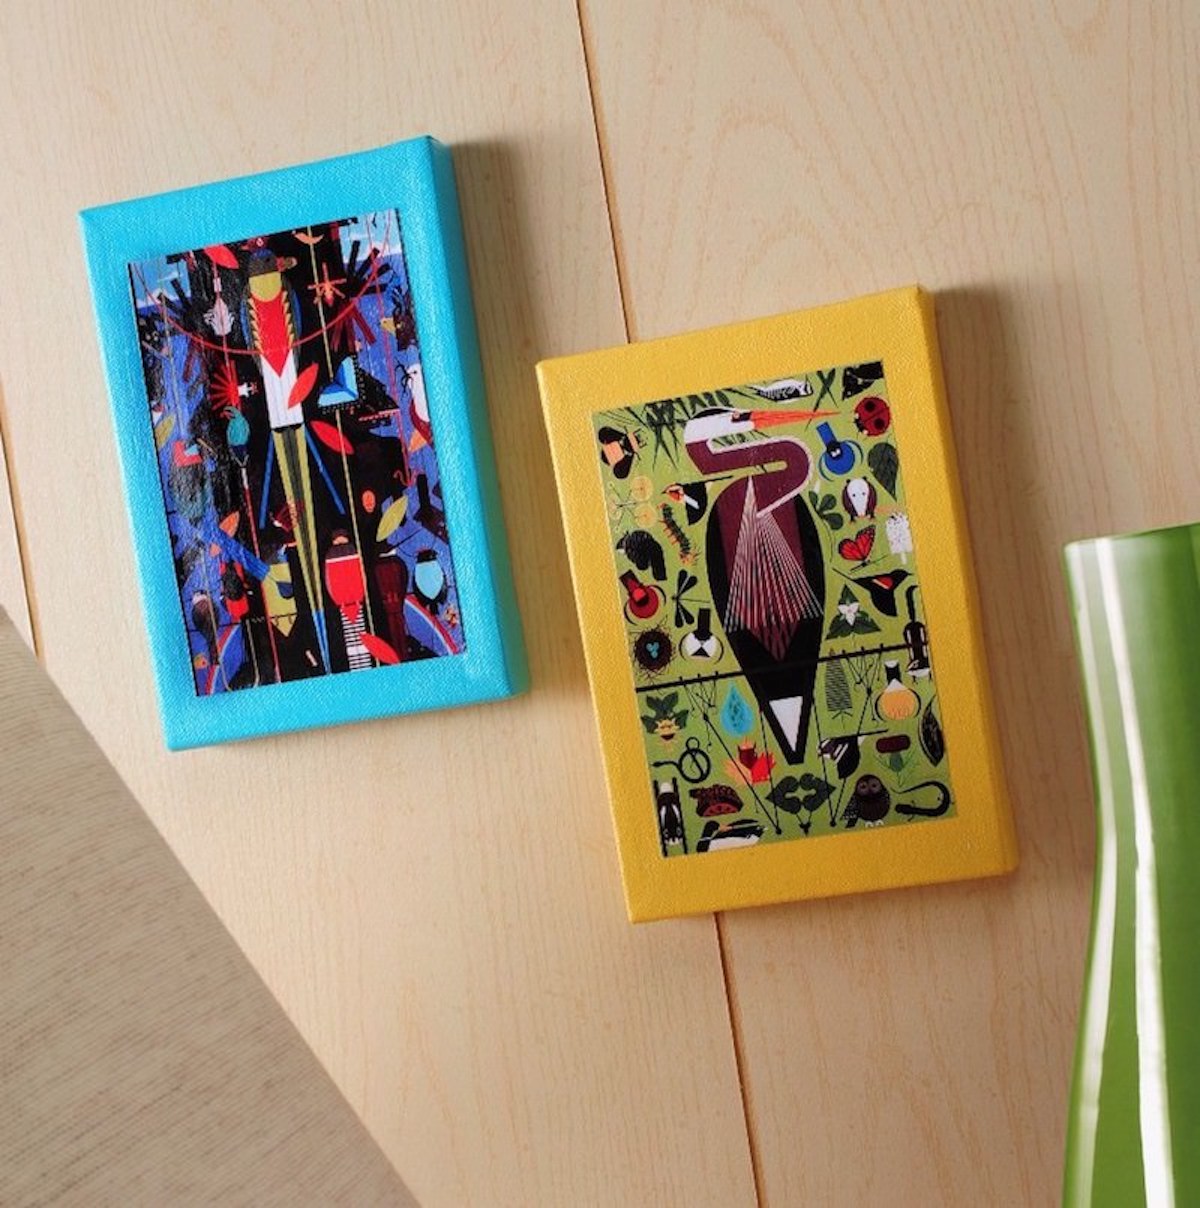
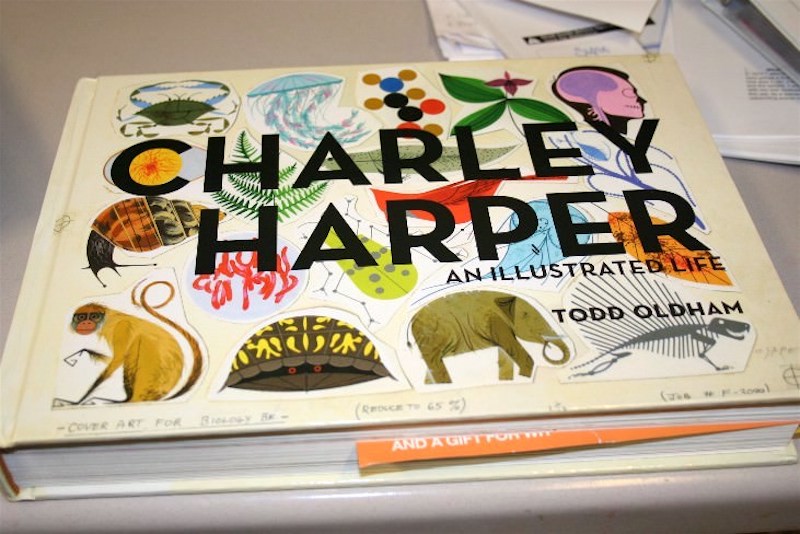
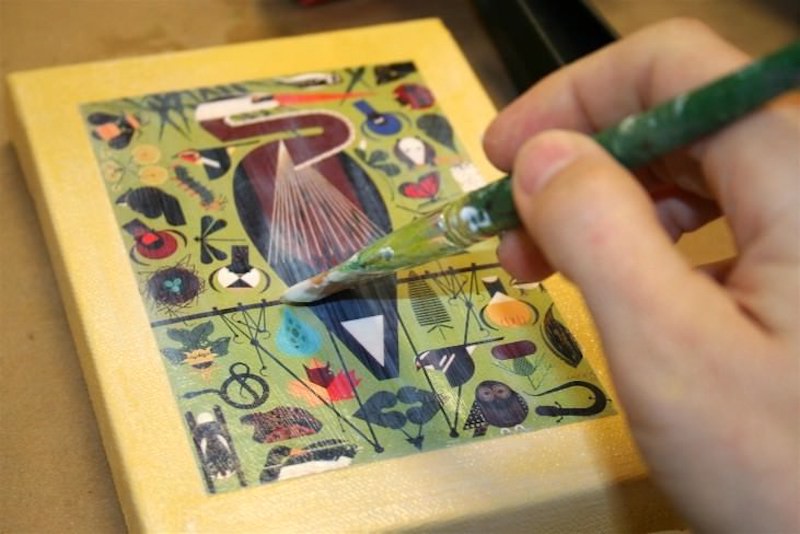
So as you can see, I did two mini-canvases featuring one of my favorite artist ever, Charley Harper. I love his work, and I own a few of his prints (lithographs) as well as this coffee table book:
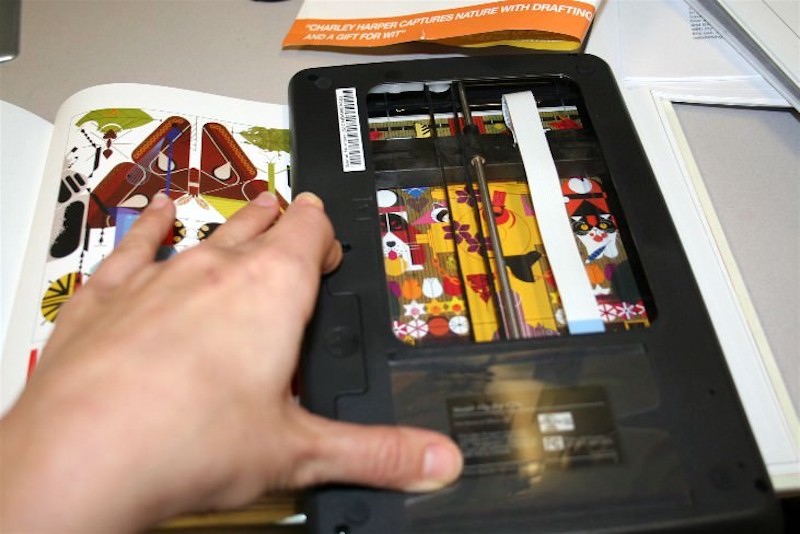
I decided to go ahead and make some wall art with some scans from the book. Before I go on I have to say that when you scan things that are not yours, it can be for personal use ONLY.
You aren’t allowed to sell them or claim them as yours. You probably already knew that, but I just wanted to make sure. So here’s what you need for this photo craft.
Gather These Supplies
- Scanner
- Mod Podge Gloss
- Computer and printer
- Book to make scans from
- FolkArt Paint – colors of your choice
- 5″ x 7″ canvases – two
- Paintbrush
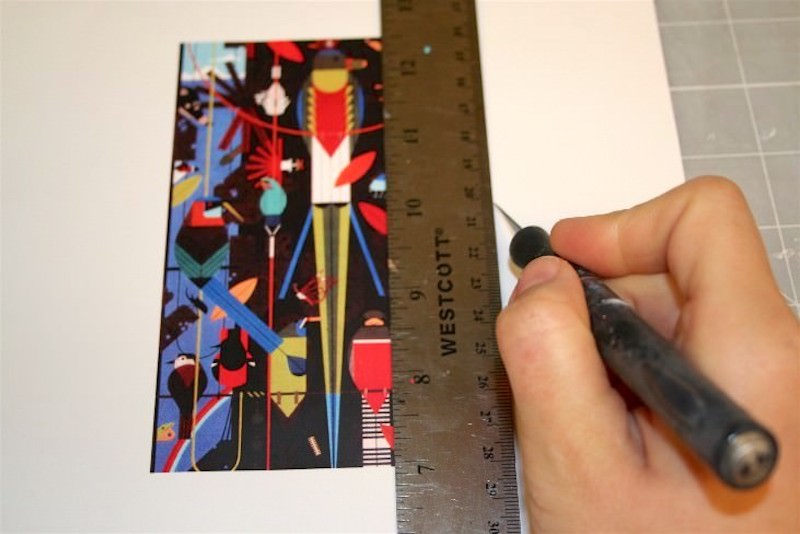
- Craft knife
- Ruler
Get the printable how for this project below:

Mod Podge Image to Canvas
Equipment
- Scanner
- Computer and printer
Materials
- 2 Canvas(es) 5" x 7"
- Book or photos
- Mod Podge Gloss
- Acrylic paint
- Clear acrylic sealer or hairspray
Instructions
- Scan a book or photos. I scanned at 300 dpi, but you can scan at 600 dpi too so that you can blow up the picture.
- Print out the images of your choice and trim them to fit the canvases. If inkjet, spray with clear acrylic sealer or hairspray on both sides and let dry before trimming.
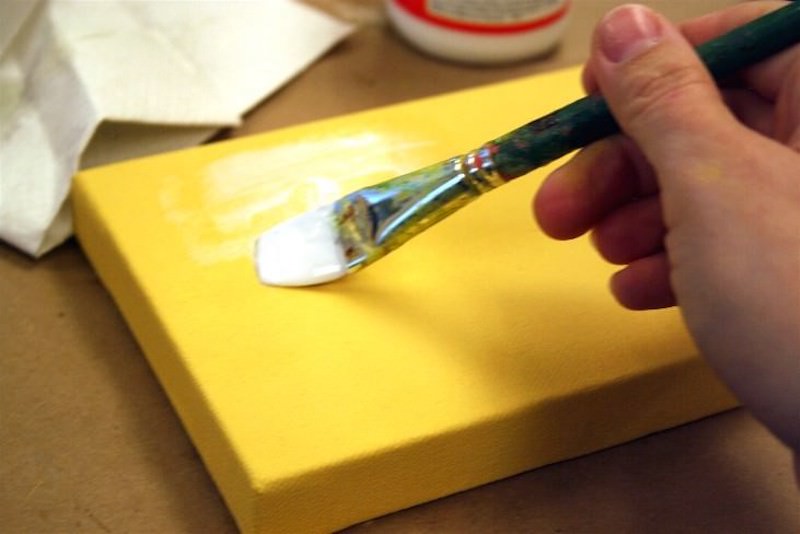
- Paint the canvases with the colors of your choice and let dry.

- Spread a medium layer of Mod Podge down on the canvas and smooth the design down to the top. Let dry for 15 – 20 minutes.
- Put a top coat on the image and then the entire canvas. Let dry completely before hanging.
Notes
If you love this DIY wall art, you’ll want to check out these other projects:
Busted Canvas • Button Canvas Art • Comic Wall Art • Decoupage Napkins on Canvas • DIY Love Canvas • Fabric Canvas Art • How to Transfer Photos to Wood • Instagram Mini Canvases • Magazine Collage • Map Canvas Art • Mount Pictures on Canvas • Nautical Wall Art • Photo Booth Canvas • Photo Transfer to Canvas • Photo Wall Collage • Plastic Animal Canvases • Poster on Canvas • Scrapbook Paper Art • Watercolor Collage


What an exciting new addition to a crafter’s arsenol!! Wow!! Love it!
I LOVE the project you designed for us to make!
I am excited to start mine!
🙂 Melissa
man you are SO GREAT Amy!!!! I now what that book…. and Mod Podge.. and to meet YOU!!!
Thank you also for being on our FaveCrafts radio show yesterday …. and look forward to being in this hop with you!
So MUCH awesome, LOVE when tech and arts come together! Think of the textures and rare visuals that could be collected with this awesome scanner. WANT.
OH!! So awesome! I have several art books I’d love to turn into canvas art for the walls in my new home, but I don’t own a scanner! Woe is me!
Isn’t it funny how sometimes the simplest things are so wonderful, yet often overlooked??
OMG! This is an awesome little tool/machine/crafter’s friend. Love Charley Harper too! What a genius.
Now that’s weird – I just used Mod Podge for the very first time today and was well impressed!!!…Sppoky or what?…Happy New Year, Kirsti xx
Incredible, you always amaze me at the wonderful things and ideas you share.
This little scanner looks really neat.
🙂 Lori m
Fabulous project!!!
Amy! this is a terrific idea using the Flip-Pal mobile scanner…it really make a clean scan especially with bulky books, etc. I love your design.
Thanks for joing me on this blog hop–cheers and Scan Your HeART Out!
Kathy Peterson Inspired