
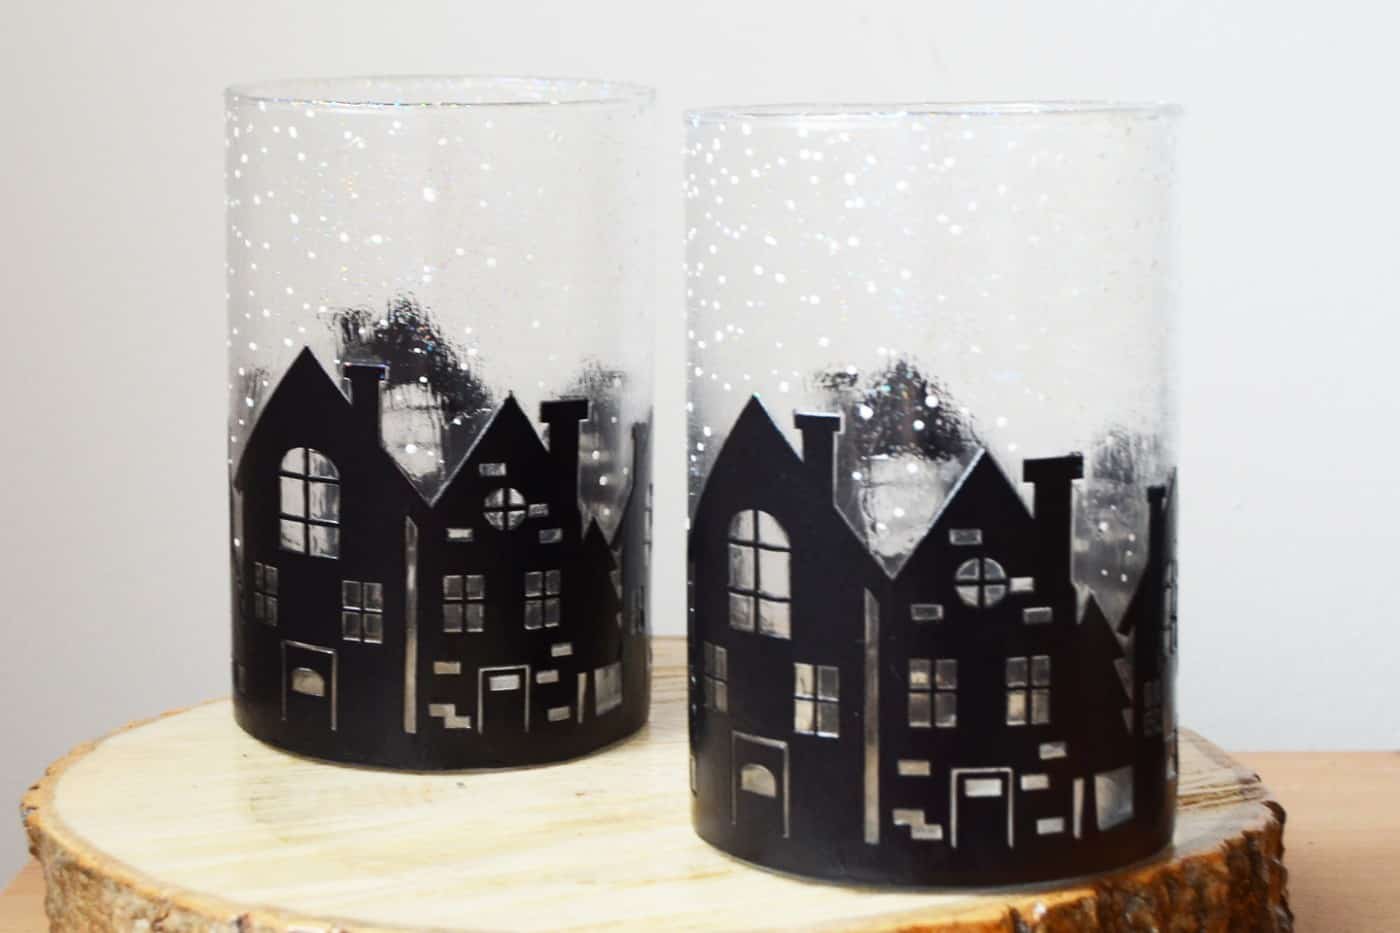
Create these unique DIY winter vases with a snowy scene! These are perfect for a holiday mantel, table decor, or for gifting. Easy to make!
Skills Required: Beginner. It helps to have some experience with Mod Podge so you can easily wrap the design around the glass holder without wrinkles. You’ll also be using a cutting machine or craft knife for your paper design.
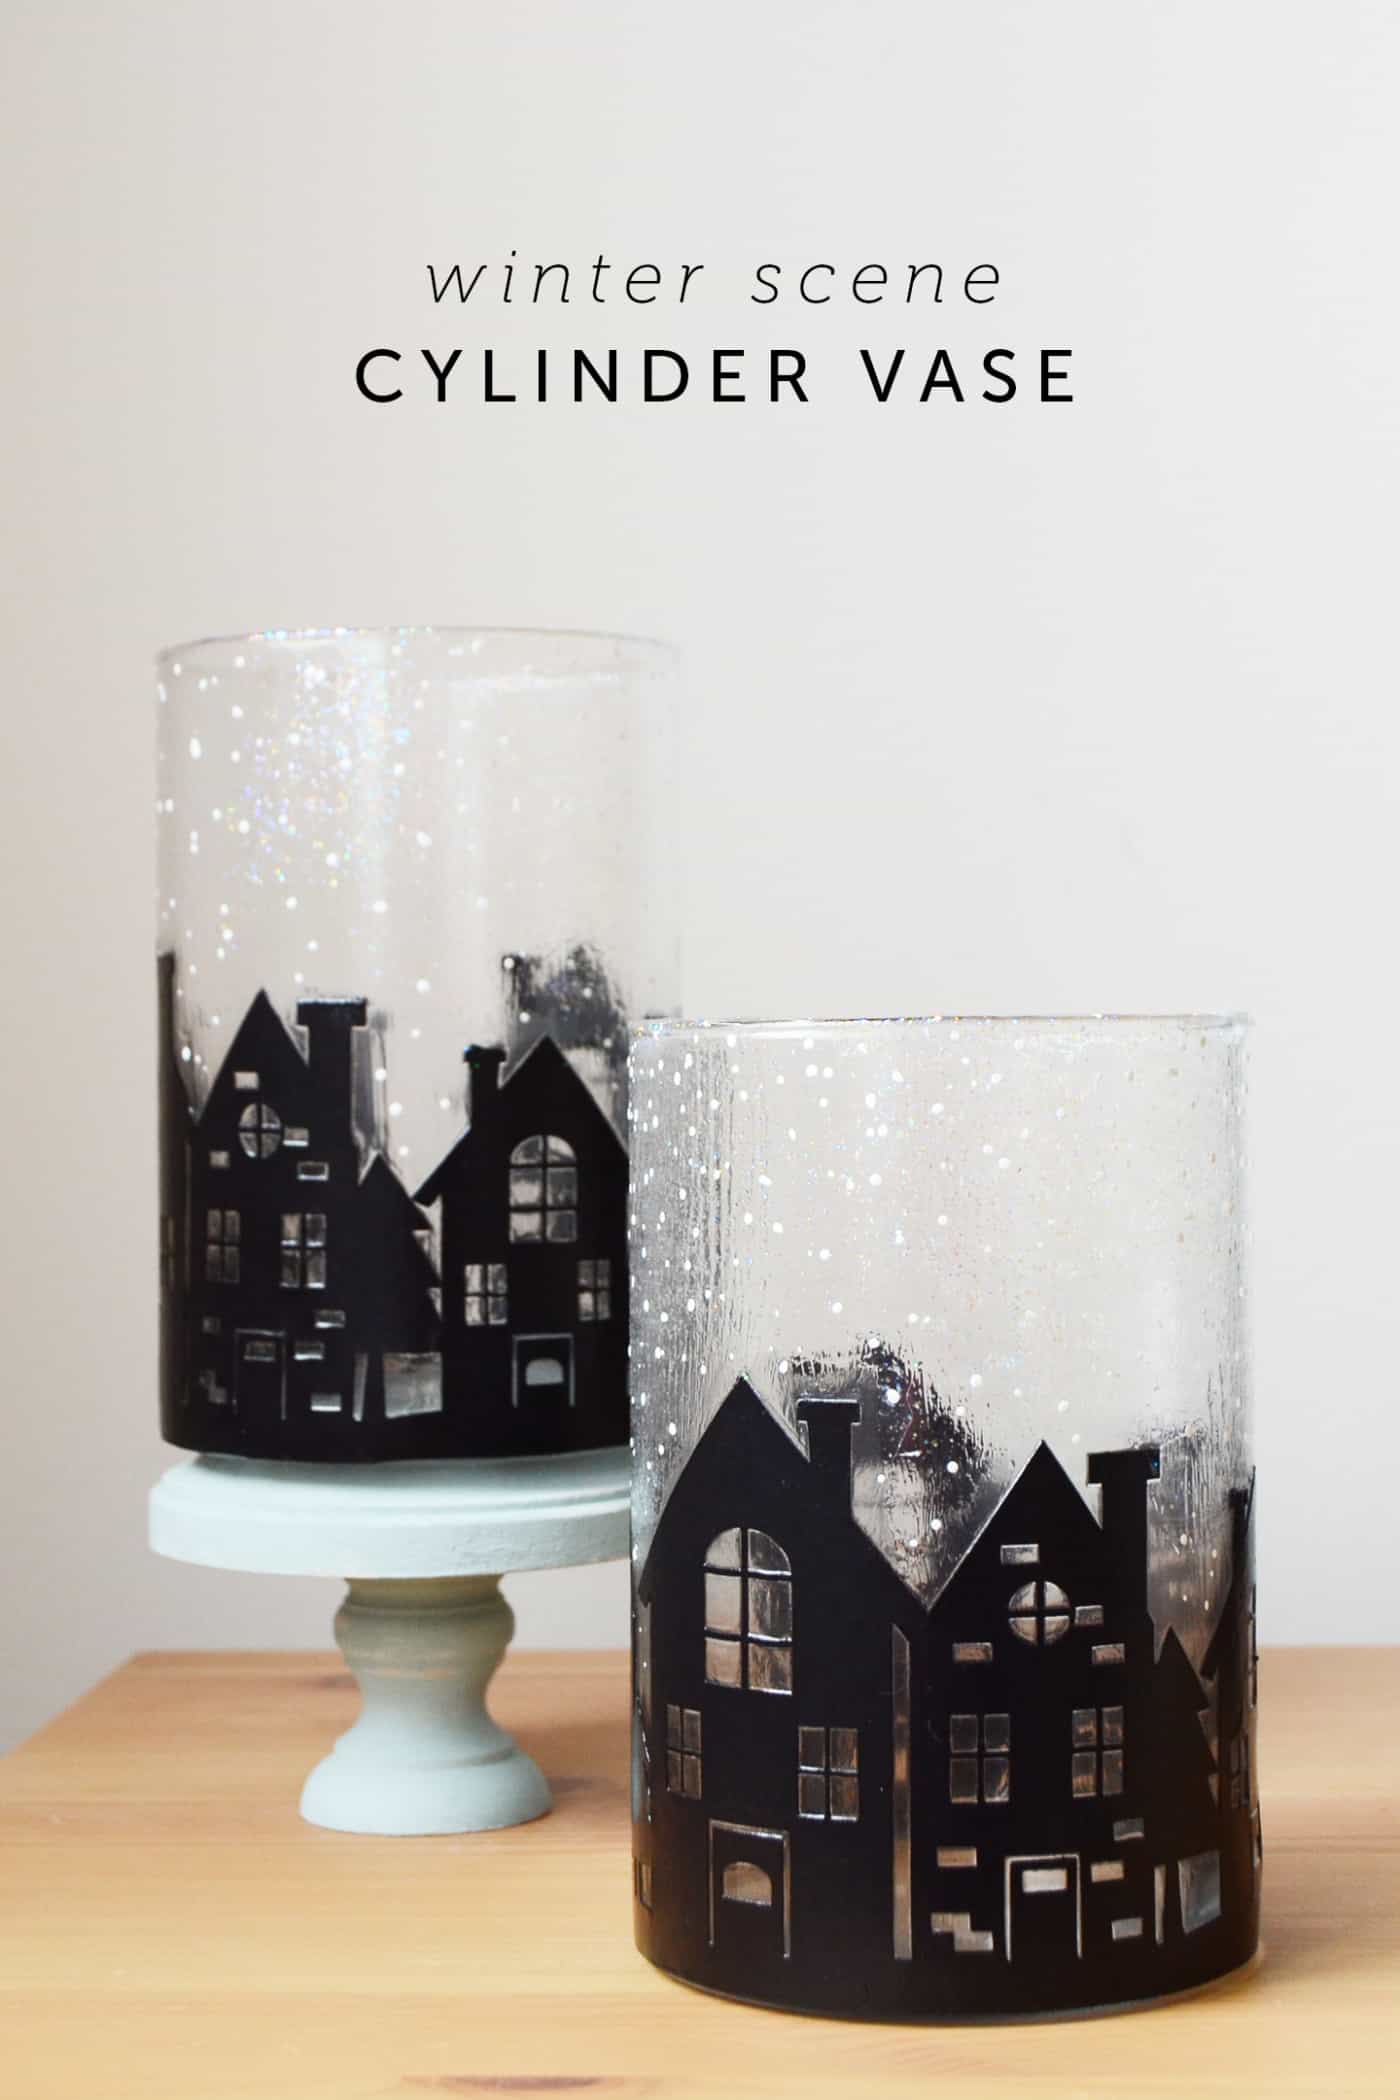
My aunt-in-law requested I make a cylinder vase with a winter scene after she saw a similar vase decor on a catalogue one day. She wanted to use the finished project as a Christmas candle holder. Great idea, right?
Of course, being the obliging niece-in-law that I am, I gleefully agreed as I thought it would be easy – and it is!
This vase decor doesn’t come together in minutes, but it’s fun to make and would definitely be great as a cute little Christmas gift, along with some baked goods!
Learn how to make this unique Christmas craft below. You’re going to have a blast making it, I promise.
DIY Winter Vases
Gather These Supplies
- Cylinder Vases
- Electronic Die Cutter (I used my trusty Silhouette)
- Christmas house border file (or pick your own)
- Black cardstock
- Acrylic paint (in white)
- Matte Mod Podge
- Sparkle Mod Podge
- Hard Coat Mod Podge
- Brush
- Ball tool (for stippling)

First, look for a cylindrical vase. There’s a ton of these at dollar stores, so they definitely won’t break the bank. I picked mine up at Dollarama, a Canadian dollar store (they were really inexpensive).
Clean the surface with some alcohol and tissue paper or cotton balls to ensure it’s free of dust and lint.
Measure the circumference of your vase, and size the width of your winter scene according to it.
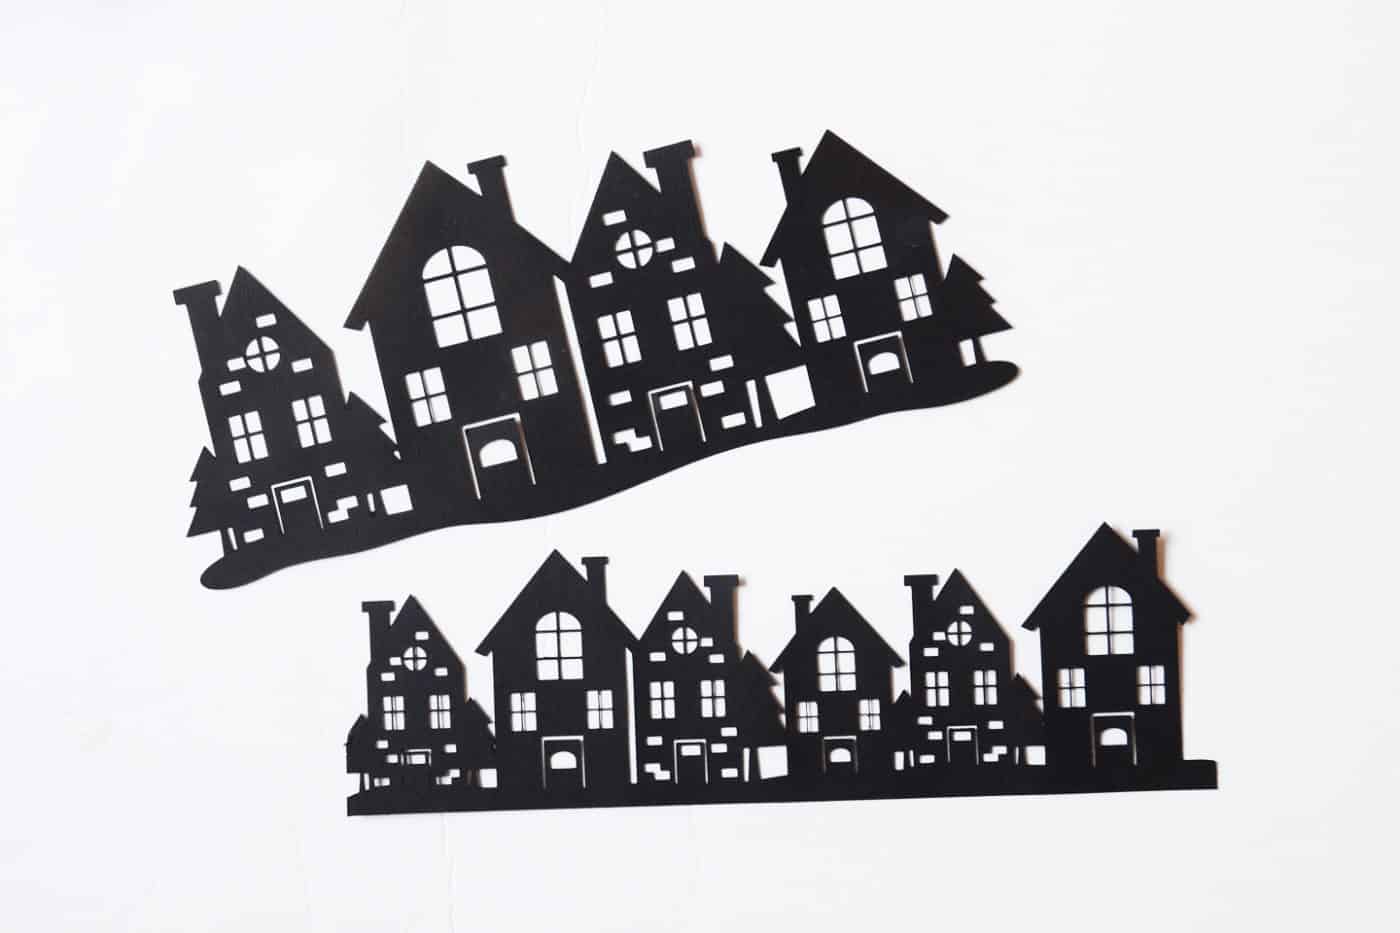
Now, cut out your winter scene. You can definitely sketch this out and cut it by hand using a craft knife, but if you own an electronic die cutter (such as a Silhouette), it’s much easier!
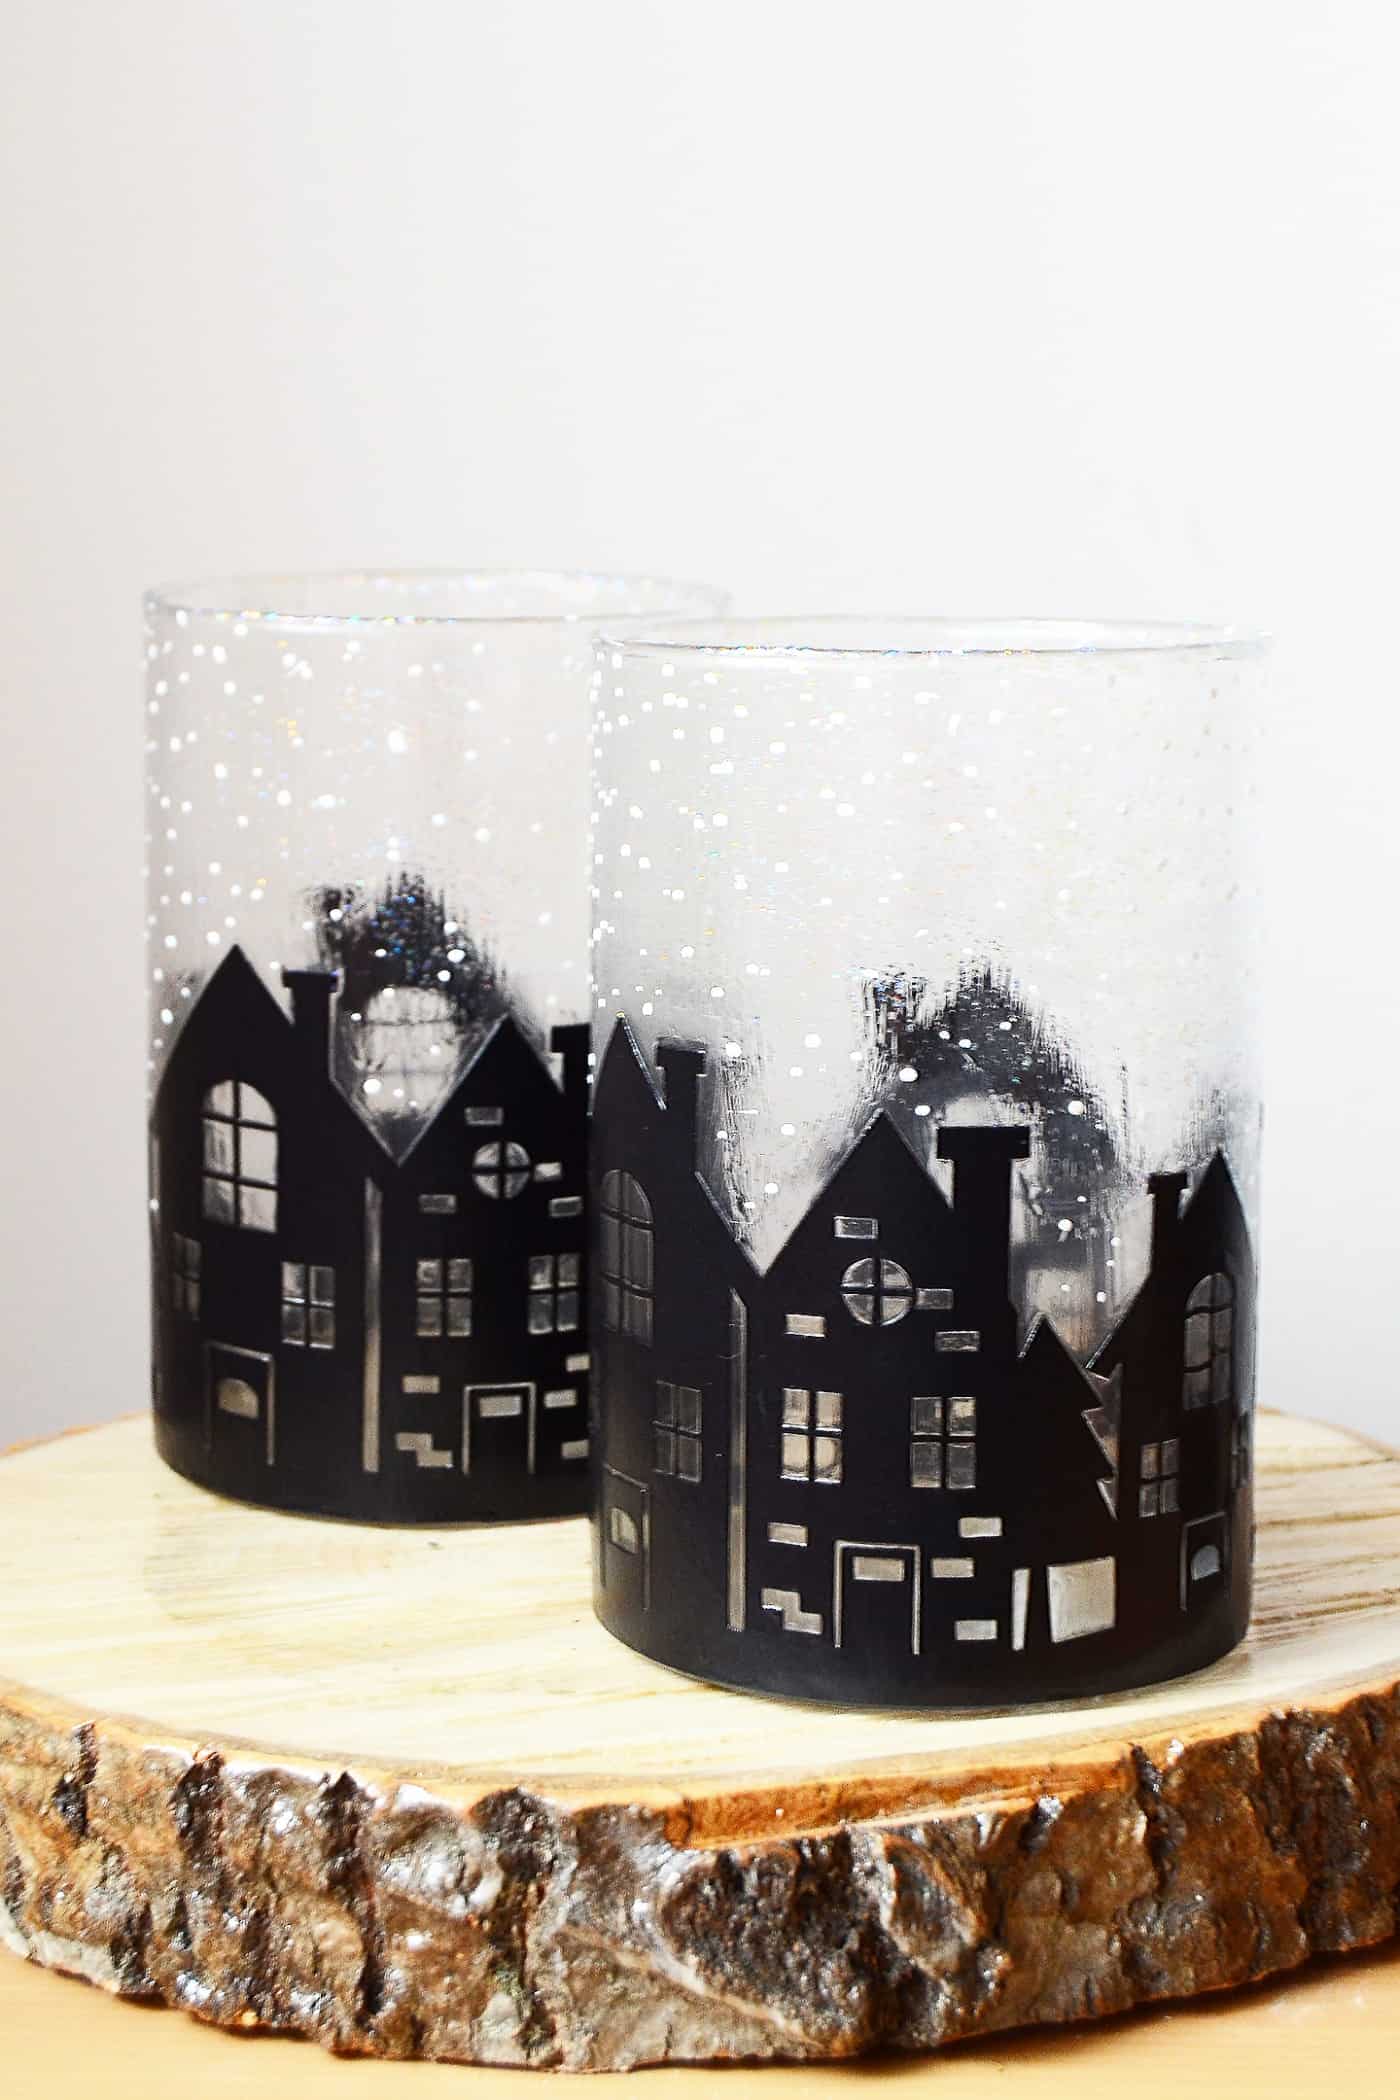
I found my scene on the Silhouette Design Store and edited it to add a few more houses.
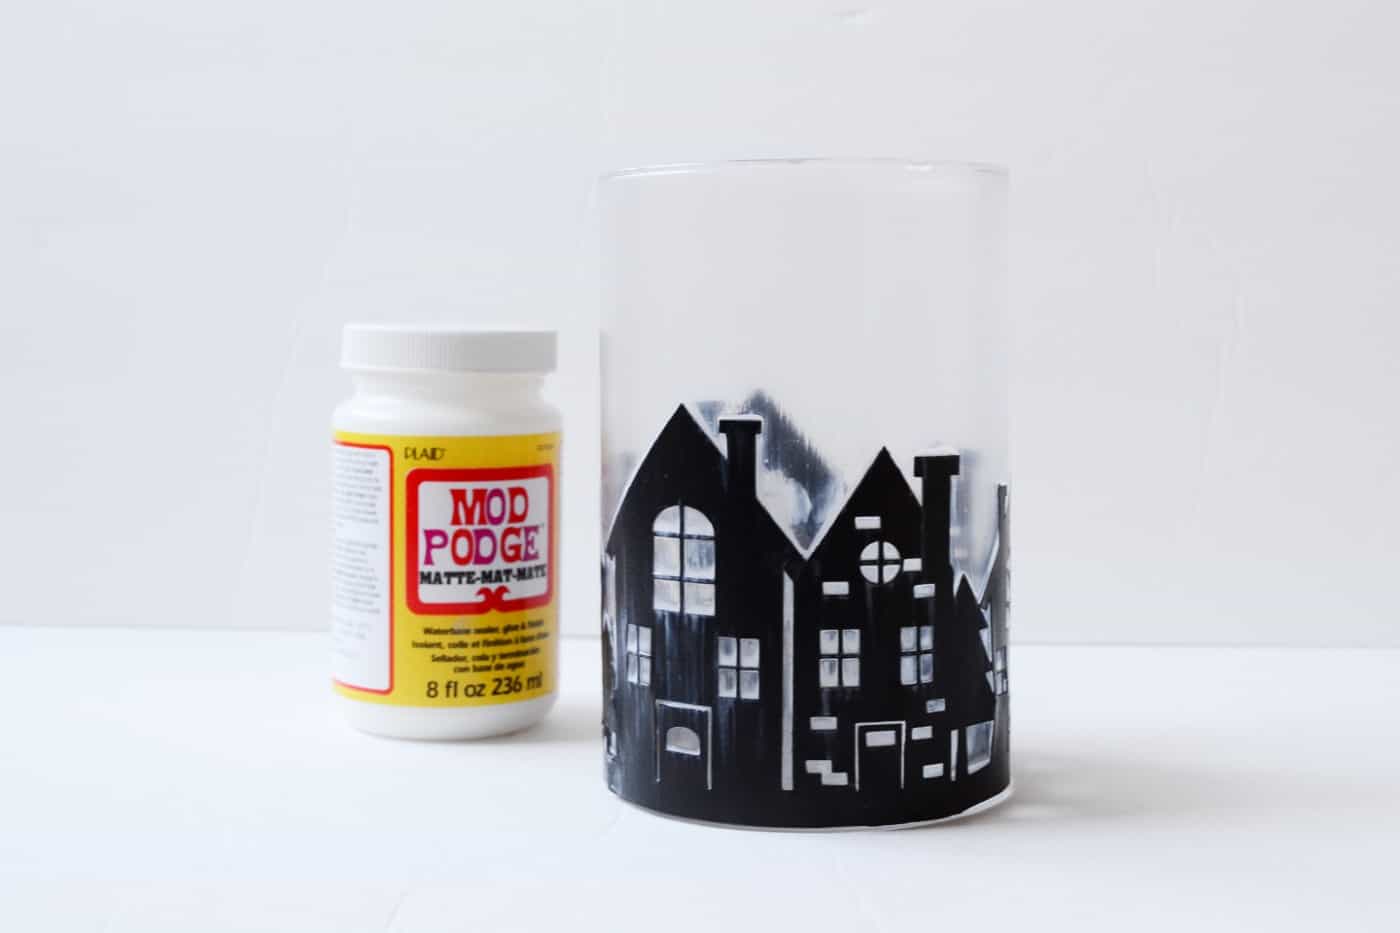
Once done cutting, adhere it to the vase with some Mod Podge Matte, and then coat it with another layer after everything has been stuck on. Wait for that to dry.

After it dries, it’s time to add some fun sparkles! I used Sparkle Mod Podge to create the effect by brushing the sparkly Mod Podge only on the bare areas (where there is no black). A few layers would be great as you want to build up the sparkle effect.
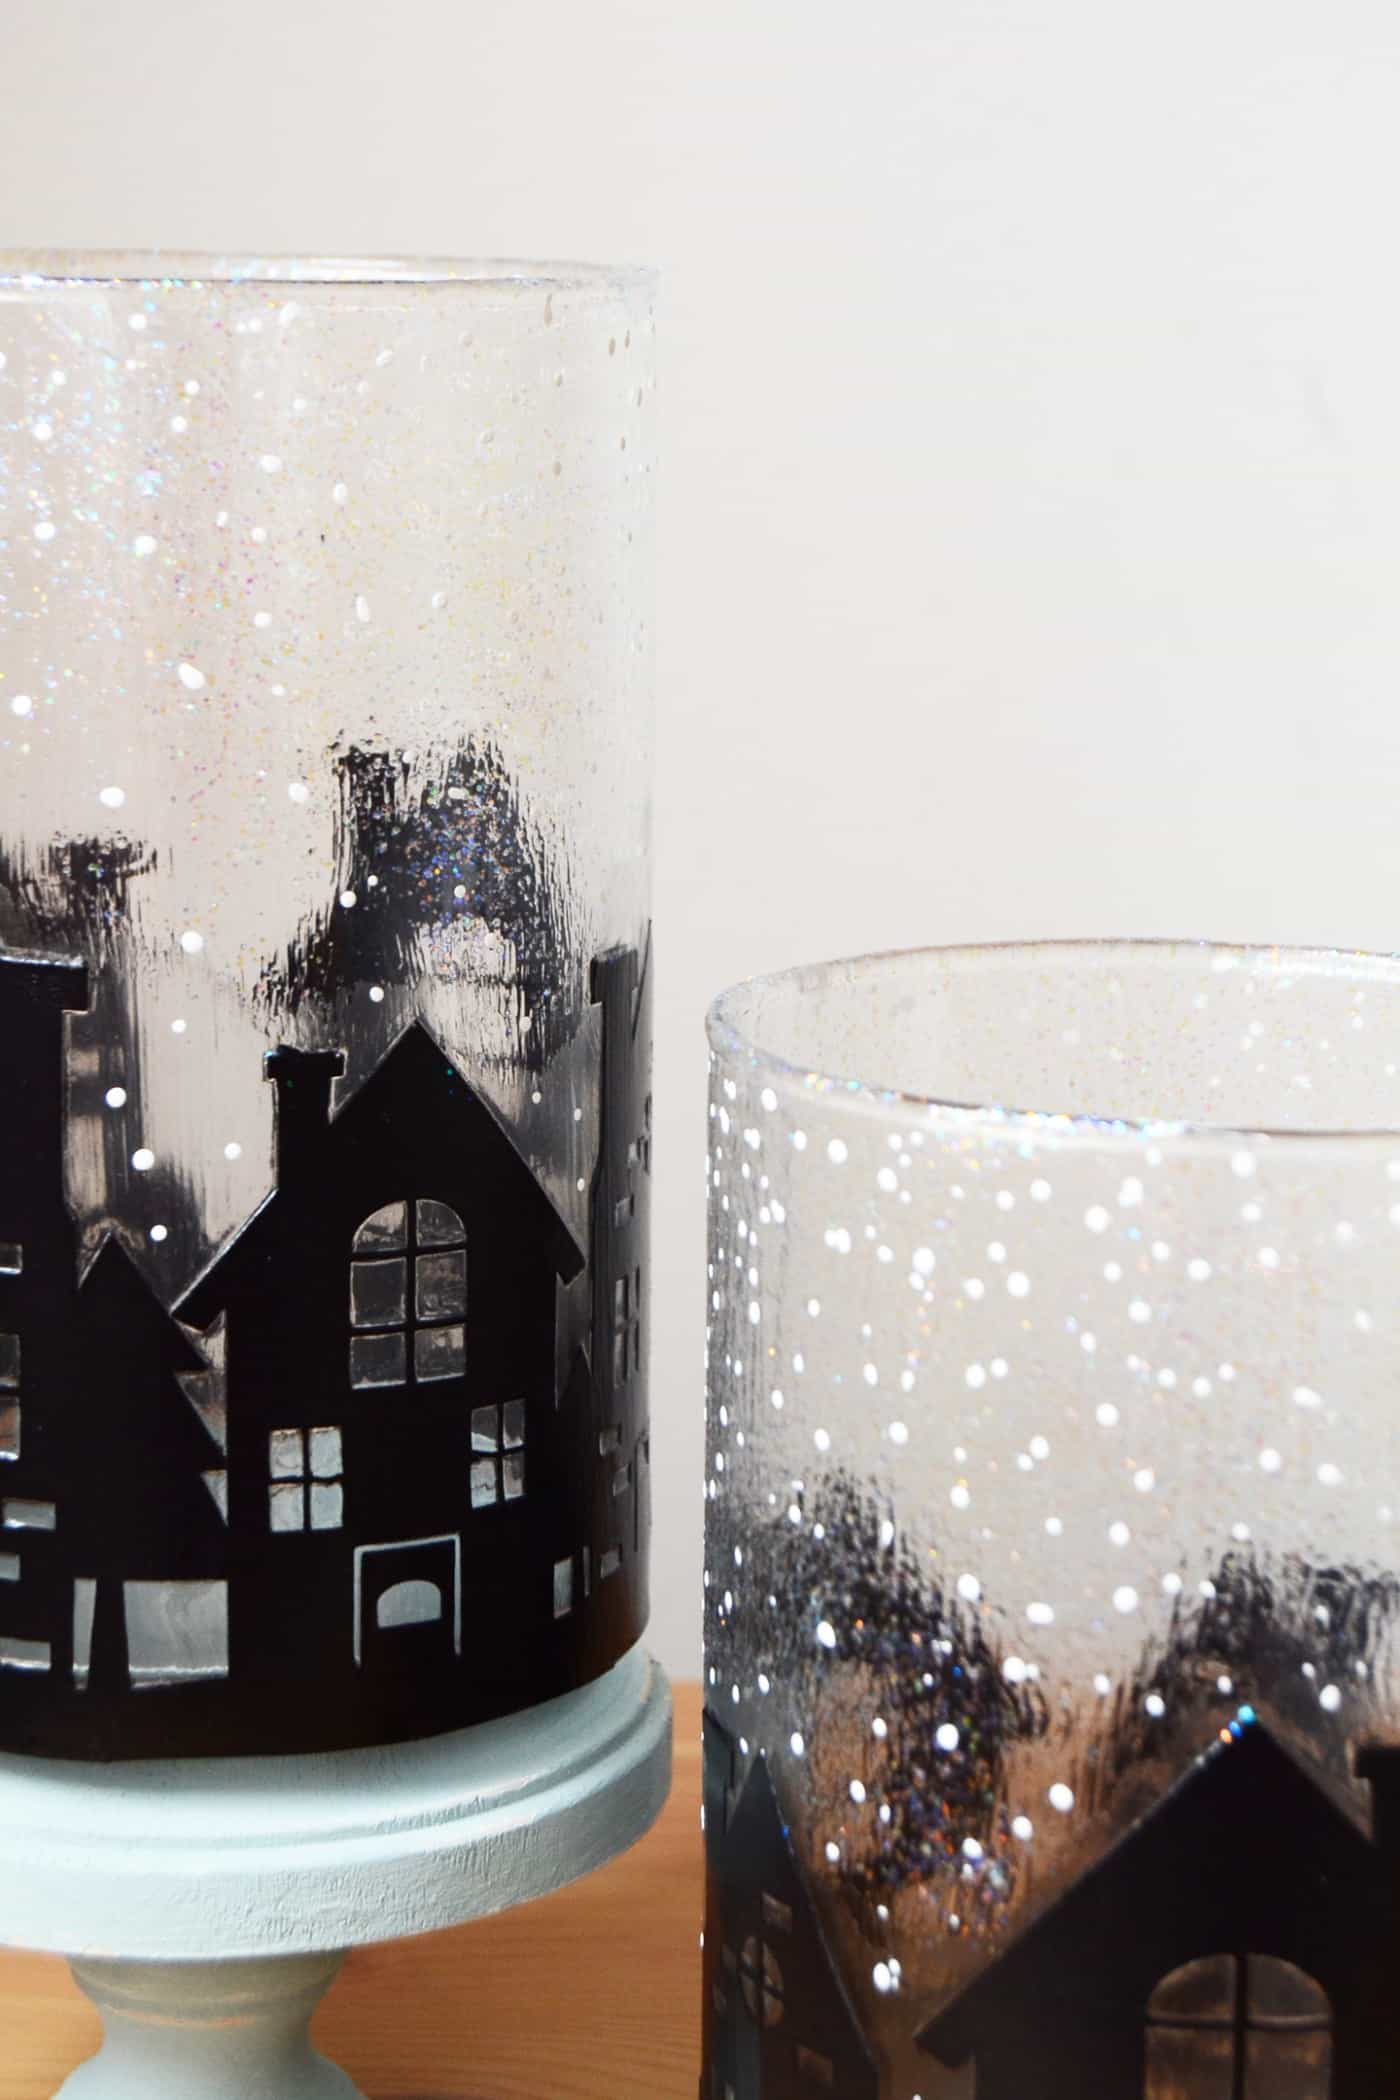
Last but not the least, I added some snow detail using a ball tool and some acrylic paint. This would be the most time-consuming part but I swear it’s easy, specially if you’re watching a funny Christmas movie 😛 You can also do it with the end of a paintbrush.
Once that is dry, add a coat of Hard Coat Mod Podge to seal everything and you are done!
Stuff the inside of your vase decor with some homemade treats or even some chocolates and a candy cane and you’re ready to give it to your friends and co-workers!
Tip: a tea light or small candle inside this looks sooooo awesome. So have fun and create this easy gift idea for friends and family.
Don’t forget to check out my blog for more ideas and printables! Happy crafting, friends!
Looking for some other winter projects to float your boat? Try these:
Believe Wood Star • Chalkboard Trees • DIY Christmas Village • Fabric Christmas Bowl • Frosted Mason Jar Luminaries • Gnome Wood Gift Tag • JOY Plaque • Peace Wood Decor • Snowball Lights • Snowman Votive • Snowman Jar • Tree Mantel Decor • Whimsical Wood Trees • Wood Trees with Book Pages • Yarn Wrapped Trees


Can you provide a template for these houses?
Hi Julia! This is art from Silhouette . . . so we can’t reproduce as it is copywritten. However you can search “house silhouette” on Google and find something you like and cut out! 😀
love this idea. Thank you for sharing it. Would also be a great gift for those winter birthdays in January and February.
That’s a great idea . . . as I am one of those January birthday people 😀
Love love this project. But wonder if you could help. I am trying to duplicate this and I have a silhouette! But every time I try to add the extra homes I can not get the to weld to the main housing unit. So when it cut they are always separate. I have tried to weld them but then when I do I lose all the window and trees. Help!!!!!!
Hi Peggy! I got an answer from Aki: “The trick is to release compound path and then weld the main outlines, before making compound path again. I’m pretty sure that’s what I did – trying to remember off the top of my head since I’m in the US visiting my mom and no access to silhouette studio program since I left my laptop at home 🙂 please let me know if it works for her!”
I love this. Your projects are always brilliant and achievable! I also don’t have a Silhouette and am a crappy drawer but I’ll find a way. T-light is what I would put in it.?
SO cute! I don’t have a Silhouette, but I love this concept so much.
Rose if you don’t have a Silhouette, I think it would be relatively easy to do with black cardstock and by designing your own template and using an X-Acto to cut out the details! At least that’s what I would do 😀