Make a DIY family reunion centerpiece with Mod Podge Photo Transfer! A perfect rustic touch for gatherings, weddings, or home decor.
I’m on a Mod Podge photo transfer medium binge! After my breakfast tray project last month, my mind started percolating with other ways I could use MP transfer.
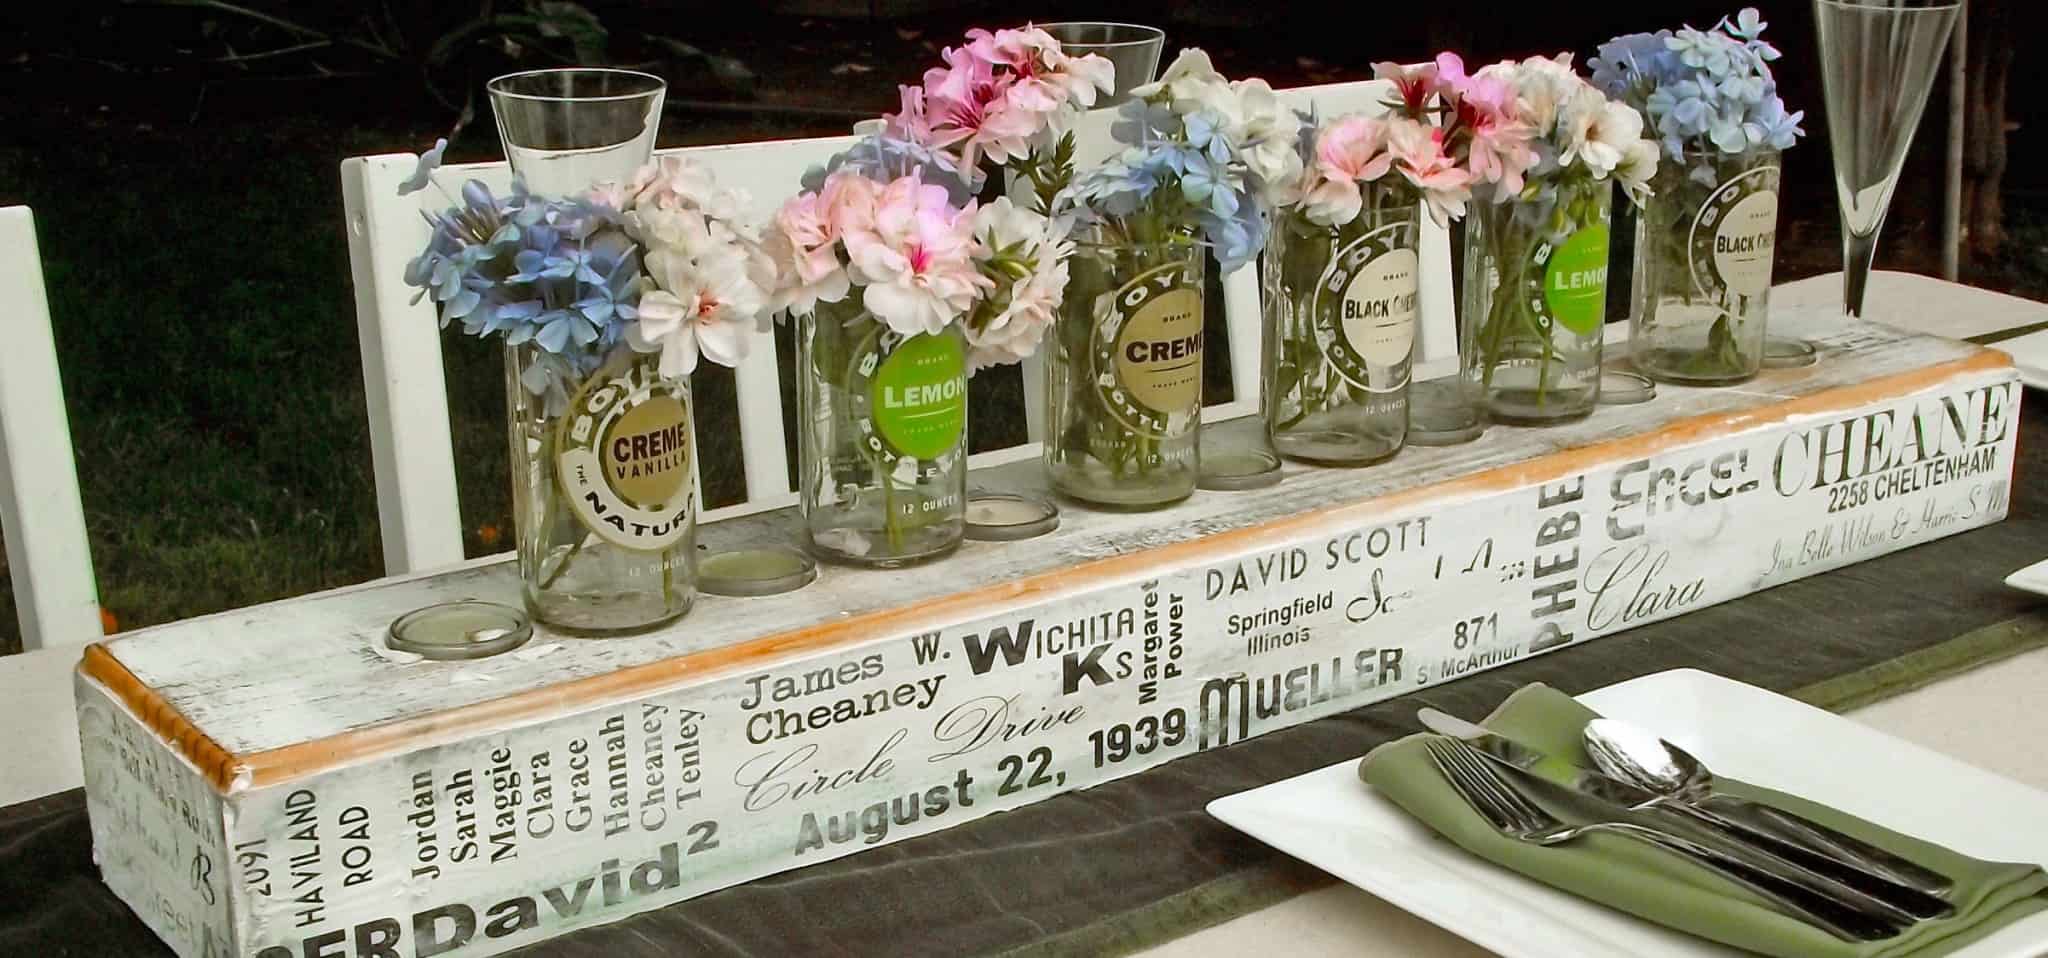
My Etsy shop and blog are pretty much all about home, family, and memories. I hit on this idea for a family reunion centerpiece (that could also be used for an anniversary, wedding, unique home decor . . . pretty much any celebration).
I thought it would be a fun way to celebrate a family’s history with names, street addresses, wedding dates, etc. I made it, I liked it, and photographed it. Then, as often happens, I thought, “Wait! I have a better idea!”
And once I started on the better idea, I suddenly realized, “Wait! I could do it this way!!”
Such is the nature of my creative process.

The issue is that in this instance, my creative process had a deadline because of the date of the party. So what follows is a tutorial on how I made my family reunion centerpiece, along with tips on how to augment it to make your own version.
At the end of this wood craft there’s a brainstorm of other variations that I hope you will enjoy. This project would look wonderful with rustic or farmhouse decor – and after the reunion it makes a beautiful decor piece. Here’s what you’re going to need!
- 4 x 6′ piece of lumber cut to 36″ long
- Wood stain
- Acrylic paint – white
- Mod Podge Photo Transfer Medium
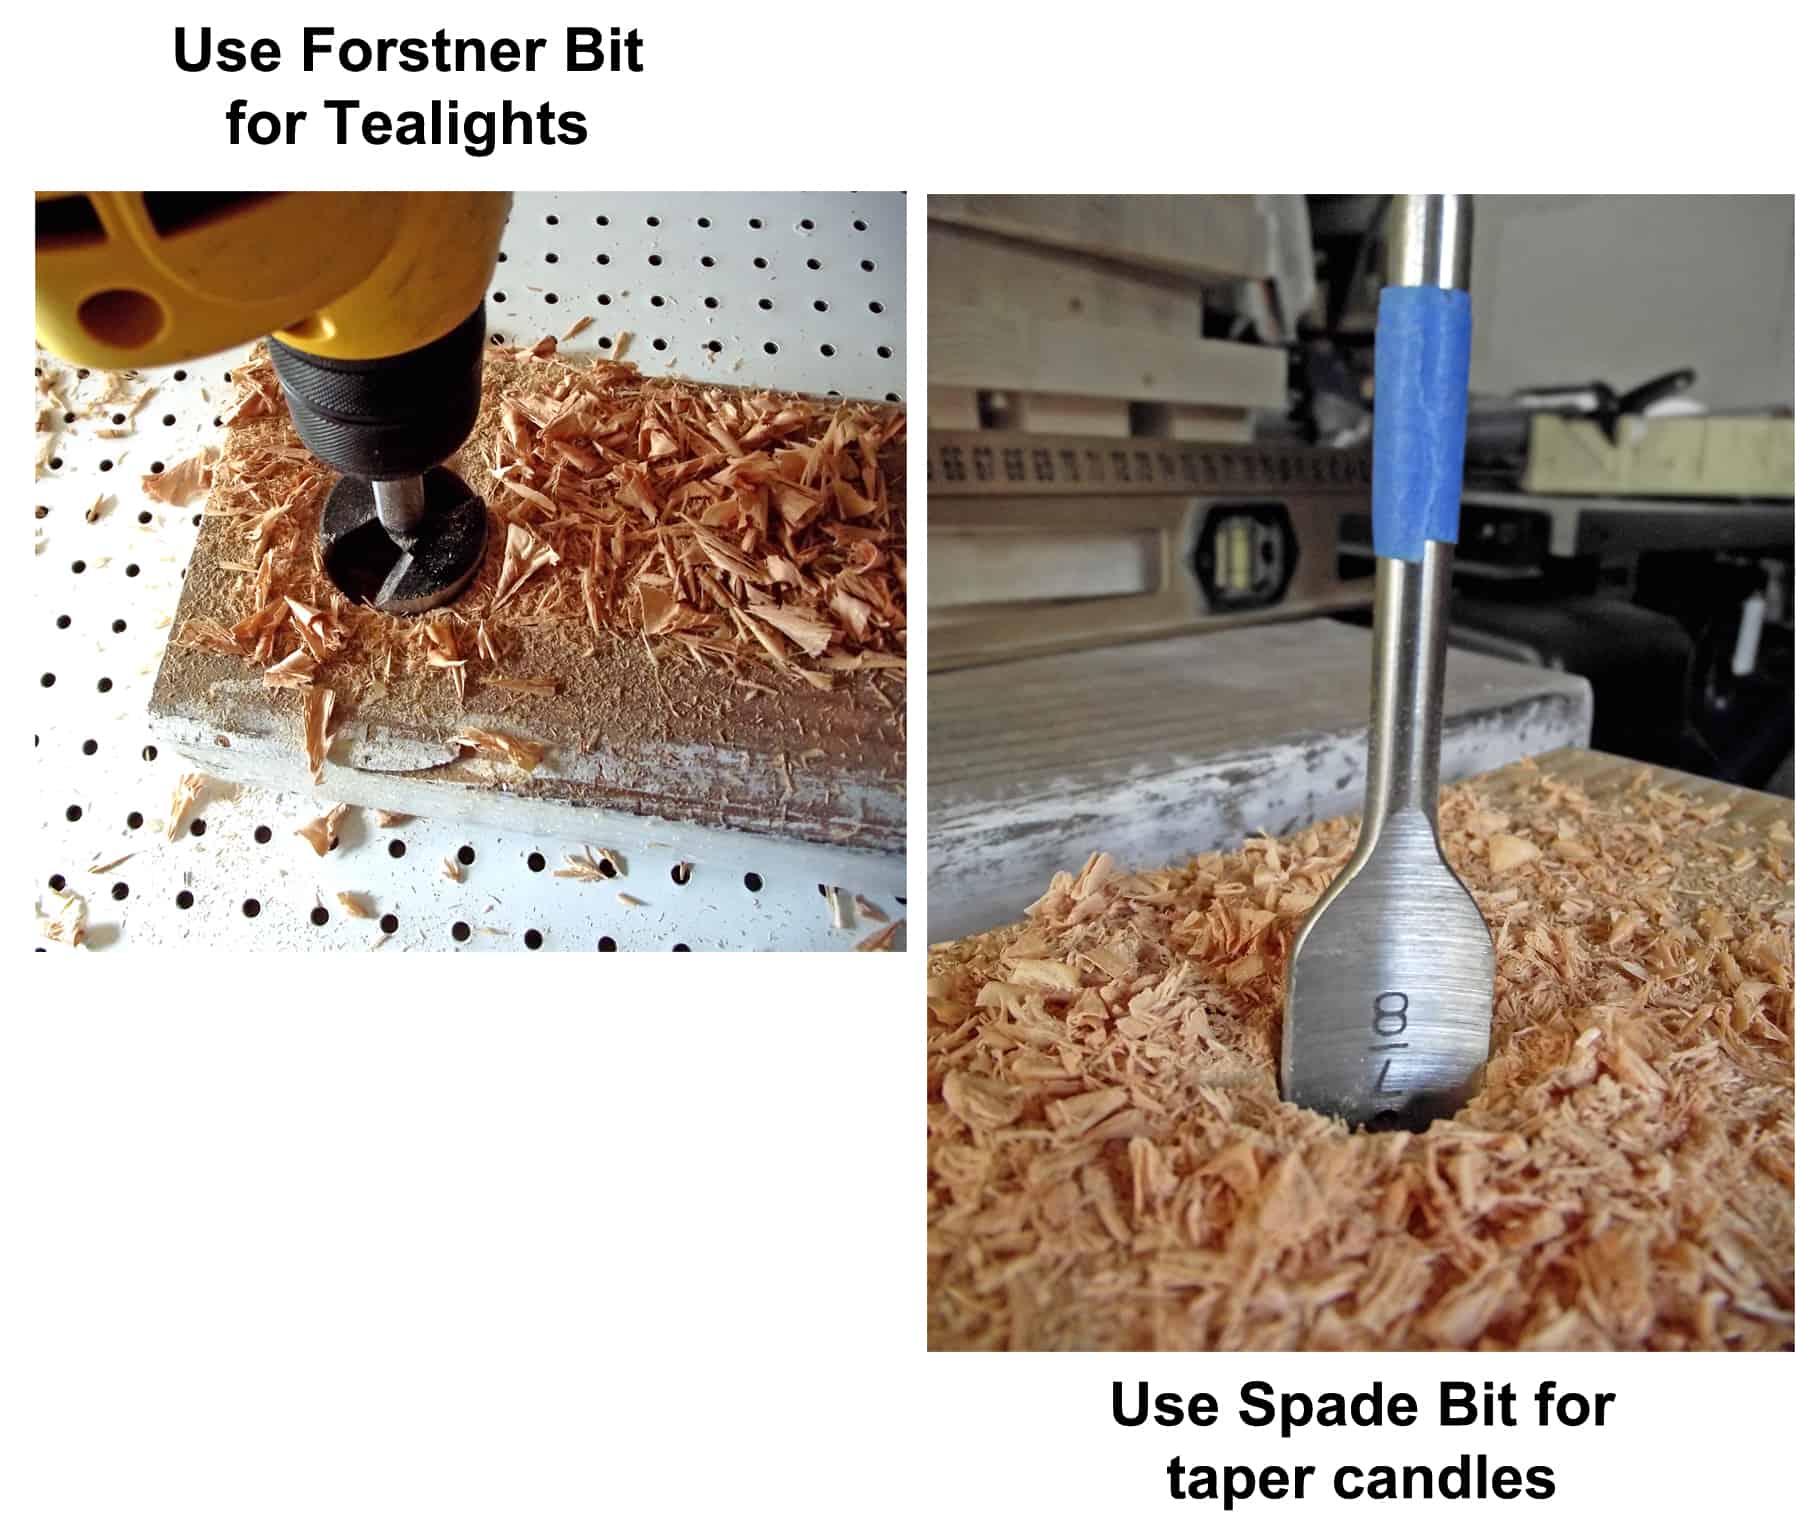
- Electric Drill with 2″ Forstner bit (to make it a tealight holder) or a 7/8″ Spade bit (for tapers)
- Sandpaper
- Laserjet copies of the family names, reversed
- Glass tealight holders (such as those from IKEA) or tapers
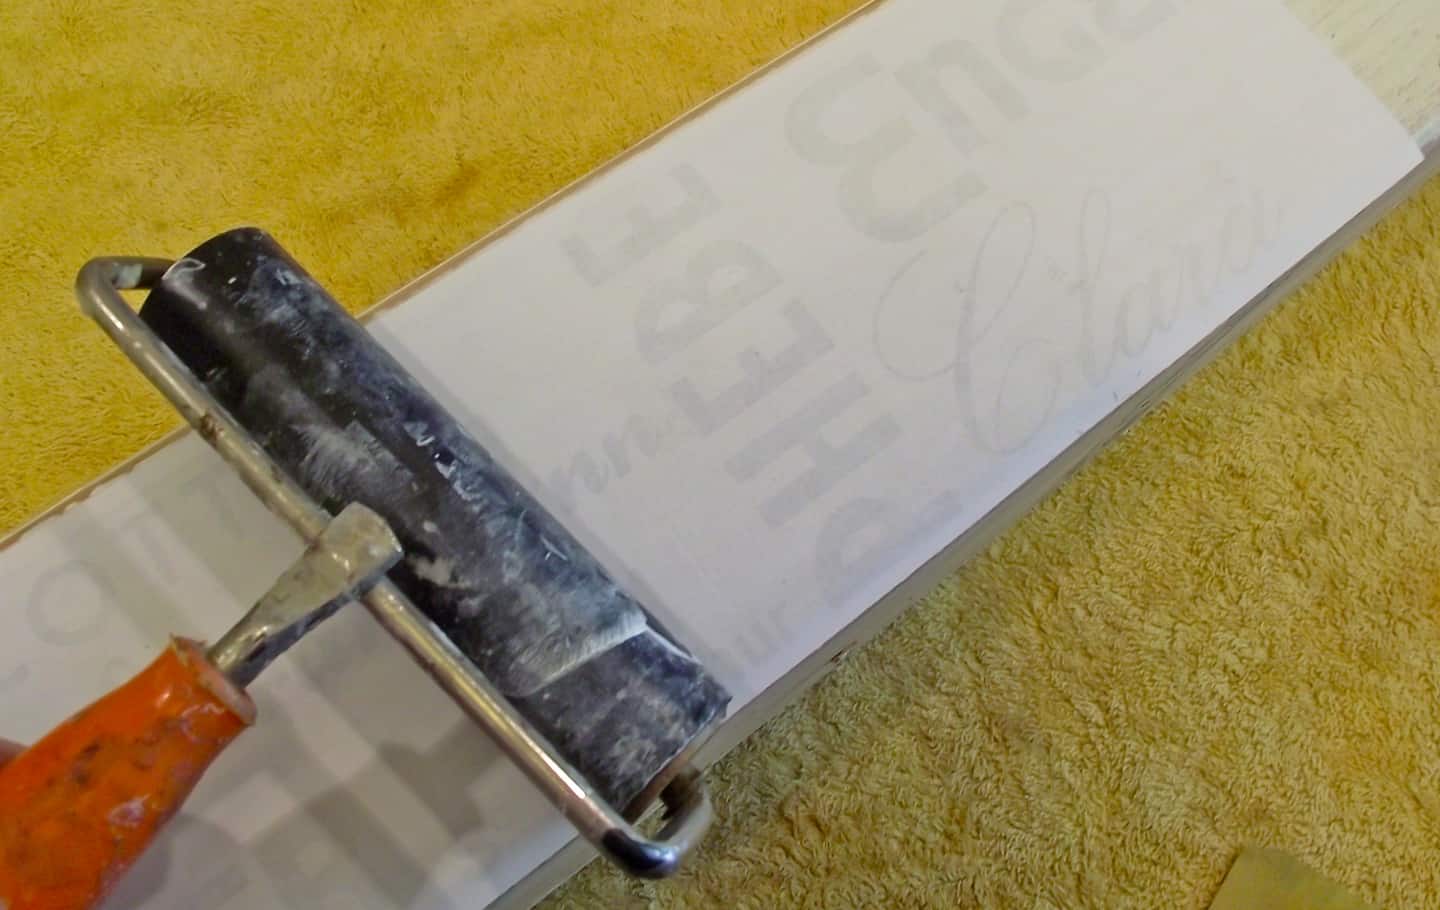
- Roller/brayer (optional)
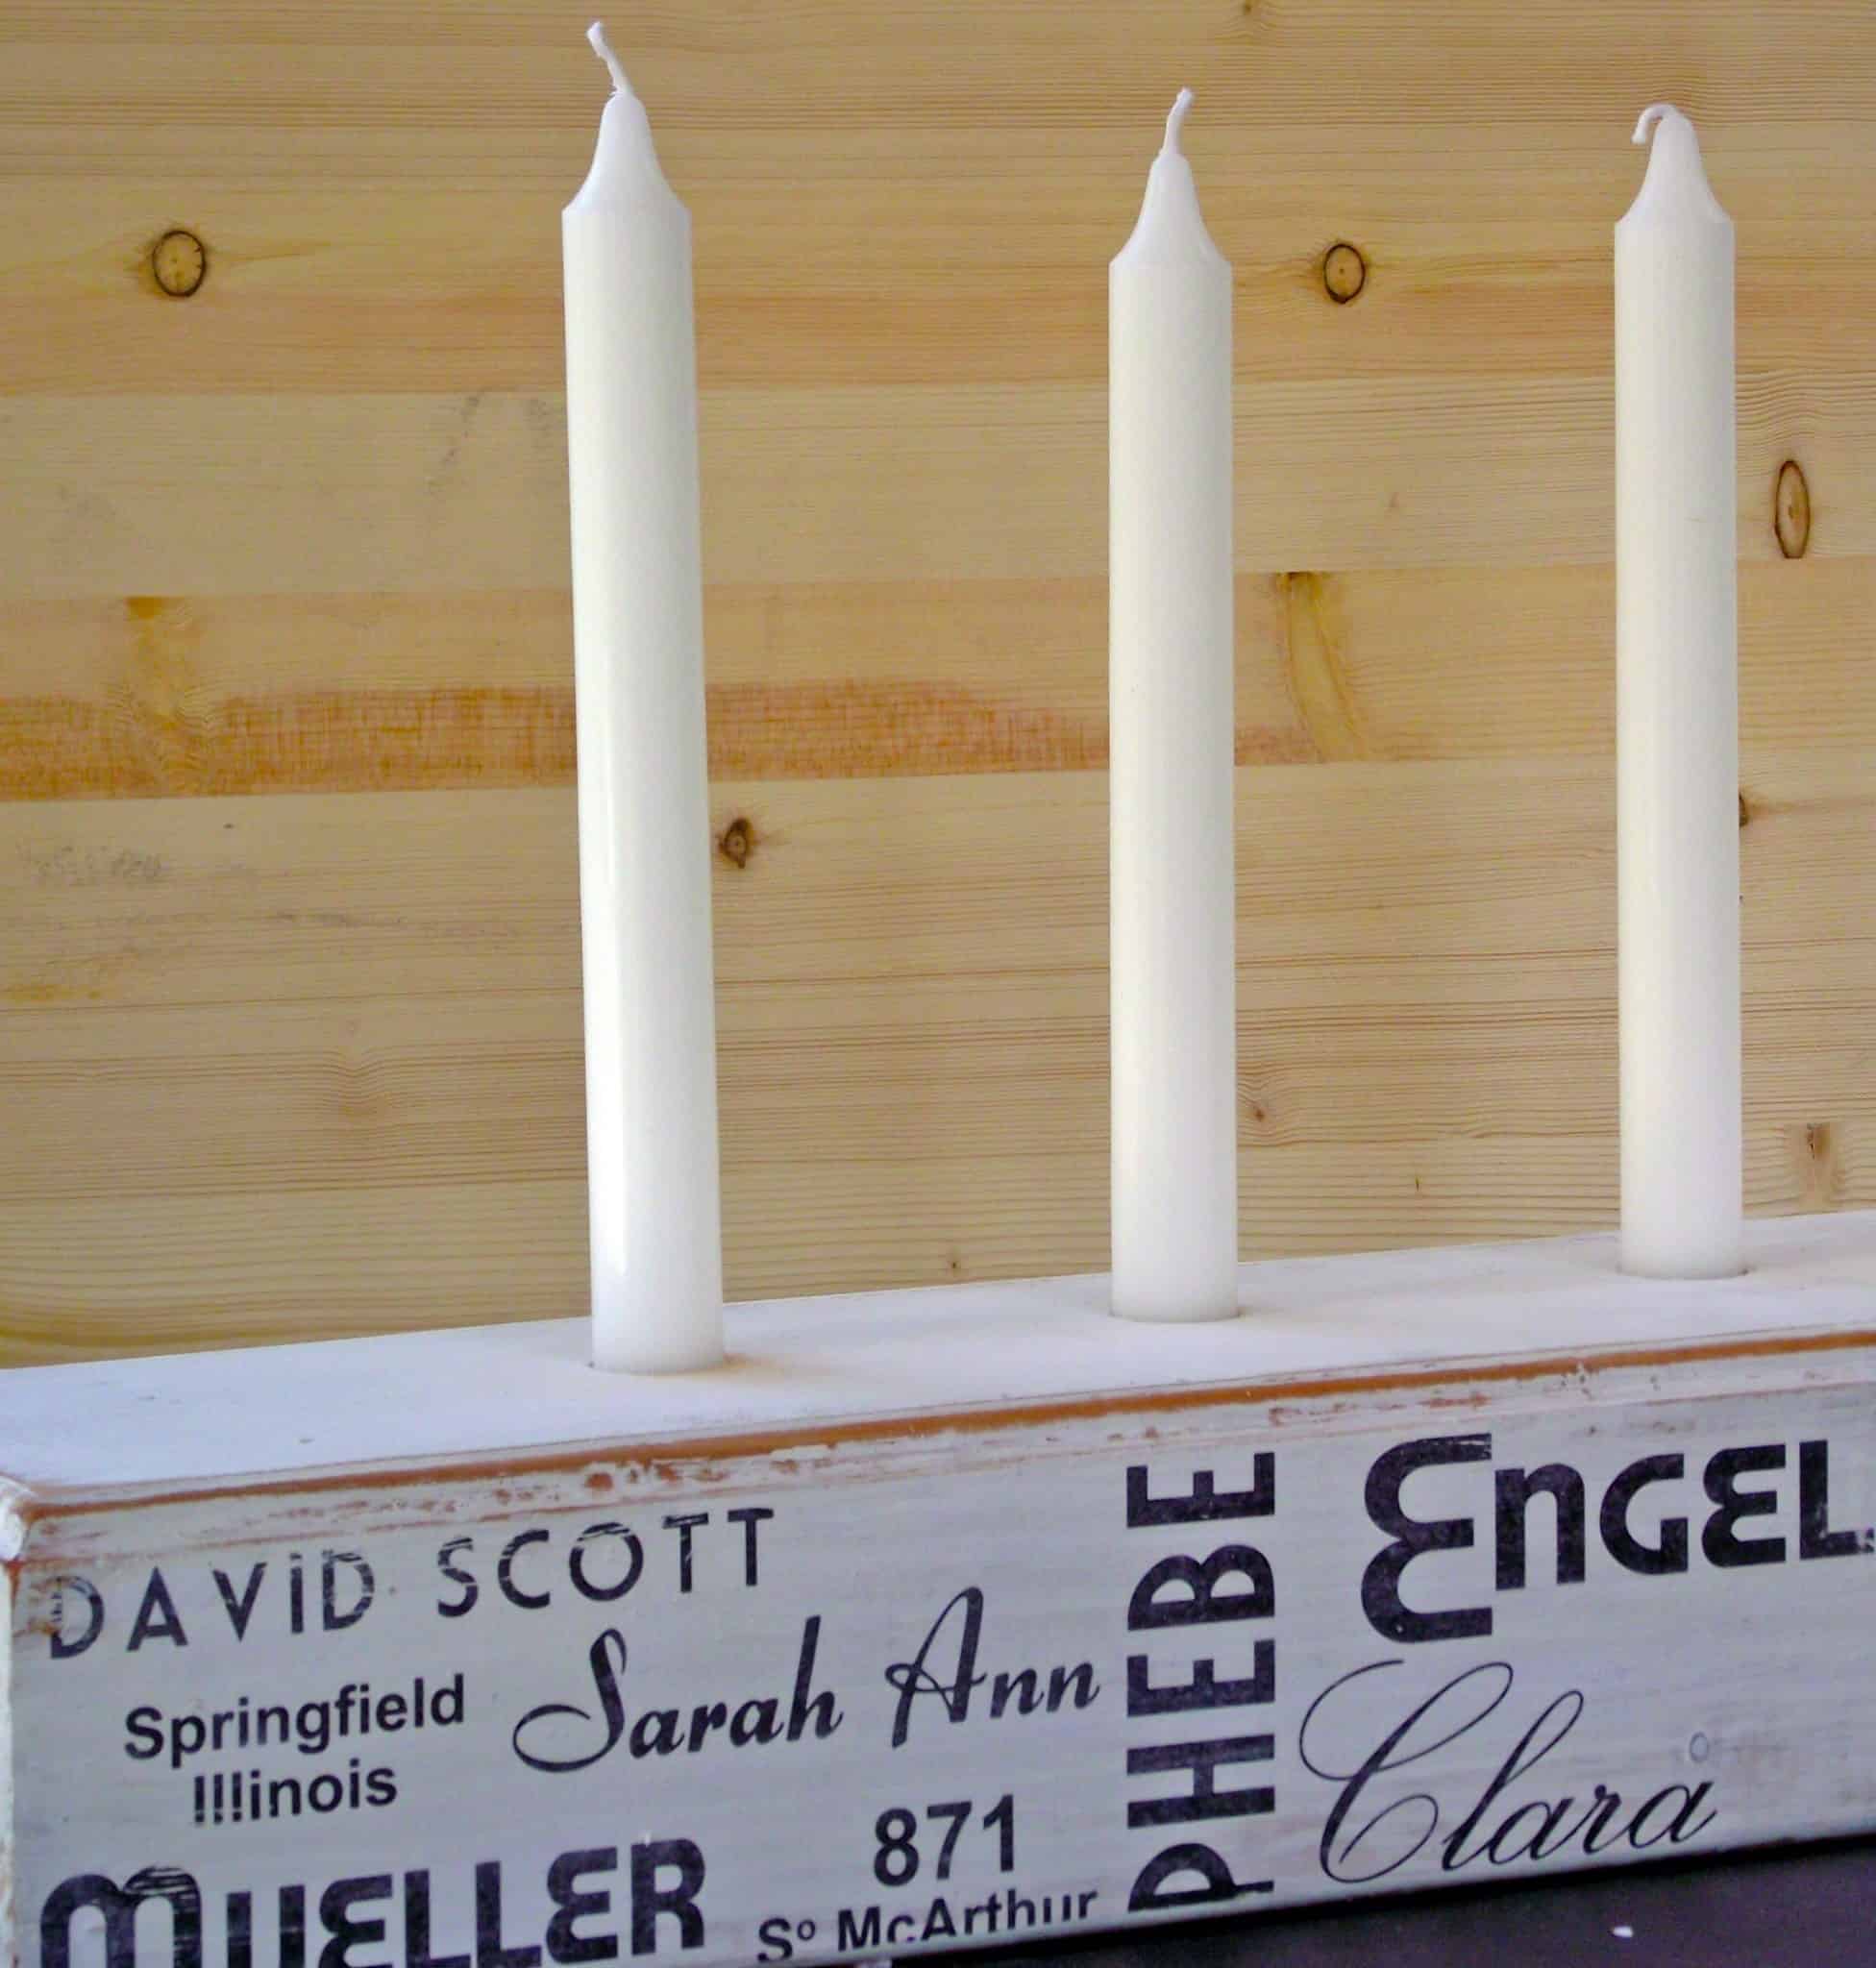
Here is version with tapers rather than tea lights:
Get the printable how to for this project below:

DIY Family Reunion Decor
Equipment
- Electric drill including a 2" Forstner bit (to make it a tealight holder) or a 7/8" Spade bit (for tapers)
- Brayer optional
Materials
- 1 piece 4' x 6' lumber cut to 36" long
- Wood stain
- Acrylic paint white
- Mod Podge Photo Transfer Medium
- Sandpaper
- Laser copy prints of the family names reversed
- Glass tealight holders such as those from IKEA or tapers
Instructions
- Clamp or brace the piece of wood securely to your work table before you drill and wear eye protection. Drill holes into the wood using the right bit (depending on the candles or votive holders you're going to use).
- I lightly stained the edges and top of the wood and then painted the whole piece with flat, white latex paint. Once that had dried I sanded the edges and top for a slightly aged look.
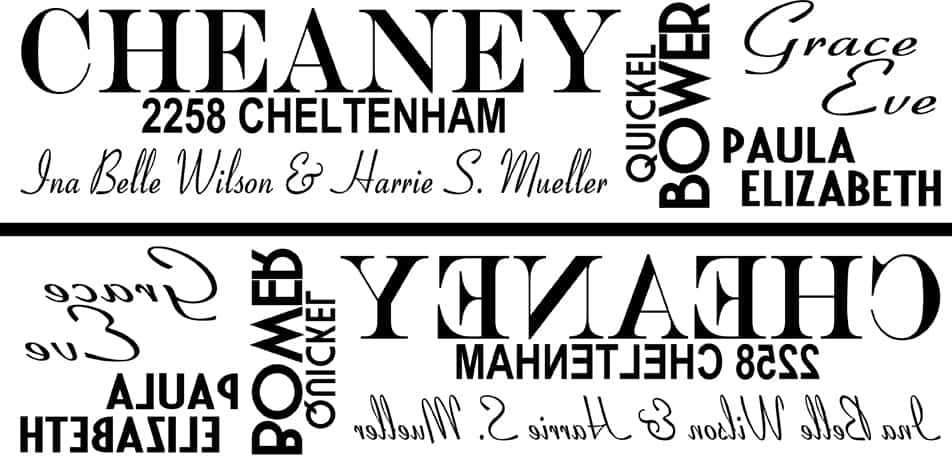
- I designed my text to fit on legal sized paper (14" long by 3" high) using the Word Art feature in MSWord. With WordArt, you can resize and move the text around to create any layout you'd like.
- I laid down a good coat of photo transfer medium on the face of the wood, then placed my paper on top. To ensure a good transfer, I used my fingers and the roller to press the paper down into the medium.
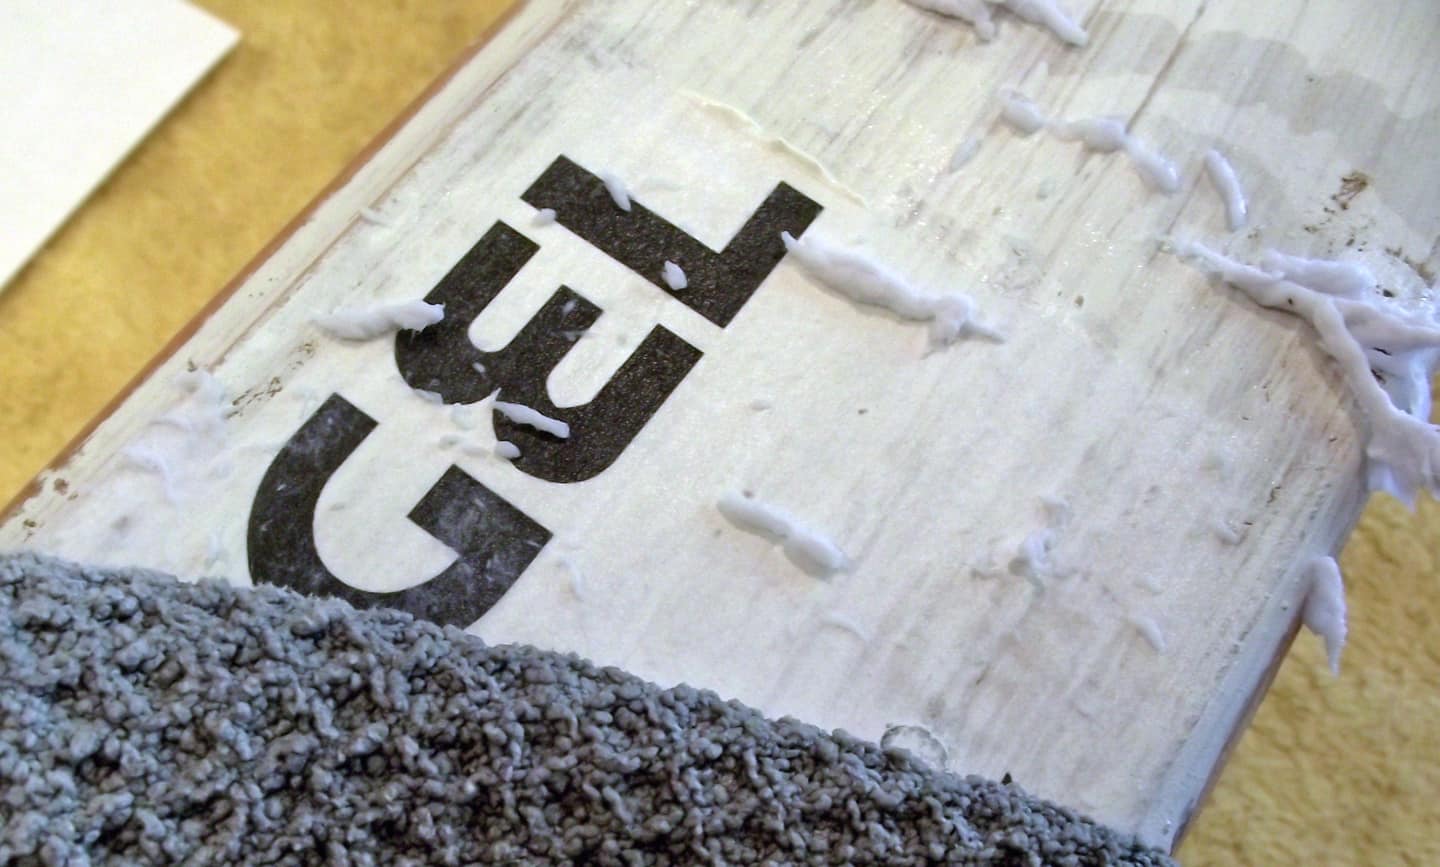
- After letting it dry overnight, I soaked the paper with a damp rag and rubbed it away. I used the transfer medium because, as you can see, even though a thin layer of paper remains you can see the wood and the texture of the wood through it.
Notes
Post Project Thoughts
- I thought it would be cool to use the same technique, but on medium-sized flower pots rather than wood. Each pot could be designated to a particular branch of the family and then they could be take-home gifts. OR perhaps small flower pots at each place setting with that person’s family names featured.
- You could do the same thing with smaller blocks. Put them together in the center of the table to make the centerpiece and then, when the party is over, everybody gets to take one home.
- The idea would also work for wedding table settings or rehearsal dinner favors.
- You could also incorporate family photos into the design for some visual variety.
I hope this sparks some ideas for your next family gathering. And, as always, I will monitor the comments section, so if you have any questions – fire away! Plus check out these other photo transfer ideas here:
Christmas Napkins • Image to a Wood Block • Inkjet Transfer • Photo Keychain • Photo Transfer to Canvas • Transfer Paper to Fabric • Transfer Photos to Canvas • Transfer Photos to Fabric • Transfer to Furniture • Transfer to Glass • Transfer to Metal