Glass tealight holderssuch as those from IKEA or tapers
Instructions
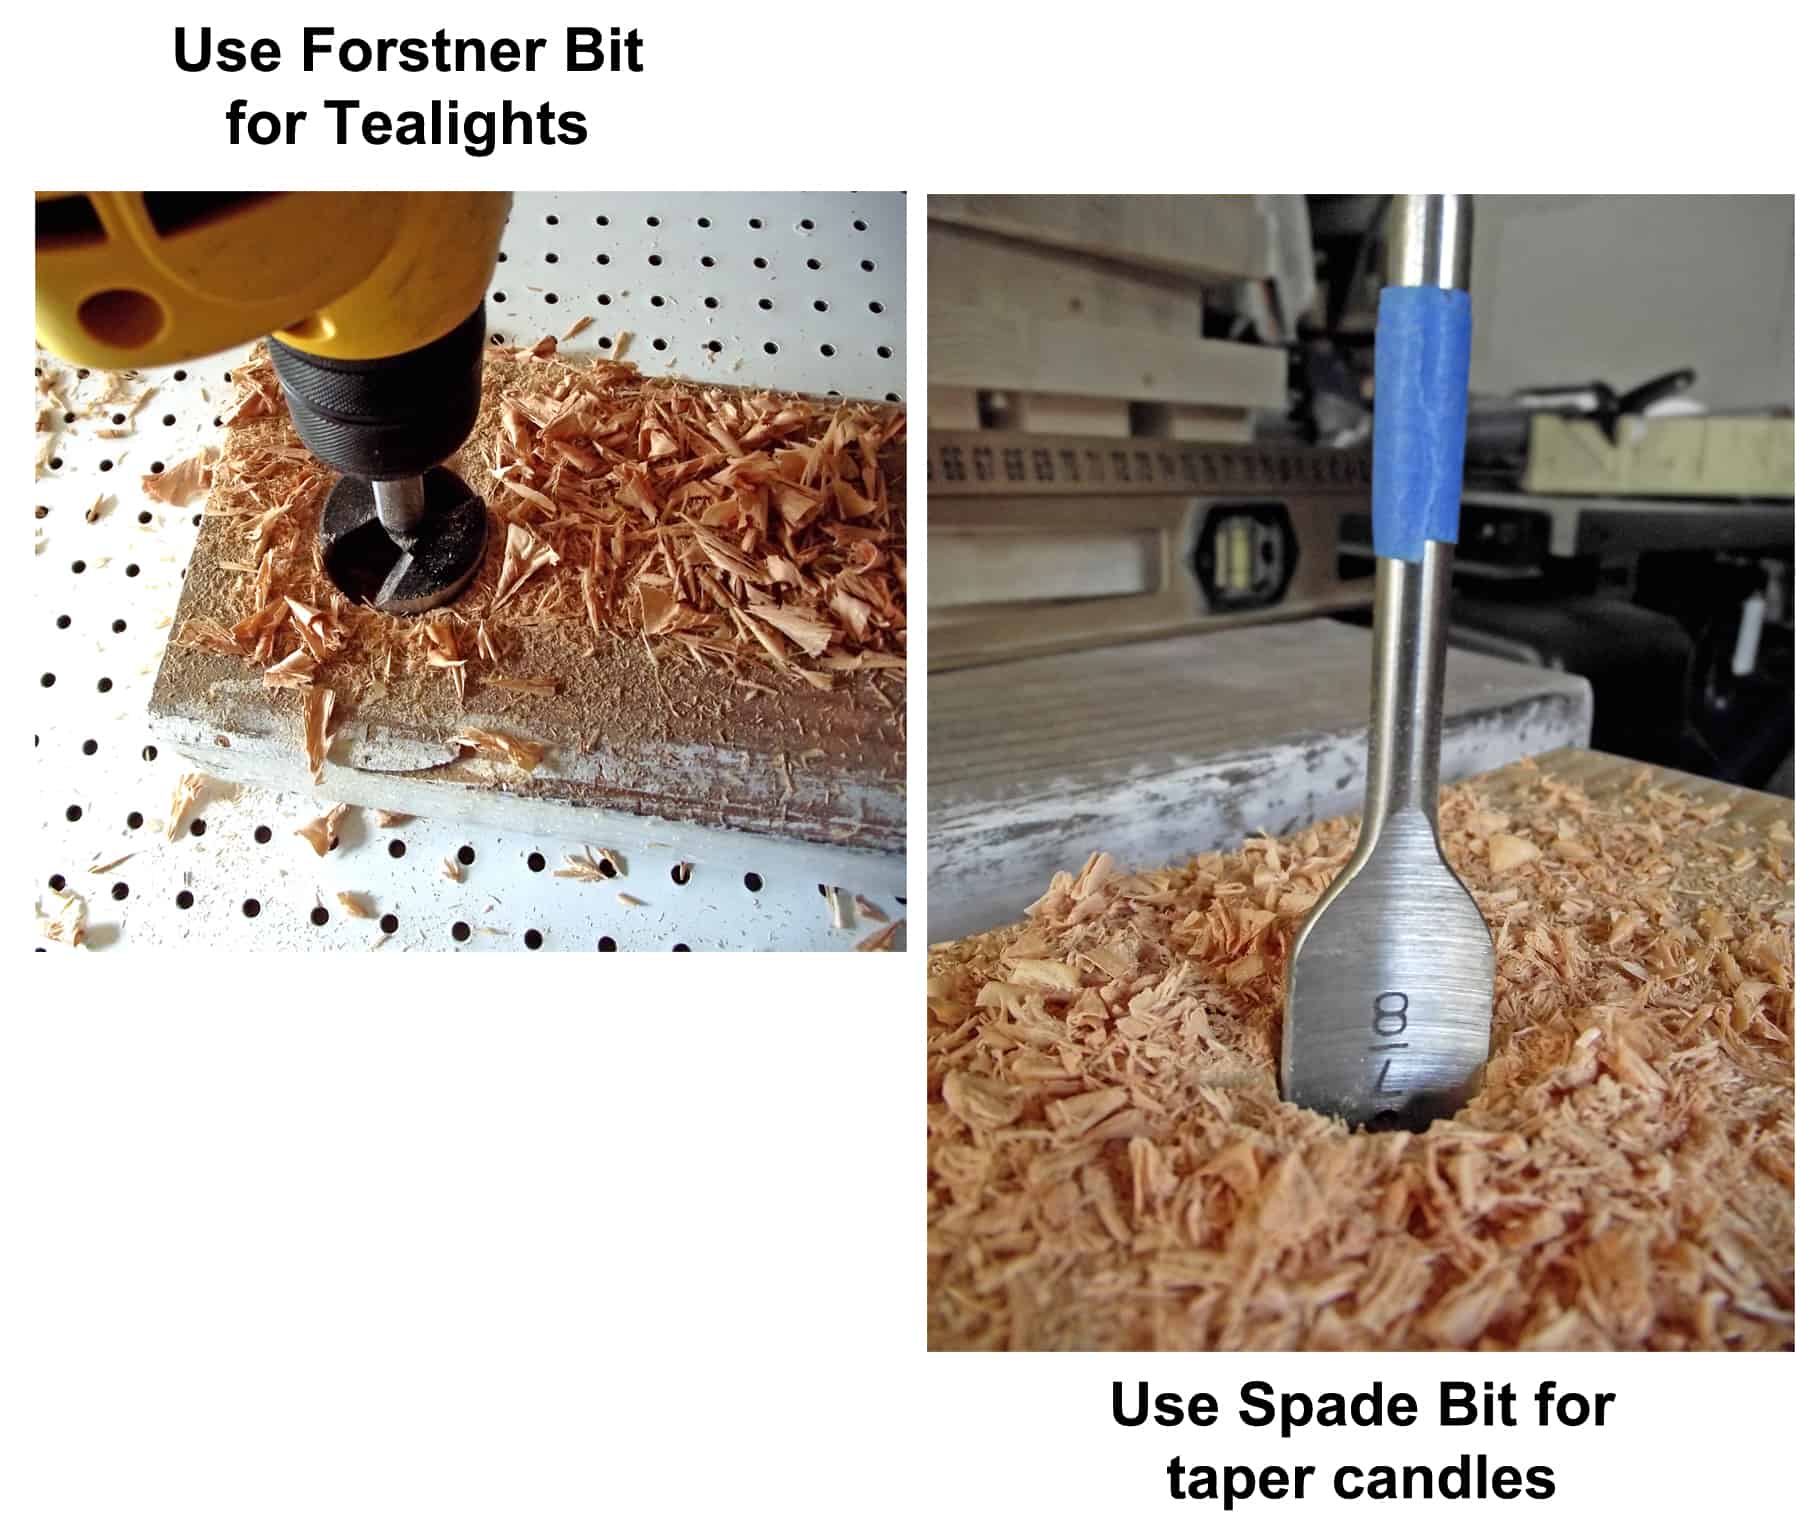
Clamp or brace the piece of wood securely to your work table before you drill and wear eye protection. Drill holes into the wood using the right bit (depending on the candles or votive holders you're going to use).
I lightly stained the edges and top of the wood and then painted the whole piece with flat, white latex paint. Once that had dried I sanded the edges and top for a slightly aged look.
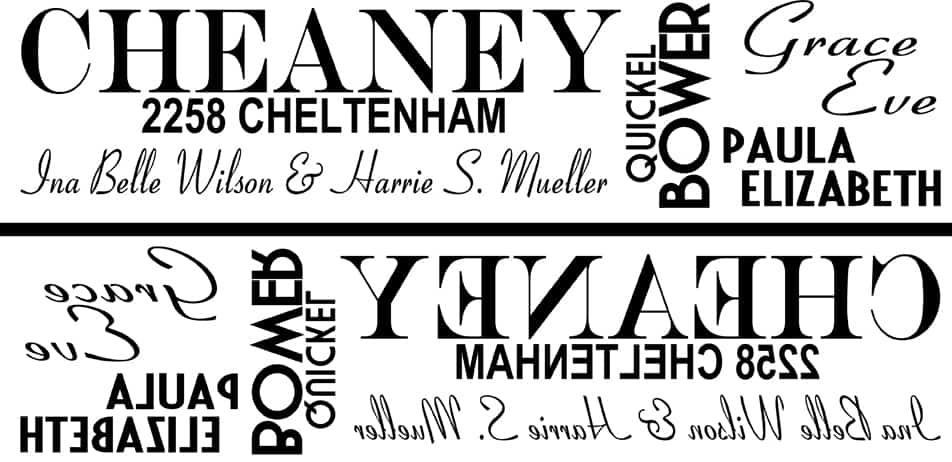
I designed my text to fit on legal sized paper (14" long by 3" high) using the Word Art feature in MSWord. With WordArt, you can resize and move the text around to create any layout you'd like.
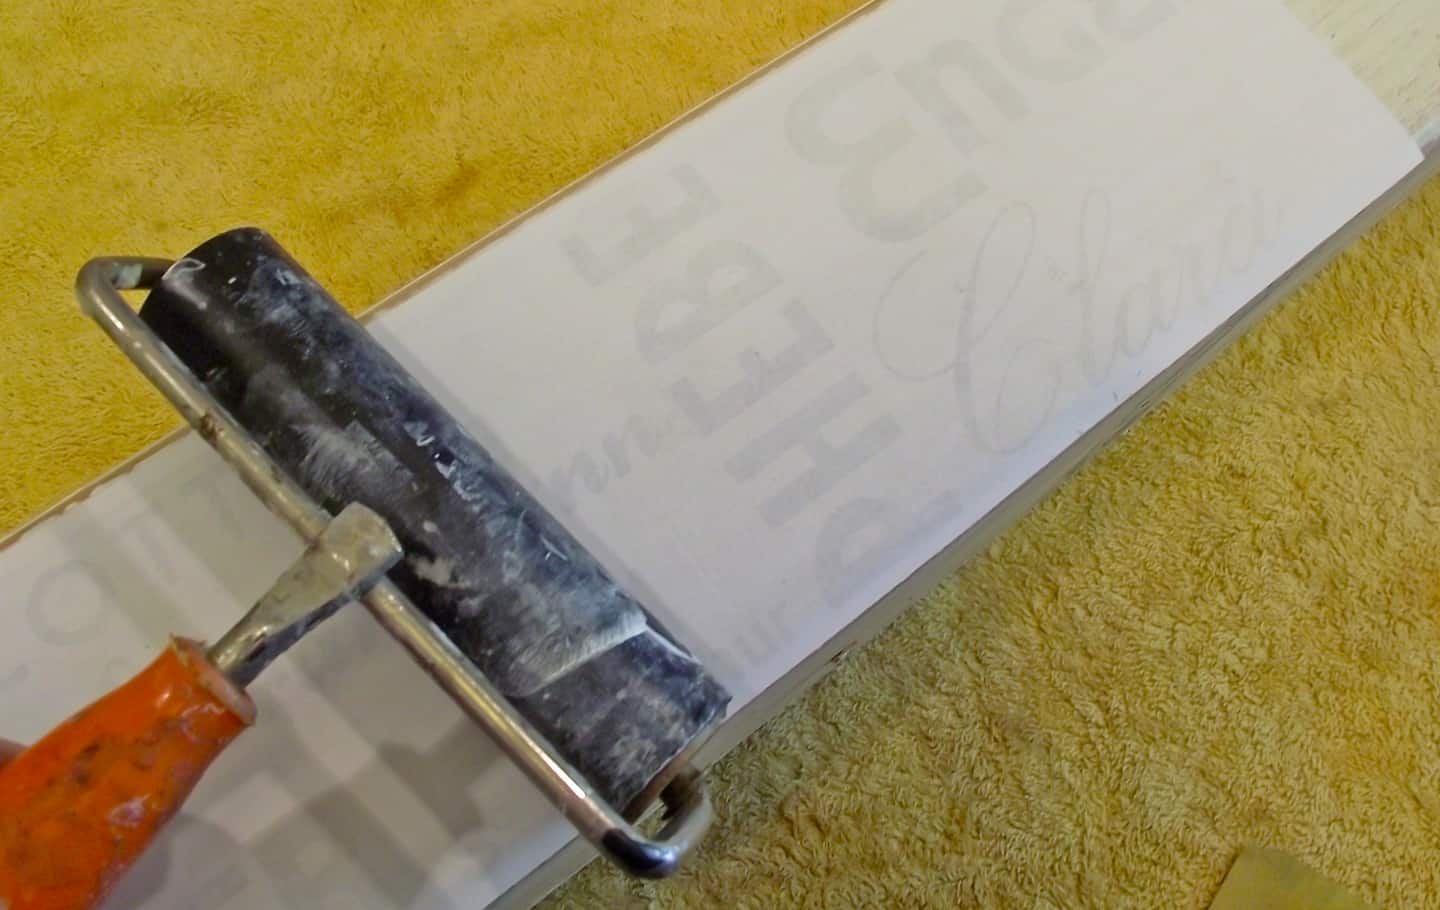
I laid down a good coat of photo transfer medium on the face of the wood, then placed my paper on top. To ensure a good transfer, I used my fingers and the roller to press the paper down into the medium.
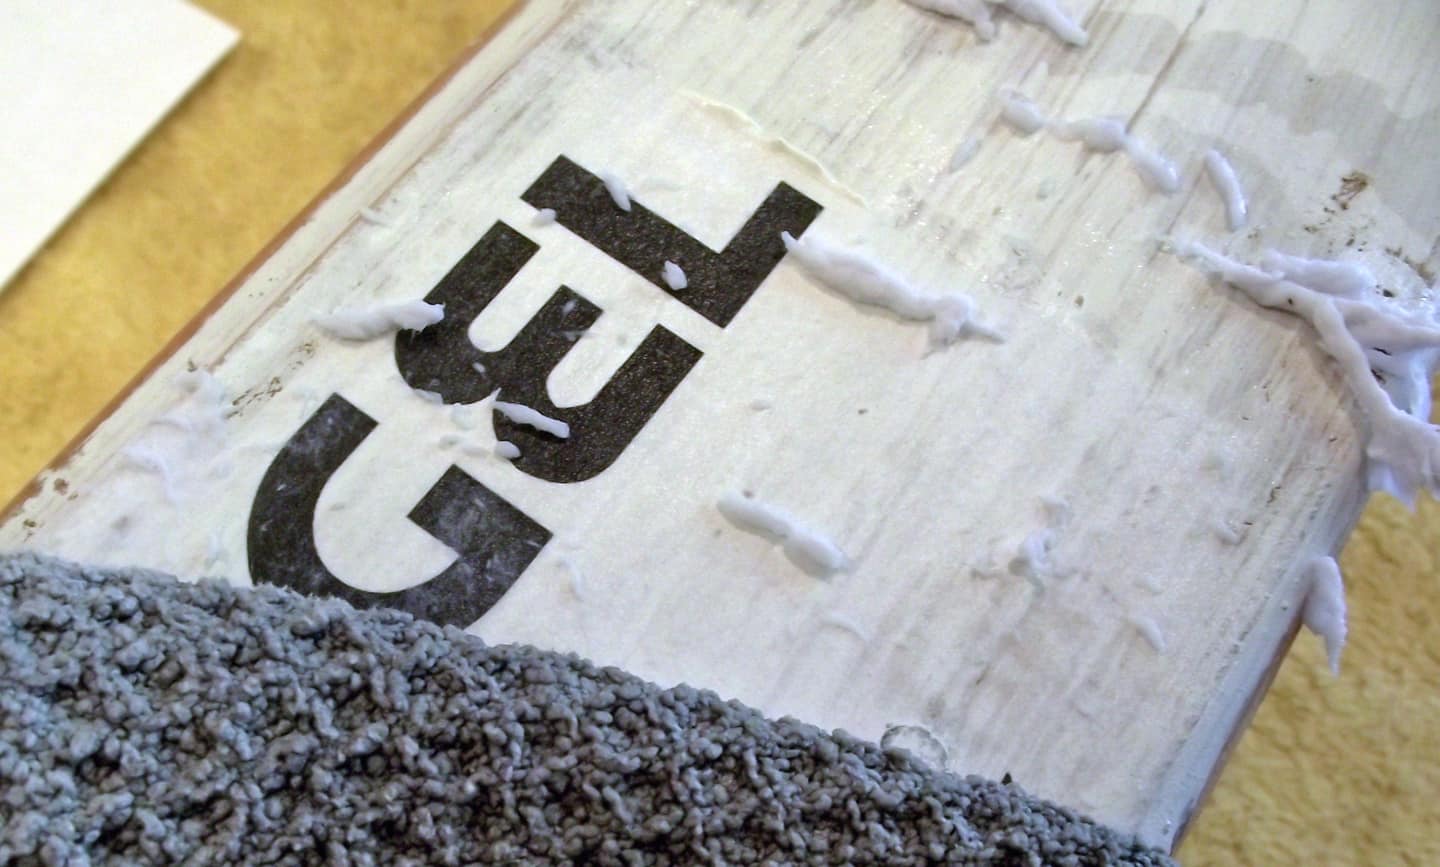
After letting it dry overnight, I soaked the paper with a damp rag and rubbed it away. I used the transfer medium because, as you can see, even though a thin layer of paper remains you can see the wood and the texture of the wood through it.
Notes
Step 1: To make sure you get all the candle holes drilled to the same depth, just mark the bit with a piece of painter's tape and drill down to that level every time.Step 3: I mixed fonts and styles and, once I had it all to my liking, I chose "flip horizontal" on the layout menu and flipped all the words backwards. I then printed it out on plain legal paper with a laser printer.It took several pieces of paper to get all the way around the centerpiece, and I had different design for each piece - here is a sample of what it looks like before and after I flipped it:I gussied up the edges of my wood with a quick pass with my small router, but I realize not everyone has those kinds of tools so it's a very optional option.