
Make adorable DIY pumpkin magnets with wood, paint, and Mod Podge! A quick, fun Halloween craft perfect for decorating or gifting.

There’s just something about a tiny pumpkin with a funny face that makes me ridiculously happy. Maybe it’s because they’re cute.
Maybe it’s because they don’t require scooping out pumpkin guts. Either way, these DIY pumpkin magnets are my new favorite fall craft!
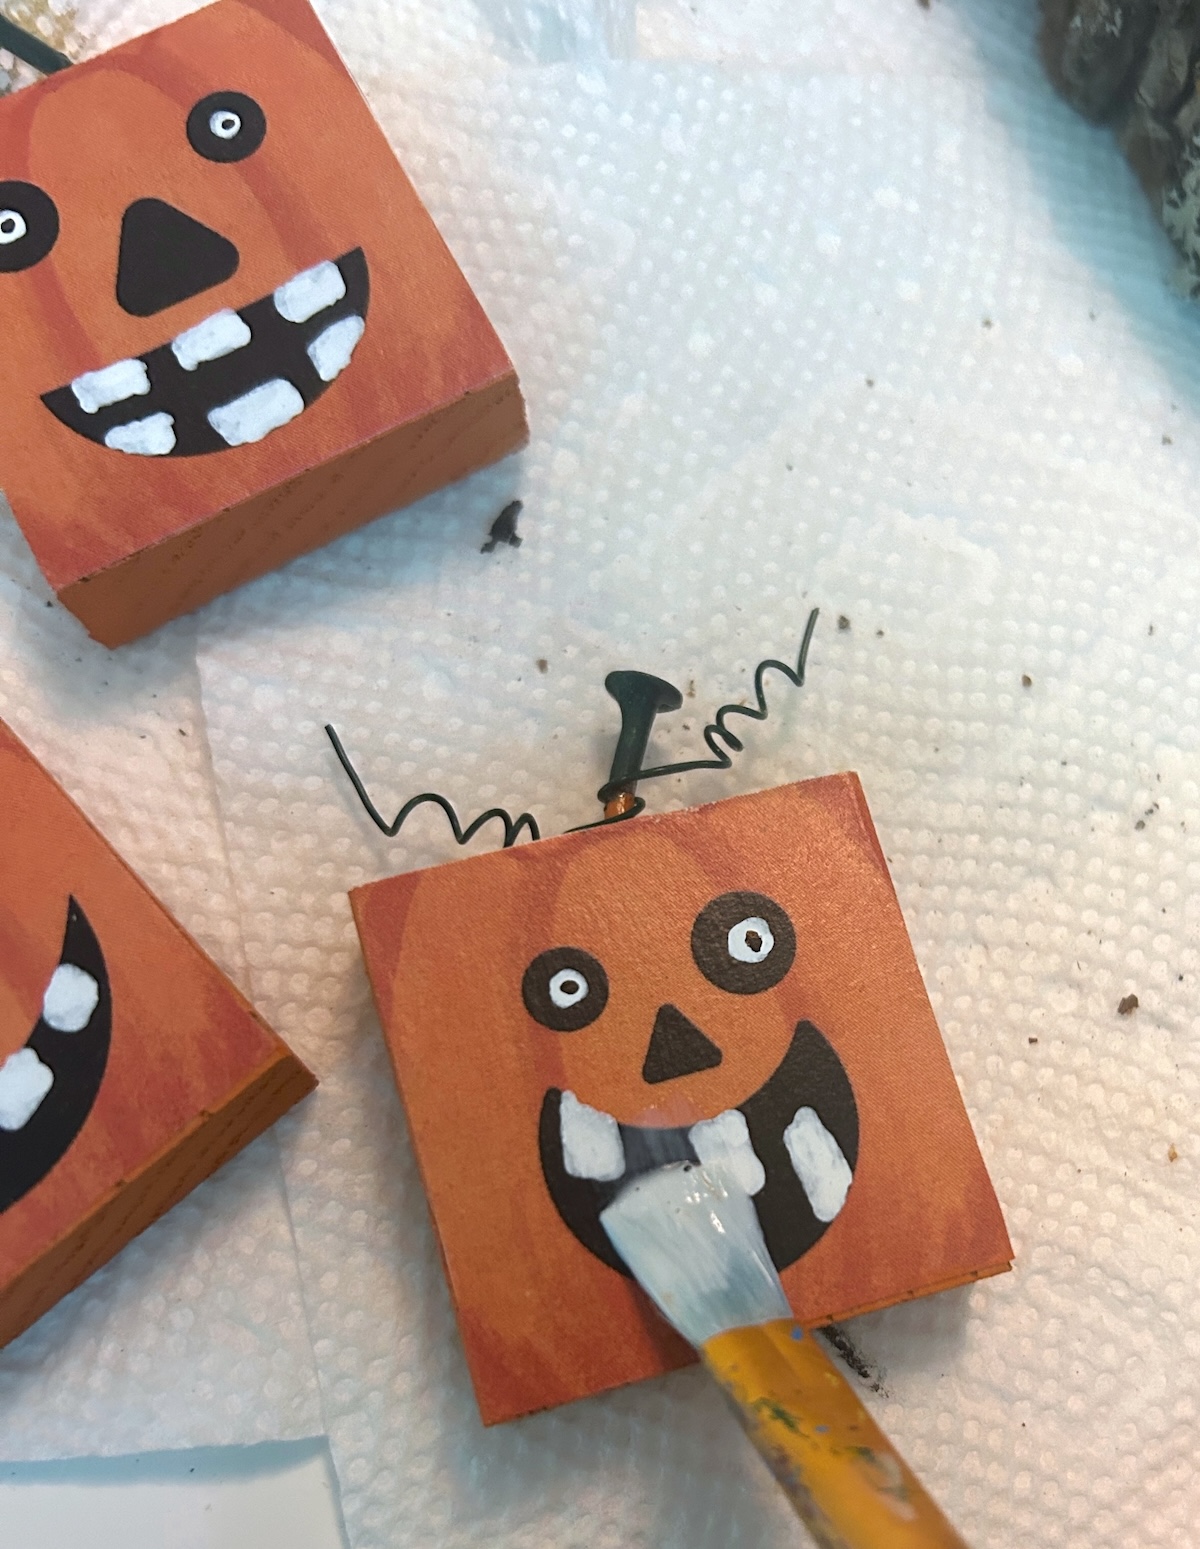
They’re made from little wood squares painted bright orange, with nail “stems” (yes, real nails!) and twisty green wire vines.
Add a printed pumpkin face on the front, seal it all up with Mod Podge, and you’ve got yourself a fridge accessory that says, “Yes, I take Halloween seriously… but also, I like to have fun.”

The best part is how customizable they are. You can make your pumpkins sweet, spooky, or downright goofy – whatever makes you smile every time you reach for the milk.
I’ve included a free printable of pumpkin faces, but you can also use scrapbook paper, stickers, or your own hand-drawn creations.
They’re quick to make, which is dangerous because before you know it, you’ll have a whole little pumpkin patch ready to decorate every magnetic surface in your house. They also make fun gifts for friends, teachers, or anyone who needs a little Halloween cheer.
So grab your Mod Podge, some paint, and your pumpkin personality of choice – these magnets are ready to bring a little fall magic (and maybe a few giggles) to your kitchen.

Get the printable how to card below:

Pumpkin Magnets
Equipment
- Pliers
- Hammer
- Table saw
Materials
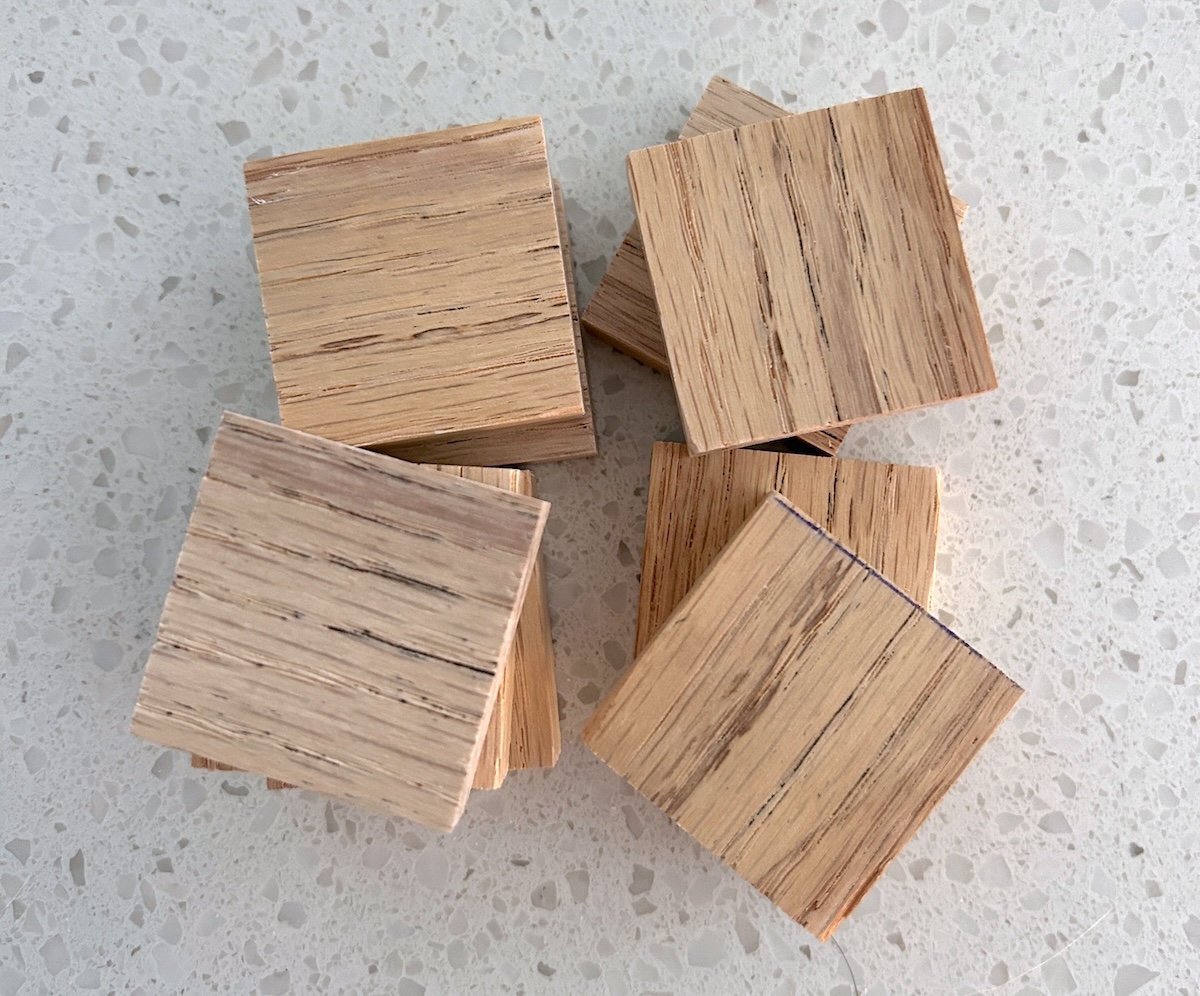
- Wood pine trim 1 1/2" x 1/4" thick
- Acrylic paint orange, green
- Paint pen(s) black, white
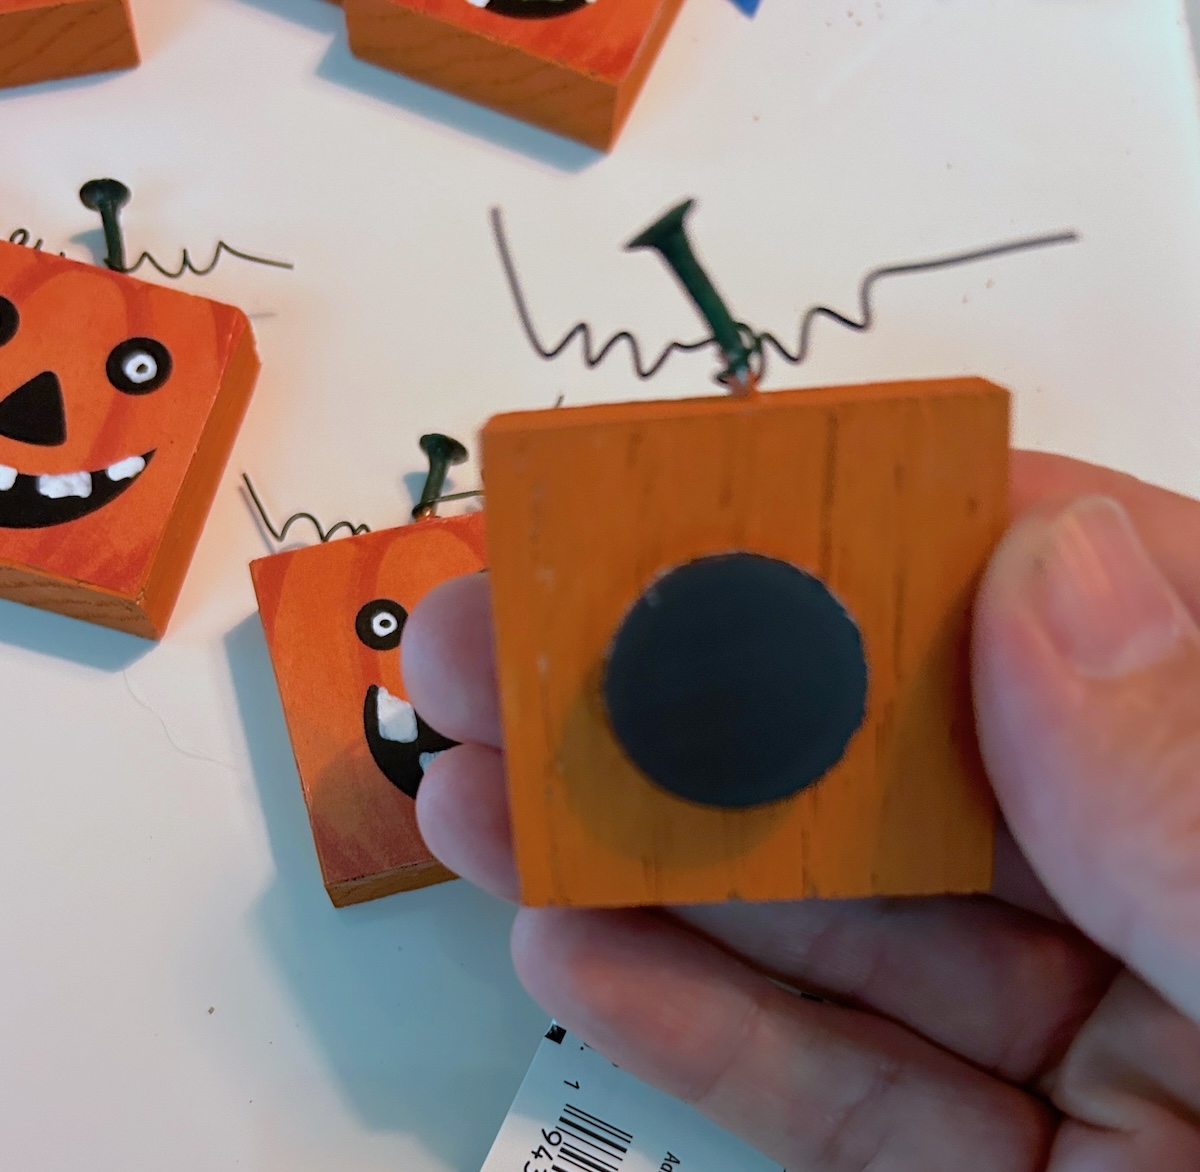
- Magnets 3/4”(1 per pumpkin)
- Mod Podge Gloss
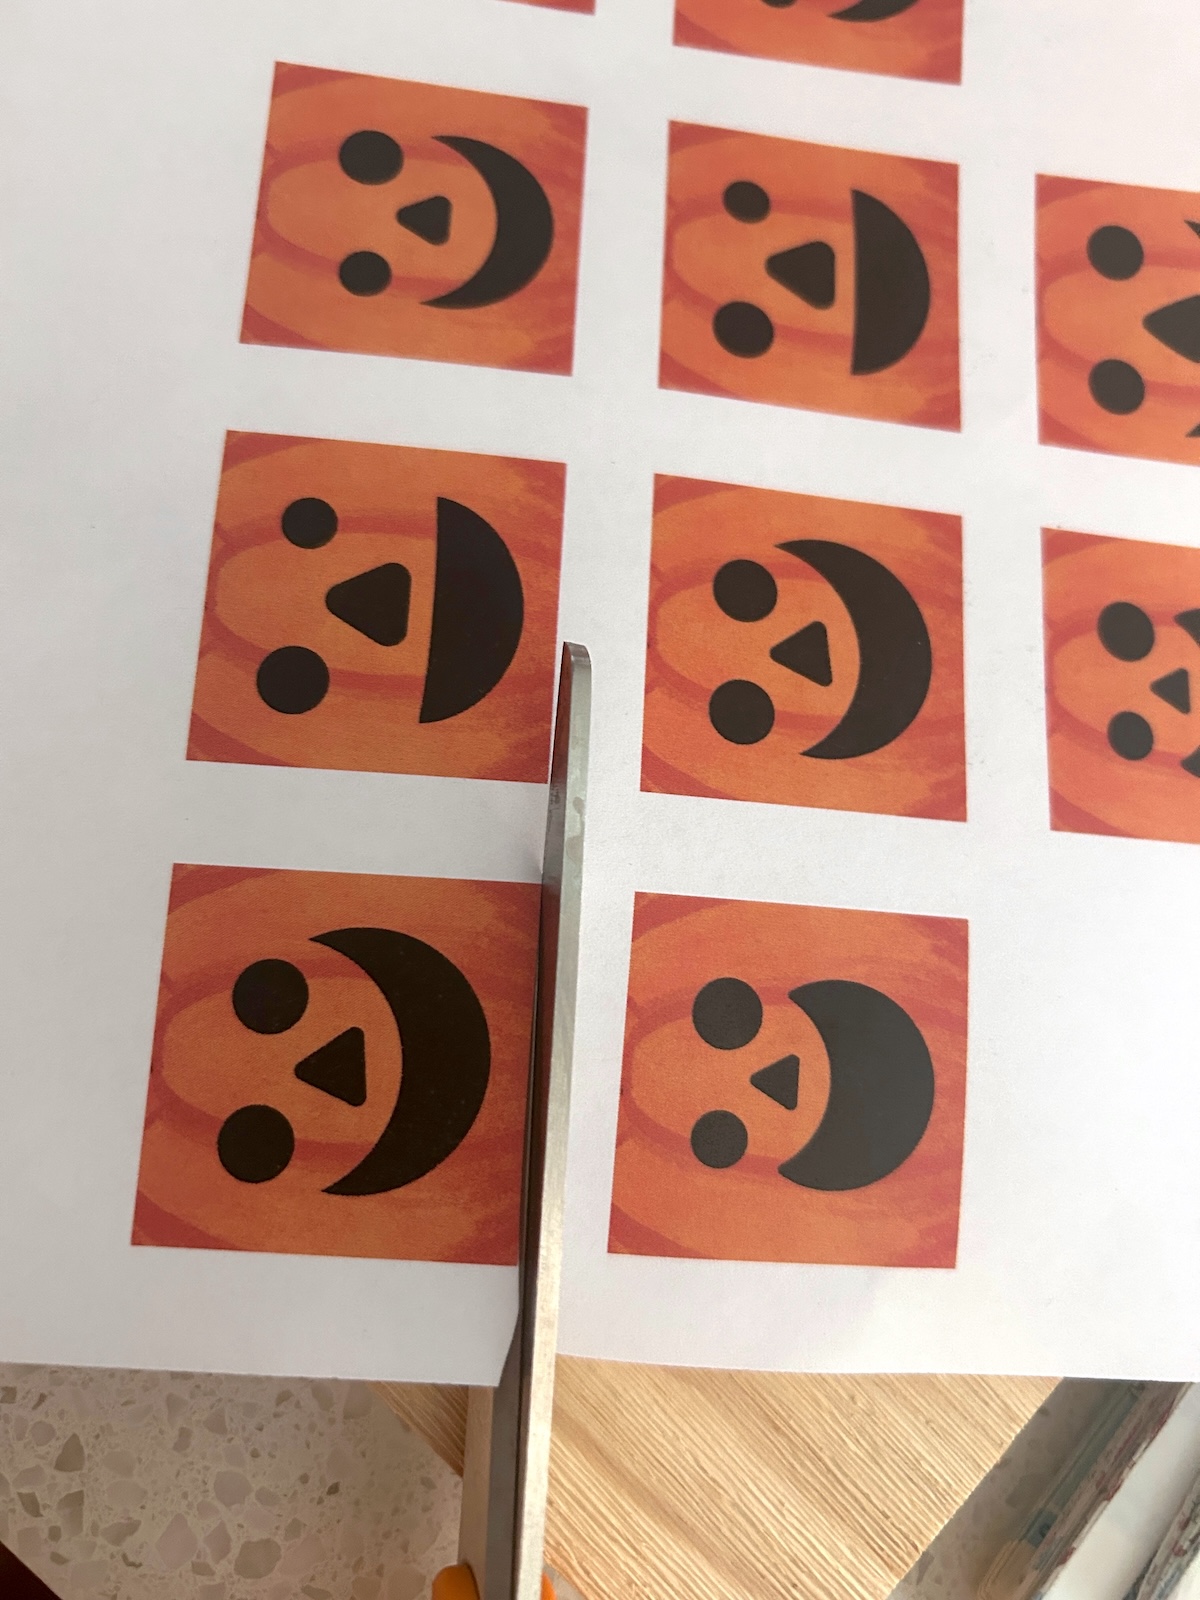
- Pumpkin face art (free printable)
- Nails
- Jewelry wire for stem
Instructions
- Cut your wood trim down to 1 ½” squares using the table saw.
- Using the drill, pre-drill a hole in the top of each wood square for your nail to go into.
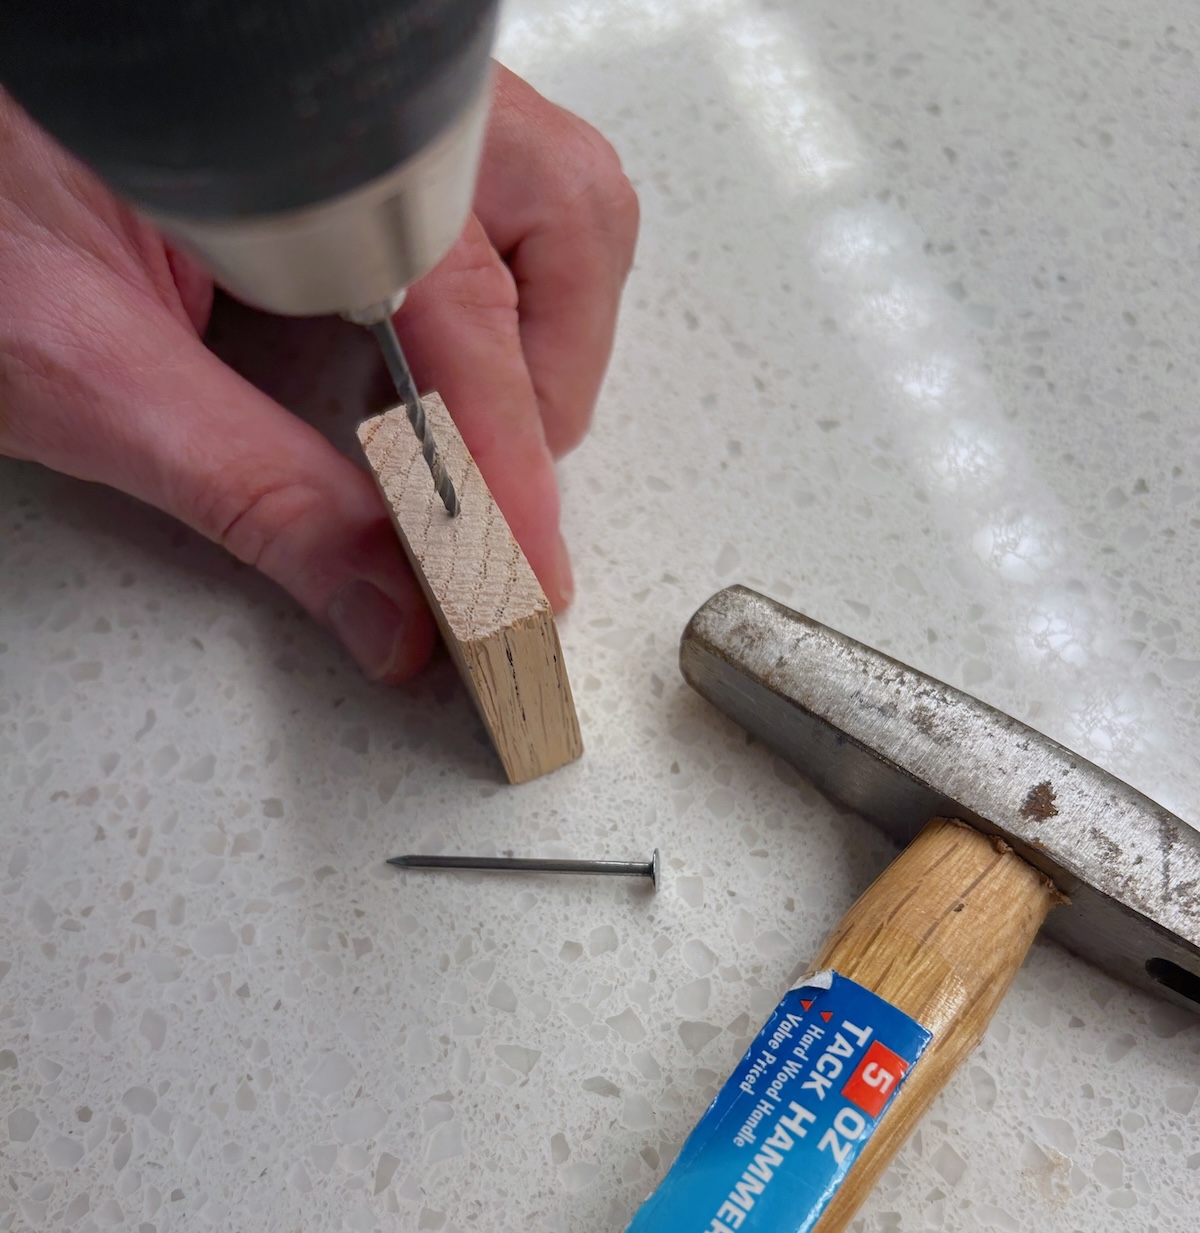
- Using the hammer, gently tap the nails into the holes you just drilled, to create stems.

- Using the pliers, bend the nails over slightly to bend the stems.

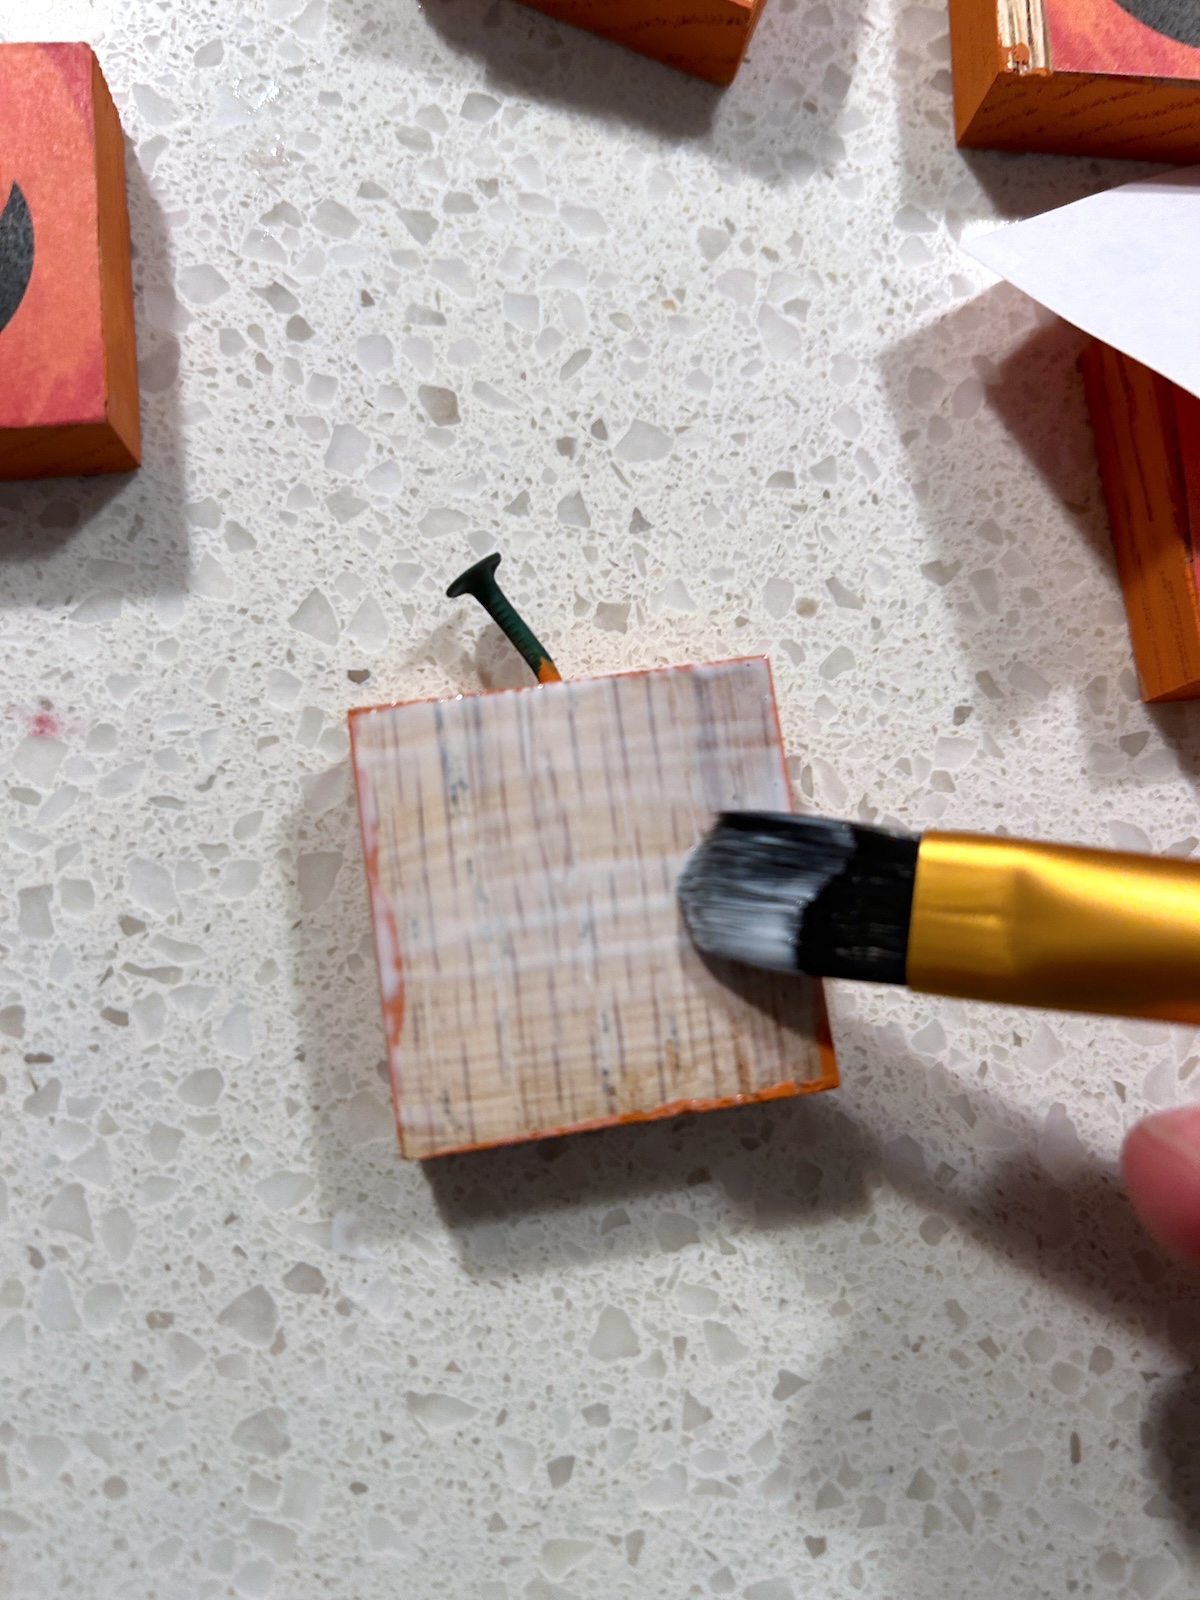
- Paint the edges of the wood with the orange paint. You can also paint one side (which will be used as the back). Let dry.
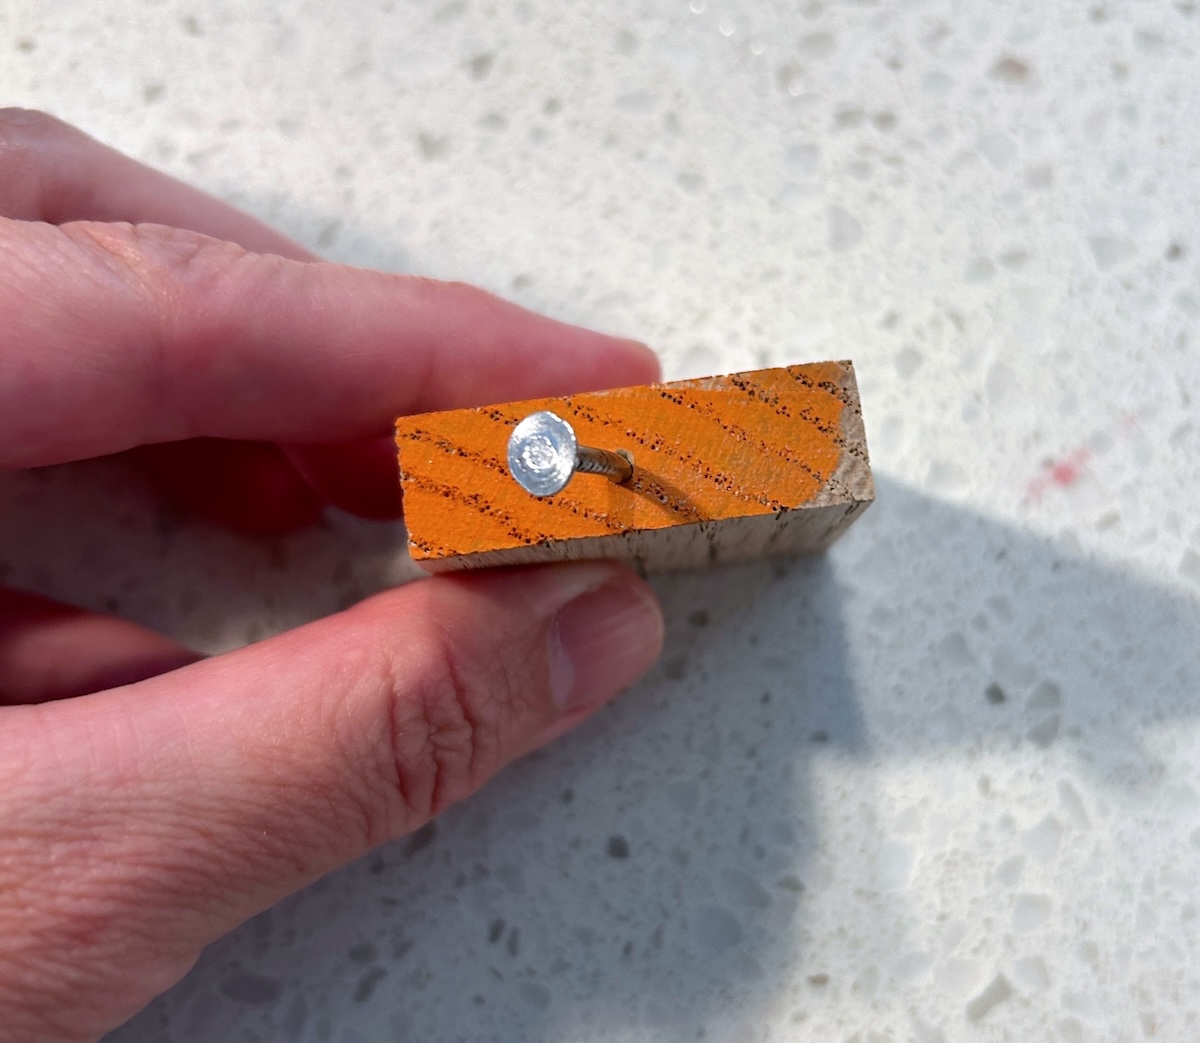
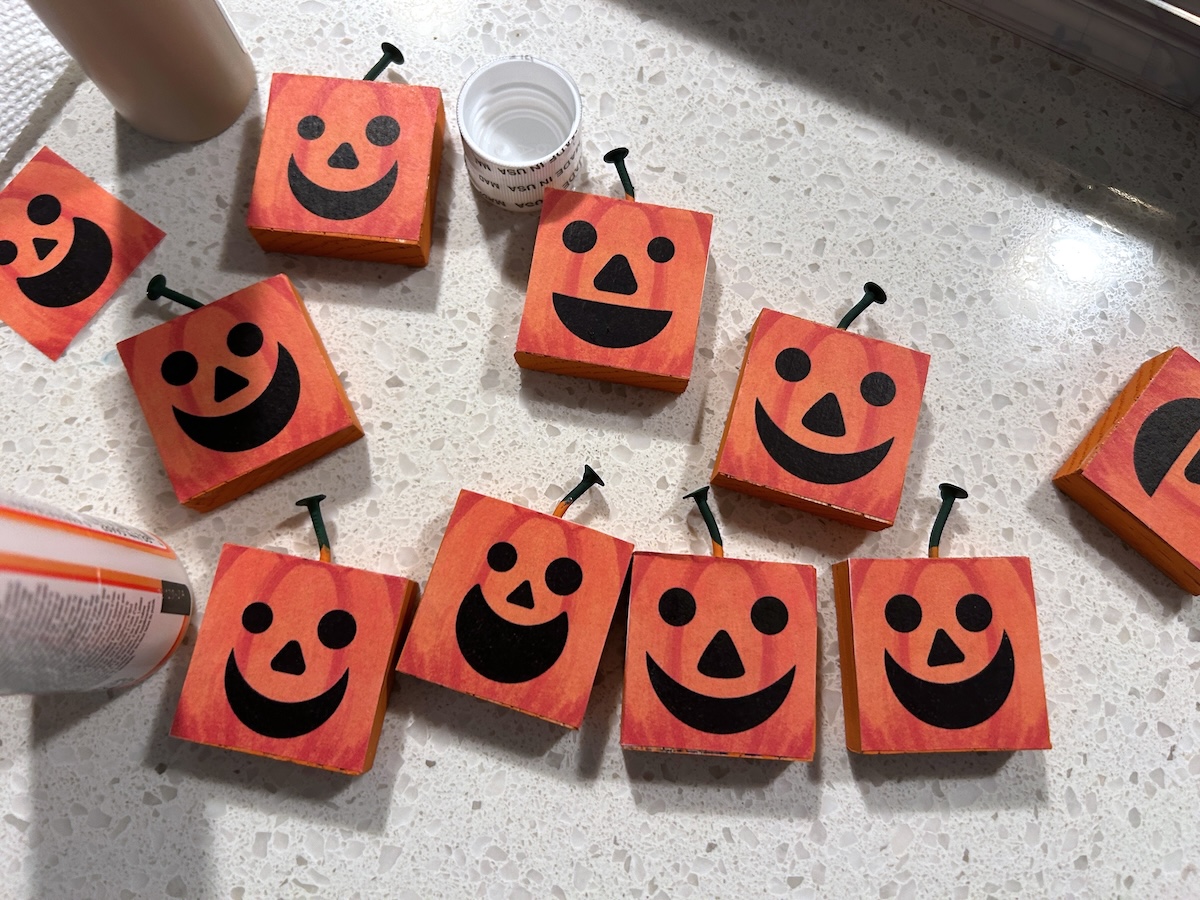
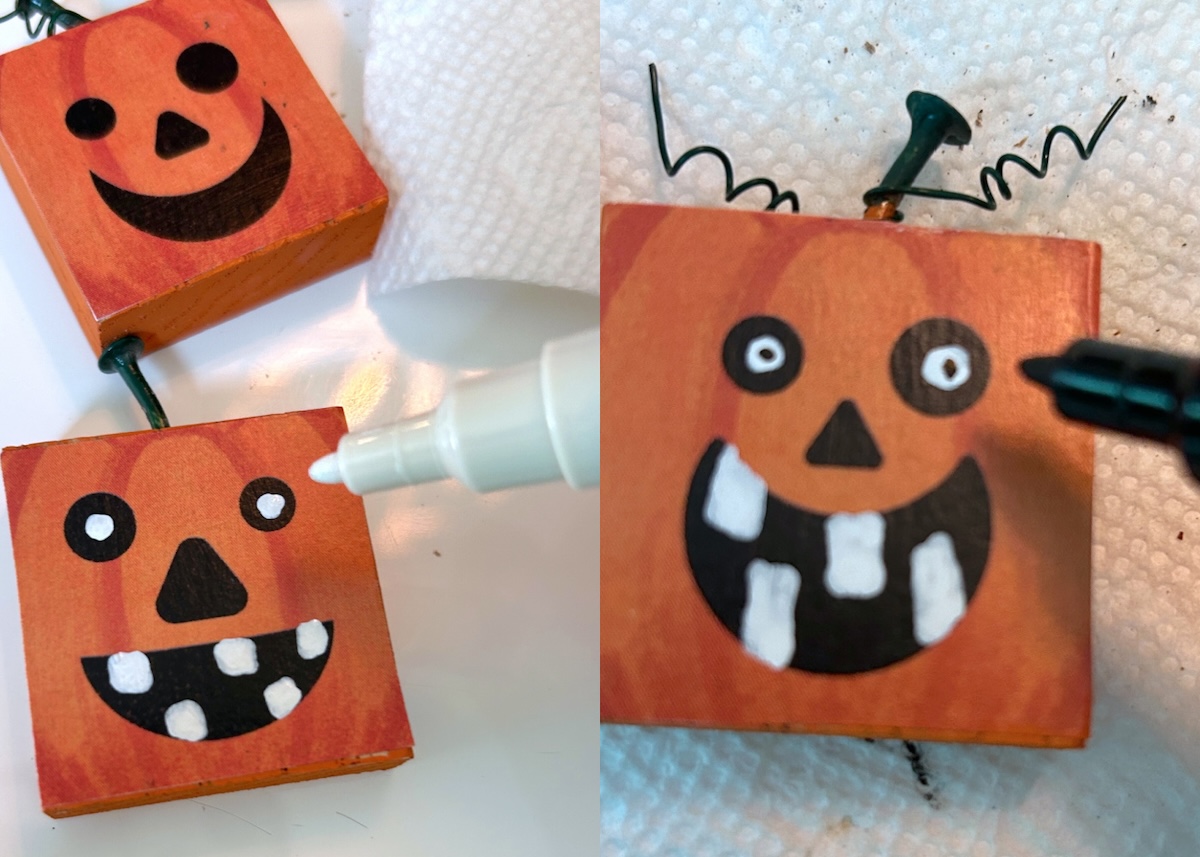
- Paint the nails either by using a brush or dipping the nail into the green paint. Let dry. Add the wire now by cutting off a length of green jewelry wire, then wrapping around the stem.

- Print the pumpkin faces out on a laserjet printer. Cut out with scissors.
- Apply Mod Podge to the front of a wood square. Smooth down the pumpkin face carefully. Using a brush, wipe away any Mod Podge that comes out the edges.
- Repeat with the pumpkins and set aside to dry completely.
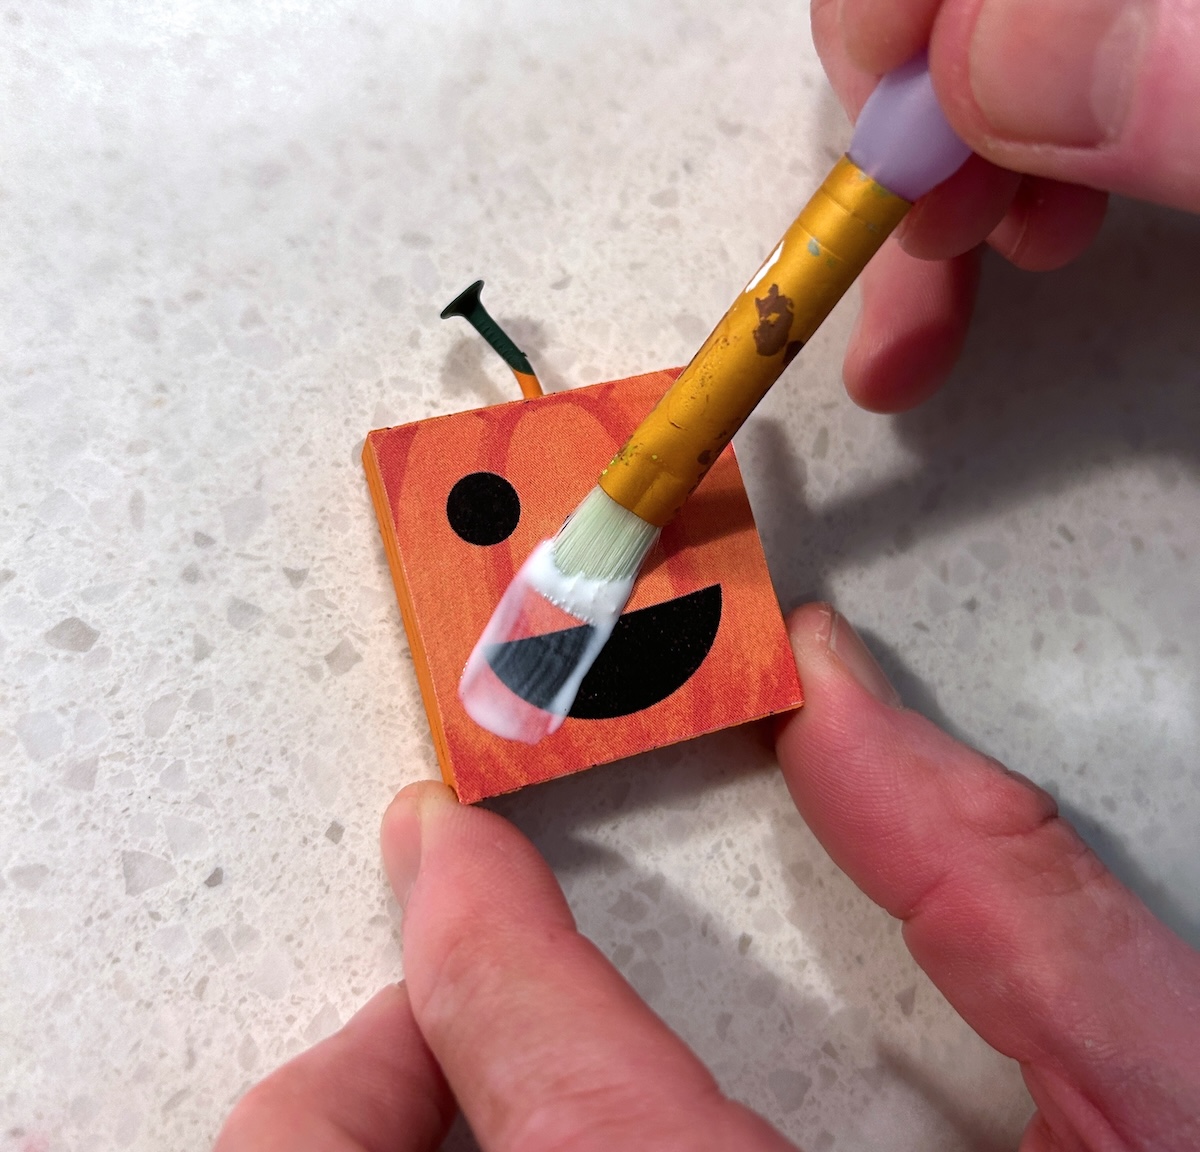
- Seal the tops of the pumpkin faces with Mod Podge. Let dry.
- Add details to the face – like teeth and eyes – with a white paint pen. I also did a large white dot, black dot, and then smaller white dot inside some of the eyes. Let dry.
- Seal over the top of the paint pens and pumpkin faces with Mod Podge. Let dry.
- Add magnets to the back. Let dry completely before using.
Notes
Did you love this cute wood Halloween craft? Let me know in the comments! Check out these other projects and posts:
BOO Letters • Button Art • Cheesecloth Ghost • Coffin Tray • Decorating Wood Cutouts • Decorating Pumpkins • DIY Wreath • Dollar Tree Wood Pumpkin • Door Hangers • Halloween Rocks • Painted Pumpkins • Potion Bottles • Spooky Candle Holders • Spooky Pumpkins • Wall Decor • Witch Hat Garland


Walter, such a cool project and great “treat” for halloween!!! You are amazing…where do you come up with all your ideas…what a creative mind you have!!!! Love it!!! Alysmommy
Fun project! When I first saw this, I thought the wood blocks were mini canvases, which I would bet would also work for this purpose. I also love the idea of using reprints of fine art (e.g. the Wm. Shakespeare portrait), and “zombie-fying” them with whacked out eyes and ghoulish gashes. Could be a fun project to do with kids! Thanks for sharing.
note to self: read every word as in Man Podger Walter so as not to be shocked by photo with arm . . . and arm hair!
Of course, I haven’t met Amy IRL so one never knows . . .
Seriously tho – cute, cute magnets! I think I’d just glue the magnet on the back w/o drilling and call it a day 😉
waoooo,coooool idea 🙂 thanks for sharing with us 🙂
lol! Totally cute!
Adorable! I especially love the screw and wire details.
Thanks, Melissa P! “Treat” looks like he got nailed in the head, LOL!
You gotta love those wacky faces!