
Pumpkin Magnets
Learn how to make the cutest jack o' lantern magnets for Halloween! These make great gifts.
Yield: 10 magnets
Cost: $5
Equipment
- Pliers
- Hammer
- Table saw
Materials
- Wood pine trim 1 1/2" x 1/4" thick
- Acrylic paint orange, green
- Paint pen(s) black, white
- Magnets 3/4”(1 per pumpkin)
- Mod Podge Gloss
- Pumpkin face art (free printable)
- Nails
- Jewelry wire for stem
Instructions
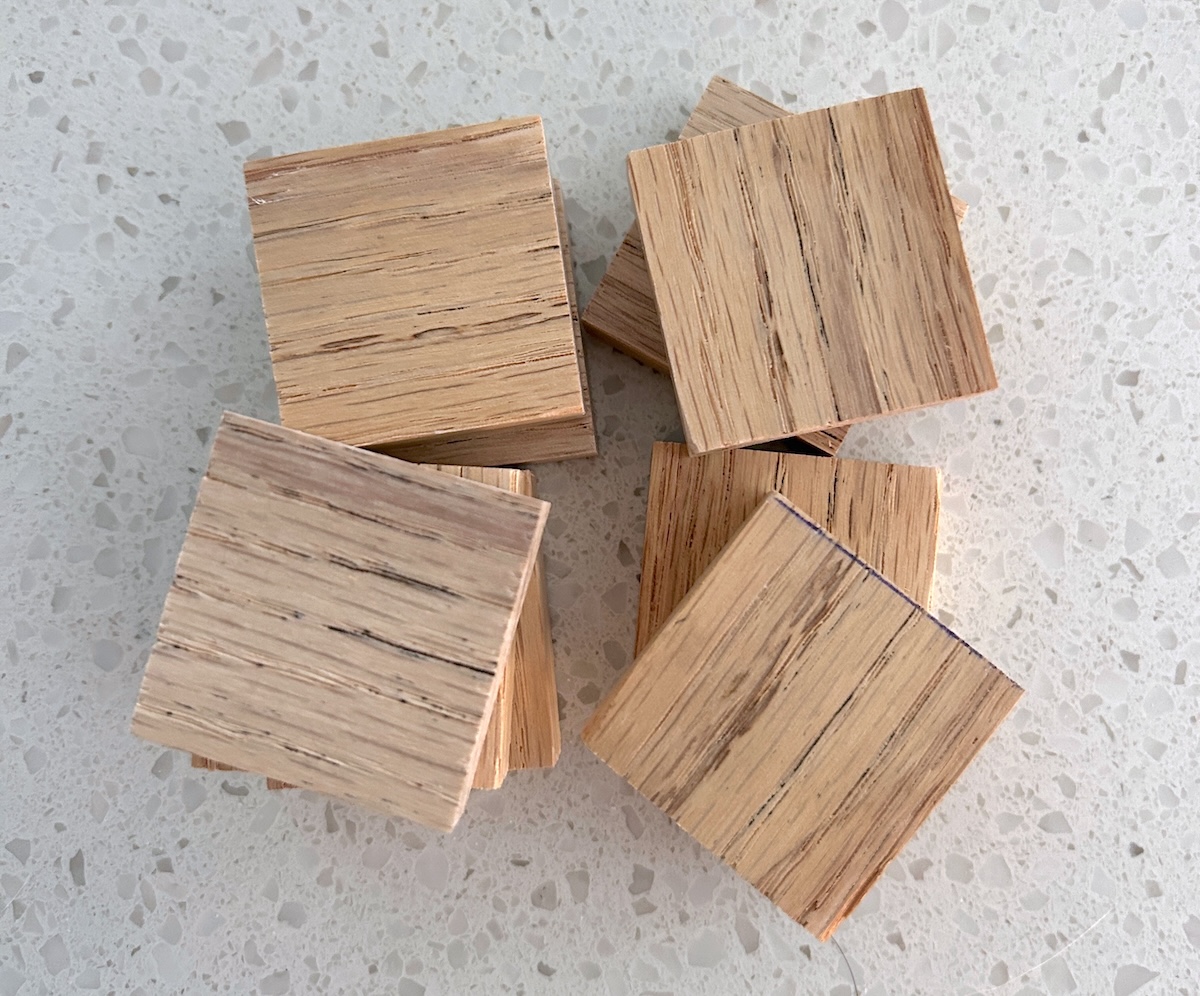
- Cut your wood trim down to 1 ½” squares using the table saw.
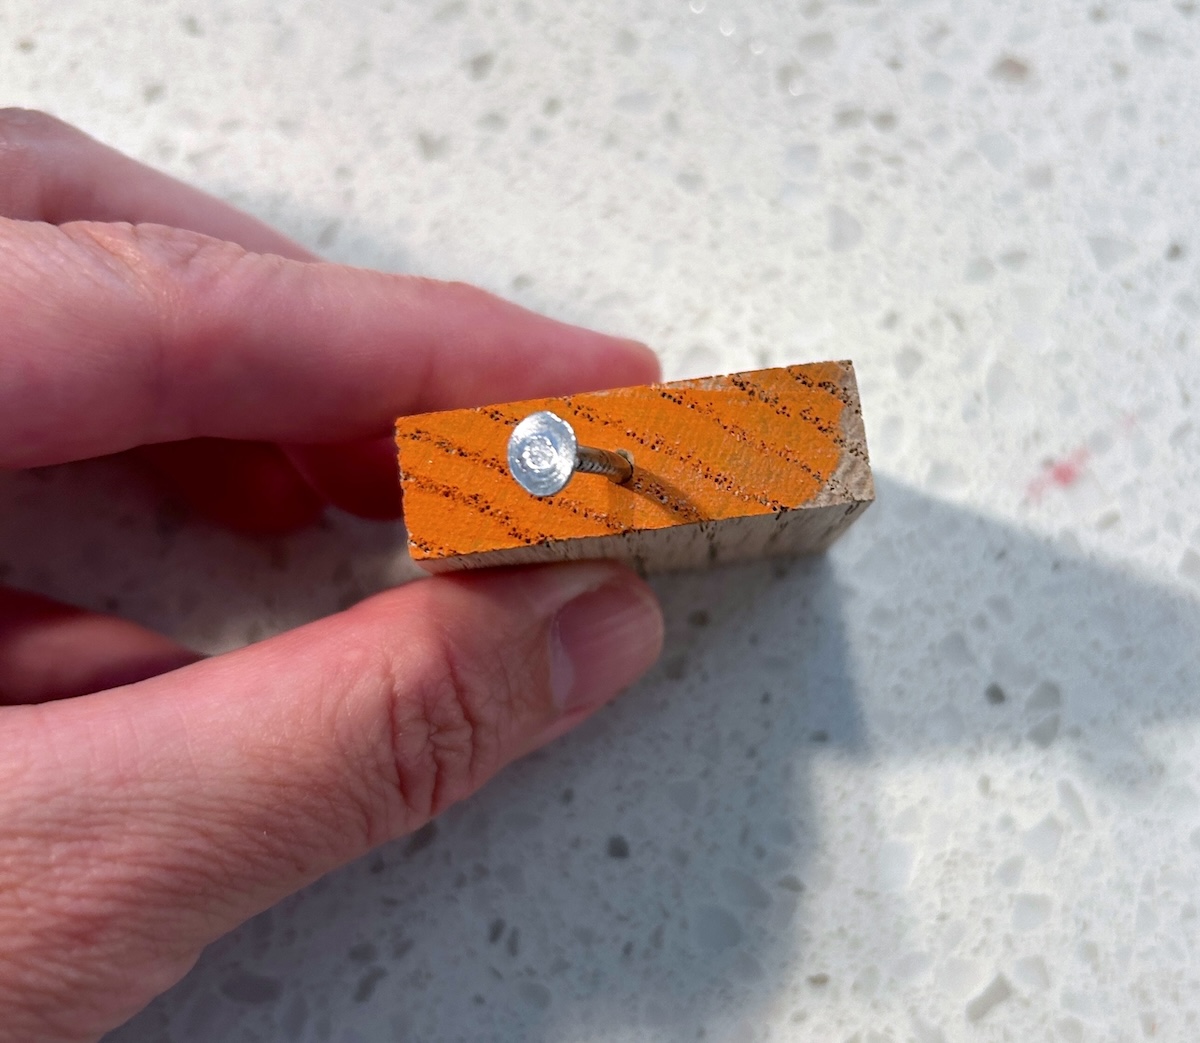
- Using the drill, pre-drill a hole in the top of each wood square for your nail to go into.
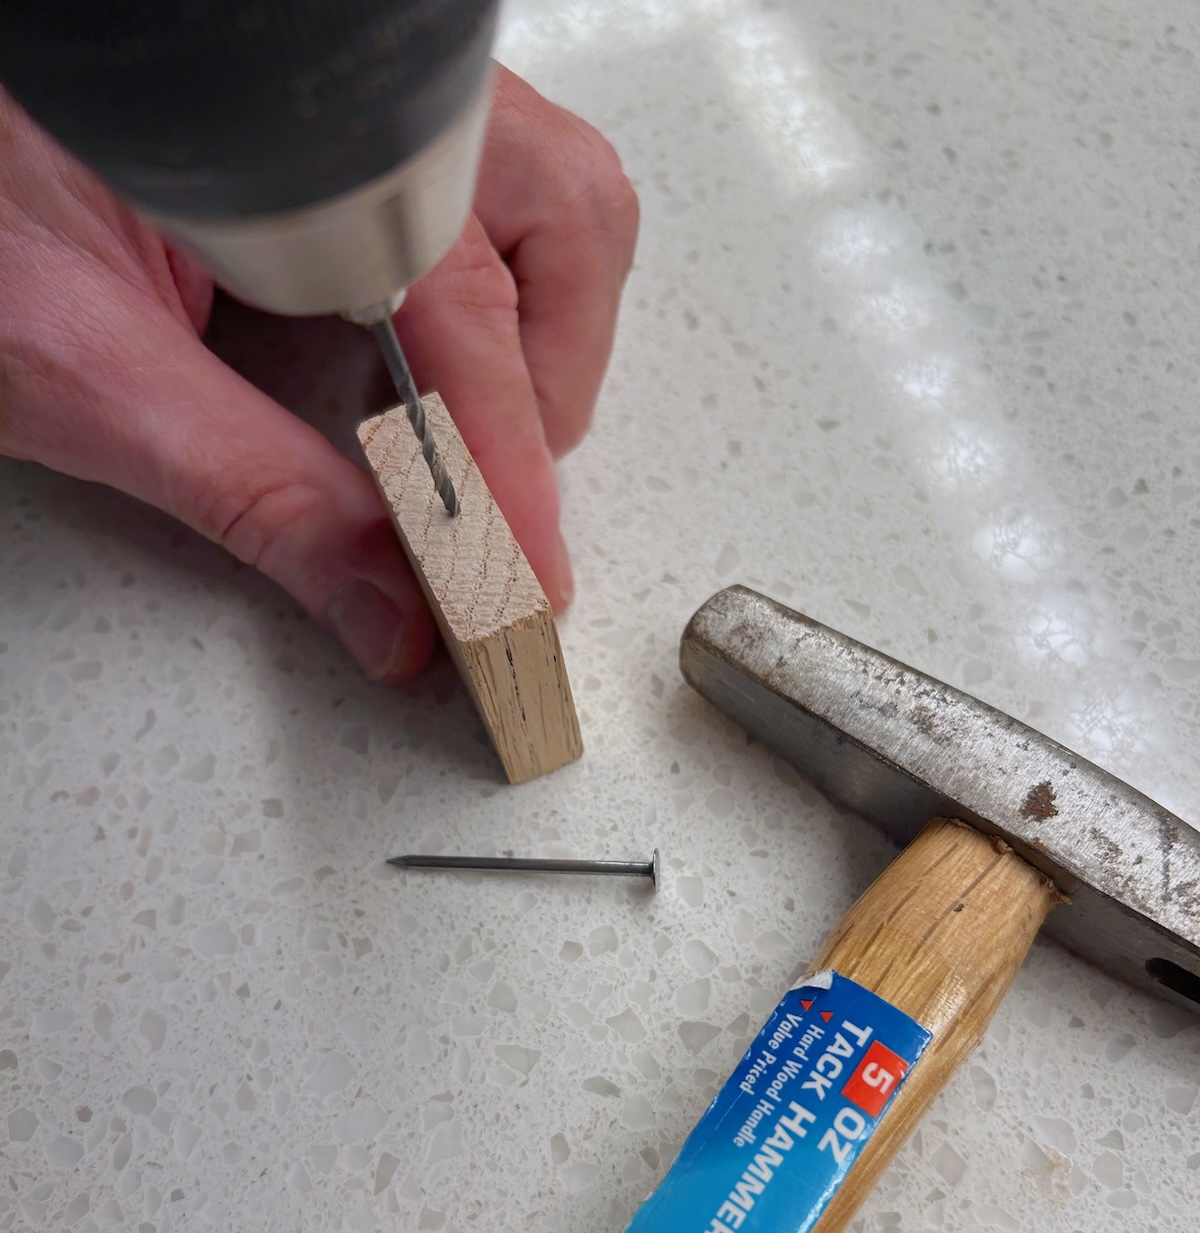
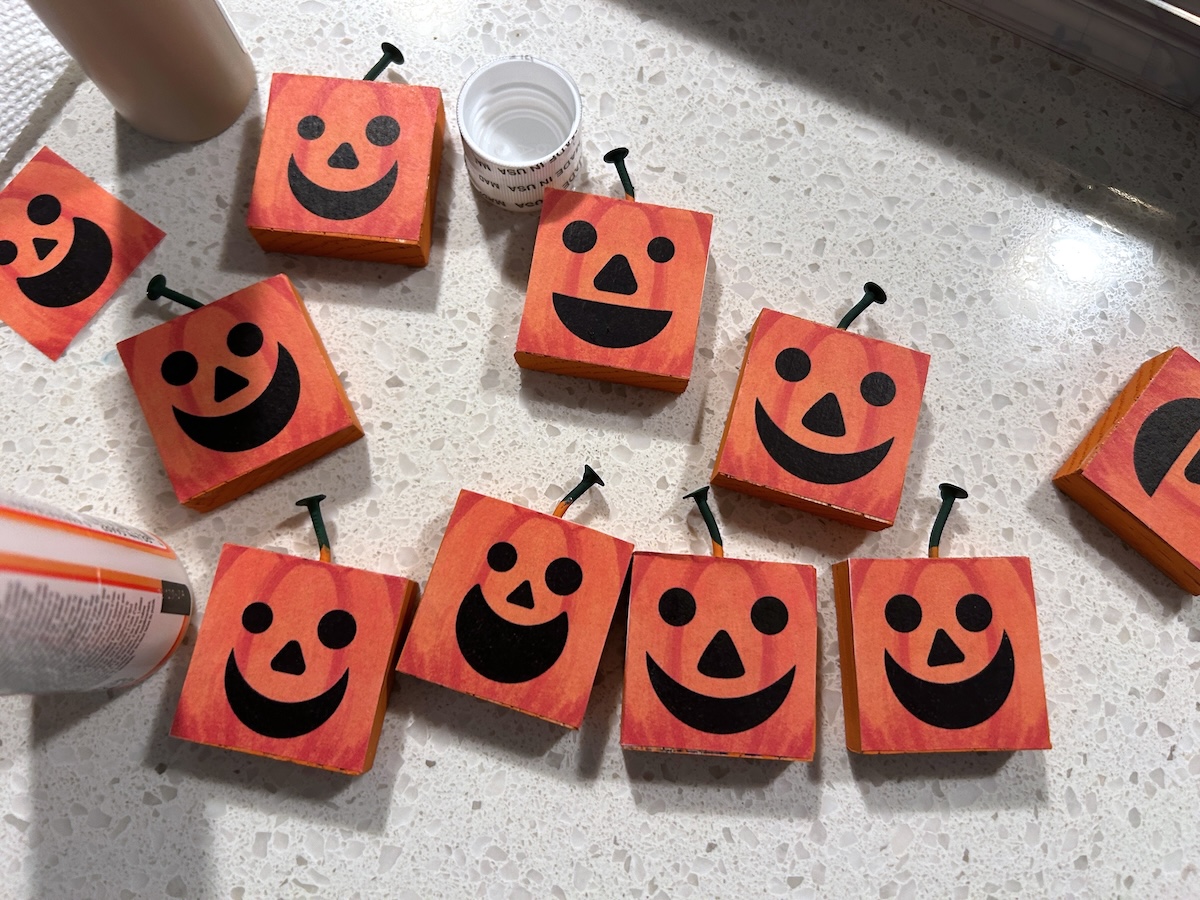
- Using the hammer, gently tap the nails into the holes you just drilled, to create stems.
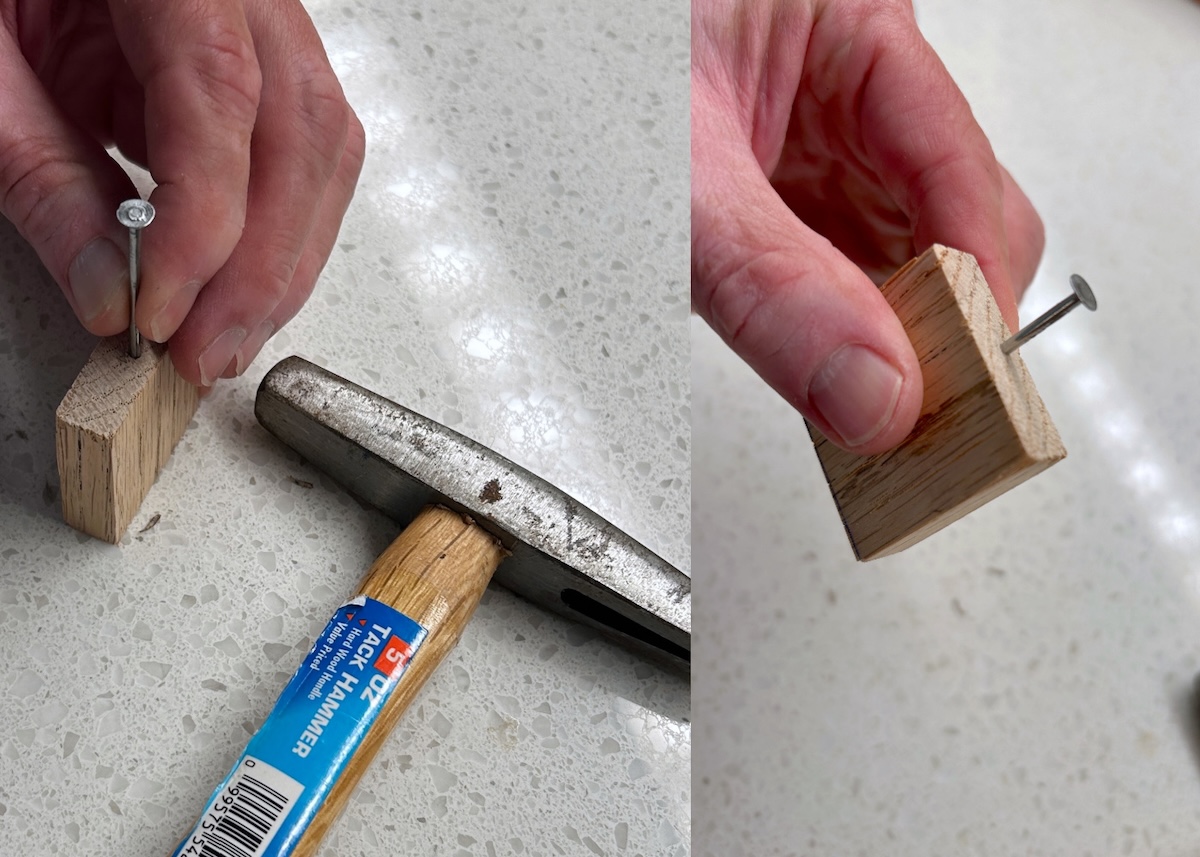
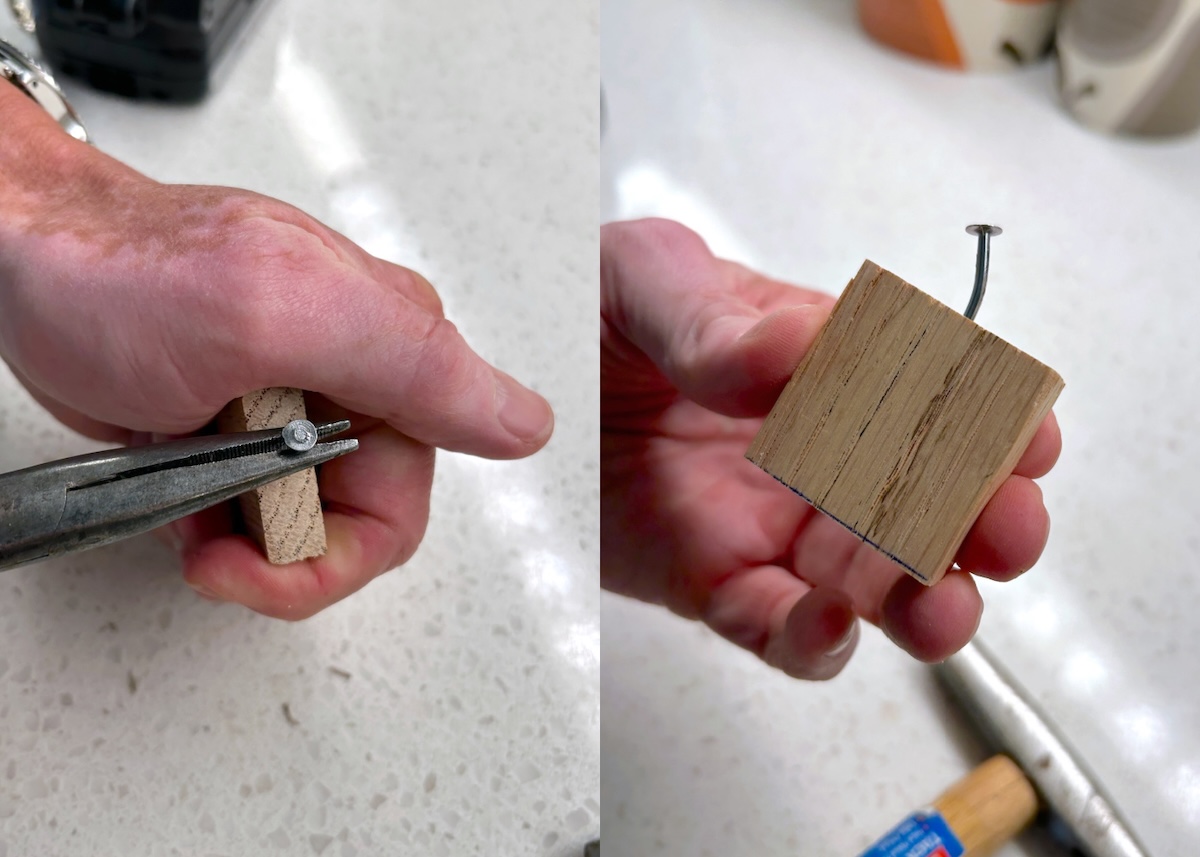
- Using the pliers, bend the nails over slightly to bend the stems.
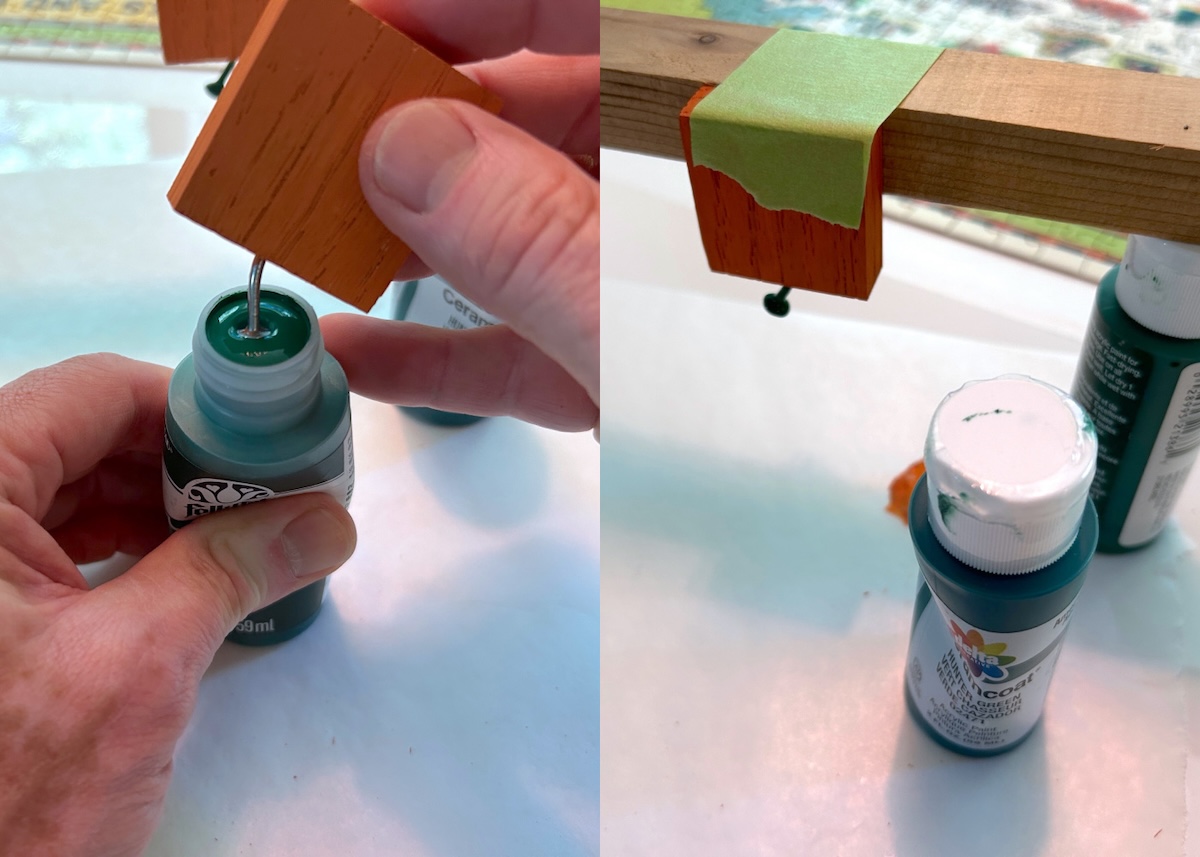
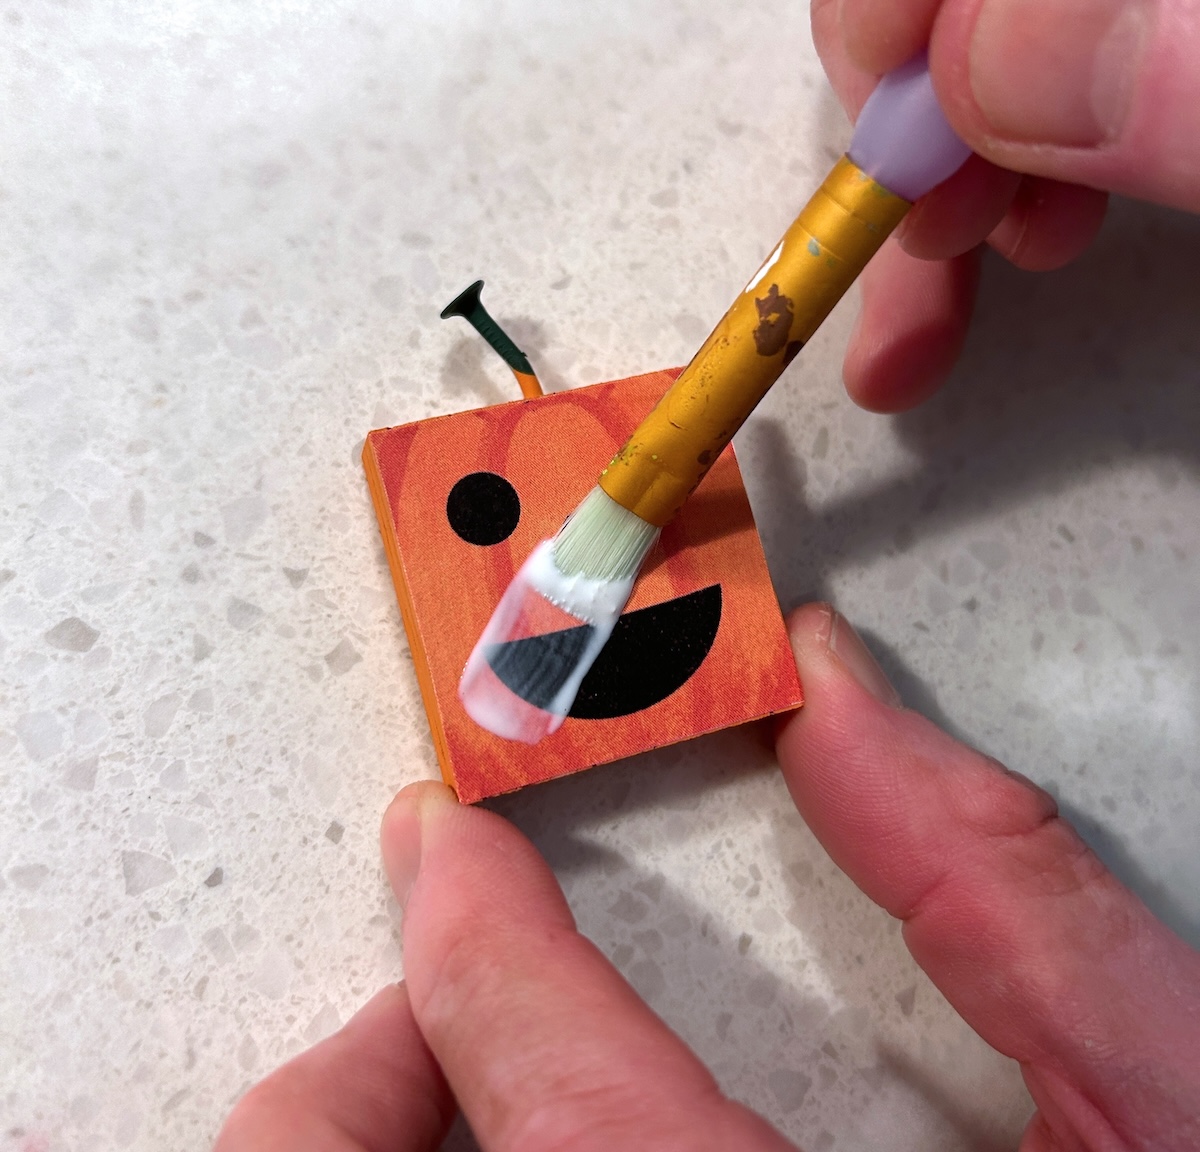
- Paint the edges of the wood with the orange paint. You can also paint one side (which will be used as the back). Let dry.
- Paint the nails either by using a brush or dipping the nail into the green paint. Let dry. Add the wire now by cutting off a length of green jewelry wire, then wrapping around the stem.
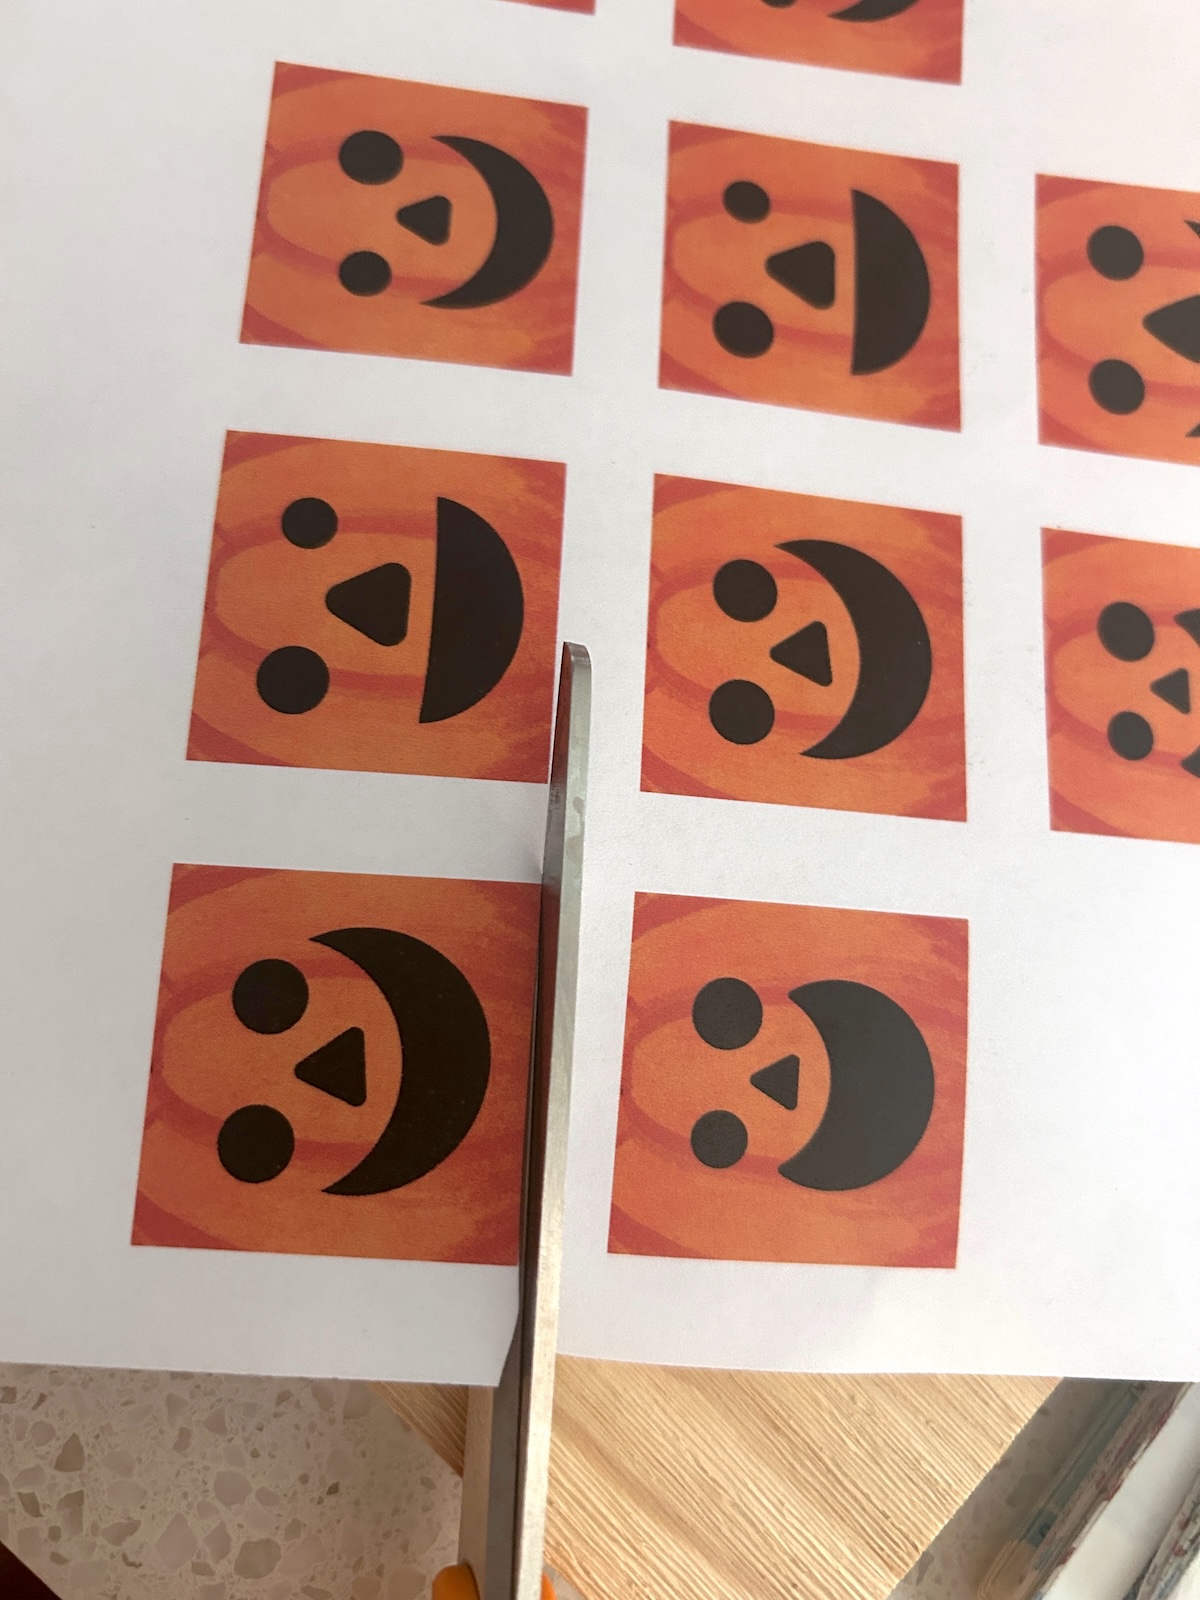
- Print the pumpkin faces out on a laserjet printer. Cut out with scissors.
- Apply Mod Podge to the front of a wood square. Smooth down the pumpkin face carefully. Using a brush, wipe away any Mod Podge that comes out the edges.
- Repeat with the pumpkins and set aside to dry completely.
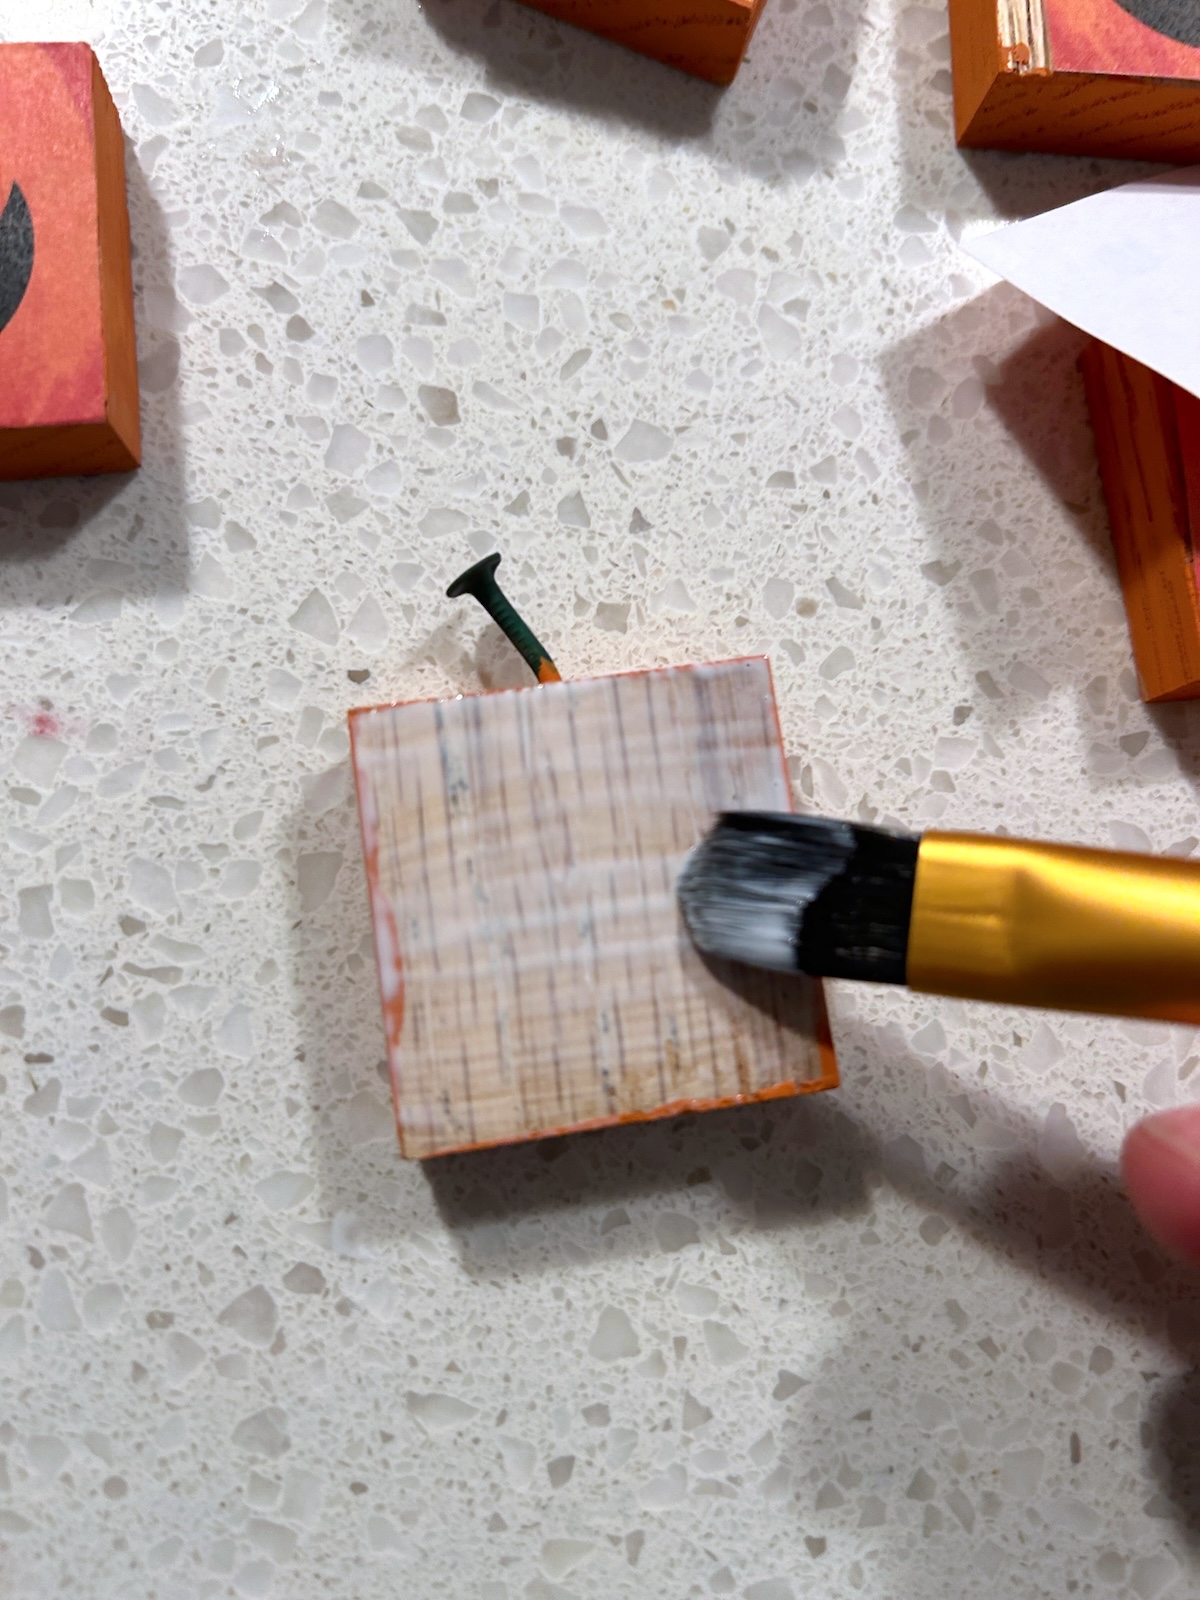
- Seal the tops of the pumpkin faces with Mod Podge. Let dry.
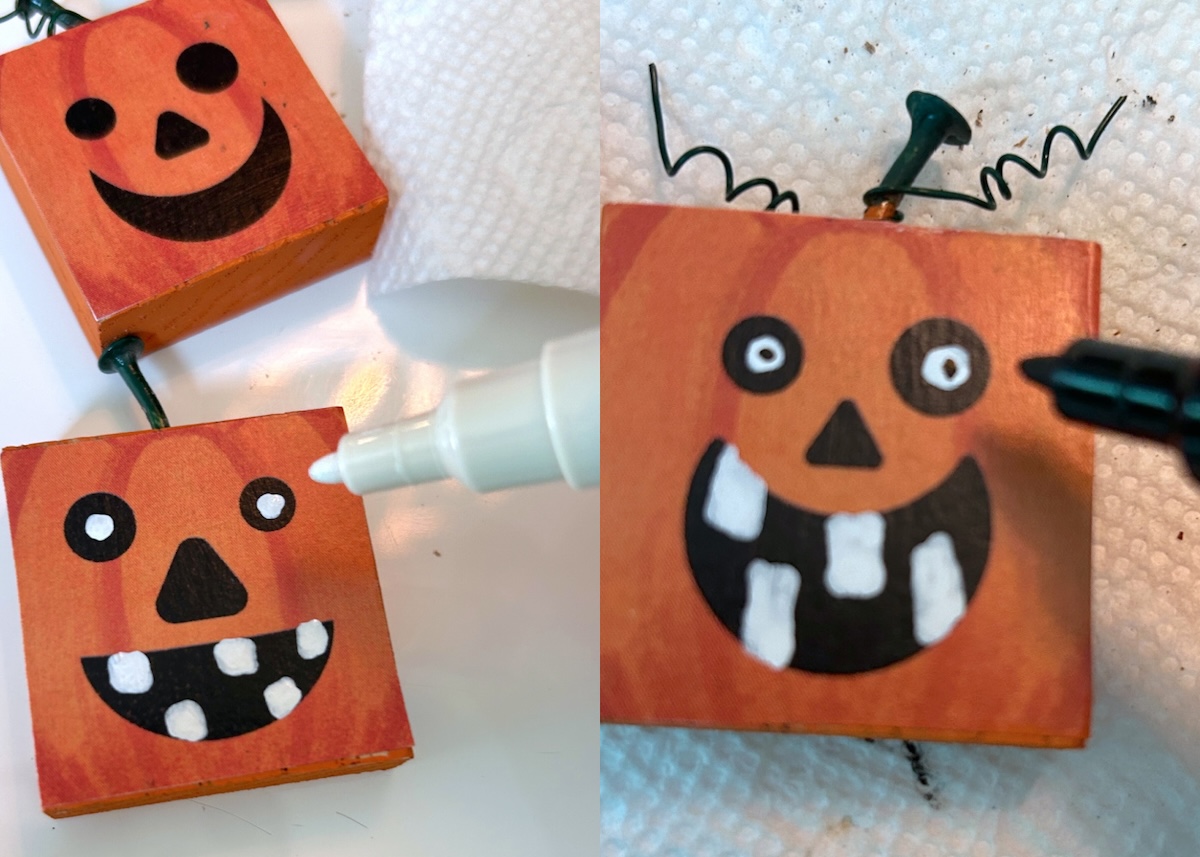
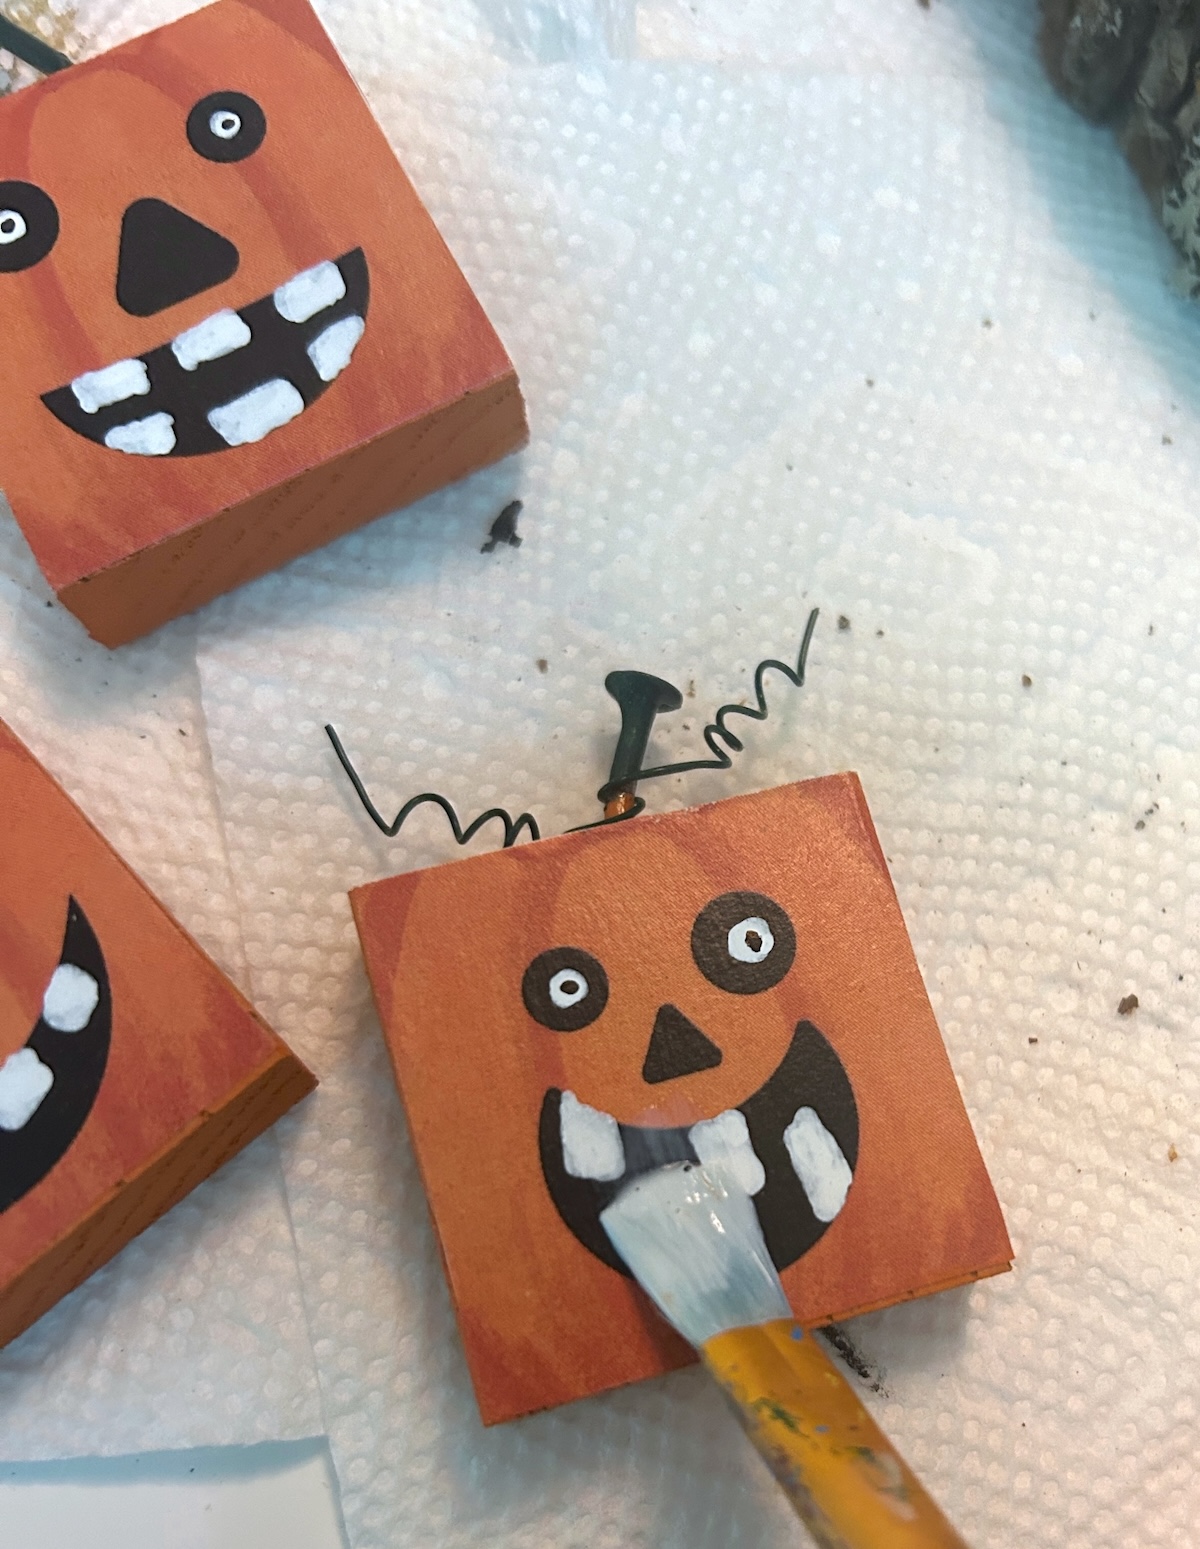
- Add details to the face – like teeth and eyes – with a white paint pen. I also did a large white dot, black dot, and then smaller white dot inside some of the eyes. Let dry.
- Seal over the top of the paint pens and pumpkin faces with Mod Podge. Let dry.
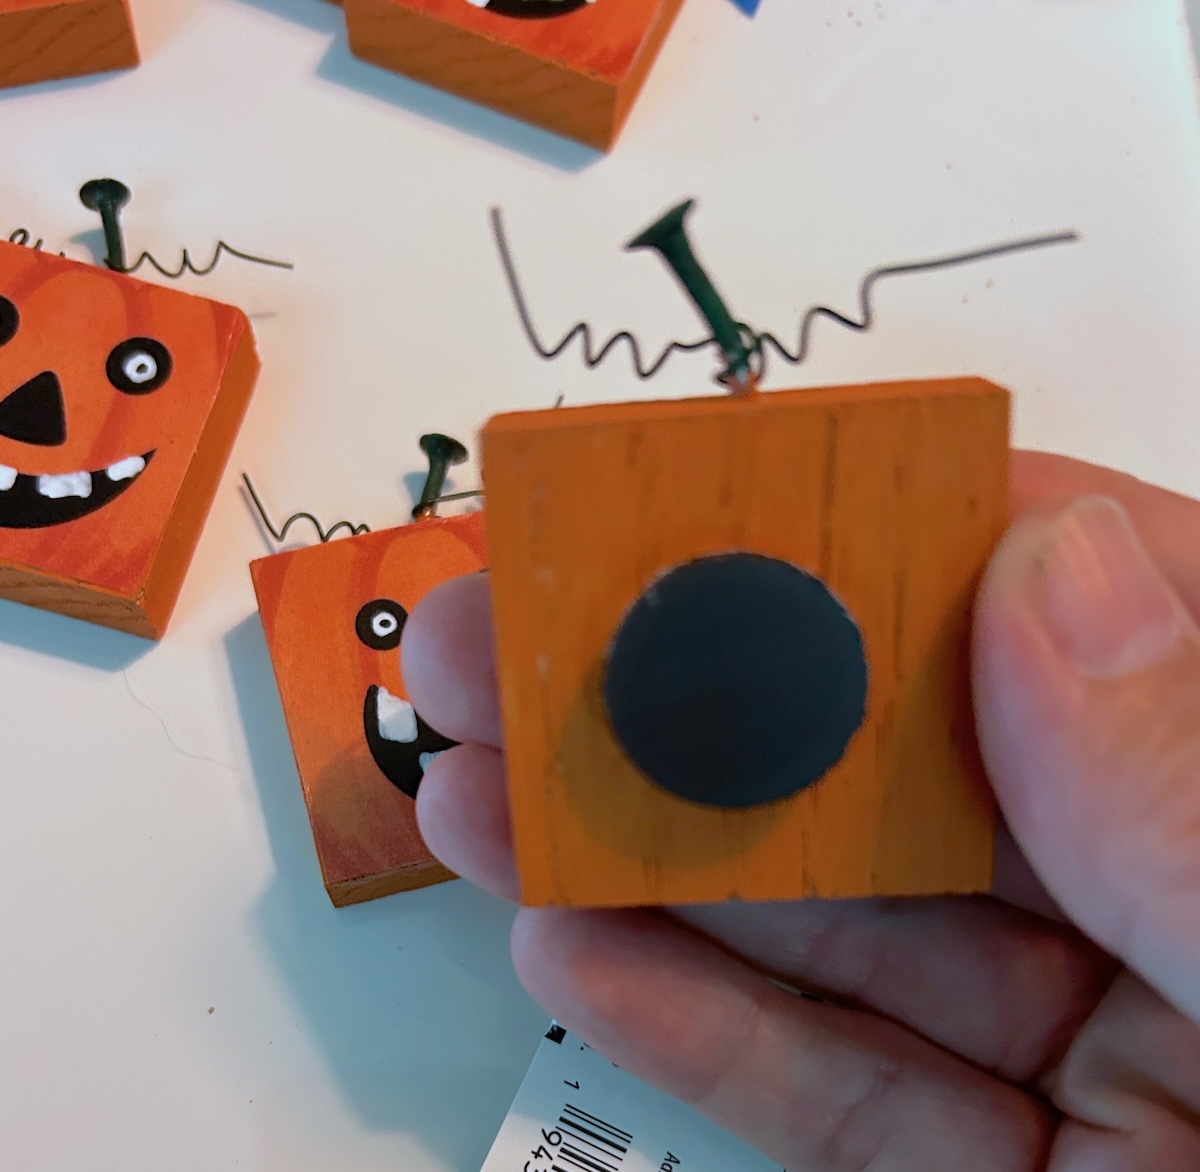
- Add magnets to the back. Let dry completely before using.
Notes
Step 1: you can also use a hand saw. I just used spare pieces of wood trim I had in the garage.
Step 13: I had adhesive magnets - they are so nice!