
Learn to make a charming DIY Easter sign with this easy tutorial. Perfect for beginners, using scrapbook paper, faux flowers, and Mod Podge.
Skills Required: Beginner. The process is pretty straightforward – you’ll be cutting paper and decoupaging it onto a sign base. This is a great beginner craft if you want to dip your toes into sign making!

As the sun starts to peek out a little longer each day and the first signs of spring begin to bloom, there’s no better time to embrace the season’s renewal with a splash of creativity.
It’s almost Easter, my friends!
If you haven’t done it yet, it’s time to swap out those winter blues for something a bit more vibrant and spirited. Imagine a cute holiday sign that says “Happy Easter!” in the most charming way possible.
And if you think it takes a lot of skill to make a sign like this, I’m excited to show you just how easy it can be. You can make this DIY Easter sign with some everyday supplies and a sprinkle of imagination.
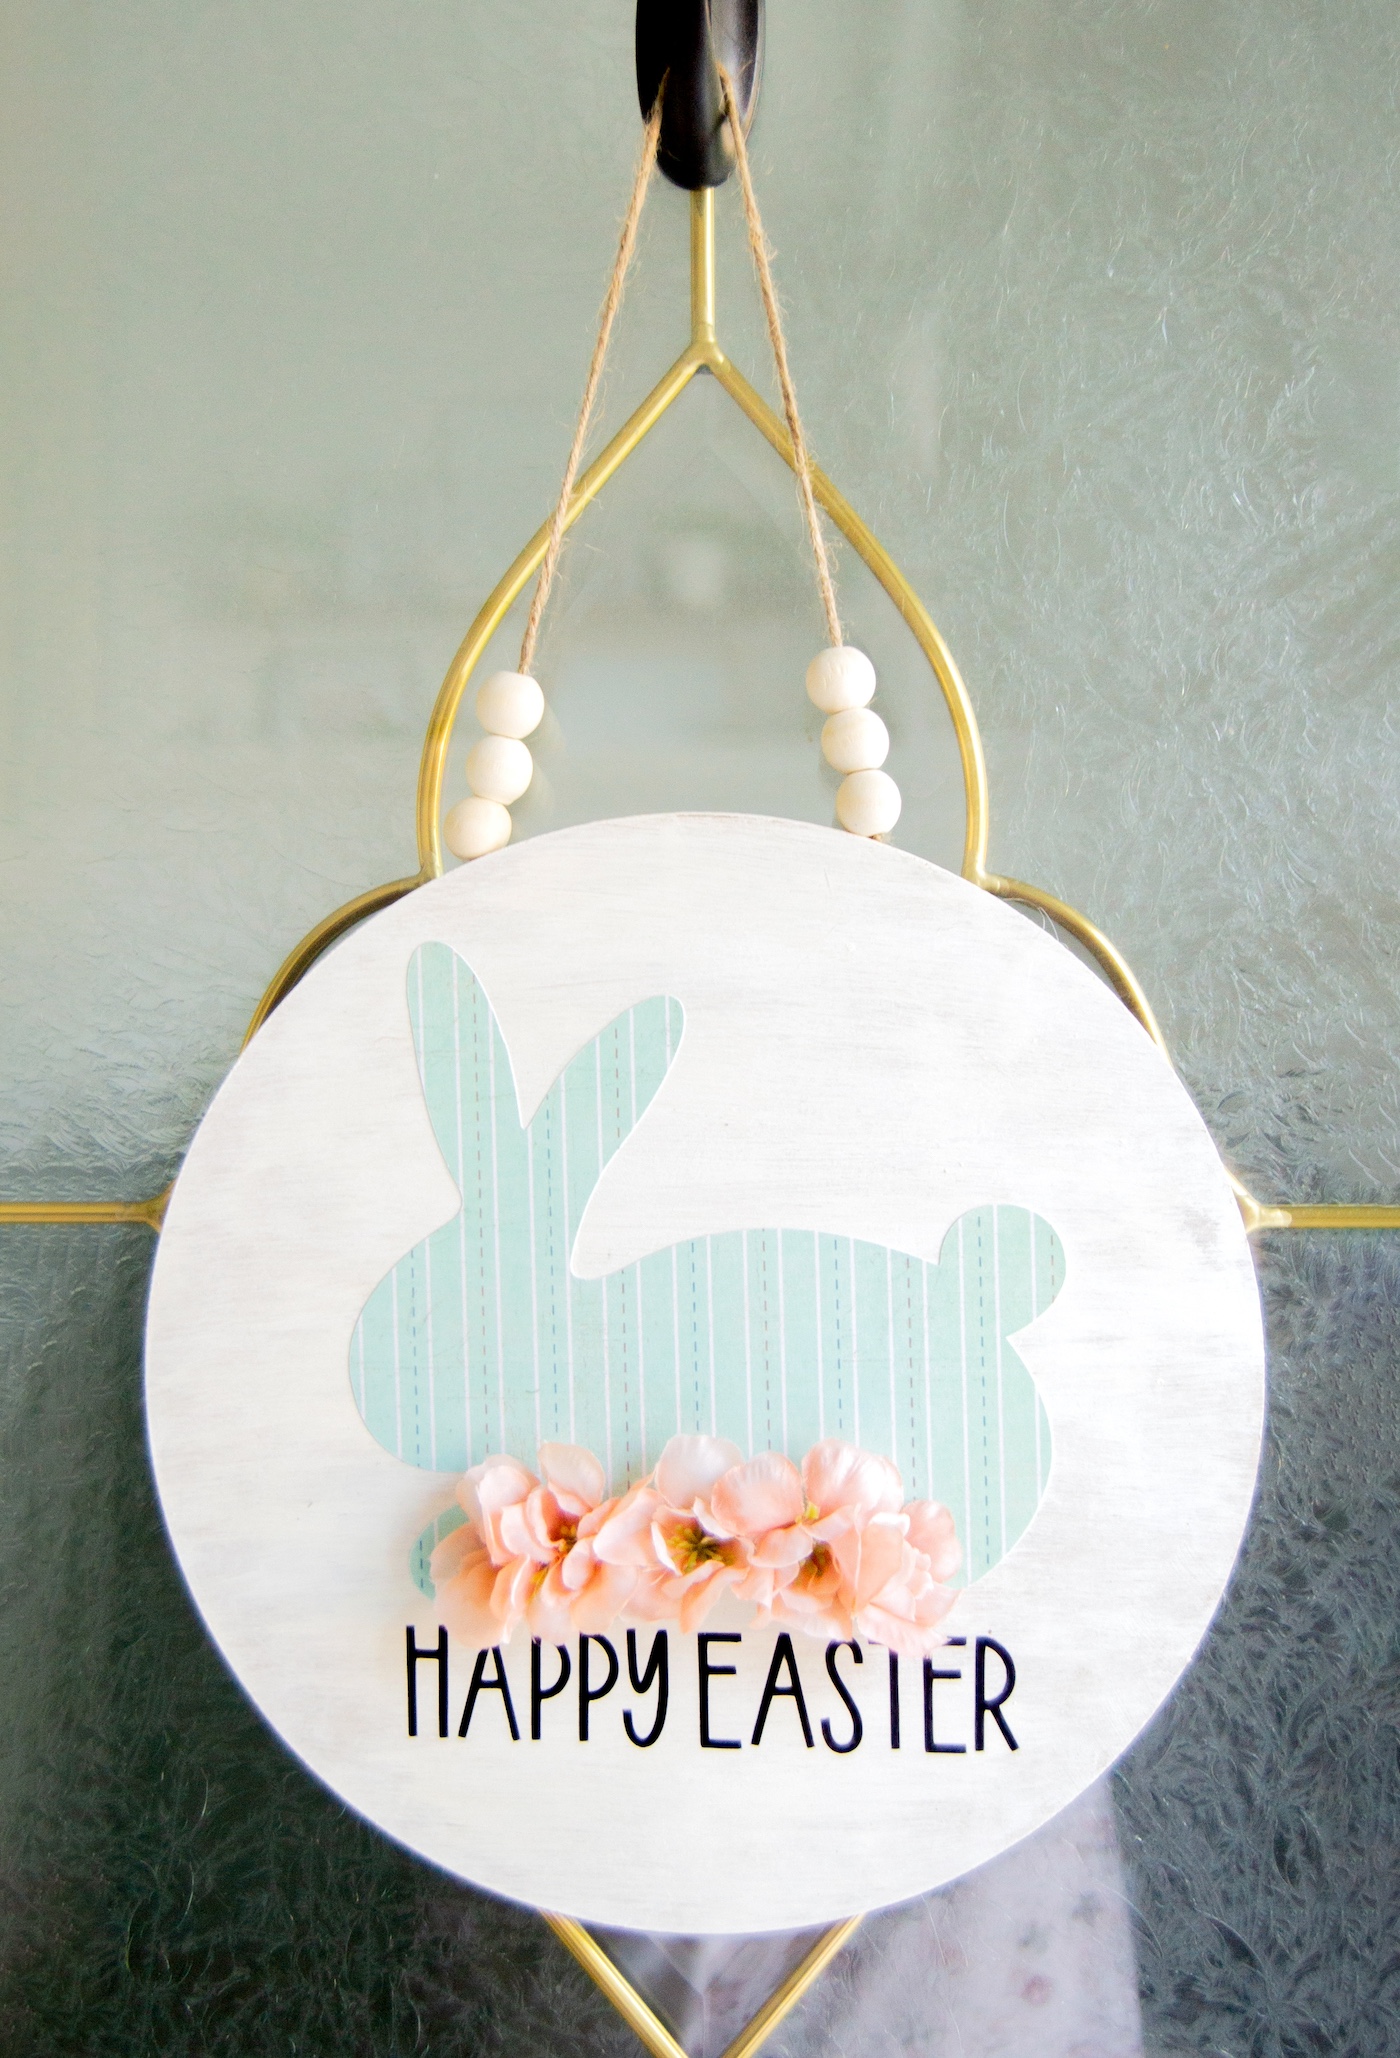
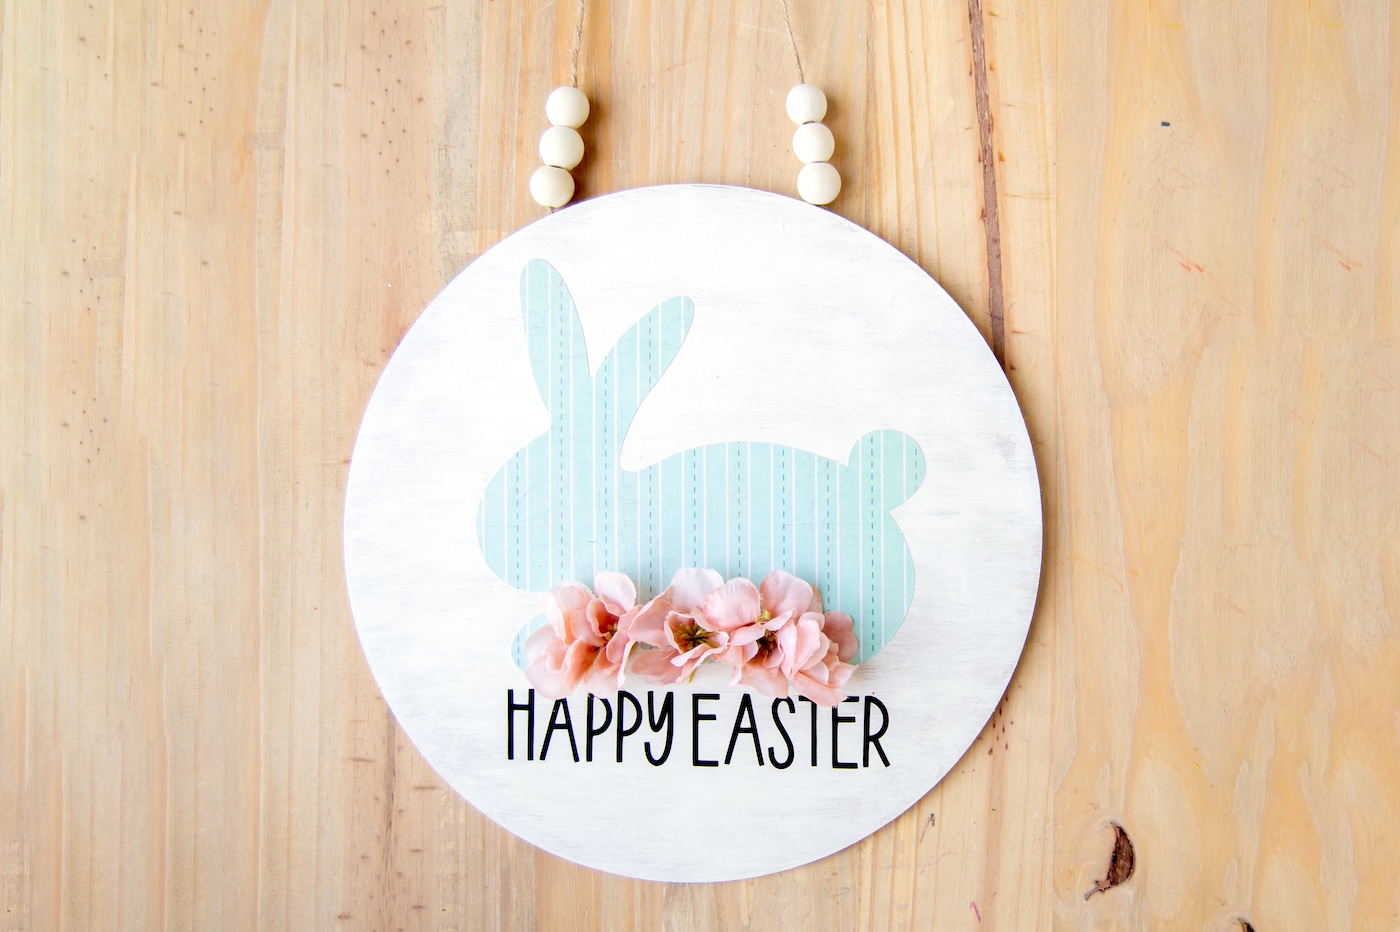
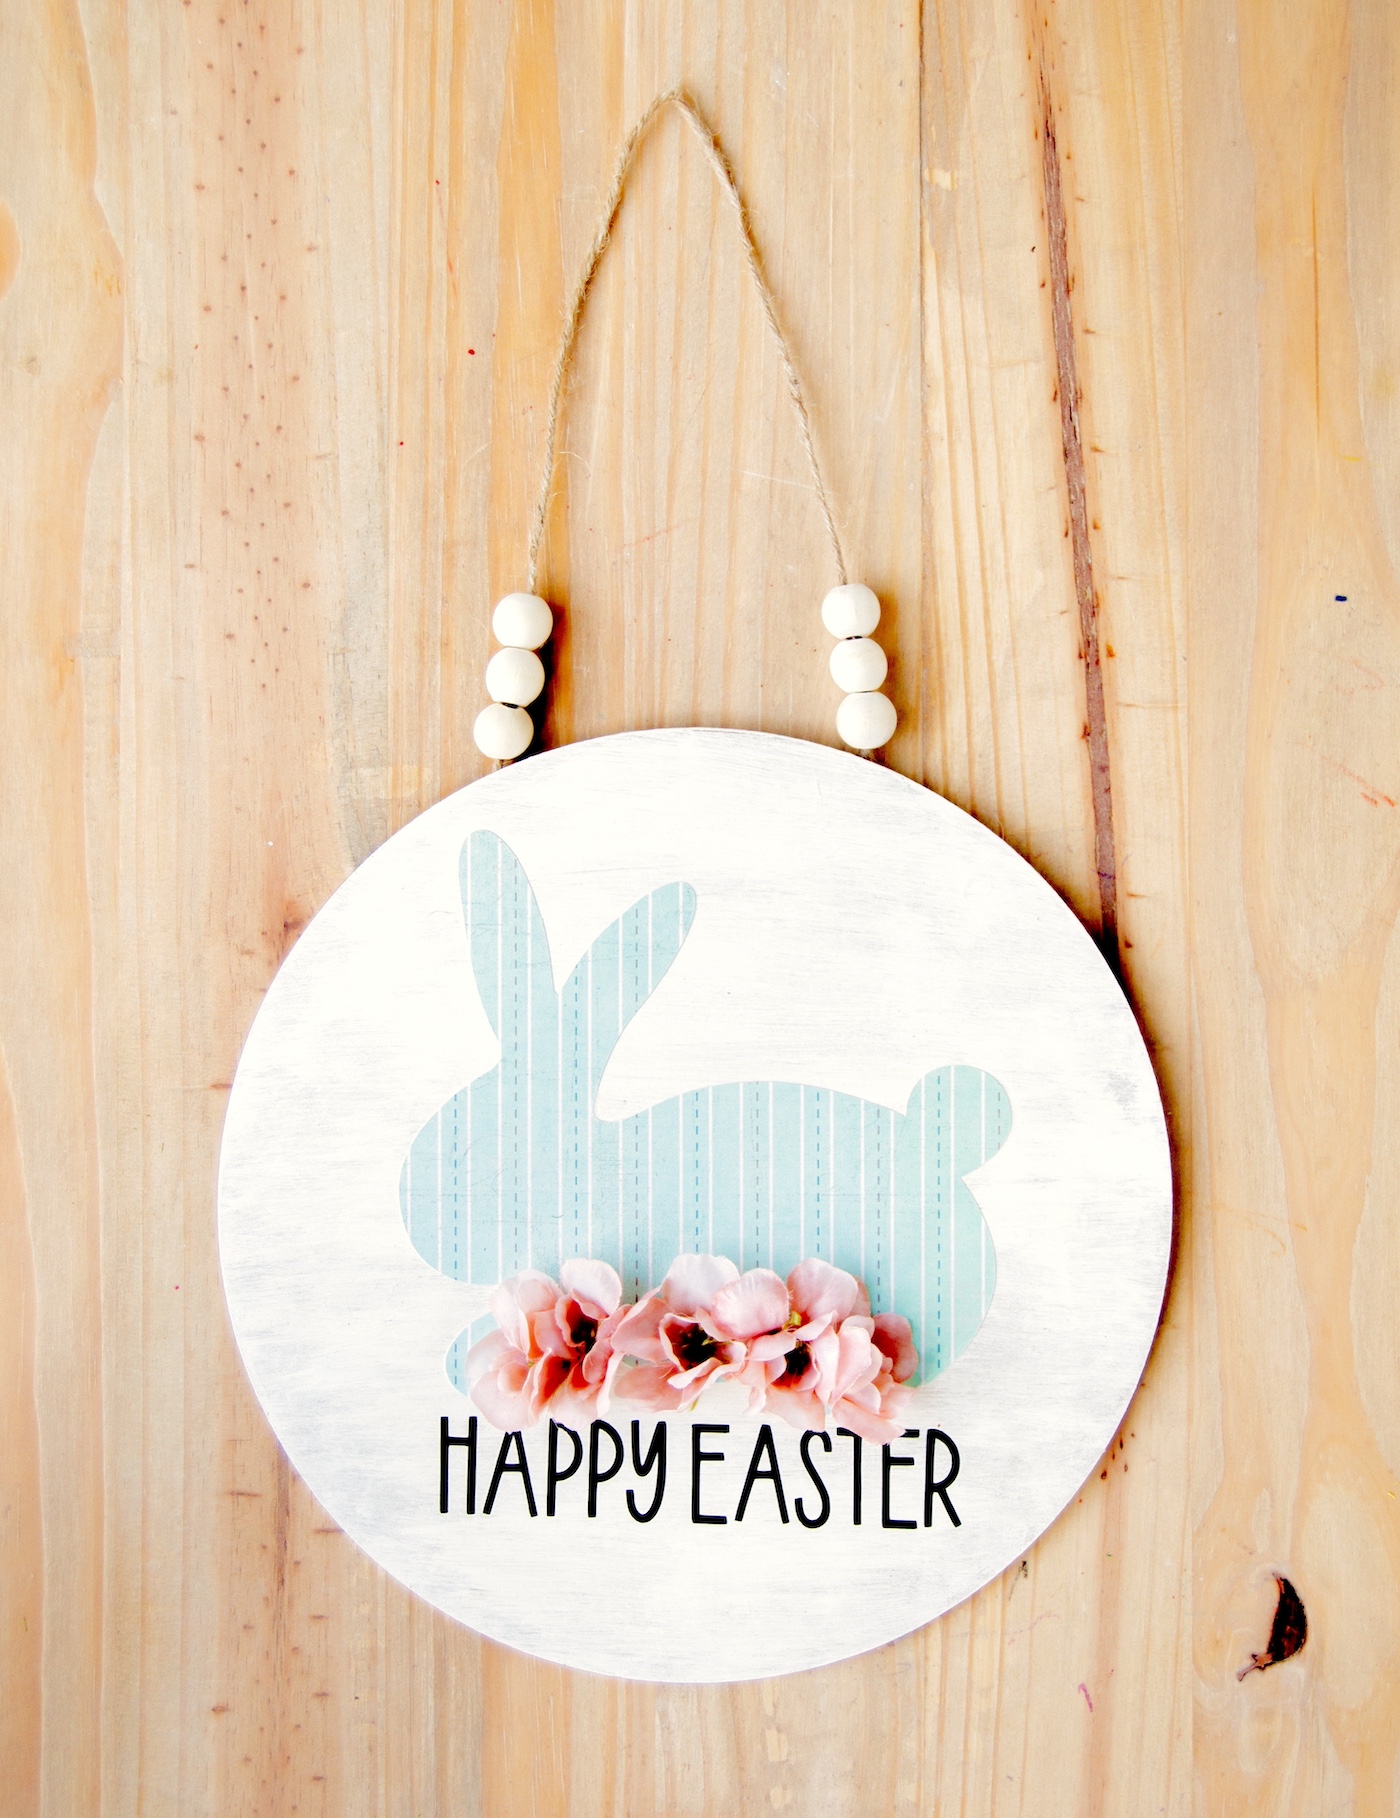
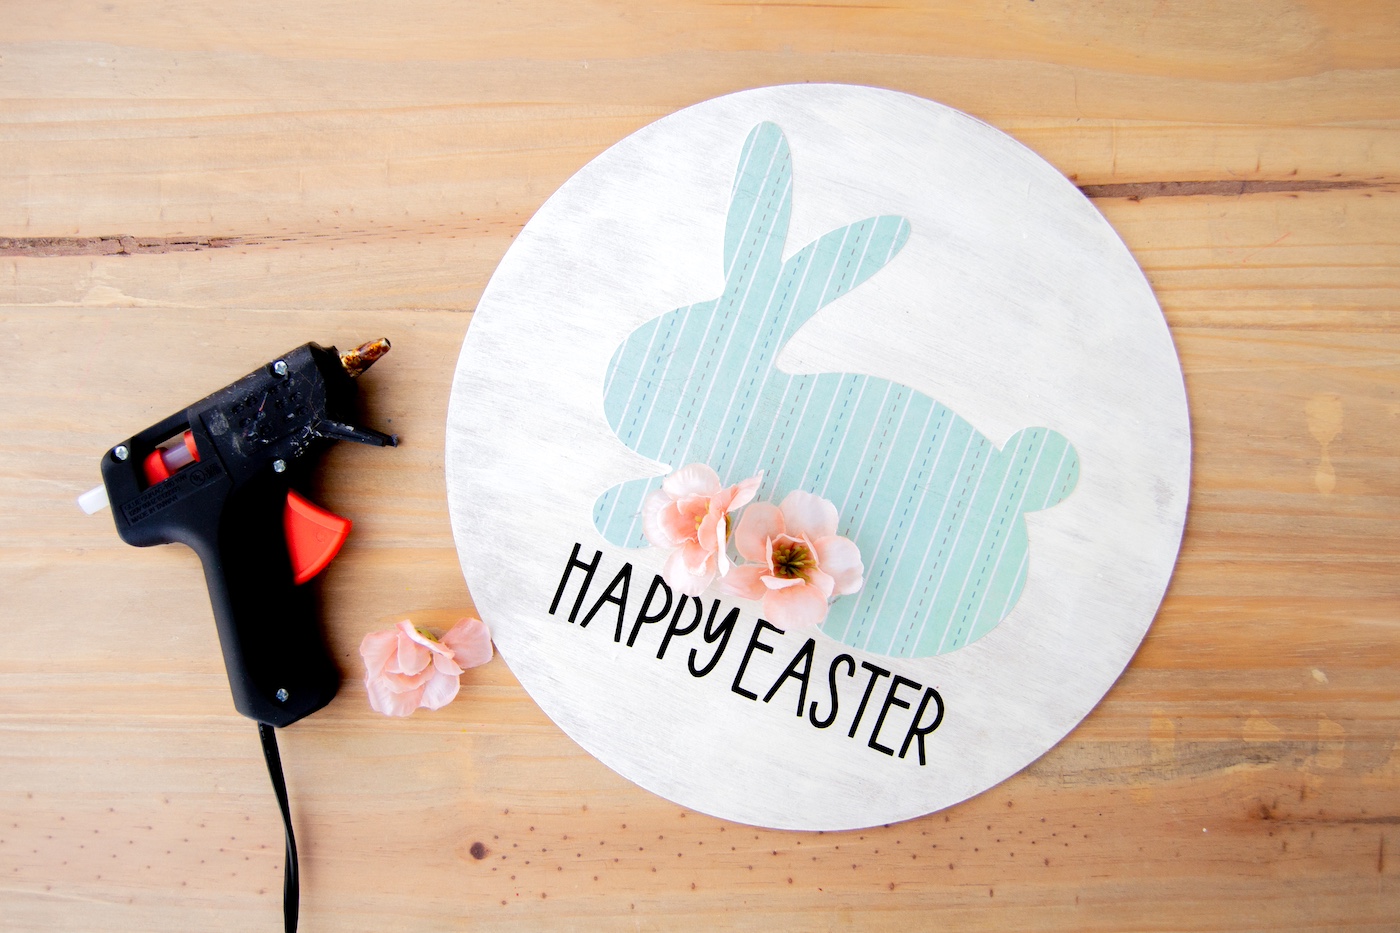
This rustic sign features a cute bunny silhouette that looks like it hopped straight out of a storybook, all surrounded by the soft, springy hues of your favorite scrapbook paper. It’s adorned with delicate faux flowers that never wilt.
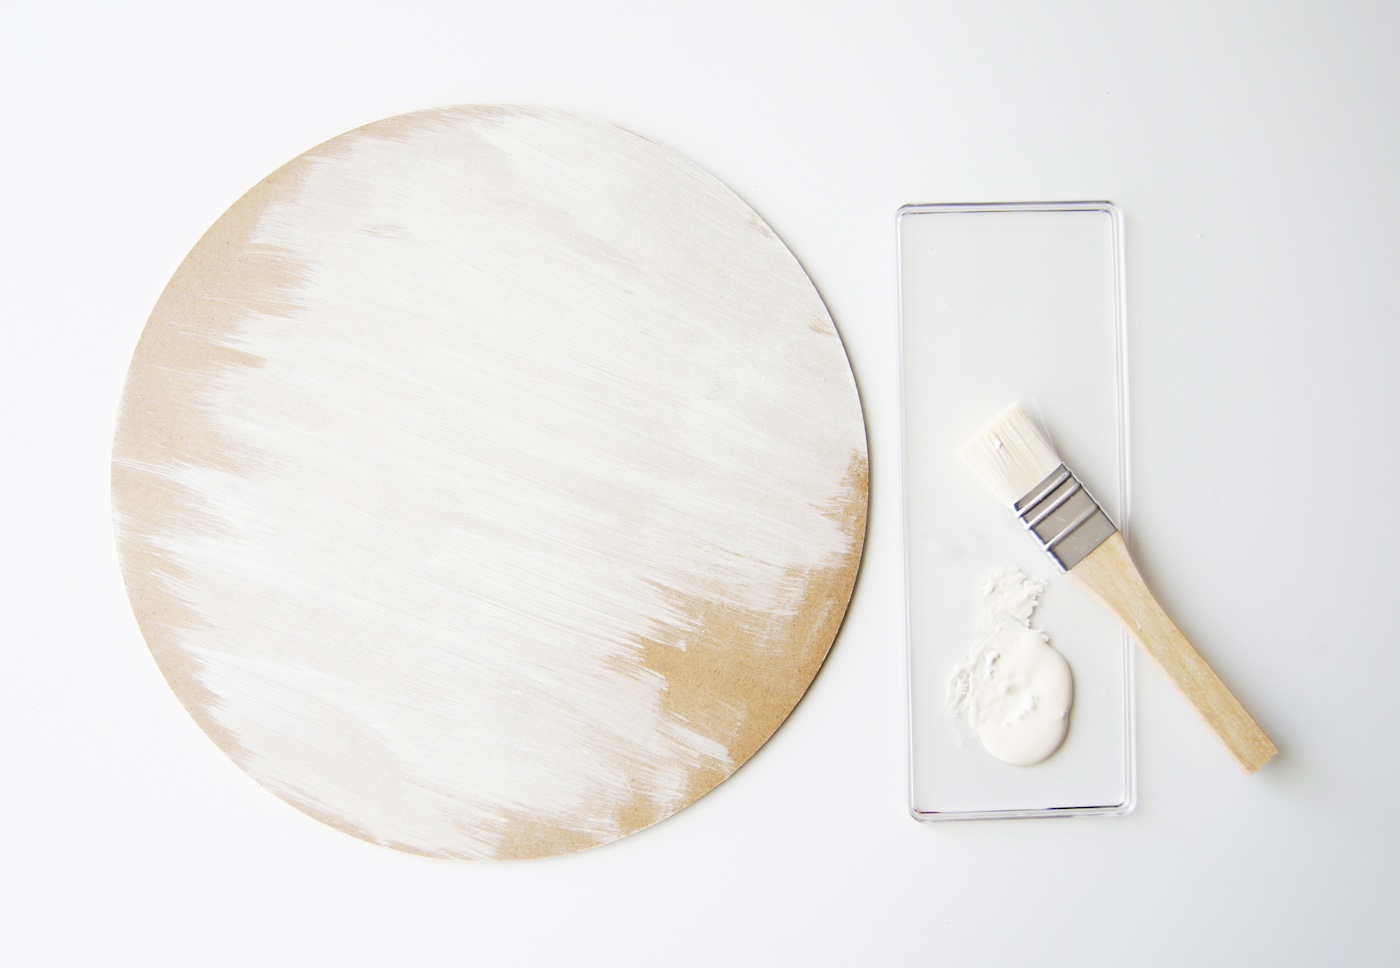
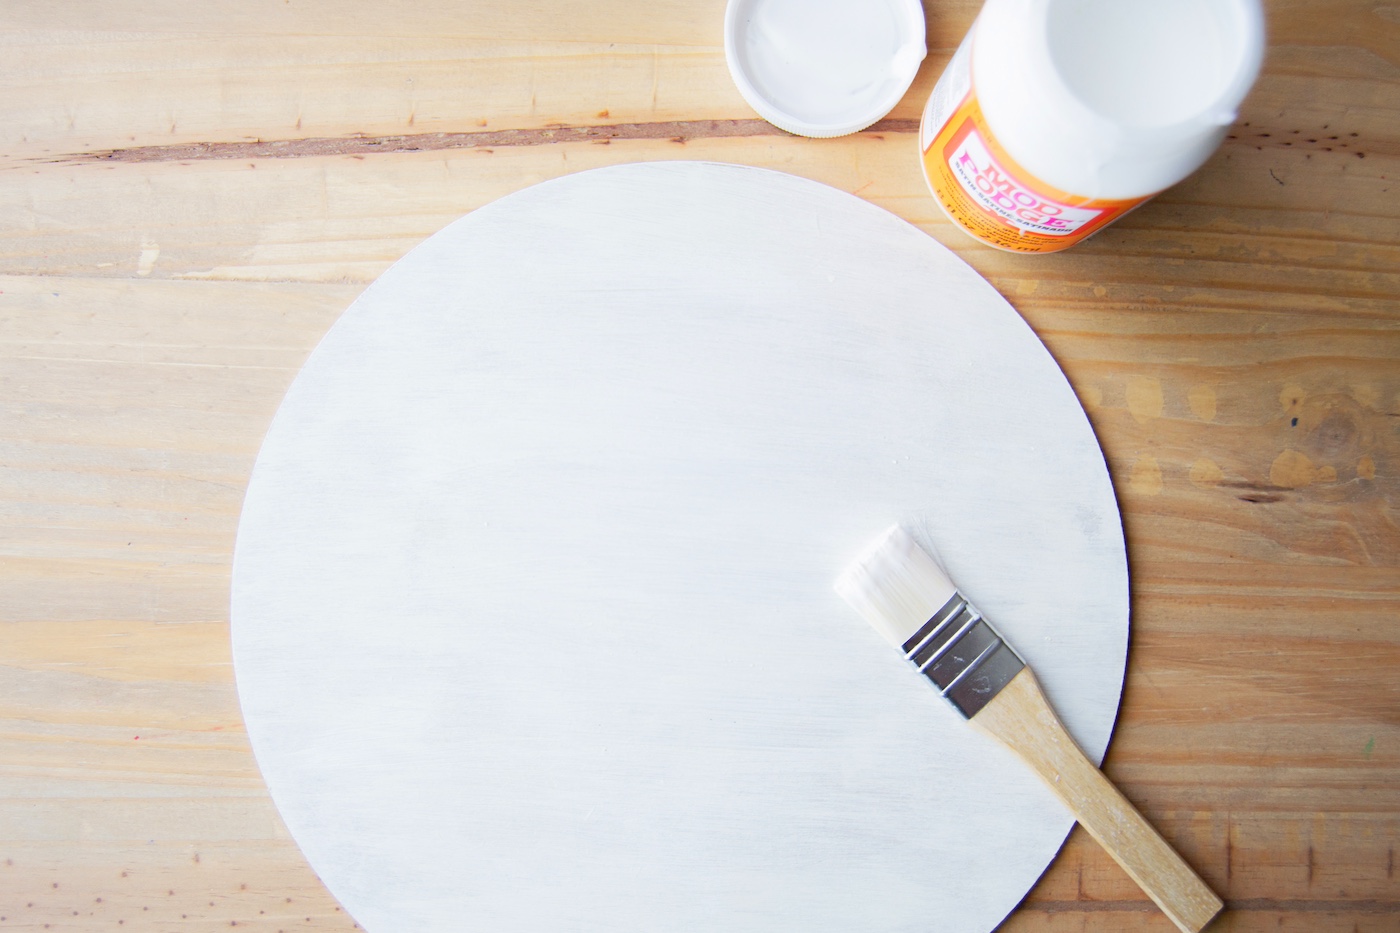
We’ll start with a plain round sign as our canvas, giving it a touch of personality with some paint. Whether you opt for a shabby chic whitewash or a pop of color to match your chosen scrapbook paper, the choice is yours.
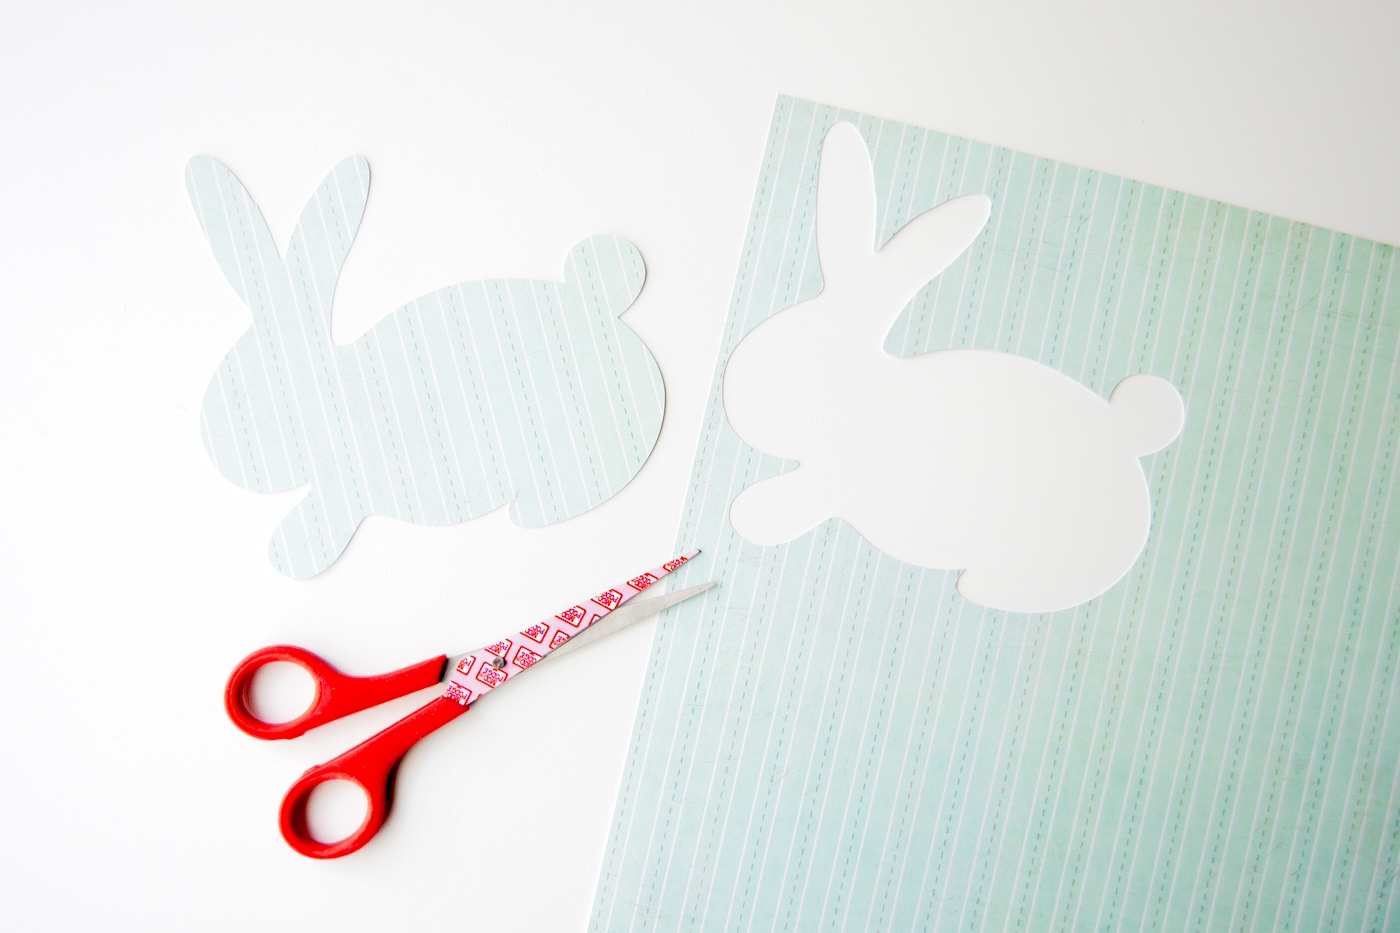
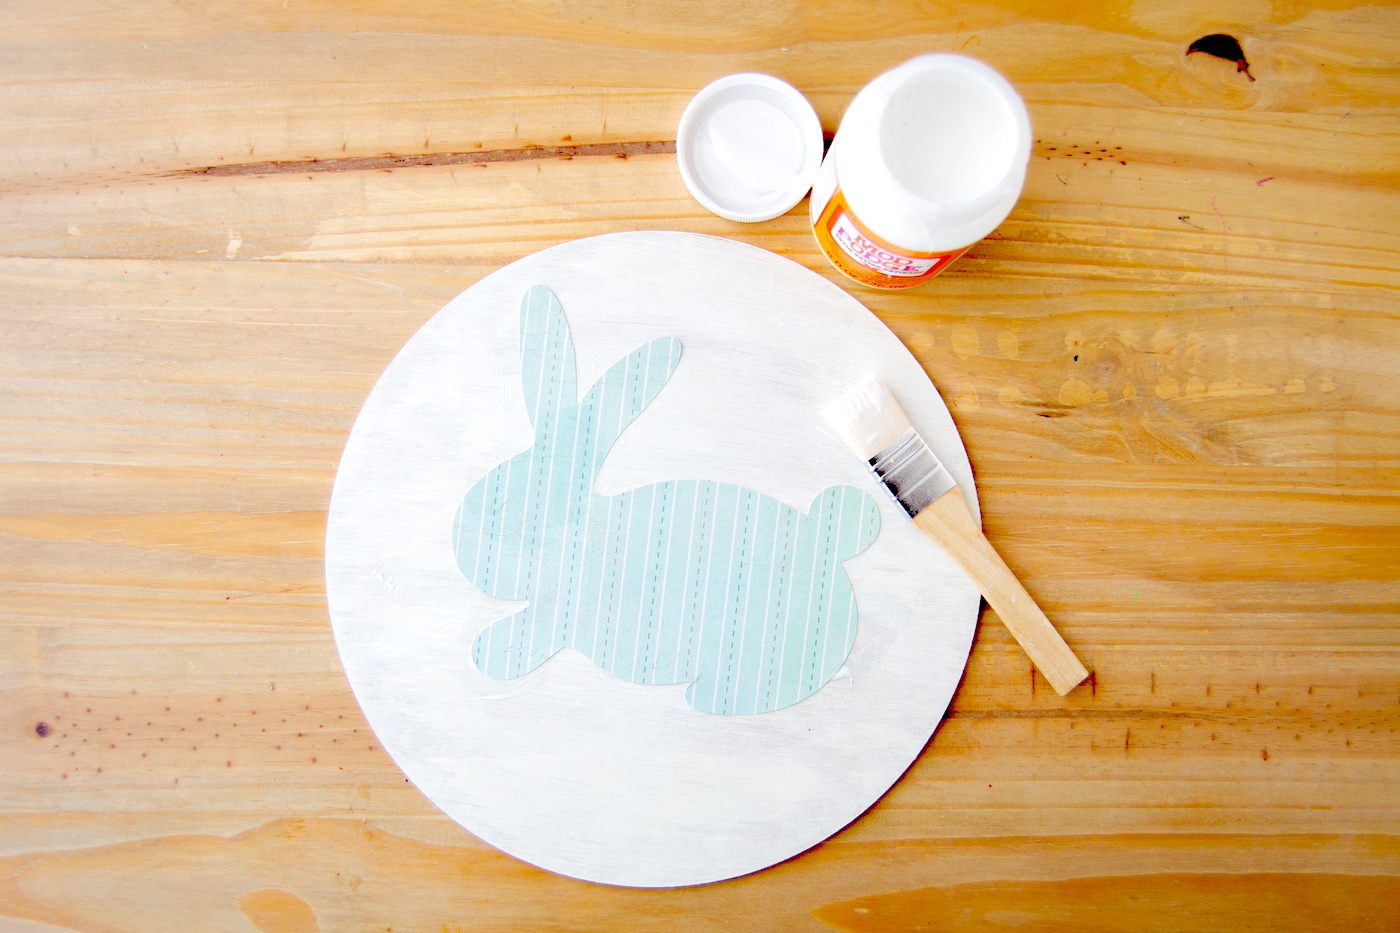
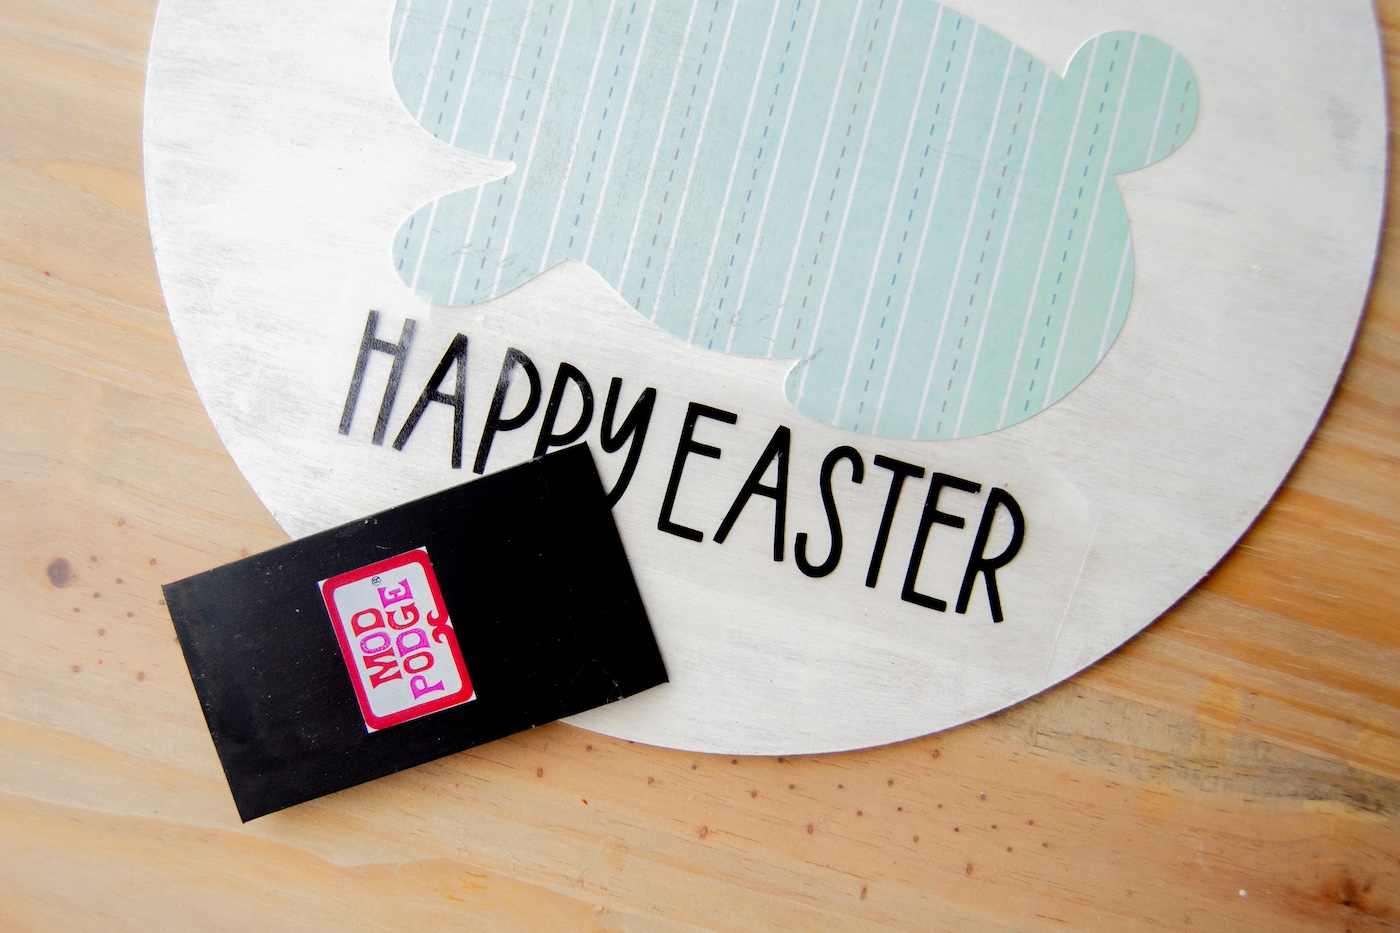
You can cut out the bunny silhouette with scissors or a die cutter (I’ve got the free file for you), and you’ll decoupage it onto the sign with a coat of Mod Podge. And let’s not forget the finishing touches of lettering and a cluster of faux flowers that breathe life into our creation.
By the end of this post, you’ll have a “DIY Happy Easter sign” that’s more than just decor—it’s a celebration of spring, a nod to creativity, and a testament to the joy of holiday crafting.
So roll up your sleeves, gather your supplies, and embark on a crafting adventure that will leave your door – and perhaps your heart – a little brighter this Easter season. Here’s what you’re going to need.
Gather These Supplies
- Round wood or MDF sign
- Craft paint
- Mod Podge Satin (you can also use Gloss or Matte depending on the finish you’d like)
- Scrapbook paper
- Jute twine
- Wood beads – 6
- Vinyl letters (or adhesive letters)
- Faux flowers
- Scissors
- Flat paintbrush
- Hot glue gun and glue sticks
Tips and Thoughts for This Project
I’ve provided the bunny silhouette I’ve used here – make sure to size it proportional to your wood sign.
I used a dry, flat brush for a white-washed, shabby chic look. You can also paint it solid or a different color to match the scrapbook paper that you pick out.
I cut ‘Happy Easter’ on my die-cutting machine using a simple font. You can also use store-bought vinyl embellishments, or adhesive letters from the scrapbooking section craft store.
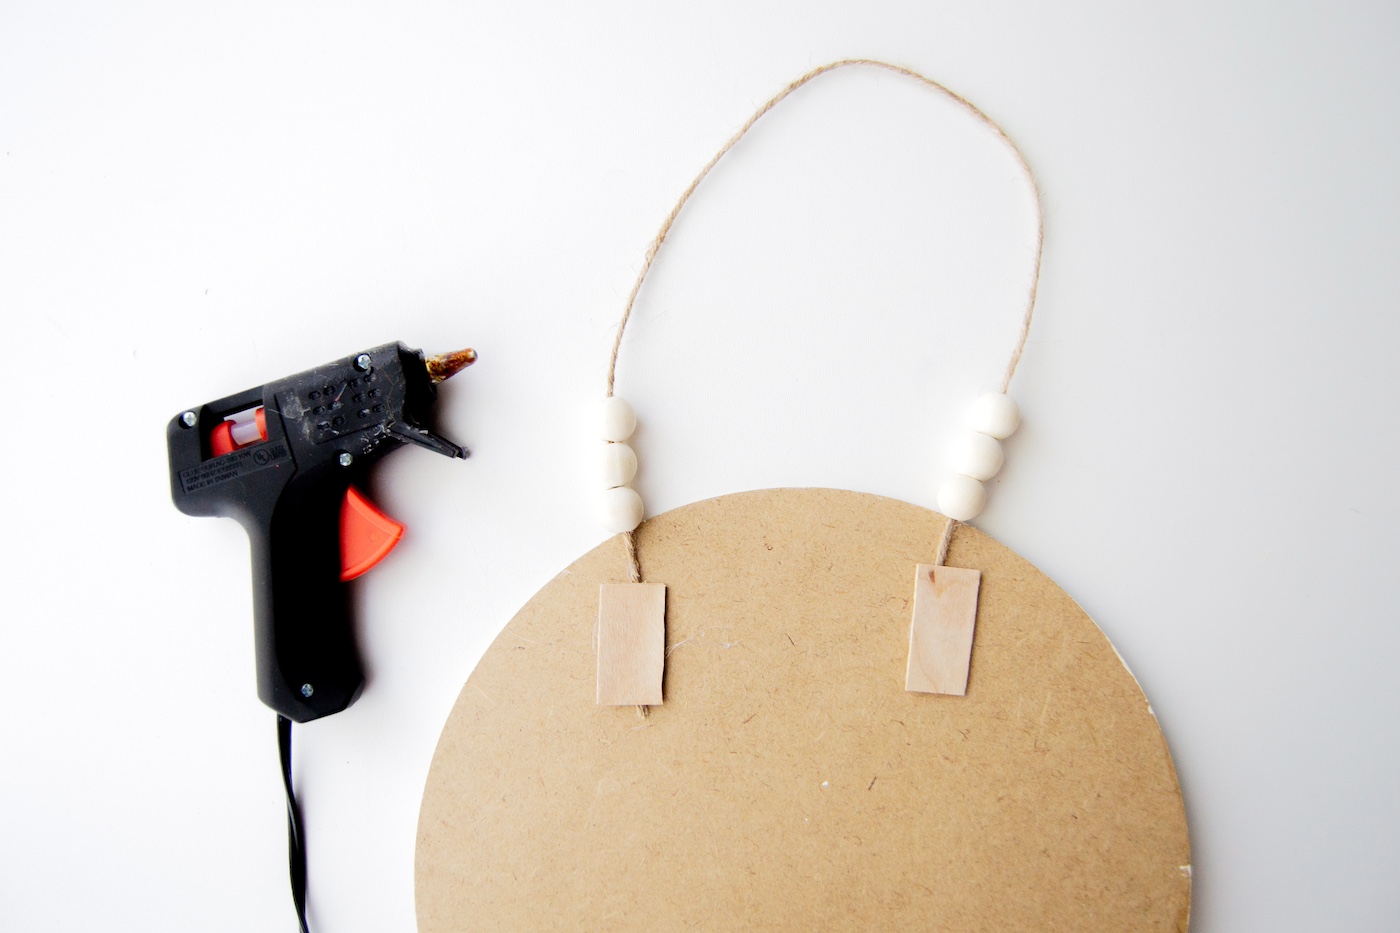
You’ll see on the back of the sign I used pieces of popsicle sticks to glue down over the ends of the jute, for reinforcement. That part is optional.
Get the printable how to for this Easter sign below:

DIY Easter Sign
Materials
- Round wood or MDF sign
- Scrapbook paper
- Vinyl letters or adhesive letters
- Faux flowers
- Mod Podge
- Acrylic paint
- Jute twine
- Wood beads
Instructions
- Paint the wooden sign in the colors of your choice. Do front and back, and let dry completely.
- Cut a bunny silhouette from the scrapbook paper with scissors, or use a die-cutter such as a Cricut or a Silhouette.
- Add a thin coat of Mod Podge onto your sign with a flat brush and adhere your bunny silhouette. Carefully press and smooth to make sure there are no gaps and lifted areas.
- Once dry, add another thin coat of Mod Podge onto the sign and the paper layer. Wait for that to dry.
- Add your vinyl sentiment – use a scraper to firmly adhere the letters before carefully removing the transfer tape.
- Use hot glue to attach your floral embellishments. You may need to cut the stems off with scissors so that they are seated better on the sign. Use as many florals as you like and let set.
- Cut a length of twine to attach to the back of your sign. String on the wood beads (optional) and use hot glue to attach to the back. Let set completely before hanging.
My Happy Easter sign is finished! Told you it was easy. 🙂 What do you like to make for Easter? Let me know in the comments!
If you enjoyed this easy Easter project, I’d love for you to visit these other unique holiday ideas:


I enjoy your newsletter so much. The great thing about most of the projects is I can get the grandchildren involved.