DIY Easter Sign
Craft a festive DIY Easter bunny sign with our simple guide. Use Mod Podge, scrapbook paper, and faux flowers for a fun, spring door decor
Yield: 1 sign
Cost: $5
Materials
- Round wood or MDF sign
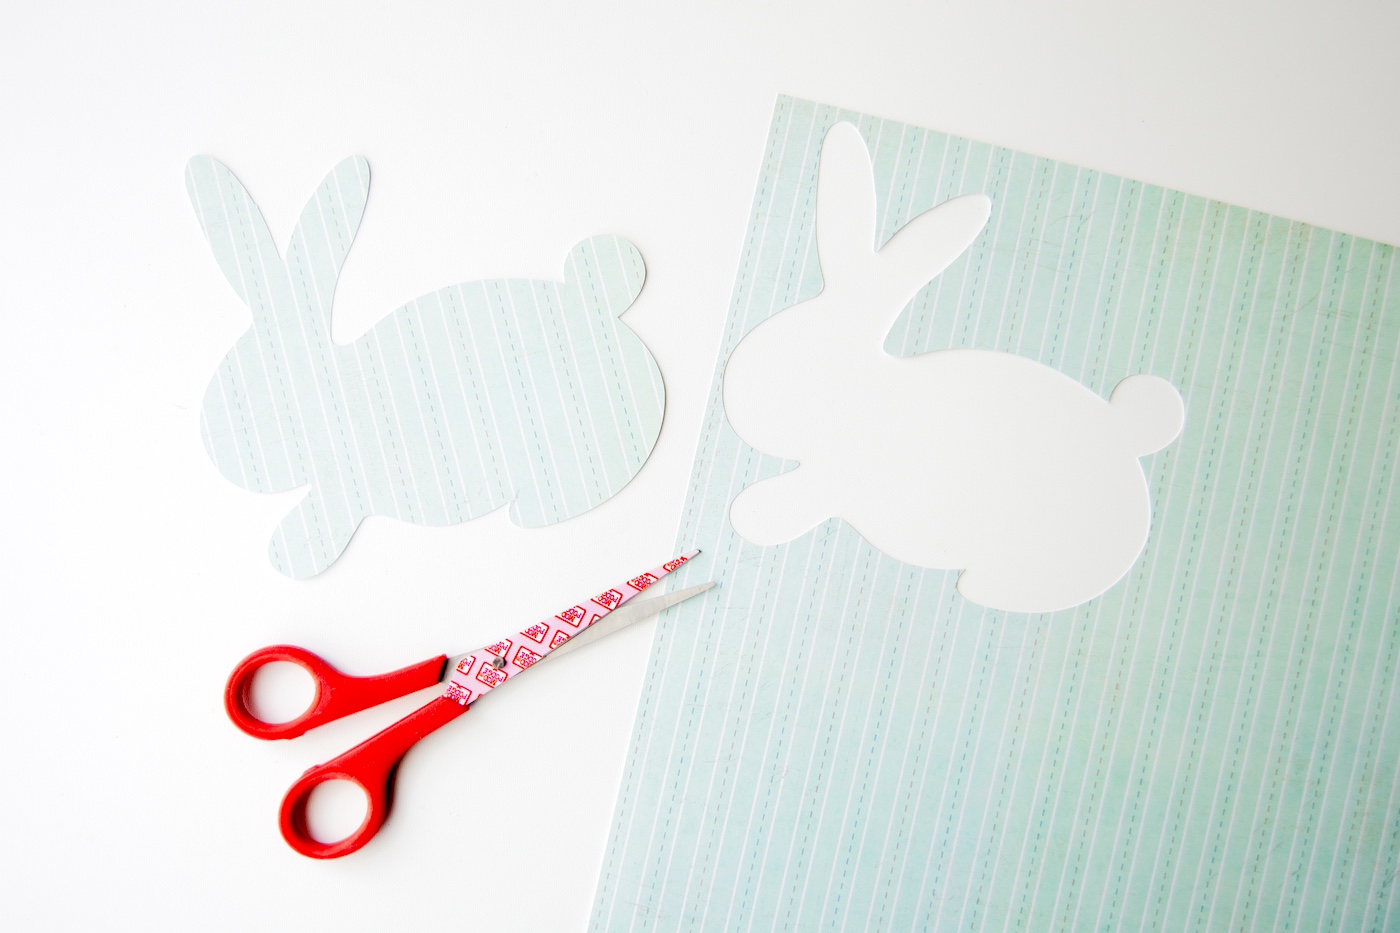
- Scrapbook paper
- Vinyl letters or adhesive letters
- Faux flowers
- Mod Podge
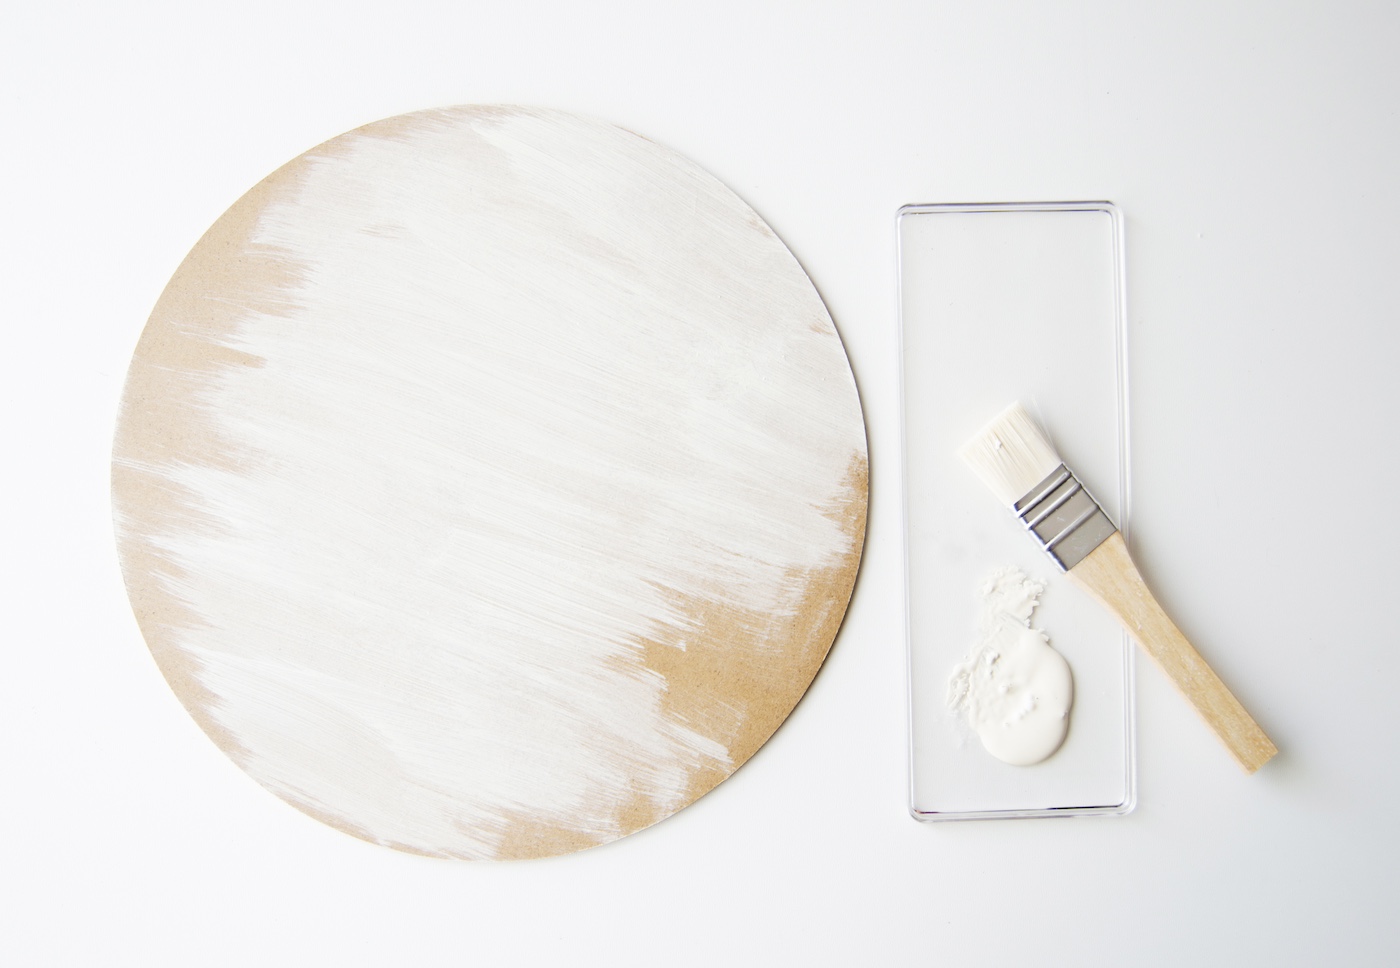
- Acrylic paint
- Jute twine
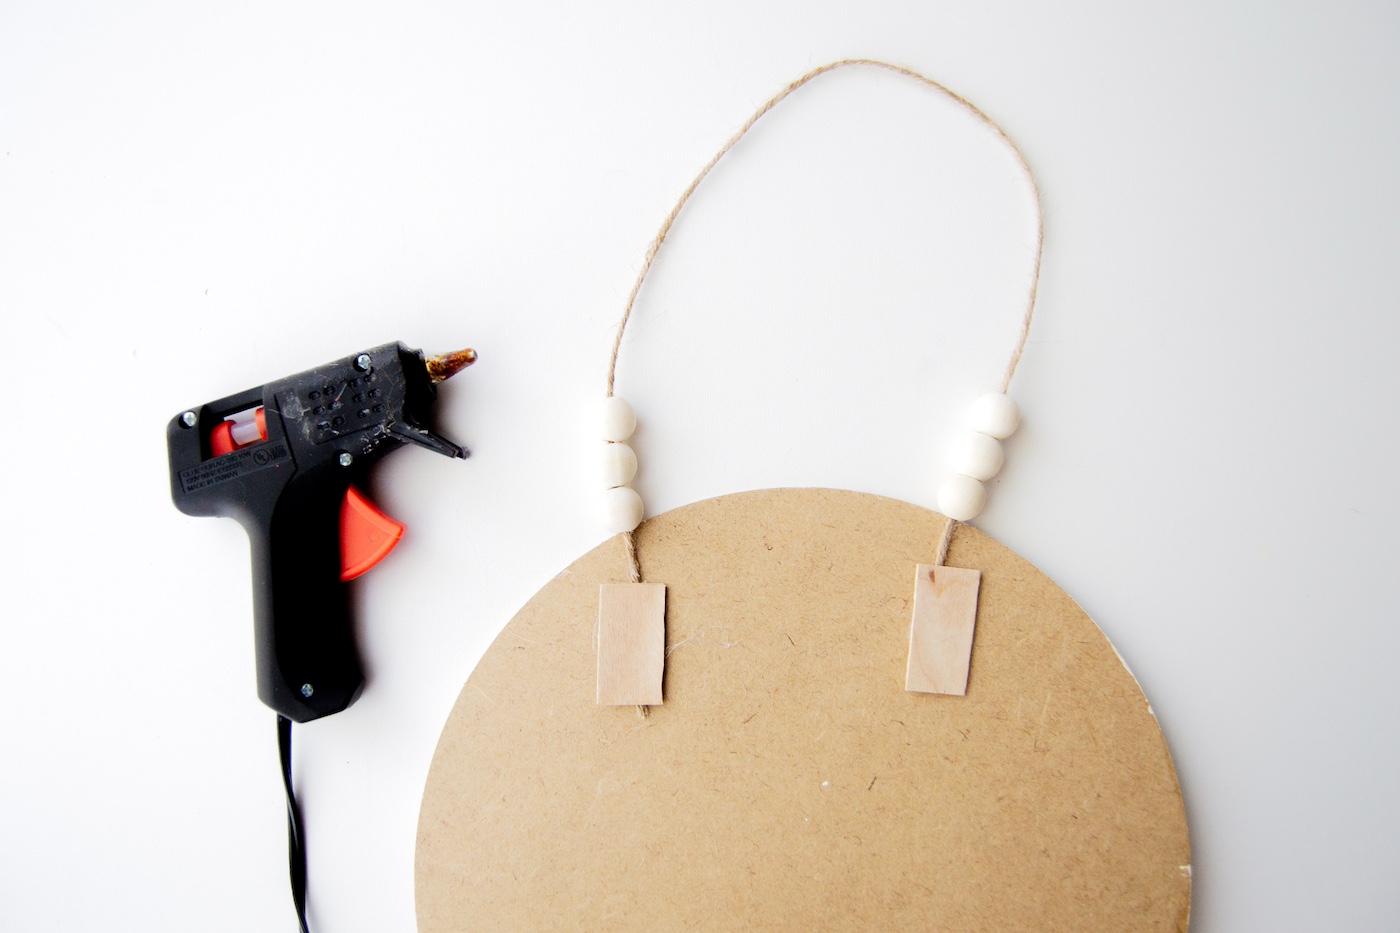
- Wood beads
Instructions
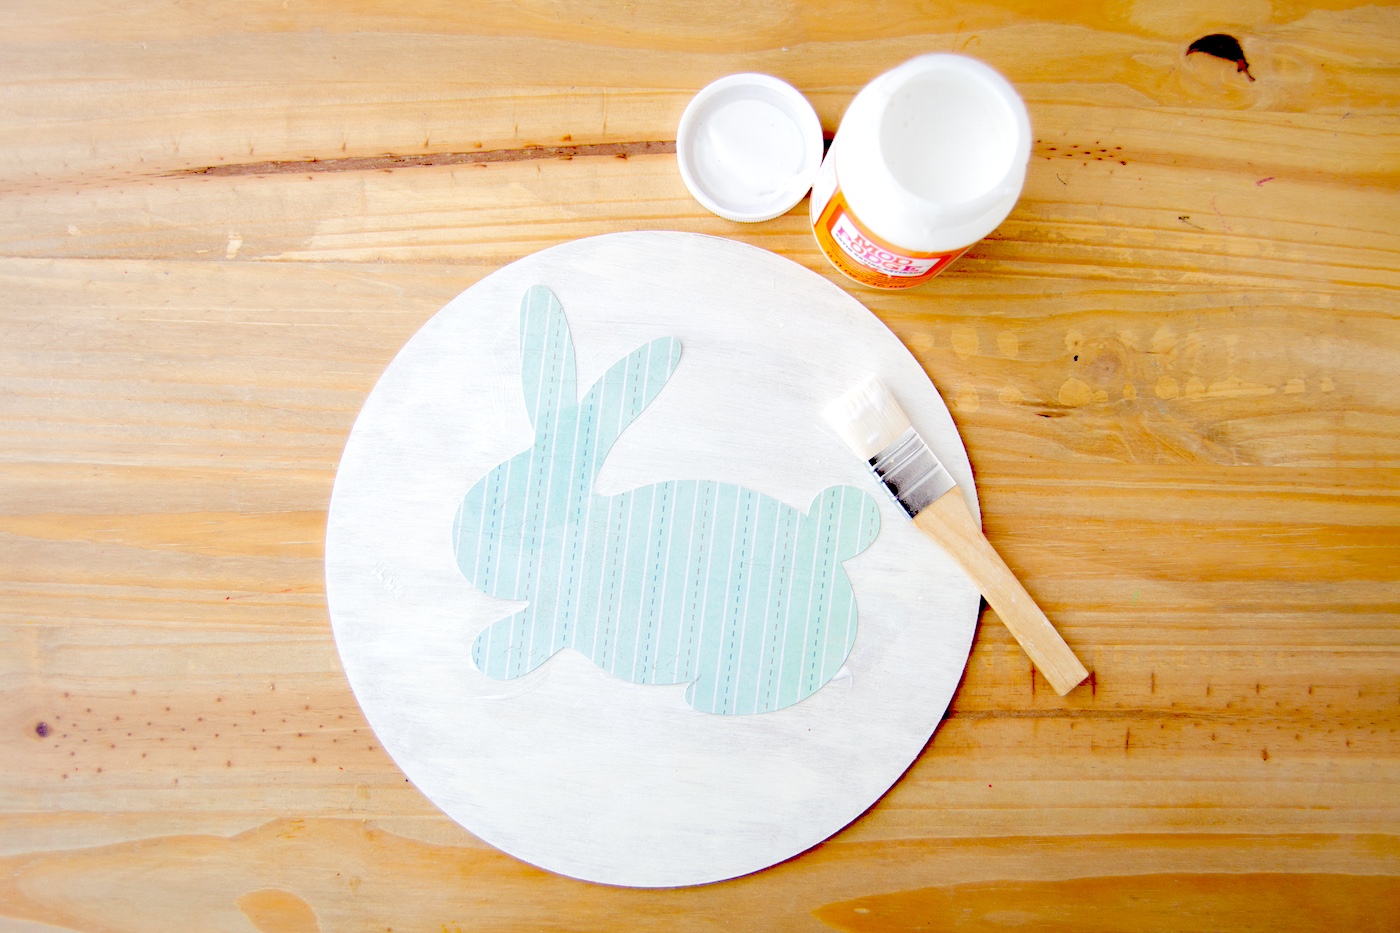
- Paint the wooden sign in the colors of your choice. Do front and back, and let dry completely.
- Cut a bunny silhouette from the scrapbook paper with scissors, or use a die-cutter such as a Cricut or a Silhouette.
- Add a thin coat of Mod Podge onto your sign with a flat brush and adhere your bunny silhouette. Carefully press and smooth to make sure there are no gaps and lifted areas.
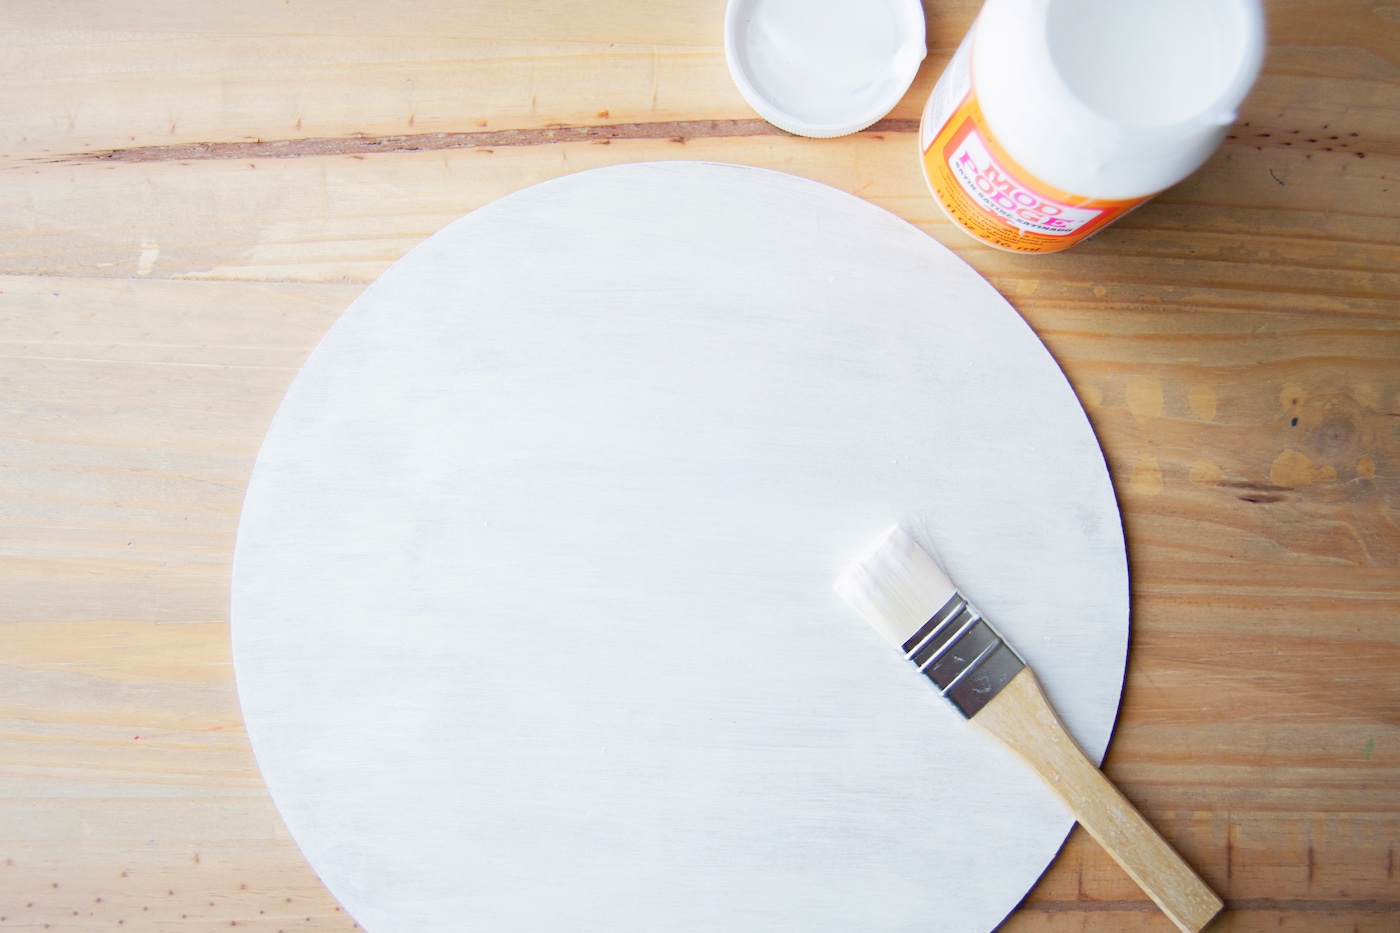
- Once dry, add another thin coat of Mod Podge onto the sign and the paper layer. Wait for that to dry.
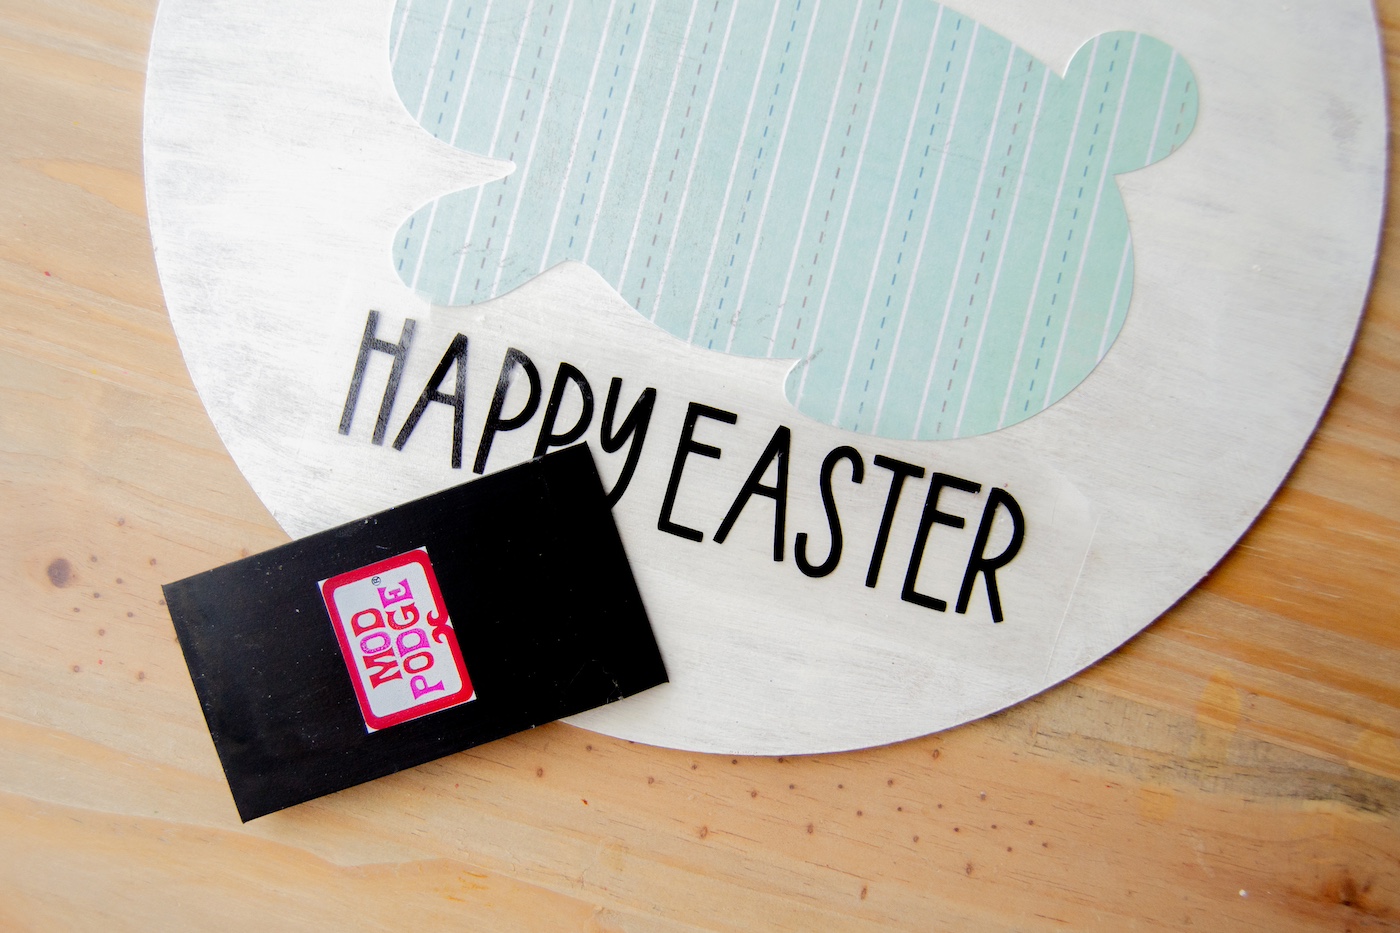
- Add your vinyl sentiment - use a scraper to firmly adhere the letters before carefully removing the transfer tape.
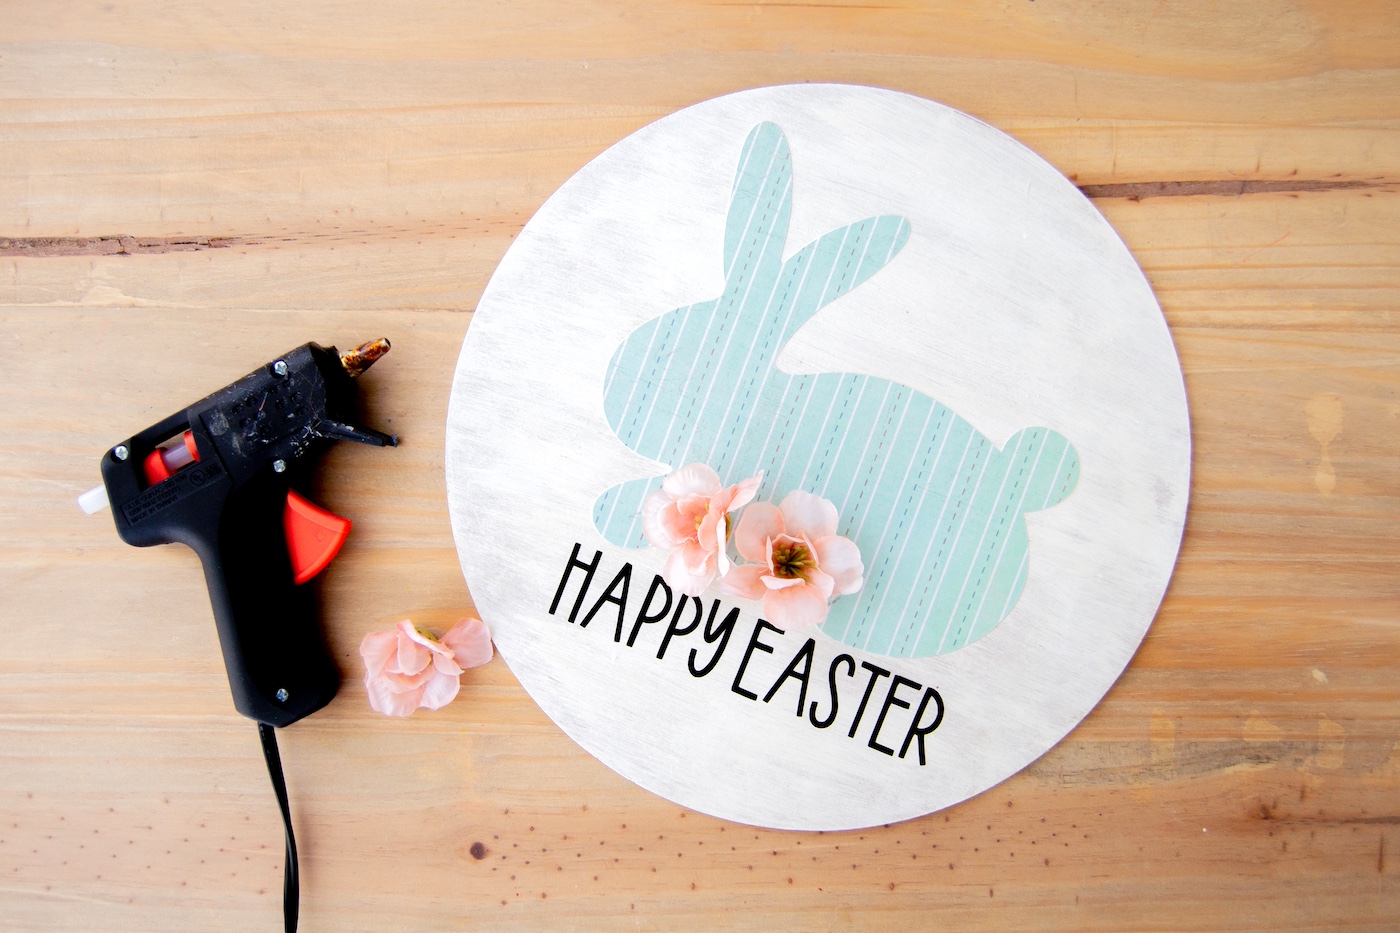
- Use hot glue to attach your floral embellishments. You may need to cut the stems off with scissors so that they are seated better on the sign. Use as many florals as you like and let set.
- Cut a length of twine to attach to the back of your sign. String on the wood beads (optional) and use hot glue to attach to the back. Let set completely before hanging.