
Discover how to make unique DIY push pins with hot glue and silicone molds! This easy guide is perfect for beginners looking to personalize their space.
Skills Required: Beginner. If you can use a hot glue gun, you can do this craft. Just be careful to protect your work surface with a silicone mat.
Hello friends! I’m excited to share something that’s both super useful and ridiculously easy to make: DIY push pins. Now, if you’re anything like me, you’ve probably got a hot glue gun lying around, maybe tucked away in a drawer or (whoops) still out on your craft table.
It’s about time we put that little gadget to good use, beyond its typical stick-stuff-together duties. And what better way than making your very own, totally customizable push pins?
This project is as beginner-friendly as it gets. You don’t need to be a craft wizard or have a magic wand—just a bit of enthusiasm and maybe a love for making your things.
Why settle for those plain, run-of-the-mill push pins when you can create something that’s not only practical but also a reflection of your style? I’m talking about using hot glue in silicone molds to craft cute, decorative push pins that are as unique as your ideas.
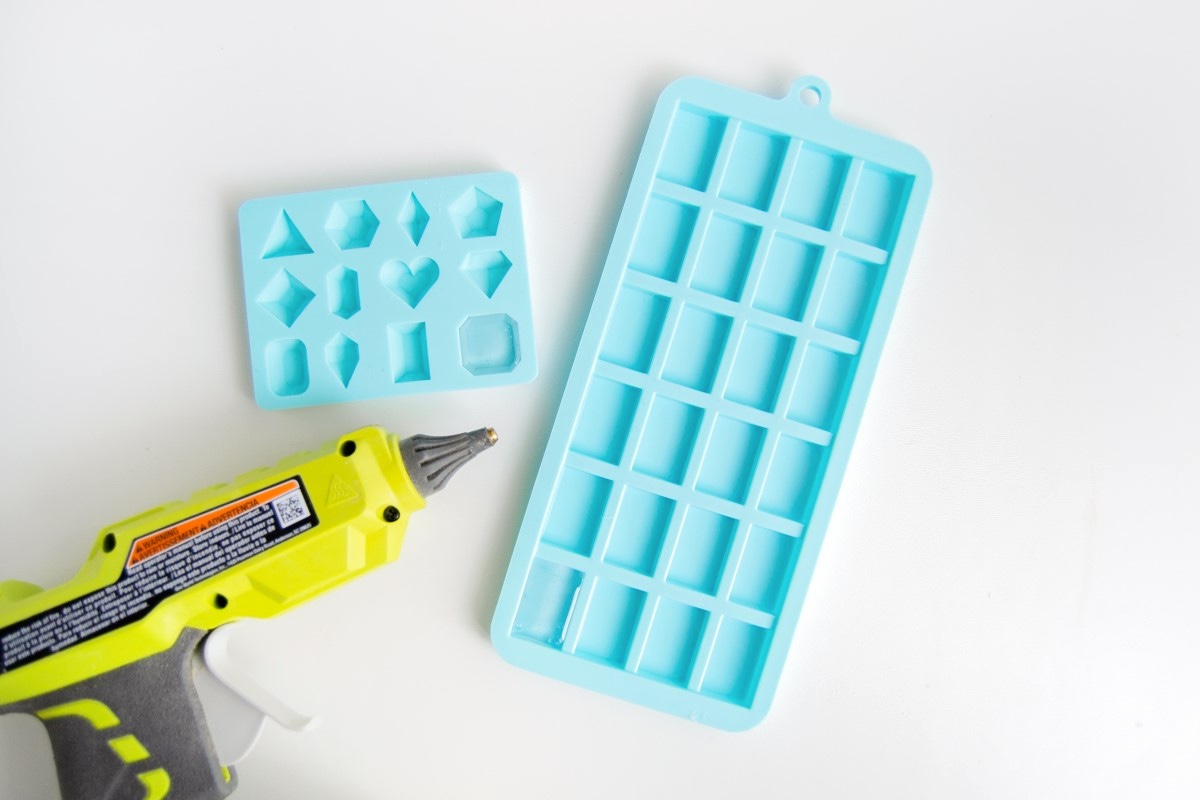
We’ll start with the basics: gemstone and chocolate molds from the craft store (yes, the baking aisle has more than just cake supplies!). With these molds, some Mod Podge, and a few other ingredients, we’re going to craft push pins that can jazz up any corkboard or wall organizer.
The best part? It’s easy, fun, and you get to play with hot glue without feeling guilty about it. You’ll also get to wield Mod Podge like a pro, adding that final touch of durability and maybe even some sparkle to your thumb tacks.
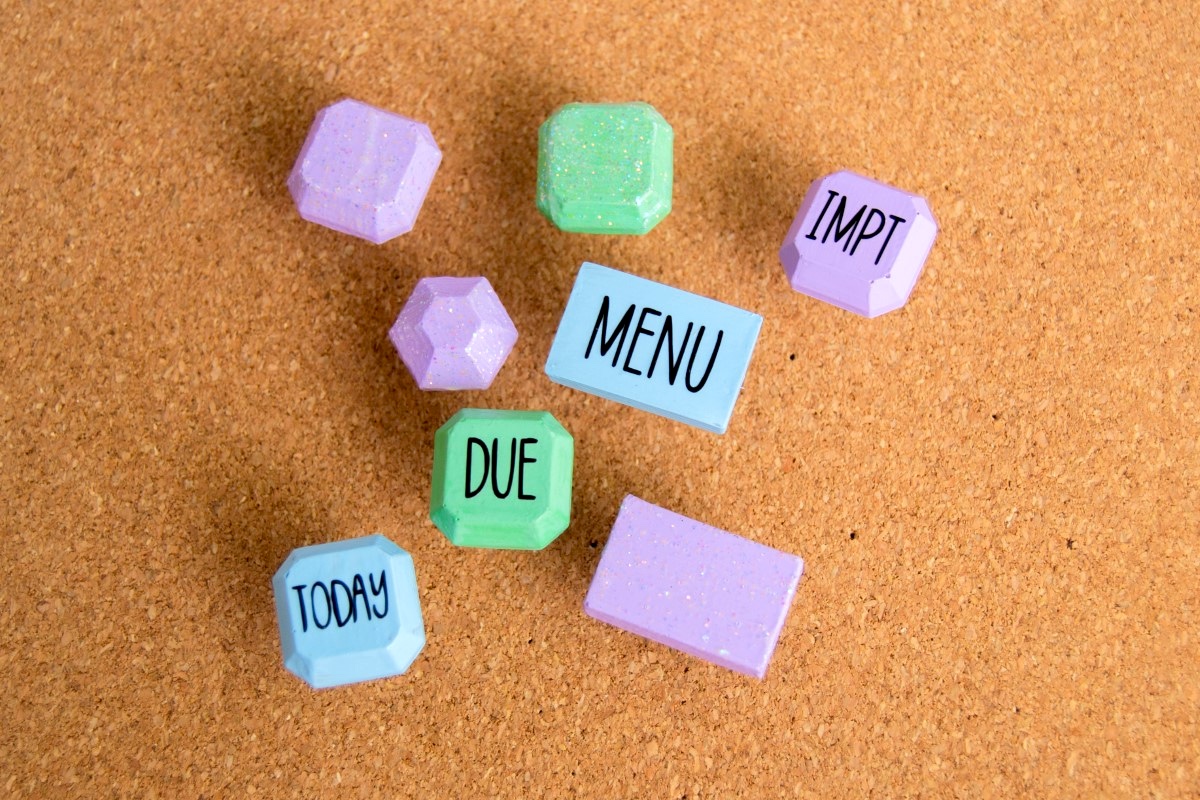
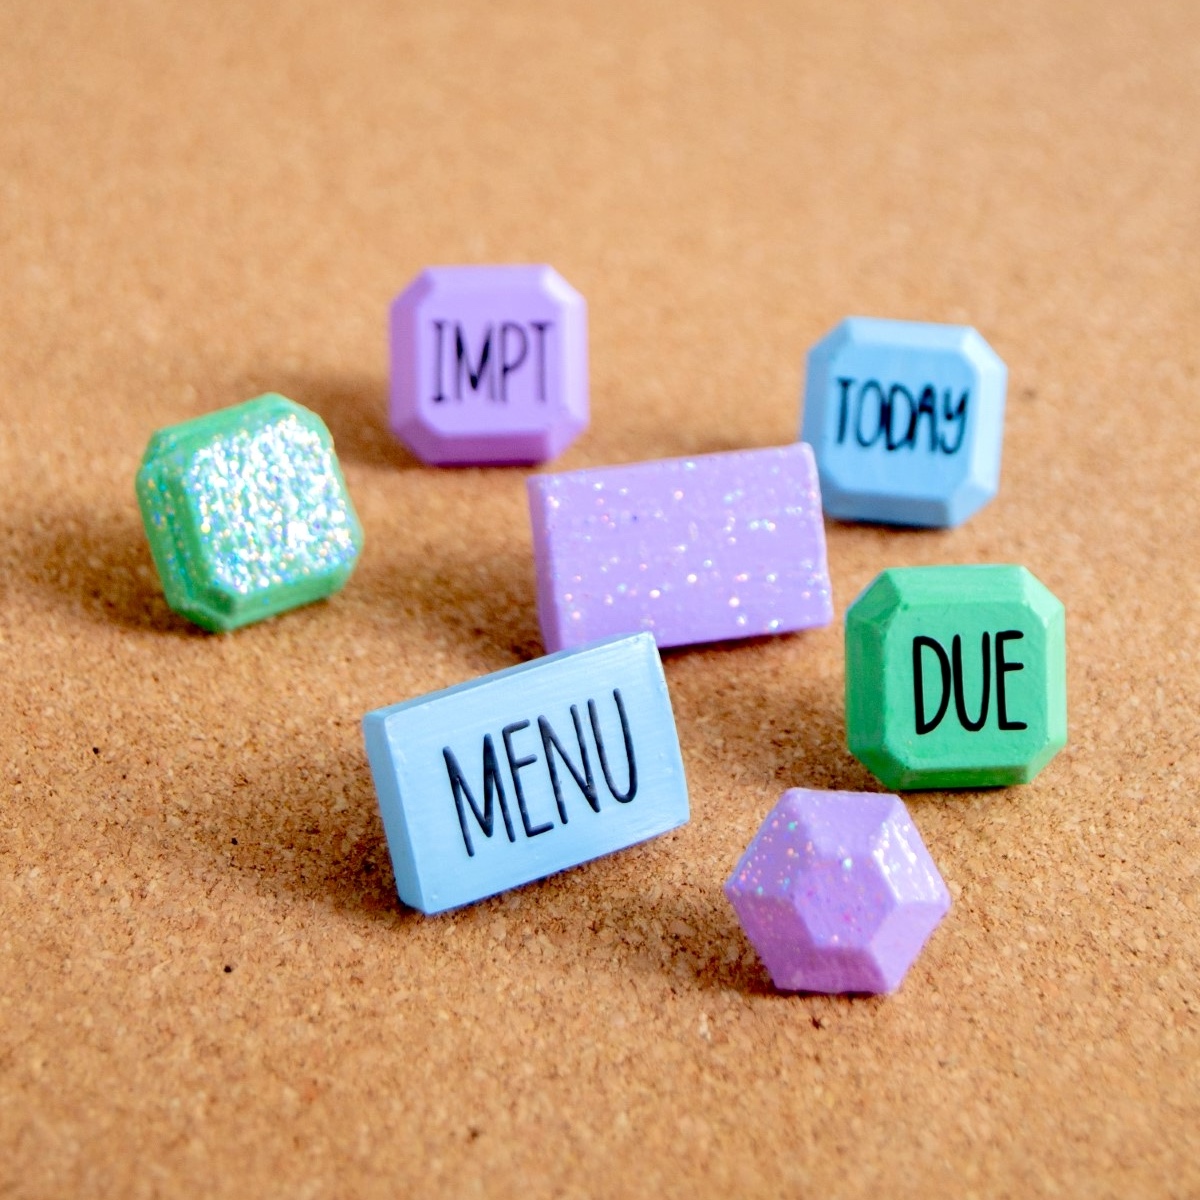
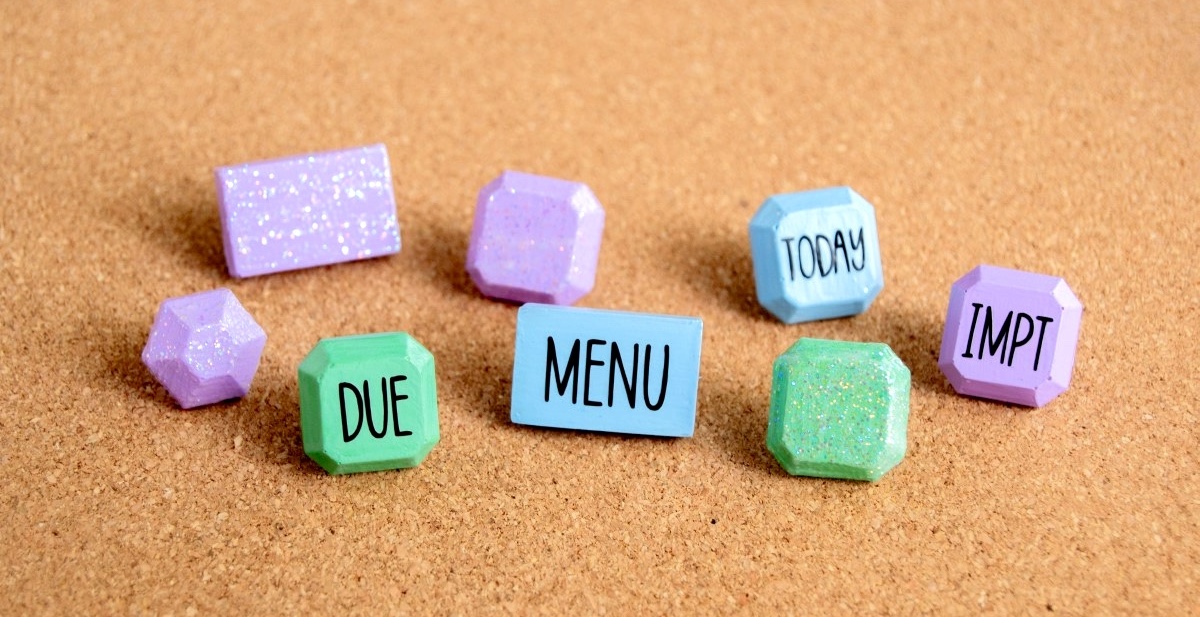
And let’s not forget the customization part—you can paint, add text, or leave them sparkly. It’s all up to you.
So, if you’re up for a quick, satisfying craft that results in something both cute and useful, stick around. Let’s make those corkboards and organizers a bit more ‘you’ with some homemade push pins. Grab your hot glue gun, and let’s get crafting!
Gather These Supplies
- Silicone molds
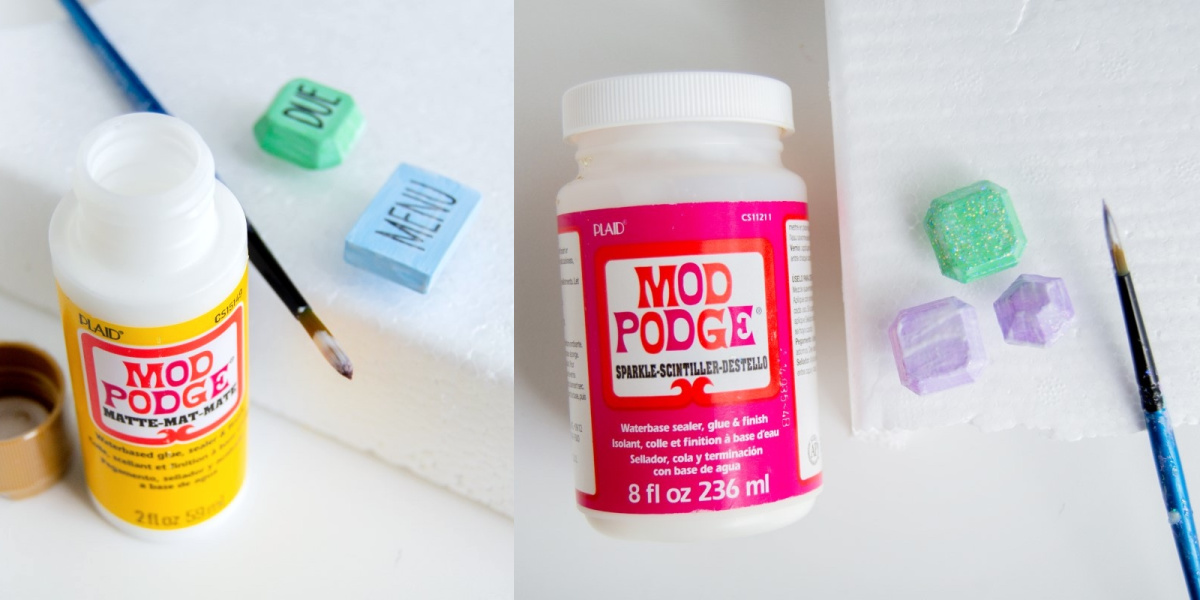
- Mod Podge (I used Matte and Sparkle)
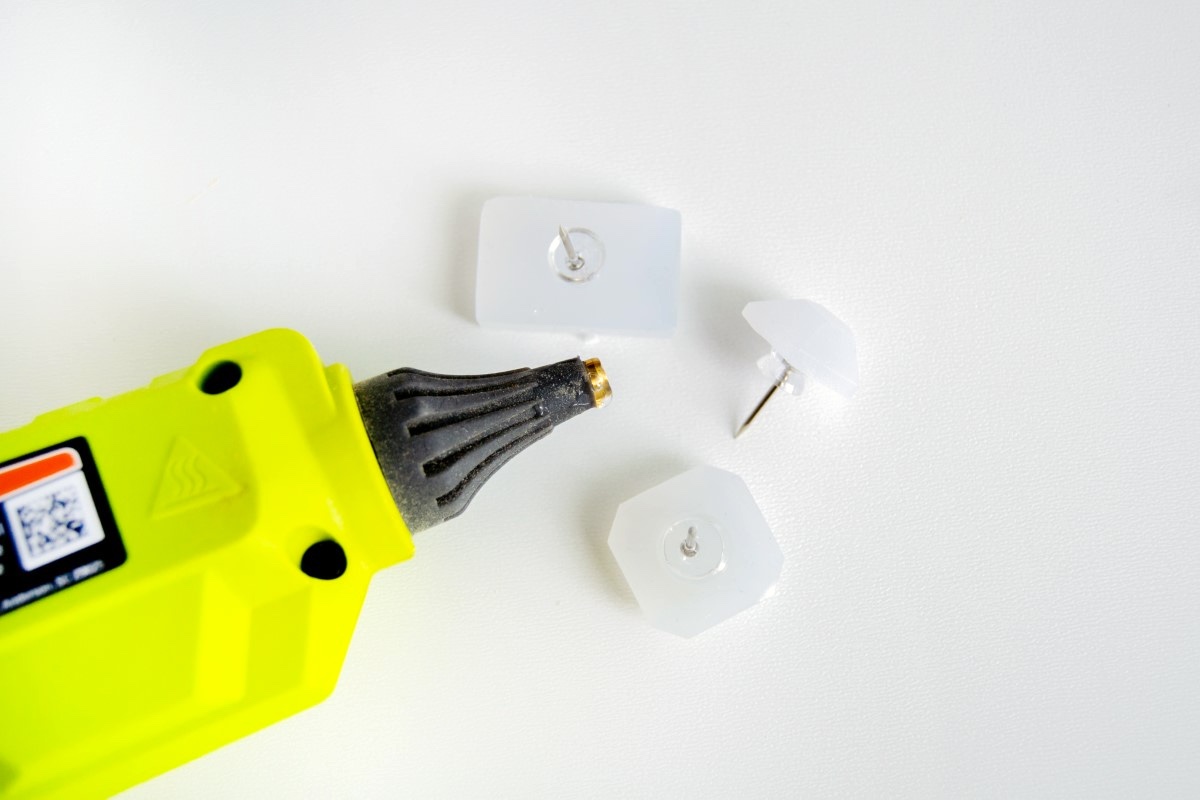
- Hot glue gun
- Hot glue sticks
- Push pins
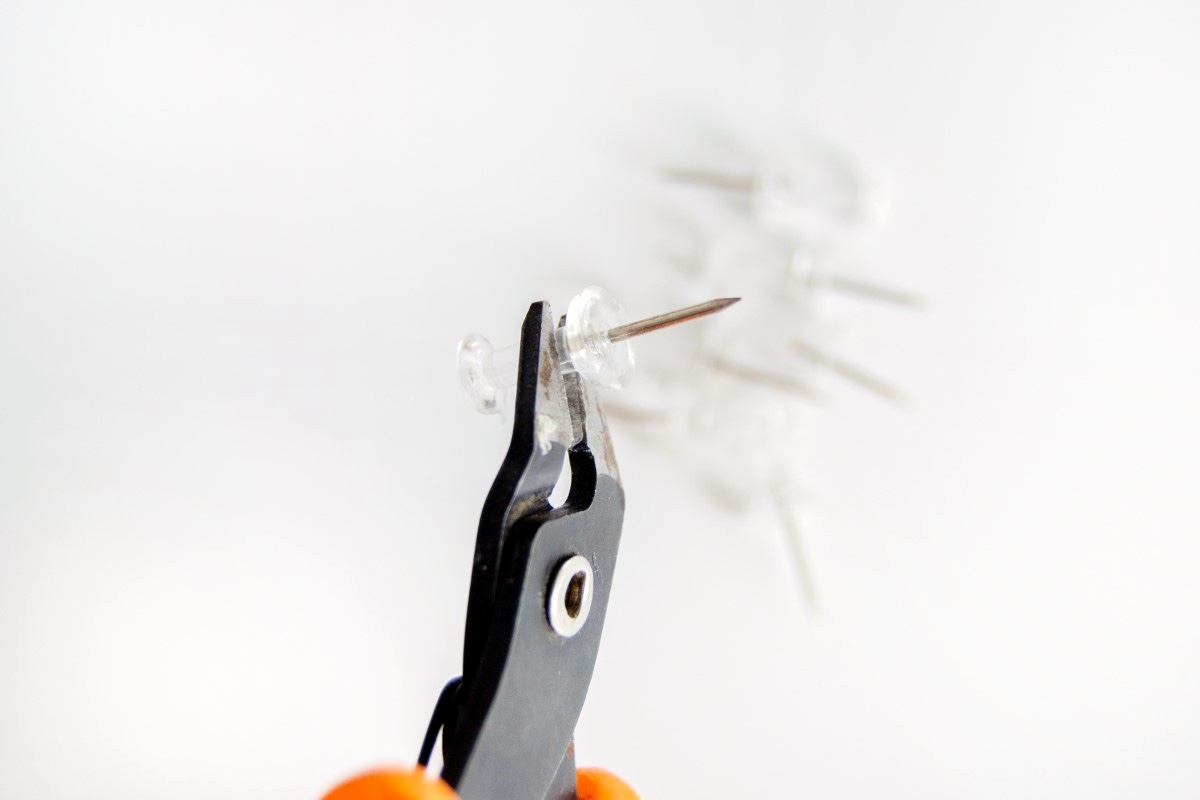
- Jewelry cutters
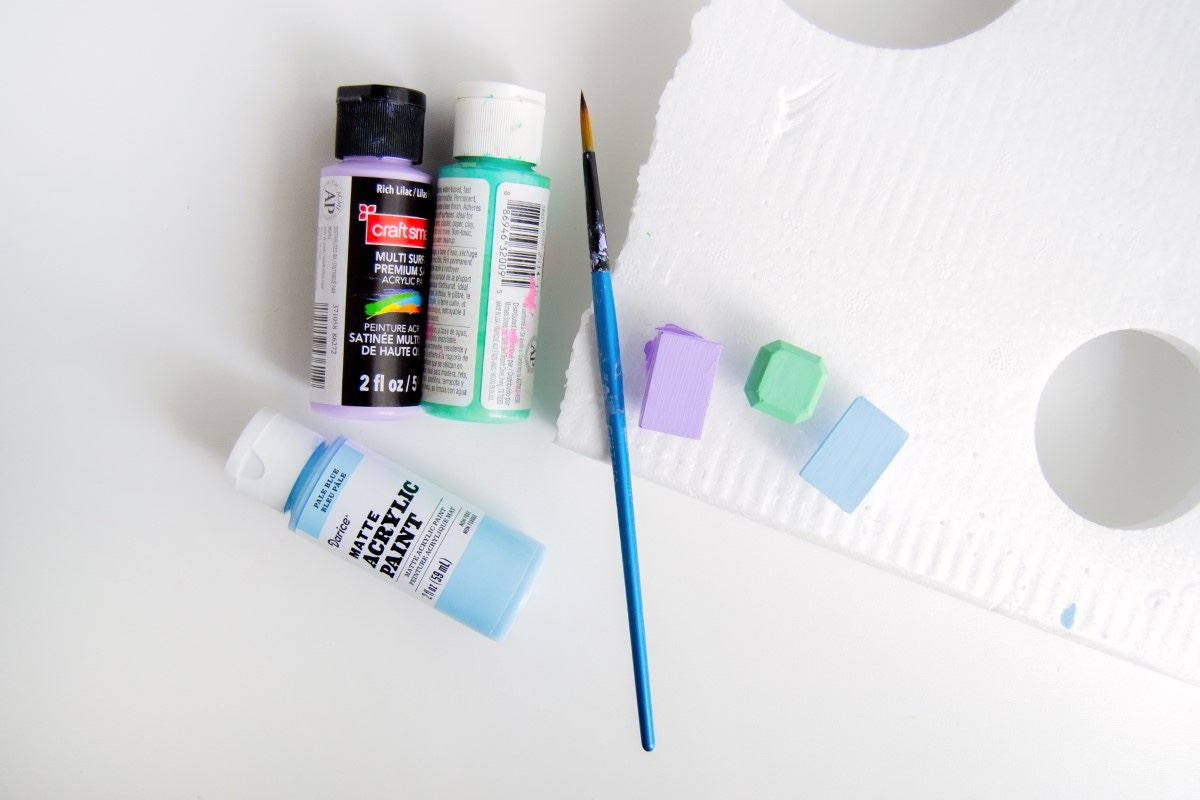
- Acrylic paints
- Paintbrush
- Die cutter and adhesive vinyl or sticker labels (optional)
Tips and Thoughts for This Project
You can also use colored or glittered hot glue. But if you are looking for specific/a variety of colors, using regular hot glue and painting it would be the most economical option.
Making the pins may take a few tries (and some practice), but it’s always fun to demold them once they’ve hardened and see what you got!
I find that multi-surface acrylic paints are more opaque and better to use with this kind of project (for the best coverage). Sticking them onto a surface such as polystyrene foam will help with the painting and drying.
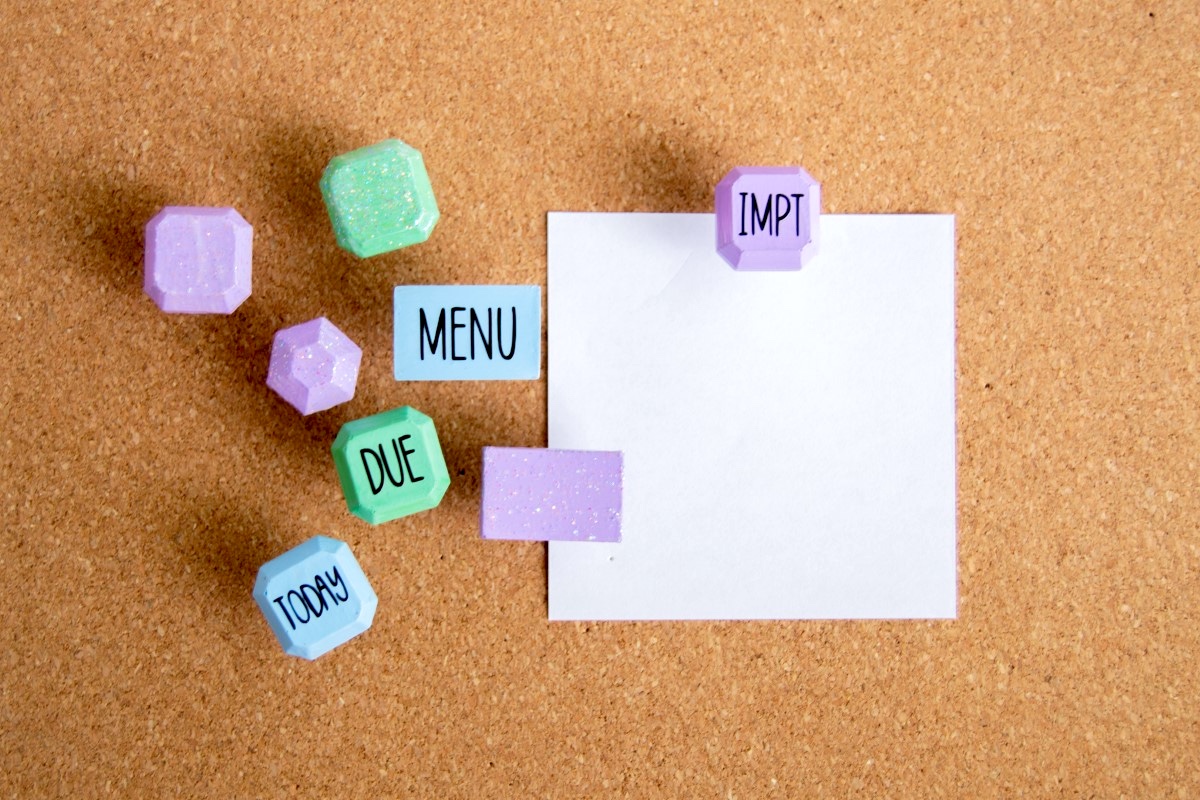
I think these decorative push pins are such a clever way to hang fun pictures and to-do lists, especially in a dorm room.
I remember when I was in college I was always looking to hang up reminders, notes and pictures from friends and family. They’re great for teachers too!
Get the printable how to for this project below:

DIY Push Pins
Equipment
- Jewelry cutters
Materials
- Silicone molds
- Mod Podge I used Matte and Sparkle
- Push pins
- Acrylic paint
- Die cutter and adhesive vinyl or sticker labels optional
Instructions
- I had these two silicone molds from the craft store (from the baking aisle) and used the rectangle and gemstone shapes. Use a high-heat hot glue gun to melt some hot glue and squeeze inside your choice of mold. Make sure to try and get glue to the corners to lessen the chance of a bubble forming. Fill the mold with hot glue, and wait for it to harden (mine took about 20 or so minutes).
- Use a jewelry cutter/plier to cut off push pin tops if you are using the clear plastic-topped ones to make them shorter. If you are using just metal flat topped ones, this step can be skipped.
- Add your cut push pins to the back of your gems by hot gluing them on. I find this step much easier than putting the push pin onto your gem directly as there is less room for error – if you put the push pins in the gem directly, it may sink to the bottom of the mold or may not be straight.
- Use the colors of choice to paint the tops of your gemstones. This could take as little as two coats depending on the type of paint you use. Wait for each paint layer to dry before adding another one.
- Add words to the top of your gemstones if desired – I did ‘Menu’, ‘Due’, ‘Important’ and ‘Today’. For mine, I cut them using my vinyl die-cutter, but you can also use planner stickers from the craft or dollar store.
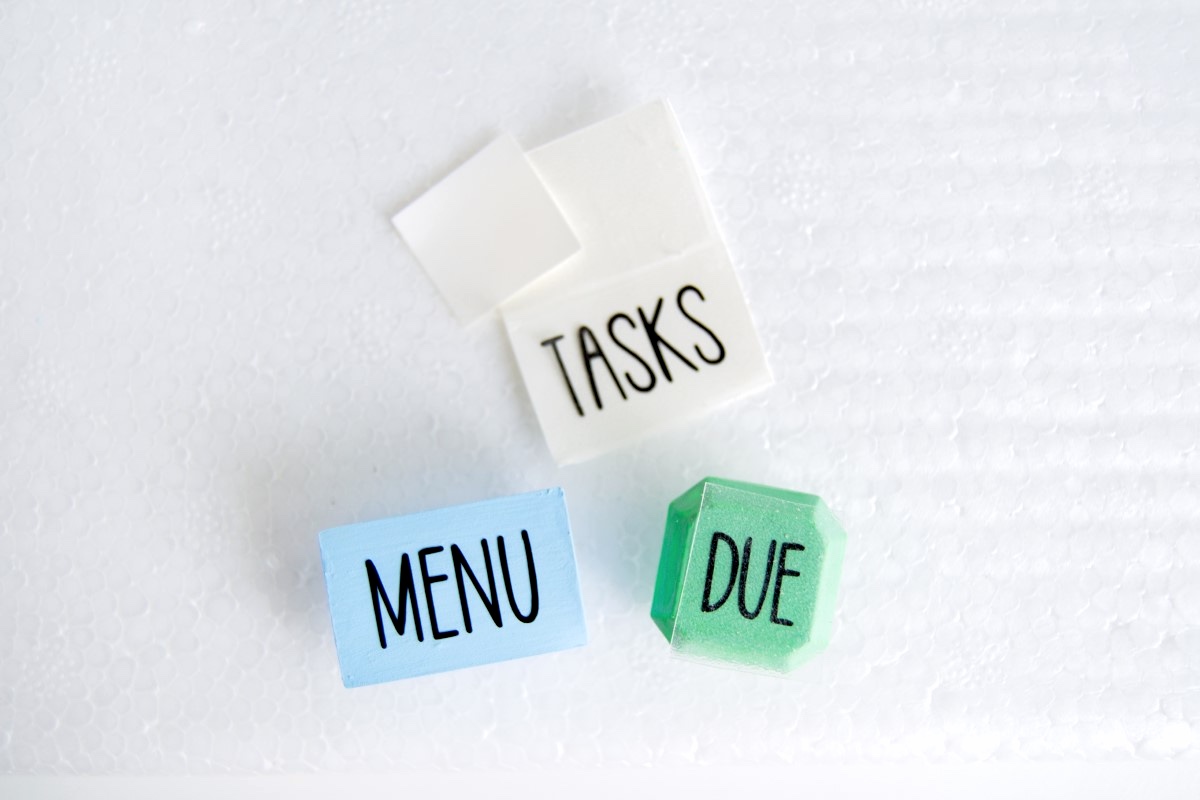
- Add a layer of Mod Podge onto your push pins to give them extra durability and sparkle. For the text ones, I used a Matte Mod Podge. For the plain ones, I used Sparkle to make them extra fun. Let dry before using.
Notes
If you enjoyed this project, let me know in the comments! Also please check out these other ideas I think you might like that use silicone molds:
Butterfly Jewelry Box • DIY Decorative Books • DIY Drop Earrings • DIY Hot Glue Rings • DIY Hair Pins • Decorate Sandals • Hot Glue Jewelry


When you use different colors how hard is it to change the glue sticks? When I tried I had to use a whole stick then go on to the next color so I had a dozen of designs when I only needed one.
I have never heard of these…the possibilities are endless. Love what you did what them!
These are so cute! What a creative idea!
How cute! Love this idea 🙂
Fantastic and cute project! I want to use these to decorate my pegboard as well.
These are too cute! I can think of way too many ways to use those melts. Oh the possibilities 🙂
How cute are these?! Definitely trying! Thanks for the inspiration! xo
Wow! I love these! I had no idea they made these! I want to create some for my daughter’s dorm room. Thanks for the great inspiration!