
Make a beautiful fall decor piece with this DIY autumn leaves frame! Easy to craft with Mod Podge and dried leaves – great for gifts or seasonal display.

Fall is hands down my favorite season to craft: cooler temps, cozy vibes, and nature showing off with the most beautiful colors.
If you’re anything like me, you’ve probably picked up a few pretty leaves on your walks (or maybe your kids handed you a whole crunchy bouquet). Well, now’s the time to put those beauties to good use with this simple but stunning DIY autumn leaves frame!
This project is the perfect mix of easy and elegant. All you need is a basic wood frame, some Mod Podge, dried leaves, and a little patience. The end result is something you’ll actually want to display year after year.

You’ll layer the leaves on with Mod Podge (I used Matte, but Gloss or Satin work just as well!), sealing everything in to create a beautiful, textured frame that totally captures the spirit of fall.
One tip? Don’t skip the tweezers. Dried leaves can be delicate, and using tweezers helps you place them precisely without tearing or crumbling.
And if you’re wondering how to dry leaves for this craft, I’ve got you covered. Check out my full tutorial on how to press and preserve leaves the easy way!

This is such a fun project to do on your own or with older kids, and it makes a lovely homemade gift, too. Ready to make something that feels a little like fall magic? Let’s get started!
Get the printable how to card below:

Fall Leaves Frame
Equipment
- Tweezers
Materials
- 1 Unfinished wood frame
- Dried leaves
- Acrylic paint I used FolkArt Country Twill
- Mod Podge Matte
Instructions
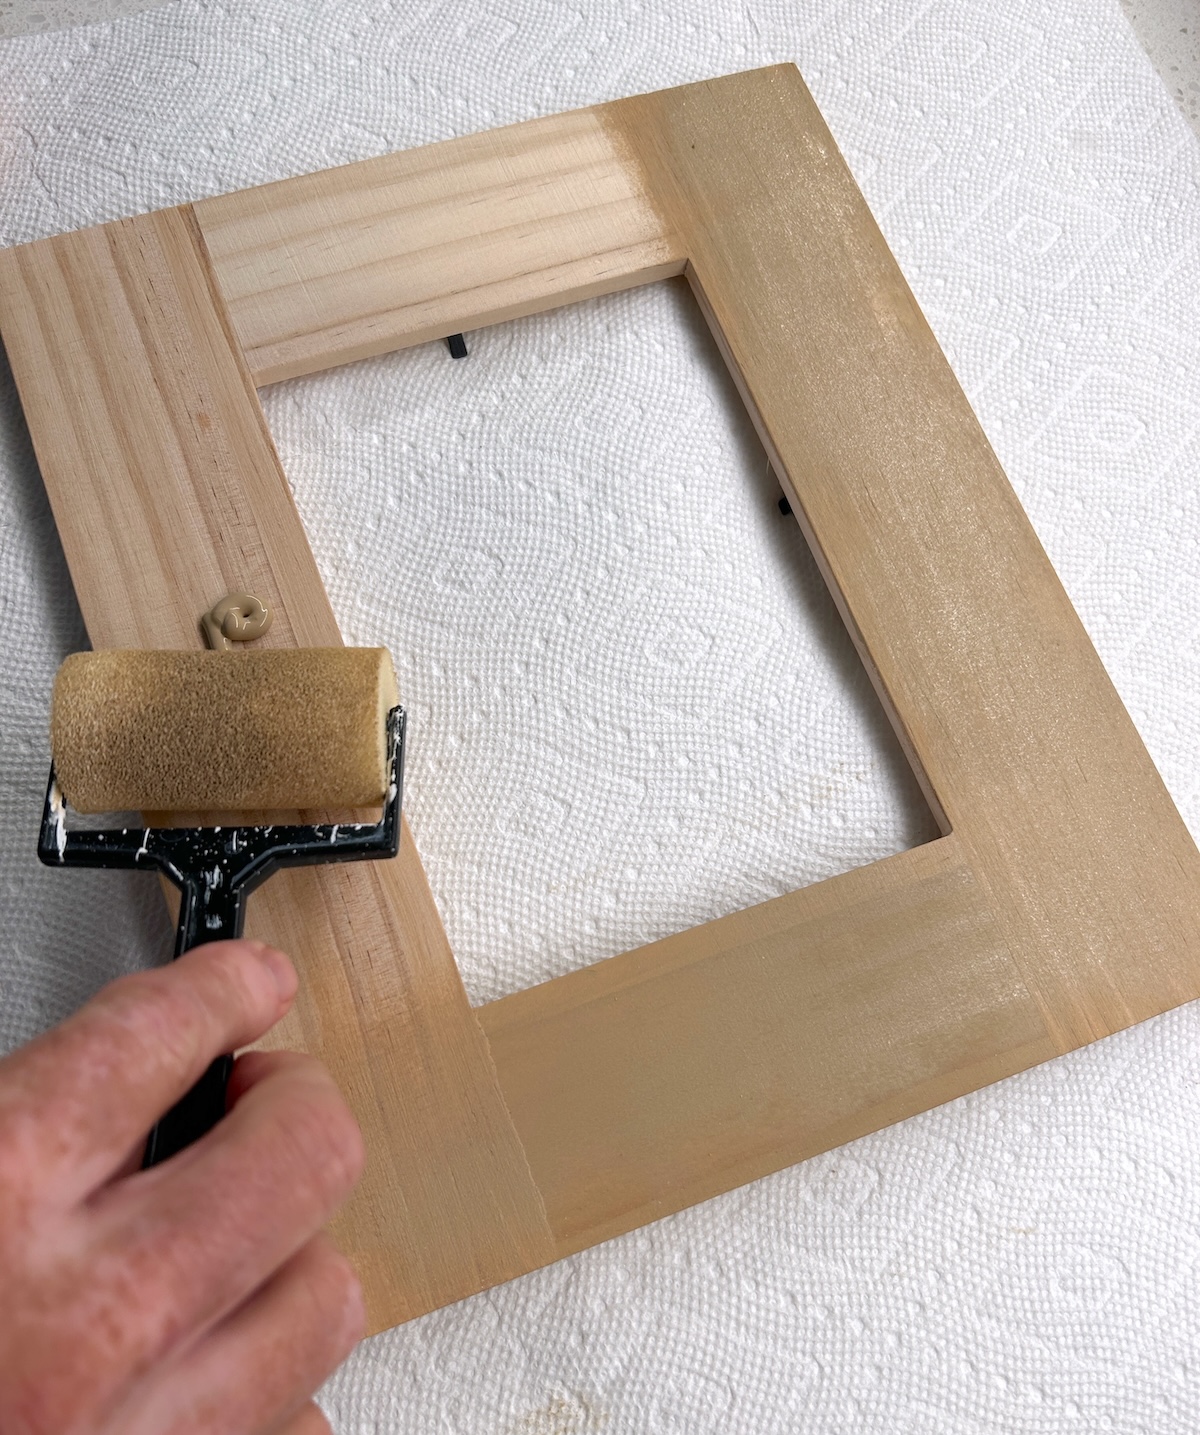
- Paint the wood frame with the color of your choice. Let dry. Add a second coat and let dry.
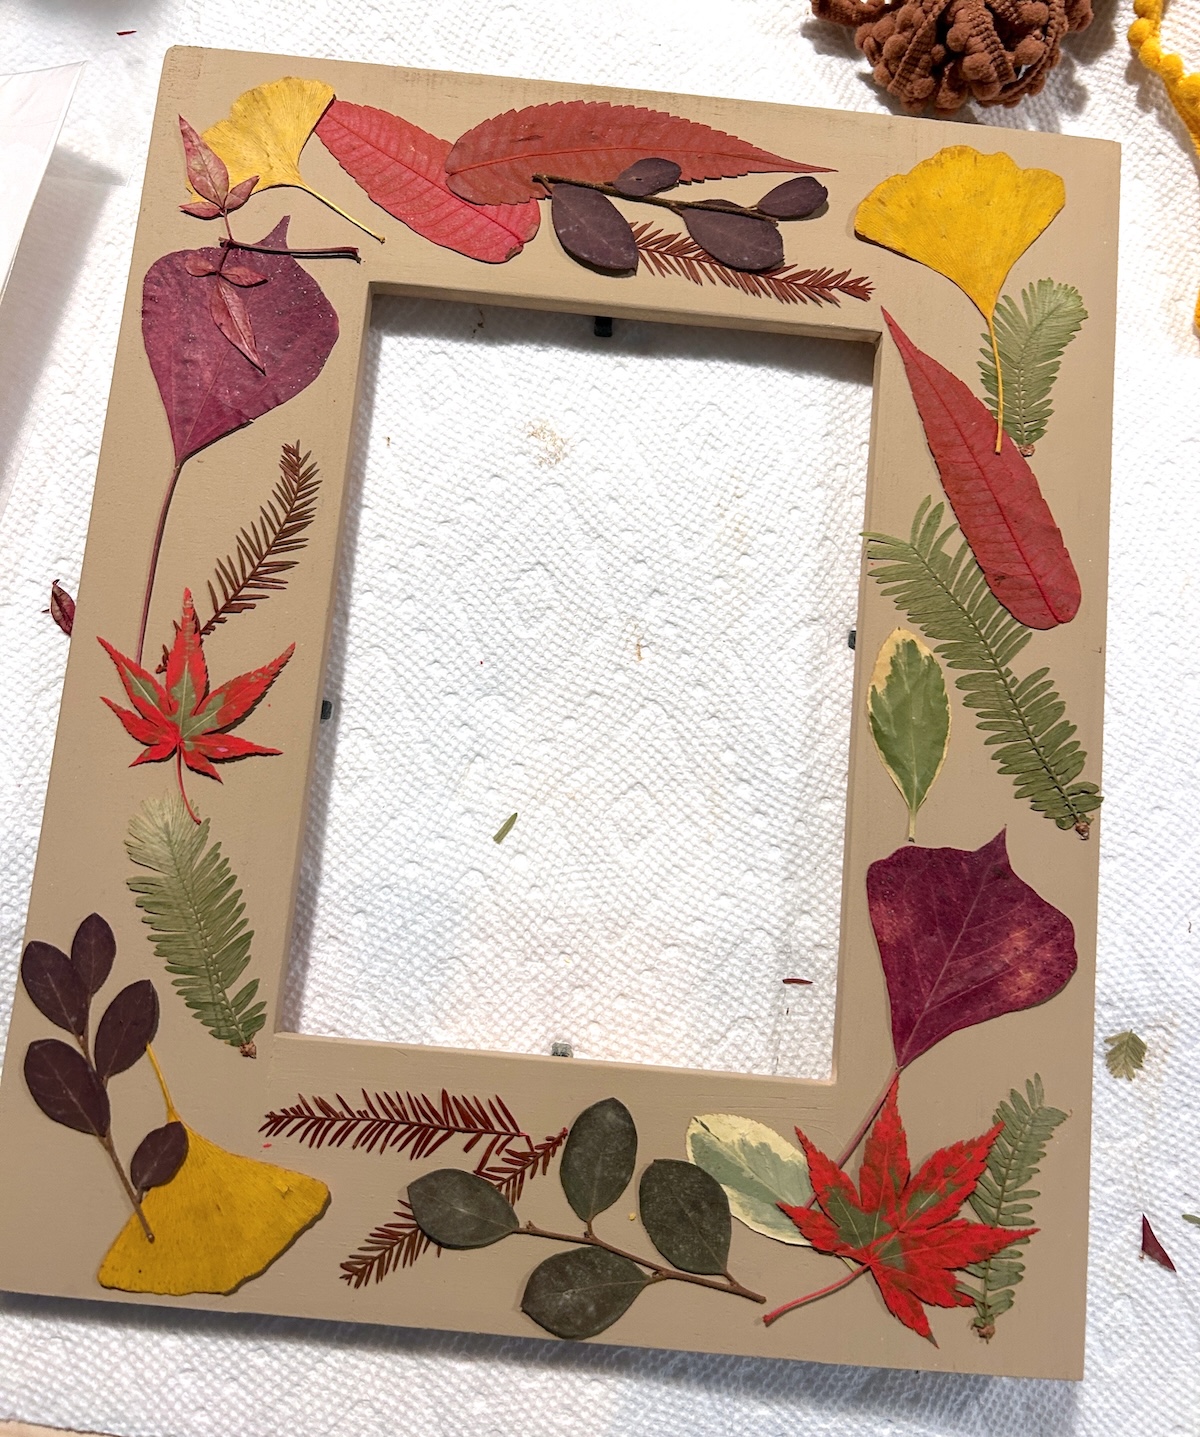
- Before applying any Mod Podge, lay out the design first. Use the tweezers to place the dried leaves on your frame. Keep arranging until you’re happy with the design, then snap a cell phone pic so you can reassemble. Remove the leaves from the frame with the tweezers and gently set aside.
- Working one area at a time and starting with the first layer of leaves, apply Mod Podge to the frame. Use tweezers to place down the leaves and gently press into the Mod Podge. Brush away the excess gently and repeat. Let dry.
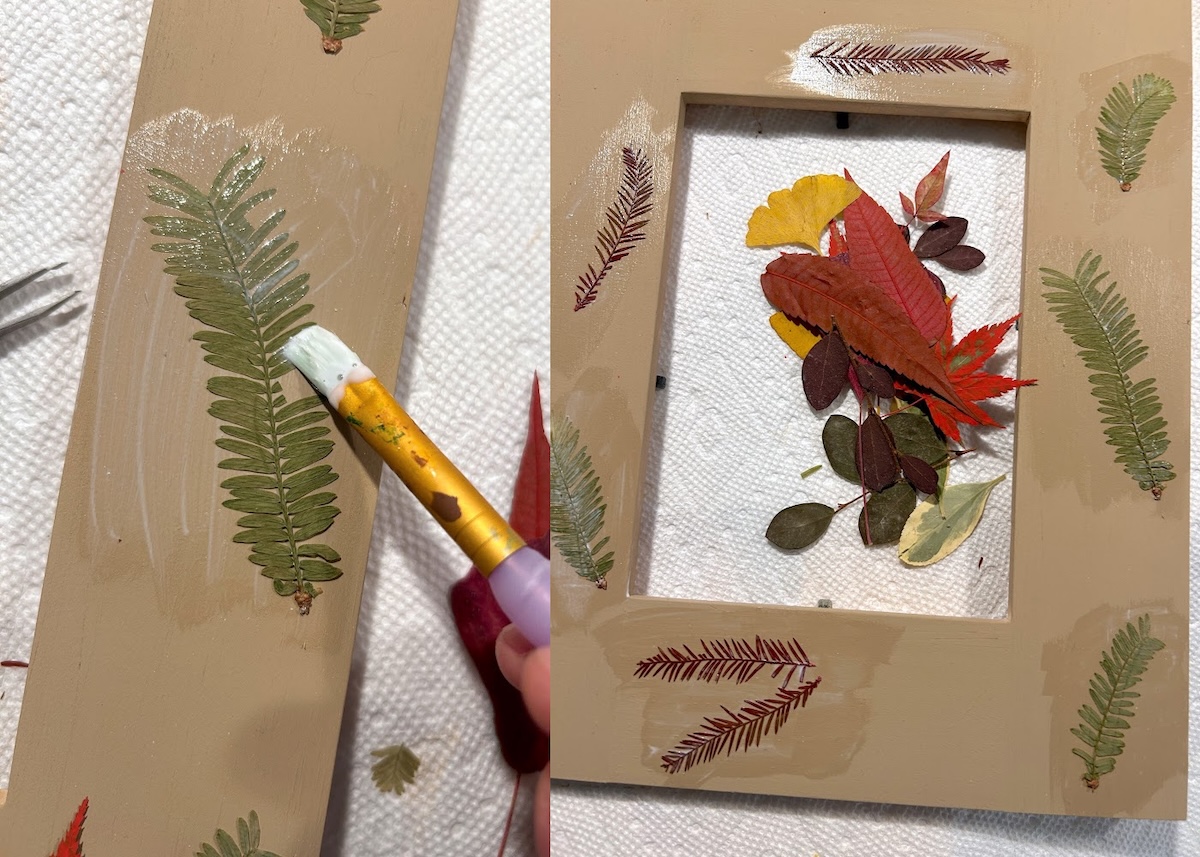
- Now work on the second layer. Apply more Mod Podge to the frame and add the leaves as you did before. Brush the excess Mod Podge away and let dry.
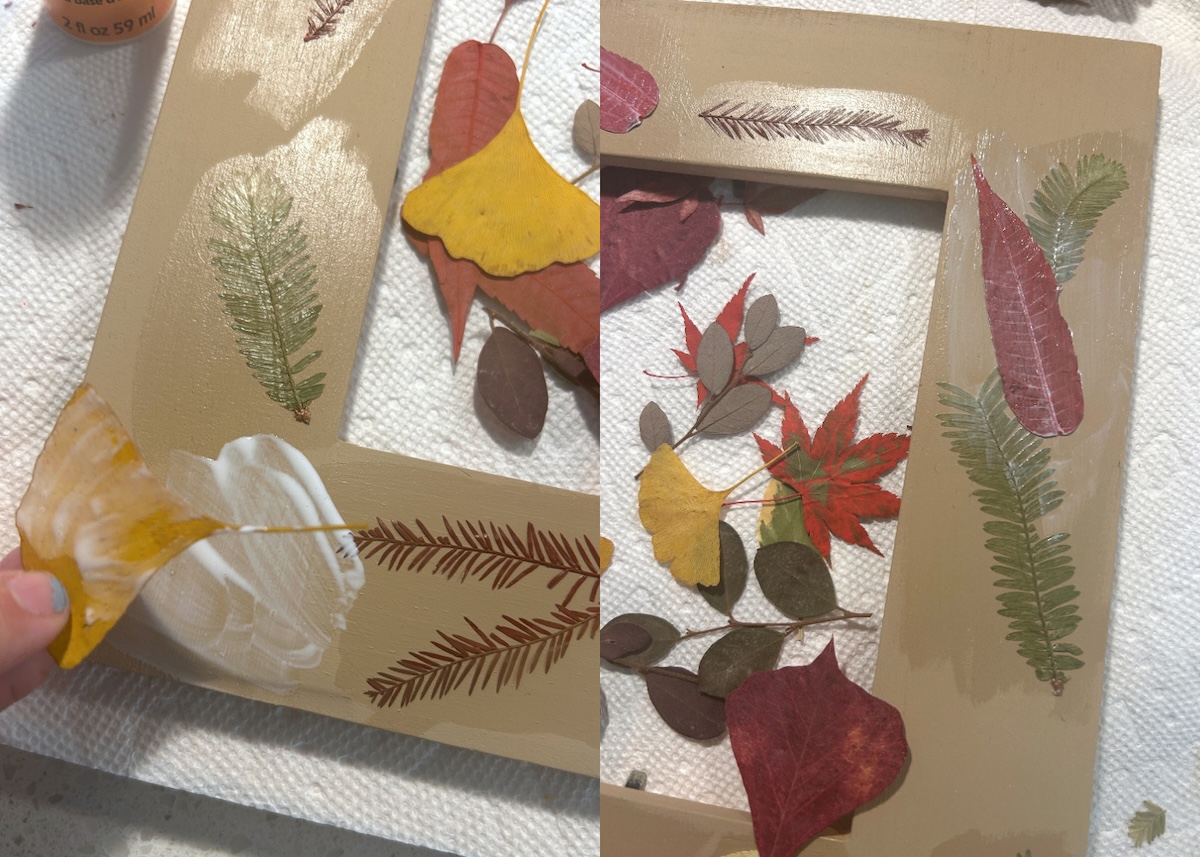
- Add a third layer of leaves as you have the previous two. Step back and see if you have any areas to fill in. Do that for your final layer and let dry.

- Seal the frame again – completely, including the edges – and let dry. To remove the excess around some of the edges of the leaves with a smaller paintbrush. Let dry completely before putting a picture in it.

Notes
What did you think about this project? Let me know in the comments! I’d also love for you to check out the following posts:
Confetti Pumpkins • DIY Fall Napkin Rings • DIY Fall Sign • DIY Glitter Pumpkins • DIY Leaf Bowl • DIY Nautical Pumpkin • DIY Pumpkin Seed Art • Wood Block Pumpkins • Dollar Tree Fall Crafts • Glitter Acorn Decor • How to Dry Acorns • How to Paint Acorns • Mod Podge Map Pumpkins • Paper Mache Pumpkins • Wood Pumpkin Decor


I love this project. Thank you for sharing.
I love the project with the bowl made with leaves. Can I use this same method with “corn husks” ?
Hmmm – I’m not sure. But I would give it a try. That sounds cool!
Love the wind effect! Do you know how the DM would react with pressed leaves?
I don’t for sure, but I think it would be fine. It’s worth a try!
This is gorgeous. Where did you find the leaf-shaped rhinestones?
perfect for the fall!
This is gorgeous!! I love the sense of movement around the leaves. Beautiful piece!