
Learn how to make cabochons with Mod Podge, clear glass gems, and printed images. Perfect for DIY jewelry, magnets, and personalized handmade gifts.

I don’t know about you, but sometimes my crafting brain wants a big, complicated project… and sometimes it just wants instant gratification. You know, the kind of project you can knock out in an afternoon while binge-watching your latest Netflix obsession. That’s where cabochons come in.
Cabochons (a fancy word for “flat-backed glass gems that make you look like a jewelry-making rockstar”) are one of my favorite quick wins.
With a little Mod Podge, some clear glass gems, and whatever images make your heart sing, you can create custom pieces that look way more impressive than the effort it takes to make them.
Seriously. Five minutes in, you’ll be like, “Why haven’t I been doing this forever?”

And the best part? These little beauties are completely customizable. Want a necklace featuring your dog’s goofy face? Done.
Need magnets with inside jokes only your best friend will understand? Easy. Feeling like your fridge needs to scream Grumpy Cat at all times? Girl, I’ve got you.
They also make ridiculously good gifts. No more stressing out over what to buy – because who doesn’t want jewelry or keepsakes that are literally one-of-a-kind?
Plus, you can crank out a whole batch faster than you can say “last-minute holiday shopping panic.” I did that not so long ago with my map magnets!

So grab those glass gems, fire up the Mod Podge (or at least, take the cap off the bottle), and let’s make some magic. Cabochons are proof that DIY jewelry doesn’t have to be fussy, it just has to be fun.
Get the printable how-to below!

DIY Cabochons
Equipment
Materials
- Glass domes
- Magazine pages or photos, scrapbook paper, or other graphics
- Mod Podge Gloss
Instructions
- Choose the image you would like to use. Place a medium layer of Mod Podge on the top.
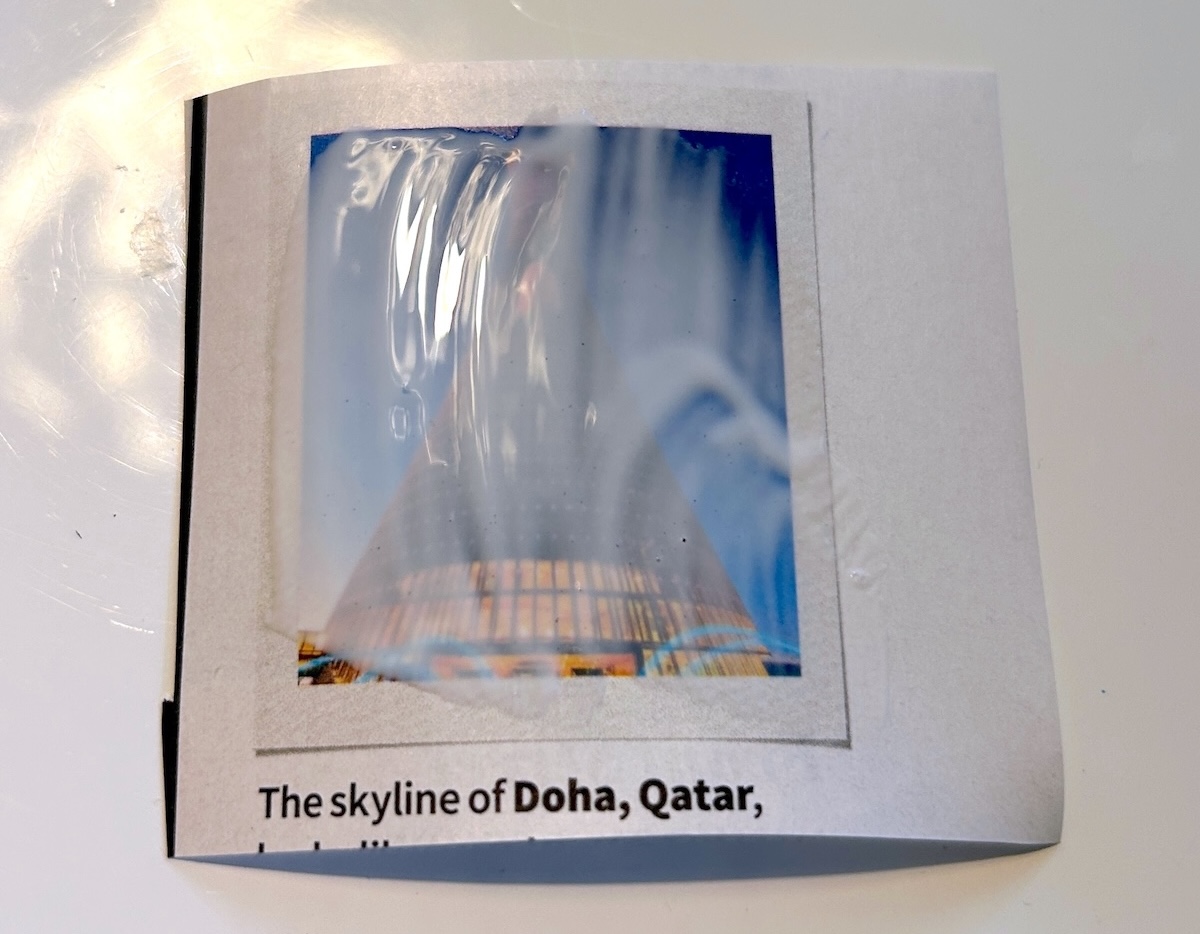
- While the Mod Podge is still fluid, place the print to the back side of the cabochon. Smooth thoroughly and wipe away excess medium that comes out the sides.Repeat with the remaining cabochons and let dry. The Mod Podge will dry clear.
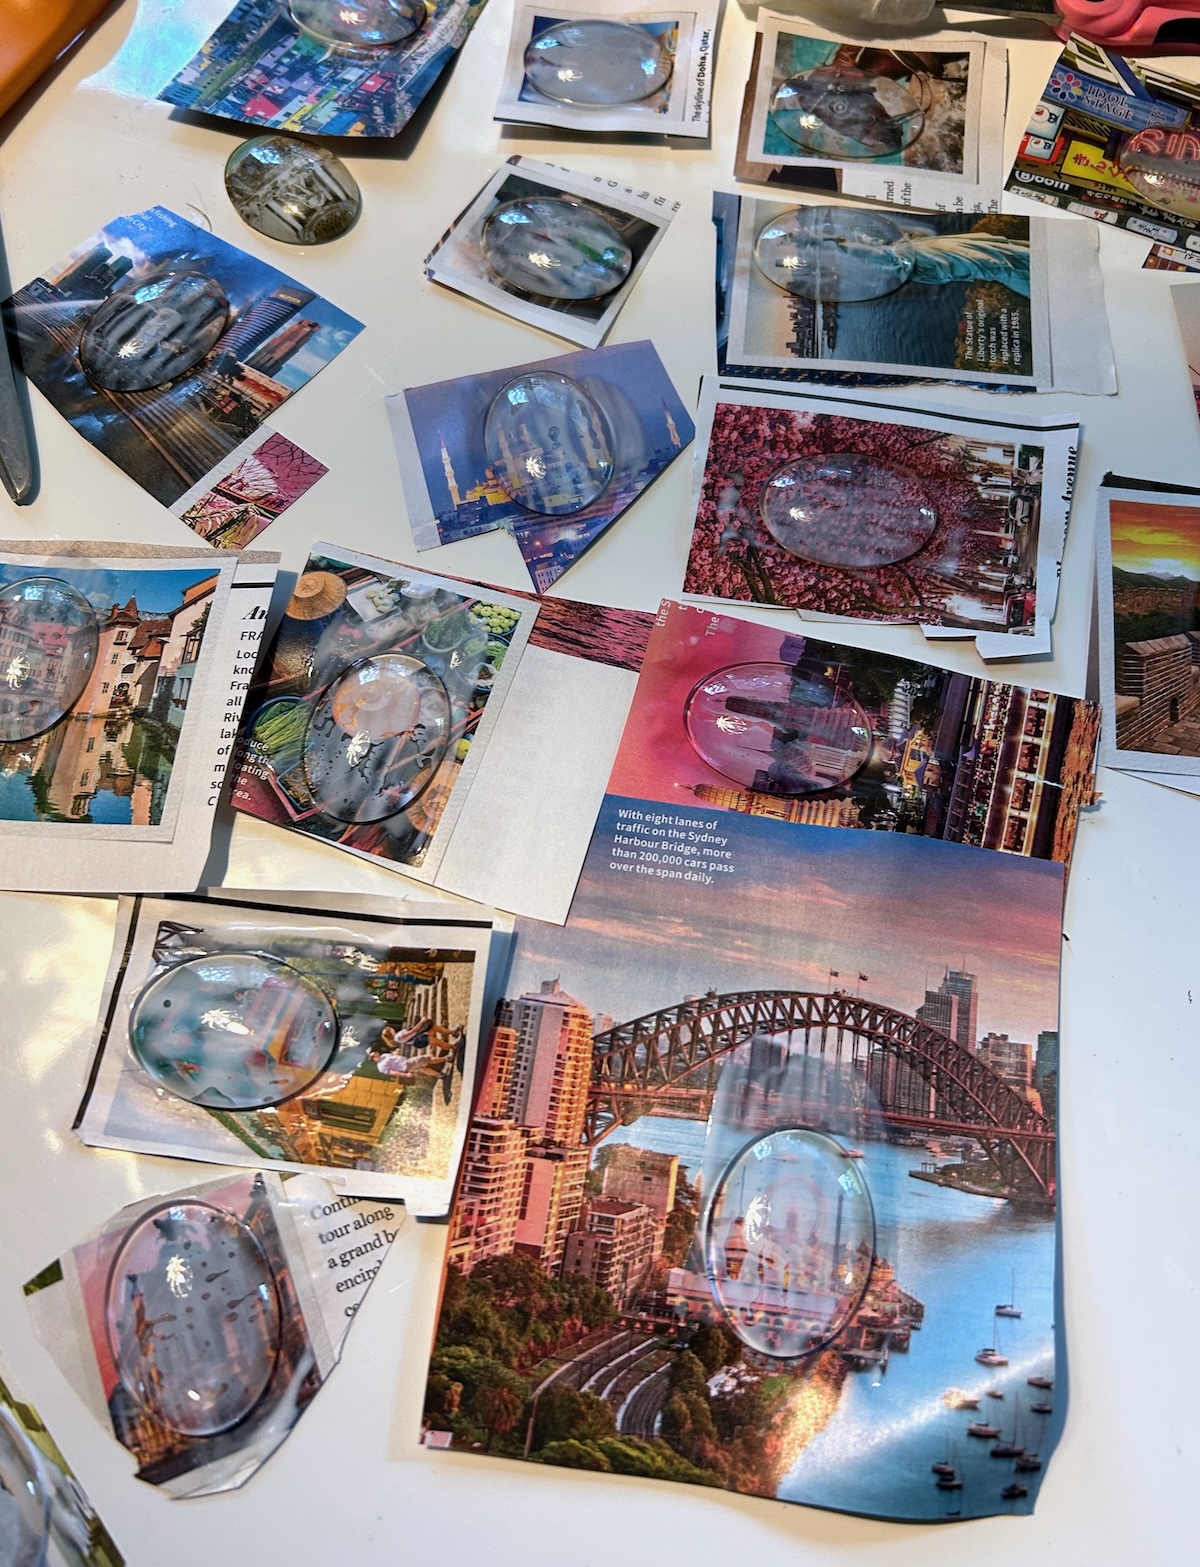
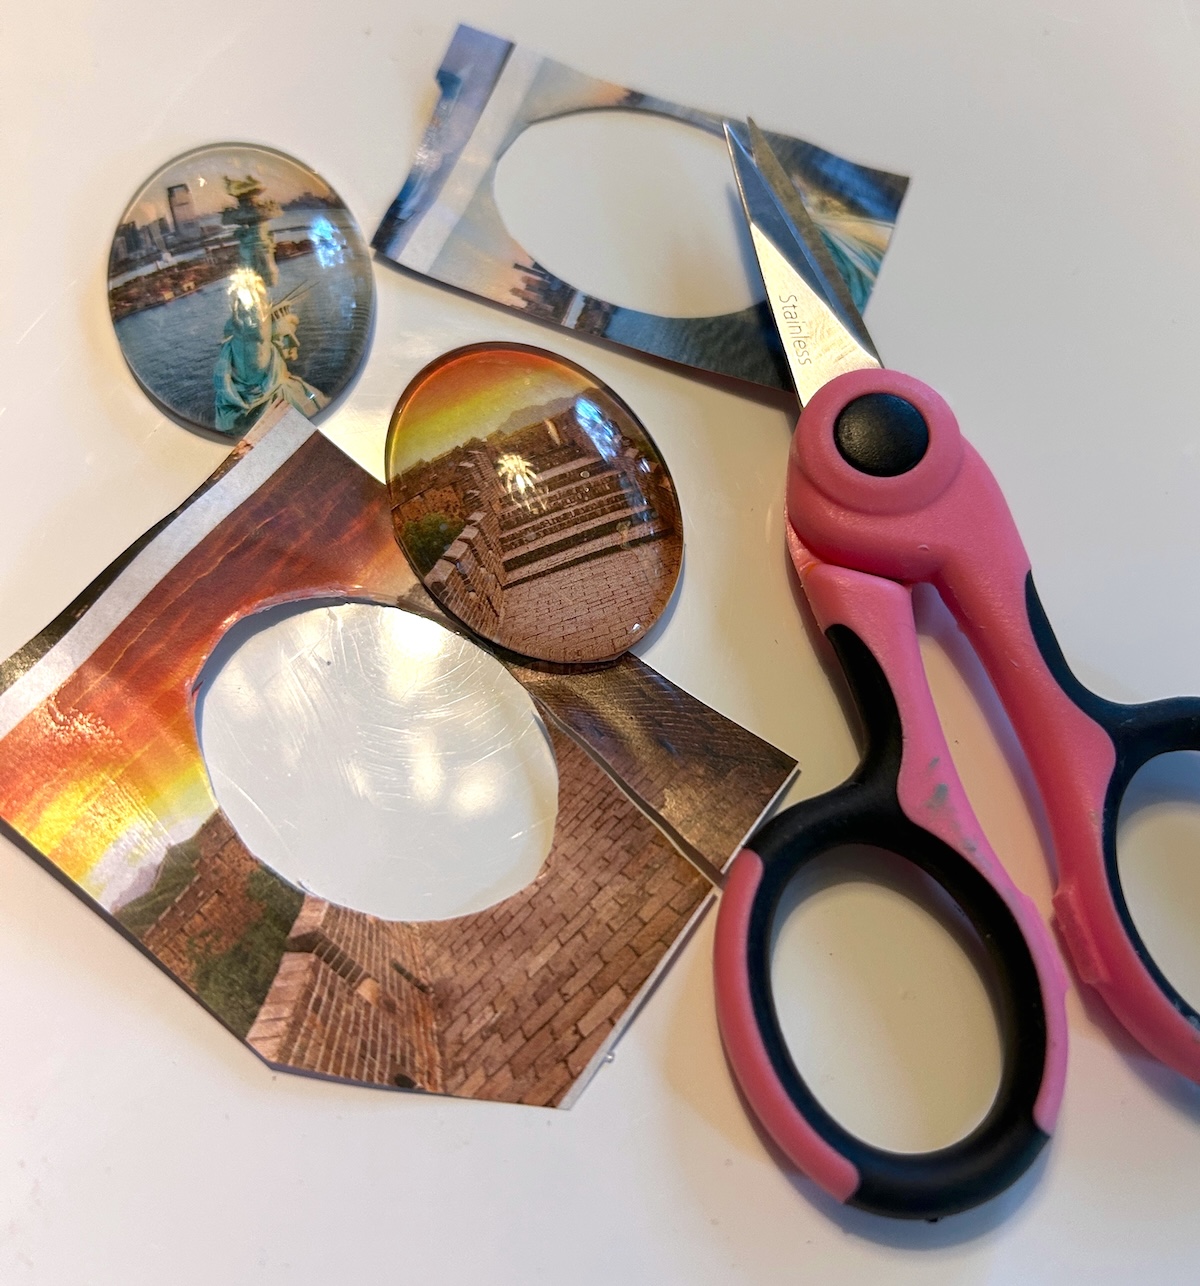
- Use detail scissors to trim the excess image from around the cabochon. Seal any edges that peel up as needed. Let dry for several hours before gluing into the bezel with jewelry glue.
Video
Notes
If you enjoyed this craft idea, I’d love for you to check out these other jewelry projects:
Bangle Bracelets • Clay Earrings • Clay Jewelry • Decoupage Earrings • Drop Earrings • Fabric Scrap Necklace • Hot Glue Rings • Lace Earrings • Leaf Pendant • Paper Beads • Paper Earrings • Photo Pendant • Resin Jewelry • Shrinky Dink Jewelry • Washer Necklaces • Wood Pendant


Your guide shows gluing the photo to the back of the cabochon and then gluing the whole thing into the pendant tray. Would it make a difference if I glued the photo into the pendant tray and then glue the cabochon over the top of it? It seems to me that it might be easier to line the photo up in the tray than it will be on the back of the cabochon.
Also, what is the purpose of letting a layer of modge podge dry on the photo before applying a second layer to glue it?
Hi Joseph! First question, you can do it your own way! Either one works depending on what you find easier. Second question, this was a guest project so I can’t ask why they did it here, because you’re right, it’s not necessary here. HAVING SAID THAT, it can help prevent wrinkles on thinner materials, help you cut fabric without fraying, and help keep the ink from bleeding if it’s a printout from your computer. So there is value to doing it and it was probably just habit 🙂 Magazines don’t need it though. Their pages are thick enough and the ink is usually very water resistant!
That’s awesome. But I want to ask you this. What is the process of gluing together a cabochon glass dome to a…cabochon glass dome? You will ask why right? Well I would like to place dry flowers in side and I don’t want to do it with resin as I have loads of class cabochon sitting…can you help me with that? I tried lactate, resin, liquid glass and nothing worked. It was very unclear and looked dirty.
Hi. This was very helpful. Thank you. But the one thing i find is that the modge podge seems to leaves “streaks” or little brush lines. (I apply with a paint brush. Should i be applying it with something else?). If you want i can send you photos of what I’m talking about. It’s not a big big deal. I think they still turn out okay, but i think the paint brush lines are slightly visible.
Thank you.
@stew, I use a old gift card to swipe a thin layer of mod podge and it works great!
Thank you for sharing this project!