
Learn how to make rock mushrooms out of smooth stones from the garden! Get the secrets for the right glue and paint to make your project last.
Skills Required: Intermediate. You’ll be using a Dremel tool, using epoxy to glue the stones together, and painting. There’s a video in the post to show you the process.

Hi friends! I’m very excited to share this tutorial today because it’s something I’ve been meaning to do for a long time. Let me set the stage for you.
If you look at my front yard from the street, you’ll see a very normal and tidy house (I’m looking at you, HOA). However if you come up onto my porch . . . it’s a different world.
I’ve created a bit of an altar.
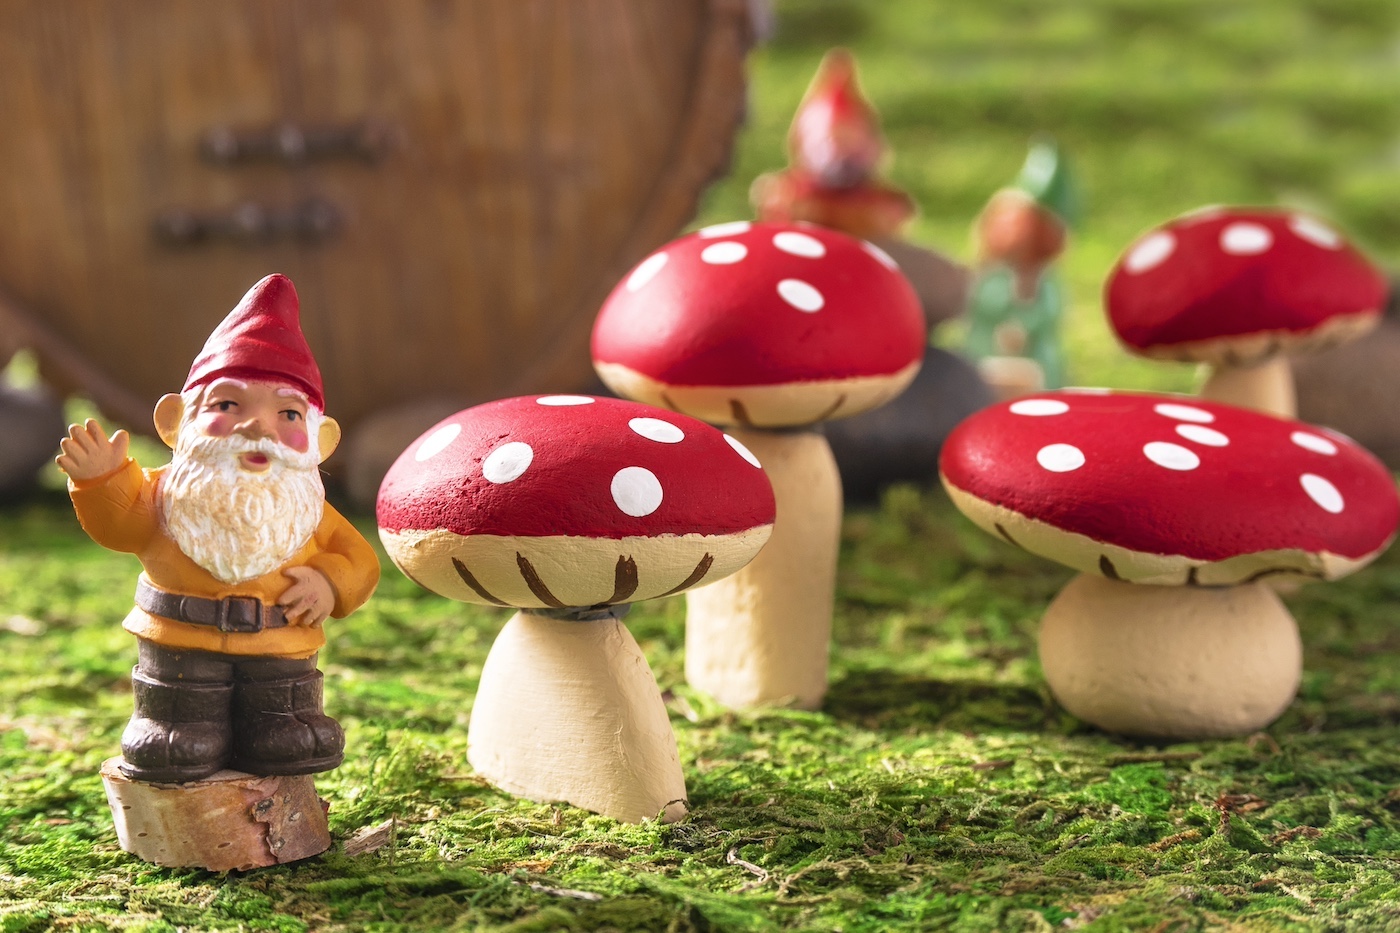
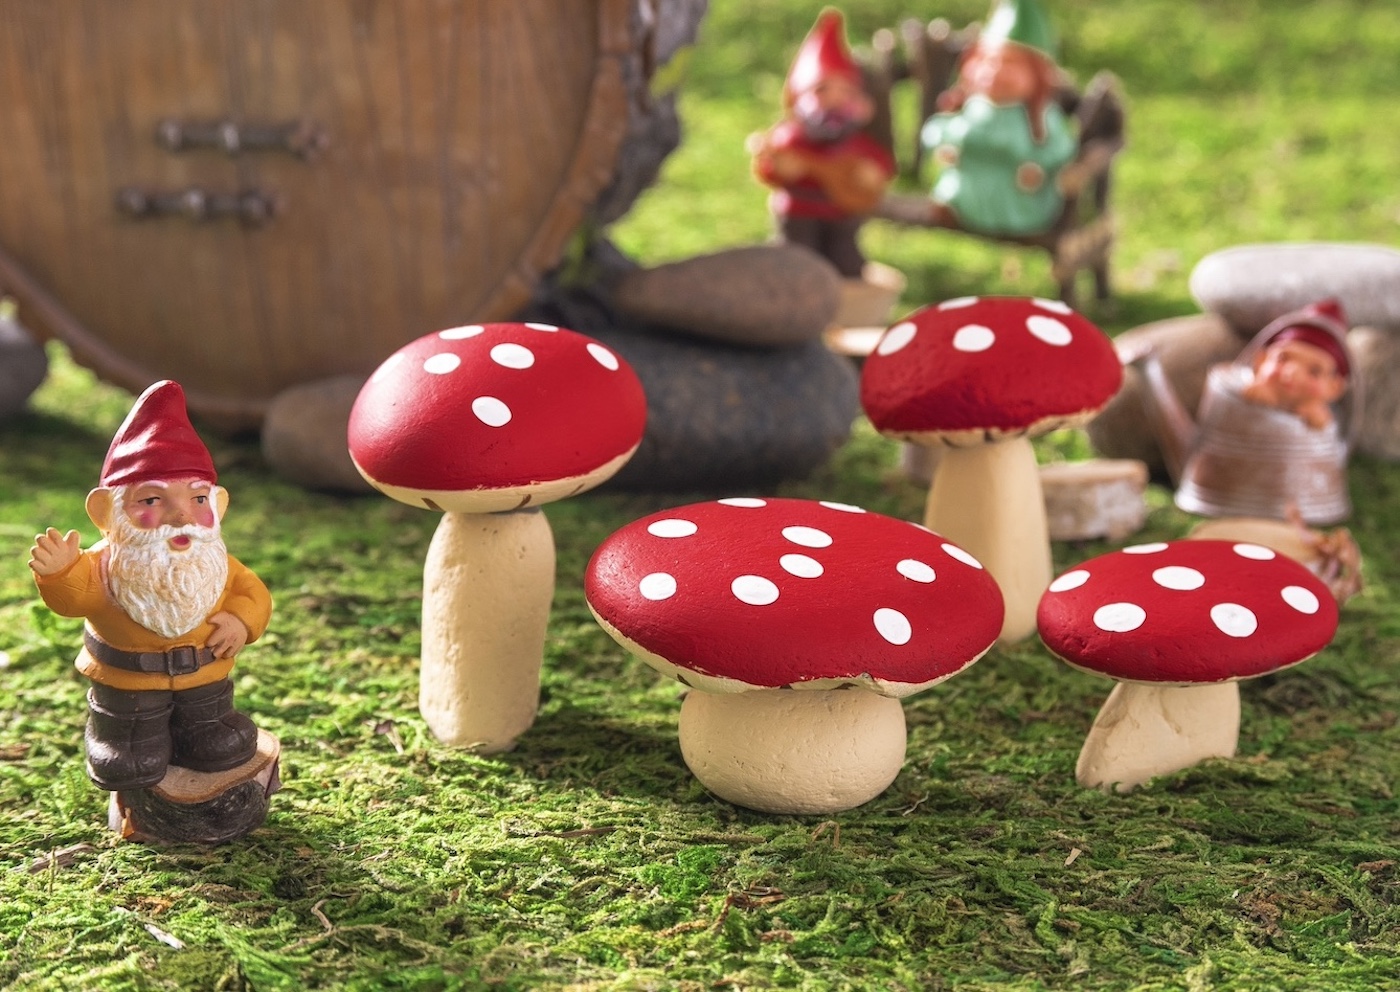
You see, many years ago I bought a gnome from Target, and that little guy has traveled with me to every single place I’ve ever lived. Always on the front porch, he brings me good luck and says hello to visitors.
The display started with the single gnome . . . and now it has transformed into a cute little world. I’ve added some mushroom clay pots, marbled and painted rocks, trinkets that delivery drivers have left, heads up coins, and a small statue of R2-D2.
It’s a mishmash of things I love, and a never ending art project that keeps getting added to. It’s pretty fun and I love it.
Recently I decided my display needed a little “zhuzh,” and with that I took on a spring craft I couldn’t wait to try: rock mushrooms.
There are small stones everywhere outside my house, including a little drainage ditch. Which didn’t seem to mind at all when I poached some rocks for these cute little caps.
And now I’m going to show you how to make them! They’re relatively easy, and you will be using a Dremel tool. It’s not hard though – you’ll simply be sanding stone (in short).
The rest is painting and gluing!
Before you get started, I do have some tips so that you can ensure success! Yes, there are strategies for making rock mushrooms. Learn from my experience below.
Tips for Making Mushrooms with Rocks
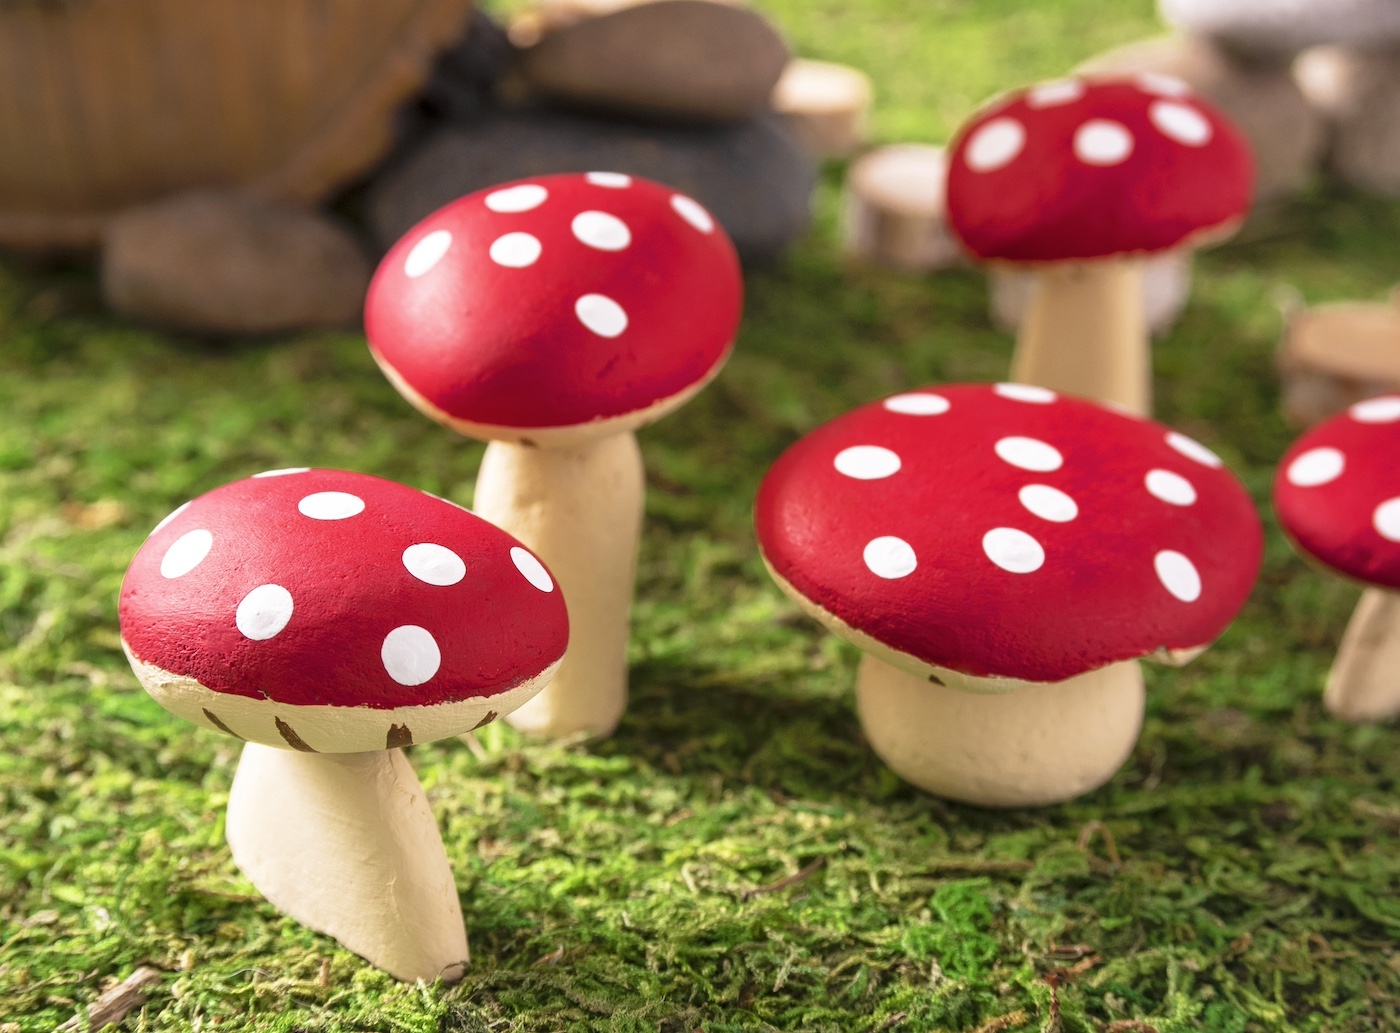
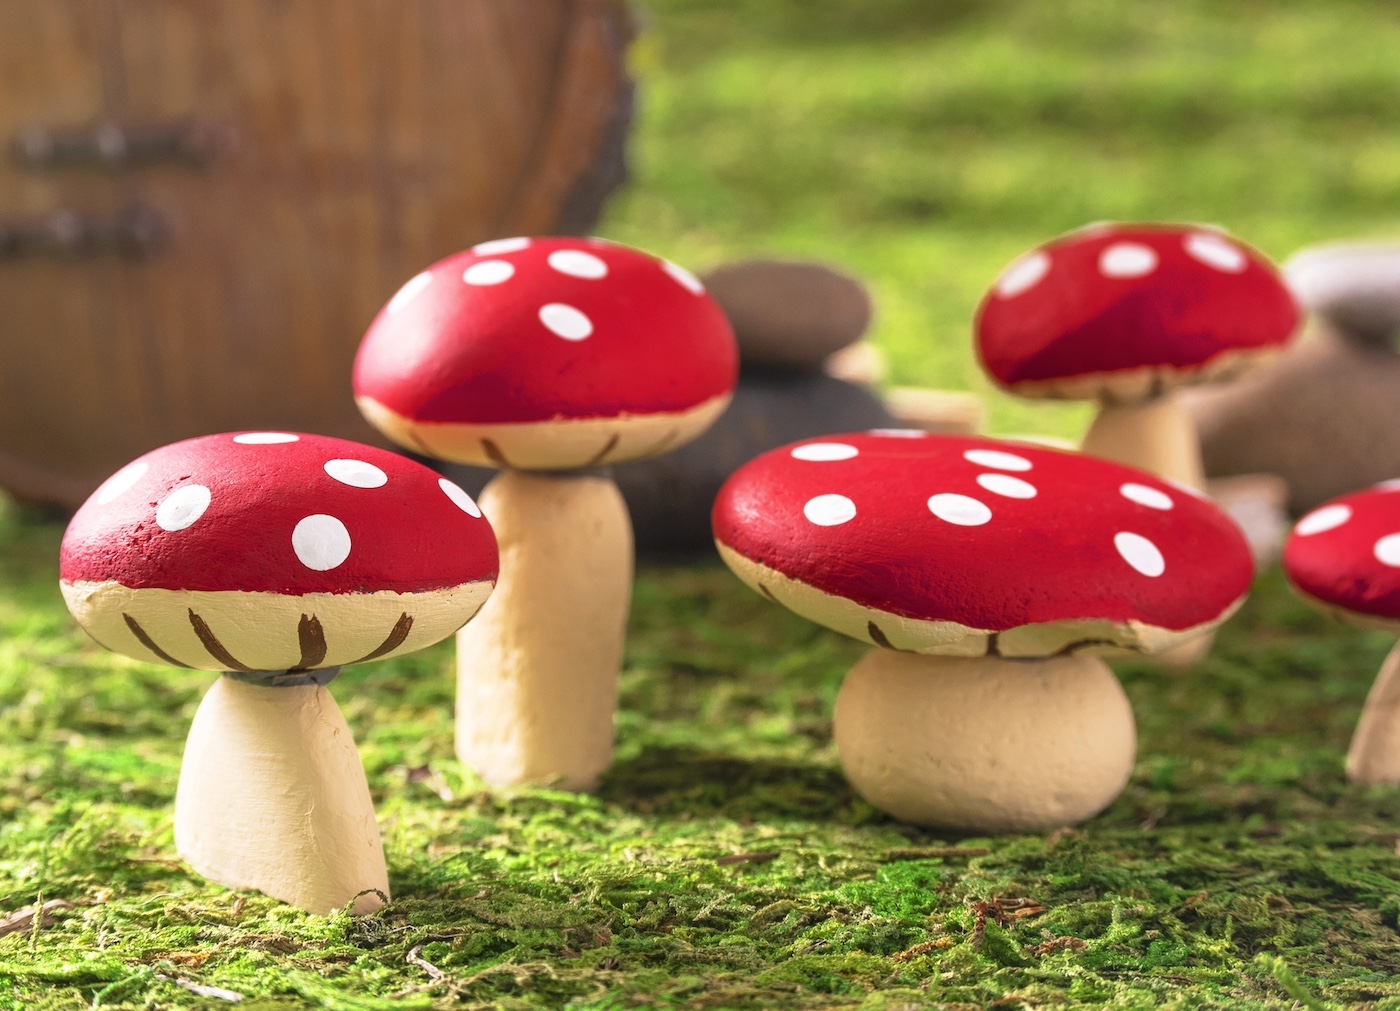
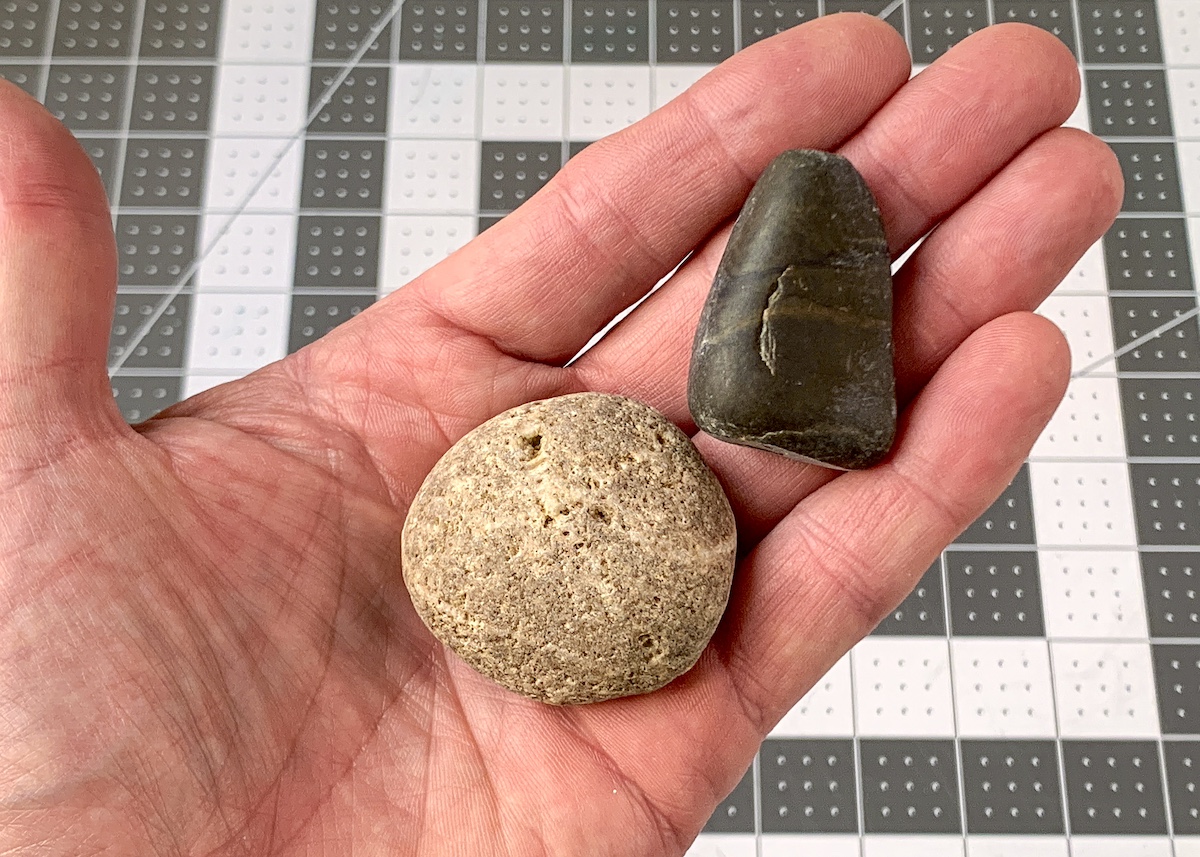
Technically you can make these mushrooms as large as small or you want. Mine are between 1 1/4″ – 2 1/2″ tall. Having said that, there are some tips I have for selecting your stones.
The most important thing is that you get the right ratio of top to bottom rocks, so that the bottom can support the top and the mushrooms can stand.
The Tops
These stones should be oval or circular, and ideally a little bit flat. You don’t want something too large for your base, or the resulting mushroom will be too top heavy and fall over.
The Bottoms
You have two options for the bottom stones. You can use a flat, more robust rock or a tall, thin rock. You’ll see in the project pictures that I used both.
The thicker rocks are nice because they give you a stable base for the top, but the thinner rocks are good too because they resemble real mushrooms. My recommendation is using a variety of heights so that your fungi forest is interesting looking.
The Adhesive
I tested craft glue, E-6000, and Gorilla glue, amongst others I had in my craft room – nothing worked and held the stones tightly. A few held the stones, but you could twist the tops around, or they were floppy.
SO I finally tried a two part resin, and that WORKED! My goal is always to use the most waterbased adhesive for the project I’m doing, but sometimes that doesn’t work.
The resin I used was Dap Tank Bond. Basically you’re looking for something that works for stone – and is potentially waterproof. I needed something waterproof since these were going outside. You can also use clear (which wasn’t available to me at the time of this writing).
Are you ready to try these rock mushrooms? Here’s what you’re going to need:
Gather These Supplies
- Rocks or stones – one top and one bottom for each mushroom
- Multisurface craft paint – red, white, brown, cream
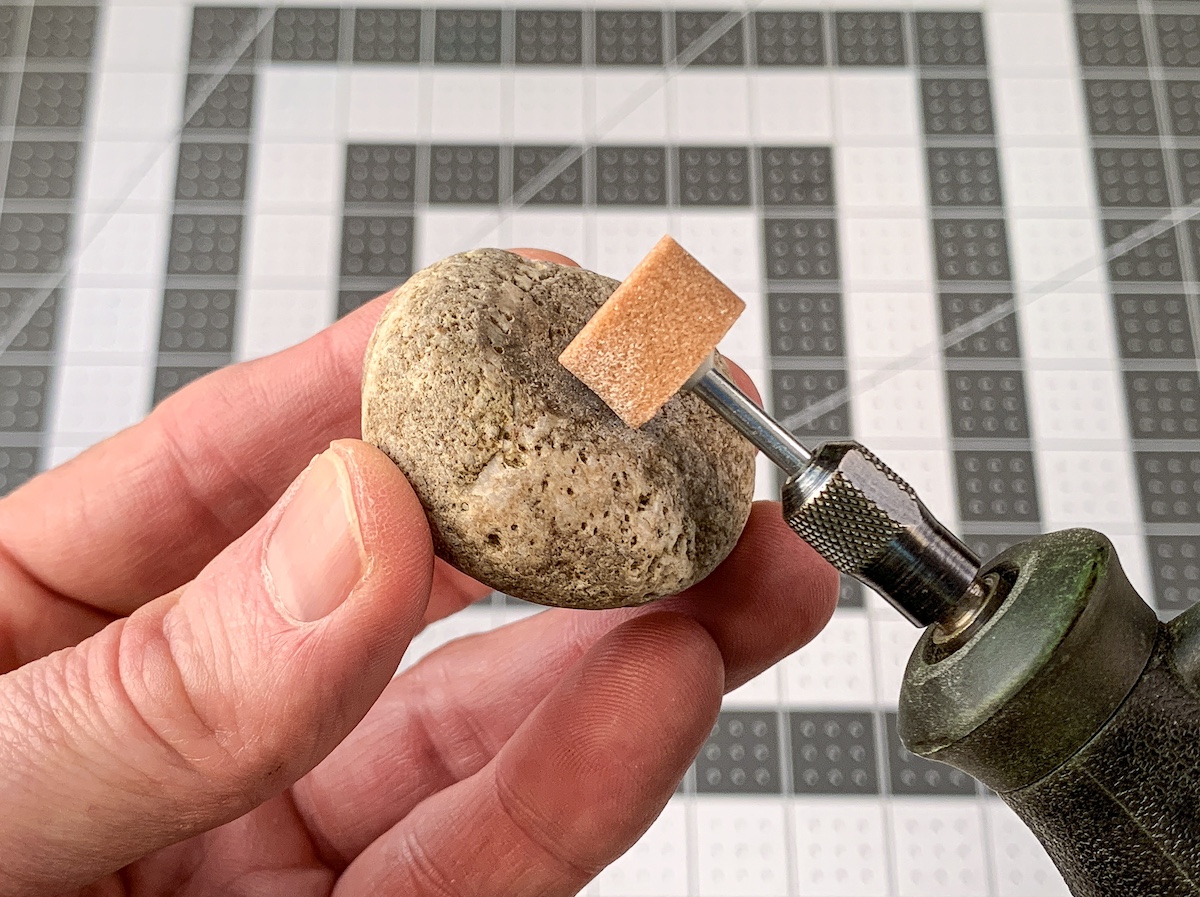
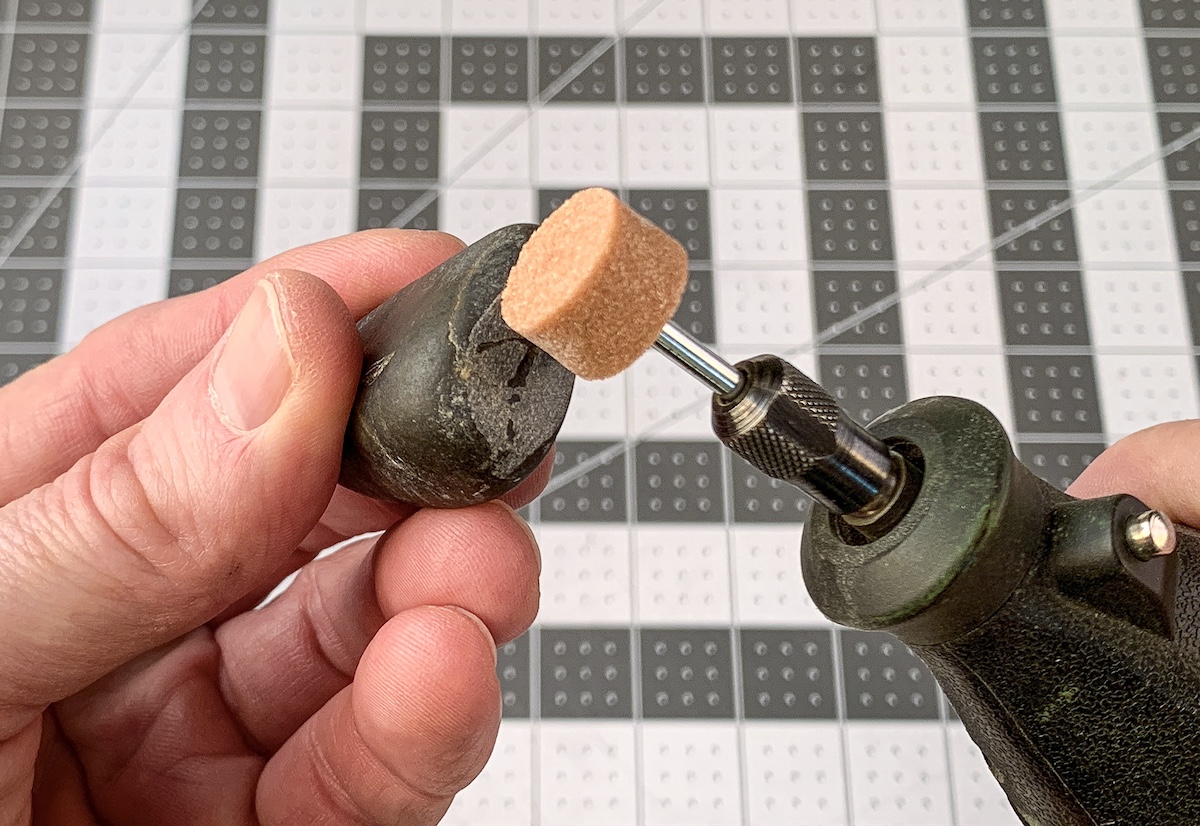
- Dremel tool with a grinding stone – we used the 8193 Aluminum Oxide Grinding Stone
- Two part epoxy for stone
- Paintbrushes
- Painter’s tape (optional)
- Mod Podge Hard Coat (optional)
- Protective equipment – if you need for the grinding with the Dremel
Tips and Thoughts for This Project
Yes, you can paint the mushrooms AFTER you glue them with the epoxy. I wasn’t quite sure how the stones would be glued together, so I painted first. Having said that, you should paint first if the stones are going to be secured in a way that doesn’t allow you to get the brush into a tight space.
If these are going inside, Mod Podge Hard Coat is a great way to seal them for a satin finish. If they are going outside, you will probably want a UV sealer for direct sunlight. Multisurface paint is great, but the sun can break down craft paint even with UV in it if it’s strong enough.
Get the printable how to card for these stone mushrooms below:

Rock Mushrooms
Equipment
- 1 Dremel tool with a grinding stone – we used the 8193 Aluminum Oxide Grinding Stone
Materials
- Rocks one top and one bottom for each mushroom
- Multisurface craft paint red, white, brown, cream
- Two part epoxy for stone
- Painter’s tape optional
- Mod Podge Hard Coat optional
Video
Instructions
- Select the rocks you're going to use for your top and bottom It helps to "test fit" them as best you can to make sure they will balance.
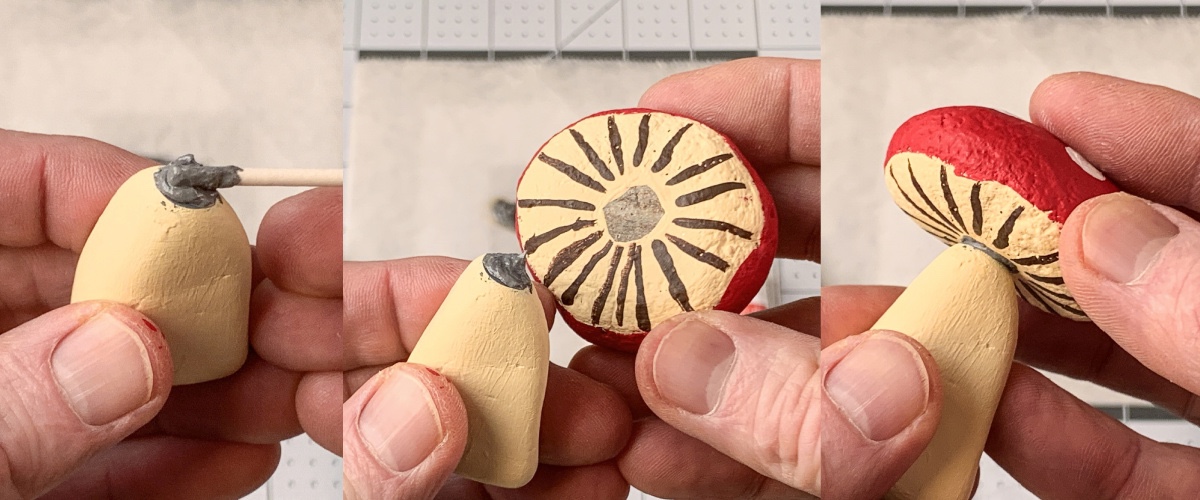
- Fit the Dremel tool with the grinding stone. On the top stone, grind a flat area on the bottom where you will glue on the stem.
- On the bottom stone, grind a flat area on one end where you will glue the stones to each other. Then grind the bottom so that it sits flat on a surface, if necessary.
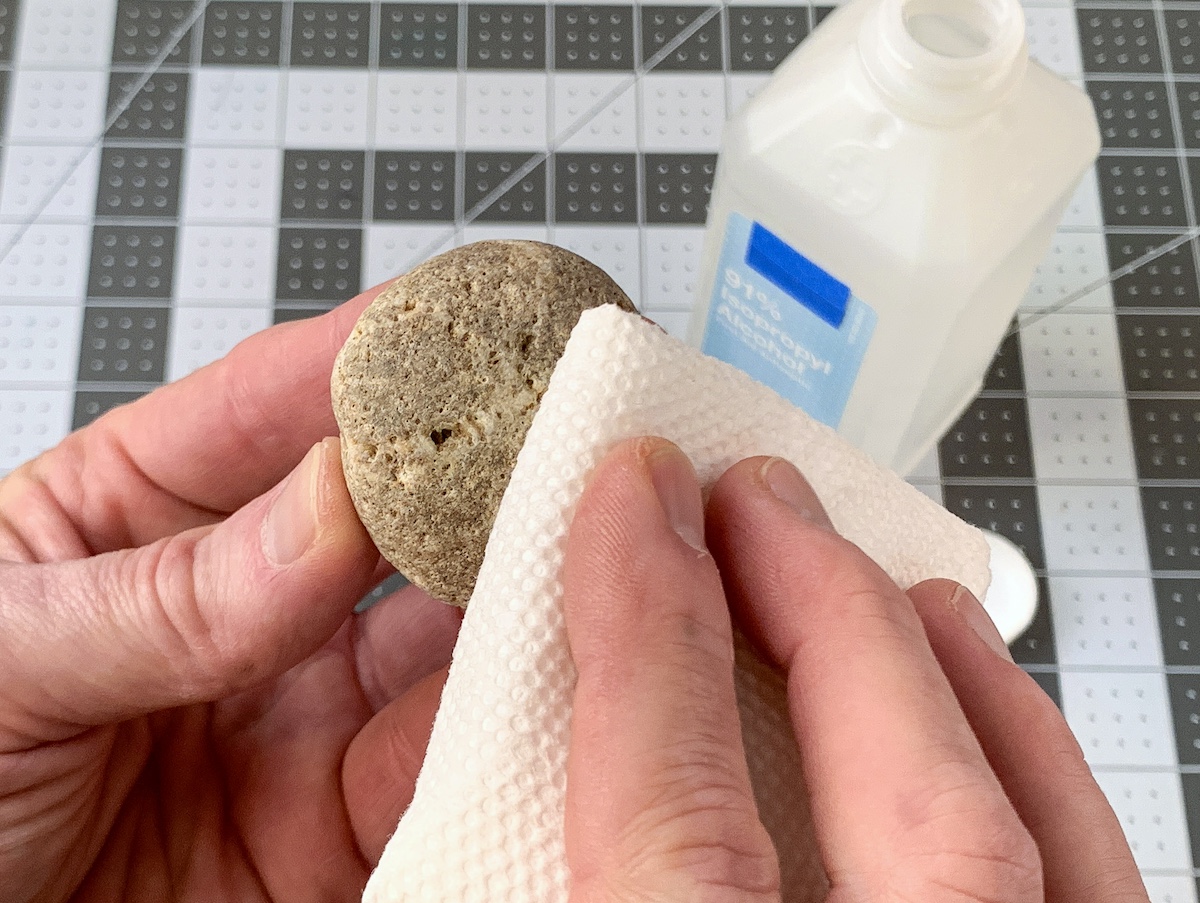
- Wash and clean the stones with mild soap and water or rubbing alcohol. This gets rid of the grinding dust also.
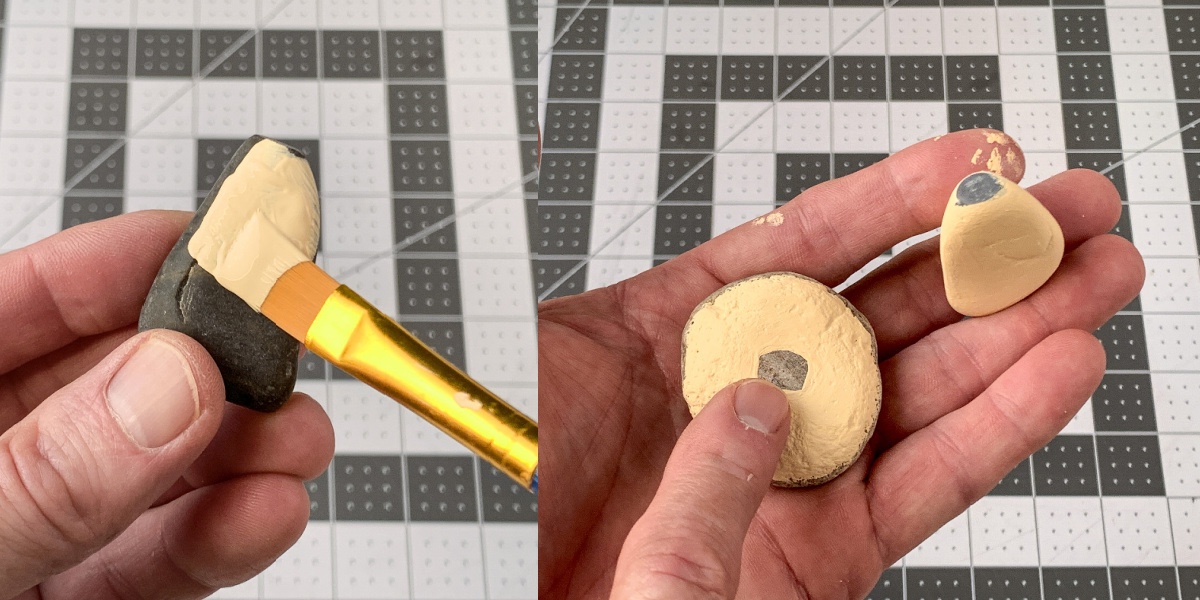
- Use the cream paint to paint the stem rock, as well as a circle on the bottom of the top rock. On both rocks, leave small areas that you are going to glue them together unpainted. I did this for maximum adhesion.
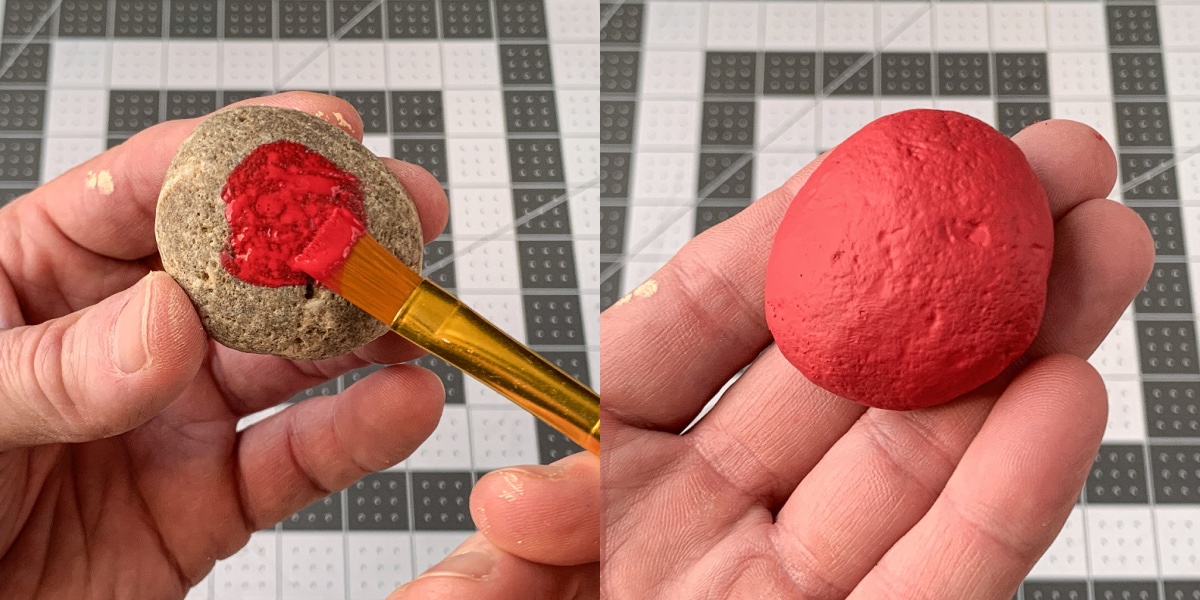
- Paint the cap rock with red paint. Give several coats and paint over the edges to meet the cream paint on the bottom.
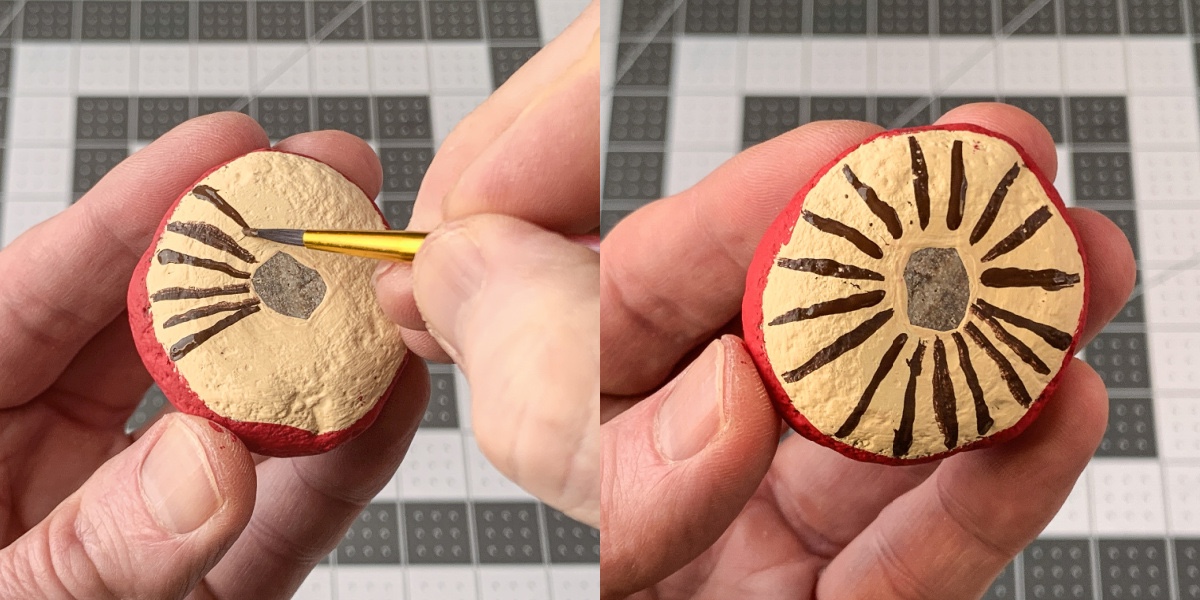
- Use brown paint and a thin paintbrush to add "gills" to the bottom of the cap, on top of the cream paint. Let dry.
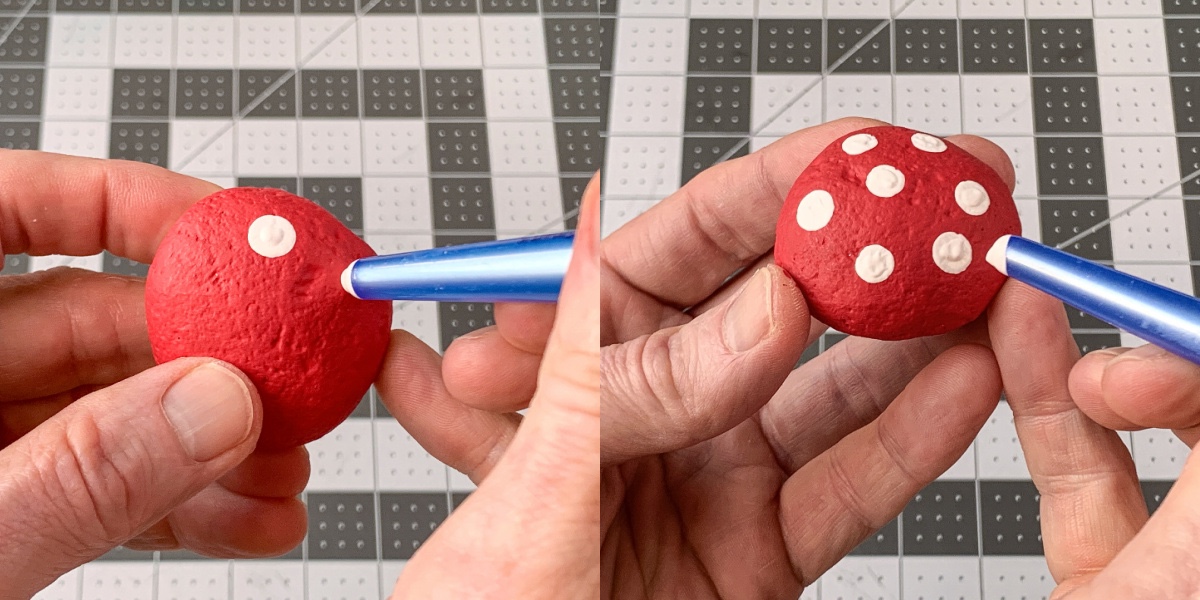
- Choose a paintbrush with a smaller end. Dip the end into white paint and then press onto the rock to make a dot. Continue until the top of the rock has several white dots on the top. Let dry.
- Following the instructions on your epoxy package, mix the resin (if required).
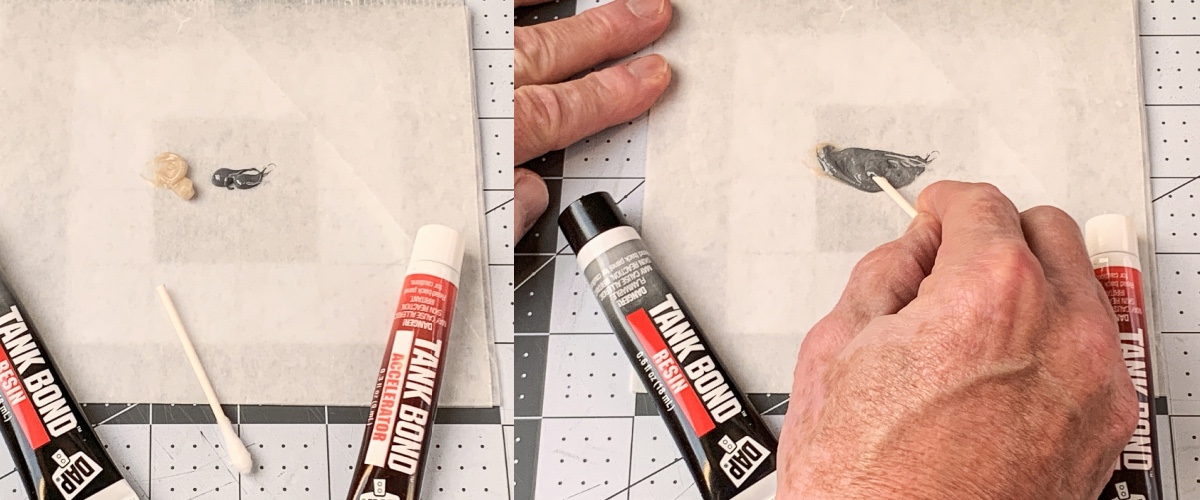
- Apply the epoxy to the top of the rock that you are using as a stem. Press the top down onto the base and hold. It should start to set right away. Use painter's tape to secure until dry, if necessary. Let dry overnight.
- If desired, seal the mushrooms with Mod Podge. I used Hard Coat for a Satin finish.
Did you enjoy making these cute mushrooms? Let me know if you have questions in the comments! I’d also love for you to check out these other posts:


Love this! Thanks for the easy to follow instructions!
I love this idea and it was so easy to follow instructions!