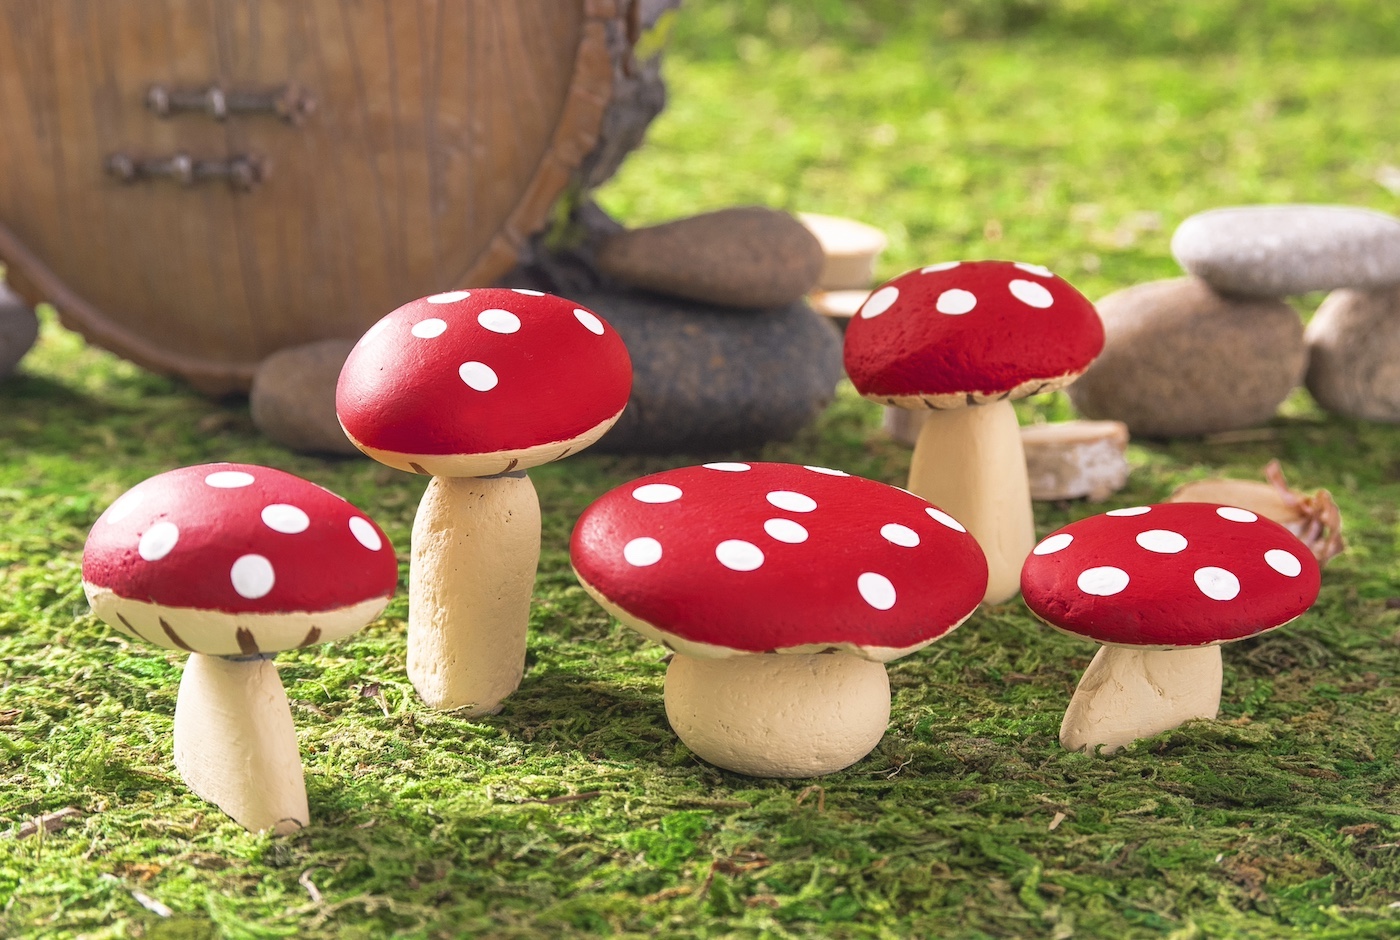
Rock Mushrooms
Make the cutest mushrooms using stones and these great tips! I'll show you how to paint and glue them for success.
Yield: 3 rock mushrooms
Cost: $3
Equipment
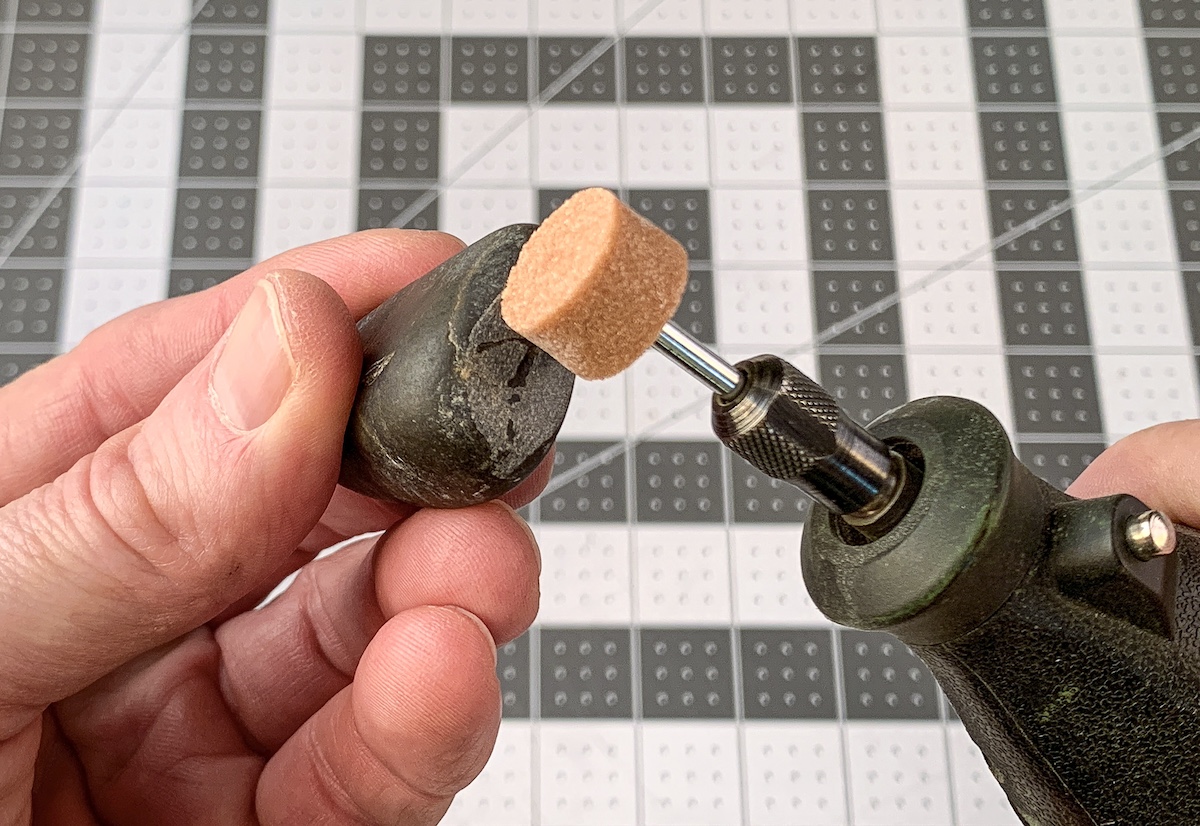
- 1 Dremel tool with a grinding stone - we used the 8193 Aluminum Oxide Grinding Stone
Materials
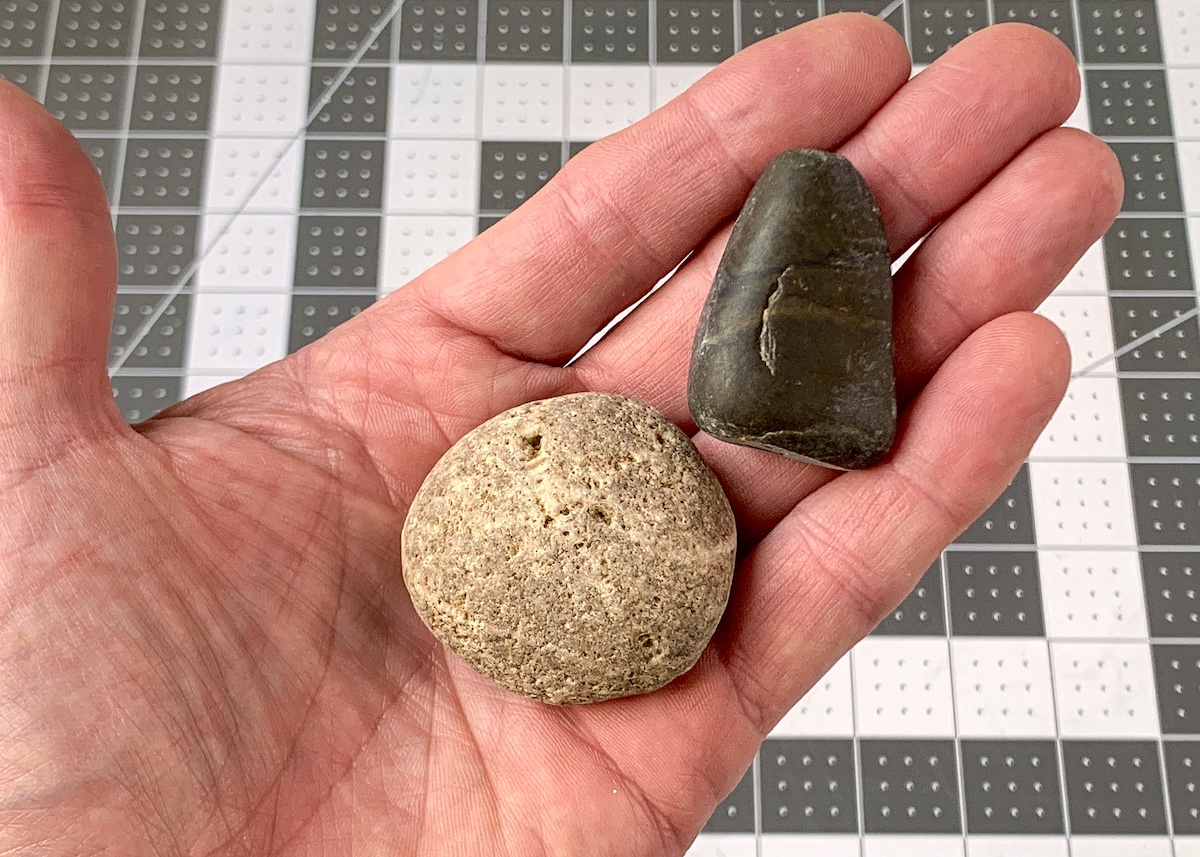
- Rocks one top and one bottom for each mushroom
- Multisurface craft paint red, white, brown, cream
- Two part epoxy for stone
- Painter's tape optional
- Mod Podge Hard Coat optional
Video
Instructions
- Select the rocks you're going to use for your top and bottom It helps to "test fit" them as best you can to make sure they will balance.
- Fit the Dremel tool with the grinding stone. On the top stone, grind a flat area on the bottom where you will glue on the stem.
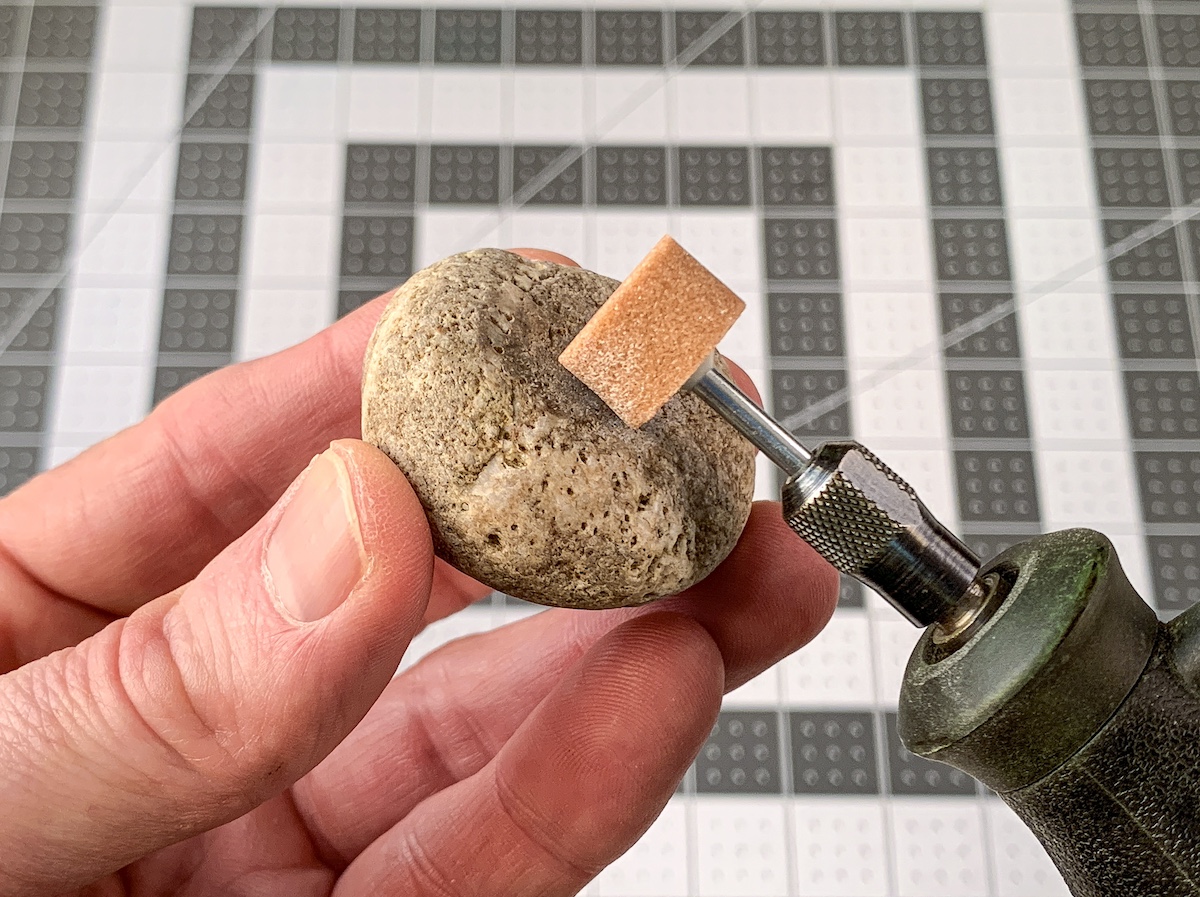
- On the bottom stone, grind a flat area on one end where you will glue the stones to each other. Then grind the bottom so that it sits flat on a surface, if necessary.
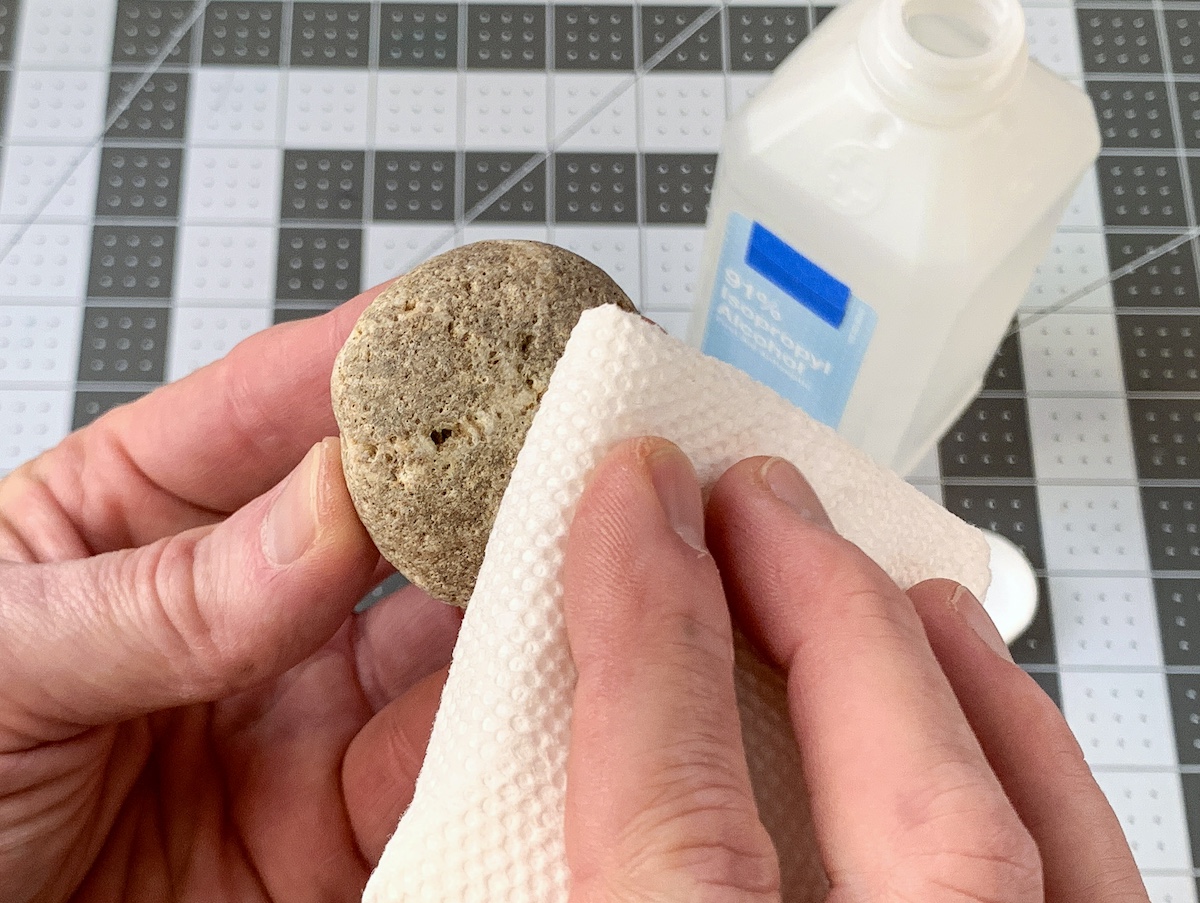
- Wash and clean the stones with mild soap and water or rubbing alcohol. This gets rid of the grinding dust also.
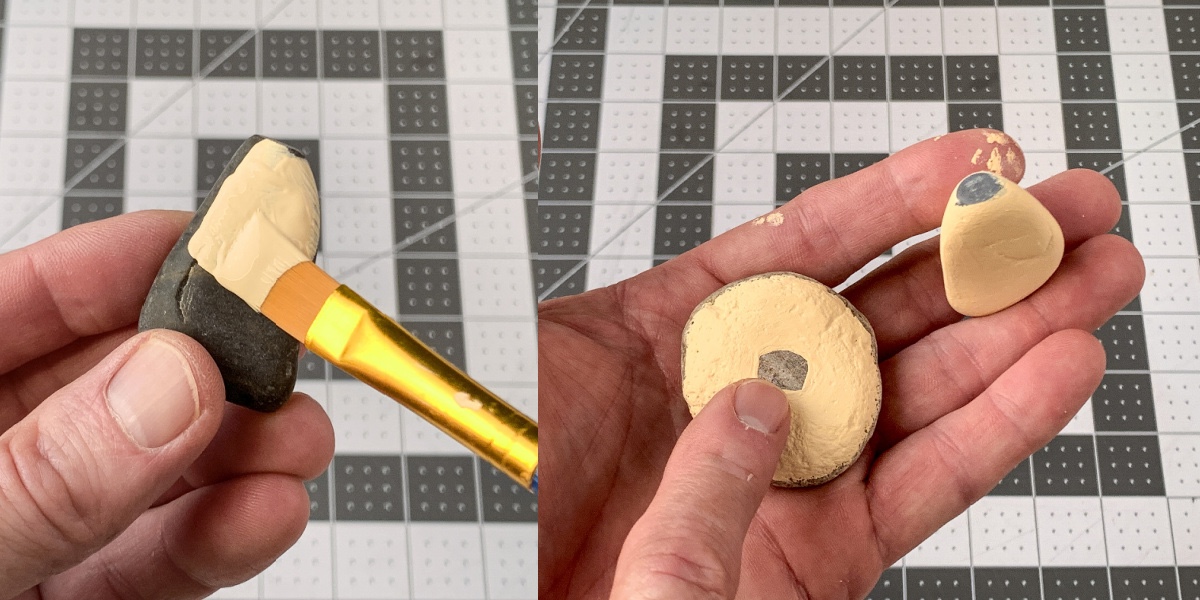
- Use the cream paint to paint the stem rock, as well as a circle on the bottom of the top rock. On both rocks, leave small areas that you are going to glue them together unpainted. I did this for maximum adhesion.
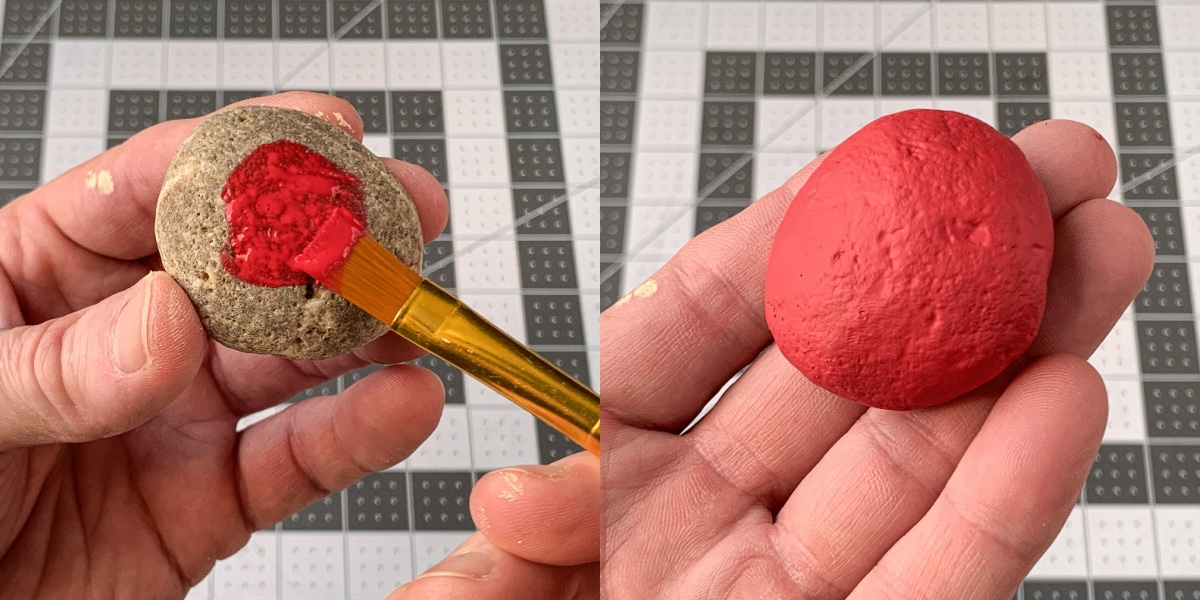
- Paint the cap rock with red paint. Give several coats and paint over the edges to meet the cream paint on the bottom.
- Use brown paint and a thin paintbrush to add "gills" to the bottom of the cap, on top of the cream paint. Let dry.

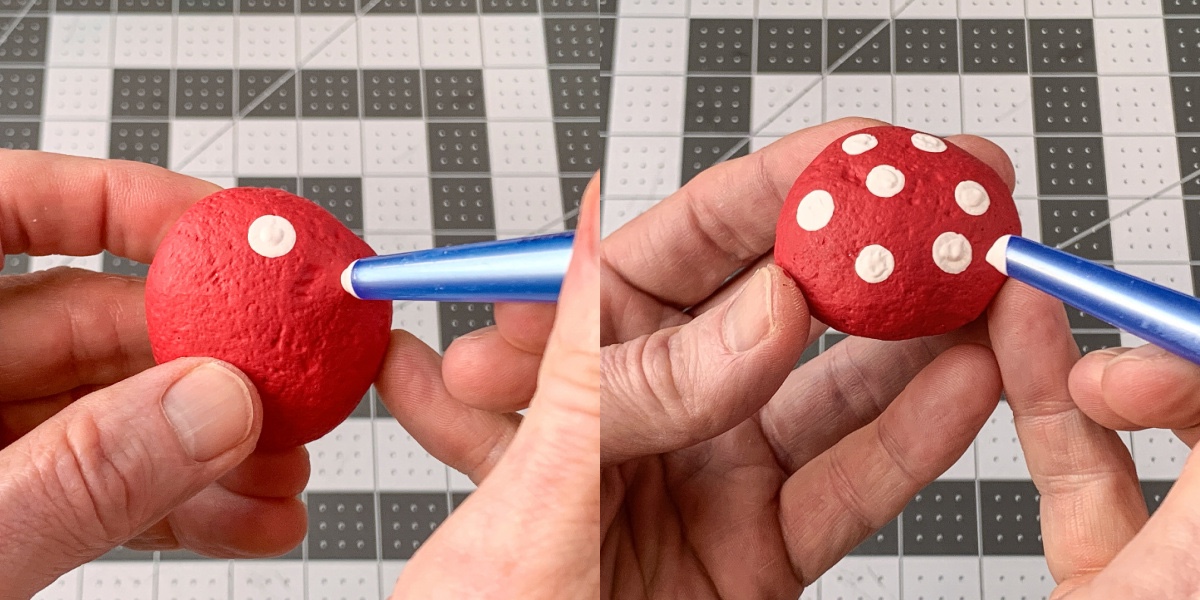
- Choose a paintbrush with a smaller end. Dip the end into white paint and then press onto the rock to make a dot. Continue until the top of the rock has several white dots on the top. Let dry.
- Following the instructions on your epoxy package, mix the resin (if required).
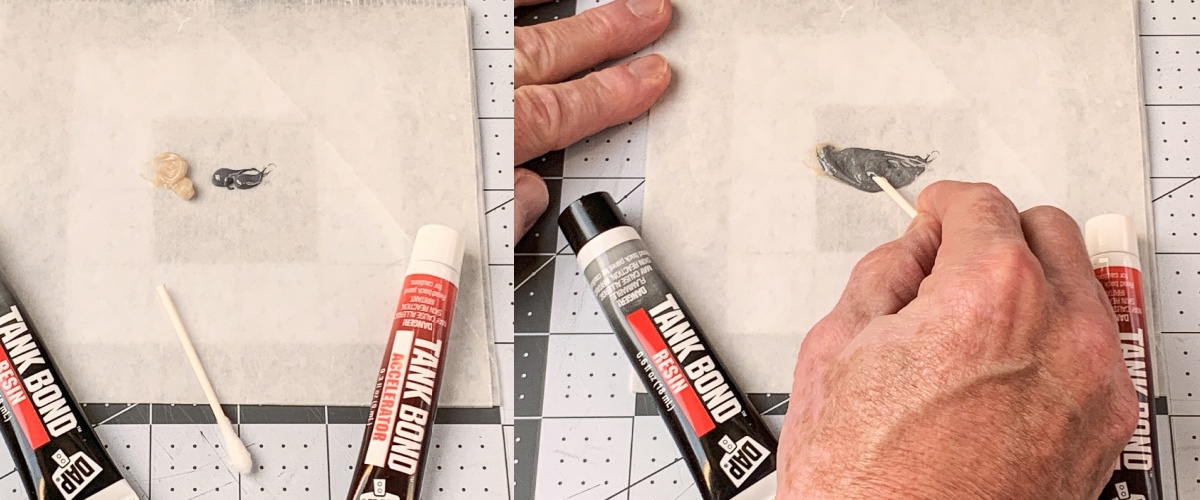
- Apply the epoxy to the top of the rock that you are using as a stem. Press the top down onto the base and hold. It should start to set right away. Use painter's tape to secure until dry, if necessary. Let dry overnight.

- If desired, seal the mushrooms with Mod Podge. I used Hard Coat for a Satin finish.