These gorgeous DIY lace earrings were made with some scraps that Justine had in her stash – they’re so easy and make great gifts! I’m going to show you how to make them – in three simple steps.
Skills Required: Beginner. The nice thing about this project is that you get to use Mod Podge and not worry about wrinkles! Anyone can do it, even a child or tween.
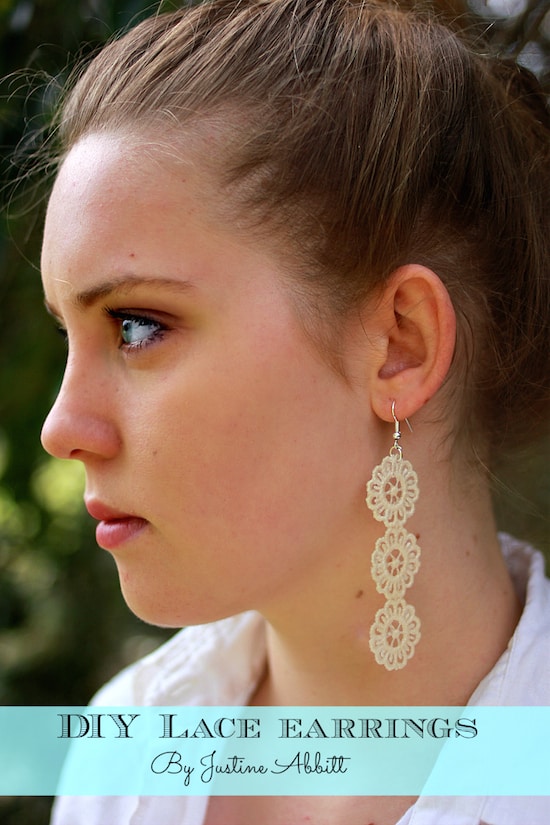
Justine from Sew Country Chick has found a fun way to make DIY lace earrings using scraps! Take a peek at the tutorial below and see if it inspires you to use scraps to make your own Mod Podge jewelry.
What else could you use for this fashion craft besides lace? Think about it as you read the simple tutorial from Justine below.
I’ve been seeing lace jewelry around lately and love it. I have lots of lace scraps lying around from my various projects: wedding gowns, baptism dresses . . . just your everyday sewing projects!
I figured it was time to turn the lace into something, so why not start with jewelry? And furthermore – why not start with earrings. Earrings are typically easy to make, and I figured I could make something really pretty with Mod Podge.
How to Make Earrings
These lace earrings take just a few minutes to make and are quite pretty on Isabelle, don’t you think?

Before we get started, I wanted to go over a few frequently asked questions about this project – with some tips and tricks for what to use. Follow my guide below and you’ll definitely have success with these lace earrings!
Tools You’ll Need
You may want some jewelry tools for this project, if you’re planning on making more jewelry or several sets of these earrings. You can get a basic set online or at the craft store.
The reason for the tools is that you’ll have to open the jump rings to attach them to the lace and to the earring hooks. You can use needle-nose pliers as a temporary solution, but jewelry pliers are much better and won’t damage the metal.
Note: Make sure your jump rings are large enough to accommodate the lace and then attach to the earring hooks! You don’t want to go home with the wrong supplies.
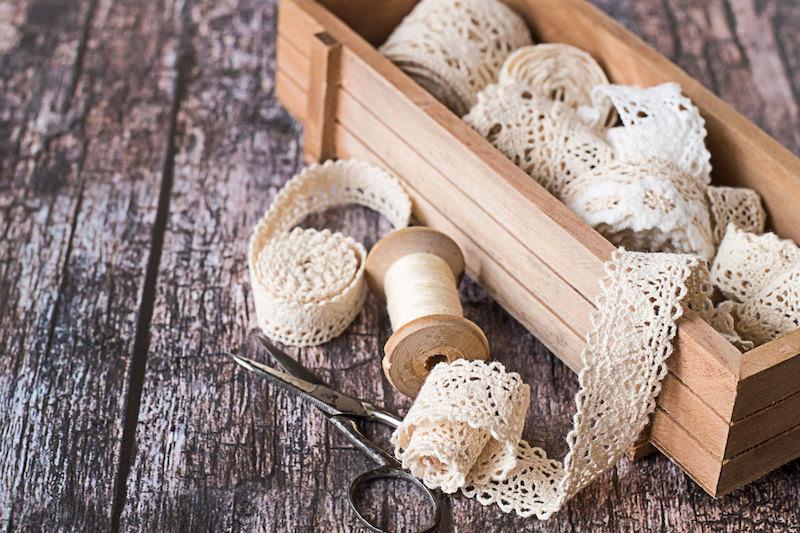
Lace to Use
There’s a variety of lace you can choose to work with this project. The color of the lace doesn’t matter – that is up to you. The thickness does matter.
With these lace earrings, we used lace ribbon that is a little bit thicker. There is some thickness to it if you hold it between your fingers.
And that’s what you want with this project. It’s hard to make lace stiff enough for earrings if it’s really thin. I find sometimes people call the thicker lace “lace ric rac” and that seems to work really well!
Don’t be afraid to wind ribbon into the lace – that’s kind of a fun option that I haven’t tried yet, but realized would work when making these lace earrings.
Where to Get Lace
If you don’t have lace left over from a project, I recommend heading to the craft store. For the most variety you’ll want to go to a craft store that sells fabric too, like JoAnn.
However, I believe Michaels has lace on spools and maybe even sells it by the yard.
Two other options for scraps: Etsy or eBay. There are vendors on both sites selling lace by the yard or in scrap lots.
I personally like to see my lace before I buy, but this is a viable and inexpensive option.
Which Mod Podge Formula?
Covering the lace bits on the earrings with Mod Podge helps make them more durable and firm, and keeps the lace from unraveling.
You could really use any of the Mod Podge formulas to accomplish this! Having said that, I’d go with either Gloss, Matte, or Satin depending on the finish you want.
But you could also use Fabric, Glitter, Outdoor . . . no one is going to know what you used except you!
The Fabric and Outdoor formulas are a little tackier so you might need a sealer over the top if those are the formulas you choose to use.
Mod Podge Stiffy
You might be wondering if you can use Stiffy for this earring craft – and the answer is yes! In fact, Stiffy will stiffen the lace much more than Mod Podge will (if you can’t tell by the name, that’s what it’s made for).
The reason that I didn’t use Stiffy in this project is only because I didn’t have it on hand at the time, and I wanted to show you that you could use both.
It’s really up to you.
If you use regular Mod Podge, the lace will still be moderately flexible. The Stiffy makes it a lot more stiff, though still a little flexible.
Are you ready to make your DIY earrings – in three steps? Keep reading to learn how to make your own.
Lace Earrings
Gather These Supplies
- Lace bits
- Two jump rings
- Two earring hooks
- Mod Podge Gloss (Mod Podge Stiffy works as well!)
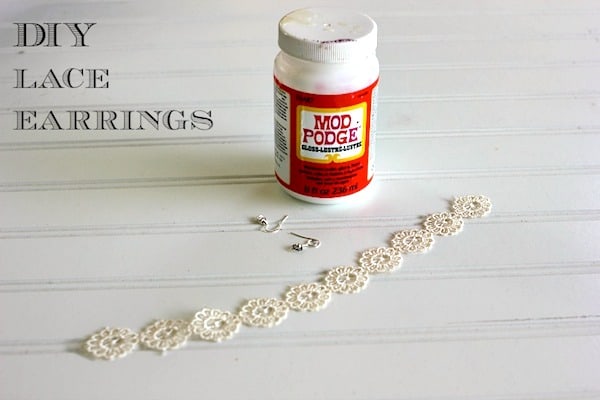
Step One: Cut the bits of lace the length and size you like.
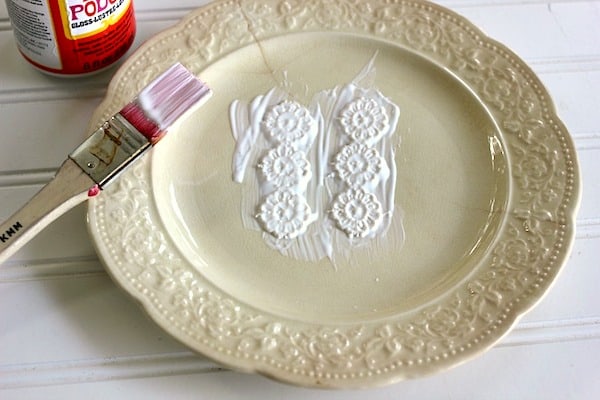
Step Two: Coat the lace with a medium layer of Mod Podge. If you do this on a plate, peel up and hang to dry.
You can also do this on aluminum foil, wax paper, or a Mod Podge silicone mat. If you do this on one of those options, you can leave the lace to dry before peeling up.
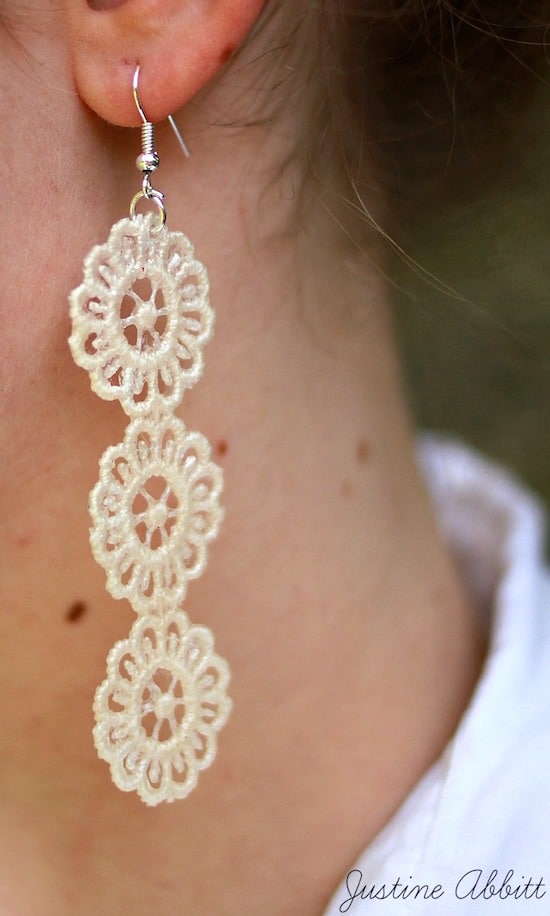
Step Three: Once dry, insert a jump ring into the lace and add the earring pieces. Then wear. You’re going to love how lightweight they are.
Make Lace Earrings
Equipment
- Jewelry tools
Materials
- Lace bits
- 2 Jump rings
- 2 Earring hooks
- Mod Podge Gloss
- Wax paper
Video
Instructions
- Cut the bits of lace the length and size you like.
- Coat the lace with a medium layer of Mod Podge. If you do this on a plate, peel up and hang to dry.
- Once dry, insert a jump ring into the lace and add the earring pieces.
- Let dry completely before wearing.
These earrings make great gifts, and you can knock out several pairs in one sitting. Use up all that trim to make a variety of handmade jewelry!
Do you love this jewelry craft? I hope you love these other ideas as well:






I love Mod Podge. Would never have thought to make earrings. Great job.
I love these! Such a simple, easy idea, but beautiful. I love lace.