
Create stunning DIY glitter pumpkins using chalk paint, Mod Podge, and Diamond Dust. A quick and customizable fall craft perfect for your seasonal decor.
Let’s be honest — fall crafts are some of the most fun to make. And when you add a little sparkle? Even better.
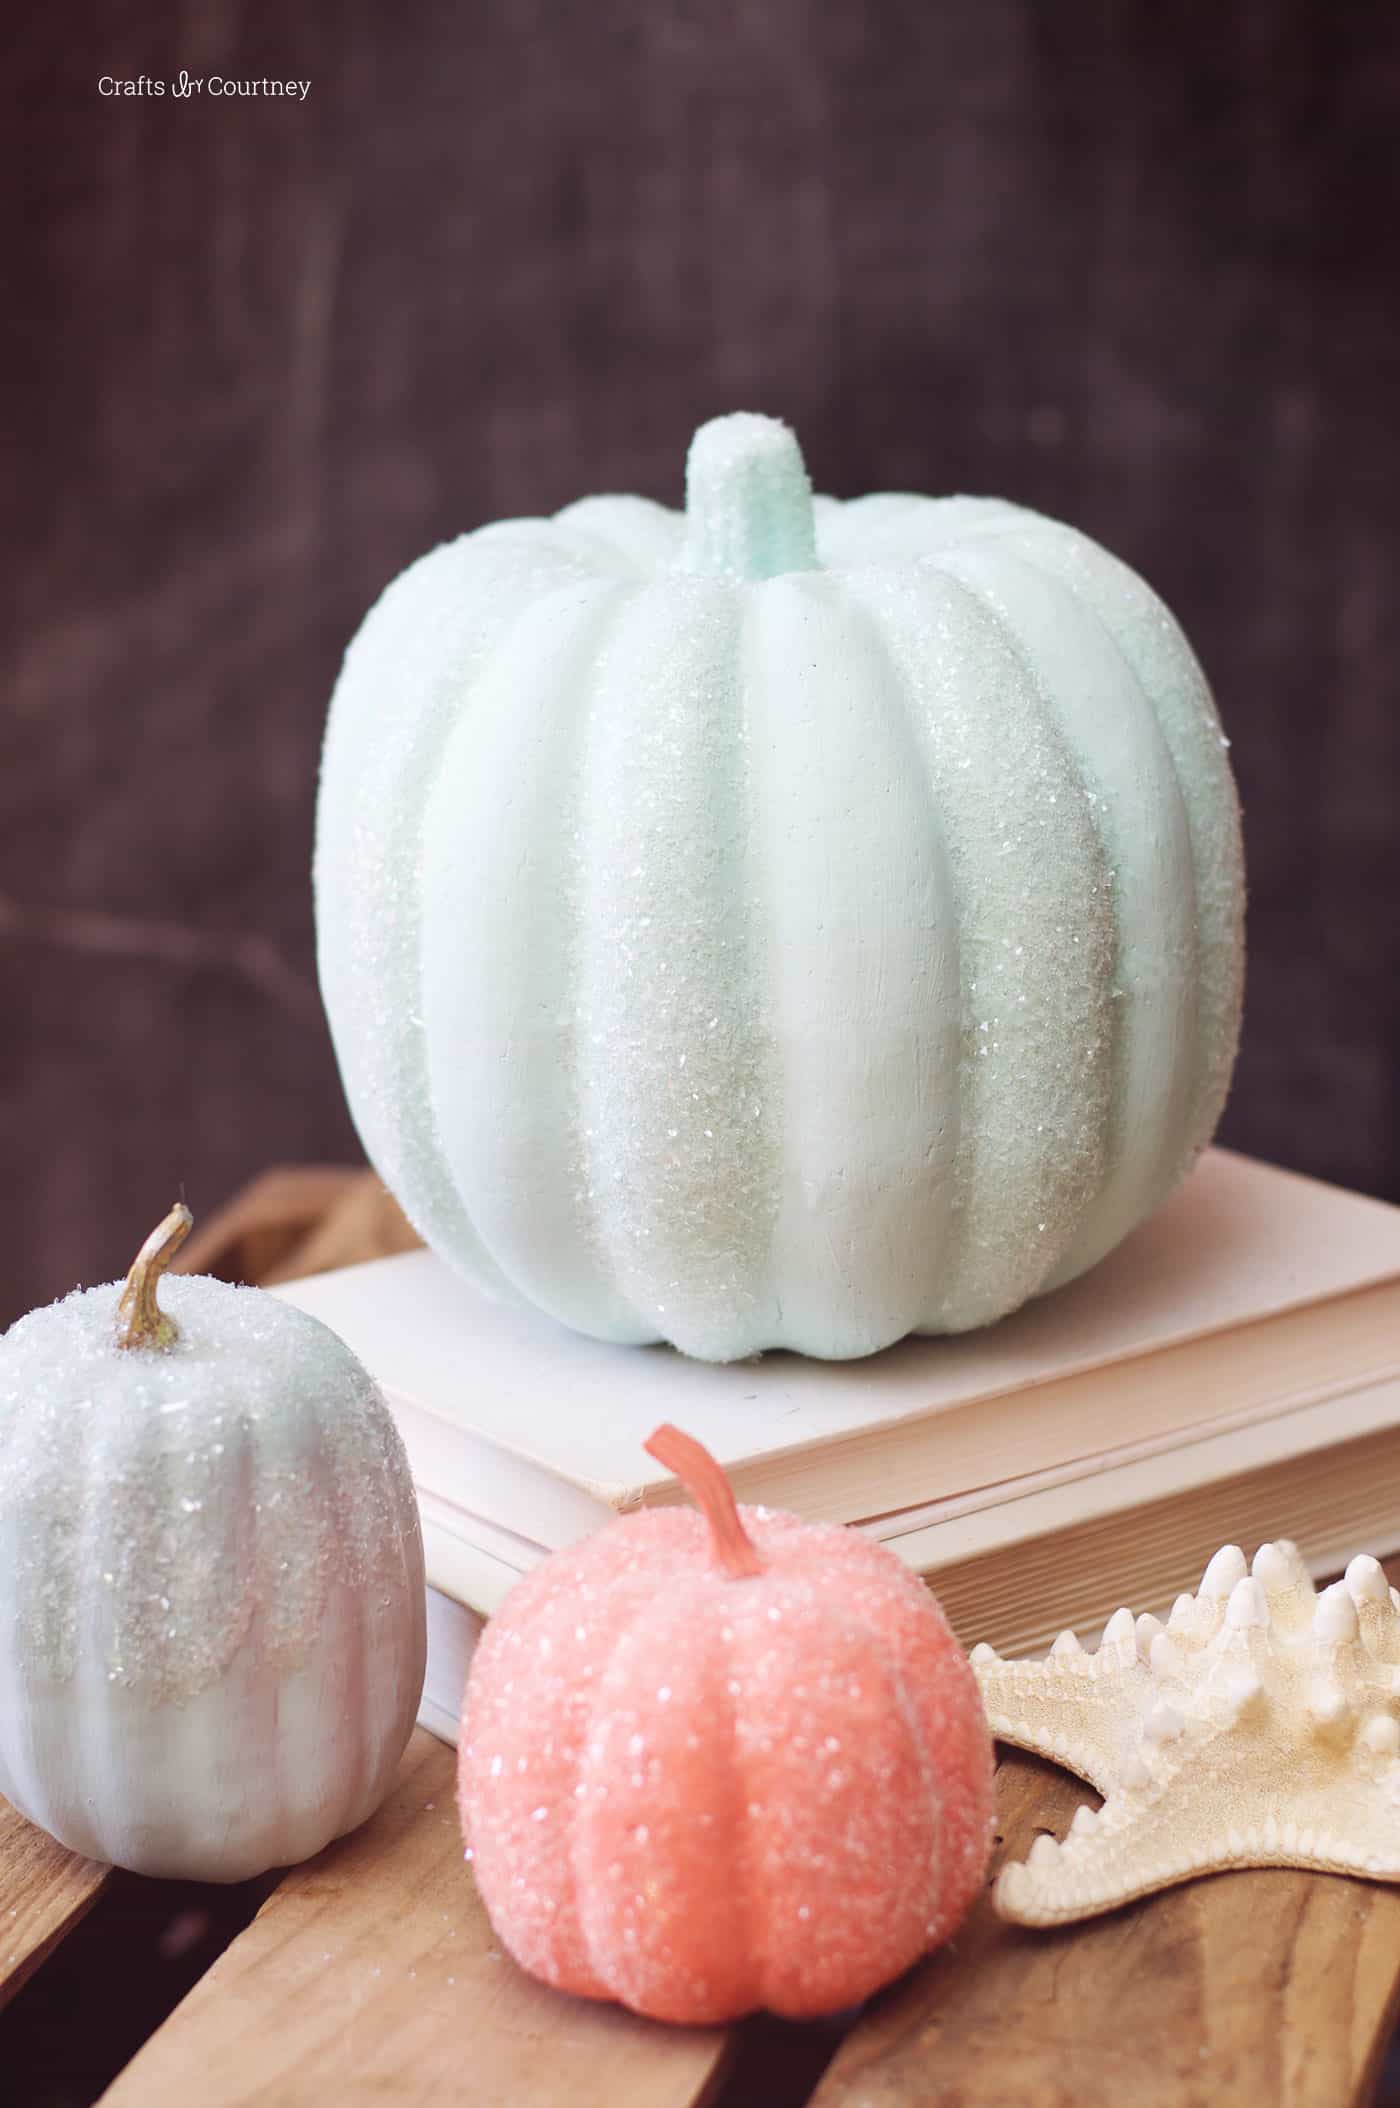
If you’re looking for a stylish way to decorate for autumn (without spending hours or tons of money), these DIY glitter pumpkins are going to be right up your alley.
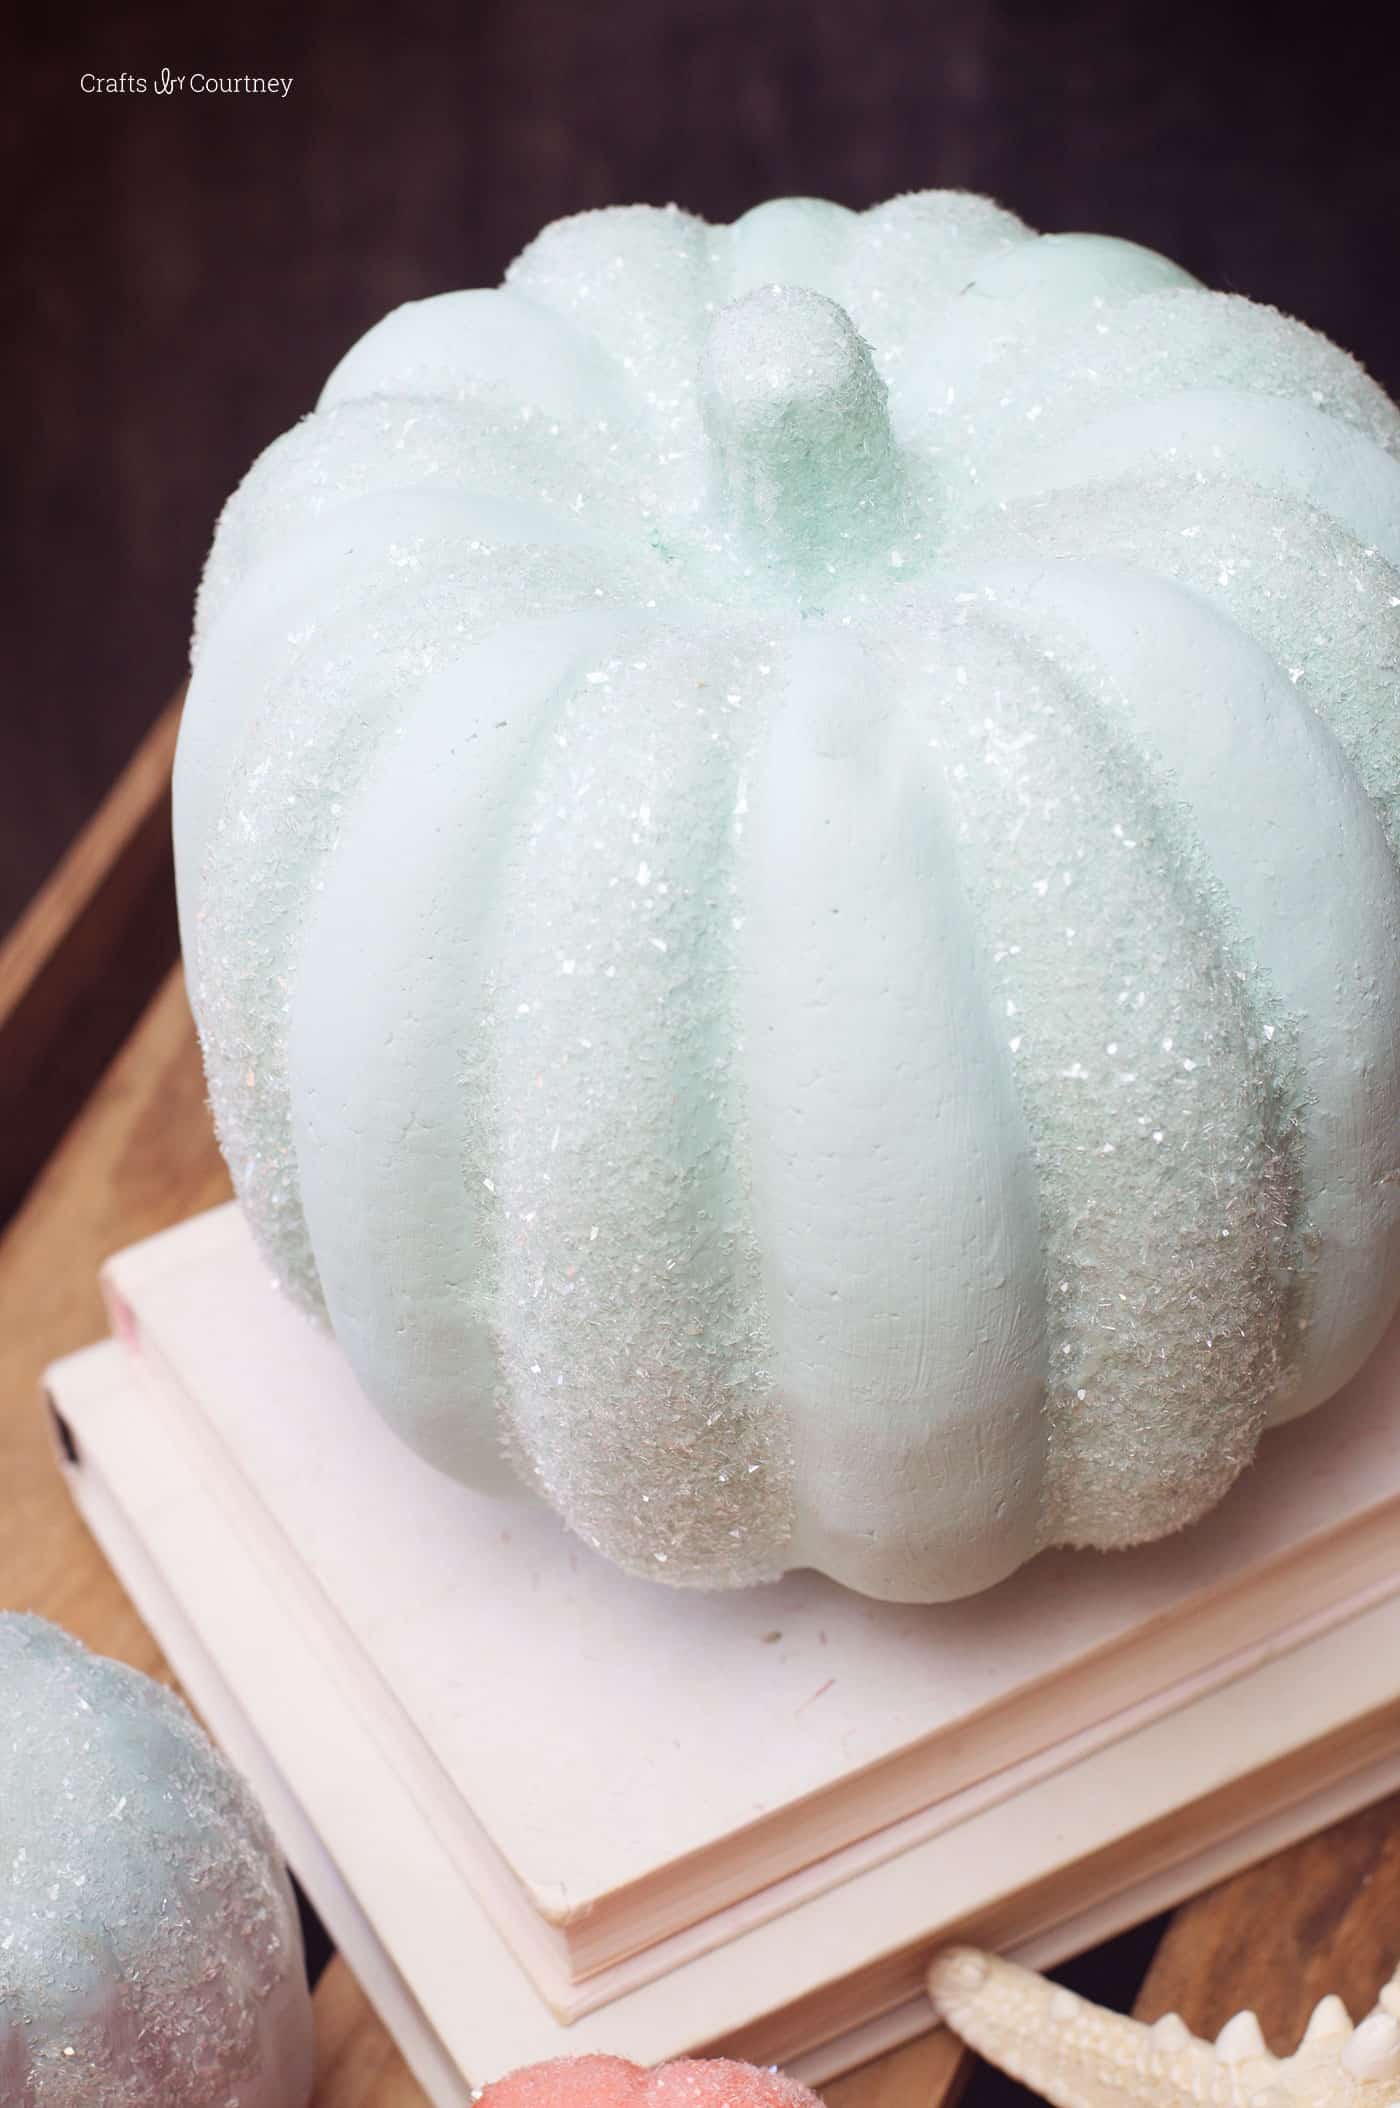
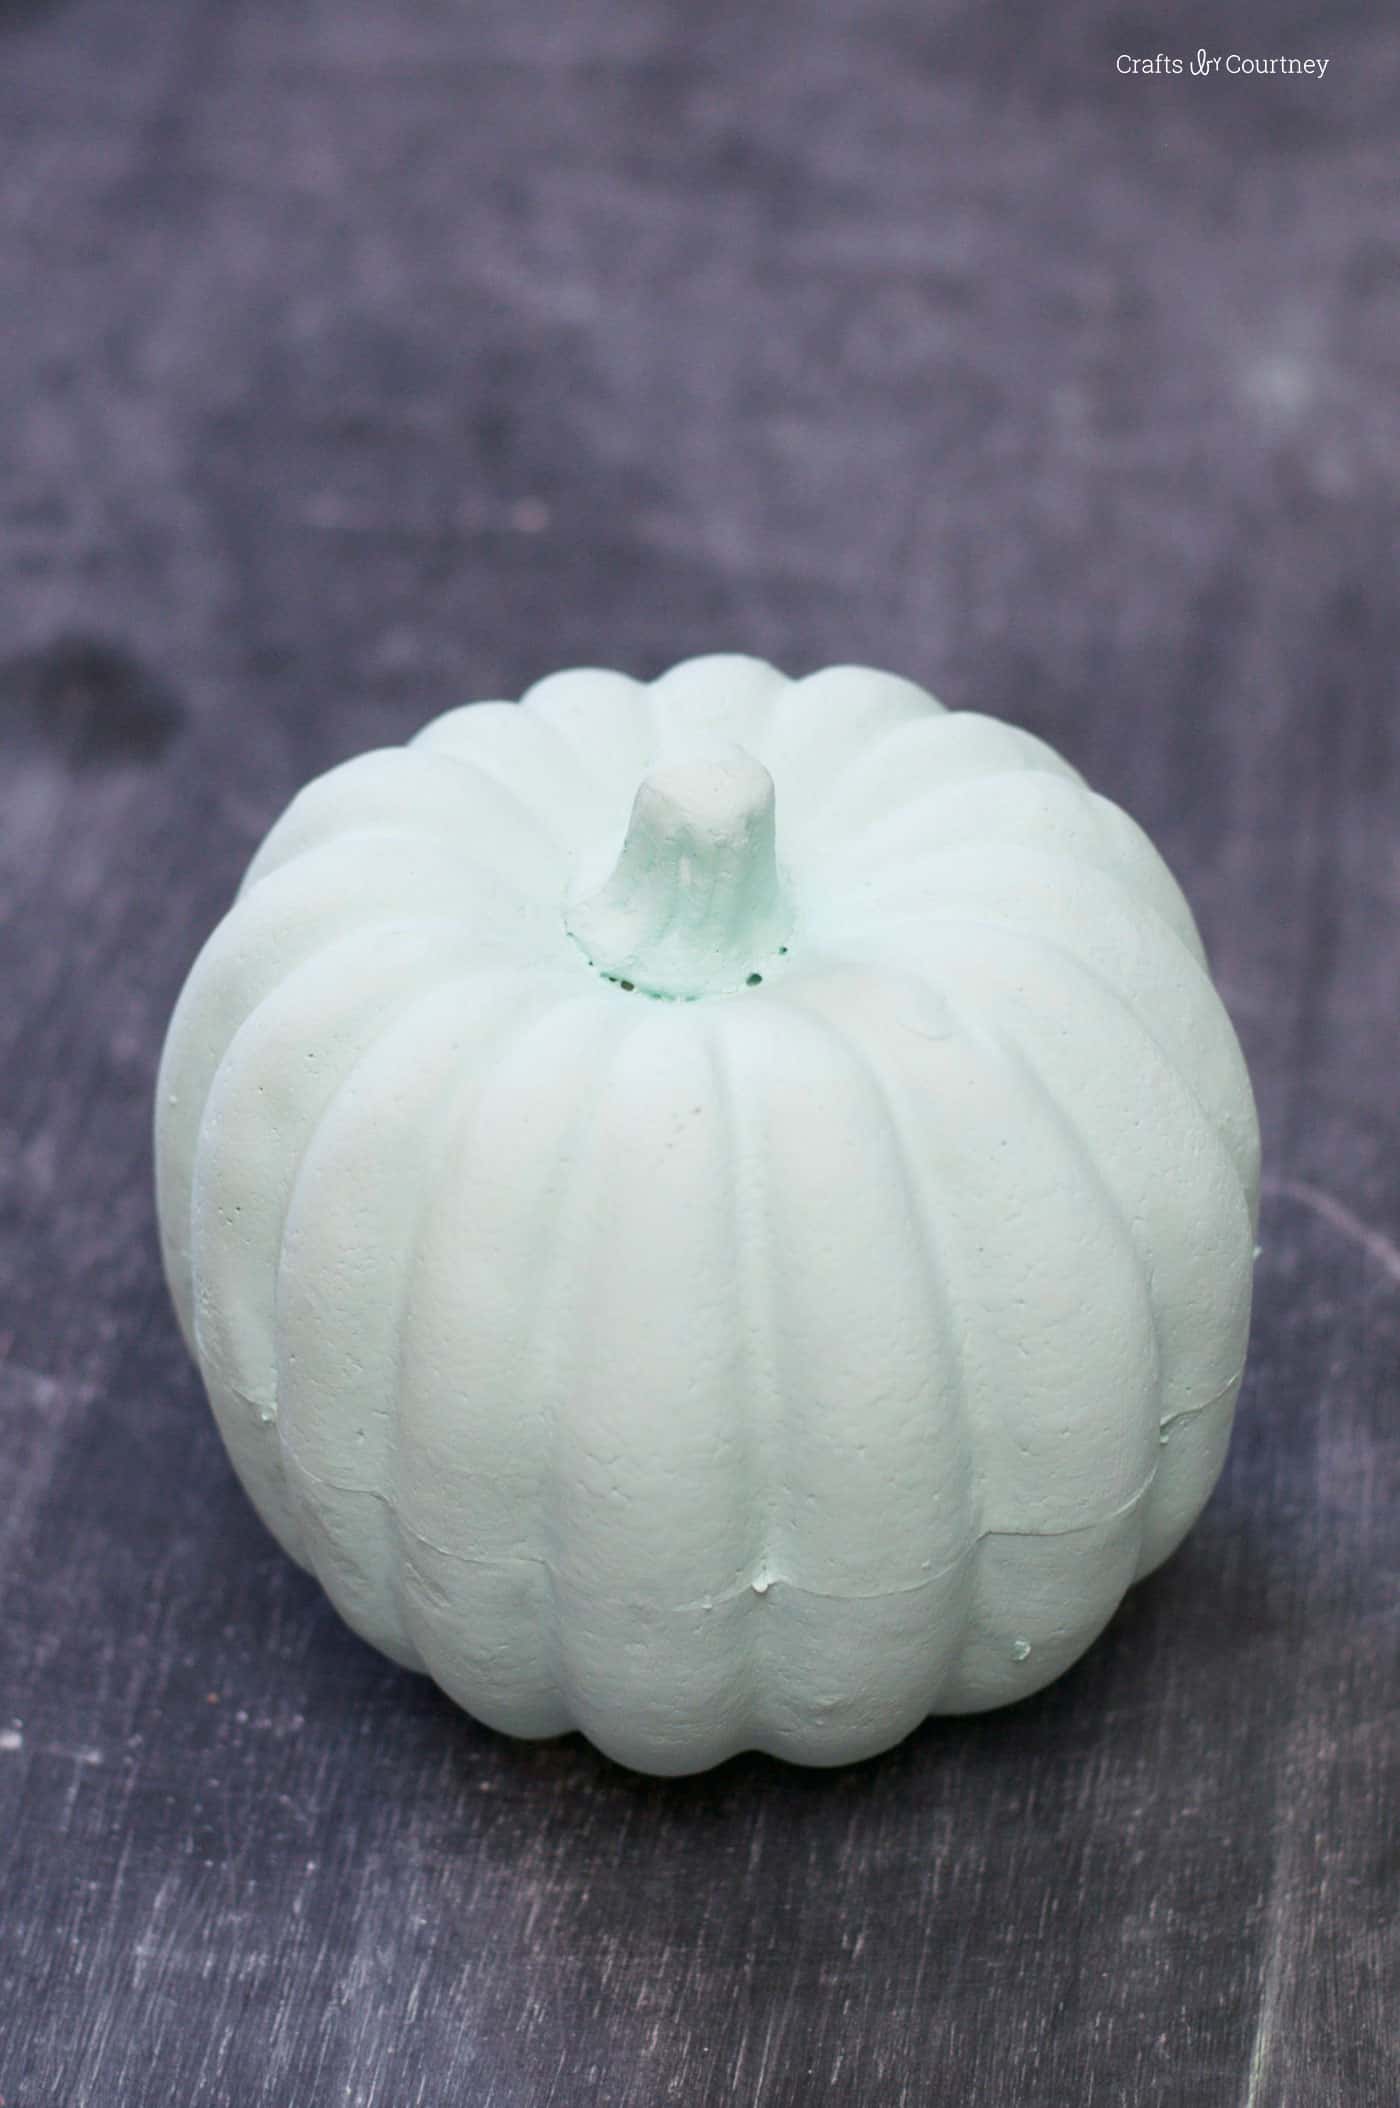
They’re made with foam pumpkins, chalk finish paint, Mod Podge, and glitter. But not just any glitter—Diamond Dust. It’s a type of crushed glass glitter that catches the light in the prettiest, most subtle way.
That said, if you don’t have Diamond Dust or want to keep it super kid-friendly, you can totally use your favorite craft glitter instead. This technique works either way!
What I love about this project – besides how easy it is – is how customizable it is. Want soft neutrals? Go for grays and creams. Love a moody vibe? Try deep blues or plum.
You can mix and match to your heart’s content, and the glitter gives it that perfect little “pop” on a mantel, shelf, or Thanksgiving table.
Best part? These glitter pumpkins only take about an hour or two to make (not counting dry time). So if you’ve got little ones running around or just need a quick win, this is one fall decor idea you’ll actually have time to do.
Let’s dive into how to make these sparkling beauties! Get the printable how to card below:
Glitter Pumpkin DIY
Equipment
Materials
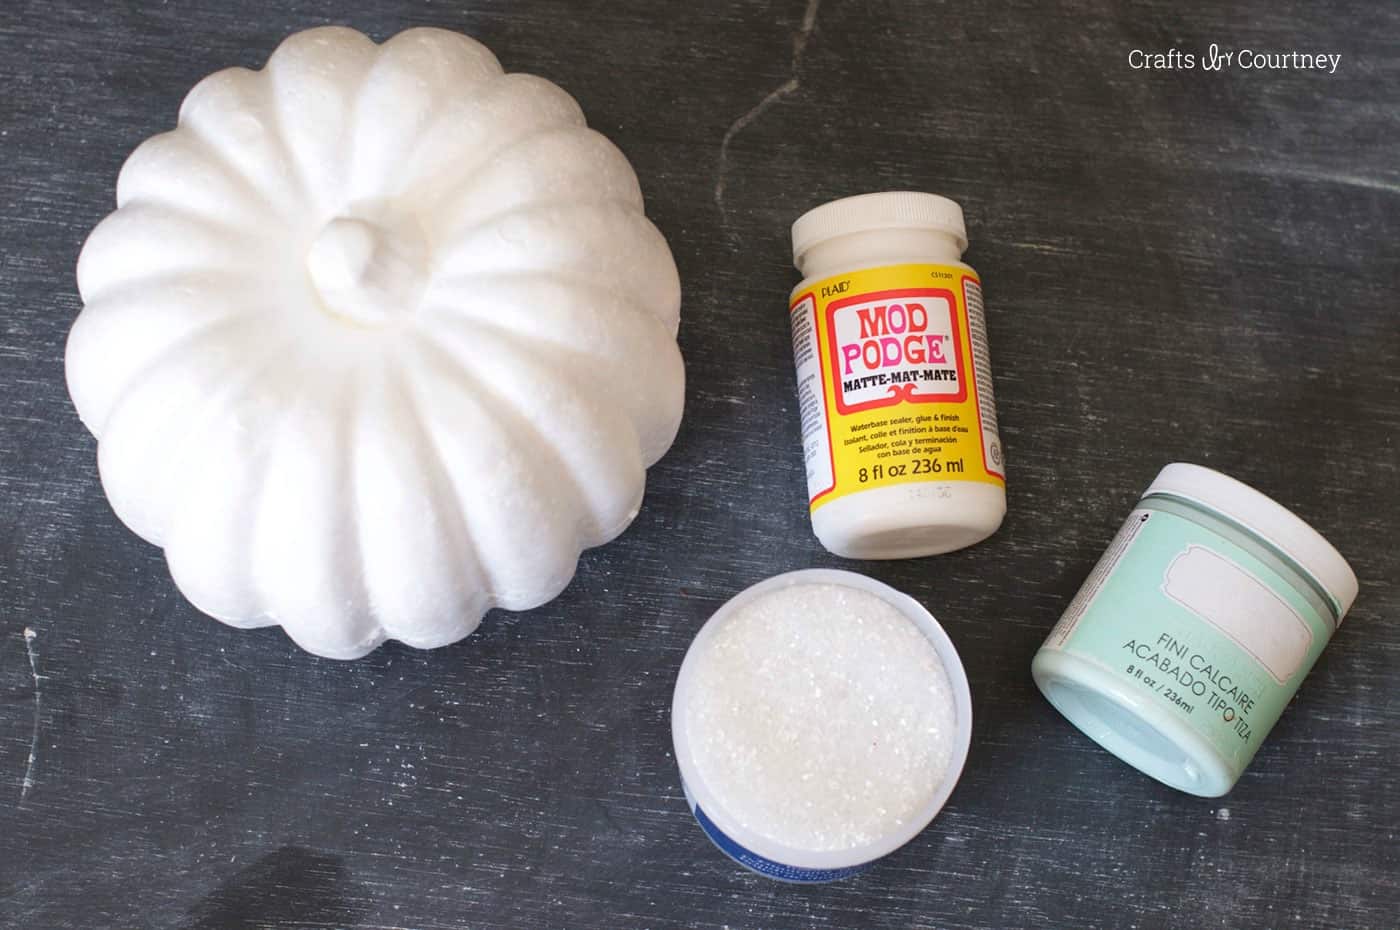
- Mod Podge Matte
- Chalk paint
- 3 Foam pumpkins
- Diamond Dust
Video
Instructions
- Paint two coats of chalk paint on each pumpkin using the brush. Let dry between each.
- Add Mod Podge to the areas that you plan to add Diamond Dust. Sprinkle the glitter directly on the wet Mod Podge (it will dry clear).I worked about 1/4 of the foam pumpkin at one time. You'll paint down the sections of the pumpkin and then move onto step 3.
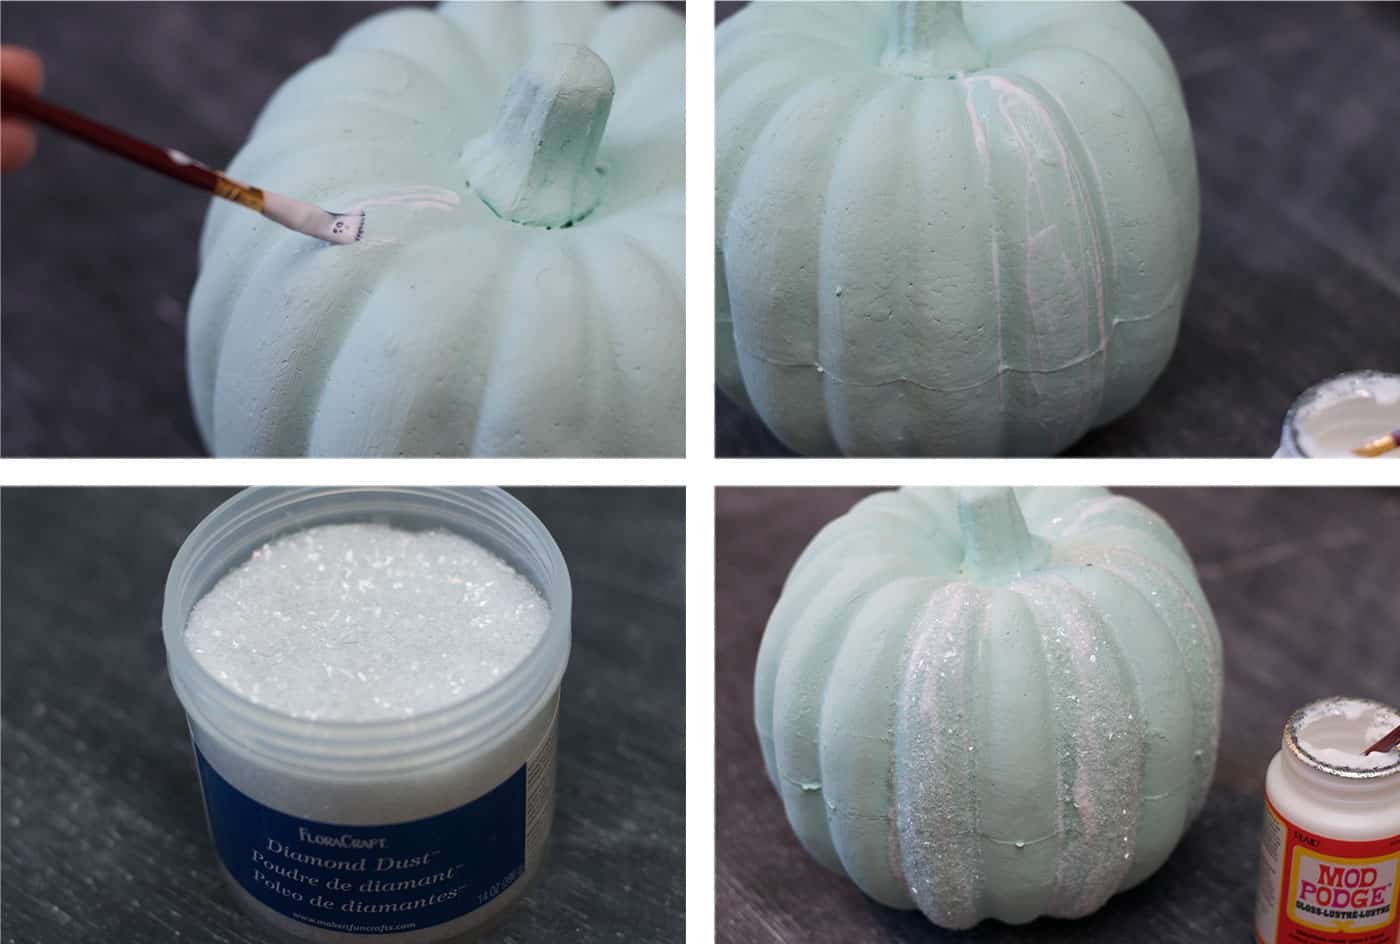
- Repeat until all areas of the pumpkin that you would like to accent are covered. Let pumpkins dry completely before displaying.
Notes
Thanks for checking out my new autumn pumpkin decor for my home! This craft is part of our fall crafts for adults, Thanksgiving crafts for adults, and Dollar Tree fall crafts. I’d also love to you to check out these other projects I’ve made with Mod Podge for autumn:
Confetti Pumpkins • Decorating Pumpkins (75+ Ideas!) • DIY Leaf Bowl • DIY Nautical Pumpkin • DIY Pumpkin Seed Art • Wood Block Pumpkins • Fall Leaves Frame • Glitter Acorn Decor • How to Dry Acorns • How to Paint Acorns • How to Preserve Leaves • Mod Podge Map Pumpkins • Paper Mache Pumpkins • Wood Pumpkin Decor


These pumpkins are super cute! I think I could even pull them off!
Paige
https://www.thehappyflammily.com/
Beautiful!!
This looks like a lot of fun! I’ll have to try this with my granddaughter. I too love the coral idea