
Learn how to decorate your own photo frame with a piece of scrapbook paper and Mod Podge! This is so easy, anyone can do it.
I’m crazy about Dimensional Magic lately, and I’m using on everything. So you’re gonna have to bear with me; I hope I won’t burn you out. But I just had to show you how it can be used on stuff other than jewelry.
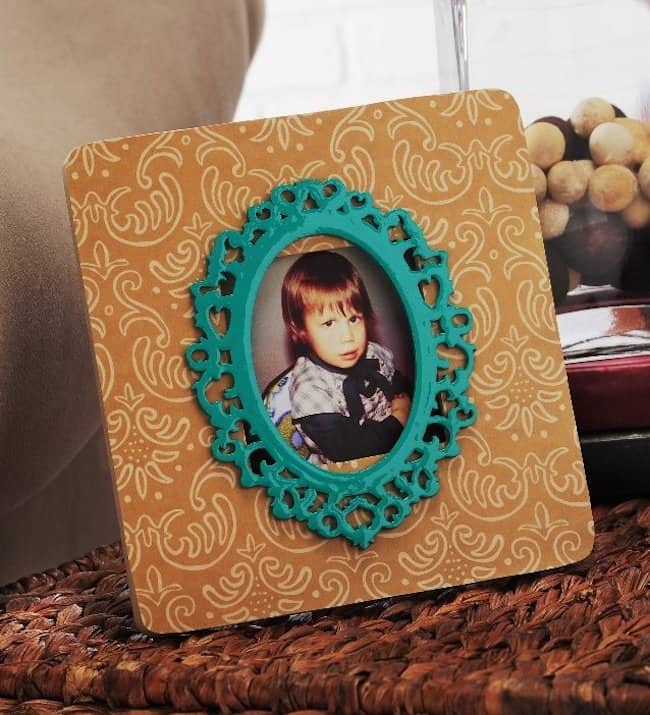
This damask decoupage frame is super easy (hello beginners!), and the kicker is that the Dimensional Magic is on the wood accent piece in the center. You may have to enlarge the photo to see the detail, but the raised DM finish looks really neat in real life.
Who is that charming little one in the DIY photo frame? You’ll just have to guess. In the meantime, here are the decoupage frame project instructions.
DIY Scrapbook Paper Frame
Gather These Supplies
- Plain wood frame
- Wood accent
- Mod Podge Satin
- Mod Podge Dimensional Magic
- FolkArt Acrylic Paint – Aqua, Parchment
- Scrapbook paper – 1 sheet, I used American Crafts Hello Sunshine Splendor
- Pencil
- Craft knife and mat
- Craft glue
- Paintbrush
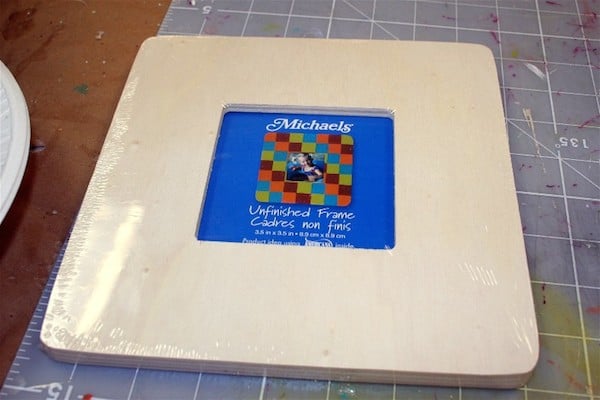
I love these Michaels frames. They are only $1! You could do a wall of them for so cheap.
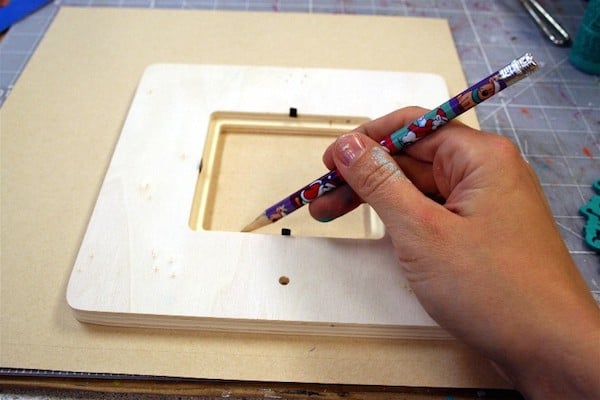
Flip the paper, design side down, and trace the frame onto it with your paper.
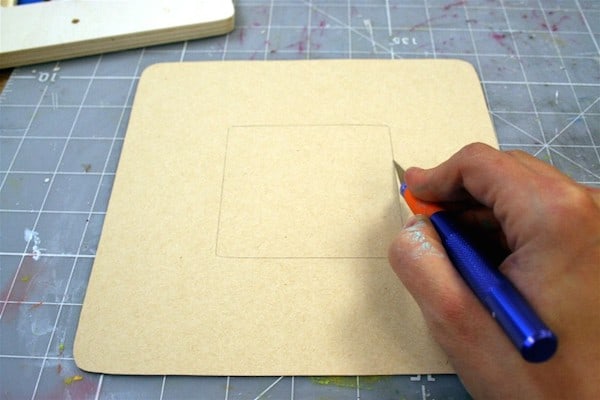
Cut the paper – I always use a craft knife on the inside piece.
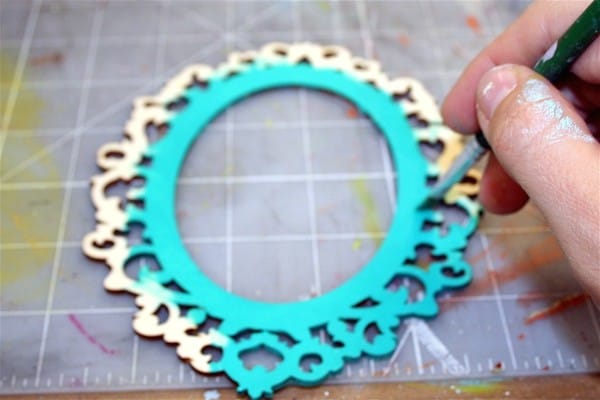
Paint your wood accent with the color of your choice. I used Aqua. I hope you are super impressed with my photo “skillz” as I focus on my fingers rather than the wood piece. Allow to dry.
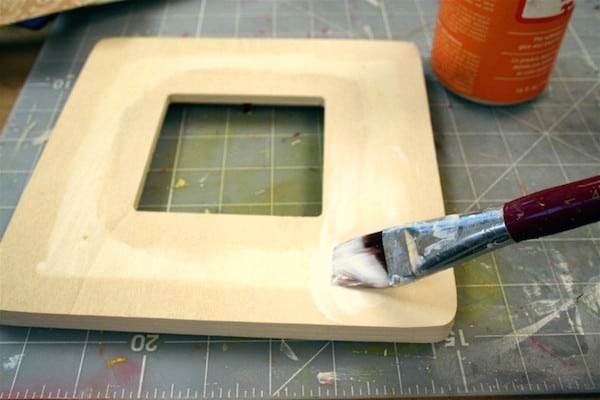
Paint your frame edges and back with Parchment and allow to dry. Then add Mod Podge to the front of the wood frame and then smooth down the paper. Let dry for 15 – 20 minutes.
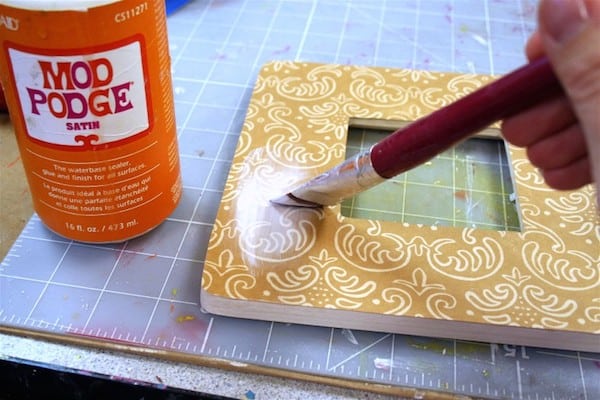
I have a secret, which is that I love Satin Mod Podge. It’s my favorite finish – it’s the same finish as the Hard Coat, except the Hard Coat is super duper tough for heavily used items. Regular Satin Mod Podge works since this frame is meant to be displayed rather than beat up. Give your frame a few coats of decoupage and allow to dry.
Apply Dimensional Magic to the wood accent. One thing I LOVE about DM is that it has great surface tension – meaning, it stays where you put it (as long as you don’t squeeze too much out).
My #1 tip for DM is that it likes to dry in a warm place. I always put it on top of the stove and away from the windows. If it gets cold, it will crack.
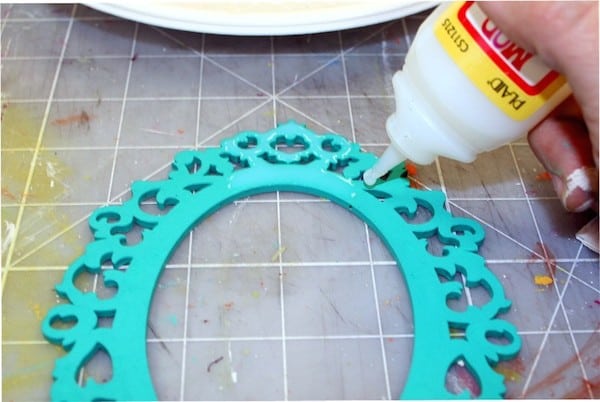
Glue your wood piece to the front of your frame, add a picture, and you are ready to roll. Hello to an inexpensive gift idea.
Now that you know how to decorate your own photo frame, what pattern of scrapbook paper will you choose? Let me know in the comments! Also check out these other ideas:
- This Mod Podge Tissue Paper Frame is Easy!
- Wrapping Paper to Frame with Mod Podge
- How to Decorate a Wood Crate with Mod Podge
- Paper Napkin Decoupage on a Wood Frame


This is great Amy! I love DM!
Great idea! You are right between the $1 frames and the Dimensional Magic you’ve got a fantastic project!!! What great gift ideas!! I love DM also! It’s been a great addition to my craft projects and once you start using it you never want to stop!! Thanks for this tutorial!!
I could not find it in our local stores, I’ll have to look again. Amy is that you in the photo?
🙂 Lori m
This is BEAUTIFUL! Thanks for visiting my blog… I truly appreciate it! :):):):):):):):):):):):):):):):):):):):):):):):)
I LOVE this Amy!! I think I need to make some!!
and do I spy a little Amy in that picture? ♥
Cool stuff Amy!
Great idea, Amy! Thanks. I think that charming little imp is you.
This is a great idea, but alas, I’ve yet to find the DM in any of my local stores. I’ll keep trying though. And… I too think I see a little Amy in the frame. Very cute!
So gorgeous! I just LOVE the way you use colour. YUM.
Amy, I LOVE how this project turned out. But I really LOVE the little Amy Lou featured in the frame~
It is ME! Ladies, try Hobby Lobby, ACMoore and JoAnns near the hot glue for DM. It’s also going to be in Michaels in August. Yay!
I love this idea! where did you find the wood accent piece??
Saw this on Tip Junkie, love it!
Love how this turned out! Love the colors!
Love this! I just better by some of that DM! Stopping by from Blue Cricket
I’d love for you to come link this up at my Tuesday Time Out Linky Party! The link is below!
Smiles,
Melanie
Reasons To Skip The Housework
Tuesday Time Out Link Up Party
Hi! I found you though “Get your craft on”. What a great idea! And so pretty too! I’ll definitely be following your blog!
So this is the first time I’ve heard of Dimensional Magic, it’s like you’ve opened up a whole new world for me. I mega heart your frame, the colors are splendid!
So cute! I love it!
Rachel @ Maybe Matilda
This is awesome, hope to see you at My Dream Canvas.
LOVE IT! This one turned out really cute! Love the little frame in the middle. I hope you can stop by and link this up to my VIP party today! http://designergarden.blogspot.com/2011/04/vip-party-11.html
Where did the little accent frame come from? I’m thinking of doing this for the table numbers at my wedding. The ornate-frame is a motif at my wedding. Thanks!
Lindsay
Hi Lindsay! I actually got it from a craft giveaway pile, but I had an idea for how to recreate. I know Michaels has something similar in the dollar bin (that’s a real frame) and you could just take the back out. I would also check the dollar store for something similar. 😀
so Beautiful 🙂 but no..its Perfect actually…
This will be a more current remark. I love Mod Podge. I have used both the spray and satin. I will be using it with contact paper from the dollar store. The paper has been used on the sides of my chest drawers. I plan to decorate with a contrasting paper on the drawers. Fun.