
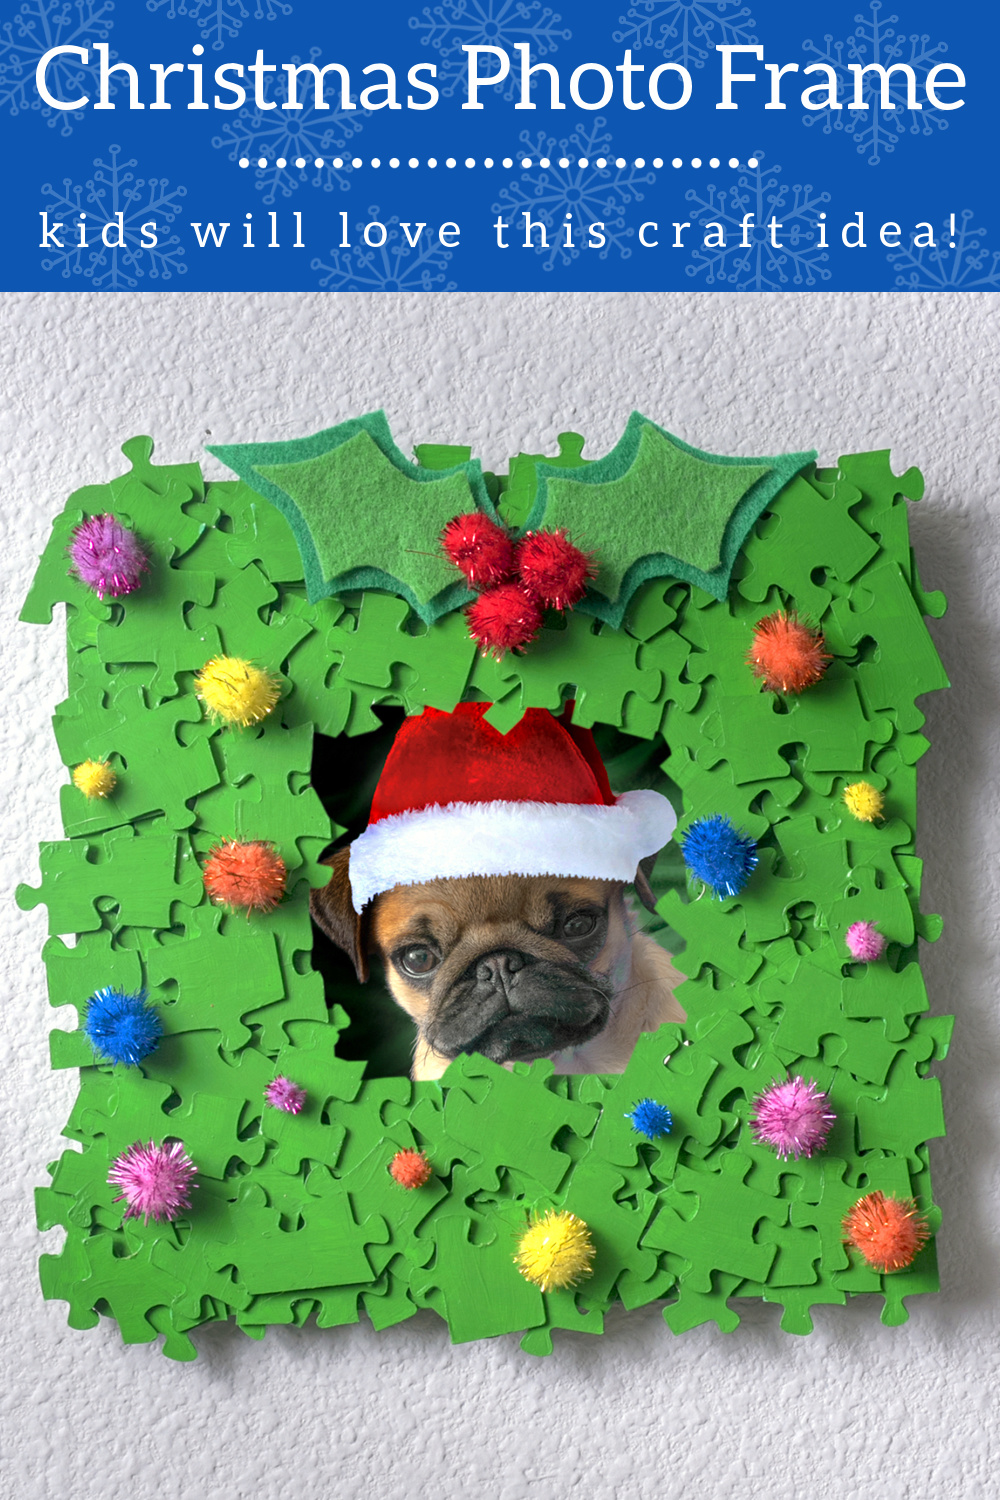
Learn how to make a Christmas photo frame using puzzle pieces – such a fun kids’ craft for the holidays, and it looks like a wreath when finished.
Skills Required: None. This project is easy enough for a child who can use a paintbrush. Children will easily be able to paint and use Mod Podge, as well as glue on pom poms and felt (adults might have to help depending on the age of the kid).
Have you ever done a puzzle and then lost the puzzle pieces (at least a few of them)? Because I have. While I’d love to be perfectly organized and have all the pieces go right back into the box, the truth is, they don’t always.
It’s a perfect metaphor for life.
Sometimes no matter what you do, the puzzle pieces just don’t end up back in the container. That happened at my house, where a box containing six individual puzzles ended up with not all of them being stored with all their pieces. And as you know, a puzzle is no good if you don’t have all the pieces.
So instead of just throwing everything away . . . why not make a Christmas photo frame out of them?? Which I know seems like a little bit of a stretch that I went from “puzzle piece” to Christmas.
But the truth is, I was inspired by this ornament when coming up with this project. I thought this would make a perfect Christmas craft for kids!
Christmas Wreath Picture Frame
I had a blank photo frame from Michaels, the puzzle pieces, the felt, the pom poms, and of course – the Mod Podge. So for me, this recycled Christmas decor was free. Which, when I can use items from my stash and not buy anything, is ideal. That doesn’t happen very often!
I encourage you to use what you have for this homemade decoration, whether it be a frame in a different shape, paper versus felt for the holly, or paint dots for the “ornament” pom poms. Whatever you need to do to make this Christmas photo frame work for you!
Note: this project uses Mod Podge Sparkle, which is sometimes hard to see in photos. It gives a sparkly overall look to the frame. You can use any Mod Podge formula you like to seal this! Kids love the glitter though, which is why I used it.
You will do this project in four steps: paint the pieces, paint the frame, add the Mod Podge, and glue down the embellishments. Here’s how it’s done.
Gather These Supplies
- Wood photo frame – finished size of ~8″ square with a 3.7″ square photo opening
- Acrylic paint – Bright Green
- Mod Podge Sparkle
- Felt – two shades of green
- Pom poms – various colors and sizes
- Paintbrush
- Craft glue
- Scissors
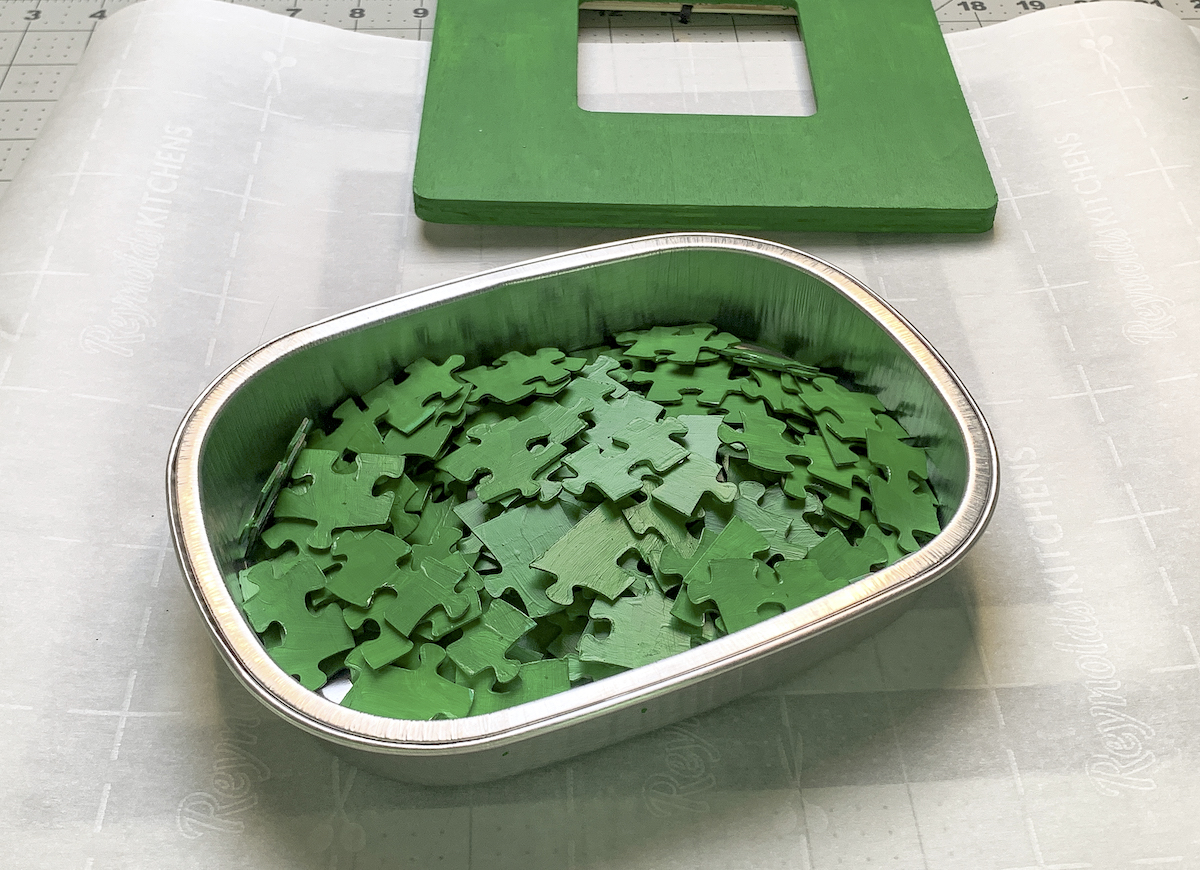
Before beginning the painting, you’ll want to figure out how many pieces you need based on the size and shape of the frame. You can estimate you’ll use about 80 – 100 pieces for a standard size craft frame, but of course “it depends.”
Lay the pieces out first so you can make sure you have enough. If you don’t, it’s probably wise to switch to a smaller frame.
Paint the Puzzle Pieces and Frame
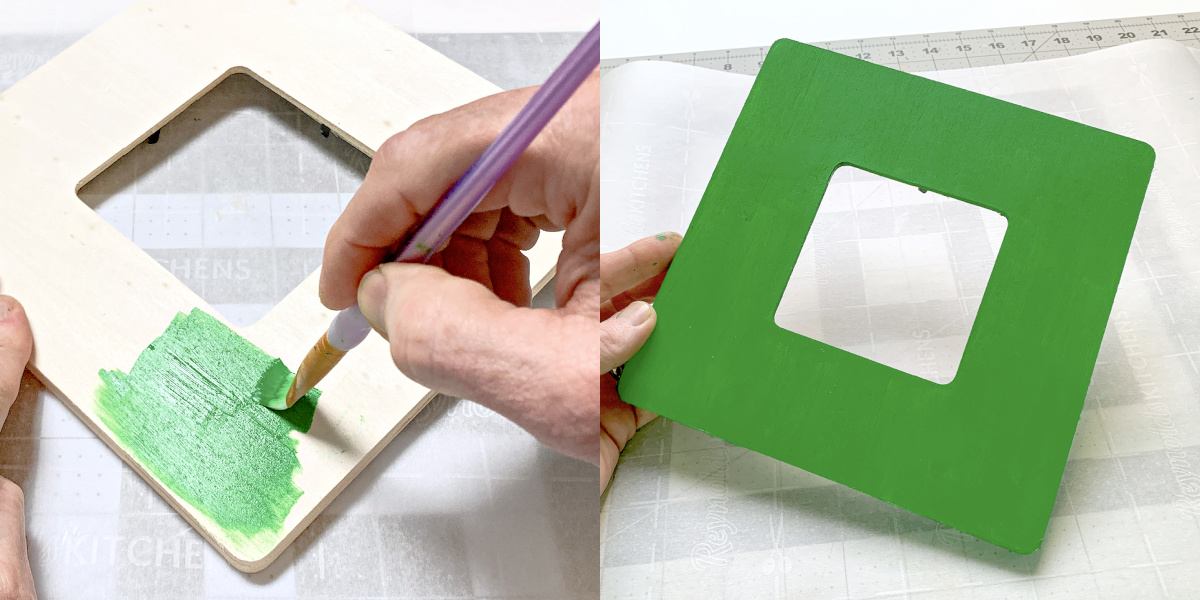
Use your acrylic paint and a paintbrush to paint the puzzle pieces. You can paint either the front or the back, but it’s probably easier to paint the back if it’s white or kraft paper colored. The paint will have better coverage.
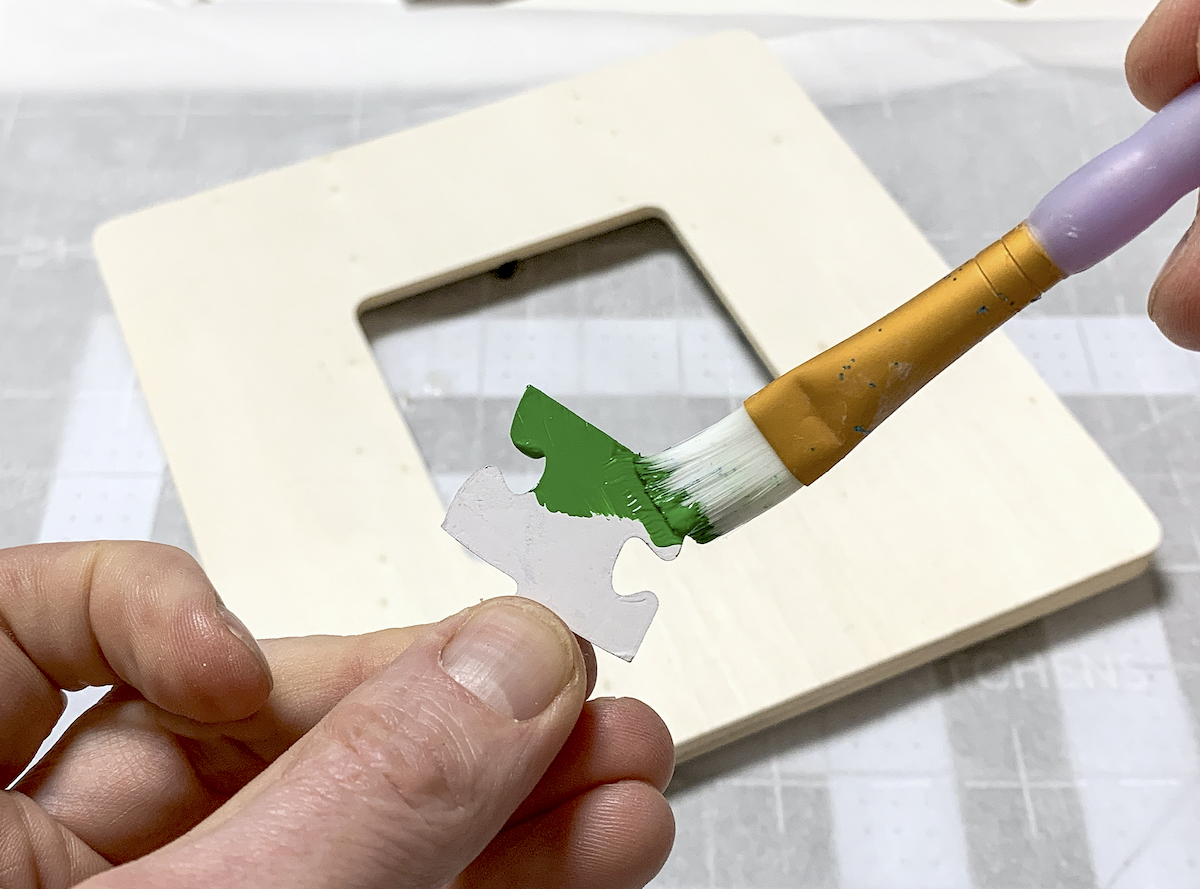
You’re also going to paint the entire frame with the same color. Give a few coats and let dry.
You’ll want to paint a few coats of paint on the puzzle pieces. Let them dry, paint them again . . . this will keep kids busy for quite awhile!
Let all the pieces dry completely.
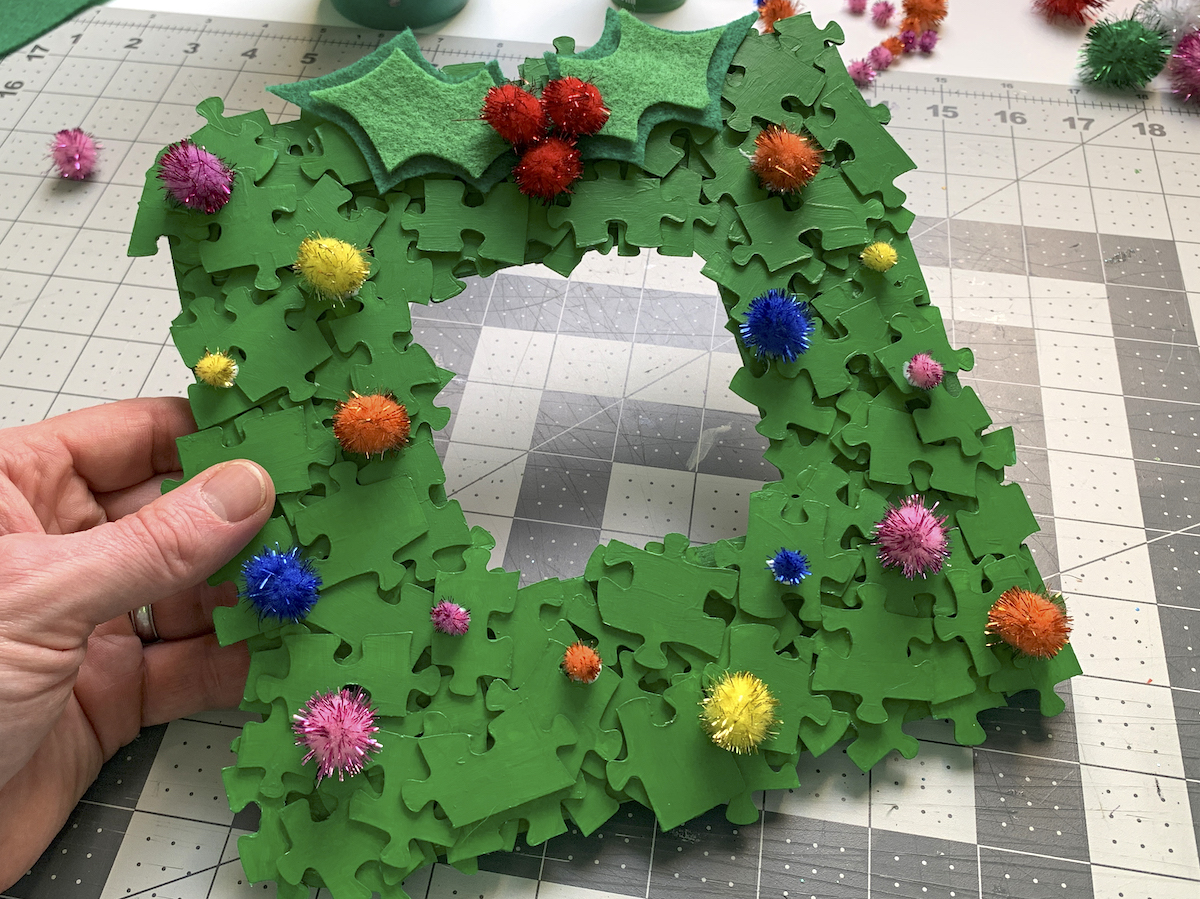
Glue the Pieces Down
When the pieces are dry, you will glue them down to the wood frame using craft glue. Start in one corner, with one piece, and then move outward to cover the rest of the frame.
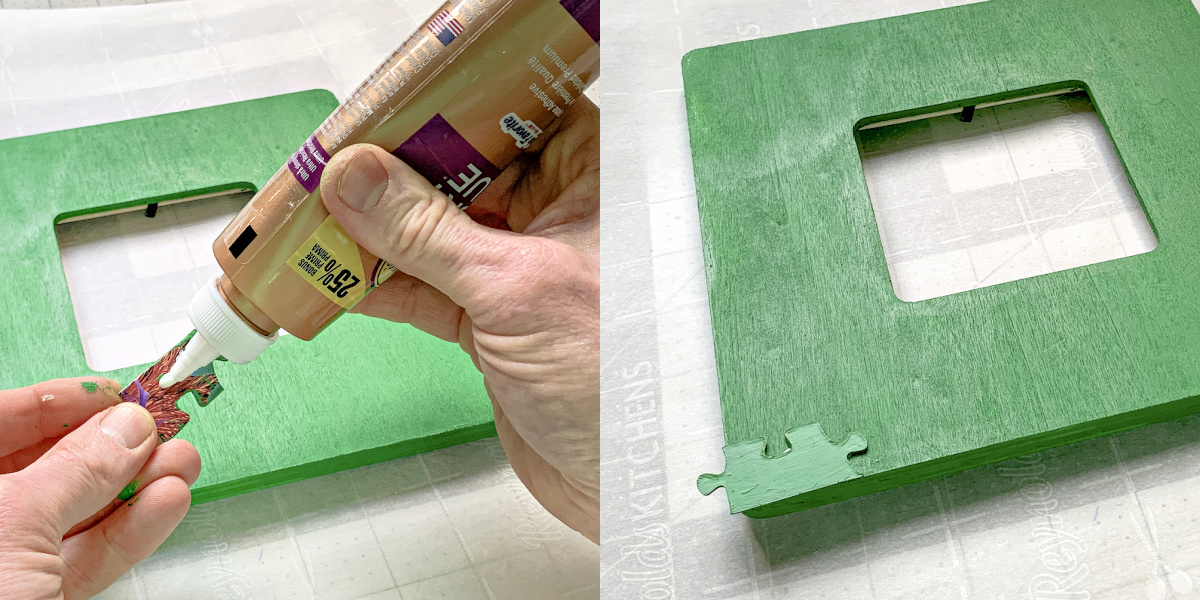
On the first layer, you’re going to glue the pieces randomly onto your photo frame as shown. There doesn’t need to be any rhyme or reason.
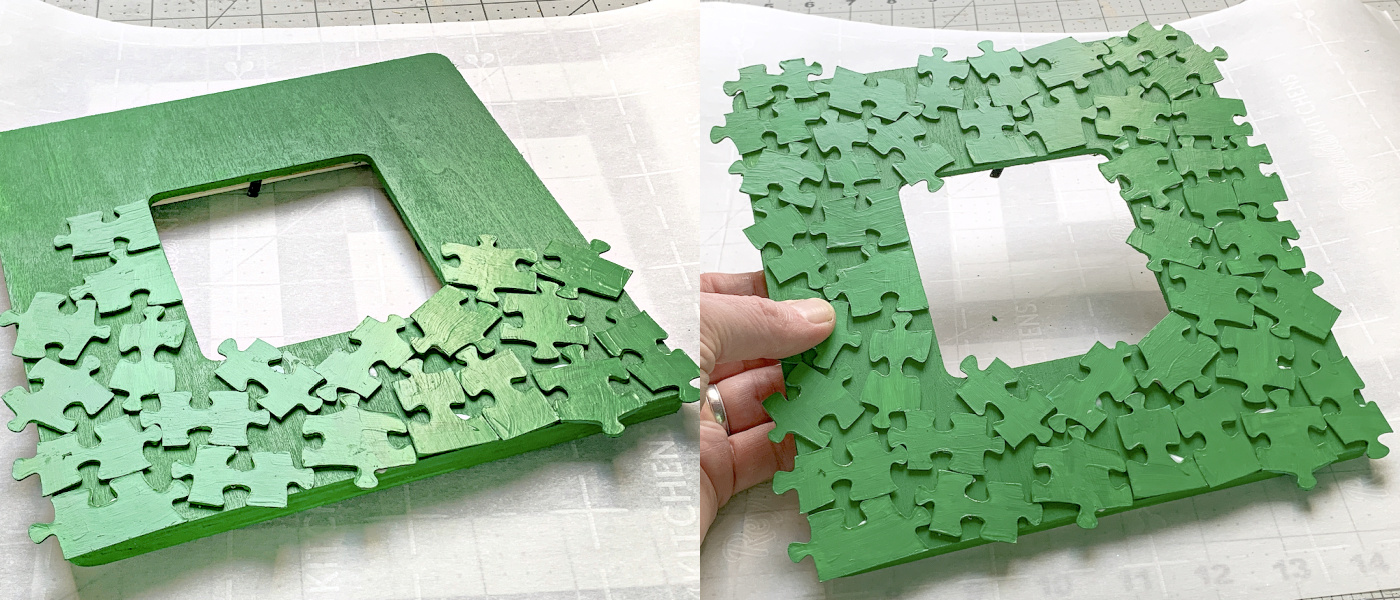
Let dry and then begin the second layer of gluing. You will only do two layers of pieces, and with the second layer you’ll cover some of the spots that didn’t get covered by puzzle pieces before (randomly).
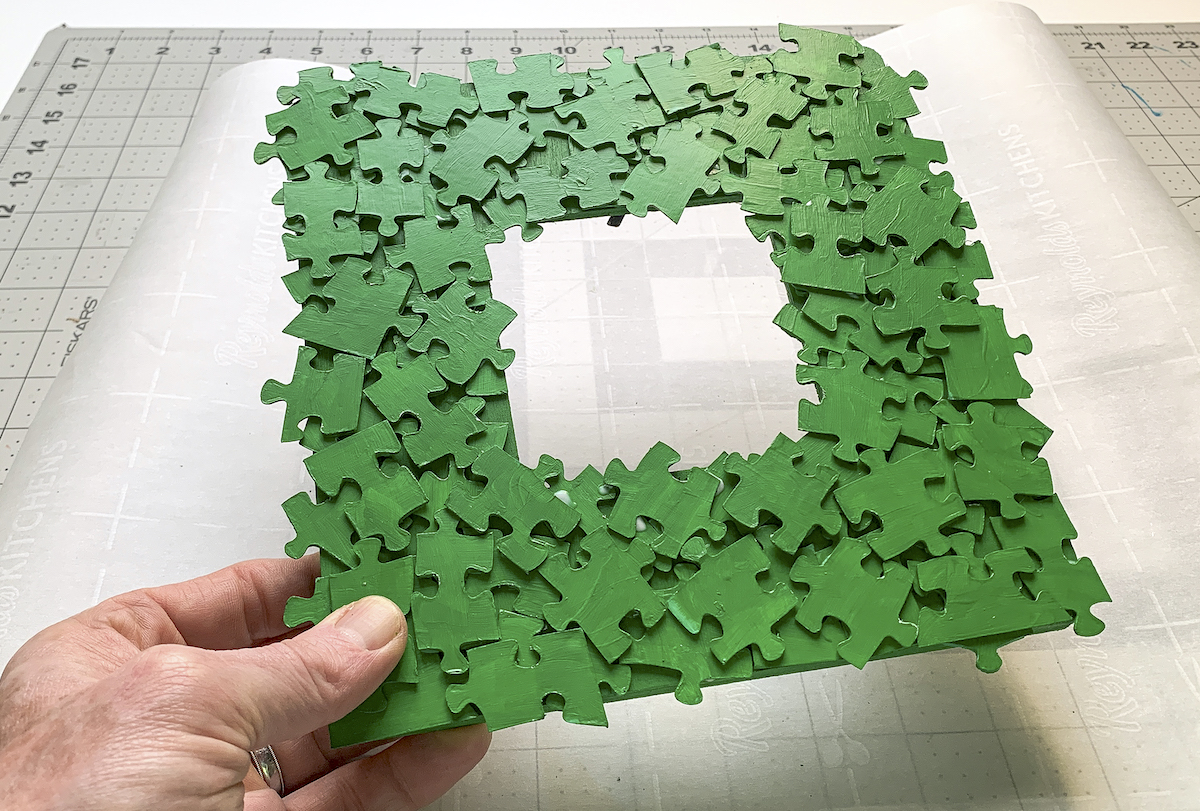
Once all the pieces are glued, let it dry completely.
Mod Podge the Frame
Any Christmas frame needs glitter as far as I’m concerned! Well, at least this one does. So add a layer of Mod Podge Sparkle over the top for a little bling-bling.
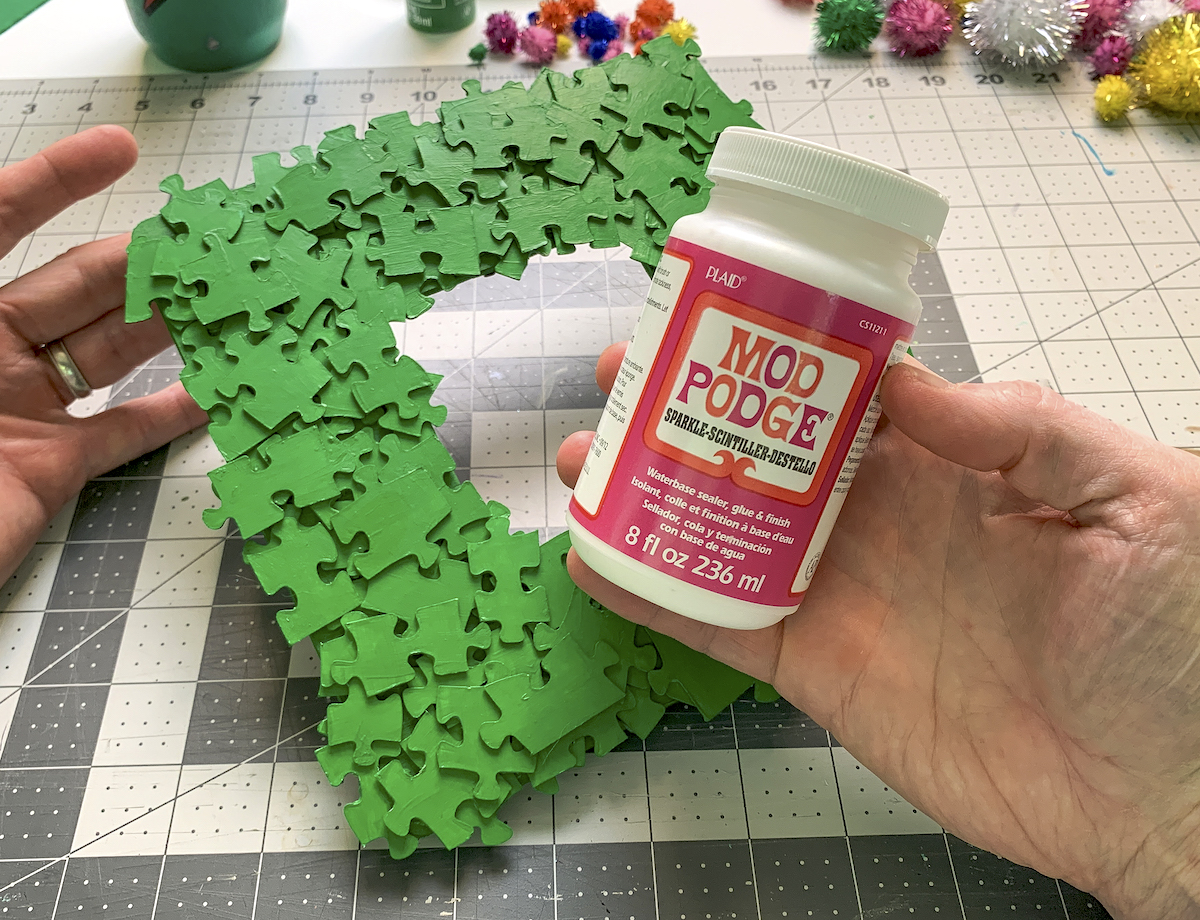
Add a layer of Sparkle Mod Podge to the frame. While this is optional, I do recommend it if you want to be truly fantastic.
Add the Embellishments
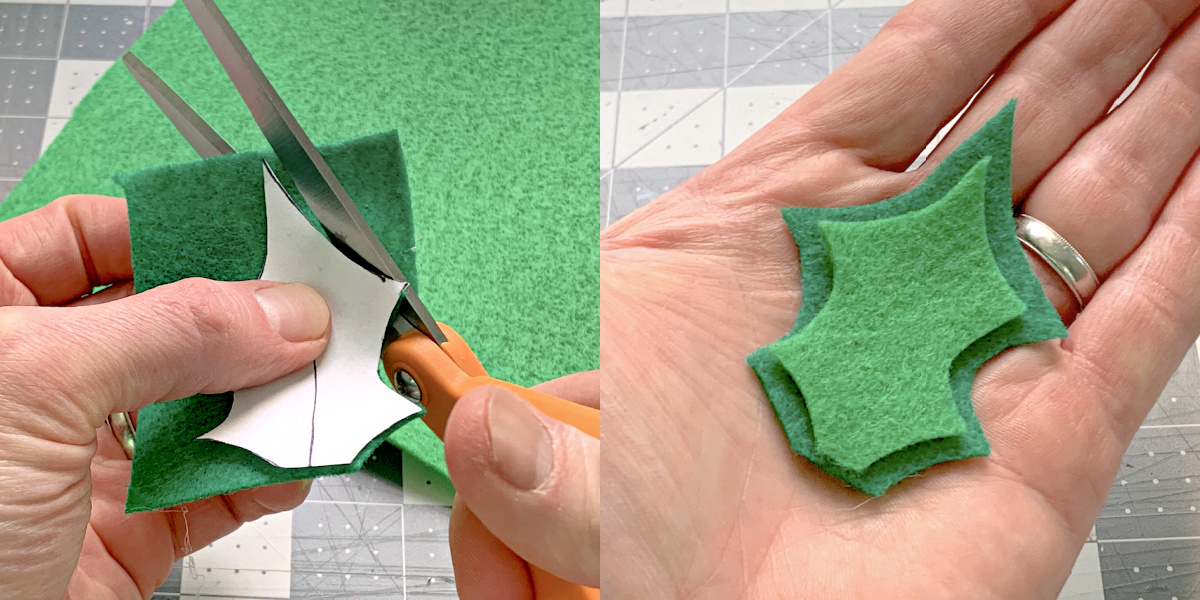
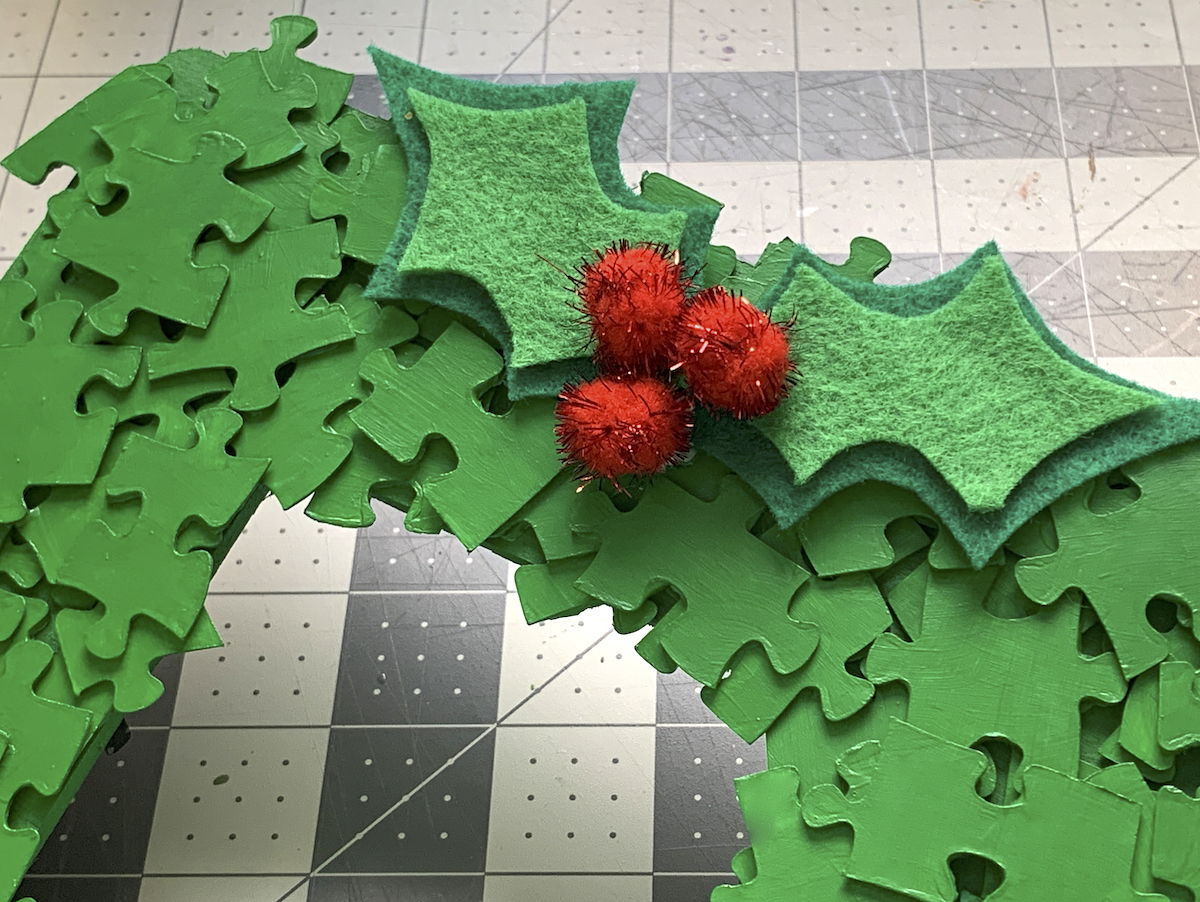
For this Christmas frame, I decided to add holly and pom poms to make it look like a wreath with ornaments. I drew some holly onto paper and used it as a template to cut out leaves from felt. I used two different colors to provide a little contrast, and made the dark green a little larger for layering.
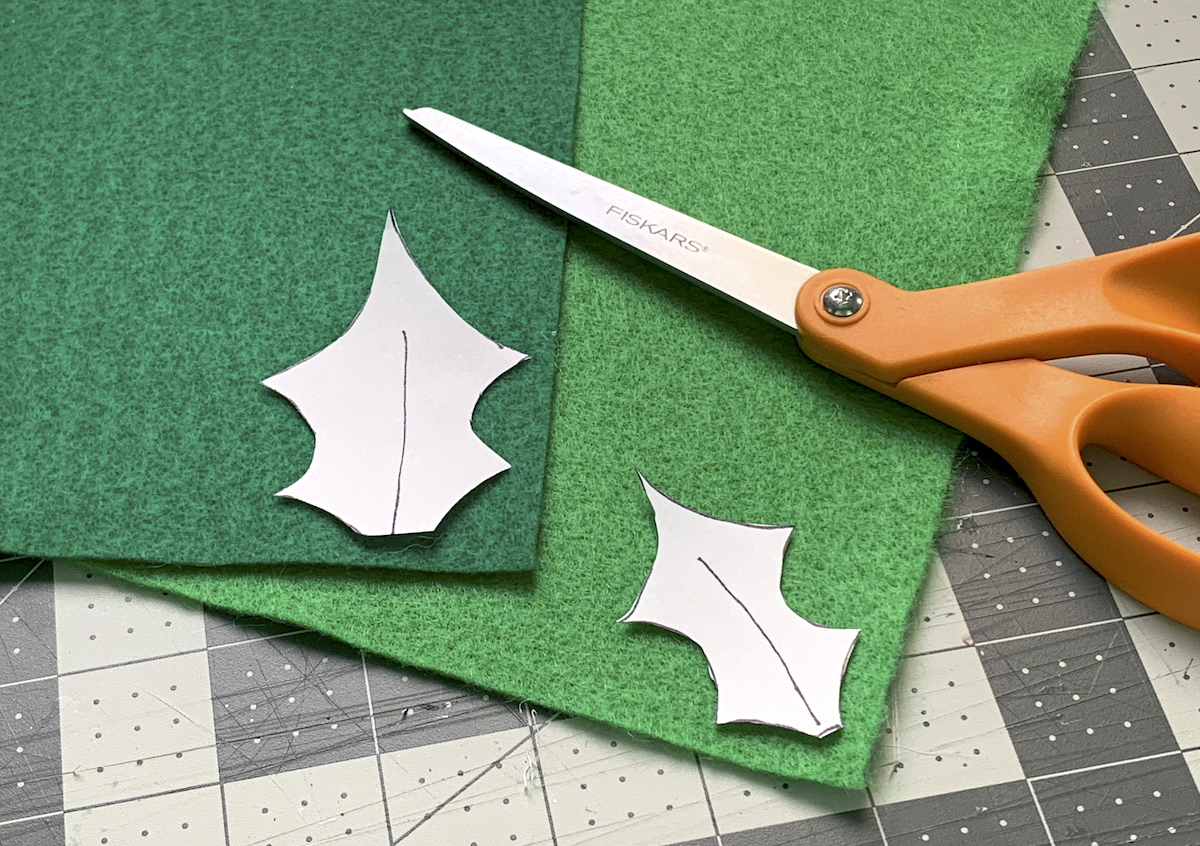
Here’s how the finished leaves will look, and they don’t have to be perfect. They add character!
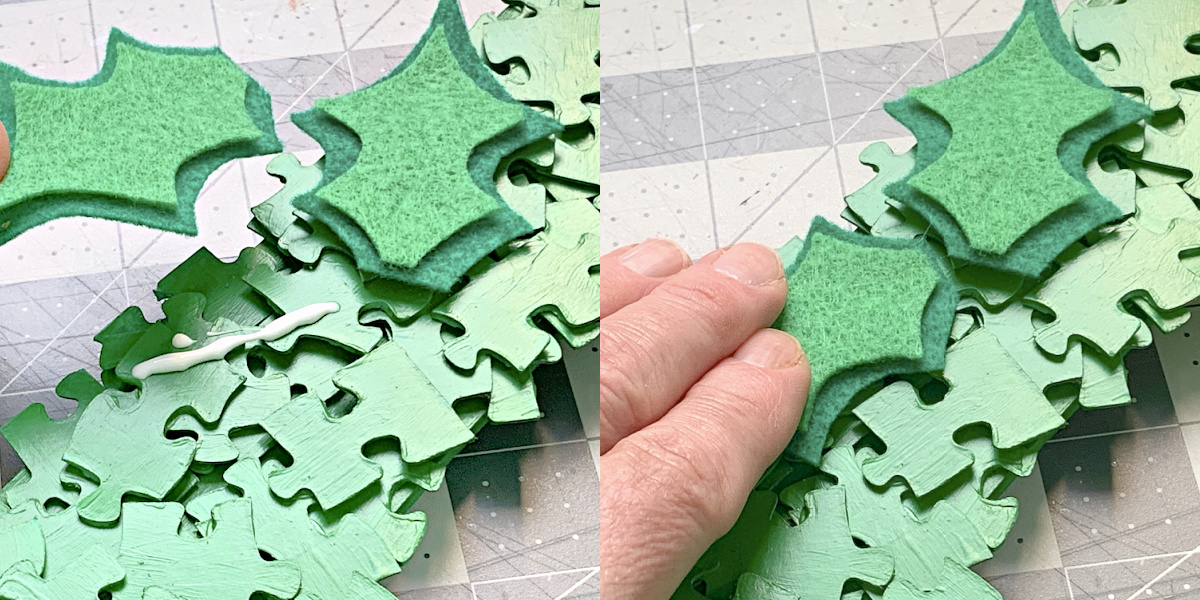
Glue down the felt holly leaves to the front top of the frame. Let dry.
Glue on three larger pom poms in red for holly berries. Let dry.
To finish your Christmas photo frame, glue pom poms randomly on the puzzle pieces to act as ornaments. Let dry.
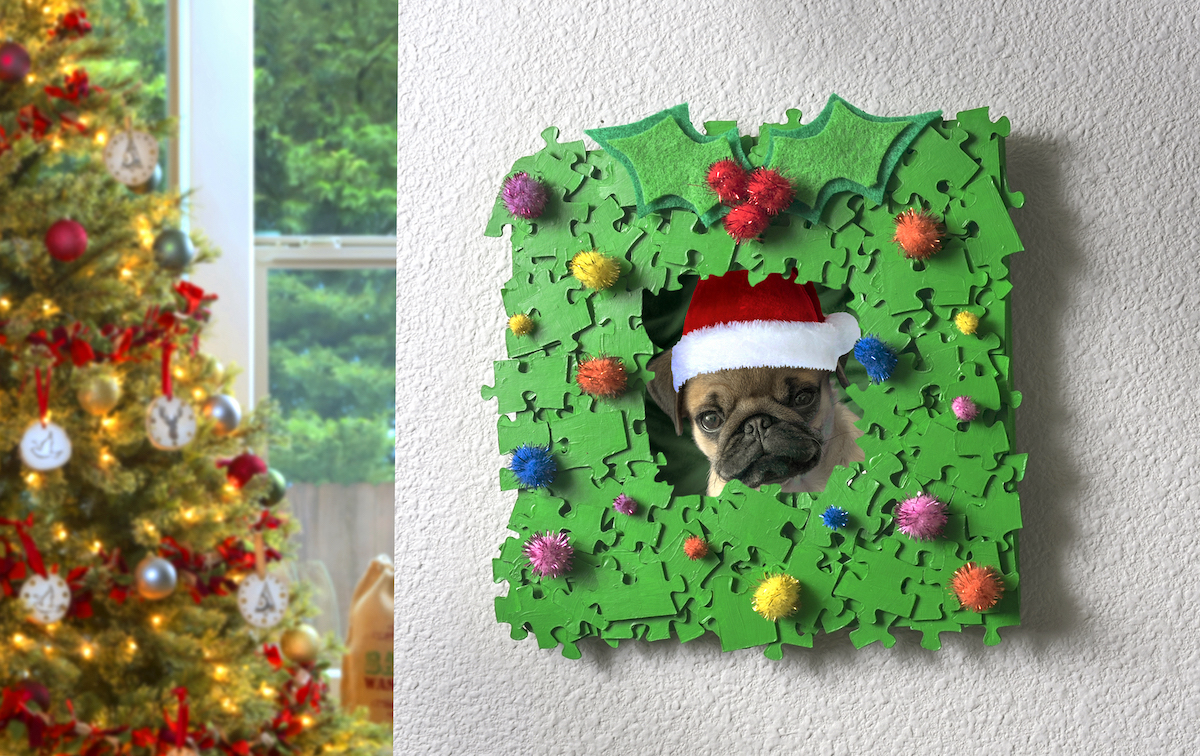
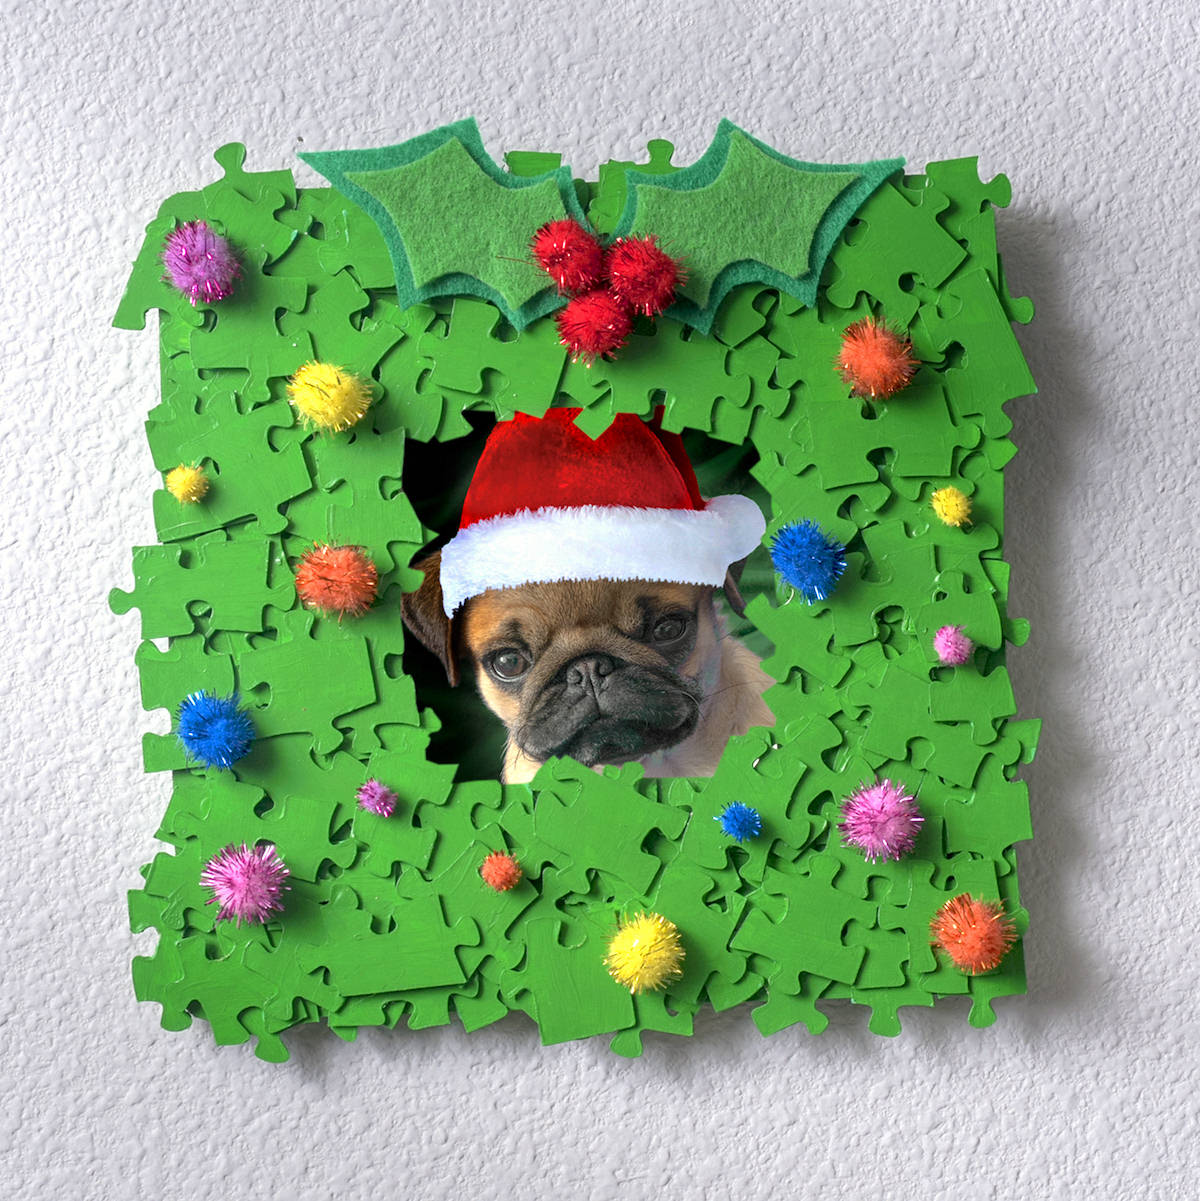
Add a photo and now you’re ready for the holidays! This would be cute for displaying your yearly Santa picture, don’t you think?
I hope you’ll try this kids’ Christmas craft and let me know what you think in the comments!
If you like this Christmas frame I hope you’ll check out these other great project ideas I think kids are also going to enjoy:


This is such a great idea Amy! I have lost many puzzle pieces in my time and this is a very creative way to make something out of it so they don’t go to waste. And makes a nice keepsake too. Thanks for sharing!