
Are you wondering how to use acrylic paint? I love using acrylic craft paint – it’s one of my top supplies for all of my creative projects. In this article I share my TOP favorite tips with you!
Acrylic Craft Paint
I’m thrilled to share my knowledge with you as a long-time user of acrylic craft paint. I paint nearly every Mod Podge project before the Podge goes on, and I use acrylic paint on projects that I don’t decoupage as well. If I can get away with using acrylic craft paint, even on a furniture re-do, I will. Why? Because:
- it’s easy to use – easy to brush and flows well, true to color
- it’s non-toxic and waterbase (typically made in the US; check the label)
- it’s inexpensive compared to oil-based paints
- clean up is simple – no solvents needed
Craft Painting Supplies You’ll Need
Craft painting isn’t hard – you can really just dive in. However, you will need some supplies. Here’s what I always have on hand (in addition to paint):
- Brush basin filled with water
- Paint tray (with a cover)
- Silicone mat
- Paper towels
- Paintbrushes – I address which kind in #3 below
This is what I use regularly, and I would say the only other thing you should make sure to have is a way to clean your brushes. You can use mild soap (like dish soap), but I really like brush cleaner.
Acrylic Paint on Wood
The most common question I get is about using acrylic craft paint on wood. First you should know that acrylic paint is made up of pigments suspended in an acrylic binding emulsion with a water base.
What does that mean?
That acrylic paints dry quickly, they are not toxic, and they can easily be cleaned with soap and water. That’s what I’m talking about! Here are the answers to some additional questions:
Can you use acrylic paint on wood?
Yes you can! The type of acrylic paint you’ll use depends on the type of project you’re doing. I typically use a higher end acrylic craft paint for my projects, even for furniture refinishing.
Do you need to prime wood before painting with acrylic paint?
You don’t have to, but I highly recommend it. Sand the surface and remove the dust with a tack cloth. I also like to put down a basecoat of white acrylic paint first as it typically leads to less layers of whatever color I’m using.
What is the drying time?
It depends on the conditions you’re painting in, but it’s usually dry to the touch at about 20 – 30 minutes, and fully cured in 6 – 12 hours. If it’s more humid, it will take longer.
How do you seal acrylic paint on wood?
You’ll use a clear sealer, like a polycrylic, to seal the paint on wood. I like to use Minwax Polycrylic Protective Finish to seal all of my projects. I apply with a nice paintbrush and let dry between coats.
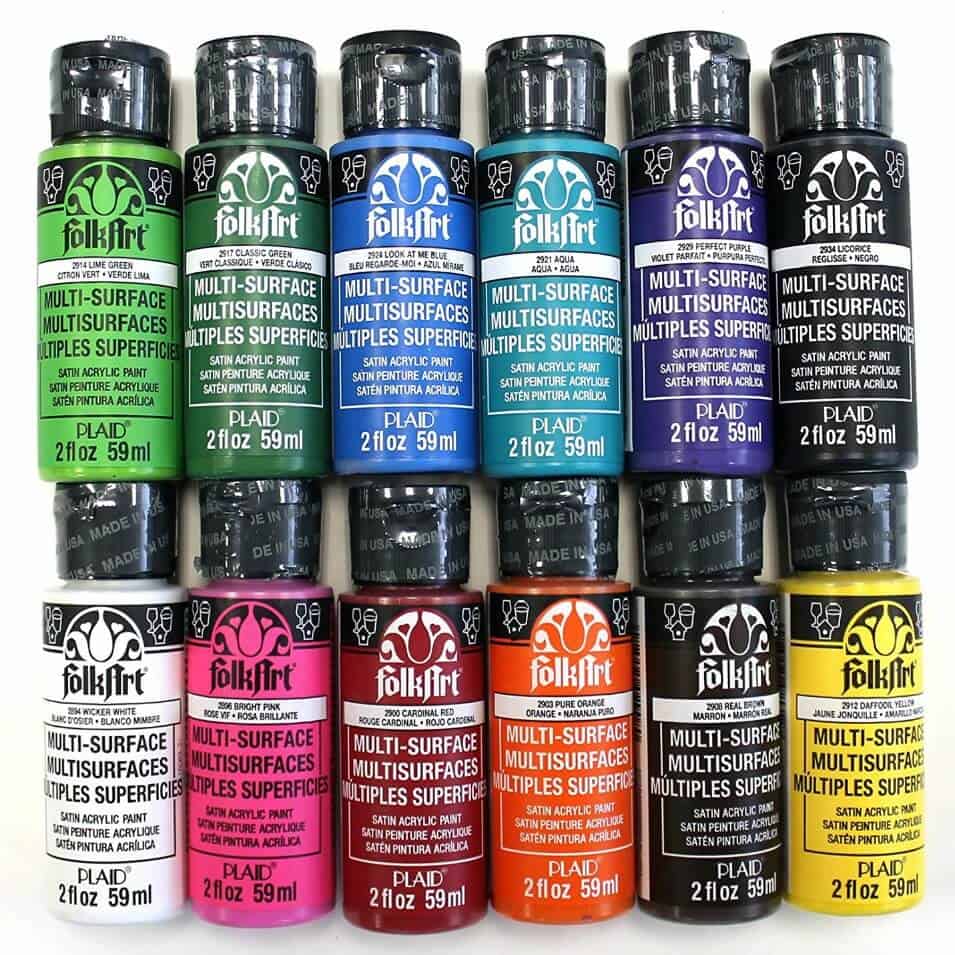
What is the best acrylic paint?
For the crafts I do, I like FolkArt or paint. When I used to take art classes, I liked Winsor Newton as well as Liquitex. Those are great for art painting and canvas.
How to Use Craft Paint
I’ve been thinking long and hard about my most important tips on how to use acrylic paint, so that I could narrow it down for you.
Hopefully these crafting tips will help you, especially if you are making home decor, gifts, wall art, or any other projects that need to look fabulous (and flawless!). These are my top tips for how to use acrylic paint.

1. Choose the right type of paint and the right color.
Make sure you read the bottle carefully while you are in the store as opposed to just throwing it into your basket.
I know the acrylic craft paint aisle has a ton of selection, but you need to look carefully because it’s better than getting the wrong thing and making multiple trips.
You should look at the bottom of a bottle of paint to tell what the color is, rather than the label. While you are looking at the color through plastic, it’s more accurate than the label color because it’s the actual paint.
Remember that it’s going to dry just a touch darker than you see through the bottle – just a little. I match all my paint using the bottom of the bottom and never have a problem!
2. Prepare your surface thoroughly.
I’ve found that good surface preparation can make a project. Not preparing a surface can “break” a project. Here are the surfaces and what you should do:
- Wood – Sand smooth with fine grit sandpaper, wipe off sawdust.
- Glass – Thoroughly wash in warm, soapy water to remove dirt, dust and grease film. Then rinse in warm water and let it dry. (get our guide to painting glass)
- Canvas – Wipe primed canvas clean; if unprimed, apply 2 coats of gesso primer or acrylic paint.
- Plaster – Wipe clean with damp cloth.
- Plastic – Clean with soap and water. You will need a special plastic paint though – acrylic paint in bottles or tubes doesn’t stick to plastic very easily. I find the best way to paint on plastic is with spray paint made for plastic (then you can Mod Podge or use acrylic paint on top). (get tips for painting on plastic)
- Papier-Mâché – Wipe clean with slightly damp cloth to get rid of dust and let dry.
- Terra Cotta – Wipe clean with damp cloth to remove dust and let dry. (get our guide to pot decoration)
- Tin – Wash with soap and water, then wipe with a white vinegar dampened cloth if it’s really dirty.
If you have a question about whether acrylic craft paint is going to work on your surface, do a small test in an inconspicuous area and let it dry. Try to scrap it off with a fingernail – you’ll be able to tell if it’s going to work or if the paint is going to scrape right off very easily.
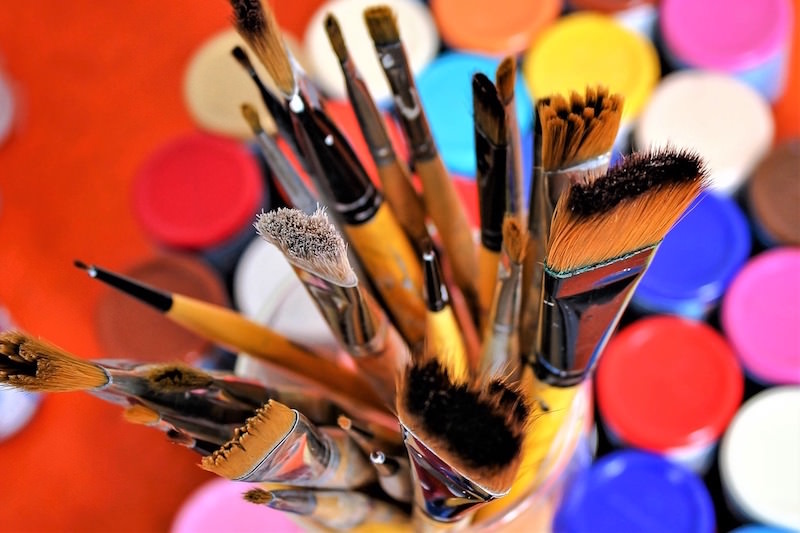
3. Use good quality brushes and take care of them.
It’s important to me to use soft natural bristle or taklon brushes (I love these brush sets – or these).
A crappy brush will show brushstrokes or leave brush hairs in your project. I have wanted to throw a project across the room because I couldn’t get a brush hair out of it – they are very elusive! Invest in your brushes and they will invest in you!
Wash your brushes between projects and leave them to dry on a paper towel (use your fingers to shape them while they are wet). Well cared for brushes are worth the investment because they will last a long time. The same goes for rollers or sprayers. Don’t scrimp and clean them up thoroughly afterwards.
4. Don’t put too much paint on your brush.
Paint should only be from the middle of your brush hairs up towards the tip. You do not load the entire brush up to the metal part (know as the ferrule). It’s better to go back and get more paint than to have too much.
Too much paint can make the brush go wacky when you press it down and make the paint harder to apply (especially important for detail work). If you need to cover a bigger surface, get a larger brush or use a roller.
I’m telling you that I don’t have patience – but I never load my brush with too much paint. Patience is a virtue in this situation, trust me.
5. Consider priming, and definitely basecoat dark items with white.
If you don’t prime, you can possibly spend a lot longer covering an item, and you may not get the adherence of paint or the brightness of color that you are looking for.
This is especially true if the item is dark. I’ve painted 20 coats of a lighter color over black and didn’t even have 100% coverage.
I recommend using gesso or a highly pigmented white (like FolkArt Titanium White) for priming. Kilz is also great if you need a large amount of primer or a product that acts oil-based.
6. Keep water nearby so that you can add it to your brush frequently.
Acrylic paint, when put on a palette, tends to dry out somewhat quickly. It’s not THAT quickly, but it’s enough that the paint could start drying while you are painting an item.
Don’t thin out the paint too much because you’ll dull the color, but it’s okay to dip your brush into water in a basin and swirl it around into the paint to get it going again.
I typically pull my brush out of the water basin, press lightly to a paper towel, then add paint. By pressing my brush into a paper towel, I’m removing some of the water . . . but not all. This helps me in the summer especially when (because of the area I live in) my paint dries quickly.
7. Use a sealer to finish.
Acrylic paint has a somewhat chalky feel (well, depending on the finish) without a sealer applied. Some acrylic paints are Satin or Gloss and have a built-sealer, so then you won’t have to add anything on top.
If there is no built-in finish, I would use a clear acrylic spray or brush on sealer so that the surface doesn’t scratch easily. It’s not required, but it’s helpful to make your project last longer.
8. Make paint chips.
Use cardstock to create “chips,” or small squares that show the colors you have in your stash. That way you know what you have for the next project.
They’re very easy to put together; simply cut cardstock into 1″ squares and paint a little bit in the middle, then let dry. There’s your sample!
Now you can take the chips to the store for home decor matching . . . rather than hoofing the table you painted to the fabric store to get coordinating curtains!
Now that you have a better grasp of how to use acrylic paint, I want to tell you about my favorite brand – I recommend FolkArt paint! I’ve using it for years. What do I love about it? Many things! It’s the best paint for wood crafts:
- Amazing color palettes
- Comes in many types (Enamels for glass, Fabric, Outdoor, etc)
- Creamy consistency and good coverage
- Durable finish
- Water based, matte finish
- Made in the USA
I know I sound like an infomercial, but this isn’t sponsored – I just really love this paint. I’ve tested a lot of different kinds and it’s easiest to work with by far.
If you enjoyed this article on acrylic craft paint, here are some others that you might enjoy:


I used these paints when doing my teracotta pots. My granddaughters started with me at age 3, rather than any other paints, we use acrylics. And I use FINGERS, a child’s finger is perfect for flowers, etc. Pansies are beautiful. Taught the 9 yr old how to ‘clean the brush’ making puff flowers. We take the 4 inch terra pots, paint as a theme and add a Goodwill bought animal that matches paint. Donate to Relay for Life. Everyone wants something painted by a child! I seal all pots with any good brand of clear spray paint. Several layers when using for real plants on the steps. Every couple years reseal.
i am about to embark on making a shabby chic wooden heart garland for my home, I would like to know whether i will still need a primer for the hearts, they are bought already cut – i will be painting them white and red.
thank you –
Karen, for something so small you don’t need to prep. Even if you have to paint several coats, it won’t take you long – so you COULD prep, but you don’t have to.
Very useful tips….ill try to care for my brushes better in between projects because i already ruined one :(, but thanks for the tips i use acrylics to paint my wooden jewelry!
Any tips for painting a light color over a dark color? I just put sealer (Triple Thick) over a canvas painting and anywhere I had painted a light color over a dark color the dark color bled through. Thanks!
Hi Lindsay, What kind of paint are you using? Typically if the dark paint below is dry with acrylic, you should be able to paint on top with no problem.
Thanks, Amy! I was using acrylic and I did let it dry. Oh well…I’ll keep experimenting! Maybe I should try sealing with Mod Podge 🙂
Is it possible to paint a canvas with acrylic paint and use mod podge matte to seal it or would i have to get the spray paint to seal it?
Hi Anonymous! You can definitely do what you are suggesting. Good luck!
Thanks for the great tips! I’ve been painting with acrylics for several years naow and have a couple other tips that I’ve used and a possible solution for the painting on plastic issue.
First, I came across this tip years ago for and use it especially for an older bottle of paint that may have been sitting around for a while. Cut a small piece of nylons or panty hose, remove the cap from the bottle and stretch the material over the opening, then screw the cap back on over it. This will help filter out any blobs of paint that may have accumulated while sitting.
Second, for painting on plastic, I have basically “primed” my surface with some of the “Fusion” for plastic spray paint. Just be sure to use a matte or flat color. Then I painted directly over it with my acrylics. I did this on some plastic flower pots over ten years ago and they are still looking great. I didn’t even bother to seal them and they have been outside ever since.
I put a dot of paint on the lid of each new bottle after its first use and keep them all in a shallow, lidded plastic bin. I can just open it up and see all the lovely shades!
great tips! one I do is store my bottles upside down. Doing this allows you to see the color and it keeps the top from becoming clogged with dry paint.
Works well for me!
Awesome article. I found it on Pinterest.
😉 xoxox
Thanks for the tips, sometimes acrylic paints can be a little tricky.
A jewelry blog.