Learn how to transfer photos to wood in three simple steps! All you need for this photo transfer to wood is your favorite image and a medium. It’s easy! Don’t forget to watch the video in this post that shows you exactly what to do.
Skills Required: Advanced Beginner. A photo transfer to wood takes some knowledge of how to apply mediums as well as a little bit of practice.
NOTE: This tutorial uses a laserjet image and Mod Podge photo transfer medium. If you’d like to do a transfer with an inkjet image and regular Mod Podge, go here.
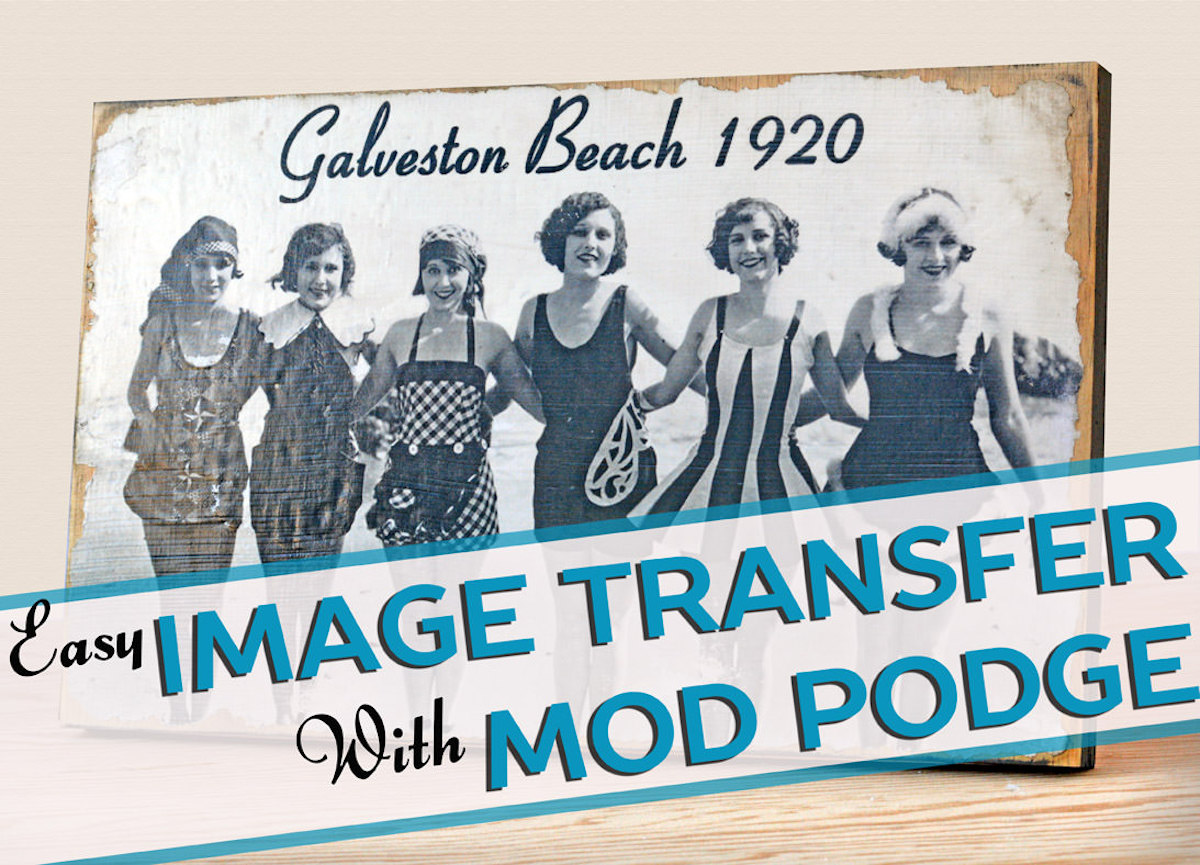
Hi, it’s David with a quick tutorial on my favorite thing to do: a photo transfer to wood with Mod Podge Photo Transfer Medium. This medium is easy to use and creates terrific results. In fact, I’ll show you how to transfer photos to wood in three simple steps!
Any painting of the wood is an additional step if you choose to do so . . . the photo transfer itself is simple as can be and makes great decor on its own.
Transferring Pictures to Wood
If you’re wondering how to transfer photos to wood, it’s a relatively simple process. You’ll print a photo out on a dry ink printer (like laserjet or an HP). You’ll paint a medium on the front of the photo, and then smooth it onto an unfinished or painted surface.
The image will need to dry on the surface overnight, and then you will wet the surface and rub off the paper, leaving the image from the ink and the dried medium behind. This particular medium will give your image a white background (as opposed to clear).
Black and white photos look great with this technique since there’s a rustic vibe, however, you can use color photos as well.
When you print out your photo(s), make sure they 1) they fit the surface you are transferring to and 2) any words should be backwards. When they are transferred to the surface, the words will be going the correct way.
Transfer Photos to Other Surfaces
The exciting thing about this project? You can use this same method to transfer photos to fabric or canvas. I’m showing you how to do it on wood, but don’t limit yourself.
Oh, and if you want to learn how to transfer photos to glass, that’s an entirely different method you’ll see here.
Learn how to transfer photos to wood the easy way below!
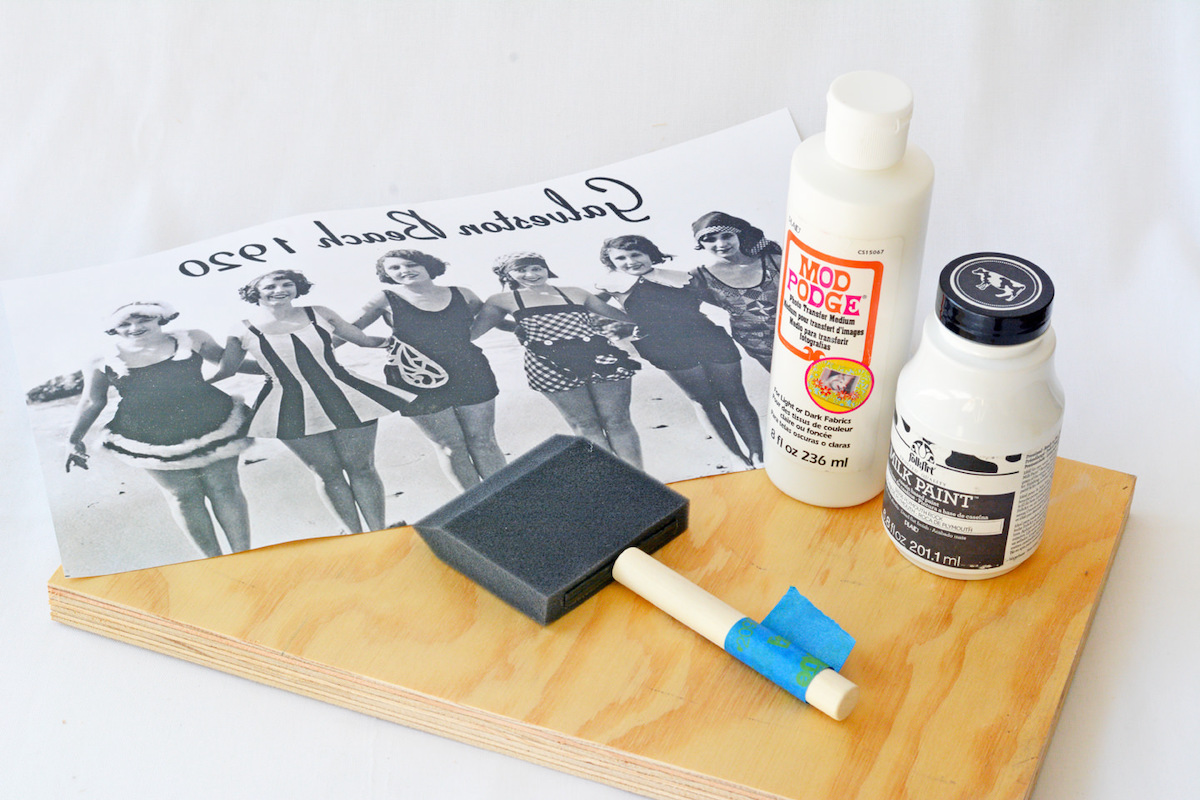
Here’s what I used for this project:
- 1/4″ plywood cut to 13 x 8 (you can also use a wood plaque from the craft store)
- Mod Podge Photo Transfer Medium
- Matte Mod Podge
- Folk Art Milk Paint: Plymouth Rock
- Foam Brush
- Damp rag or wet sponge
- Image printed on regular paper using a laser printer or photocopier
- Sharp craft knife
- Brayer (useful but not absolutely necessary)
- Silicone craft mat (useful but not absolutely necessary)
Tips and Tricks for This Project
Painting the board is optional. You can use any acrylic paint, milk paint, or chalk paint. You’ll let the paint dry completely before doing the transfer on top.
Reverse text before printing. Since the photo has text, I reversed the image before printing it onto plain paper using my laser printer.
Use DRY ink. Laser prints work as well as DRY ink toner prints (like HP ink). You may have to do some research or experiment to see if your printer has dry ink.
Protect your workspace. I laid everything on a silicone mat, which is great for this. You can use wax paper if you’d like but make sure to protect your work surface.
A brayer is great for smoothing. I smoothed out any air bubbles using my fingers and the brayer (the brayer is great but if you don’t have one use a rolling pin, a glass bottle, etc).
Distress if you want to. I wanted a very vintage/beat up feel so I went in with my sander and sanded away the edges of the graphic, revealing the plywood. Once I was happy with the look I sealed the whole thing with two coats of Mod Podge Matte.
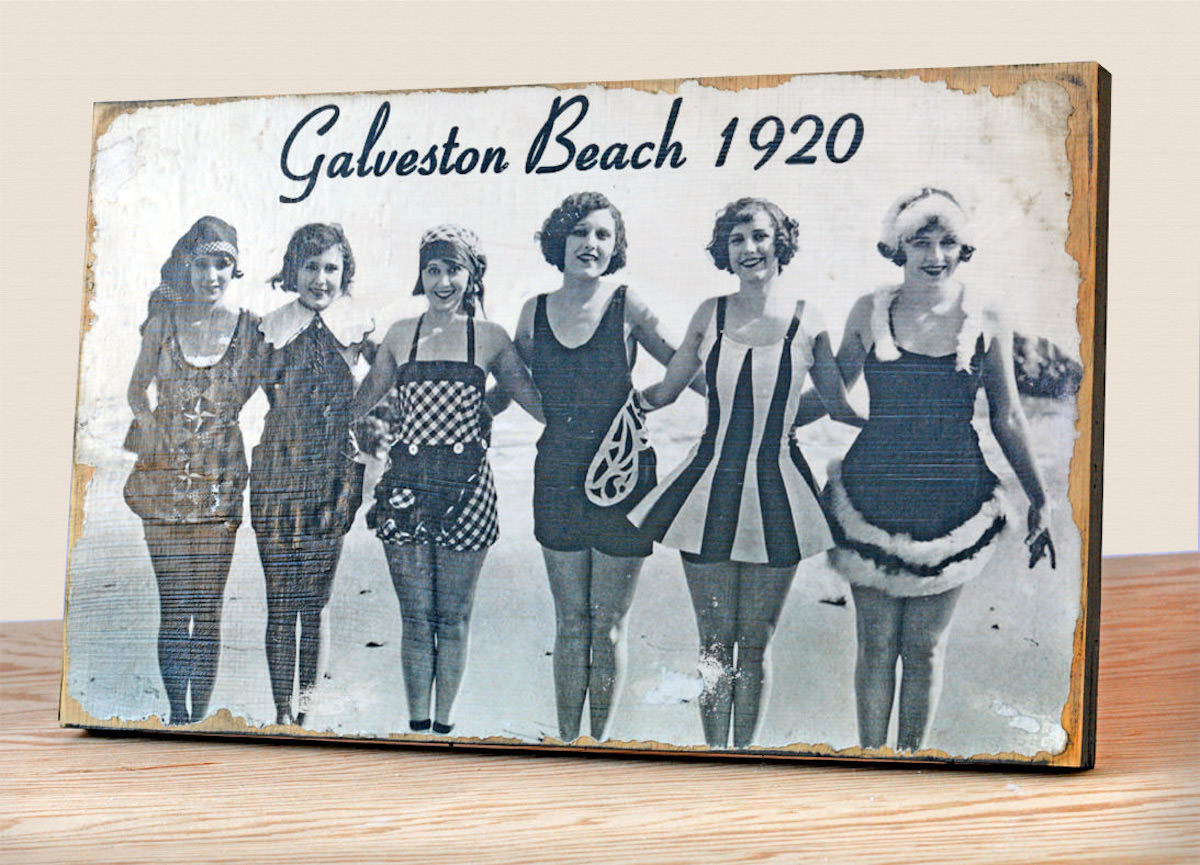
Now you know how to transfer photos to wood! Easy, sorta quick (if you don’t count the passive drying time), and inexpensive wall art!
TIP: I’ve worked with Mod Podge Photo Transfer Medium a lot, but if you’re new to it, do a little tester piece before tackling a big project. And please check out the extremely useful list of tips that Amy has compiled for working with Transfer Medium here.
Photo Transfer to Wood
Materials
- 1 piece 1/4″ plywood cut to 13 x 8 or the size of your choice
- Mod Podge Photo Transfer Medium
- Mod Podge Matte
- Acrylic paint
- Damp rag
- Image printed on regular paper using a laser printer or photocopier
Video
Instructions
- Print the image or photograph to fit the surface using a laserjet toner printer. Remember to reverse any words so that they will read correctly.
- Paint the surface with acrylic paint. Let dry completely.
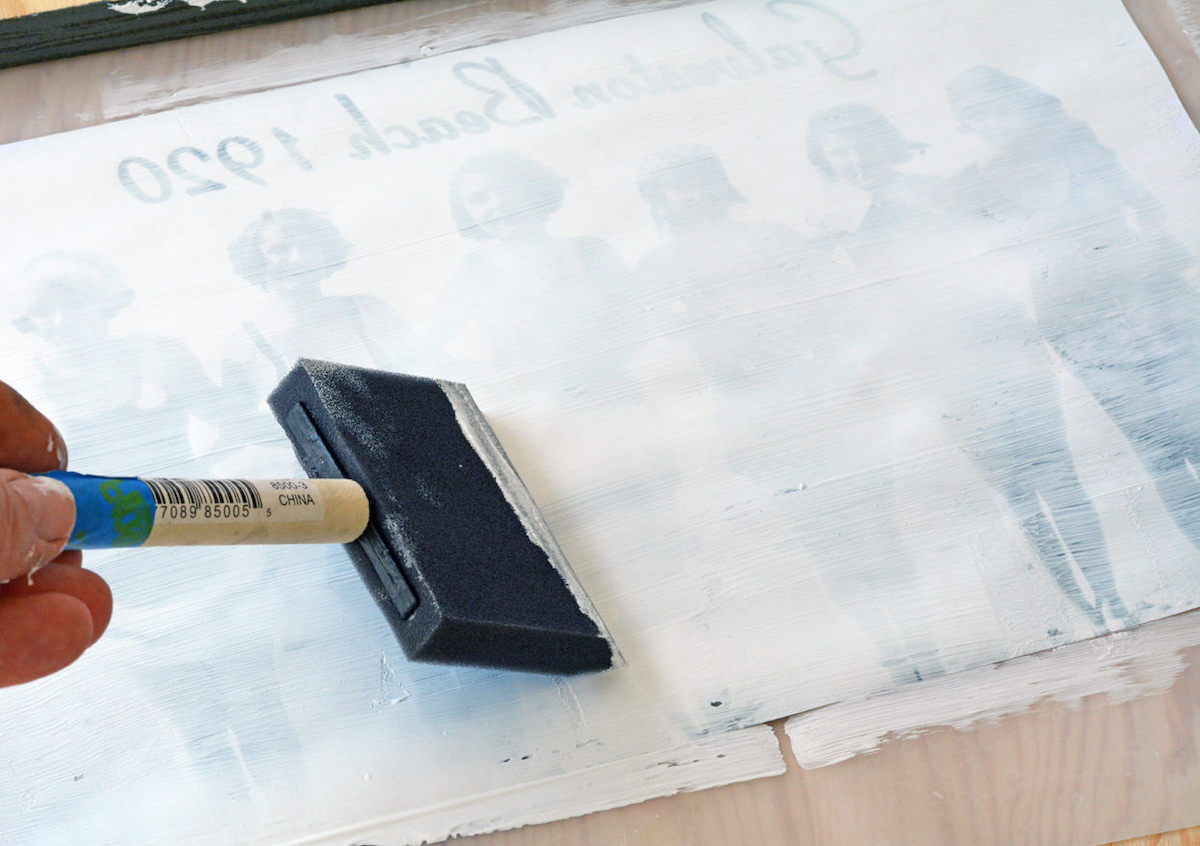
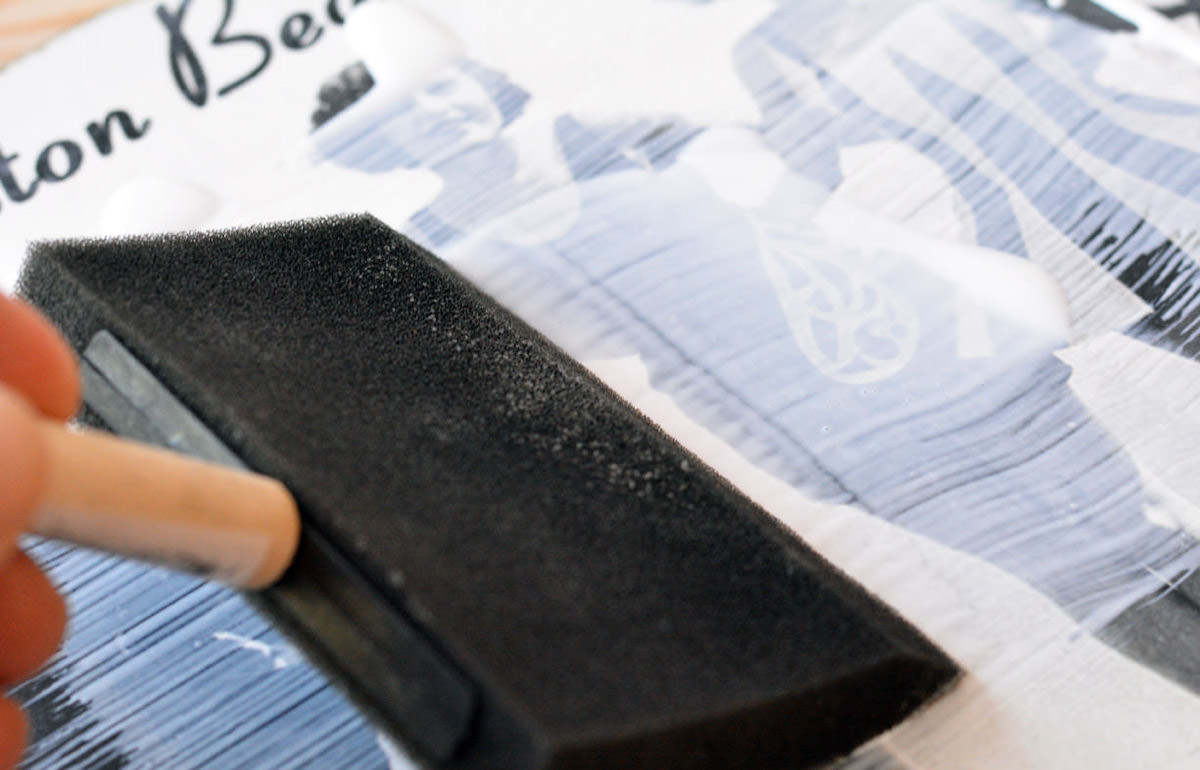
- Place your image on a mat with the ink side up. Squeeze a generous amount of Mod Podge Photo Transfer Medium onto the photo and spread with a foam brush.
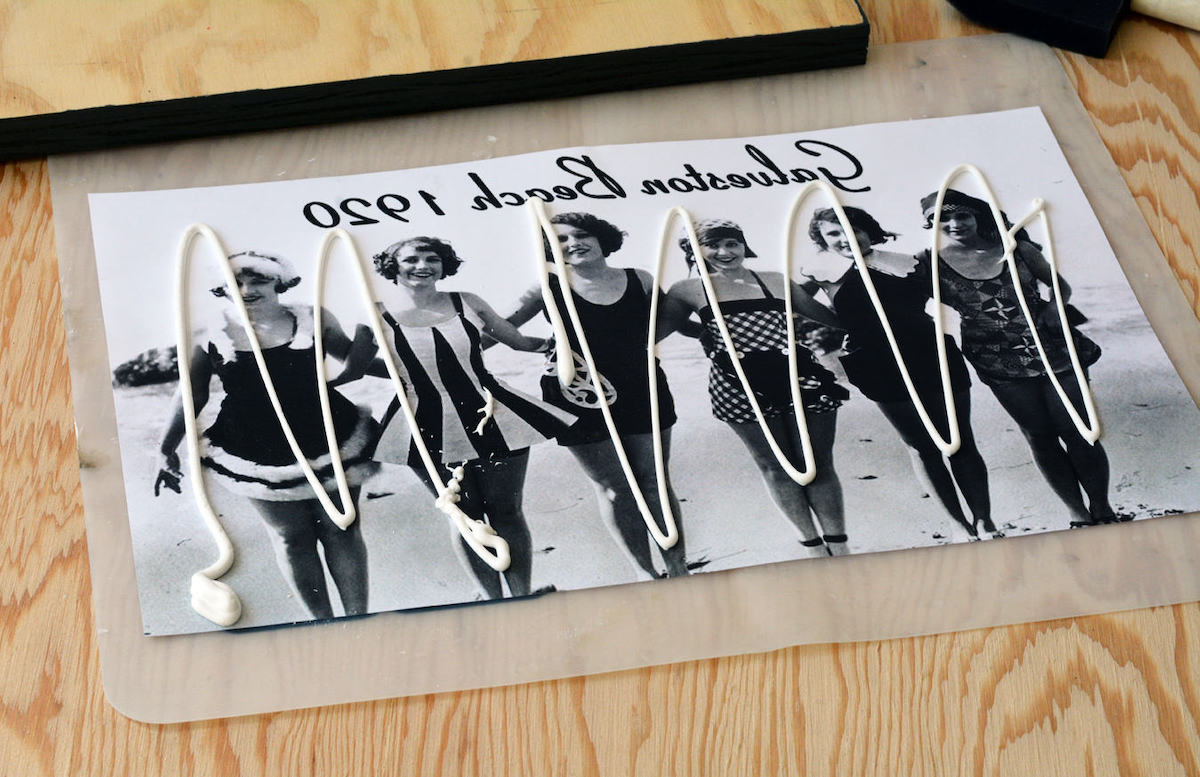
- Continue spreading the medium until it obscures the image. Be sure to get the corners well.
- Lay the picture image side down onto the surface. Smooth down, removing any air bubbles. A brayer helps here, as does having a wet rag (see Notes section).
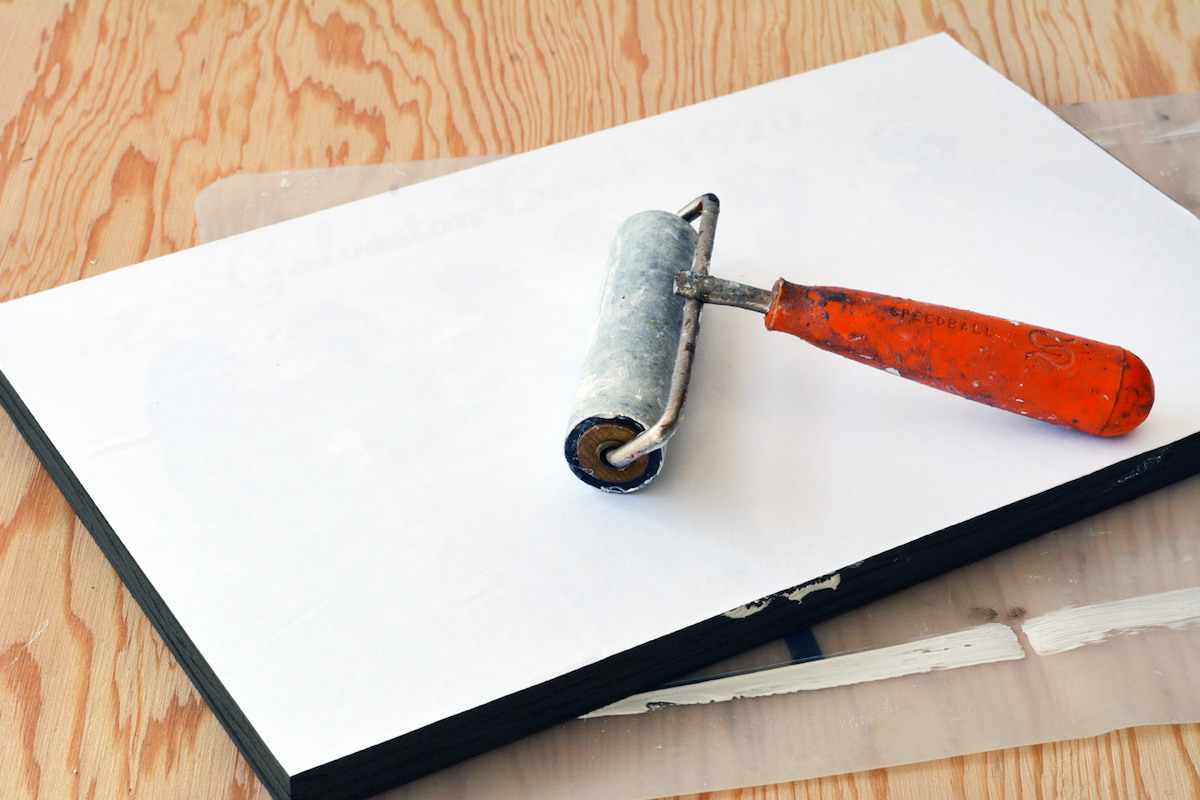
- Set aside for 24 hours to dry.
- Place a damp cloth down onto the back of the photo for several minutes. Start rubbing away the paper very, very gently. Rub harder as you get more comfortable, but use a light touch.
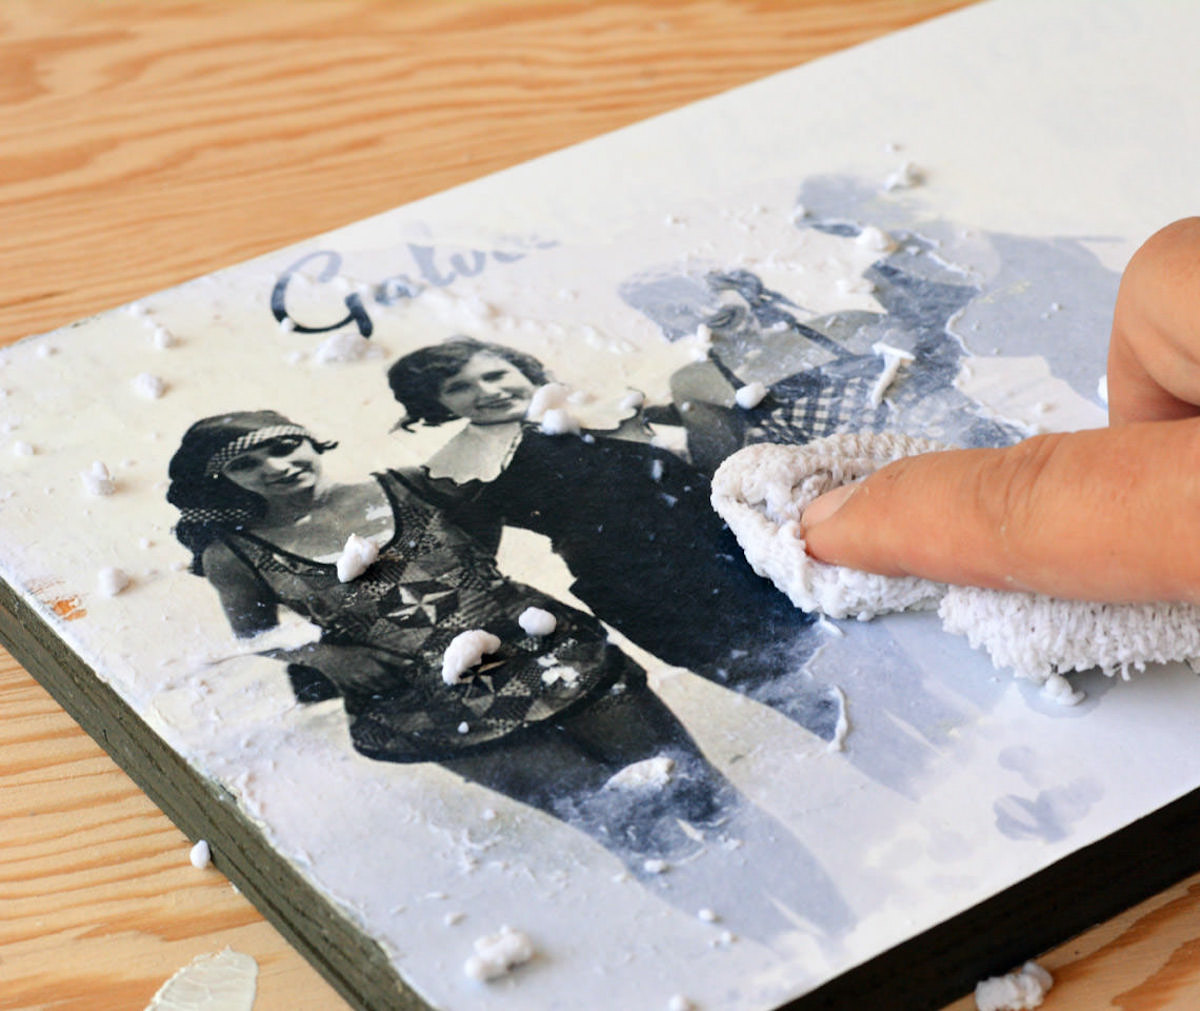
- After removing the top layer of paper, let dry a little and then repeat. It's better to rub gently and repeat the wetting process several times than to rub too hard and rub the image away.
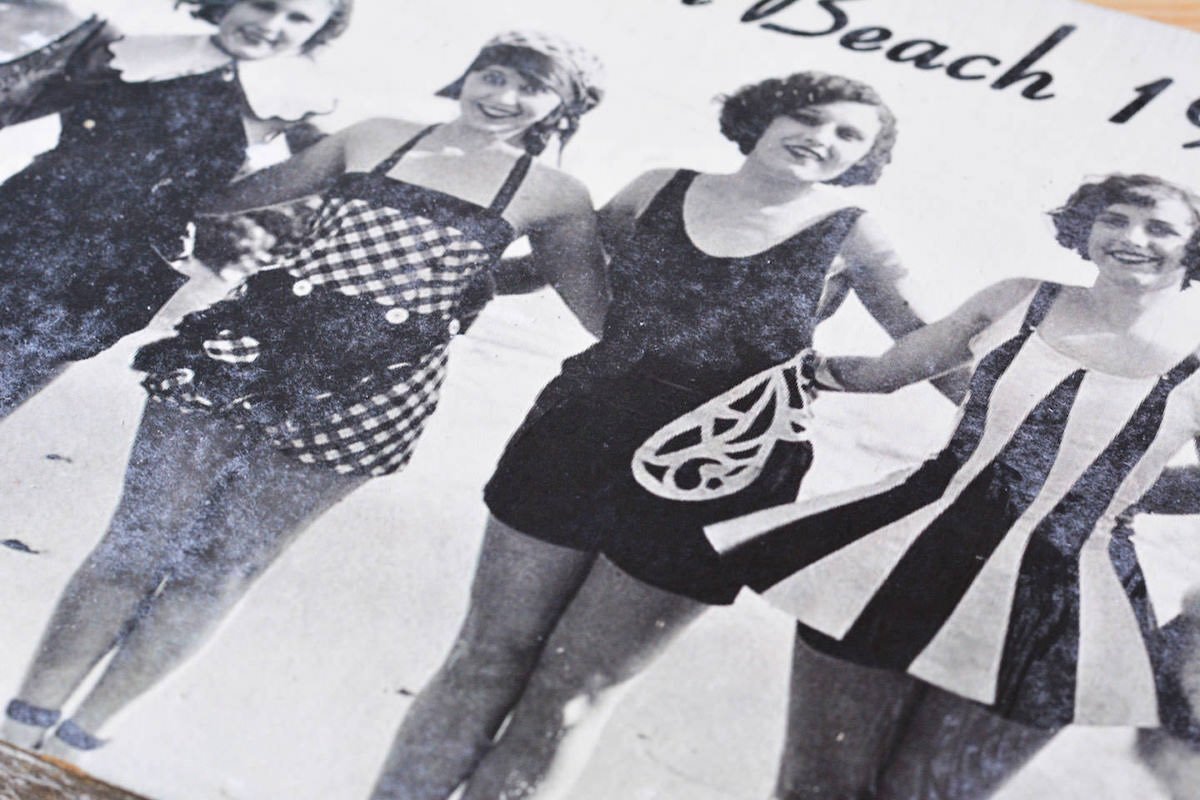
- Once you're satisfied with the image, further distress the piece with sandpaper if you like. Add a coat of Mod Podge Matte (or two) on top and let dry.
Notes
Are you ready to see the video of the process? Just click PLAY on the video in this post. In this example, you’ll learn how to transfer an Instagram picture to a wood block. Plus check out these other photo transfer ideas here:
Breakfast in Bed Tray • Christmas Napkins • Photo to a Wood Block • Inkjet Transfer • Photo Keychain • Photo Transfer to Canvas • Transfer Paper to Fabric • Transfer Photos to Canvas • Transfer Photos to Fabric • Transfer to Furniture • Transfer to Metal


…had the same eproblem….tutorials never actually mentioned a transfer medium. would have been nice to know!
@Mary, not sure what tutorial you watched, but step #3 calls it out.
@Mary, it’s step three. The tutorial clearly lists it out.
Could you use this same process using an artist canvas instead of wood?
Yes you could!
Thanks Amy!
@Frani, yes you sure can
I don’t understand..how do you “reverse the image before printing it” ? That’s the one thing I don’t understand how I would do that????
Hi there! You would do it in a Word processing program, Photoshop, or there is even a website that will do it for you: https://flipapicture.com/
Does this work with colour photos?
Yes ma’am!
Hi, I’ve heard that this dries white and the wood grain underneath gets covered. Do you know another mod podge produce that dries clear? Thanks
Yes it does dry white! There are two options for you 🙂 The clear photo transfer medium, with laserjet images: https://amzn.to/2UDrUCZ. Or you can use this method, with inkjet images: https://modpodgerocksblog.com/inkjet-photo-transfer-to-wood/
What a great refresher on how this is done! Fun project! Thanks Amy!
In answer to Glittergirl’s question regarding reversing an image; you can do so by going to settings on your computer; selecting Printers, select your printer by clicking on the printer to the right, click on Manage, then select Printing preferences. From there, click on the Advanced tab and look for reverse print. Select that and then click apply or okay and you are good to go.
I’ve done this before using a canvas and a colored laser printer photo and after letting it dry and rubbing off the paper, I get this very ashy result. I thought trying this on wood would eliminate the ashy look, however it did not. In your video tutorial your picture looks quite vibrant after rubbing of the paper prior to putting on the finishing coats of Mod Podge. How do I make my photo look vibrant after rubbing of the paper?
Hi Mashonda! Ashy sounds like perhaps there is still paper on the image? I’d do another test piece on a block of wood (or whatever’s cheap) and a sample photo. Just to see if by rubbing a little further than you normally do gets you better results. Part of it is the image that’s printed out and how vibrant the colors are, and that is different for different printers. But I really think you might be able to rub off more paper (or that it’s worth trying). My projects, if I rub off enough, aren’t ashy.
Hi. After trying a couple of times, parts of the photo were not transferred. I wondered; is the density of the wood a factor? – Im using hard wood.
Thank you.
About to try
Gives your photograph a wonderful effect. This is a keeper!
Easy to do
You make the craft seem very easy to do. I can’t wait to try this.
Must try. Would make a wonderful gift for family or friend.
Nice project with clear directions excited to try it myself.
What a neat idea … will have to give it ago.
Haven’t done this yet but you make it look easy!
I can’t wait to try this with some pictures I have of my parents.
Great step-by-step tutorial on the process. Can’t wait to try this!
This is really brilliant as a moment instructions clear, easy t to follow. Layout clear.
LOVE this idea. Can’t wait to try it.
love this idea! Can’t wait to try this.
I’ve use this many times and it’s always great fun! Always do a practice run first. Once you’re comfortable using this Photo Transfer you’ll want to use it all over the place!
I’ve tried this before but not with Mod Podge. You do good work!
Vintage really fits this project.
pretty slick. I just made my friends dog picture on a piece of wood. I am giving it to her today.
Happy to see modpodge also has a medium transfer I will try it. I have been using Liquitex for a long time. Looking forward to trying it
It is not difficult. It takes time. The end result is something to be proud of.
Another lovely gift/decoration for any time of the year
great to learn didnt realize it could be so easy
I enjoyed making this for a friend as a gift! I find people really like things hand made!
These turn out FABULOUS! Great tutorial.
Lots of potential gifts for family
Must try this.
Great idea but I think it will be a challenging project for me.
I have to try this
great new way to do photos
LOVE IT
I’ve seen this project on other sites many times, but the directions didn’t seem this easy. I’m ready to try it now!
This is fun to do, but it takes some practice for sure. DO NOT start with your intended project! Work on a couple of scrap pieces first.
All of your tutorials are great. I have not yet found one that I cannot use. This one for the photo project will be use for my friends and family (especially when I am no longer on this earth). Thank you.
Sounds pretty simple
Lovely project, have tried it once, and will be trying it again.
This looks awesome!
Interesting – just read you can do it with inkjet printer – good to know since that’s what I have
I have been using the transfer medium for awhile and it works awesome!
I have been doing photos on tiles left over after retiling our bathroom. Love them. I have never used the transfer though.
I have been looking for a way to transfer pictures to a canvas to make for my grandkids. I can’t stencil all that well, but with this technique I will have no problem completing my project. Modge Podge makes life easier!
this would make a nice wedding or anniversary gift
I have done a few of these, each one came out differently as I progressed and tried new tricks. One that I liked doing was two different photos layered, it took some doing, but looked like a superimposed misprint but in the coolest way!
Great tutorial here!
Thanks for all the tips. I’ve tried this before and it didn’t work very well. I tried it again with your help and it turned out wonderful. Thank you. I really appreciate your instructions.
Thanks for the tutorial. Can matt mod podge be used instead of the photo one?
Can’t wait to try this!
Done! Wow! Looks wonderful and did one for on-laws. They were shocked I did this. Finally they accepted me (haha). Pretty easy, just takes time and patience. Will do more
transfer photos to wood
I would love to try this, and I have a couple photos in mind already to try it with!
What a clever craft, I’m going to make lots of gifts.
I have used this transfer method on several occasions and will use it more. It is easy and turns out fabulous.
Great for learning how to transfer photos. Love!!!
Thanks
I tried this project and had great success with it
This is a straightforward tutorial on transferring pictures. I’m looking forward to making some of these for gifts.
simple quick project for all ags.
I have never tried this yet. I am just learning and i can think of so many things to do with this. Thanks for sharing.
I loved this project. I made my transfer on canvas to create my own personalized totes! I also made transfer re-usable totes to put gifts in for the holidays instead of using wasteful wrapping paper. My family loved them!
Great video on how to mod podge a picture to a surface other than glass. There was as link to follow for transfer to glass.
Great gift idea.
Easy Project .
What a fun project.
I will definitely be trying this one out. I have so many old black and white photos.
I want to do this but I’m afraid I will mess it up.
By far this is my favorite, ?Simple and great results
This is another great project idea to add to my bucket list! I like the idea of transferring the photo to wood!
Found the lesson excellent and was easy to do the worse bit was waiting 24 hours for it to dry but good results
I have been wanting to do a picture of my grandson and his puppy on wood. I have the wood and picture, now all I need is the Mod Podge.
I love the vintage look.. Thanks for sharing..
I will try this for sure. I have tons of vintage photos I’d like to display.
I LOVE this idea! Great idea for a gift with all the old family and friend photos I have!
easy directions, now maybe I am more prone to try it, have been a little timid on this one
Super cool craft with great instructions.
this is fantastic, an youcan use family photos to personalize your creation
I’ve only tried this twice, had limited success but that was before I saw these instructions. I’ll have to try again.
Love this project and it is a good detailed step by step one. Wish I was better at getting wrinkles out, perhaps it is in the wrist action? LOL. You need to try this one out
This was fun! I will probably do it again and I hope to get better at it!
the first time I did it ?I rubbed much too hard, but with patience and a softer hand, it worked great!
Very cool for vintage graphics
Amazing Idea! I have so many photos. Wonderful way to display them. Wonderful gift for anyone special!
Always wanted to try this!
I love this!
I like this a LOT
So simple, and it does work. Remember to mirror your image if you want it to look like the original photo
Very informative. Thank you!
Great tutorial and what a brilliant idea for gifting!! Thanks
Again, thanks so much. I have several projects pending for which I needed this info. Just perfect.
I did this n it came out awesome. I got the photo mod pod n did on wood n canvas.
Another great tutorial! I’ve been wanting to do this for some time but never found good instructions.
Transfer Photo To Wood
can u imagine seeing ur GG Grandmother on wood?
This looks amazing to do on a cold winters day. Make a great Mother’s Day gift
Fun and easy project with lovely results. The how-to guidance provided was excellent. Definitely sharing with friends who also like crafts.
definitely want to give this a go….awesome!
I made this one already just a super stunning idea…thanks for the great instructions
I have this tutorial saved to try. The only problem I have had is finding somewhere to print a photo with a laser printer. Sadly that has kept me from trying this technique.
Love this, I made christmas tree decorations.
Really enjoyed reading on how to go about image transfer. Now to go shopping! Thank you for all the details and tips.
This makes perfect gifts
Love this Project!
This worked well. I did a picture of my daughter and teacher this way. It wasn’t perfect but gave it a vintage feel. I liked it.
This is awesome I’ve always wanted to do this with my mother’s old photos. You really do rock as you are using products that we all have on hand and make it so easy
I’ve read this article several times but I have yet to try this. It seems like magic and I don’t understand how it works. One day, instead of just reading, I’ll take the recommended steps and create a beautiful project.
Cool Idea!
So many ways to utilize this suggestion.
I’ve never tried this with the Mod Podge product, but after reading this I’m going to. I like the effect…the vintage look…will look great with some old family pix.
I c ant wait to try this one!!
Photo Transfer to Wood
Great craft and great instructions.
I have been wanting to do this and this described how to transfer the picture to the wood perfectly. Now to find the right kind of printer to get a picture. Will try fed ex or ups print places. Good clear instructions.
Easy to follow directions to transfer your photos to wood.
I’ve always wanted to try this….love this idea and would be great gift.
This is just what I have been looking for. I have a great project in mind.
This looks super easy to do. I have a ton of pictures from the 40’s to 2000’s and this looks like a good project for them.
Can’t wait to try this! I picked up photo transfer medium this week and it’s my weekend project.
Very timely idea for my needs. I am about to transfer some photos to a crate. Thank you!
I made a sign for my G-Daughter’s wedding using this tutorial. It was fabulous!
Excellent article. I wondered how to use this product and the instructions are easy so I might attempt this now! Thank you.
I can’t wait to try this.
This is on my list to learn to make. Thanks for the great instructions.
Great gifts or just to keep for self!!
Step bystep instructions help take the stress off doing new craft
I have done this before. It is easy, and really works. I want to do it again.
I did this along time ago – didn’t turn out very good – time has change – gonna try it again
I’ve always wanted to know how to do this.
One of my all time favorite crafts with modge podge
Great directions. Thanks
Great Idea!
Well explained and I wonderful way to show a special photo!
Start looking for those fun photos. Easy to do and make great and fun gifts.
I have some pics that I would like to use this way. I almost got some Photo Transfer last time I was at the craft store. Too many projects right now but thanks for the awesome idea.
Excellent
This really opens up lots of project and gift ideas. Thank you for posting it
thank you for this it is an excellent way of transferring a photo and your instructions are great to follow
I love this craft. I am searching through my photos to find the best to do.
Cool idea!
****
What a wonder gift. I can not wait to make these for my family.
I have seen this many times but never tried it. I think I’ll print some photos out and give it a go.
I love the look this project gives especially if you use old photos in o4der to get that vintage look, and who doesn’t like that look. It’s like going back in time! A fun way to preserve a special memory??
I can’t wait to use these helpful instructions so that I can start transferring photos to wood using Mod Podge.
It’s a wonderful keepsake for sure. I can think of so many uses for this! Thanks for sharing. 🙂
have seen this on several sites and really need to give it a try x
4 star
It would be fun to transfer the photo to a box and store other photos in the box. It would be fun to transfer a special photo onto artists’ canvas and hang it.
Especially wonderful with those vintage photos where you dress up. ❤️❤️
Thanks for the tutorial I have tried this method many times works great.
I have never tried or even known to do this but I have extra pieces of wood laying around and plan to do this today! My daughter got accepted into the high school of her choice [with 4 of her best friends] and I plan to make one of these with their pictures and their new HS’s logo and give as gifts! The video and details were great! This is great! Thanks for the idea!!
Brilliant idea
I make treasure boxes for the littles 4th birthdays this littles’ will be transfers… thank you!
I’m looking forward to doing this one myself!
I have done this with photos printed on a sheet of paper. Works really well on a piece of white lapboard wood.
This will be great with some old sepia toned photos I have of the relatives.
?
This is the best step by step directions I have seen so far. Will be trying while oout of school for the next two weeks.
love this!!! Also a project I have always wanted to try. The instructions are clear and concise.
This is a very nice project. I really the example that was used in the tutorial.
I also REALLY like that the print function for the instructions.
I can’t wait to try this out with pics on my mantelpiece!!! I’m always looking for something different and this will fit the ticket perfectly! WOW and only two ingredients…that’s amazing! The hardest AND funnest part will be to choose the pics! Thanks for this great idea 🙂
havnt tryed this but sure gonna
Perfect for preserving and displaying special moments.
like this project! good, clear directions. thanks
What a great way to preserve old pictures and display them as a piece of art instead on just hanging in a frame of in a scrapbook!
This project was fun to do as a family and we had great conversations (and a little laughter) while working on it.
I didn’t realise how easy this would be to do and i’m definately going to try
What a neat idea!
Great tips on which mediums to use and what type of results they produce. I looked for a long time to find out how to transfer a photo to a black surface. Modge podge photo transfer medium will give me the white background I want. Thanks!
How are the whites transferring in this tutorial? It’s obviously not just a home print where anything white is just the white paper you print on. I have characters i created and want to put on wood but they have lots of white so the diy methods from a home print won’t work. How did you get the white?
It’s the formula! The formula dries white, providing the background for the transfer. There is also a clear formula, and a way to do an inkjet transfer with Mod Podge to make a clear background as well.
Hi Amy, I followed your steps, did do a tester just for the sake of seeing how gentle I need to rub the image to not mess it up. I learned a bit so a test piece is an excellent idea. Ok, so I did the real piece, totally love it! Came out as perfect as can be. I stained the frame, let it dry over night, then used chalk paint over top (lightly, leave the etching in the frame material stain colored). Then I went back over it with a light light bristle coat of stain again to add more patina, wiped away. I’ve done furniture this way and turns out great. It is fairly dry (will let it set over night). I have never used modge podge and don’t have much time to get this gift to my friend. How long will it need to dry before I can handle it? Gift it? Should I coat the surface and the frame? Anything wrong with polycrylic instead? That’s what I’m more familiar with. Thanks!
You can go ahead and use poly! That’s just fine. Then when that dries, you should be able to send it and not worry about stickiness or anything. Glad you had such success, yay! Sounds like a great project.
My image on the wood comes out blurry. Any suggestions?
Are you using an inkjet image or laserjet? Send me a pic! amy at modpodgerocksblog
@Amy, Hi. Can you the regular mod pod get for the laser jet or do you have to you transfer medium?
Hi Laura! You can use regular Mod Podge with laserjet for a transfer but it’s much fainter than when you use the medium. I would stick with the medium for laserjet. There is a clear background version too!
Hi Amy, I used my regular ink jet printer and the medium. It came out really good except part of the image is pink. Any suggestions? Thank you, kelli
Hi Kelli! This is because you used inkjet. Part of the image is pink because any red inks in the ink bled. Laserjet is suggested for this project – see the instructions. Thank you!
Hi Amy, super cool project! so I finished getting the paper off and when I went to add the mod podge coating as the final step I realized I have the gloss not matte. Does it matter if gloss or matte are used? Or is just preference?
Hi Liz! It’s just personal preference – doesn’t matter! And thank you! 😀
Hi, can I use prints that are done at a photo lab to transfer onto wood?
Hi Carmen! No, you need something printed with laserjet. The ink won’t release from that photo paper, which is what you need to happen. Also you need to be able to rub the paper off.
Hi! I was wondering if the process would work for different types of wood other than plywood?
Hi Brandon! Yes, it works for all types of wood. The only issue is if there’s a coating – you might want to sand it off. If it’s unfinished wood, you’re fine. You’re really looking for a porous surface so the acrylic product can “grab.”
i did a clipart image of grapes but did not trim the image (left some blank paper on edges) now image has white background as if i printed white for the transfer why did this not come off in the rubbing process?
For regular Mod Podge photo transfer medium, it has a white background (the product). So it didn’t come off because that is what the background is. However, there’s a clear version you can purchase too! That would give you the clear background you might be looking for.
want to try first time to put a photo on a tile,can someone please advice me products to use
What kind of paper is best? I’ve been trying to transfer photos onto wood, but I can never get that last bit of paper off without destroying the photo underneath. It’s a super frustrating experience. We just used whatever paper that comes out of the printers at FexEx. but that paper seems kind of tenacious and you never seem to get past that white opaque state to clear picture.
I just use plain white copy paper which is probably a little thicker than what comes out of the FedEx printers. 15 – 20 lb. or so? I’m wondering if a sponge might help you to rub off the paper without removing the image.
Hi I followed the steps and it came out perfectly but I did the final step and it came out white? Is this supposed to happen?
Hi Emer – the final step is rubbing off the paper. I’m worried you rubbed off the design?
Can you do this transfer with an actual photo?
Hi Kathy! Unfortunately not this method. Because the ink won’t release from photo paper – and that’s how the transfer is created, because the ink transfers to the medium.
Thanks for these instructions. Has anyone discovered a clear (but color laserjet combatible) paper that can be used for this purpose. I’d prefer no white background on the final product. Thanks.
There’s a clear version! https://amzn.to/3yWizNn
Can I use regular Mod Podge for photo transfer to wood?
Well I just picked up a dollar tree figure about 3/4 inch thick. It had a paper imagine that I sanded off. I am pretty sure it is a pressed paper not real wood. I painted it with chalk paint. Do you think the paint will seal the paper so it does not rub down if I am careful once the pic is on it. I used the transfer photo decapouge.
Yes I think the paint will seal the paper just fine!
Can you use printed photos that you get from a photo lab
No you can’t. You need the ink to be able to release from the printout. Regular photo paper has a coating and won’t let the ink release to the transfer. Has to be laserjet!
@Amy, thank you
Amy, here is my potential project. Using pages from a book (double side printed and not able to flip the image), I need to use a medium on the image, rub the paper off the back, then apply to canvas or foam core. The book is at least 40 years old – and professionally printed. What would be the best medium to use on the image itself so it is clear and not milky white. Used to use your method here to transfer on to painted wood as well as molded plaster. It is a lot of fun, but I want to try something new!
Hi Cathie! If it was professionally printed, then I’m assuming it’s laserjet. This product requires laserjet (or dry ink) images and has a clear background: https://www.amazon.com/Mod-Podge-CS11216-Transfer-Medium/dp/B079ZNMZHQ/
Is there a decent home laser COLOR printer you can recommend please?
It’s constantly changing based on what is out but I would say I get good feedback on HPs like this one: https://www.amazon.com/HP-LaserJet-Wireless-7KW64A-BGJ/dp/B083ZY524C/
I have not upgraded but I need to. My printer is still kicking it tho 😀 But this is the one I would get!
Has anyone tried this with wood that has a coat of stain on it? Is it necessary for the wood to be bare?