
Mak DIY spooky candle holders using thrifted jars, Mod Podge, and vintage photos. Quick, easy, and perfect for party decor or your Halloween mantle!
Skills Required: Beginner. You should have experience with decoupage if you want to try this project – especially to prevent wrinkles in the printed photos.
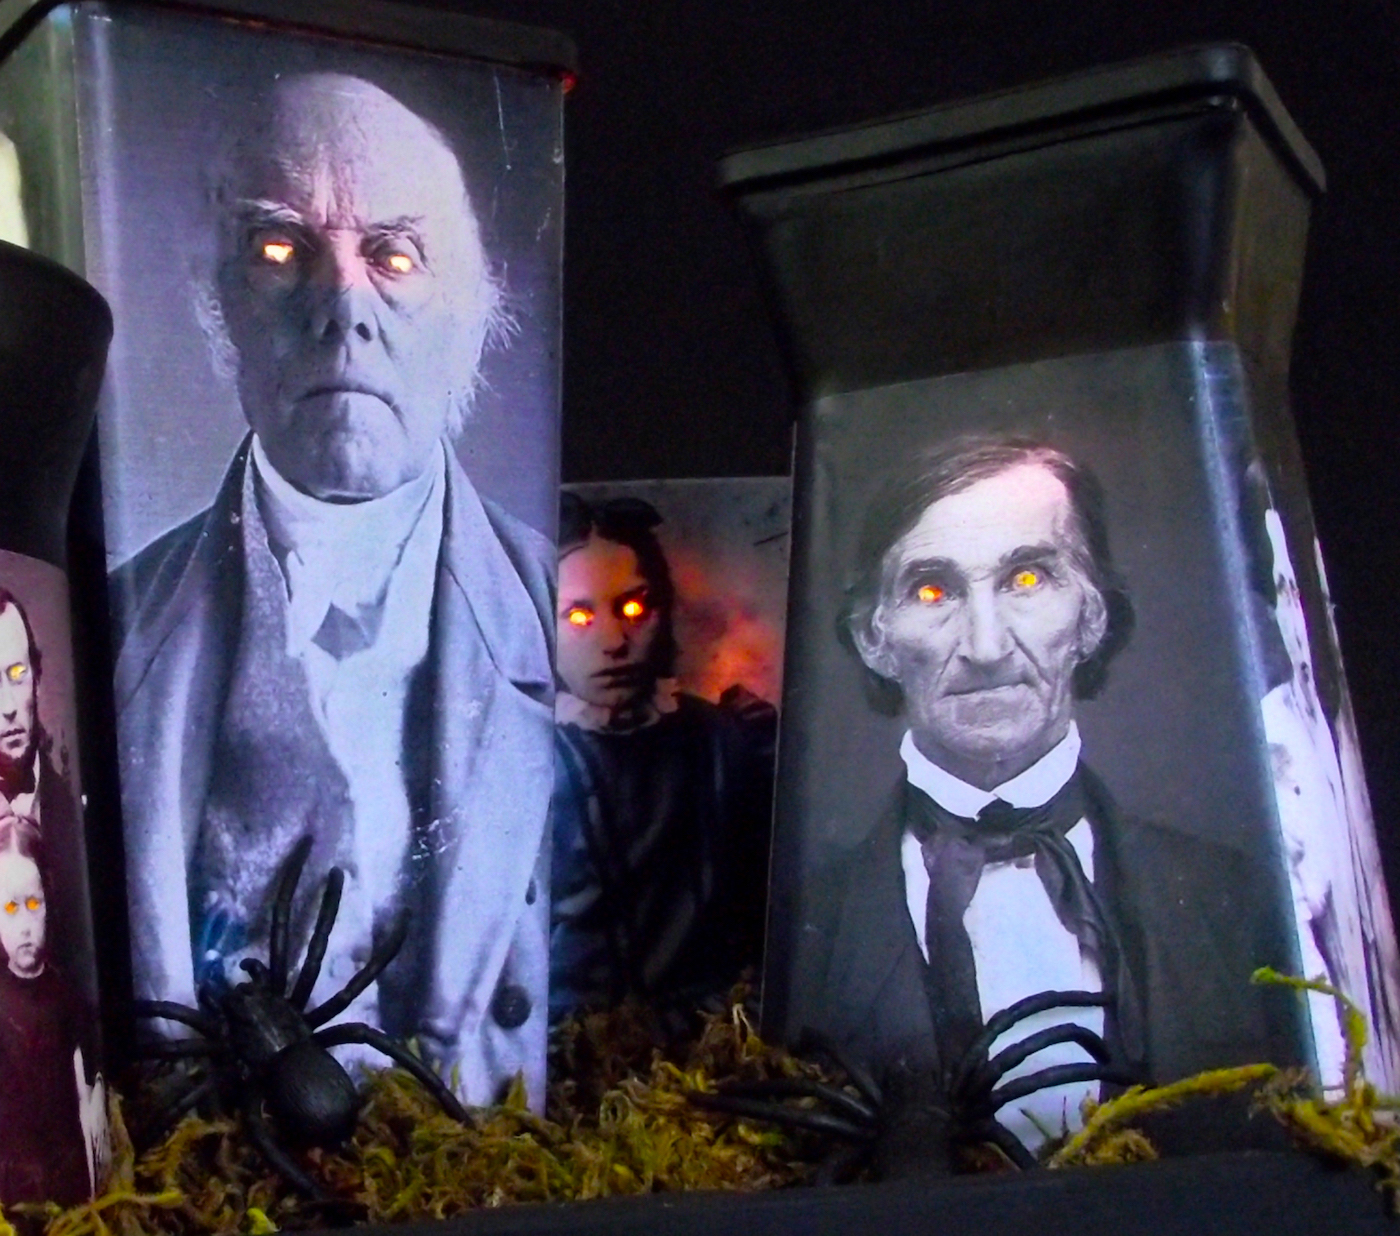
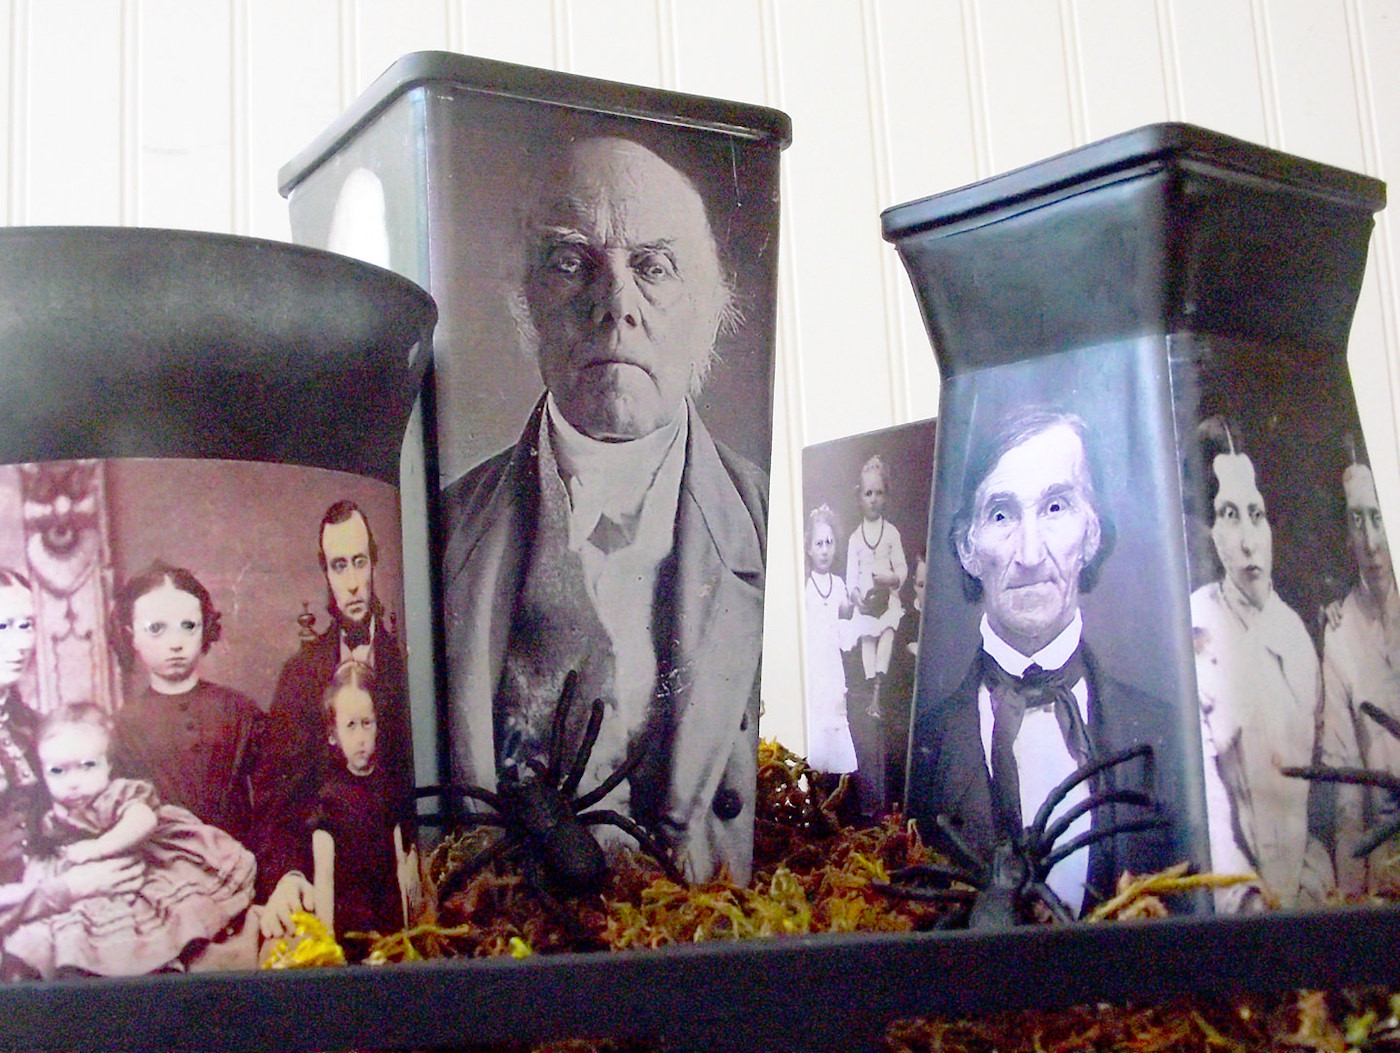
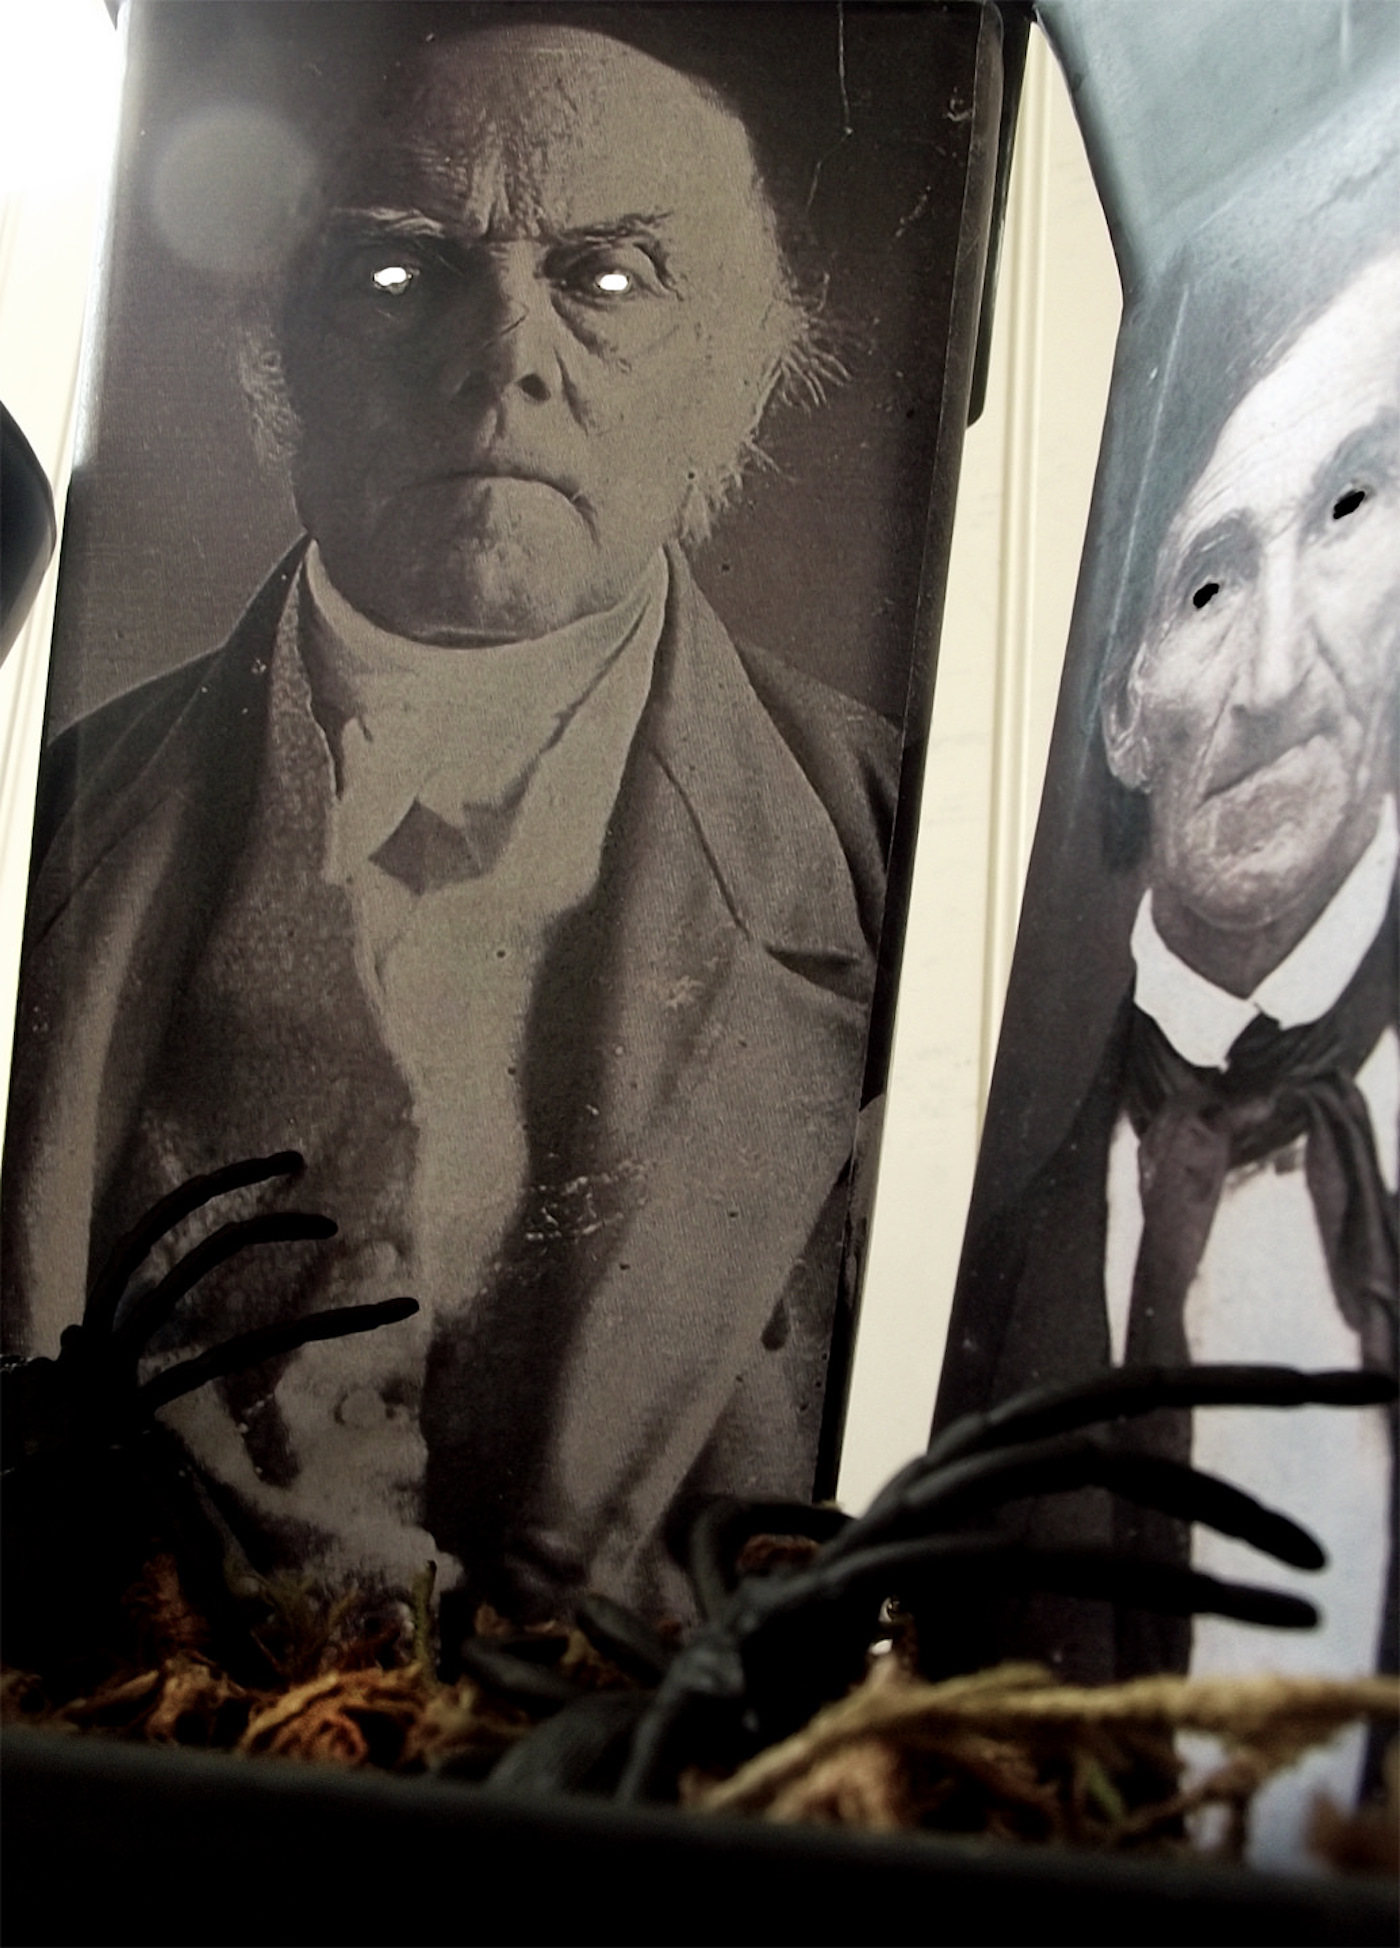
I don’t know about you, but when I think Halloween party, I think moody lighting. Give me flickering candles, spooky shadows, and just a hint of creepy glow and I’m all in.
So when I suddenly found myself hosting an impromptu Halloween get-together (why do we agree to these things so fast?), I knew I needed a quick centerpiece – and fast.
That’s how these DIY spooky candle holders came to life.
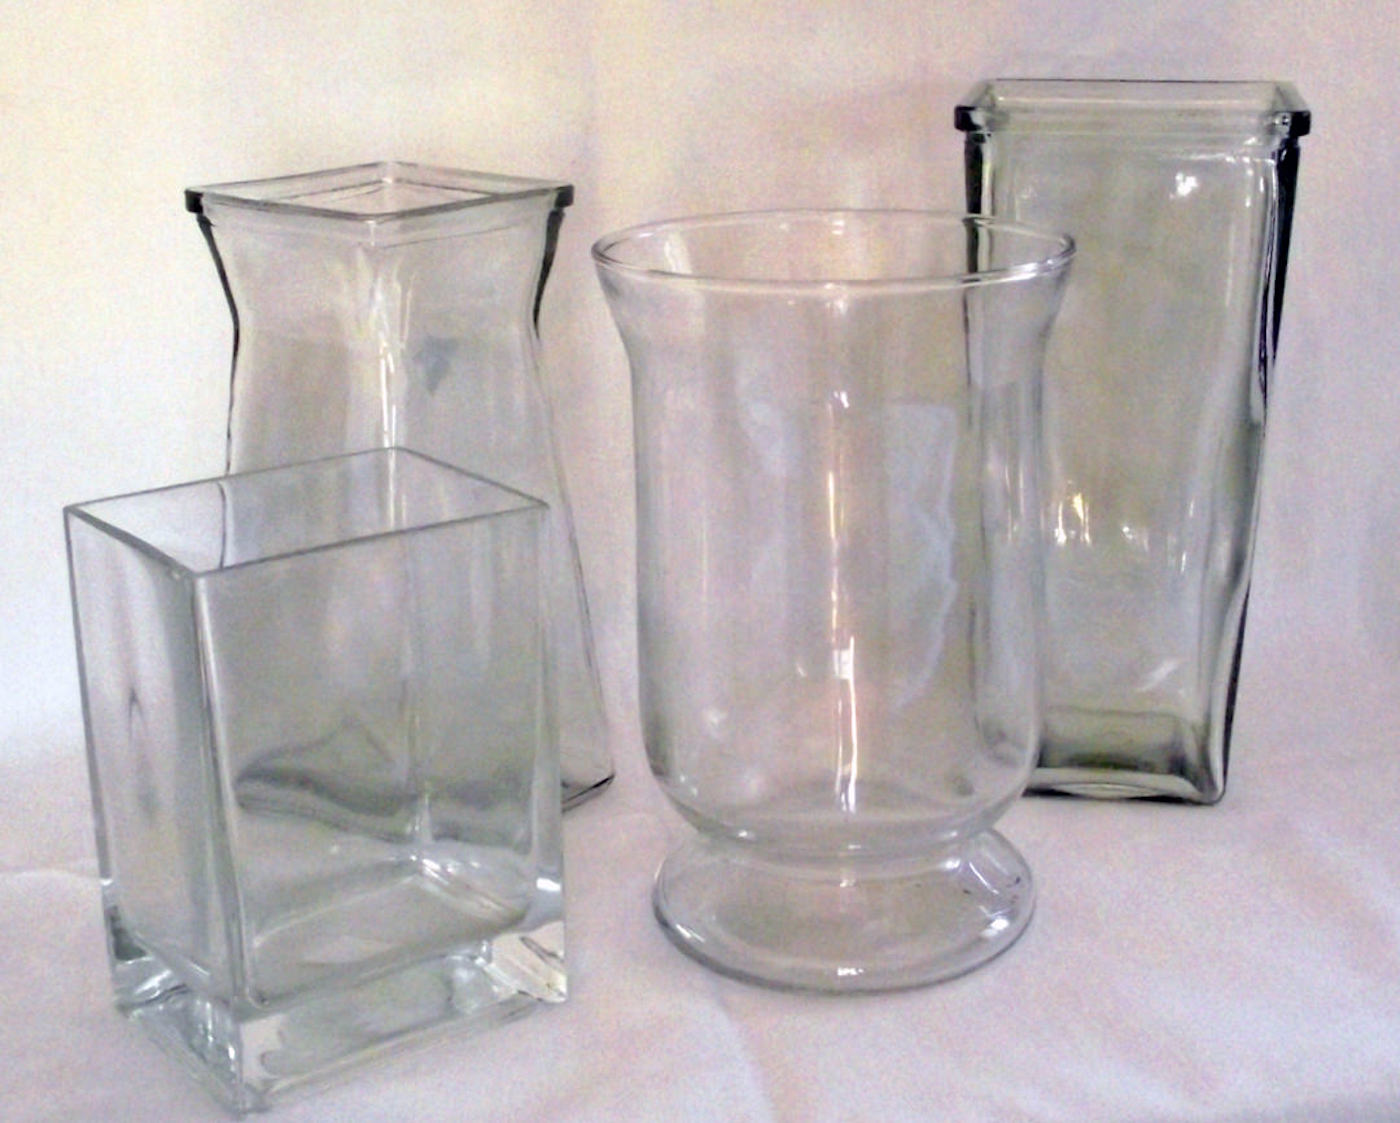
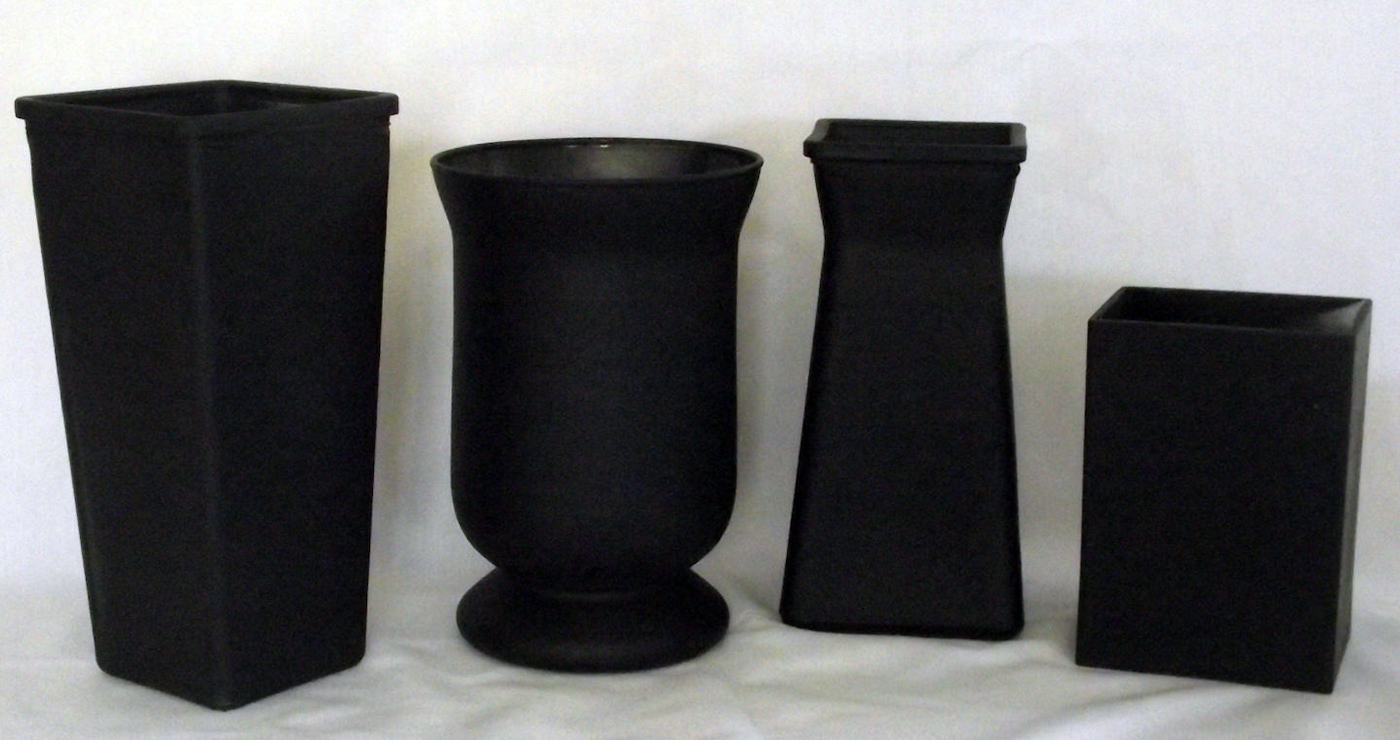
I hit up the thrift store with no real plan, and ended up grabbing a few mismatched glass vases for less than a dollar each. I didn’t know exactly what I was going to do with them until I remembered an old trick using Mod Podge and vintage photos.
Add a little spray paint, poke out some creepy glowing eyes (sorry, Victorians), and boom . . . instant haunted vibe.
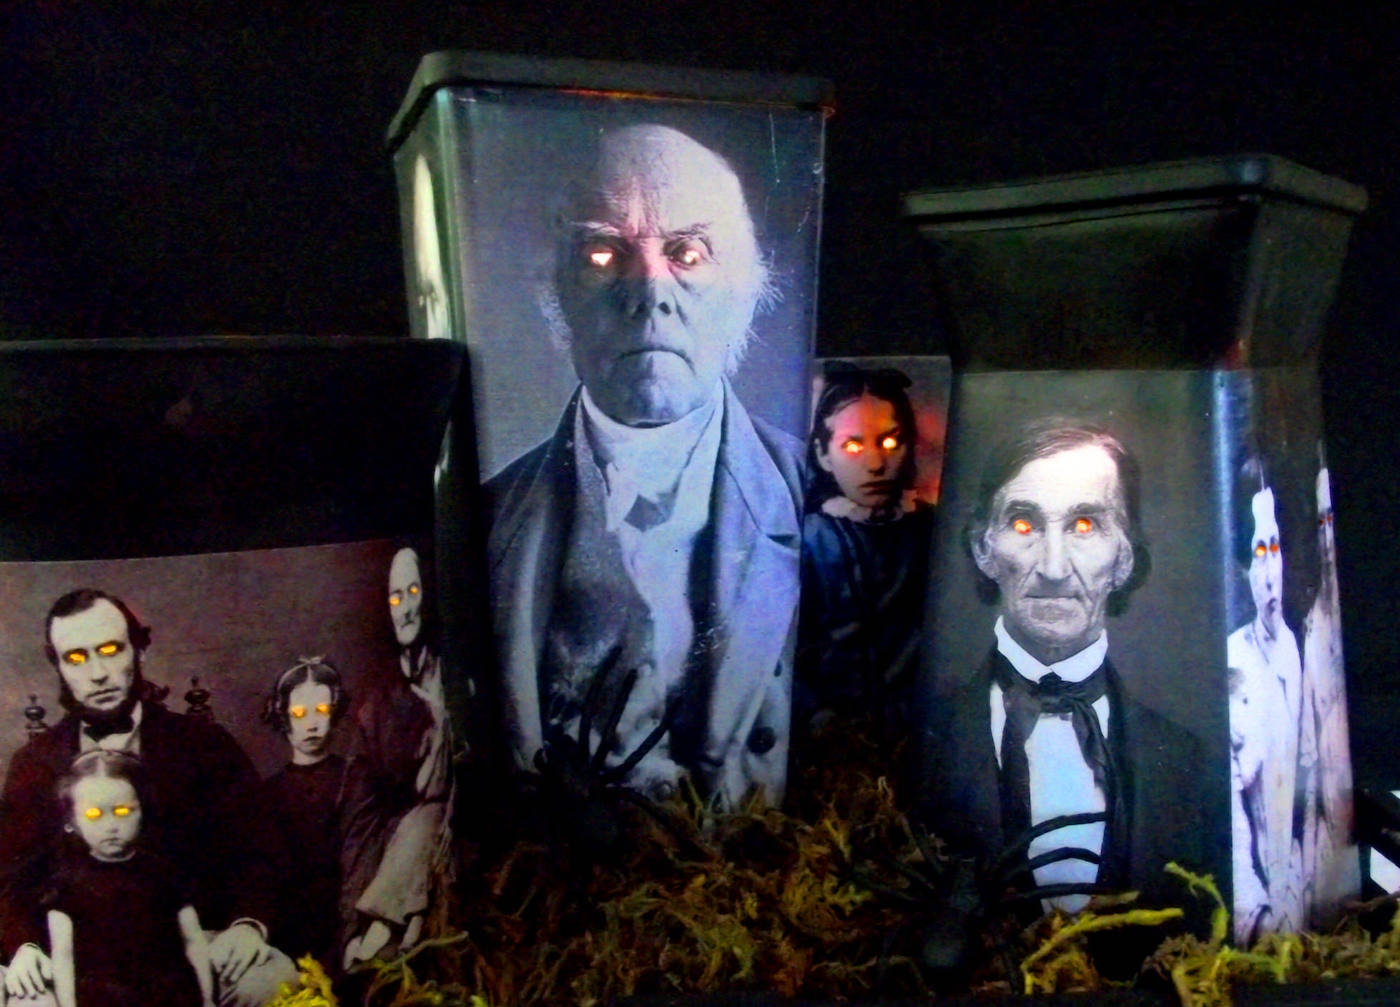
What I love about these is how easy they are to personalize. You can make a whole set in an afternoon, and they look amazing lined up on a table, a mantle, or even tucked into a bookshelf.
And because they use electric tealights, they’re safe to leave glowing all night long.
If you need fast Halloween decor with major spooky charm, and you don’t mind giving a few antique portraits a haunted makeover . . . this one’s for you.
Gather These Supplies
- Glass jars or vases
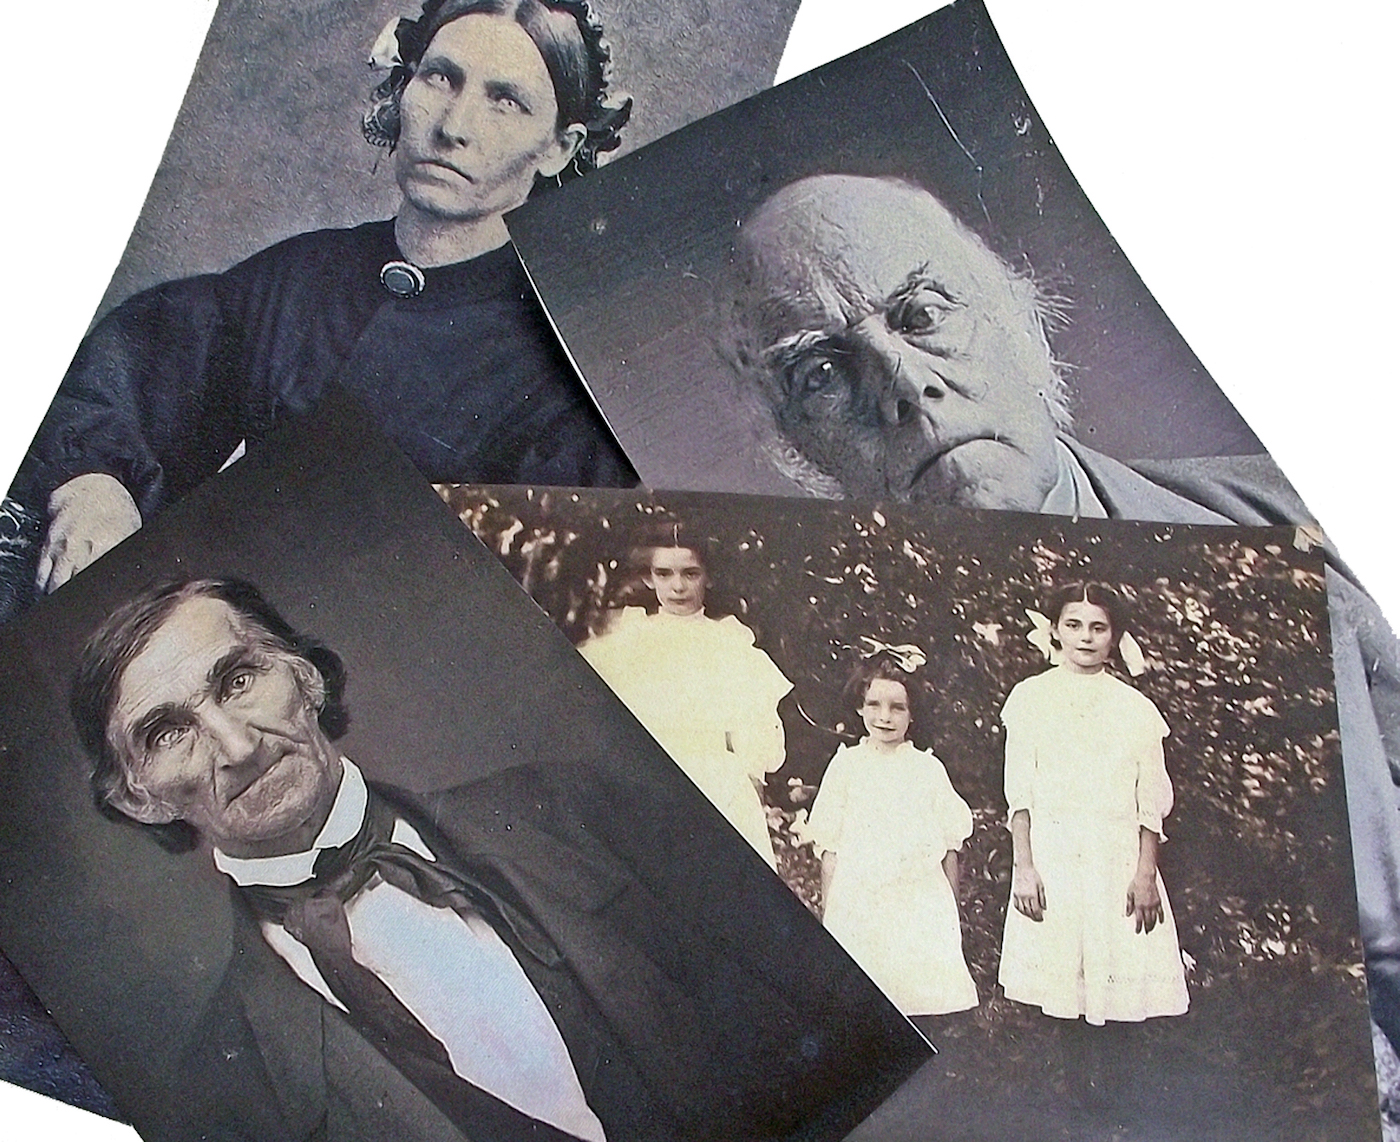
- Vintage photos printed on laserjet
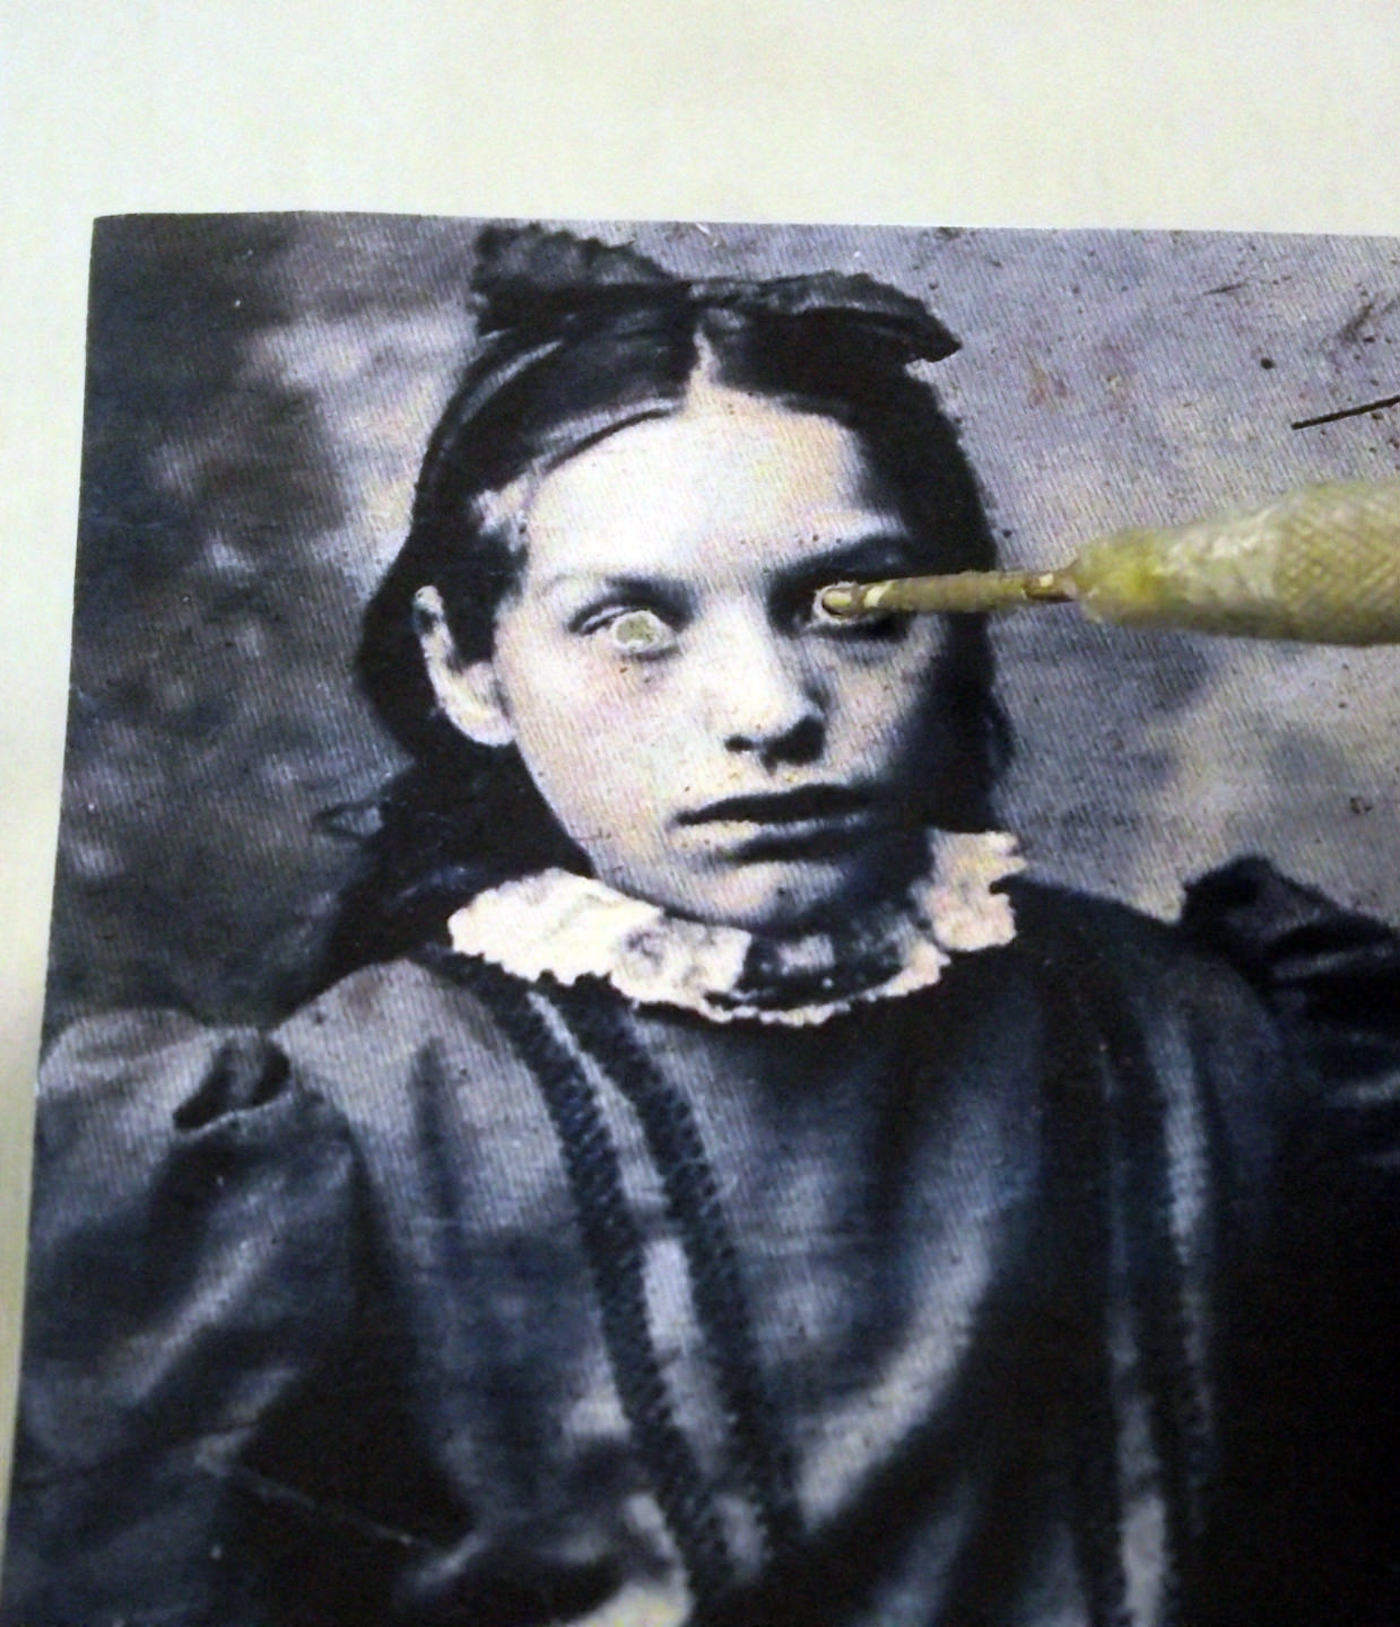
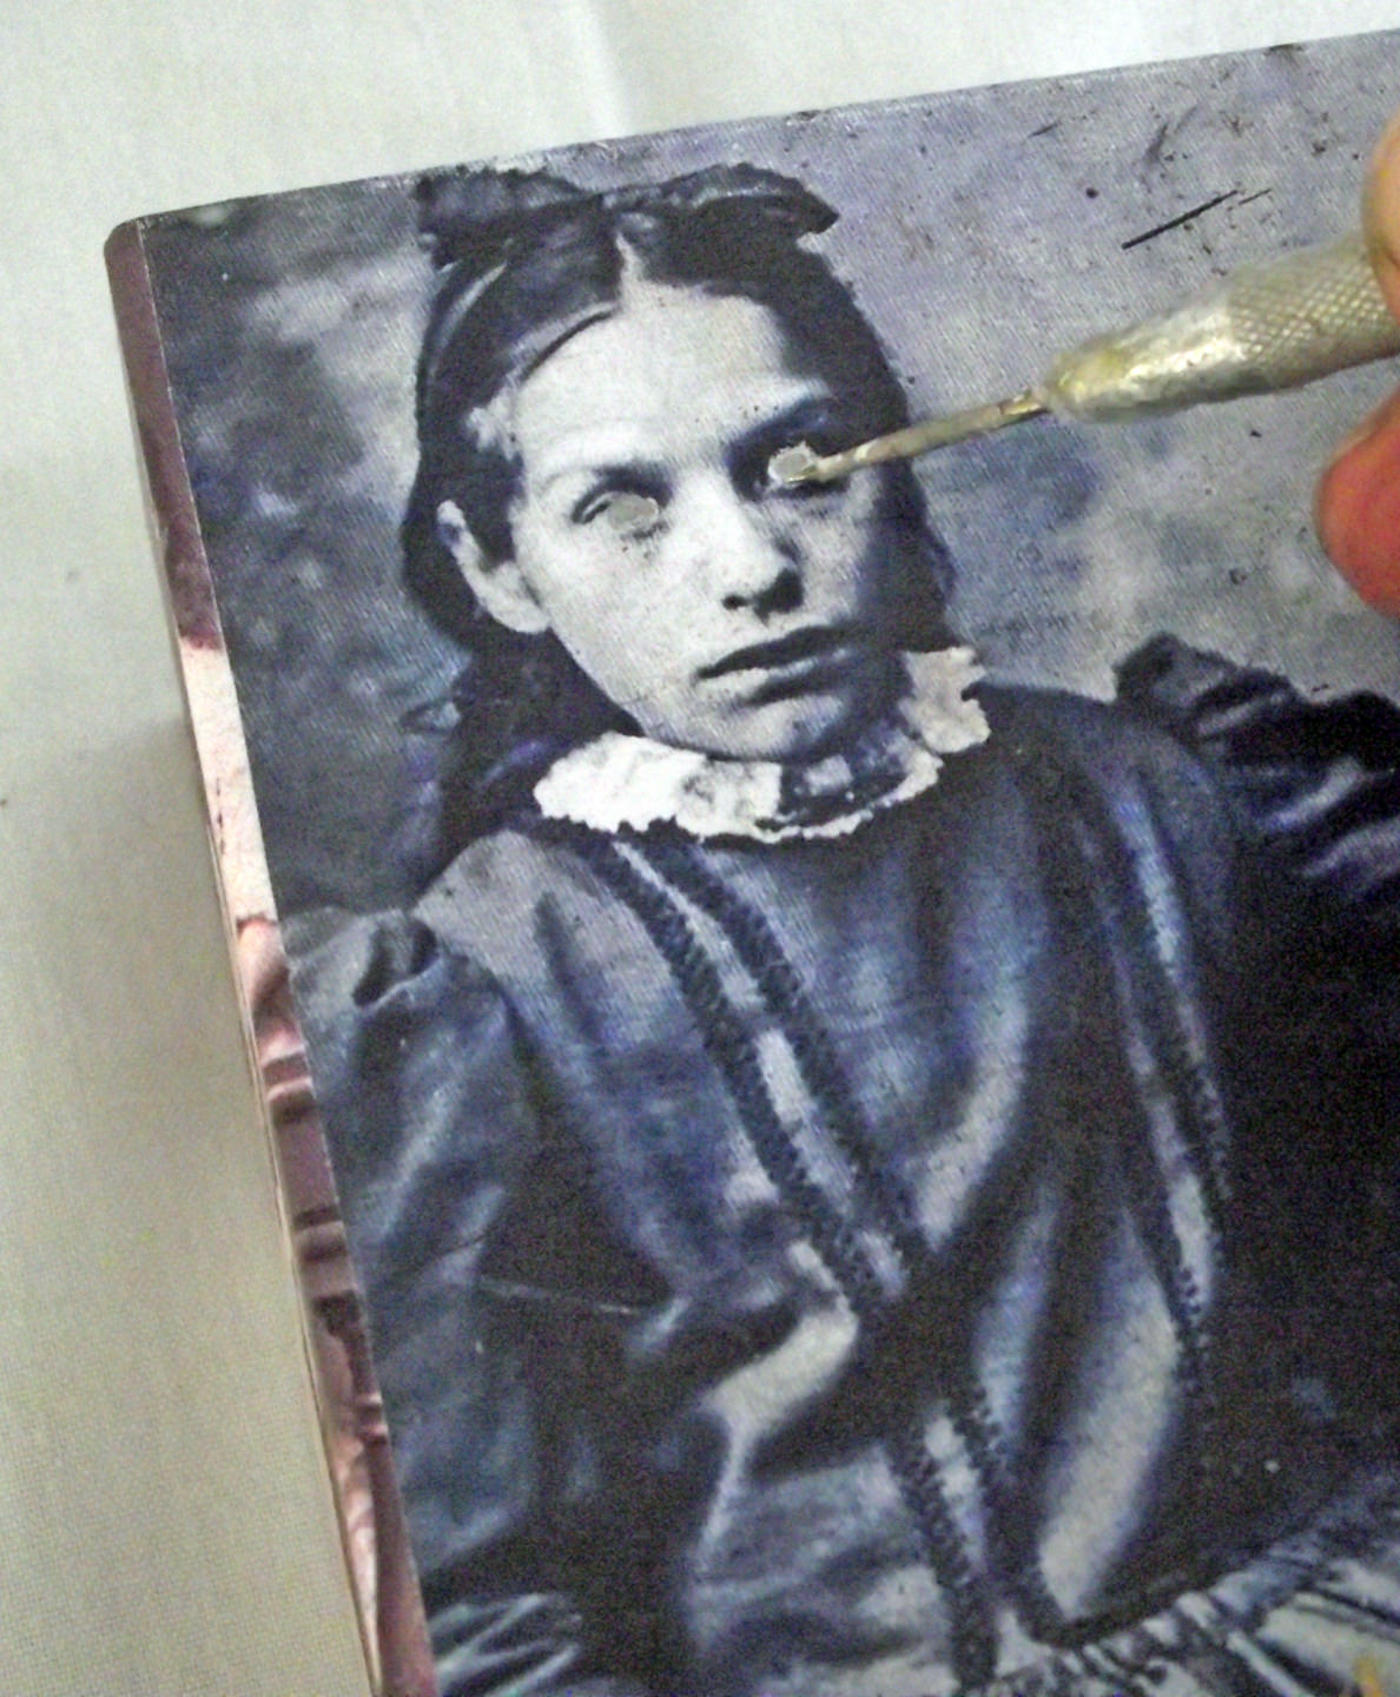
- An awl (I believe that’s the official name – I tend to call it “that pointy thing that I don’t know why I have or where it came from”). A toothpick, craft knife or anything sharp would work
- Black spray paint
- Matte Mod Podge
- Electric tea lights
- Scrap wood
- Paintbrush
- Scissors
I did discover that on a few of them I needed to elevate my tealight just a bit to get the maximum glowing eye effect – a chunk of wood did the trick (painted black of course).
Now I just need a few other things, some mood lighting, food . . . oh! and a costume. Then I’m good to go!
Get the printable how to card for this Halloween craft for adults below:

Spooky Candle Holders
Equipment
- Awl or sharp object
Materials
- 4 Glass jars or vases
- Vintage photos printed on laserjet
- 1 can Spray paint black
- Mod Podge Matte
- Electric tea lights
- Scrap wood
Instructions
- Choose four jars of varying sizes and styles. Wash with mild soap and water or rubbing alcohol and let dry.
- Spray paint each glass jar with a coat of black spray paint and let dry.
- Choose vintage photos to fit the containers and resize to fit. Print and cut with the scissors to fit the vases.
- Before attaching the photos to the vases, use the awl to poke out the eyes.
- Use Mod Podge to attach the pictures to the candle holders. Spread the Podge on the vase, a thin layer on the back of the picture, and then smooth them together. Repeat until all holders are covered and let dry.
- Use the awl to clean up the eye sockets on each image, simultaneously scratching the paint off underneath so the light can shine through.
- Apply a coat of Mod Podge to each container and let dry completely before using.
Notes
-
- If you’re in a hurry, stick with straight sided vases. I like the tapered shapes I used, but trimming things to fit slowed me down a bit.
- Glass vases are easy because of the varied sizes and shapes, but you could use PVC pipe, cardboard tubes – pretty much anything.
- I think electric lights are a must for this. Not because it’s much of a fire or heat danger just because you don’t have to think about them as the evening goes on.
- For maximum glowy eye effect, try to keep all the eyes on roughly the same level for each jar. I got lucky and did it by accident. If you have some pics where the eyes are down low and some where they eyes are up high, they won’t glow evenly.
Have a great Halloween, everyone! Let me know what you think of this idea in the comments. I’d also love for you to visit these other posts:
BOO Letters • Button Art • Cheesecloth Ghost • Coffin Tray • Decorating Wood Cutouts • Decorative Blocks • DIY Wreath • Dollar Tree Wood Pumpkin • Door Hangers • Mason Jar Lanterns • Mummy Luminaries • Paper Cones • Potion Bottles • Spooky Pumpkins • Wall Decor • Window Art • Witch Hat Garland


how does the light go through the black paint?
Hi Christine! David says when he cleans up the eyes with the awl he scratches away the black paint 🙂
Very spooky indeed. Great craft and instructions. Thank you for a great idea.
I LOVE IT.
About halfway through this post I started to chuckle just a little bit and by the end I was full belly laughing at this awesome idea! I was thinking that this would be awesome to do for Thanksgiving with turkeys and pilgrims and elves and Santa with reindeer for Christmas! Add a little spookaliciousness to all the holidays! Sorry I think my mind has gone macabre this year because I have done more Halloween stuff than ever before.
I was originally here to find out who the lucky winner of the rafflecopter prize is. I know ONE DAY it will be me but I would rather have it be sooner than later! LOL
Thanks for listening to me ramble and have a great weekend!
I love the elves and Santa idea! That is awesome Barb 😀
Spooky….I love it!
L-O-V-E these!!! I collect those scary hologram photos. This year I bought the gallery room wrap with creepy photos, so this centerpiece idea will add another layer to my creepy portraits! Thanks so much for the great idea!