
These Easter earrings are the cutest you’ve ever seen! So easy to make with simple supplies and Mod Podge. Learn how to do it here.
Skills Required: Beginner. It helps to have a bit of prior crafting experience, especially for the jewelry part. However, if you have a knack for tools, you might want to just jump in!
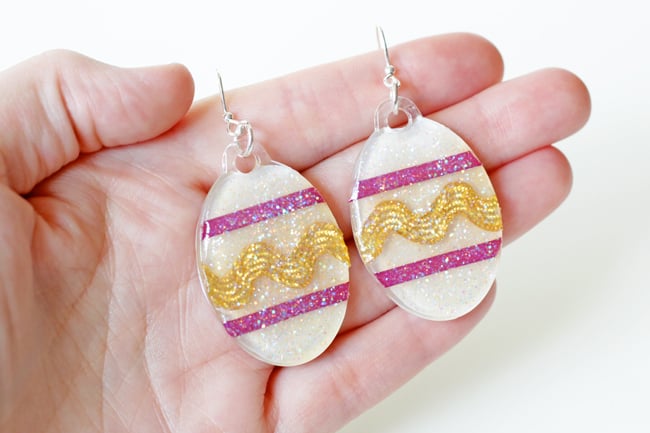
Looking for a fun, easy, and totally adorable way to add some Easter flair to your outfit? These DIY Easter egg earrings are the perfect project!
They’re colorful, festive, and a great way to use up scrap ribbon – because let’s be honest, we all have that stash of leftover craft supplies waiting for a purpose.
What makes these earrings so great? First, they’re completely customizable. Whether you love soft pastels or bold, bright hues, you can match your Easter vibe perfectly. Second, they look way more impressive than they are difficult to make.
With a few supplies, Mod Podge, and some fun trims, you’ll have a set of handmade earrings that look like they came straight from a boutique.
These would make fantastic gifts for Easter lovers, crafty friends, or anyone who appreciates unique accessories. They’re lightweight, which means they’re comfortable to wear, and they add just the right touch of springtime whimsy to any outfit.
Imagine pairing them with a cute floral dress for Easter brunch or gifting a pair to your bestie inside an Easter basket.
Whether you’re crafting for yourself, making gifts, or just looking for a quick creative escape, these DIY Easter egg earrings are the perfect way to celebrate the season. Let’s get making!

Easter Egg Earrings
Equipment
- Jewelry pliers
Materials
- 2 Acrylic shapes oval – you can use wood also
- 2 Earwires
- 2 Jump rings 7-mm
- Ric-Rac
- Ribbon thin
- Mod Podge Matte
- Dimensional Magic glitter
- Acrylic paint optional, if you used wood
- White paper optional, if you used clear acrylic
Instructions
- If you decide to use wood shapes, paint them with acrylic paint in the color of your choice and let dry.
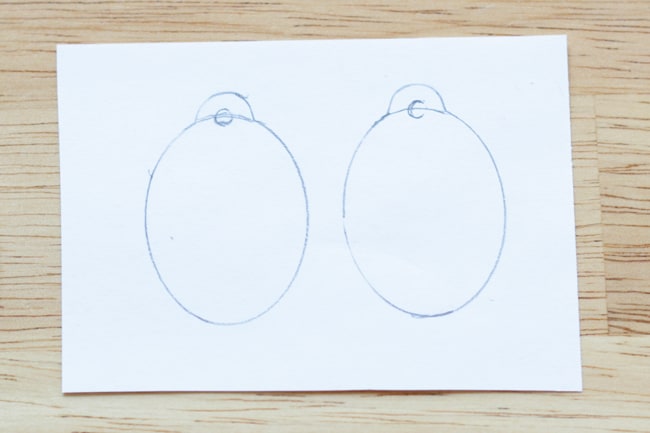
- For the acrylic shapes, begin by tracing them on some white paper with a pencil. Cut them out, removing all pencil lines and cutting a little dip in the top of each paper oval to accommodate the hole at the top of the shape.
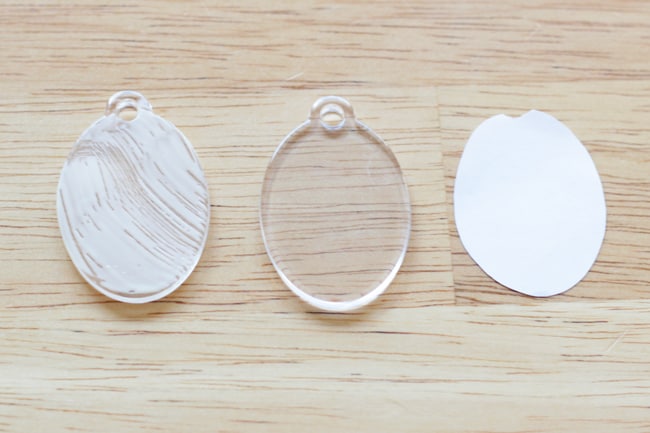
- Paint a layer of Mod Podge onto each acrylic shape, and place the paper cutouts on each. Paint another layer of Mod Podge over the top. Let dry completely.
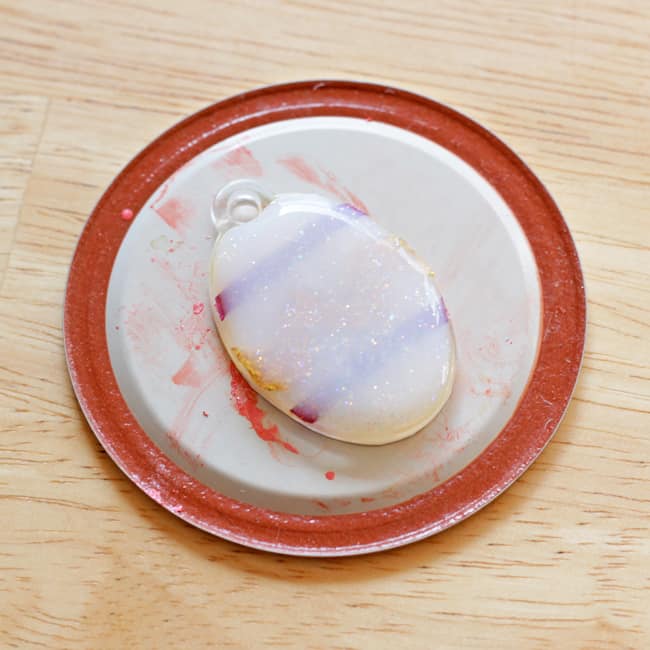
- Once dry, flip the shapes over. Cut one piece of ric-rac to fit across the middle of each shape. Cut two pieces of thin ribbon (I used purple) to fit across the shape above and below the ric-rac.
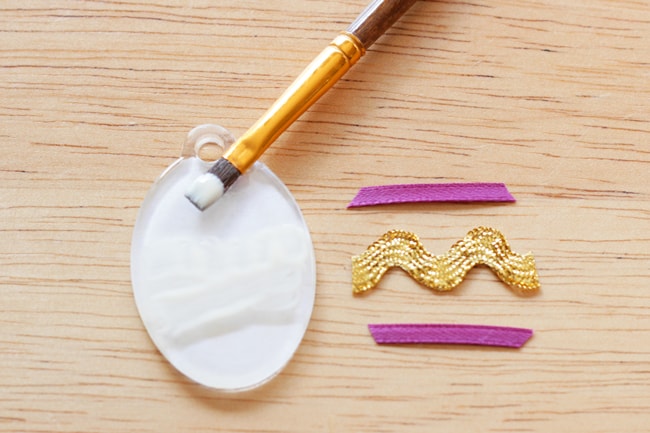
- Next, paint a layer of Mod Podge onto the blank or painted side of the shape. Place your ric-rac and thin ribbon down and cover all of it with another layer of Mod Podge. Again, let dry completely.

- To avoid bubbles on your finished project, prime your Dimensional Magic bottle by squeezing some out onto a test surface. Then, fill in each earring with a layer of Dimensional Magic. Let dry for 24 hours.
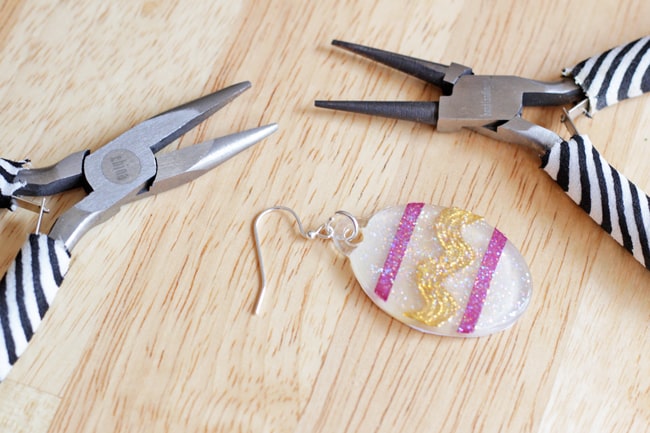
- When they’re dry, attach an earwire to each egg with a 7-mm jump ring to complete the earrings.
Notes
Did you enjoy this Easter craft? Let me know in the comments! Don’t forget to check out these other jewelry ideas as well:
Bangle Bracelets • Clay Earrings • Clay Jewelry • Decoupage Earrings • Drop Earrings • Fabric Scrap Necklace • Hot Glue Rings • Glass Cabochons • Lace Earrings • Leaf Pendant • Paper Beads • Paper Earrings • Photo Pendant • Resin Jewelry • Shrinky Dink Jewelry • Washer Necklaces • Wood Pendant


Darn cute idea..I made an Easter Egg pin for my jacket..same idea only I used a Sticker, I turned out sooo cute. I am so proud of myself.
Totally making these before Sunday!!!