
Create a beautiful DIY fall sign in just three simple steps! This quick and affordable craft adds seasonal charm to your home decor.
Skills Required: Intermediate Beginner. This autumn sign project will test your knowledge of Mod Podging pieces of paper without wrinkles. I give you tips below, but it helps if you have prior experience with Mod Podge since this is a large piece of wood.
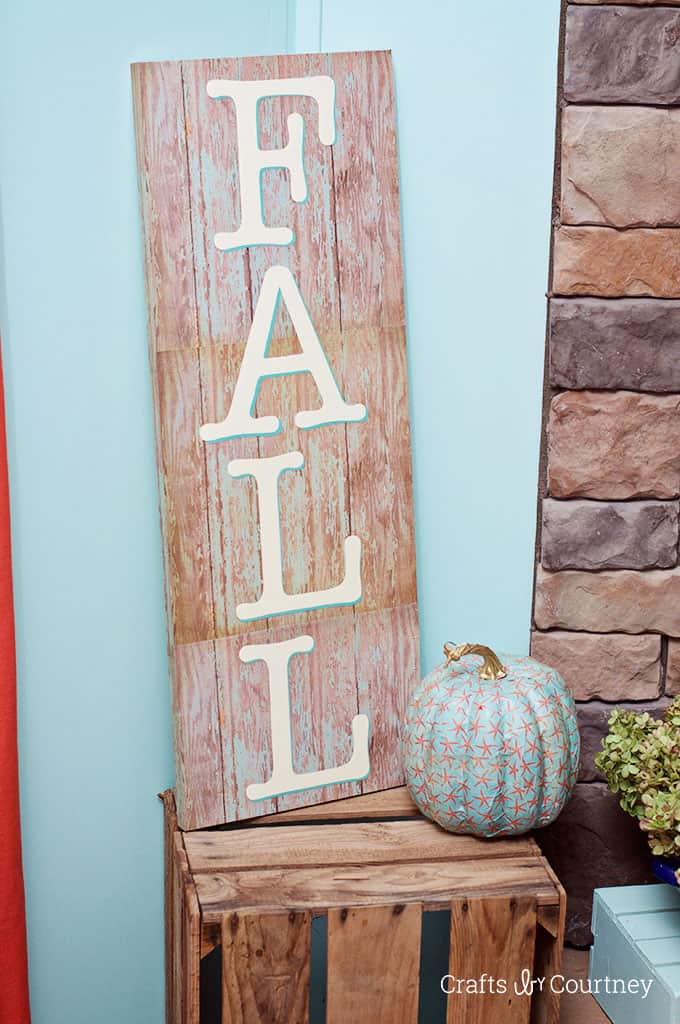
Since autumn is here, I really wanted to make a new DIY fall sign for the house. I made a Harvest sign last year using vinyl, so this year I thought I’d give Mod Podge a try and see what I could come up with.
I was debating on a Halloween sign or general fall, and autumn finally won out. I knew I would be able to keep it up a lot longer if I did!
What I was really excited about was using some wood patterned scrapbook paper that I’ve had in my stash for a while now. I’m sure you know the feeling of pulling something out of your stash and finally using it. What can I say – it’s a rush.
My main recommendation for you is that you stick with a surface 12″ wide or smaller – OR the width of your scrapbook paper if it’s less than 12″.
That way you don’t have to patchwork everything together. It will make your life easier.
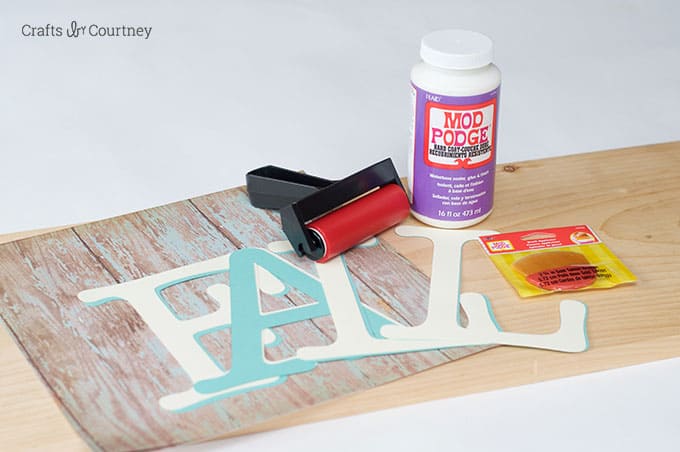
Gather These Supplies
- Mod Podge Hard Coat
- Wood – about 12″ x 32″ in size
- Mod Podge Brayer
- Mod Podge Brush Applicator
- Scrapbook paper for background
- Paper letters (cut with a die cutter or scissors, or letters of your choice)
- Craft knife and mat
Note that I found this scrapbook paper at Hobby Lobby. You can also find woodgrain scrapbook papers online.
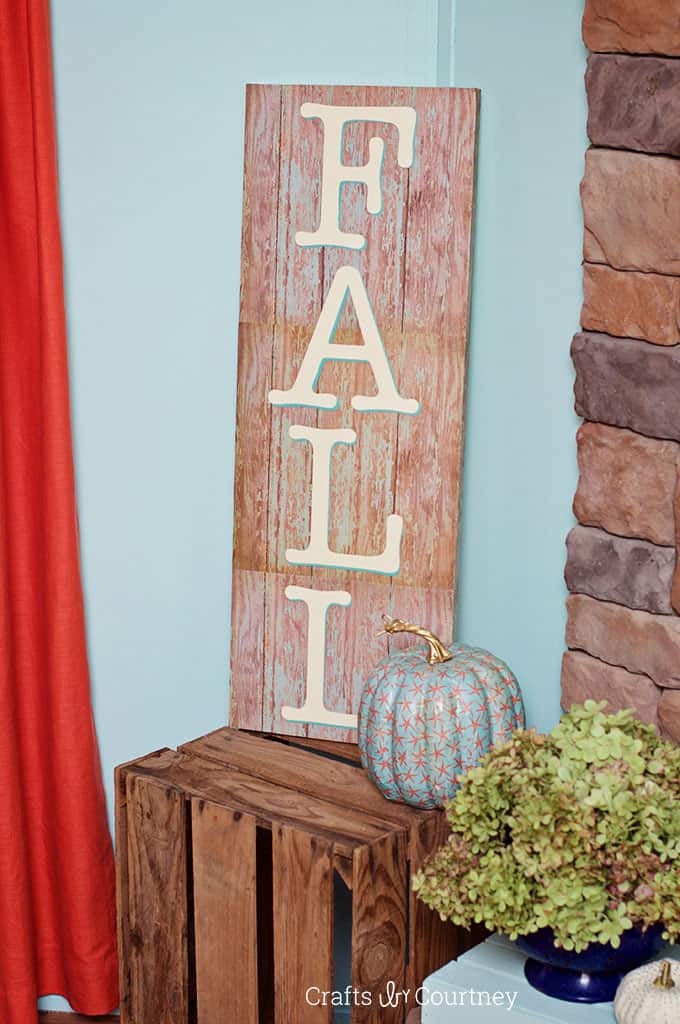
Fall is such a fun time to decorate, it’s just makes me feel so happy. I’m super excited how it turned out, and I love the colors here. I feel it fits my style perfectly. I need to make a sign like this for Thanksgiving – and Christmas – and every other holiday!
Get the printable how to below:

DIY Fall Porch Sign
Equipment
- Brush applicator
Materials
- Mod Podge Hard Coat
- 1 piece wood about 12" x 36" in size
- Paper letters
Instructions
- Measure, mark, and cut the scrapbook paper to fit the wood (including the sides).
- Add Mod Podge to the sides of the wood. Place the strips down and roll with the brayer. Add more Mod Podge as needed. If any scrapbook paper comes up, add a little bit more Mod Podge and then smooth down again.
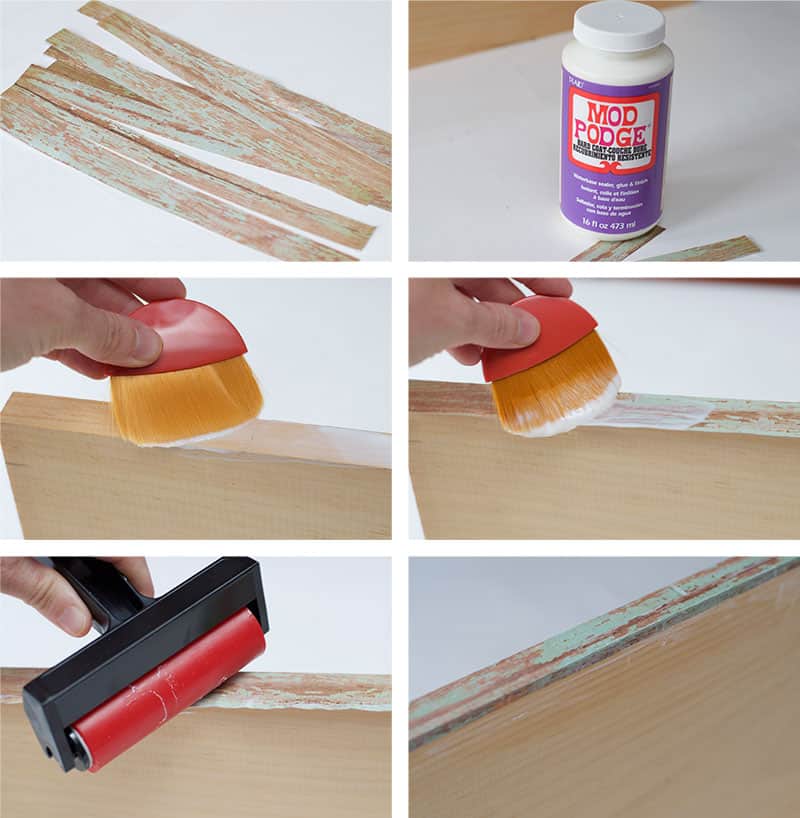
- Add paper to the front of the wood. I started at the top, by adding a layer of Mod Podge to the wood then laying the scrapbook paper on top. Use the brayer to smooth out any bubbles. Repeat until the top is covered. Let dry for 15-20 minutes.
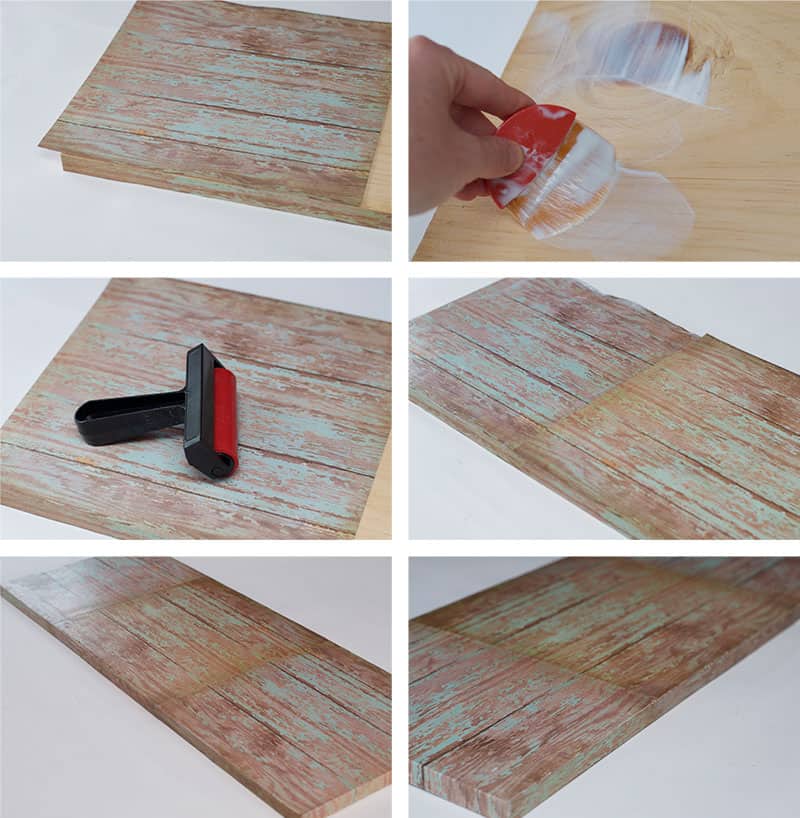
- Apply a top coat of Mod Podge and let dry for 15-20 minutes. Trim the excess paper off around the edges with a craft knife.
- Use a cutting machine to cut out the letters, or use pre-cut letters from the craft store. For a drop shadow effect like mine, cut out two sets of letters in the same size but different colors.
- Decide on letter placement and apply Mod Podge to the back of the paper; smooth down. If you are using two sets of letters for shadow, let first set dry before applying second. Let letters dry completely.
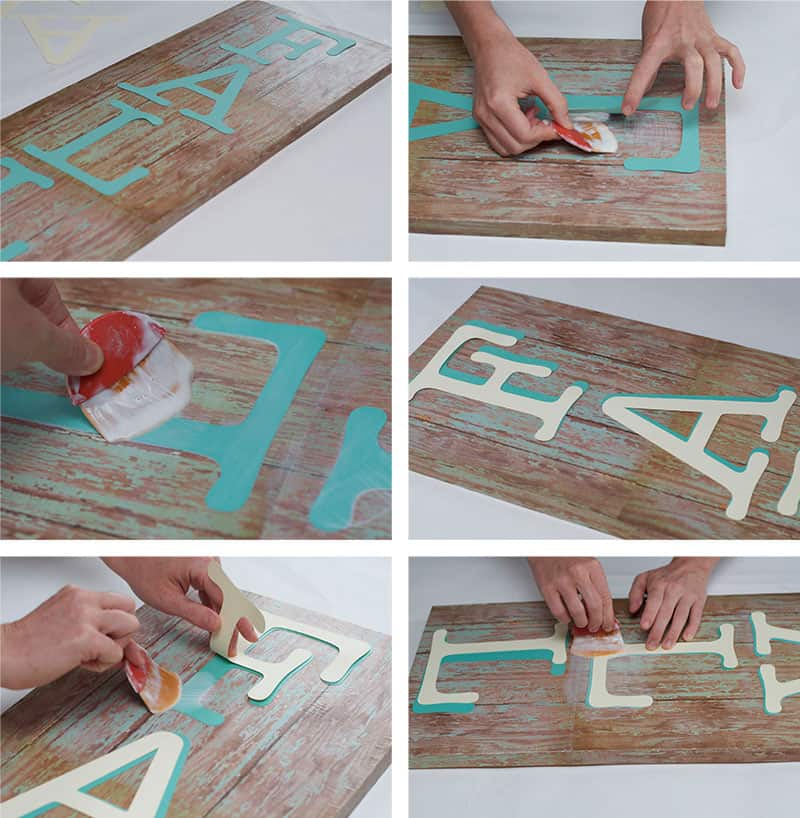
- Add two coats more Mod Podge over the sign. Let dry for an hour before displaying.
If you guys want to get even more crafting inspiration, be sure and visit my blog. I’d also love for you to check out the following ideas:
Fall Crafts for Adults • DIY Fall Napkin Rings • DIY Leaf Bowl • DIY Nautical Pumpkin • DIY Pumpkin Seed Art • Wood Block Pumpkins • Fall Leaves Frame • Give Thanks Sign • Glitter Acorn Decor • How to Paint Acorns • How to Preserve Leaves • Mod Podge Map Pumpkins • Paper Mache Pumpkins • Wood Pumpkin Decor


Super cute idea 🙂
This sign is super cute! You did a great job!
Paige
https://www.thehappyflammily.com/