
Use fabric and Mod Podge to turn inexpensive IKEA trivets into DIY cork boards! This is an easy, fast way to display notes, pictures, and ideas on your wall.
Skills Required: Beginner. You’ll be using Mod Podge to attach fabric to cork, then hanging these with adhesive strips (or anything you think).
Have you ever stared at your walls, thinking they could use a bit of pizzazz – something more than just another picture frame or a poster? Well, brace yourself for a crafty revolution because we’re turning some cork rounds into the coolest kid on the block.
Say goodbye to the days of cork boards that take a long time to make, and hello to a DIY project that’s not just easy but quick. I’m going to show you how to make your own DIY cork boards using nothing more than IKEA trivets, a sprinkle of creativity, and a dose of Mod Podge.
This isn’t just any craft project; it’s your ticket to adding a dash of personal flair to any room without breaking the bank or, more importantly, the walls.
Whether it’s for pinning up photos in your dorm, organizing bills in your office, or displaying recipes in your kitchen, these aren’t just any cork boards – they’re customized with fabric, tailored by you, for you.
And the best part? You’re making them from cork IKEA trivets. Yes, those things you thought were just for protecting your table from hot dishes are about to become the base of your next favorite craft project.
This project doesn’t require the skills of a seasoned artist. It’s all about having fun, getting (very slightly) messy, and creating something that’s uniquely yours.
Paint those trivets, slap on some fabric, cut, glue, and voilà – you’ve got yourself a cork board that’s not just functional but also a reflection of your fabulous self.
Because let’s be honest, in a world of endless Zoom calls and emails, we could all use a little more color and joy in our lives. Let’s get crafting! Here’s what you’re going to need to decorate a cork board.
PS: This would also be an easy back-to-school craft to update your child’s homework area, too. Teens can make these themselves.
Gather These Supplies
- Round cork trivets – “Heat” at IKEA
- White craft paint
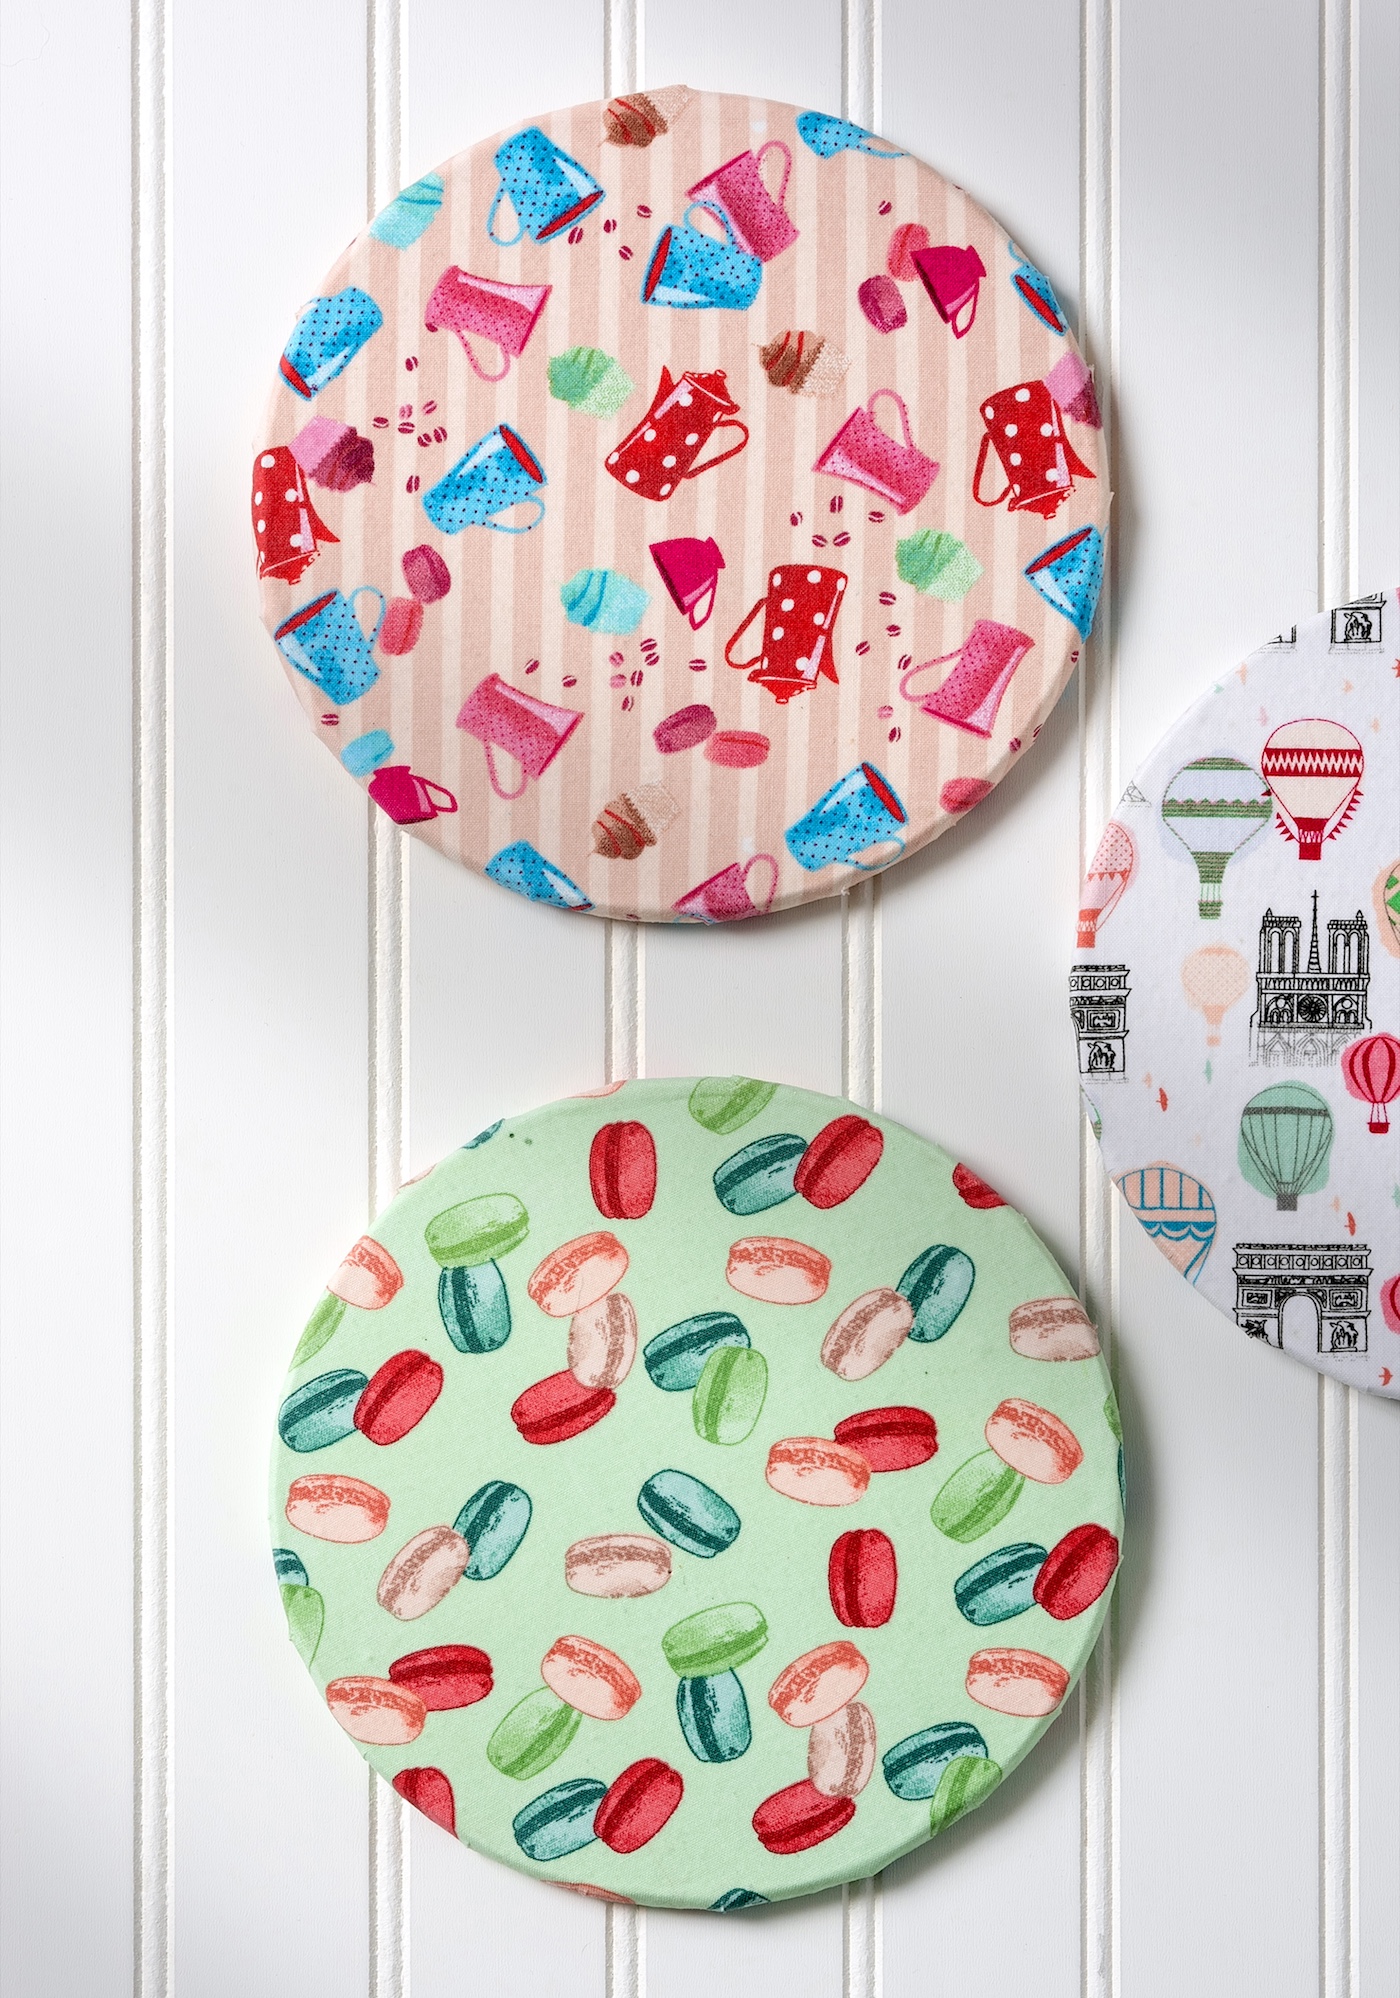
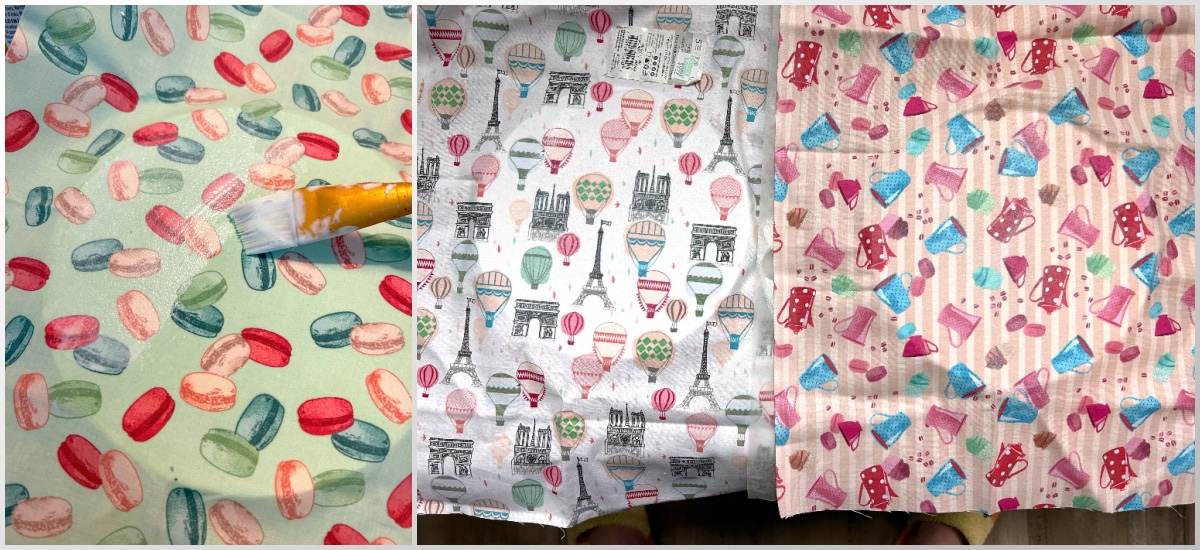
- Fabric (I used 3 different coordinating)
- Mod Podge Satin
- Balsa wood or wood popsicle sticks
- Strong adhesive glue (E-6000 or super glue)
- Picture hanging strips
- Paintbrushes
- Scissors
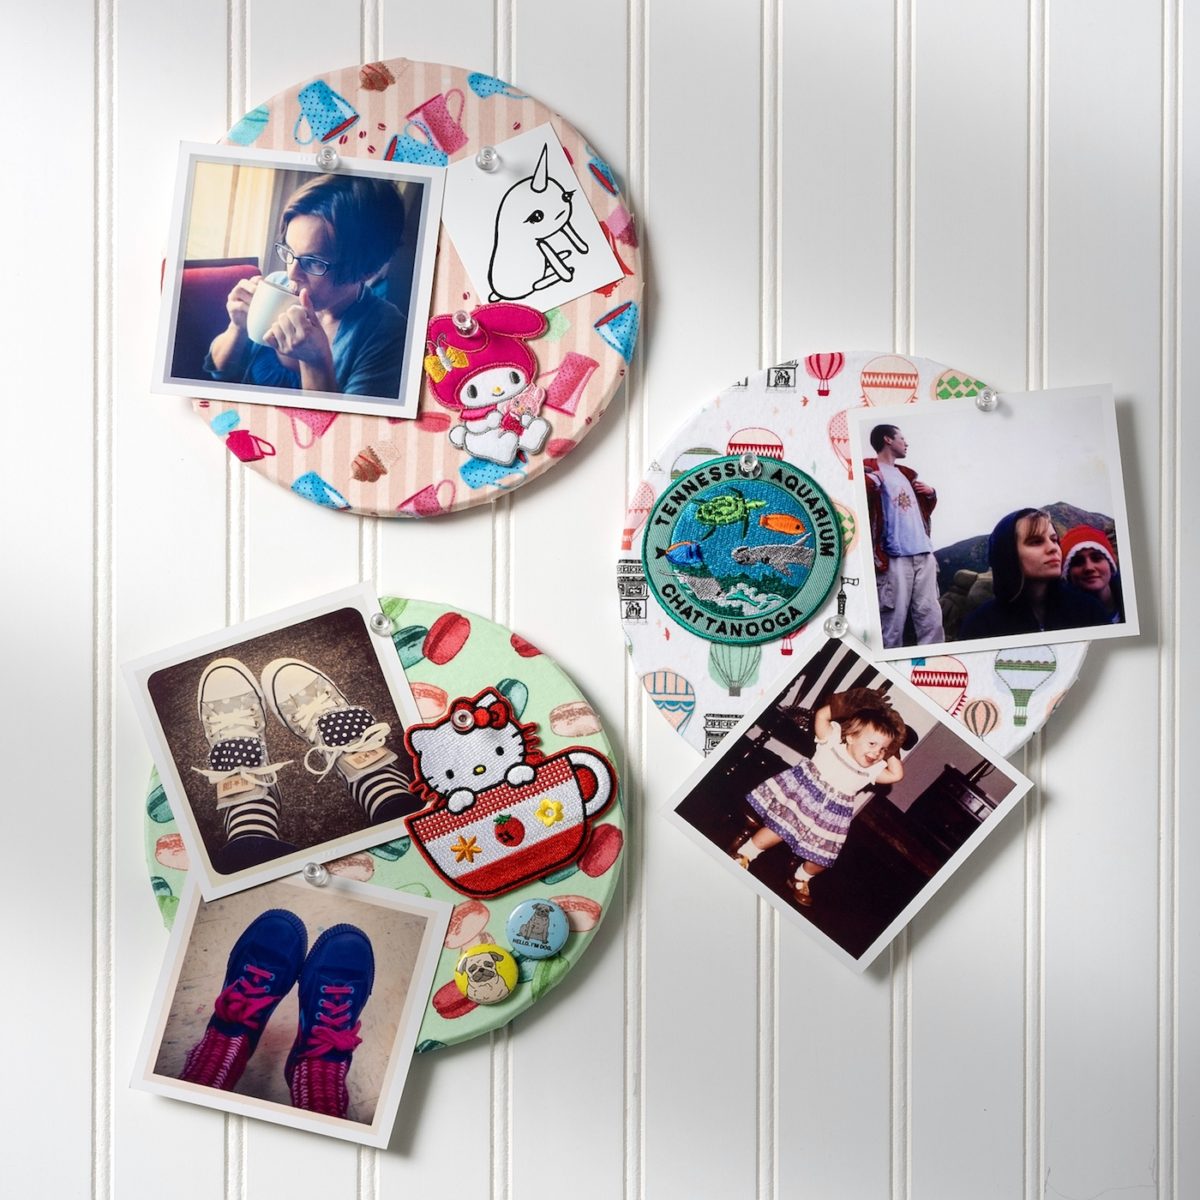
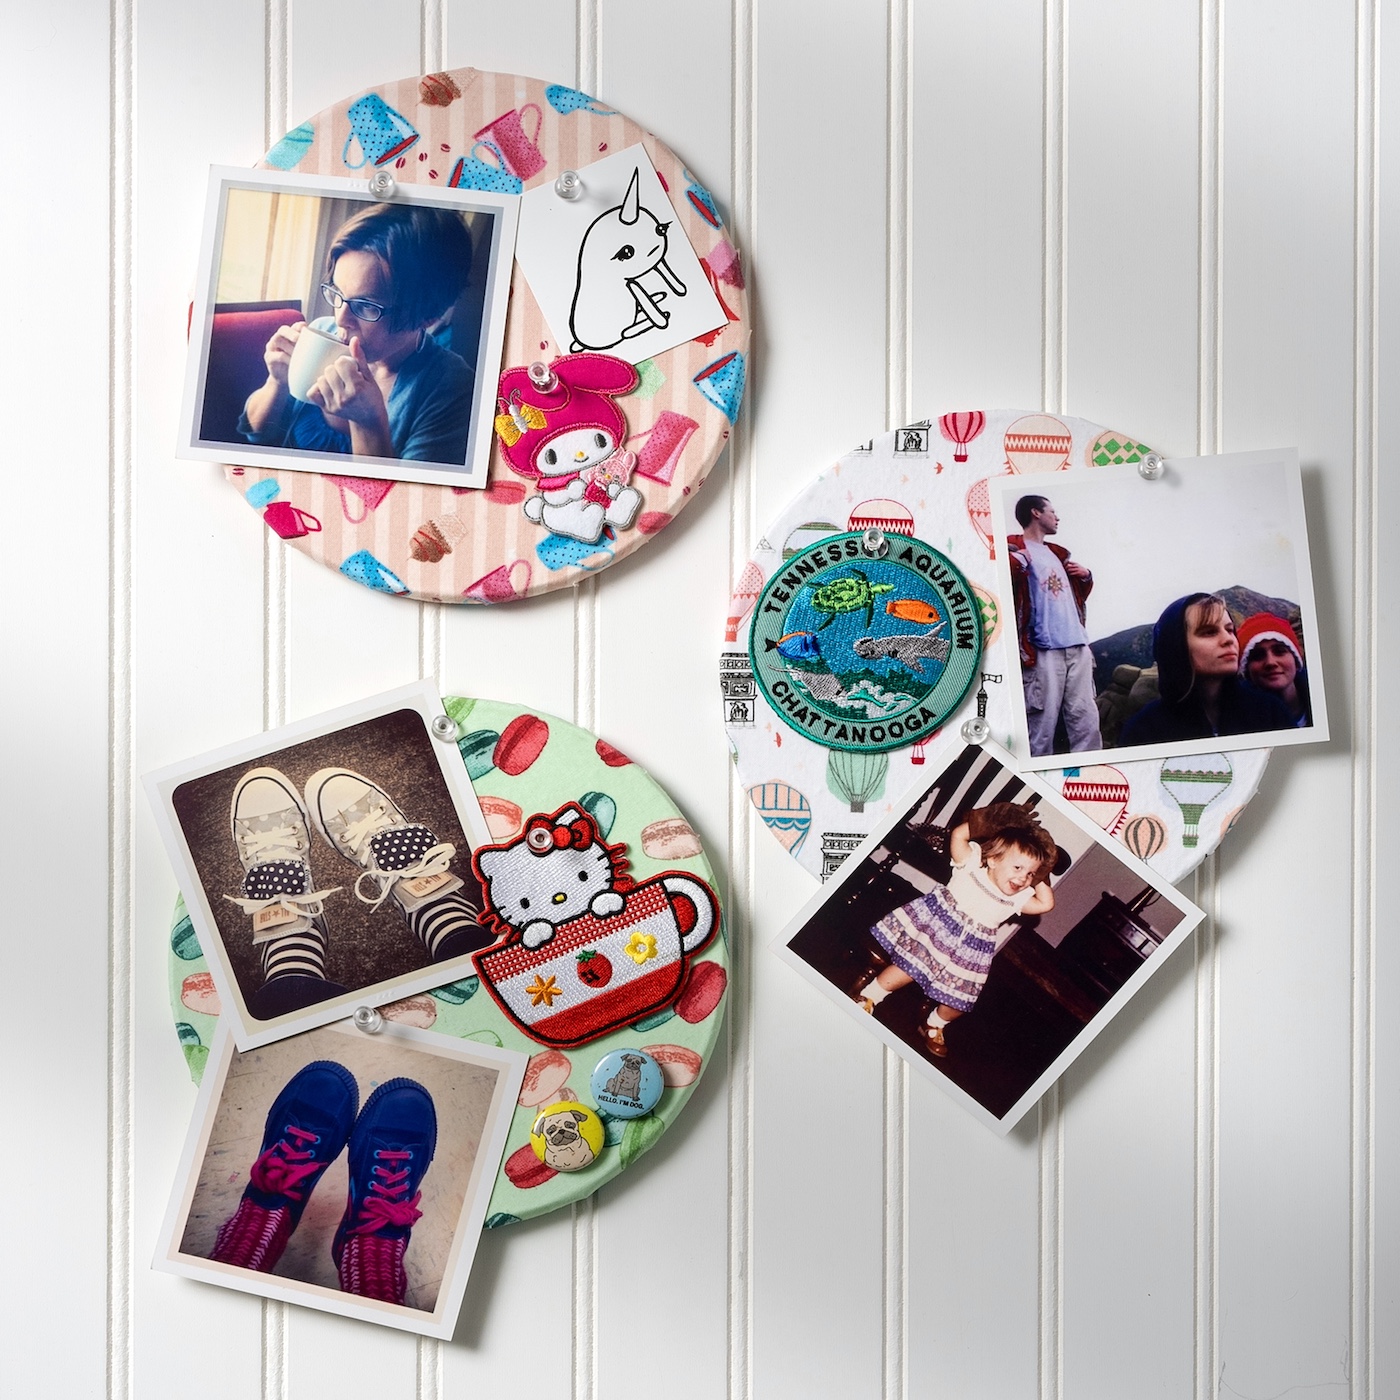
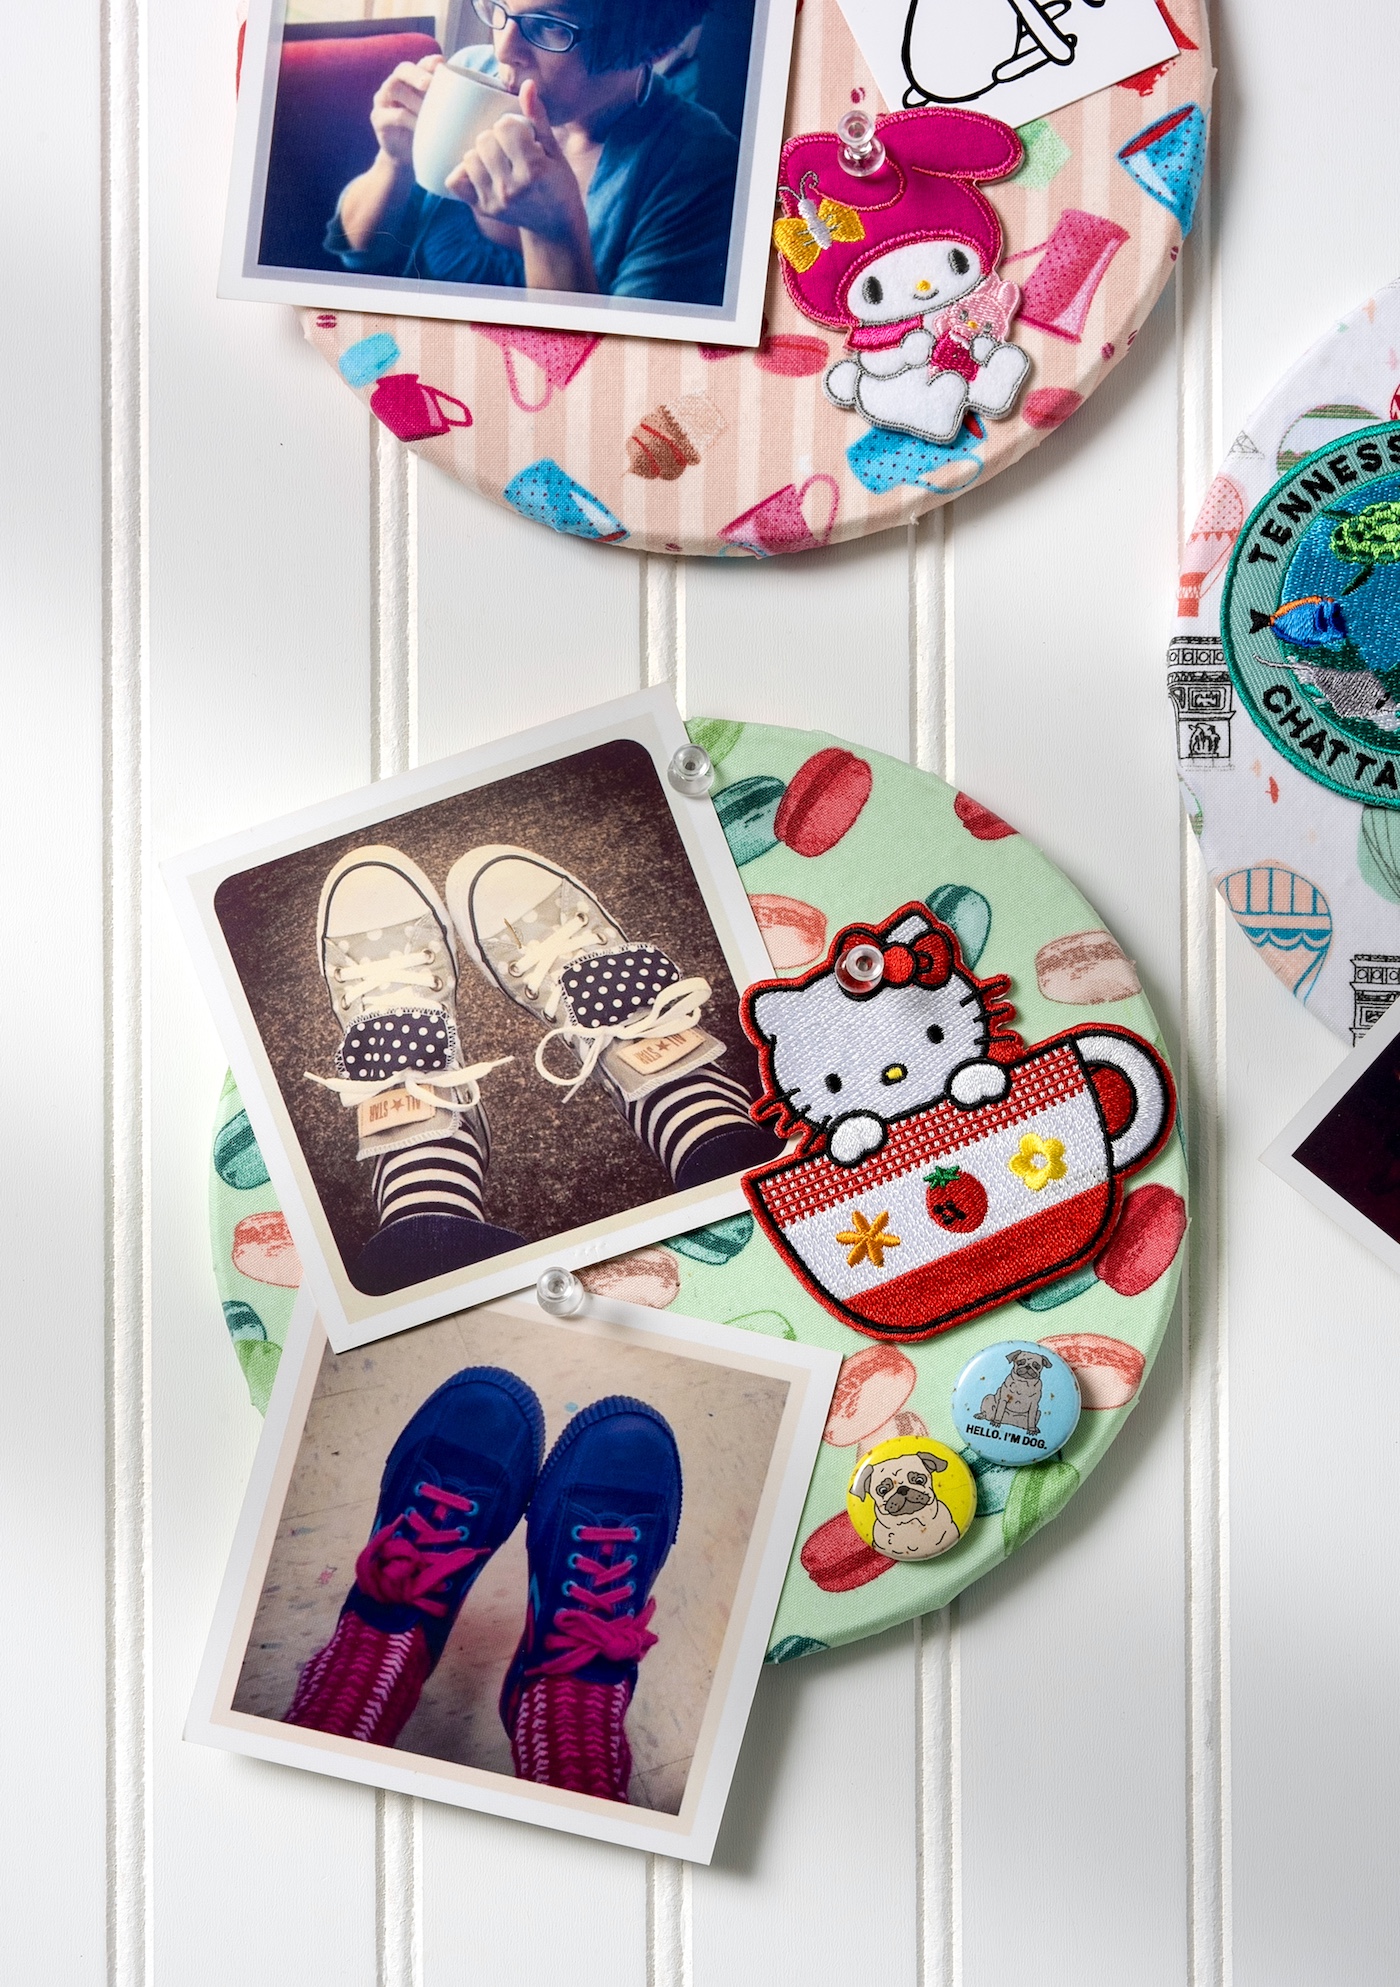
I decided to hang the cork boards in a cluster on one smaller wall. I love how this gives an often unused area of the room a purpose.
I’m so glad I saw these cork trivets . . . decorating them was a simple way to update my home office. Who doesn’t love organization that is both functional and cute?

DIY Cork Boards
Equipment
Materials
- 3 Round cork trivets "Heat" at IKEA
- Craft paint white
- Fabric I used 3 different coordinating
- Mod Podge Satin
- Balsa wood or wood popsicle sticks
- E-6000 Or other strong adhesive or super glue
- Command strips
Instructions
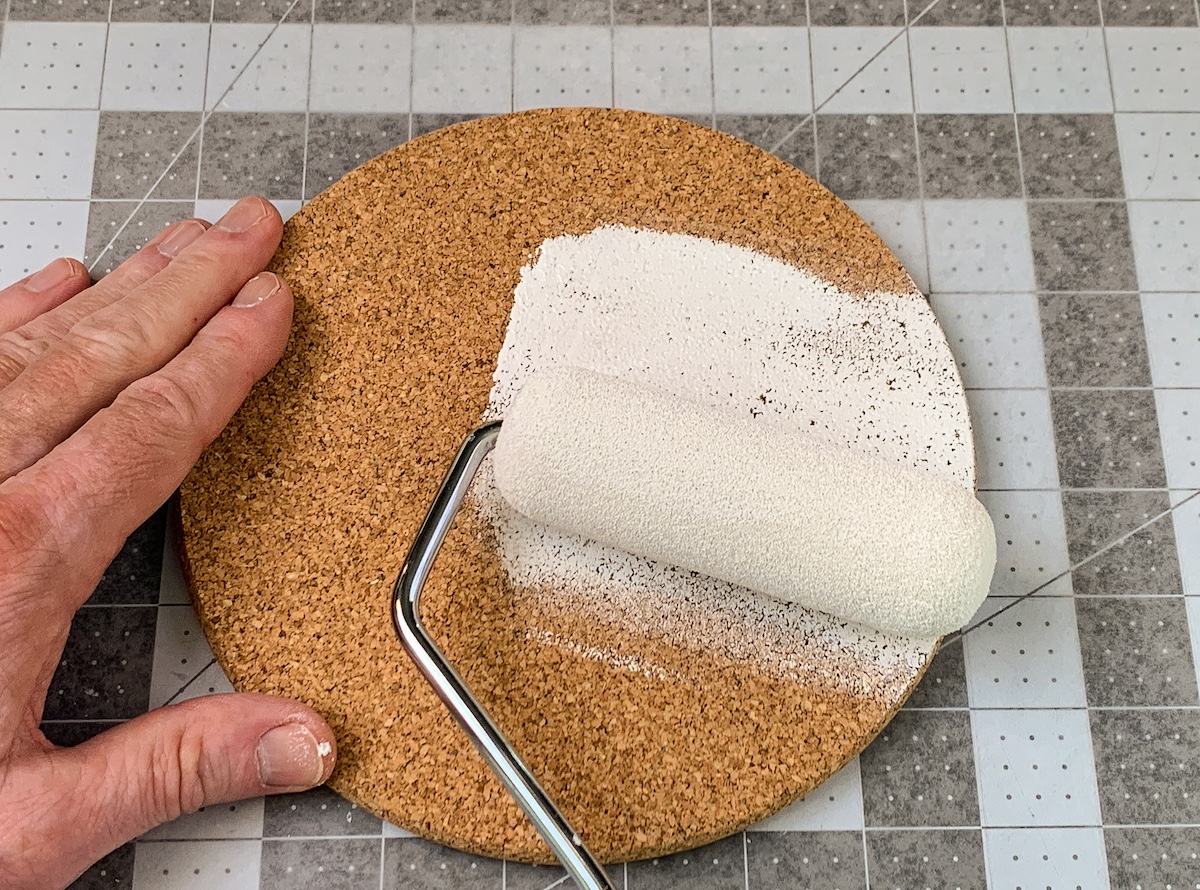
- Paint one side and the edges of each trivet with white paint. Allow that to dry and apply a second coat if needed for complete coverage.
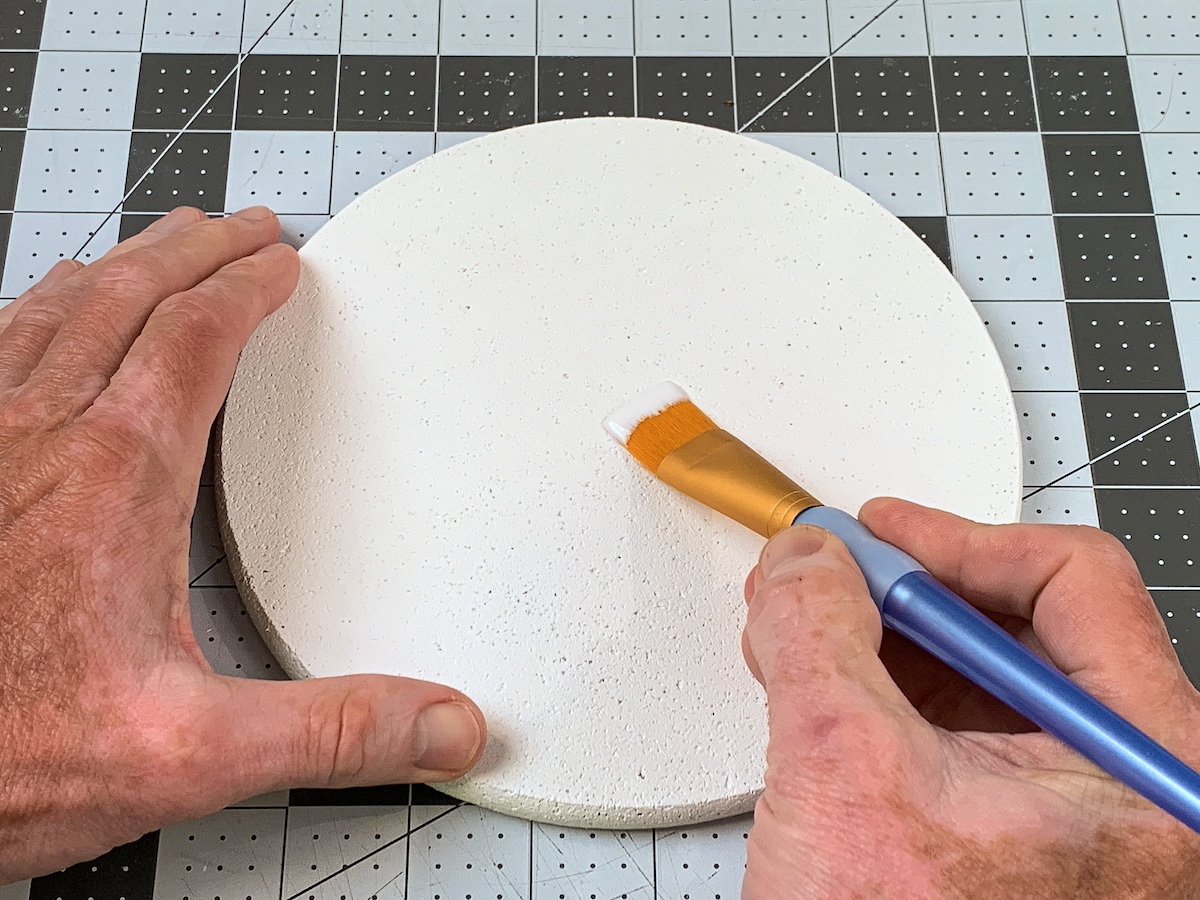
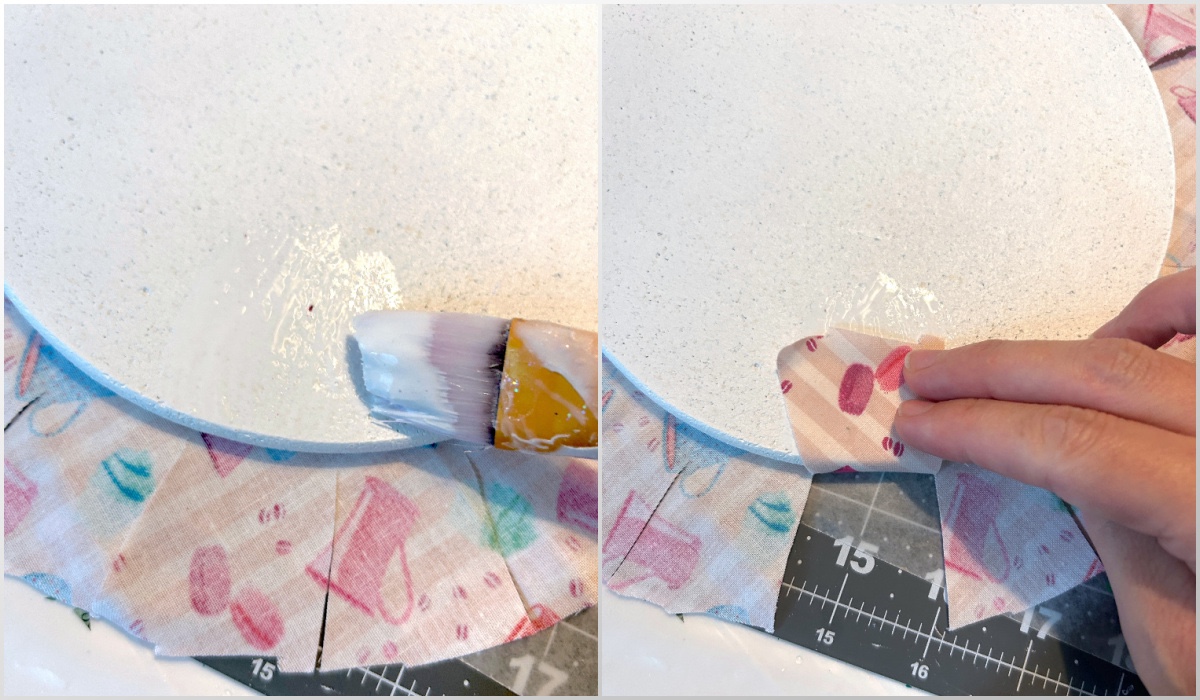
- Working with one cork circle at a time, apply a medium (not thick) layer of Mod Podge over the top of the cork circle, making sure to get the edges.
- Smooth the fabric over the Mod Podge, making sure to get all the way to the edges. If some comes through the fabric it's okay. Just wipe away any excess. Repeat with the remaining cork circles and let dry.

- Apply Mod Podge to the top of the fabric. One coat is fine. let dry.
- Cut around the edges of the circle with scissors, leaving about an inch or two of fabric all the way around. Then you're going to cut the excess fabric into tabs as you see in the photo, so that you can bend the fabric around the back to attach.
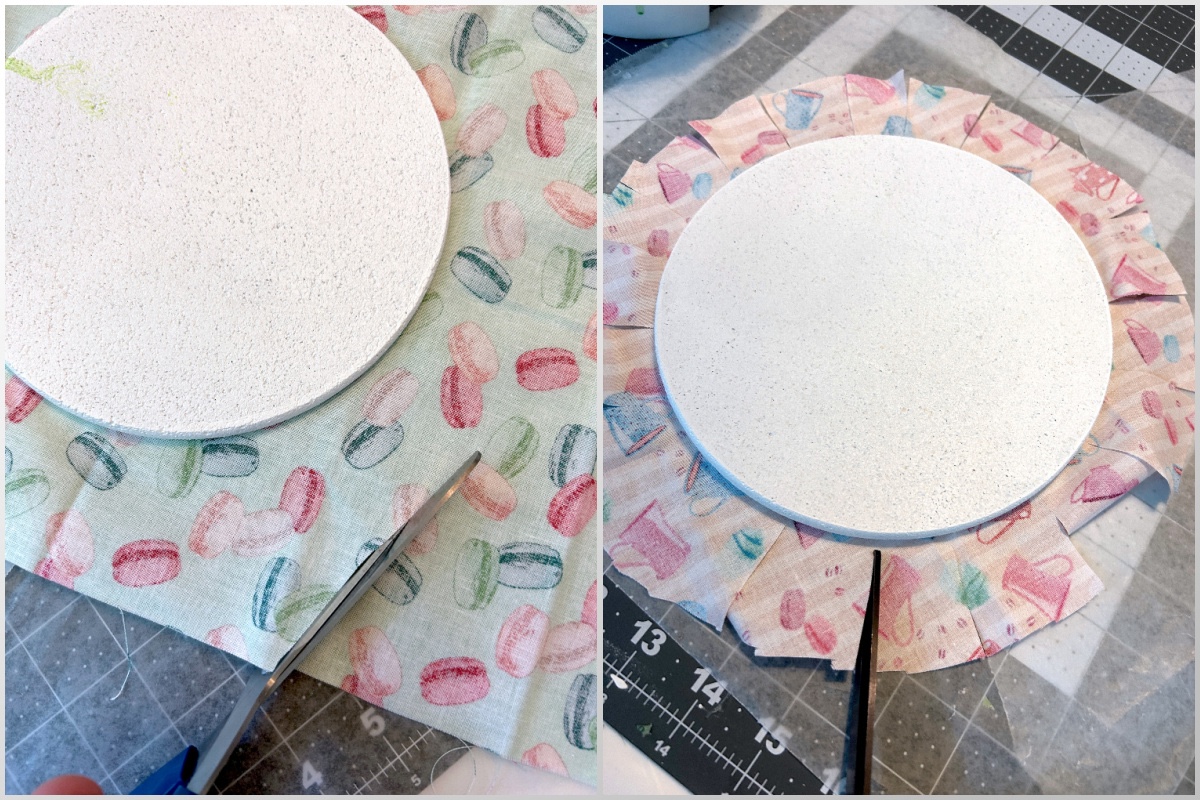
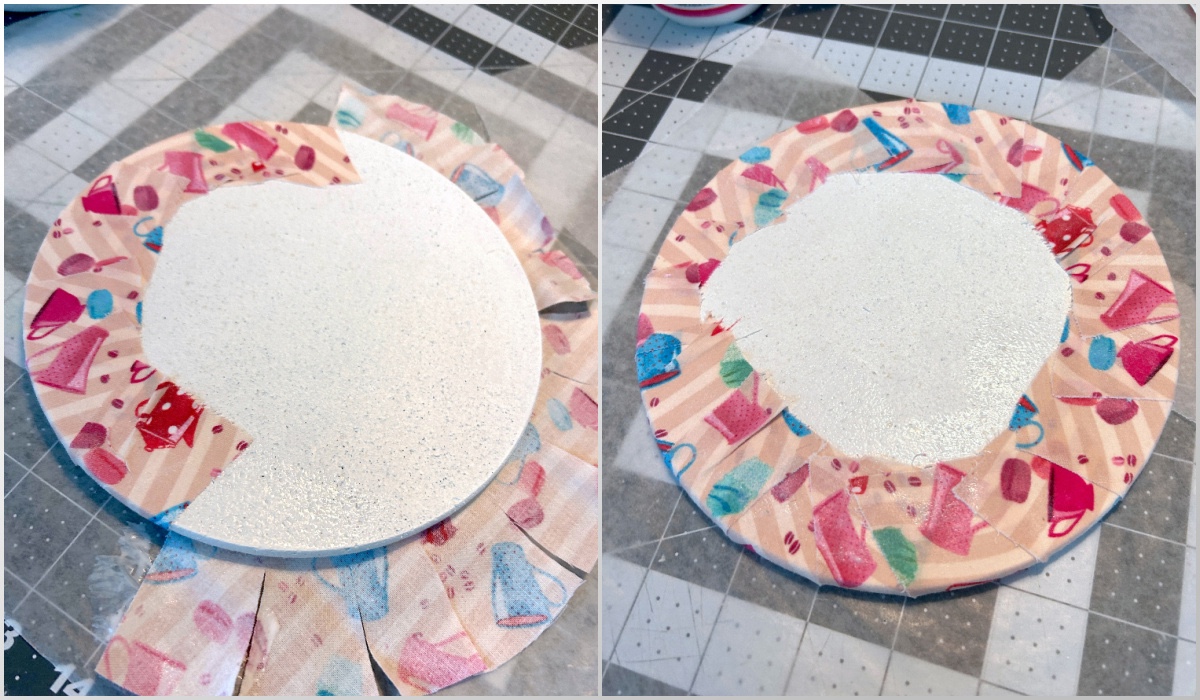
- Apply Mod Podge to the edge of the back of the cork round and fold a tab over, smoothing down with the brush (and your finger if necessary).
- Continue this step all the way around the cork circle, applying Mod Podge and attaching the tabs to the back. Repeat with all cork circles and let dry.
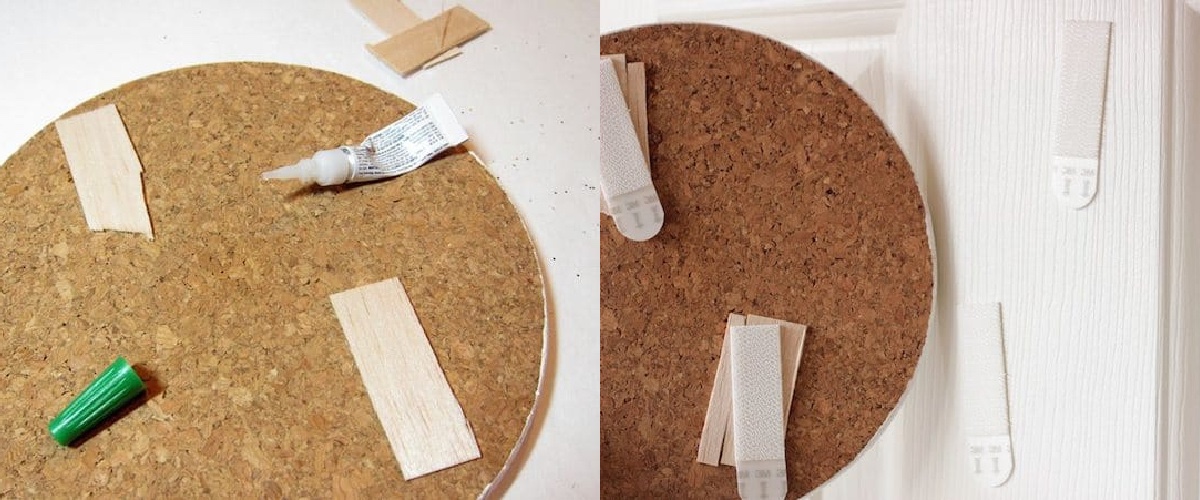
- Glue down the wood using a strong, fast adhesive (i.e. super glue) where I planned to attach the strips. Allow the glue to dry. Attach your picture hanging strips to the wall and the wood pieces on the back of each memo board, following the directions on the package.
Notes
What did you think of this idea? Let me know in the comments! Do you want to see some other IKEA item makeovers? You’re going to love these ideas:


I love the glitter and I love that we have the same things on our “to-do” list! 🙂 Is mod podge the best way to seal off glitter? I remember they said some awesome way of doing it on Craft Wars and I think this may have been it but I can’t remember!
I would love it if you linked this up at my link party! You can find it here:
http://thewellcraftedhome.blogspot.com/2012/08/well-crafted-wednesdays-18-link-party.html
Love how these turned out! I just picked up a couple of cork rectangles at a yard sale. I’ll have to try this! Thanks so much!
This is so awesome – I totally love it!
So glittery and pretty. Is there anything Mod Podge CAN’T do, haha! I’d never have thought to use it this way, looks great.
I love practical projects that are also fun. This is definitely both!
I made one too, using the same cork trivets! 🙂
Yours is more glittery, I like it
Have a look:
https://crearescout.wordpress.com/2012/05/28/stanciled-cork-bulletin-board/
Cecilia
love it! I can already imagine half a wall covered in these! and all the color options! thanks a bunch for the idea!
Absolutely love this! have to try it for my teenage daughter..she would love the glitter! Thank you for sharing!! 🙂 Bonnie