
Try this easy no-carve mini pumpkin decorating with Mod Podge – perfect for kids, toddlers, and stress-free Halloween crafting.
If there’s one thing I’ve learned about fall crafting, it’s that bigger isn’t always better – especially when it comes to pumpkins.
Tiny pumpkins are adorable, affordable, and frankly, just easier to handle when you’re crafting with kids (or if, like me, your coordination sometimes rivals that of a newborn giraffe).
If you’ve ever tried carving a pumpkin with a toddler, you already know it’s less festive and more like a pumpkin-scented wrestling match. Good news: this project requires zero carving and exactly zero band-aids.
These no-carve mini pumpkins are perfect for a laid-back craft afternoon with the kiddos or even a fun activity at a Halloween party.
The best part? You’ll be using Mod Podge, colorful confetti, and your creativity – no sharp knives involved! It’s easy enough for toddlers but still entertaining for big kids and adults (we see you, adults, who secretly love crafting with googly eyes and glitter).
Let’s skip the pumpkin guts this year and opt for something a little less messy but just as festive.
Ready to decorate some mini masterpieces? Grab your Mod Podge and let’s do it!
Here’s what you’re going to need to get started!
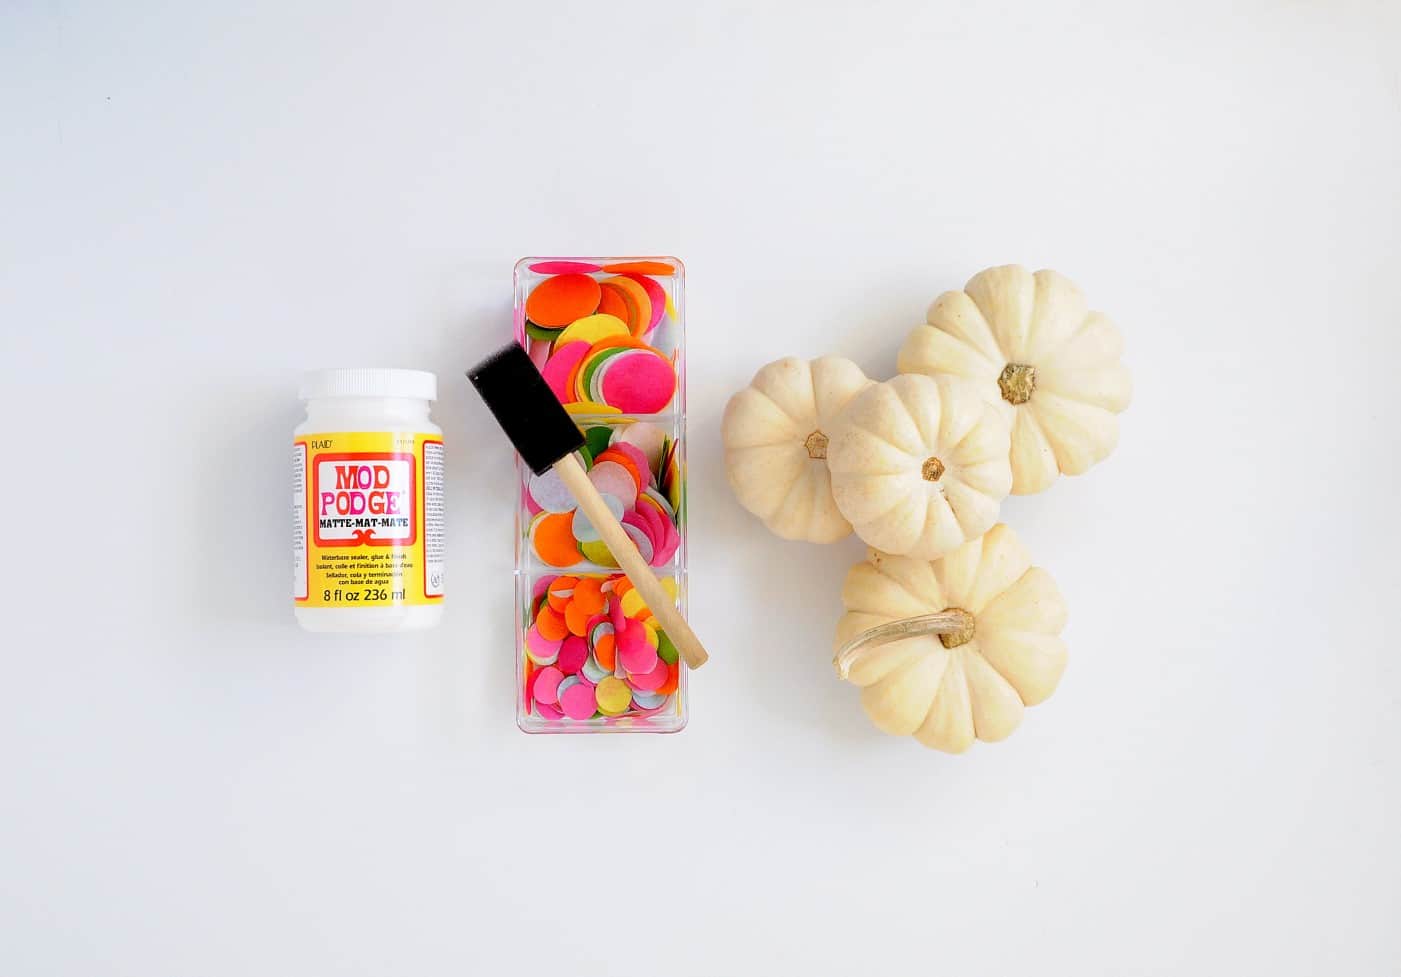
Gather These Supplies
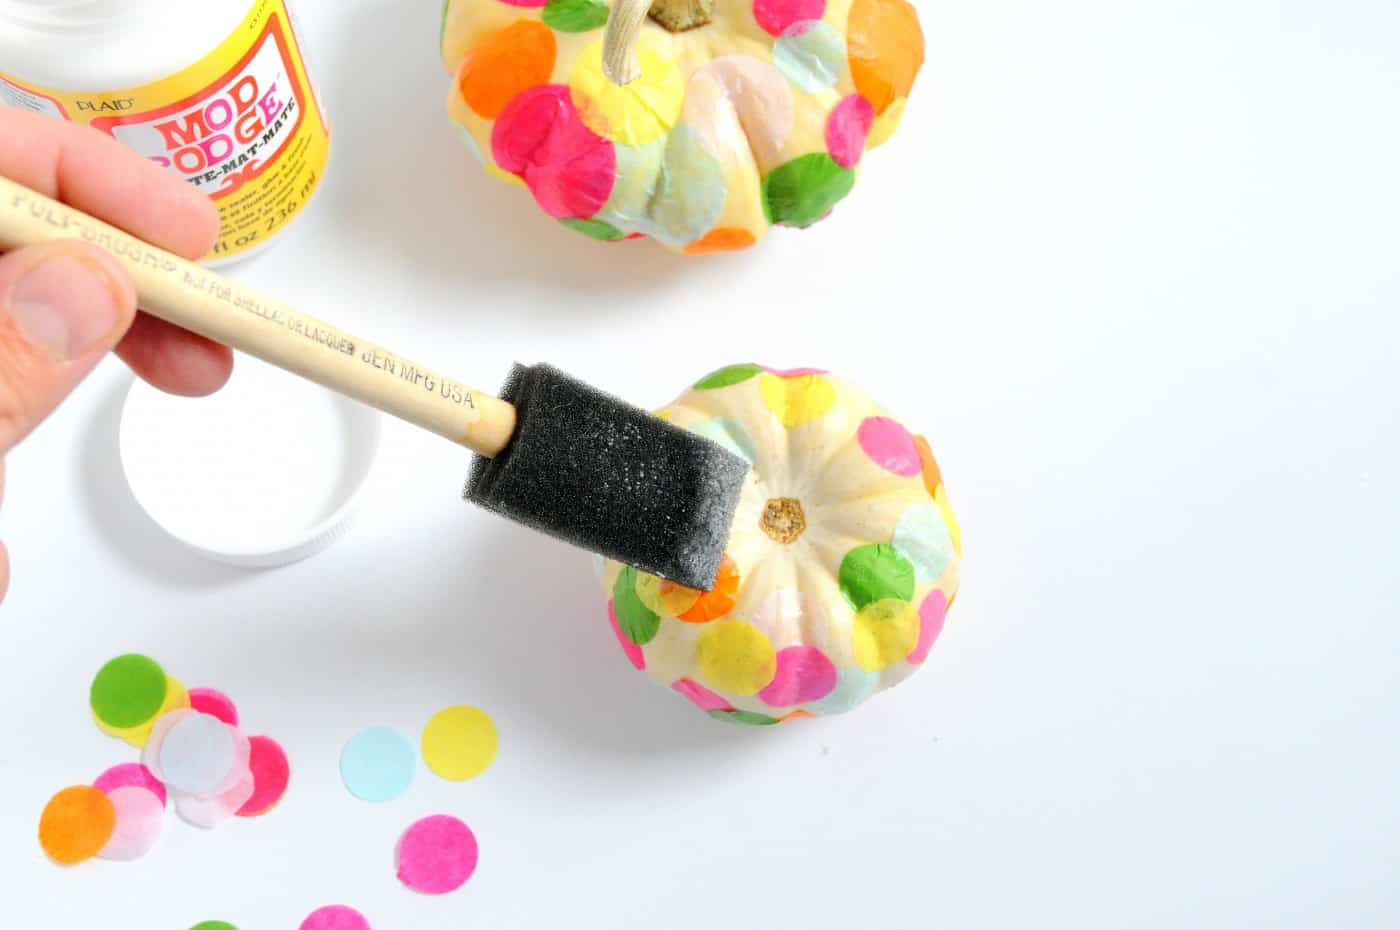
- Small white pumpkins
- Confetti (thin, tissue paper kind is best)
- Matte Mod Podge
- Sponge applicator or paint brush
Get the printable how to card below:

Decorating Mini Pumpkins
Equipment
- Circle punch(es) optional
Materials
- 3 small white pumpkins
- Mod Podge Matte
- Confetti tissue paper
Instructions
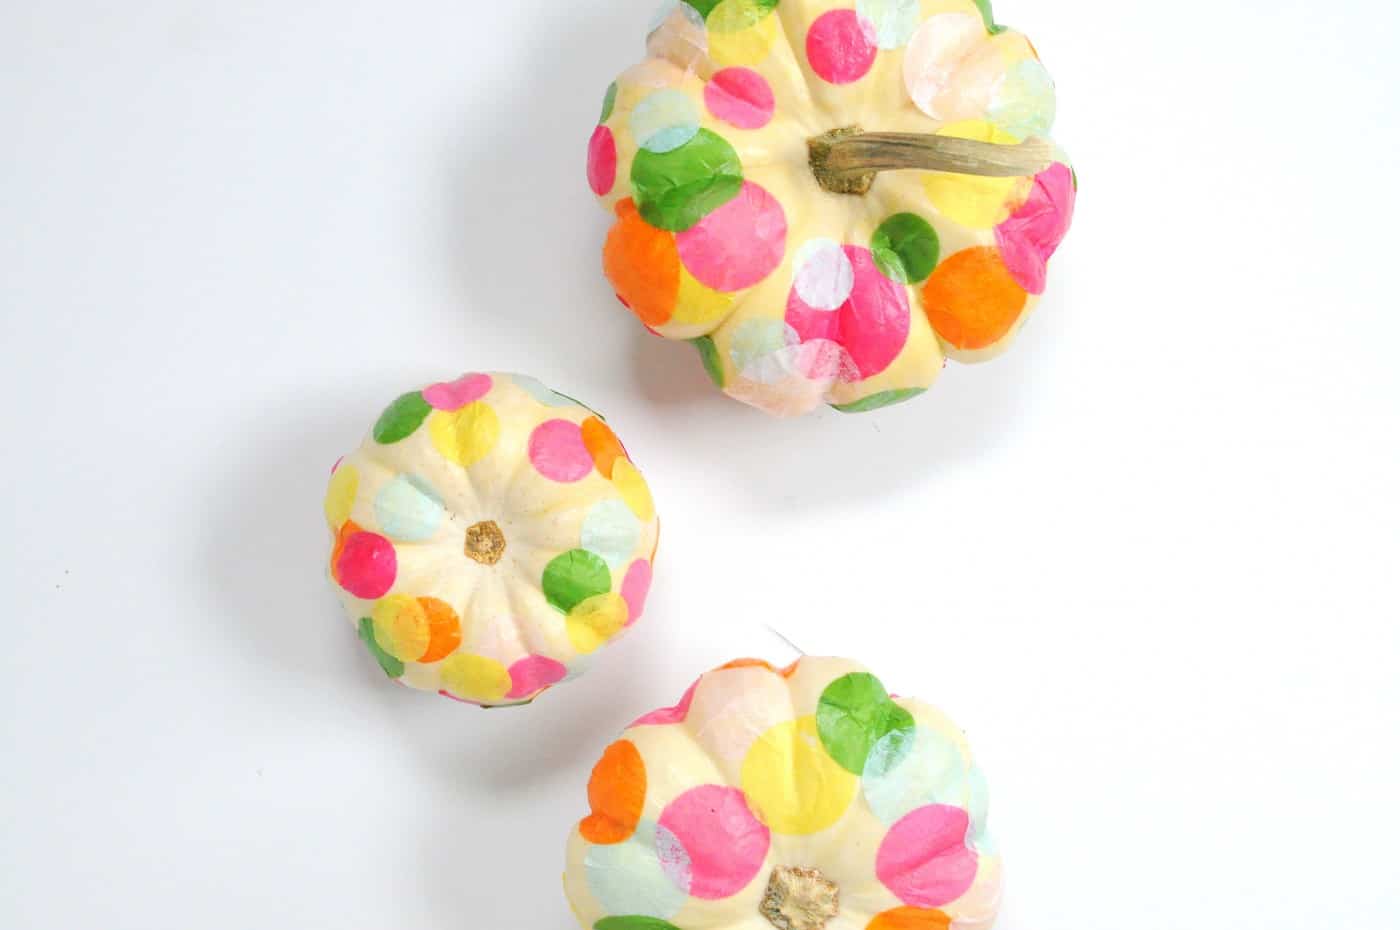
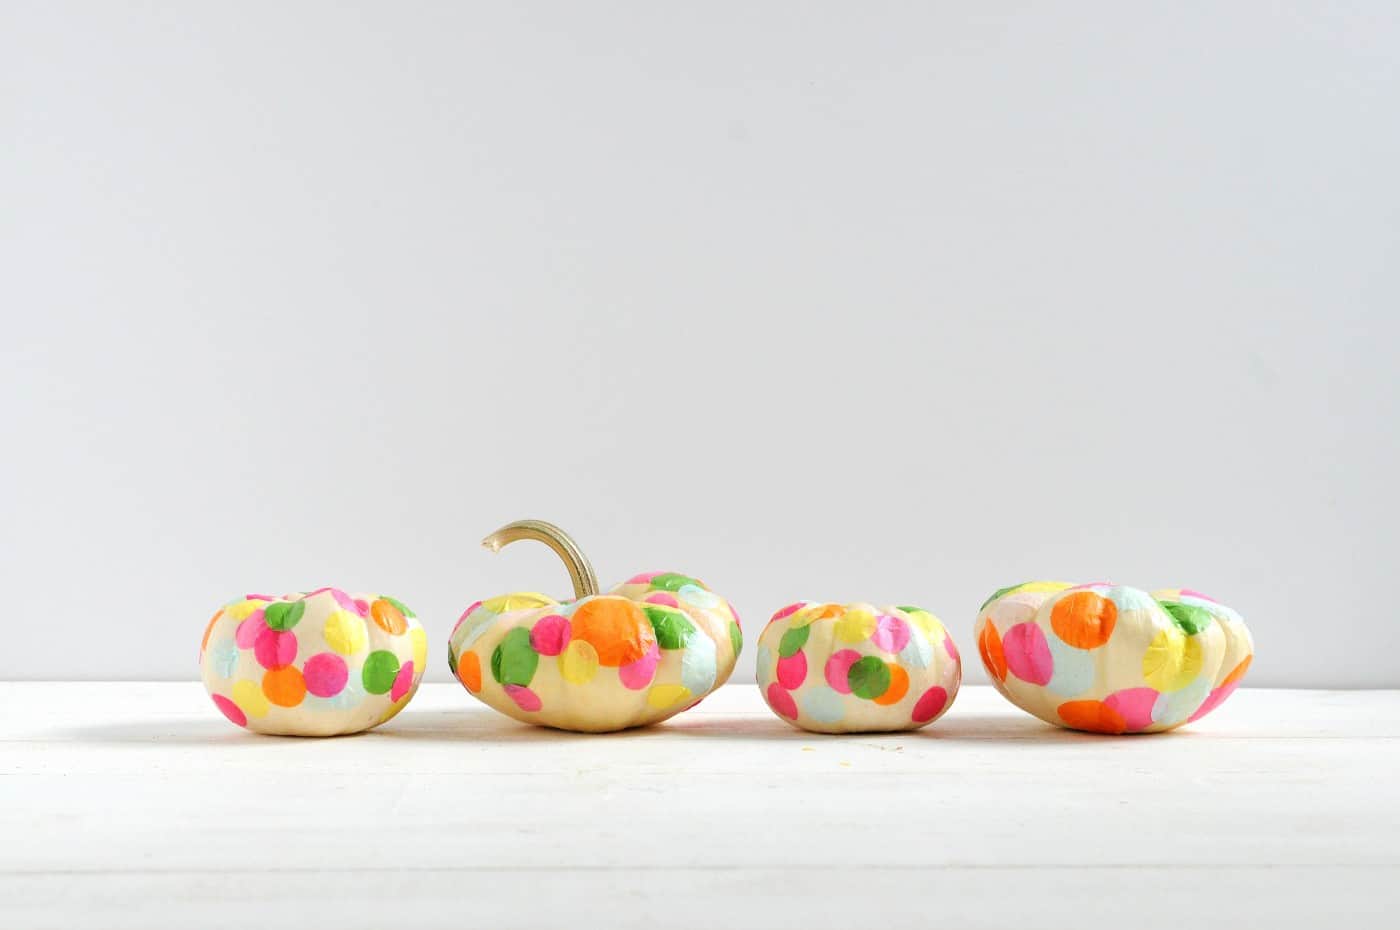
- Working in small sections, coat a pumpkin with Mod Podge. Layer on single pieces of confetti and let dry.
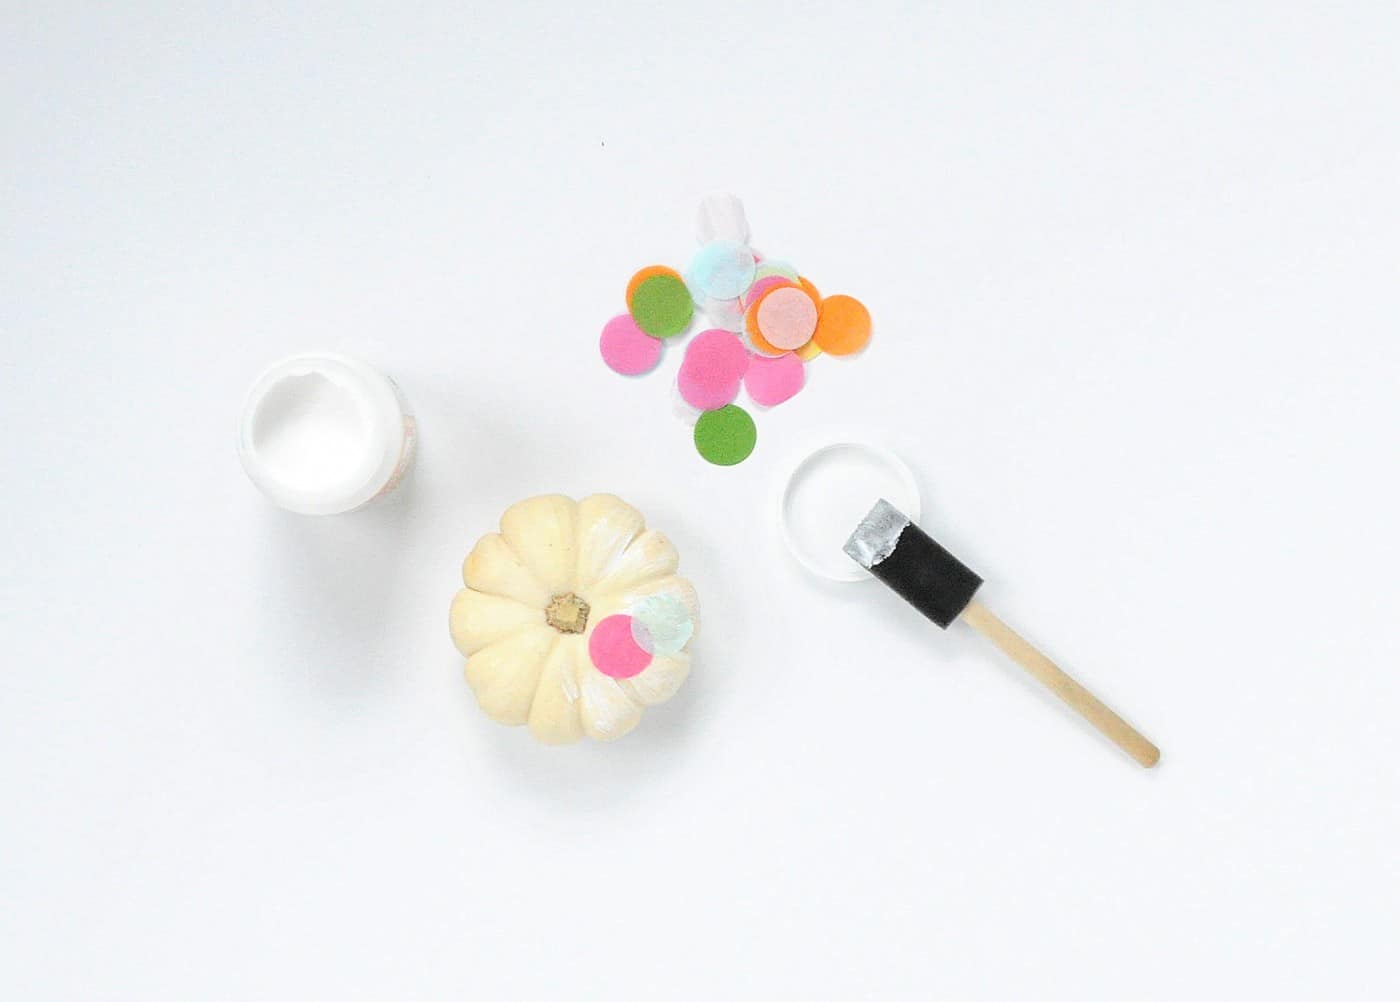
- Continue until one entire pumpkin is covered, smoothing as you go. Don't brush too much over the existing confetti, or it will brush right off. Let dry a little between layers if needed.

- Repeat with the additional pumpkins. Let them dry and apply a second coat of Mod Podge as a sealant, if desired.
Notes
What did you think of this idea? Let me know in the comments! I’d also love for you to check out these other fall ideas:
Confetti Pumpkins • Decorate Paper Craft Pumpkins • DIY Glitter Pumpkins • DIY Leaf Bowl • DIY Nautical Pumpkin • Wood Block Pumpkins • Duct Tape Pumpkin • How to Paint Acorns • How to Preserve Leaves • Mod Podge Map Pumpkins • Paper Mache Pumpkins


These pumpkins are super cute, and easy! My kids would have loved doing this! I guess we technically still can since we still have our Halloween pumpkins that we didn’t do anything with!
Paige
https://www.thehappyflammily.com/