
Unleash your creativity with our easy DIY journal cover tutorial. These are perfect for handmade gifts and ideal for crafts of all ages.
Skills Required: Beginner. Using a thicker paper in this project (scrapbook paper thickness) prevents wrinkles. It’s a simple project even for someone who has never Mod Podged before.
Ah, the joy of turning something plain into a masterpiece of your own creation! Who among us hasn’t been captivated by the magic of die-cut embellishments? Especially when we’re talking about die-cut overlays.
These little wonders are not just for adding pizzazz to scrapbooks; they can transform notebooks, journals, and so much more into personalized treasures.
And just in time for back-to-school season, or honestly, any gift-giving occasion, I’ve got a craft that’s bound to tickle the fancy of teens and adults alike.
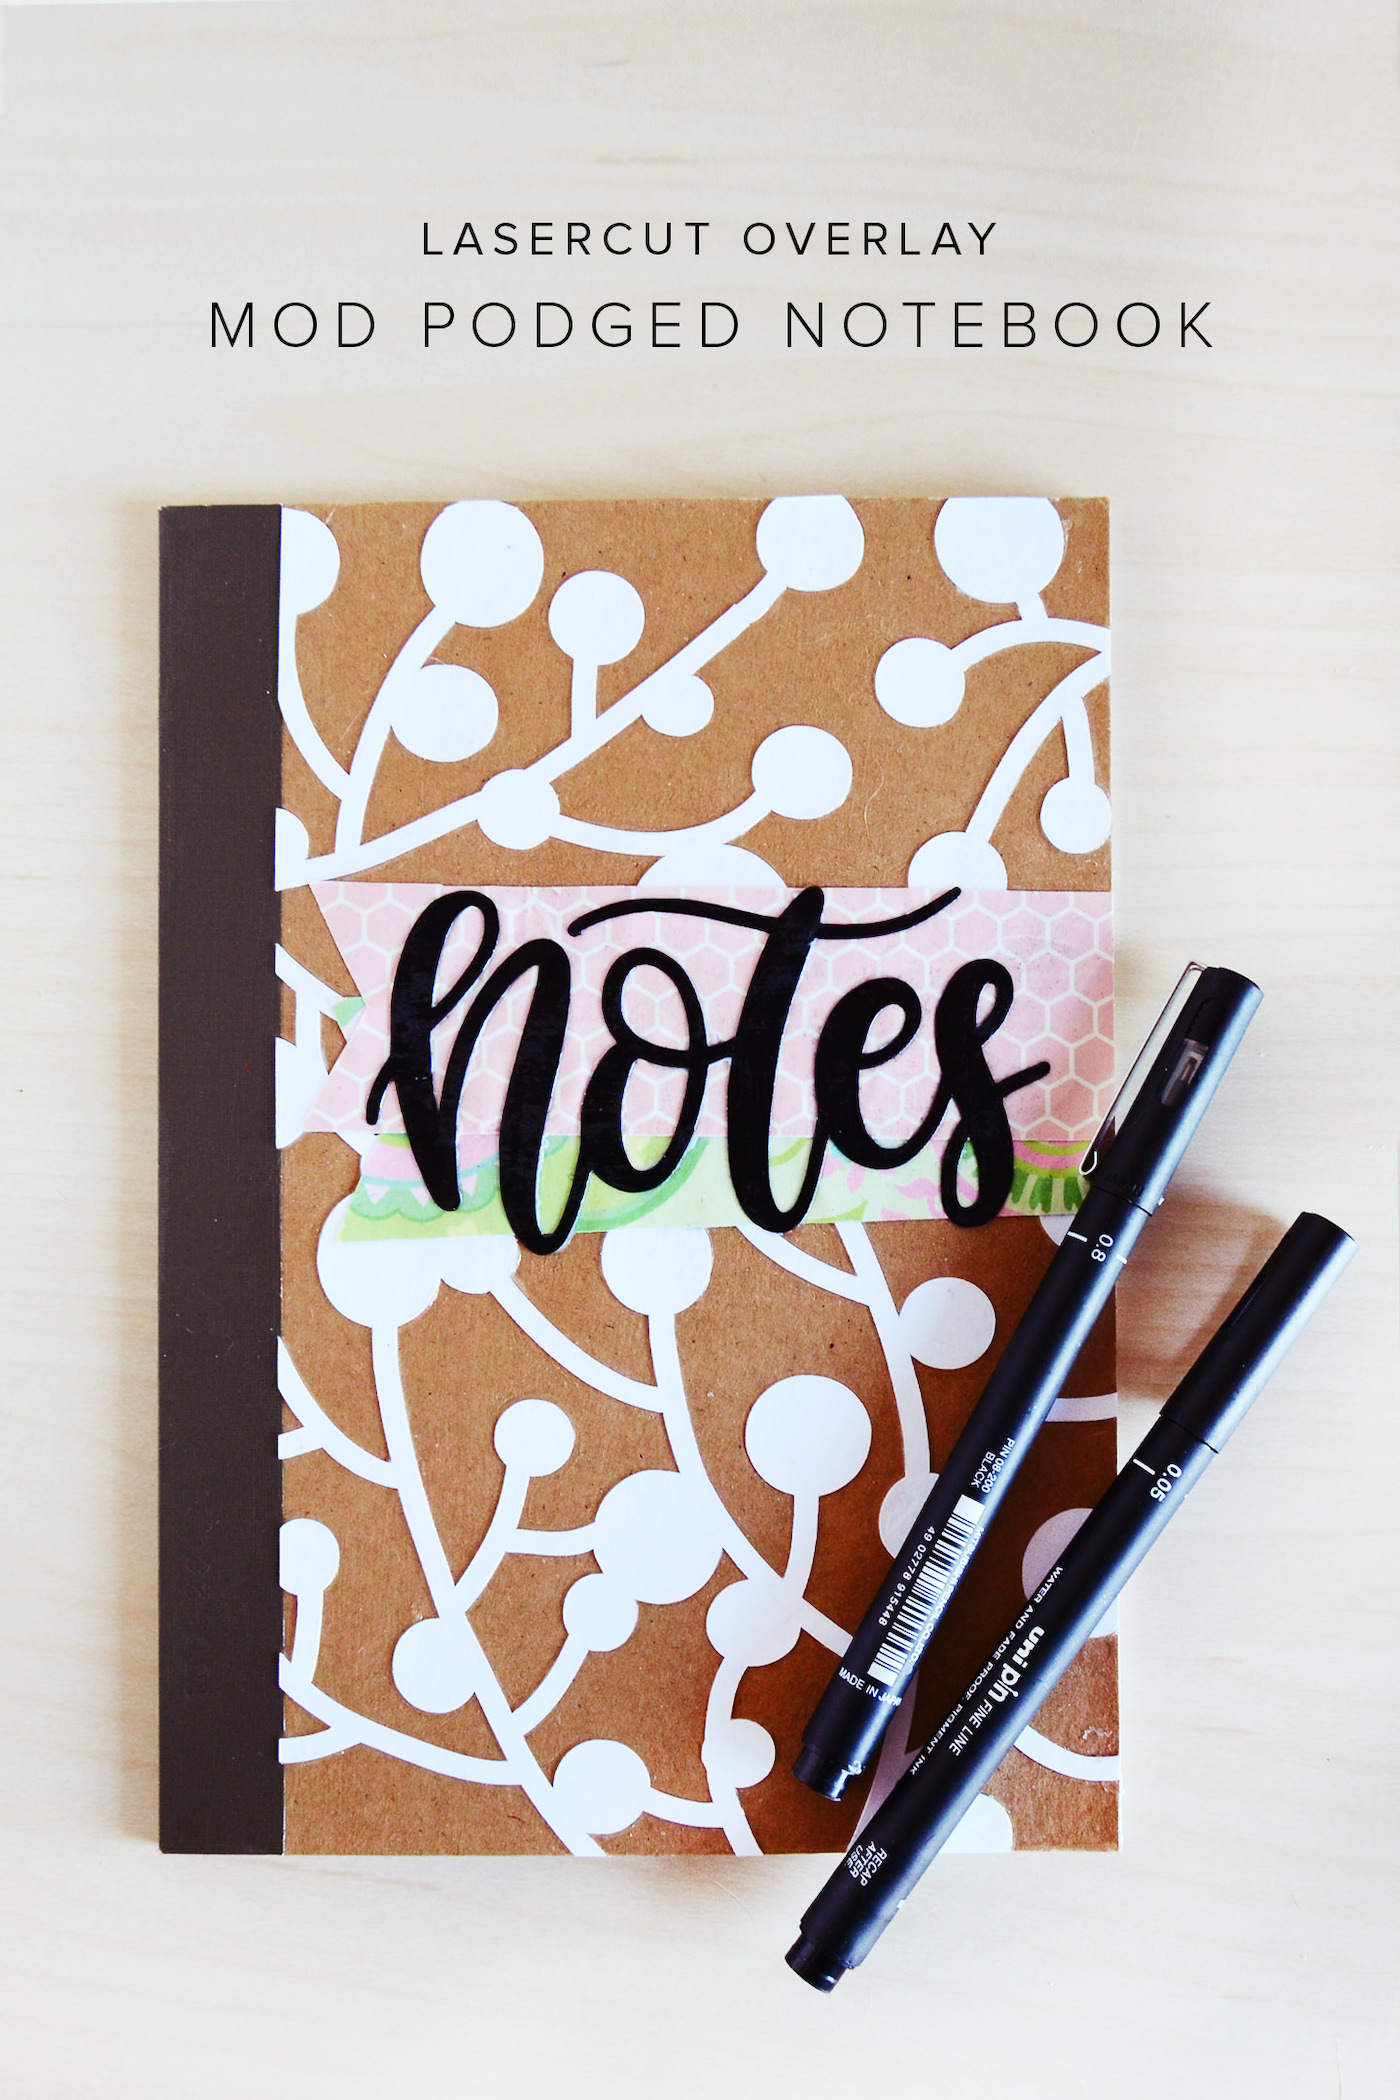
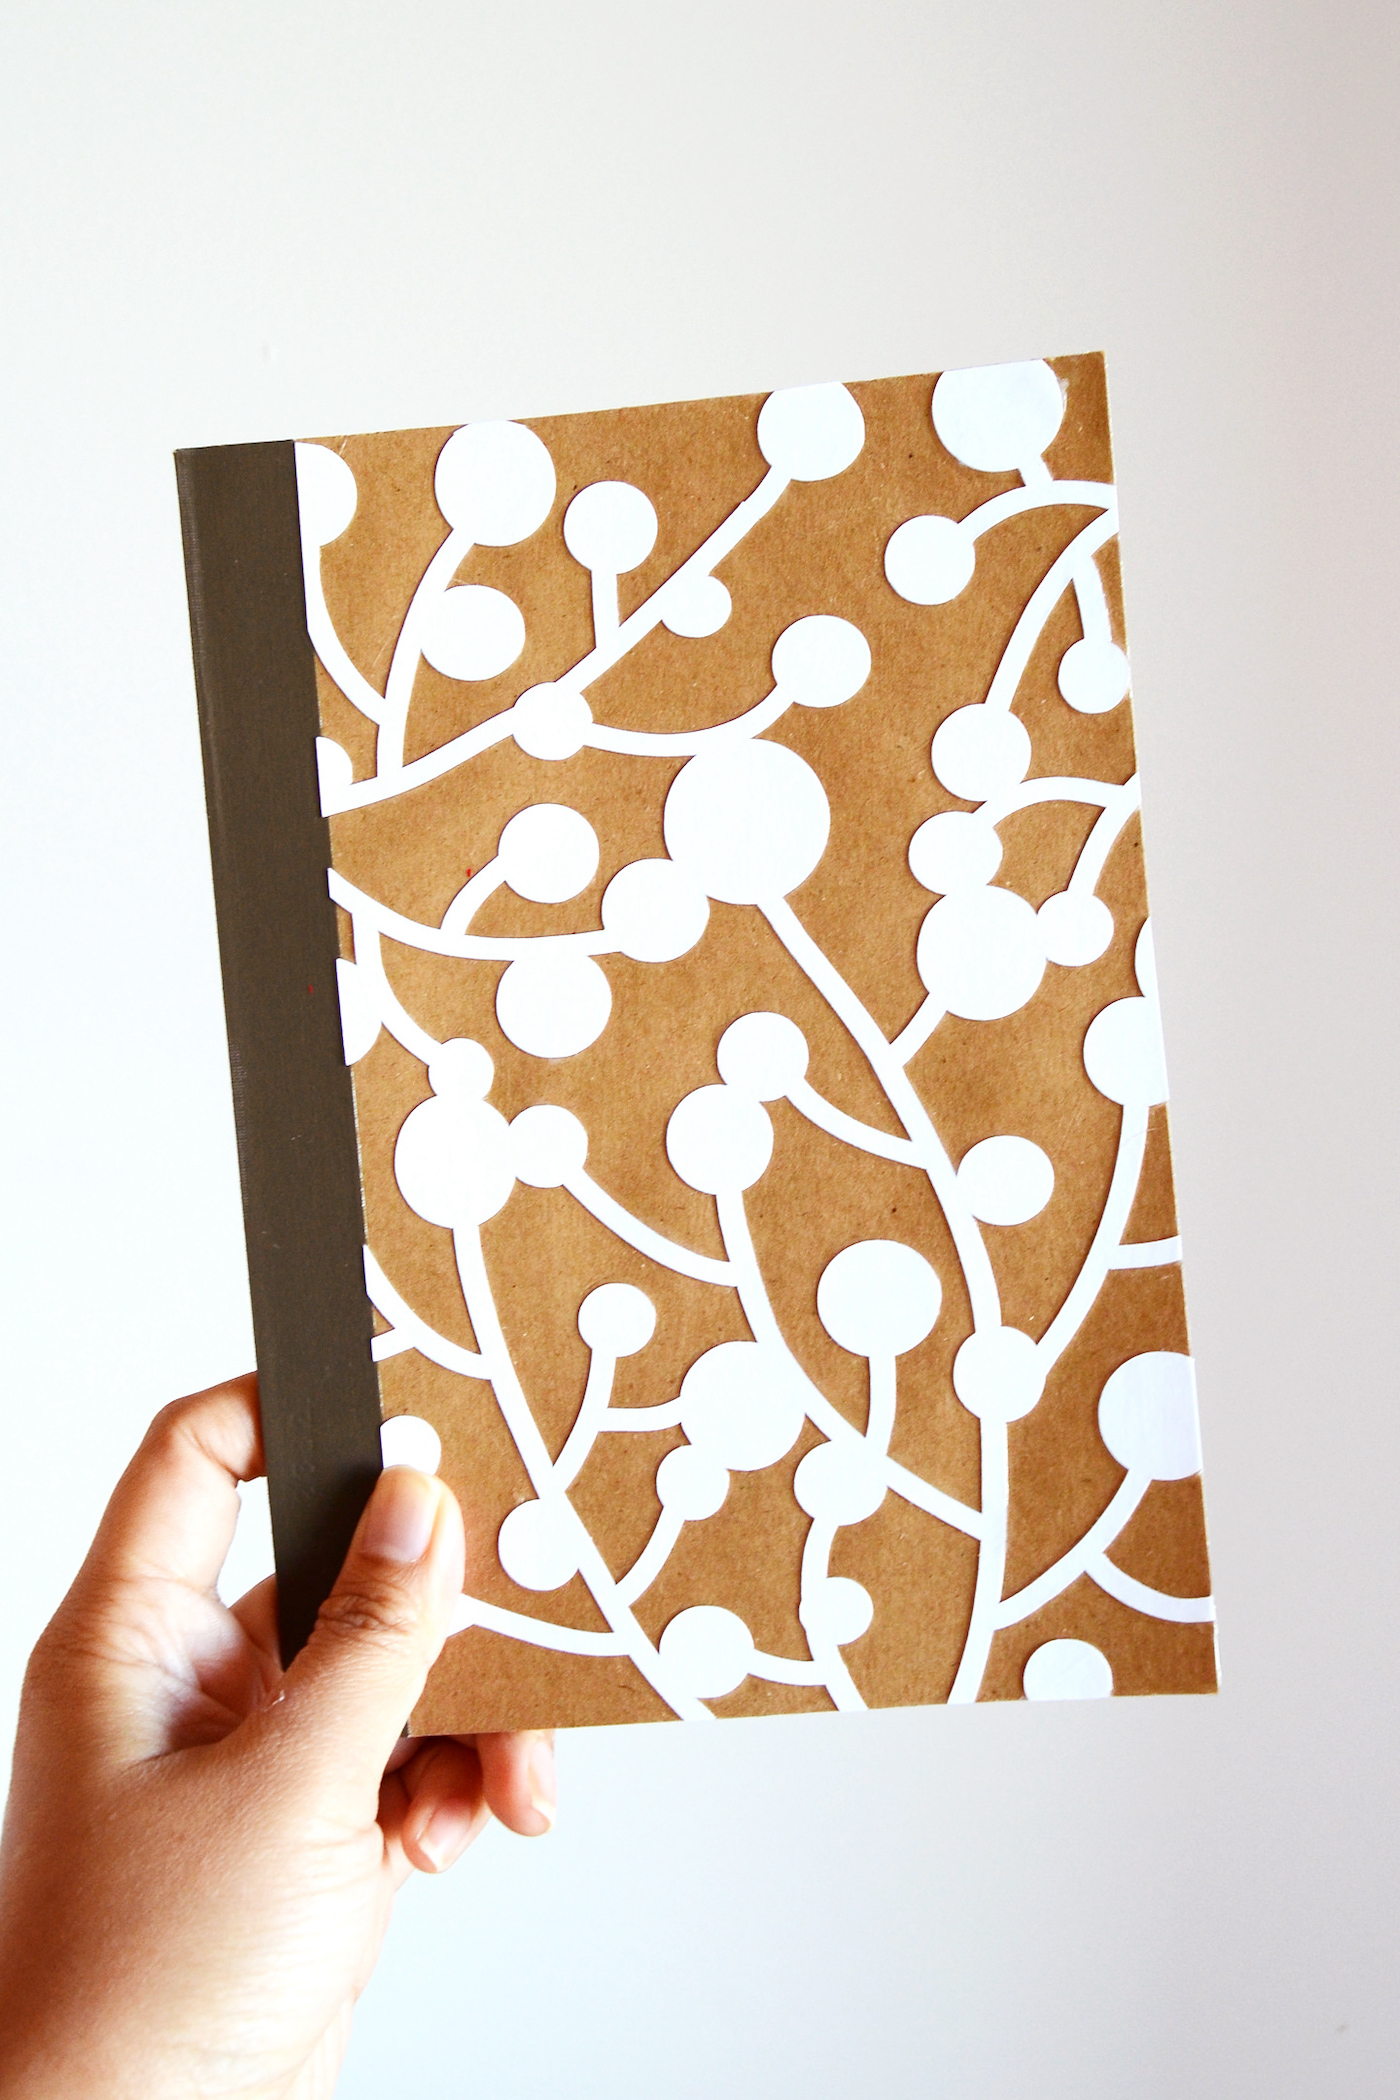
Imagine taking a simple journal cover and elevating it with a stunning die-cut paper overlay. With Mod Podge. Yes, that’s what we’re jumping into today.
This DIY aesthetic journal cover project is the epitome of customization. Whether your style is understated elegance or bursting with color, this tutorial lets you tailor to your heart’s content.
And who doesn’t love a thoughtful handmade gift? Be it a budding writer, a dedicated teacher, or simply someone special in your life, this DIY journal cover speaks volumes of care and personal touch.
So, if you’re ready to create something uniquely beautiful that’s as fun to make as it is to give away (or keep for yourself, no judgment here!), then you’re in the right place.
Stick around as I guide you through the steps to decorate your journal cover with a die-cut paper overlay, turning the ordinary into extraordinary. Let’s unleash our creativity and make something memorable, shall we?
Here’s what you’re going to need!
Gather These Supplies
- Blank notebook
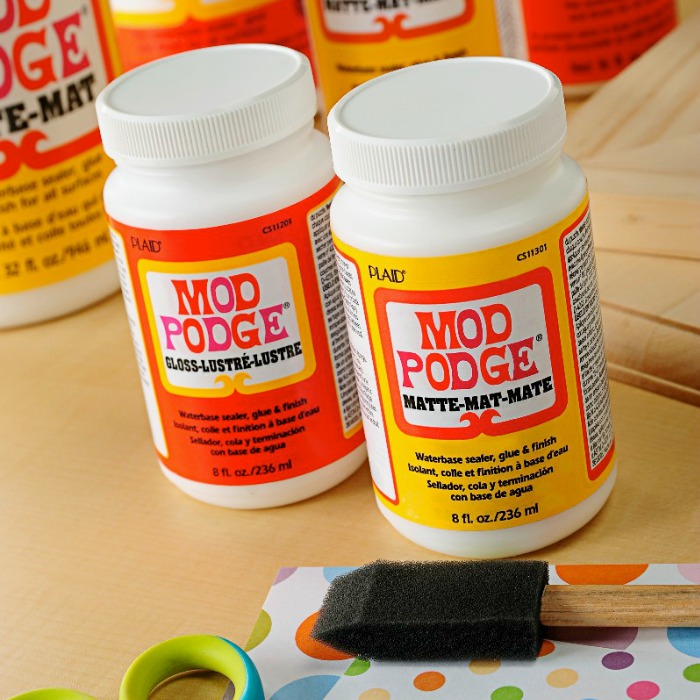
- Matte Mod Podge
- Brush
- Die-cut overlay
- Scrapbook paper
- Scissors
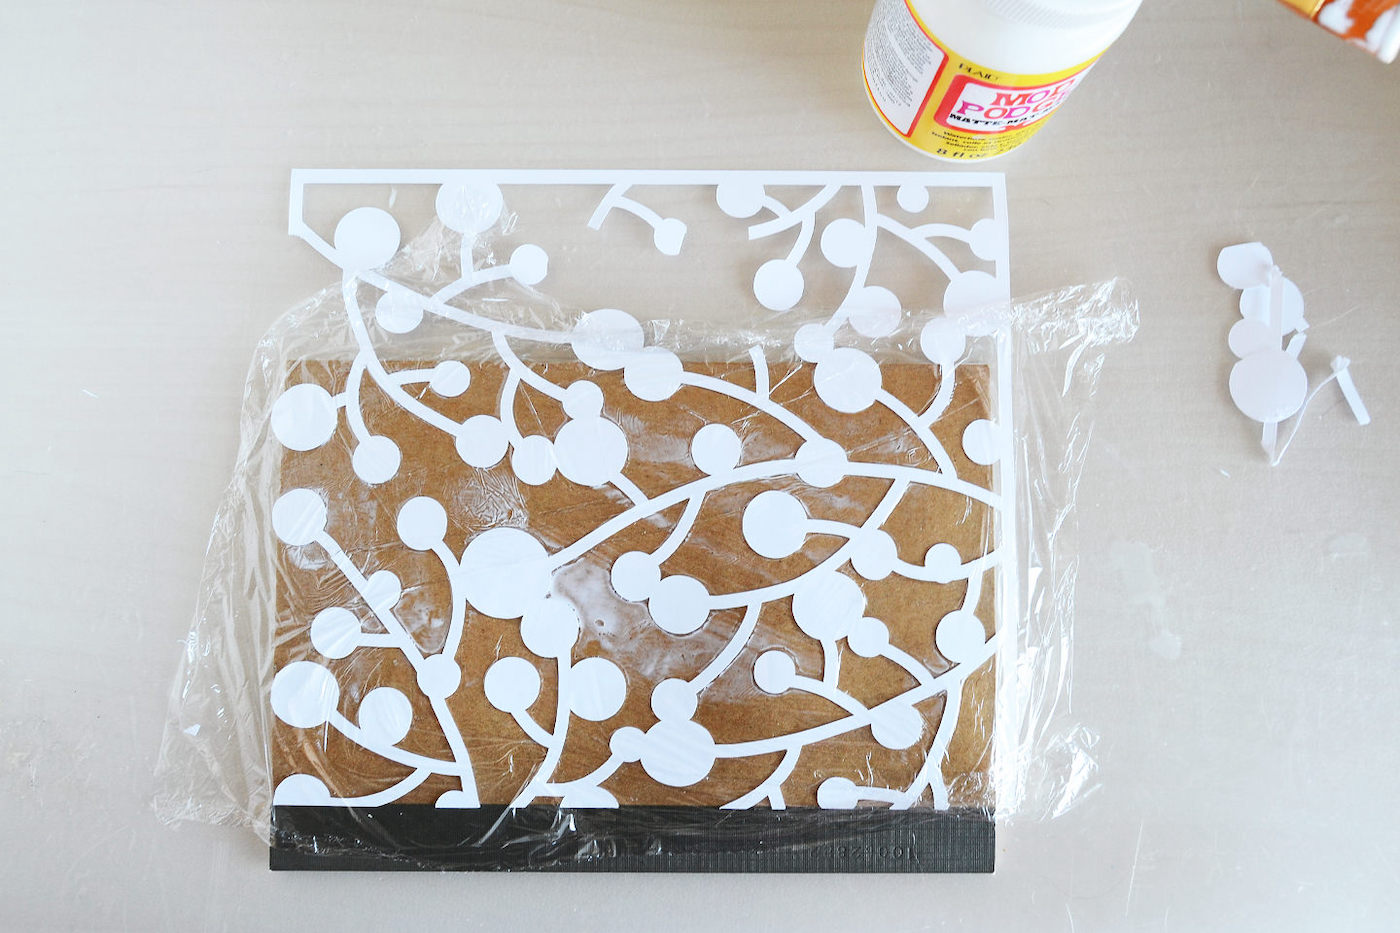
- Cling wrap
- Template (for use with die cutting machines – download here)
Tips and Thoughts for This Project
- I really love the notebooks from Muji, but you can definitely get a simple blank one from any craft or book store.
- You can get the die-cut overlays at your local craft store OR if you have a die-cutter such as a Cricut or Silhouette Cameo, you can create one yourself.
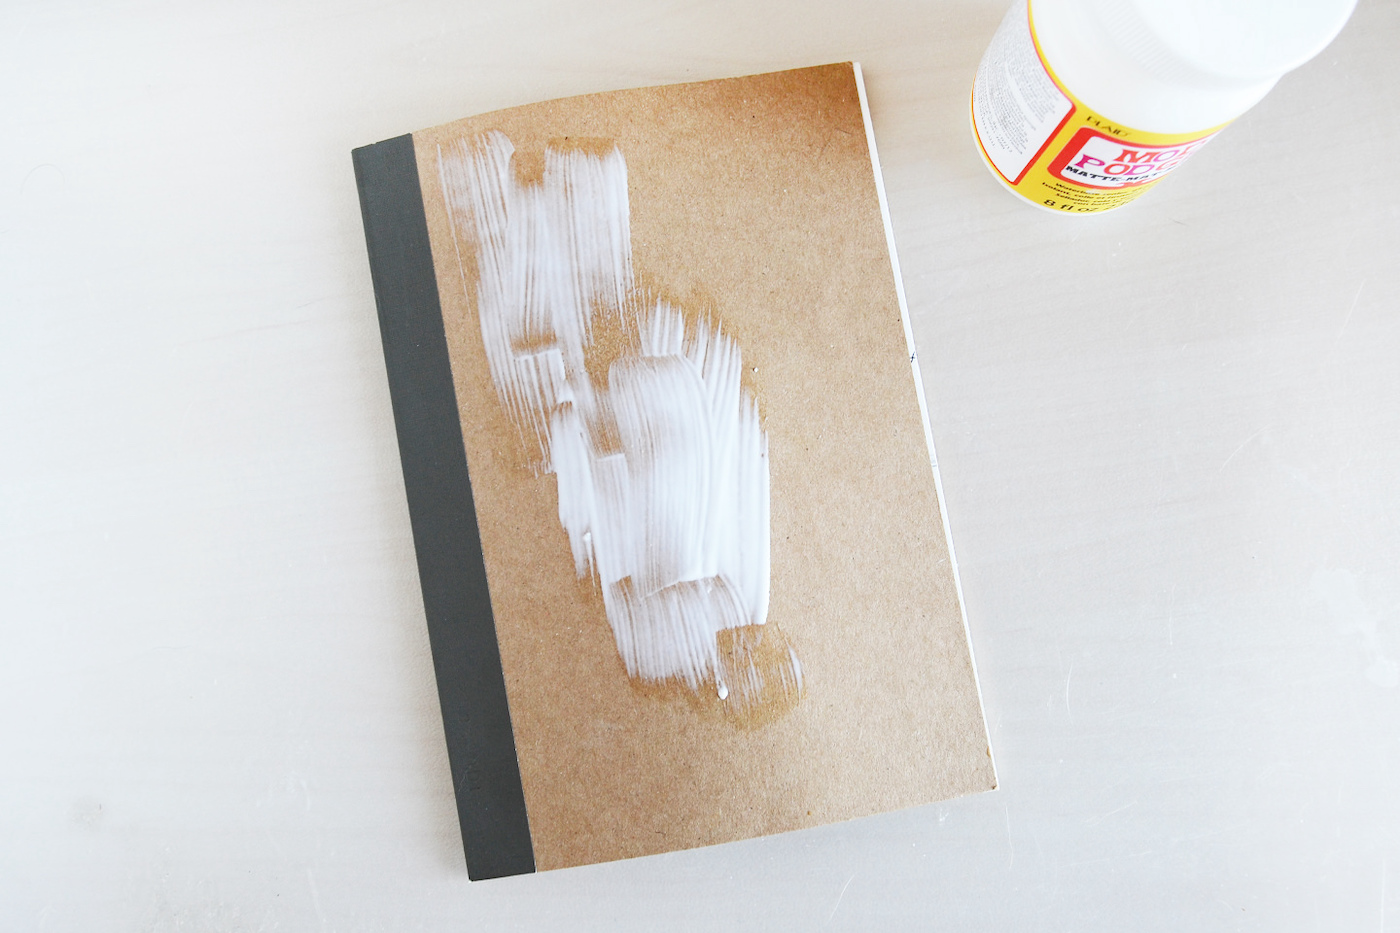
- You can paint the notebook cover before Mod Podging the die cut, if desired. Let the paint dry completely before decoupaging.
- You can use any Mod Podge formula for this craft depending on the finish you like. I used Matte, but Gloss and Satin also work great. Don’t be afraid to use Sparkle too!
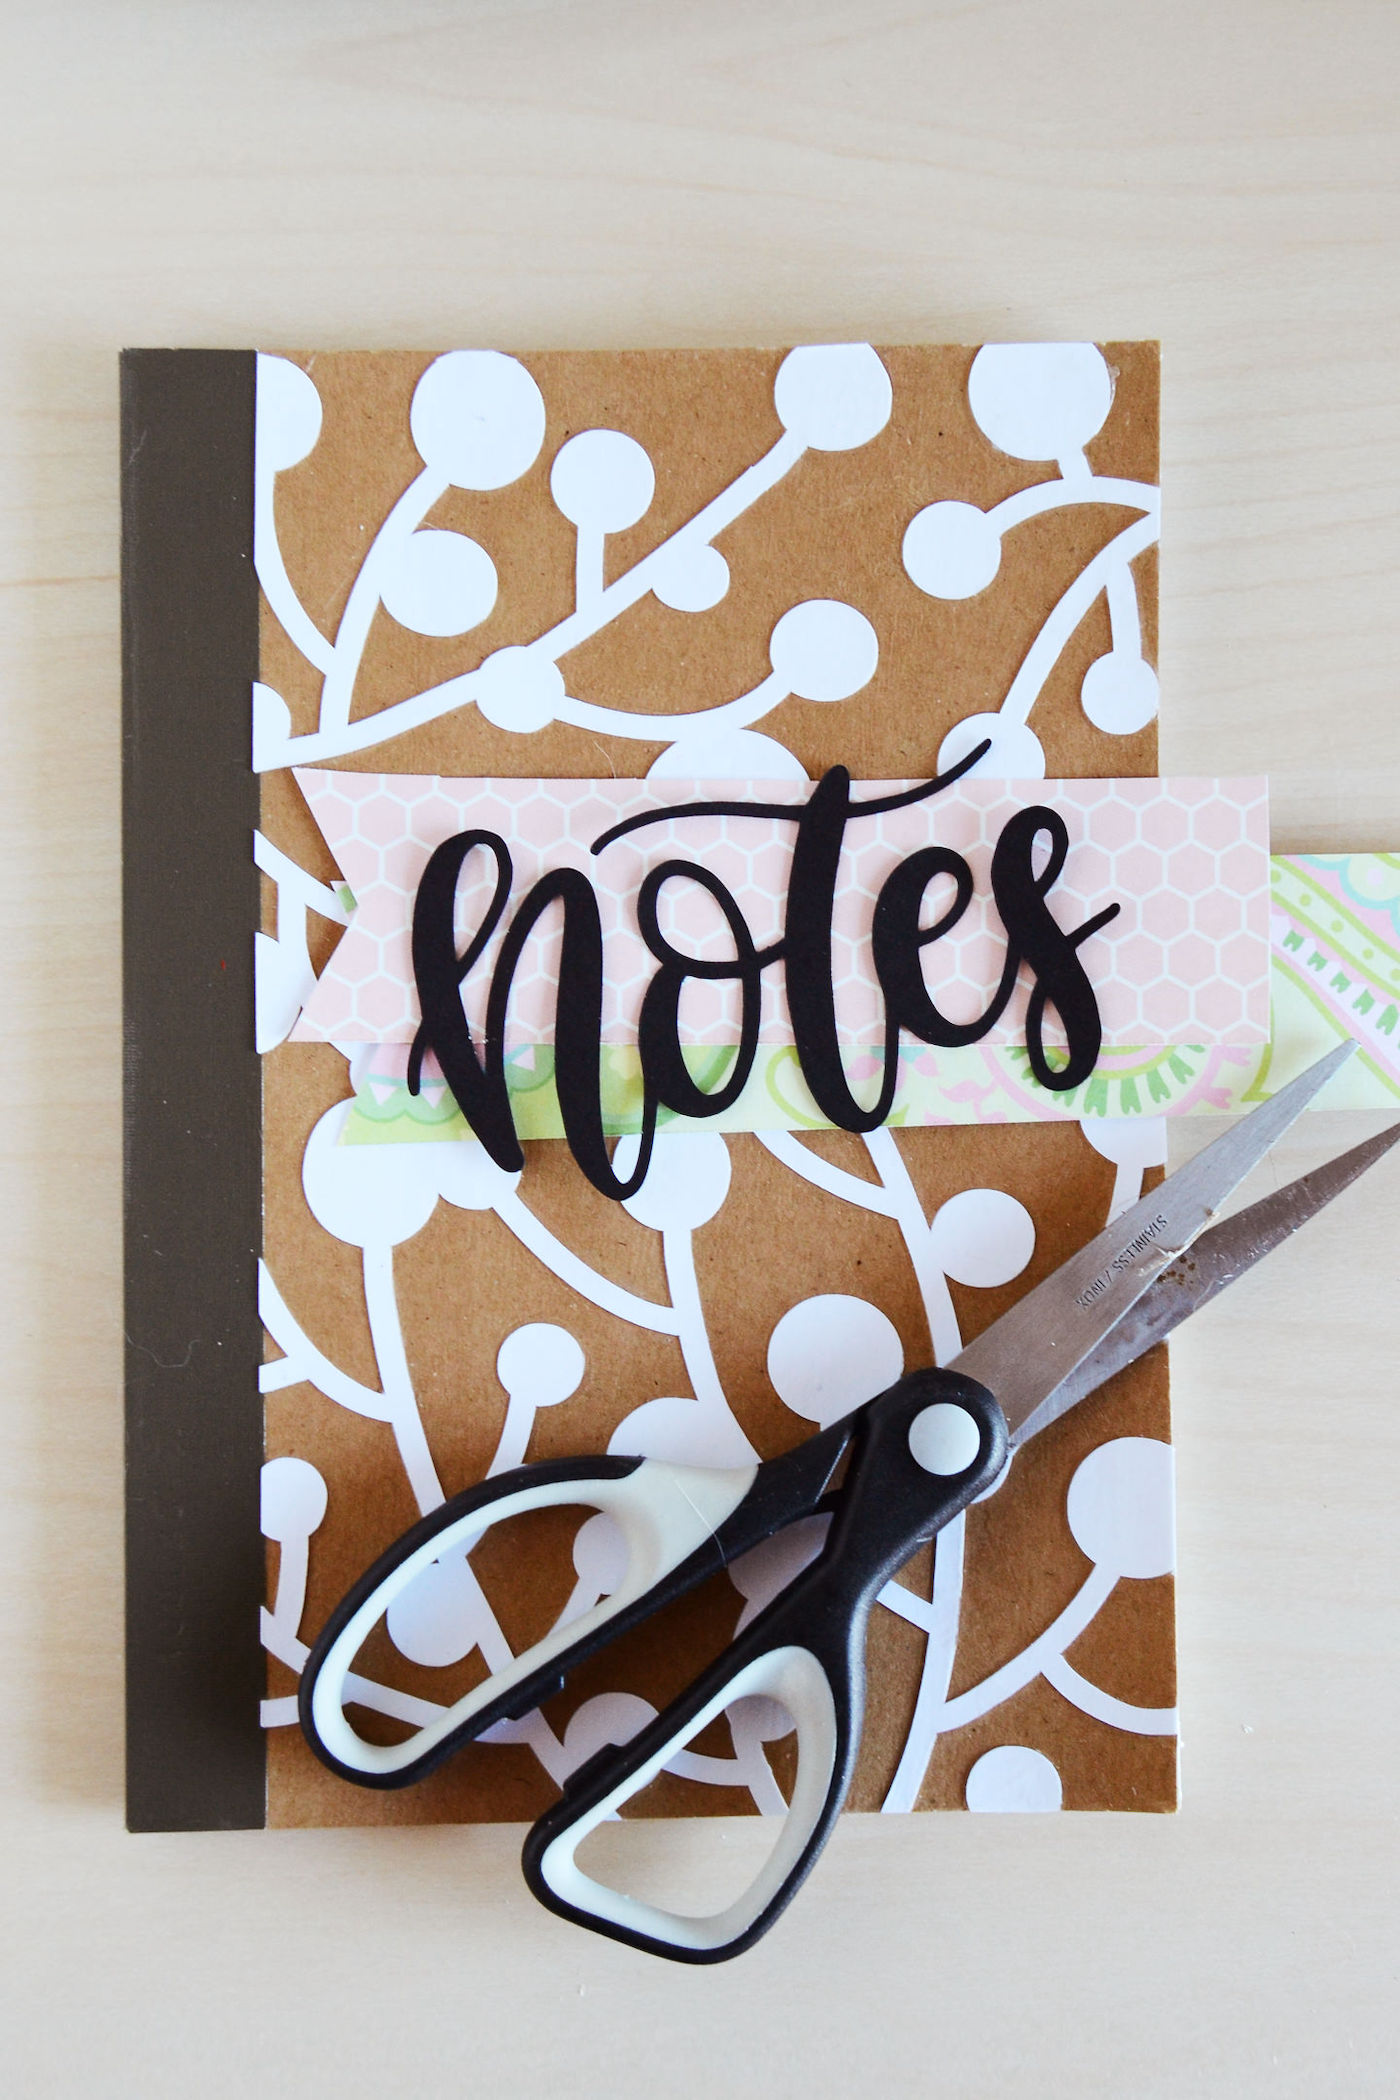
- You can download the hand-lettered cut file for the word “NOTES” on the supply list and cut it with your die-cutter if you have one! Otherwise, you can purchase inexpensive die-cut words or letters at the craft store.
Now you know how to decorate a notebook the easiest way possible!
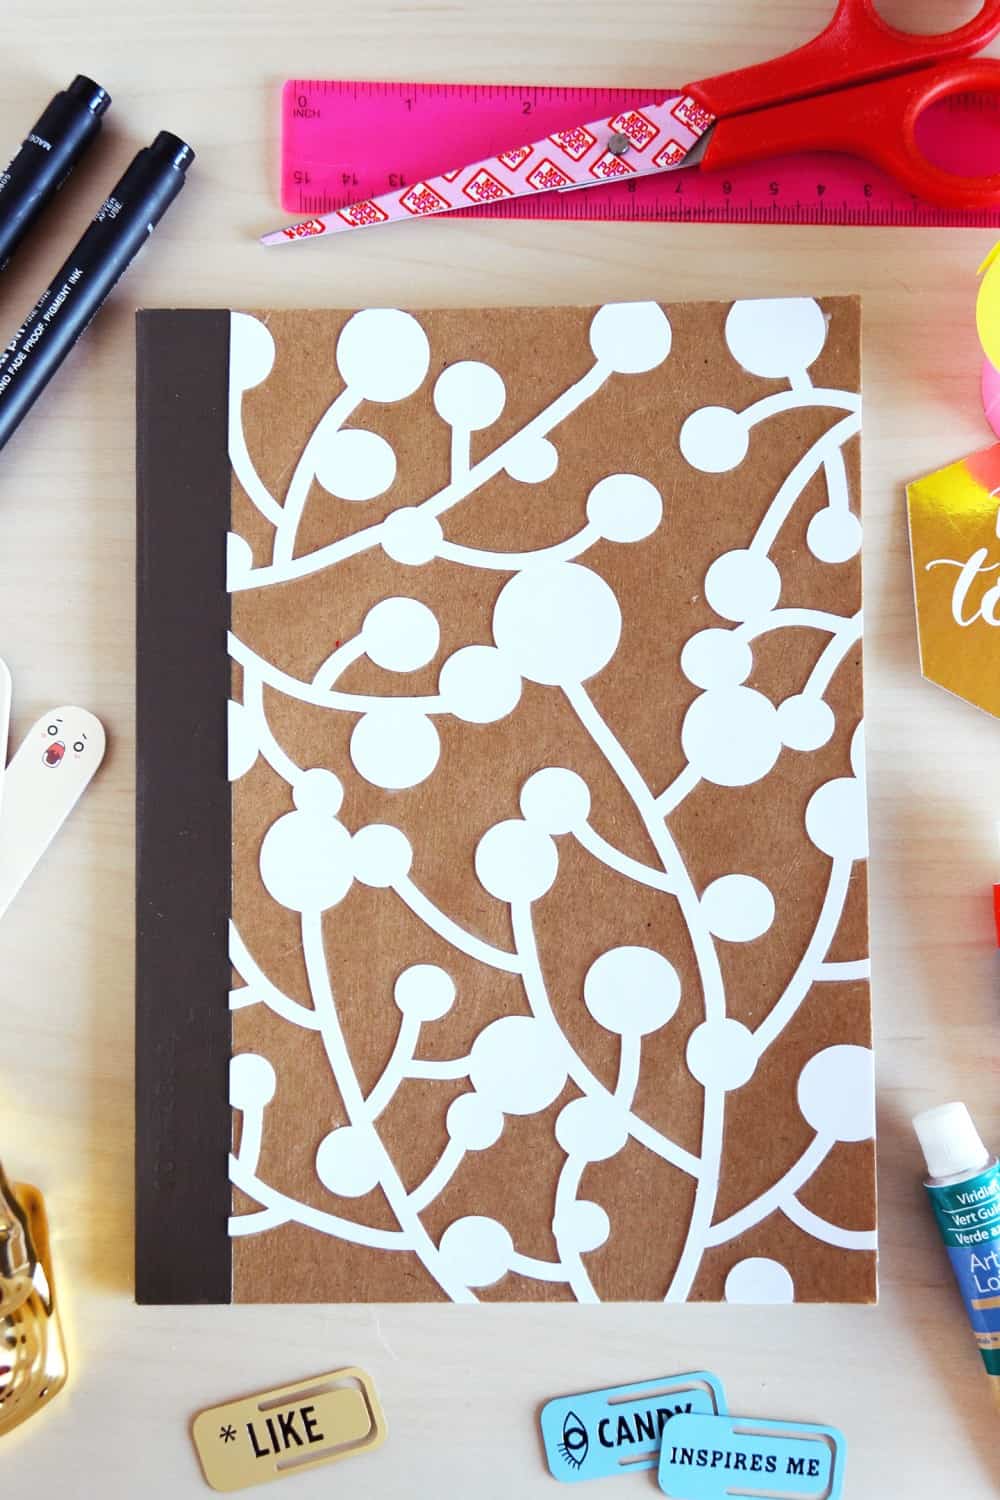
I created both a simple journal as well as a second one to embellish a bit more. You can get the how to card for this craft below!

DIY Journal Cover
Equipment
Materials
- Blank notebook
- Mod Podge
- Die cut overlay
- Scrapbook paper
- Cling wrap
Video
Instructions
- Choose a die cut overlay sheet and a notebook.
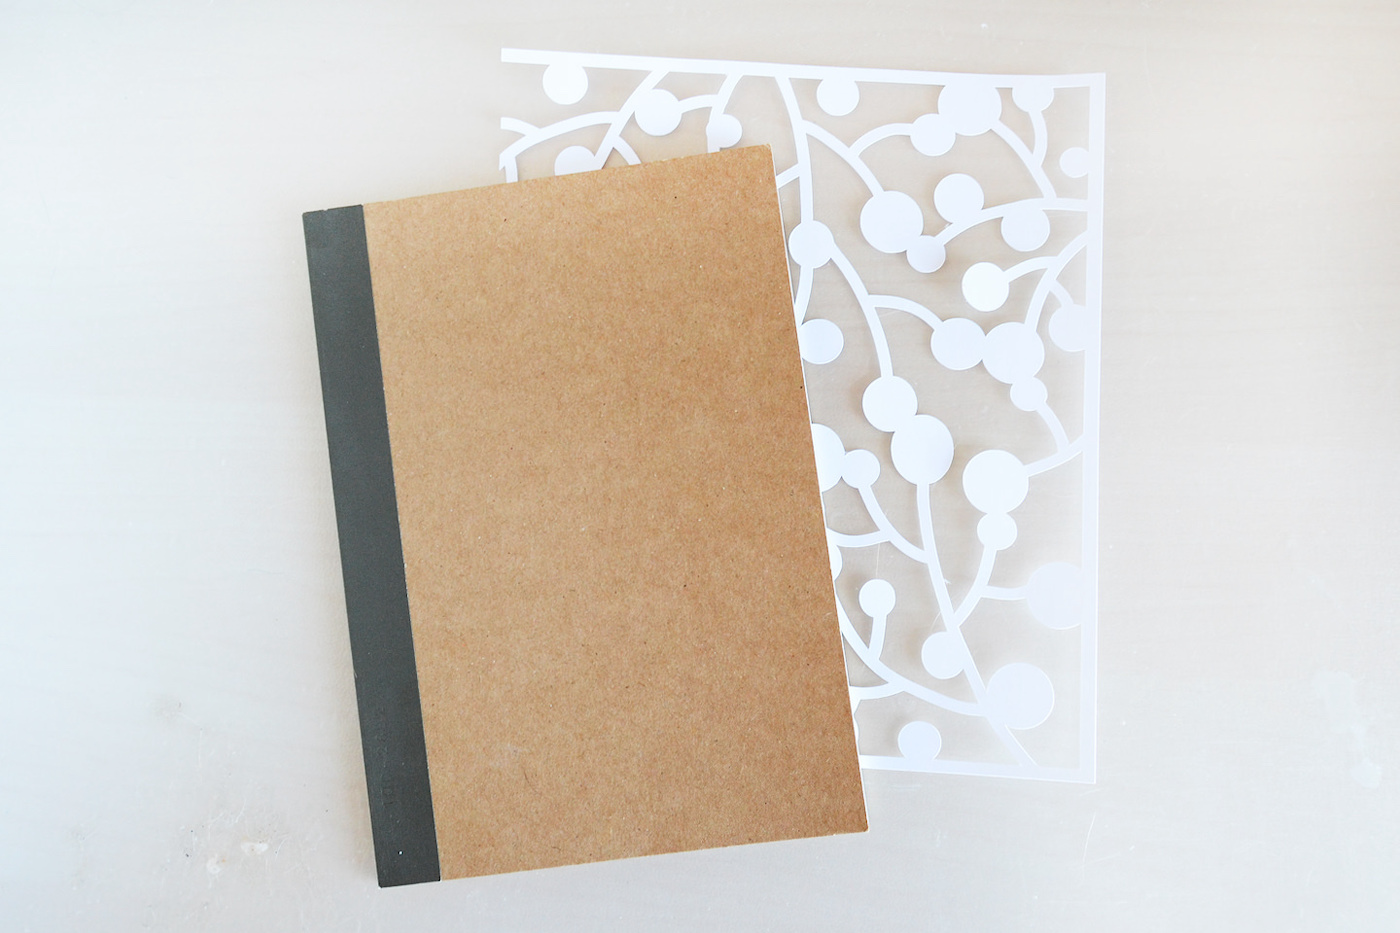
- Spread a medium layer of Mod Podge onto the front of the notebook.
- Adhere the die cut paper, using cling wrap to press the overlay onto the notebook to adhere it. Remove the cling wrap, and then apply another layer of Mod Podge. Let dry.
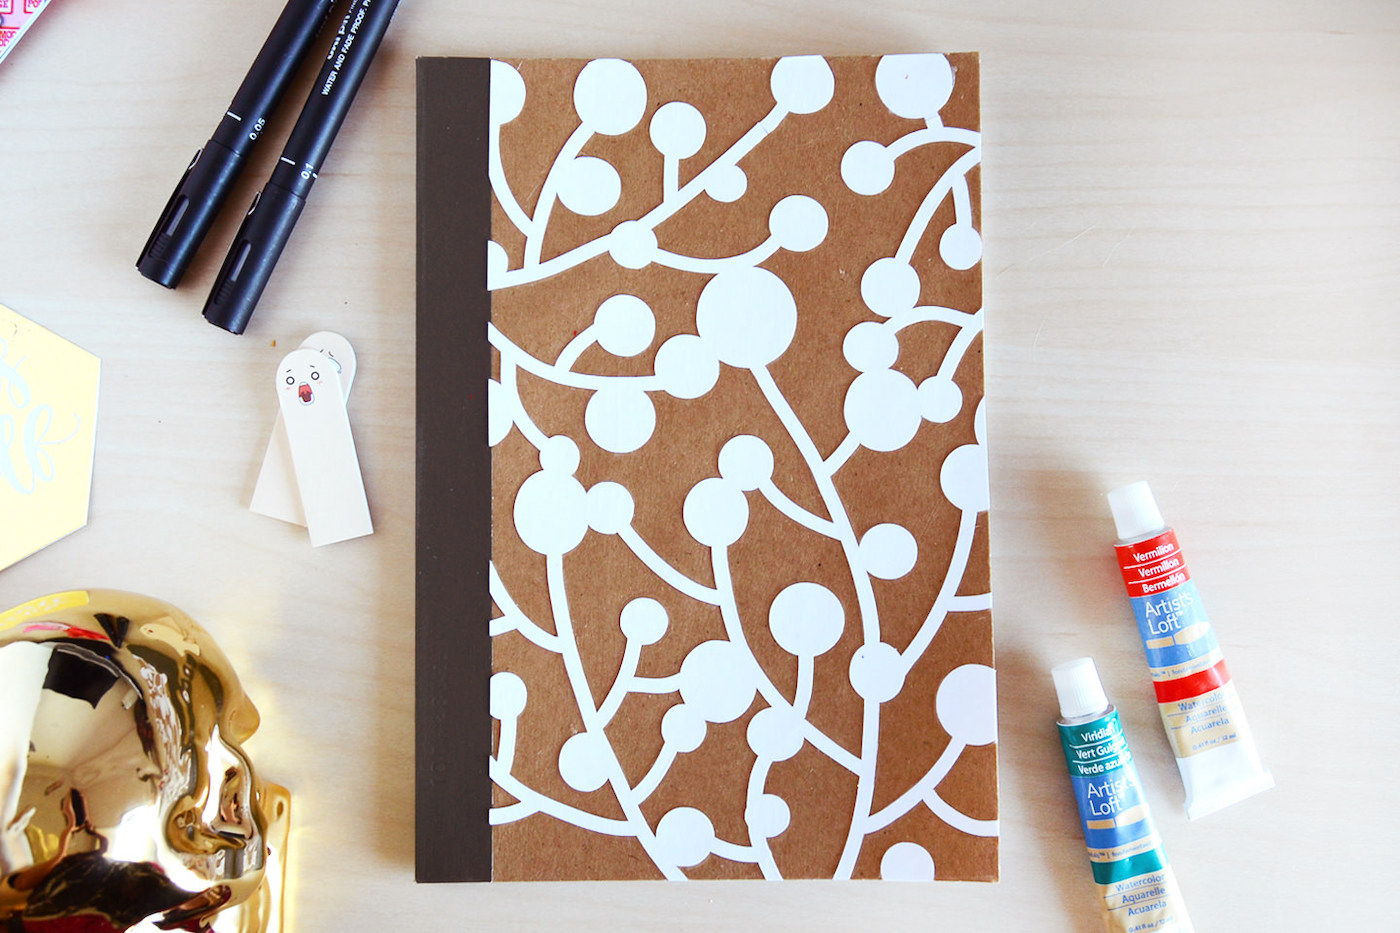
- Cut off the excess paper around the edges with the scissors.

- Add a final layer of Mod Podge to the front of the notebook and the die cut. Let dry.
- Add additional embellishments, words, or letters as desired. You can use either Mod Podge or craft glue to adhere. Let dry completely before using.
Which one do you prefer – the simple one or the embellished one? Either way, they’re very easy to make and makes a really fun and simple craft for kids and adults alike!
Did you enjoy this project? Let me know in the comments. Then I’d love for you to check out these other notebook makeovers:


These notebooks are really cool! Will have to try!
Love this idea…thanks for sharing. .