
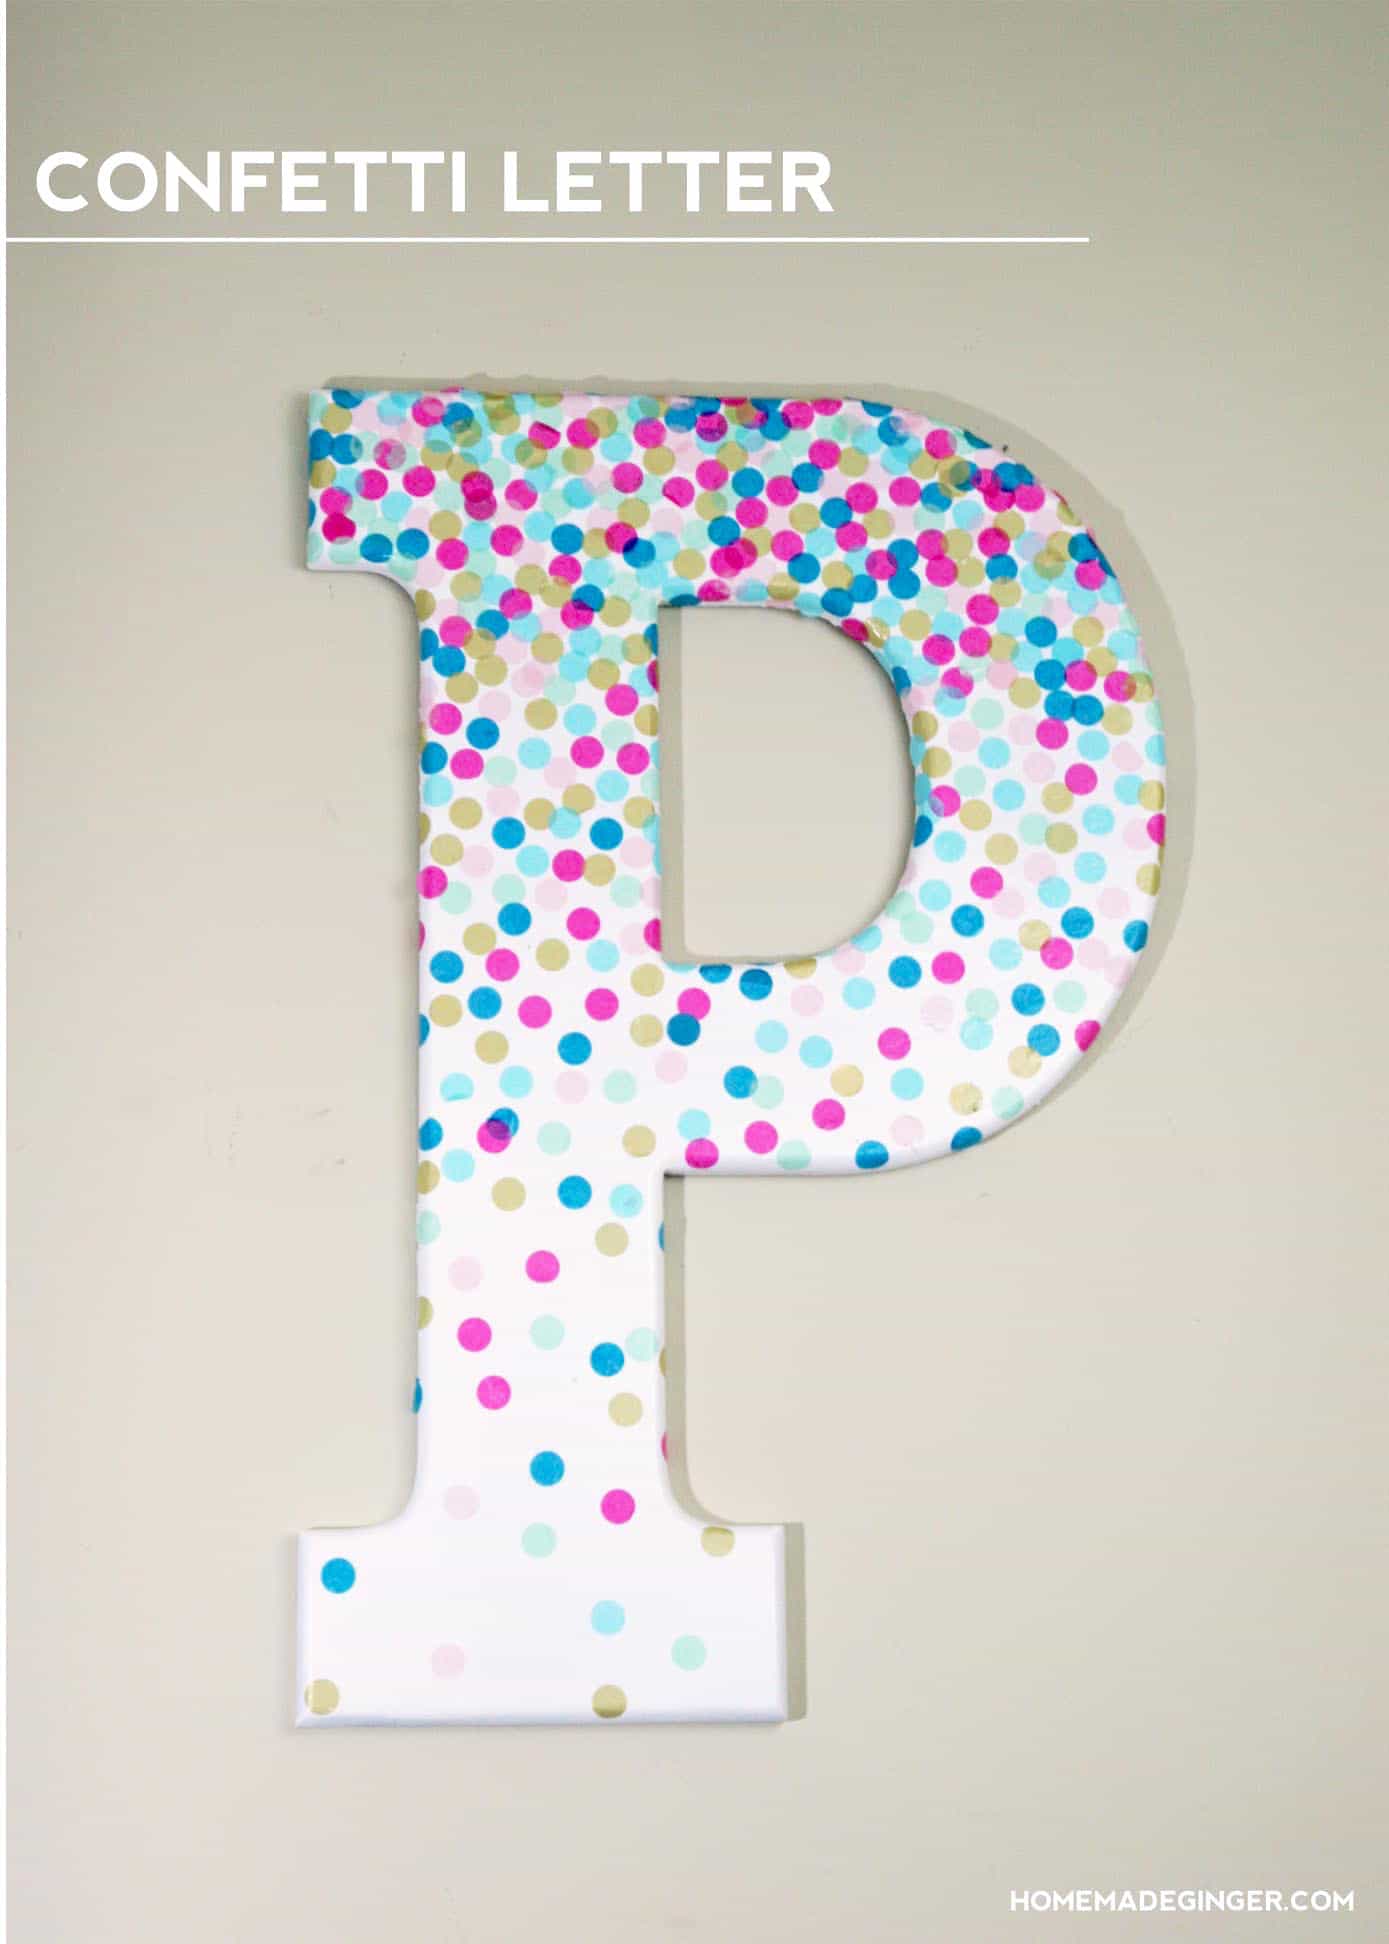
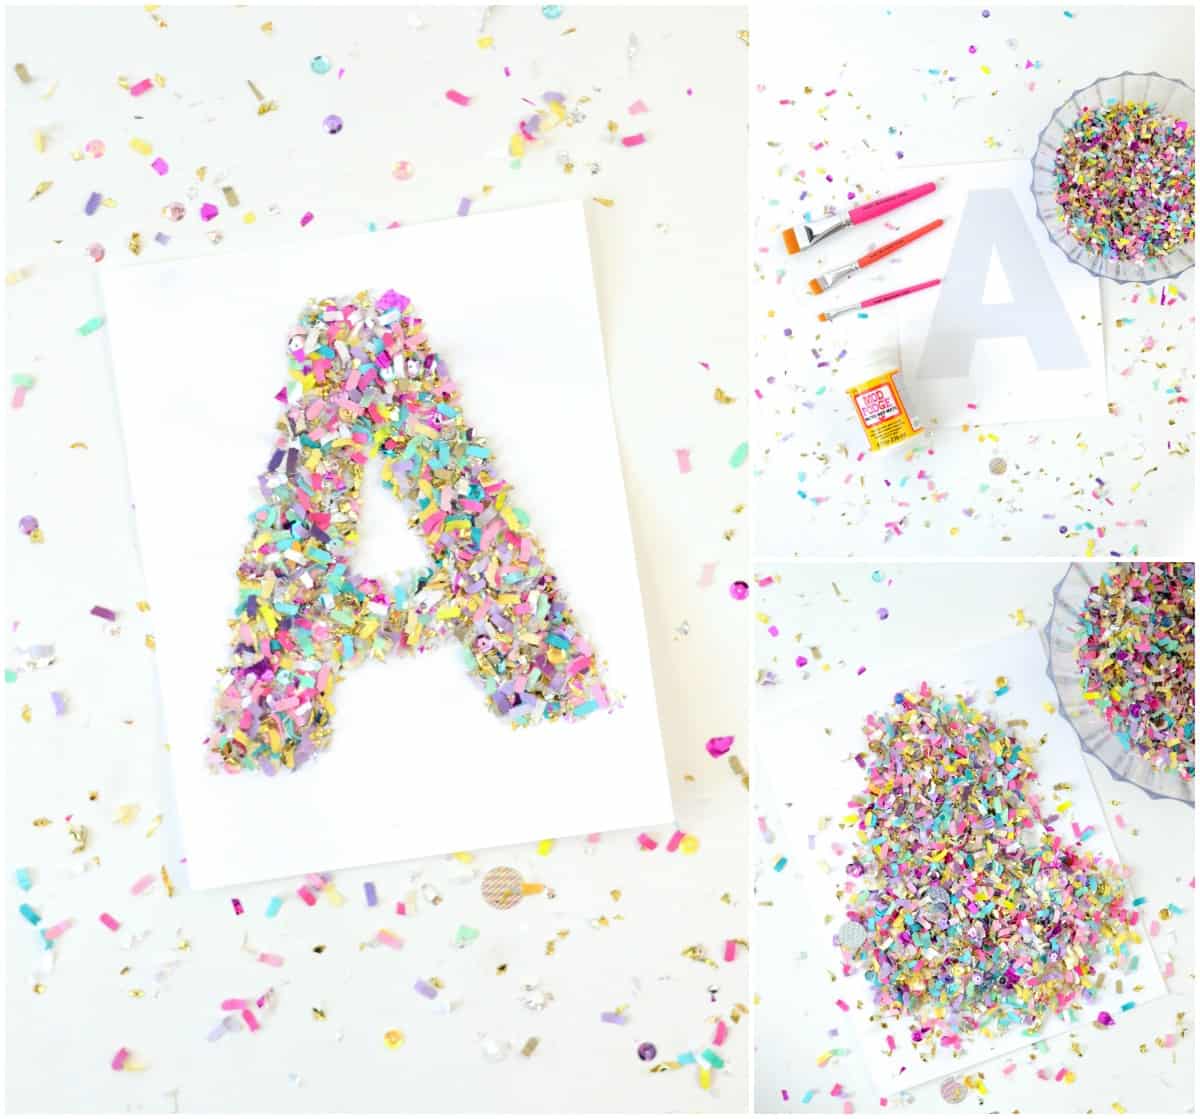
Learn how to make decorative letters using confetti and Mod Podge! This project is perfect for a kids’ room or craft studio.
Skills Required: None. This project is extremely easy. You’ll be able to accomplish it even if you’ve never picked up a paintbrush or opened a bottle of Mod Podge.
I am in the process of moving my daughter into a big girl bed and decided that we need to spruce up her decor a bit for her big girl room. I wanted to come up with a decoupage idea that was easy but would look super cute.
I have been loving the confetti trend in home decor and thought I would try my hand at it with some decorative letters. I think you’re going to love this wood craft idea.
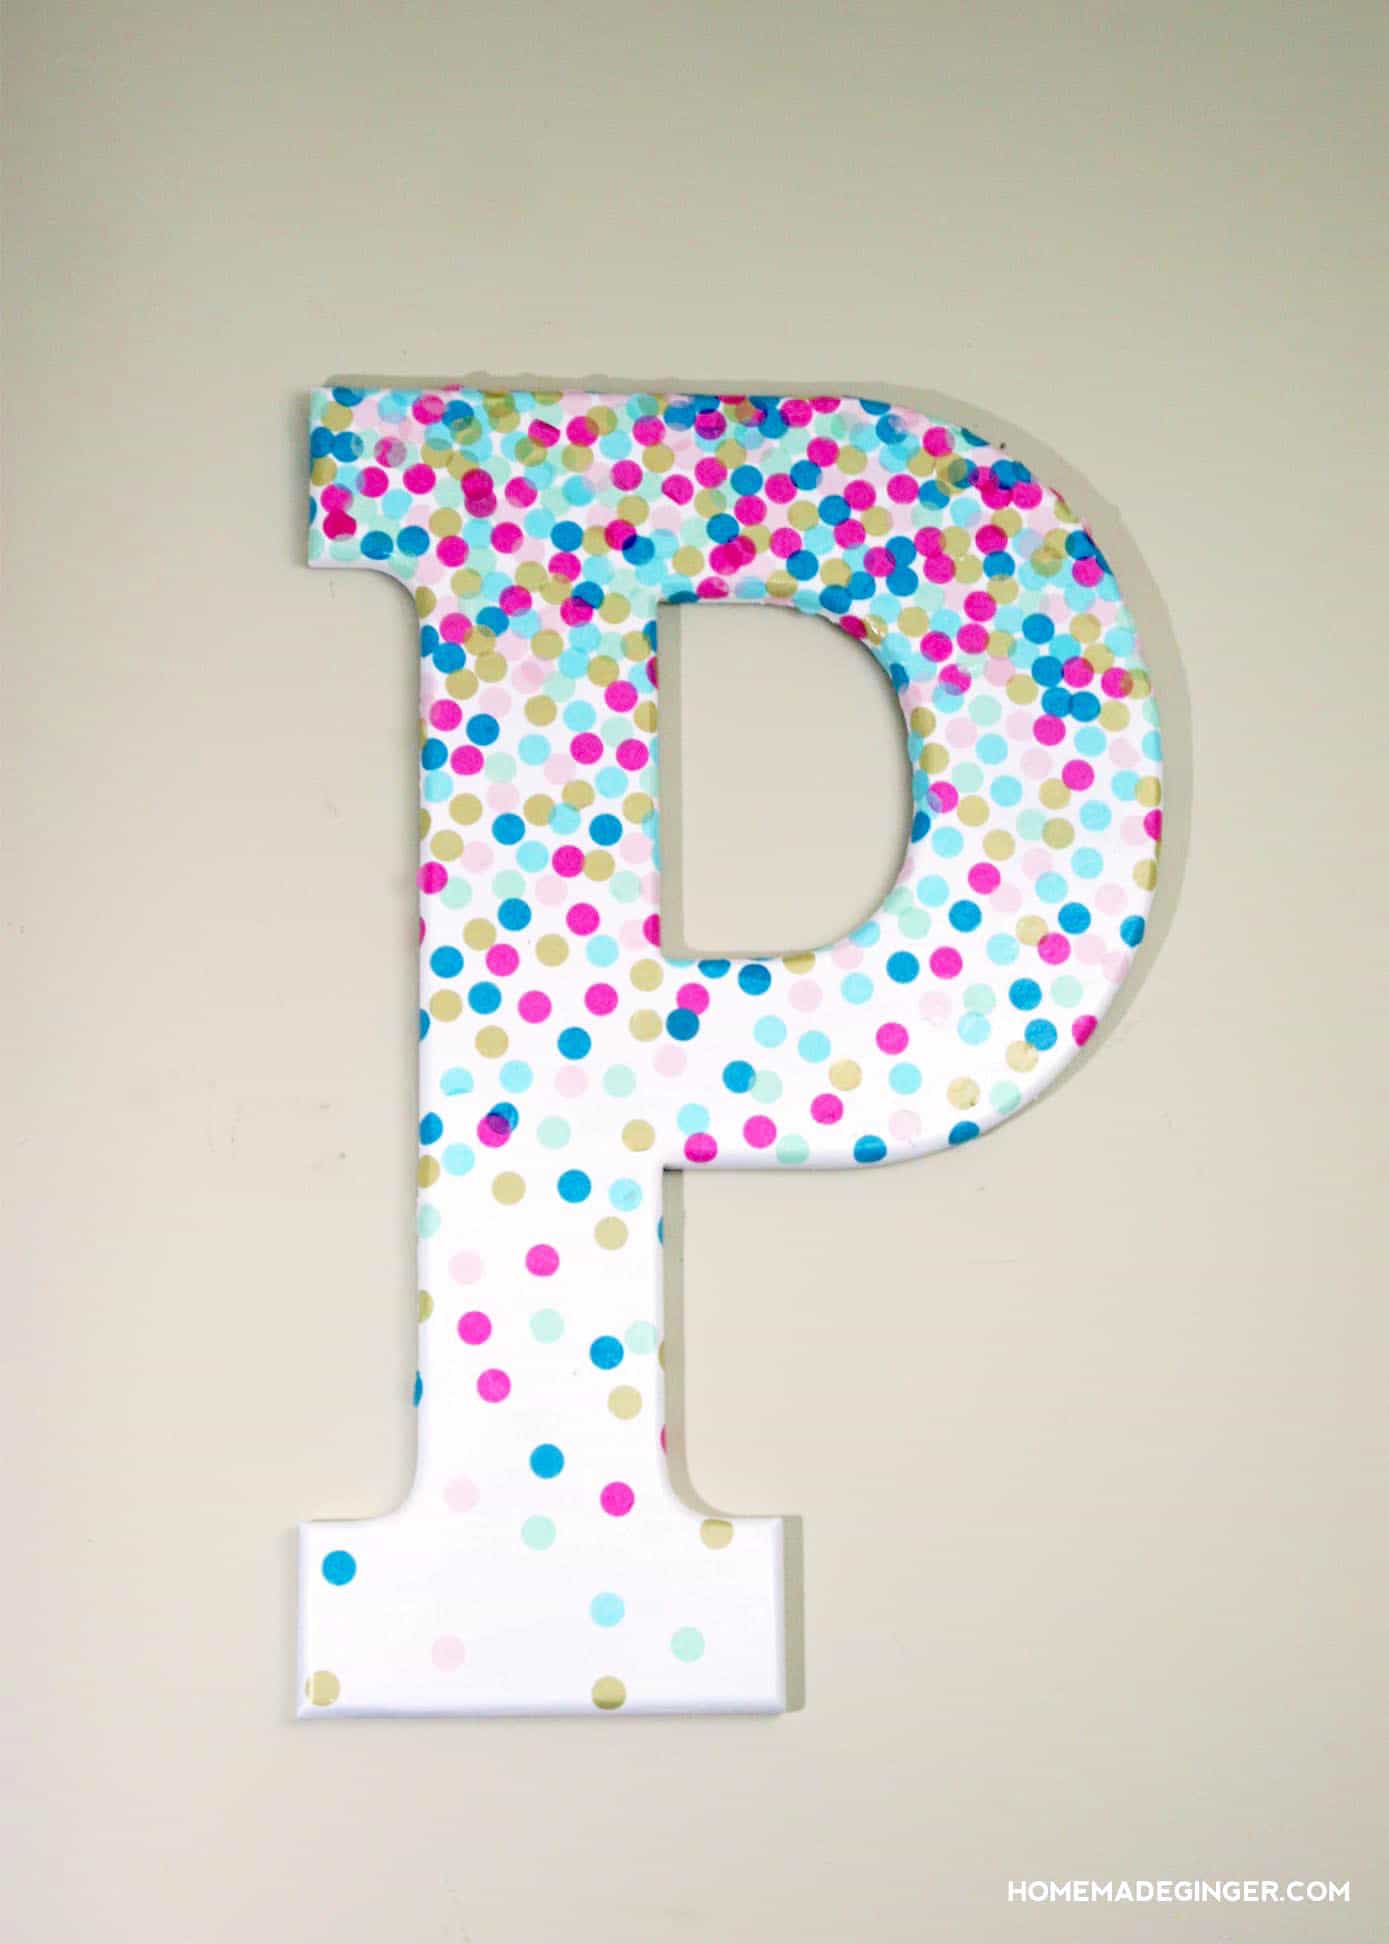
This confetti letter was so easy to put together, and I just love how it turned out. It’s so festive and fun for a kid’s room or nursery. It’s a perfect beginner craft if you’ve never used Mod Podge before!
You could change up the colors for a boy or even put one in an office or craft space – and of course, add a bunch of them if you like!
Letter Wall Decor
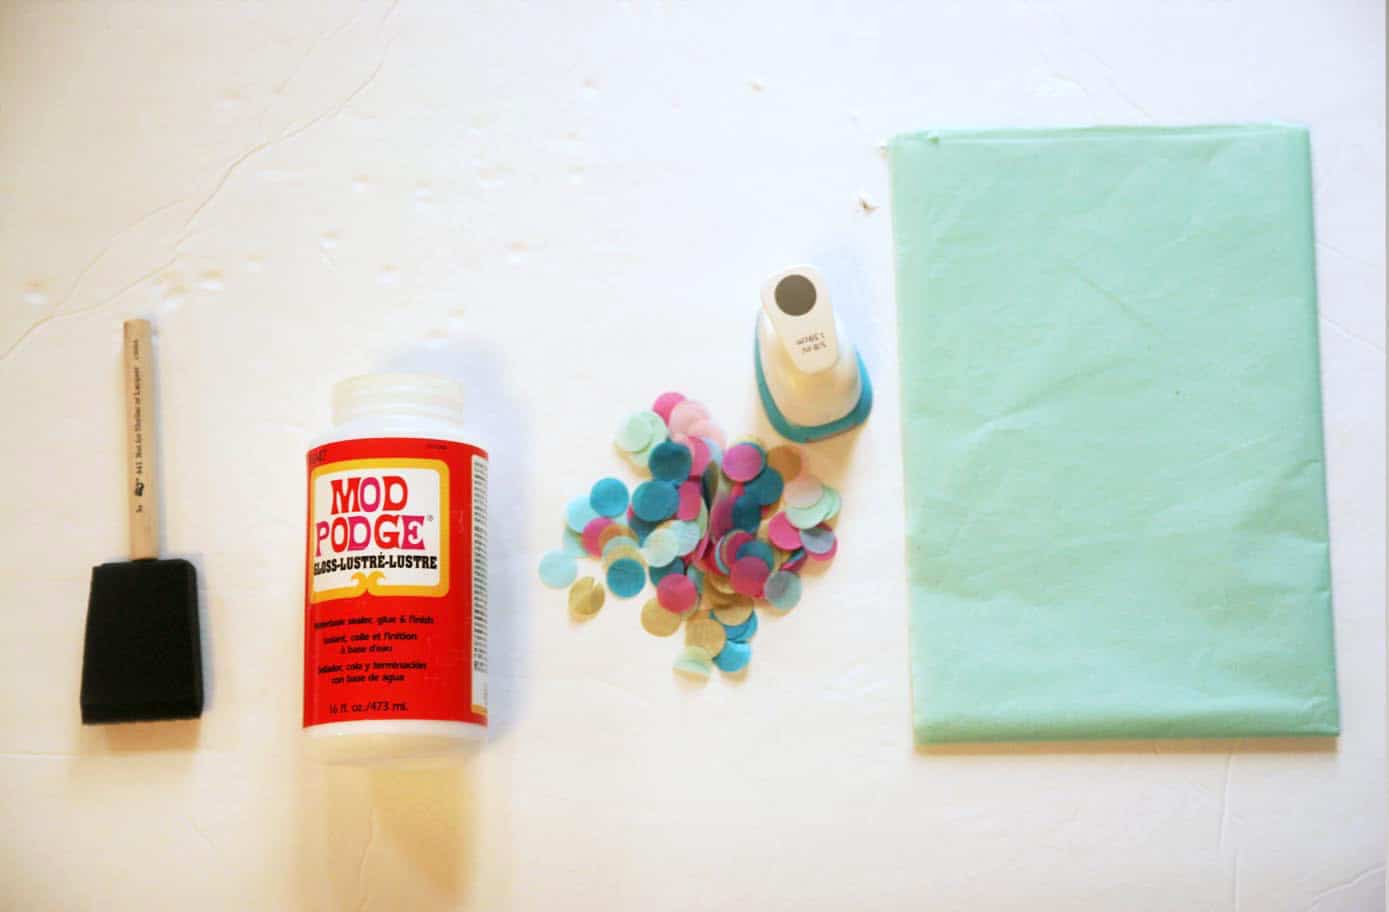
Here’s what you will need:
- Mod Podge Gloss (Matte would work as well)
- Foam Brush
- Tissue Paper
- Large Hole Punch
- Wooden Letter
- Craft Paint (optional)
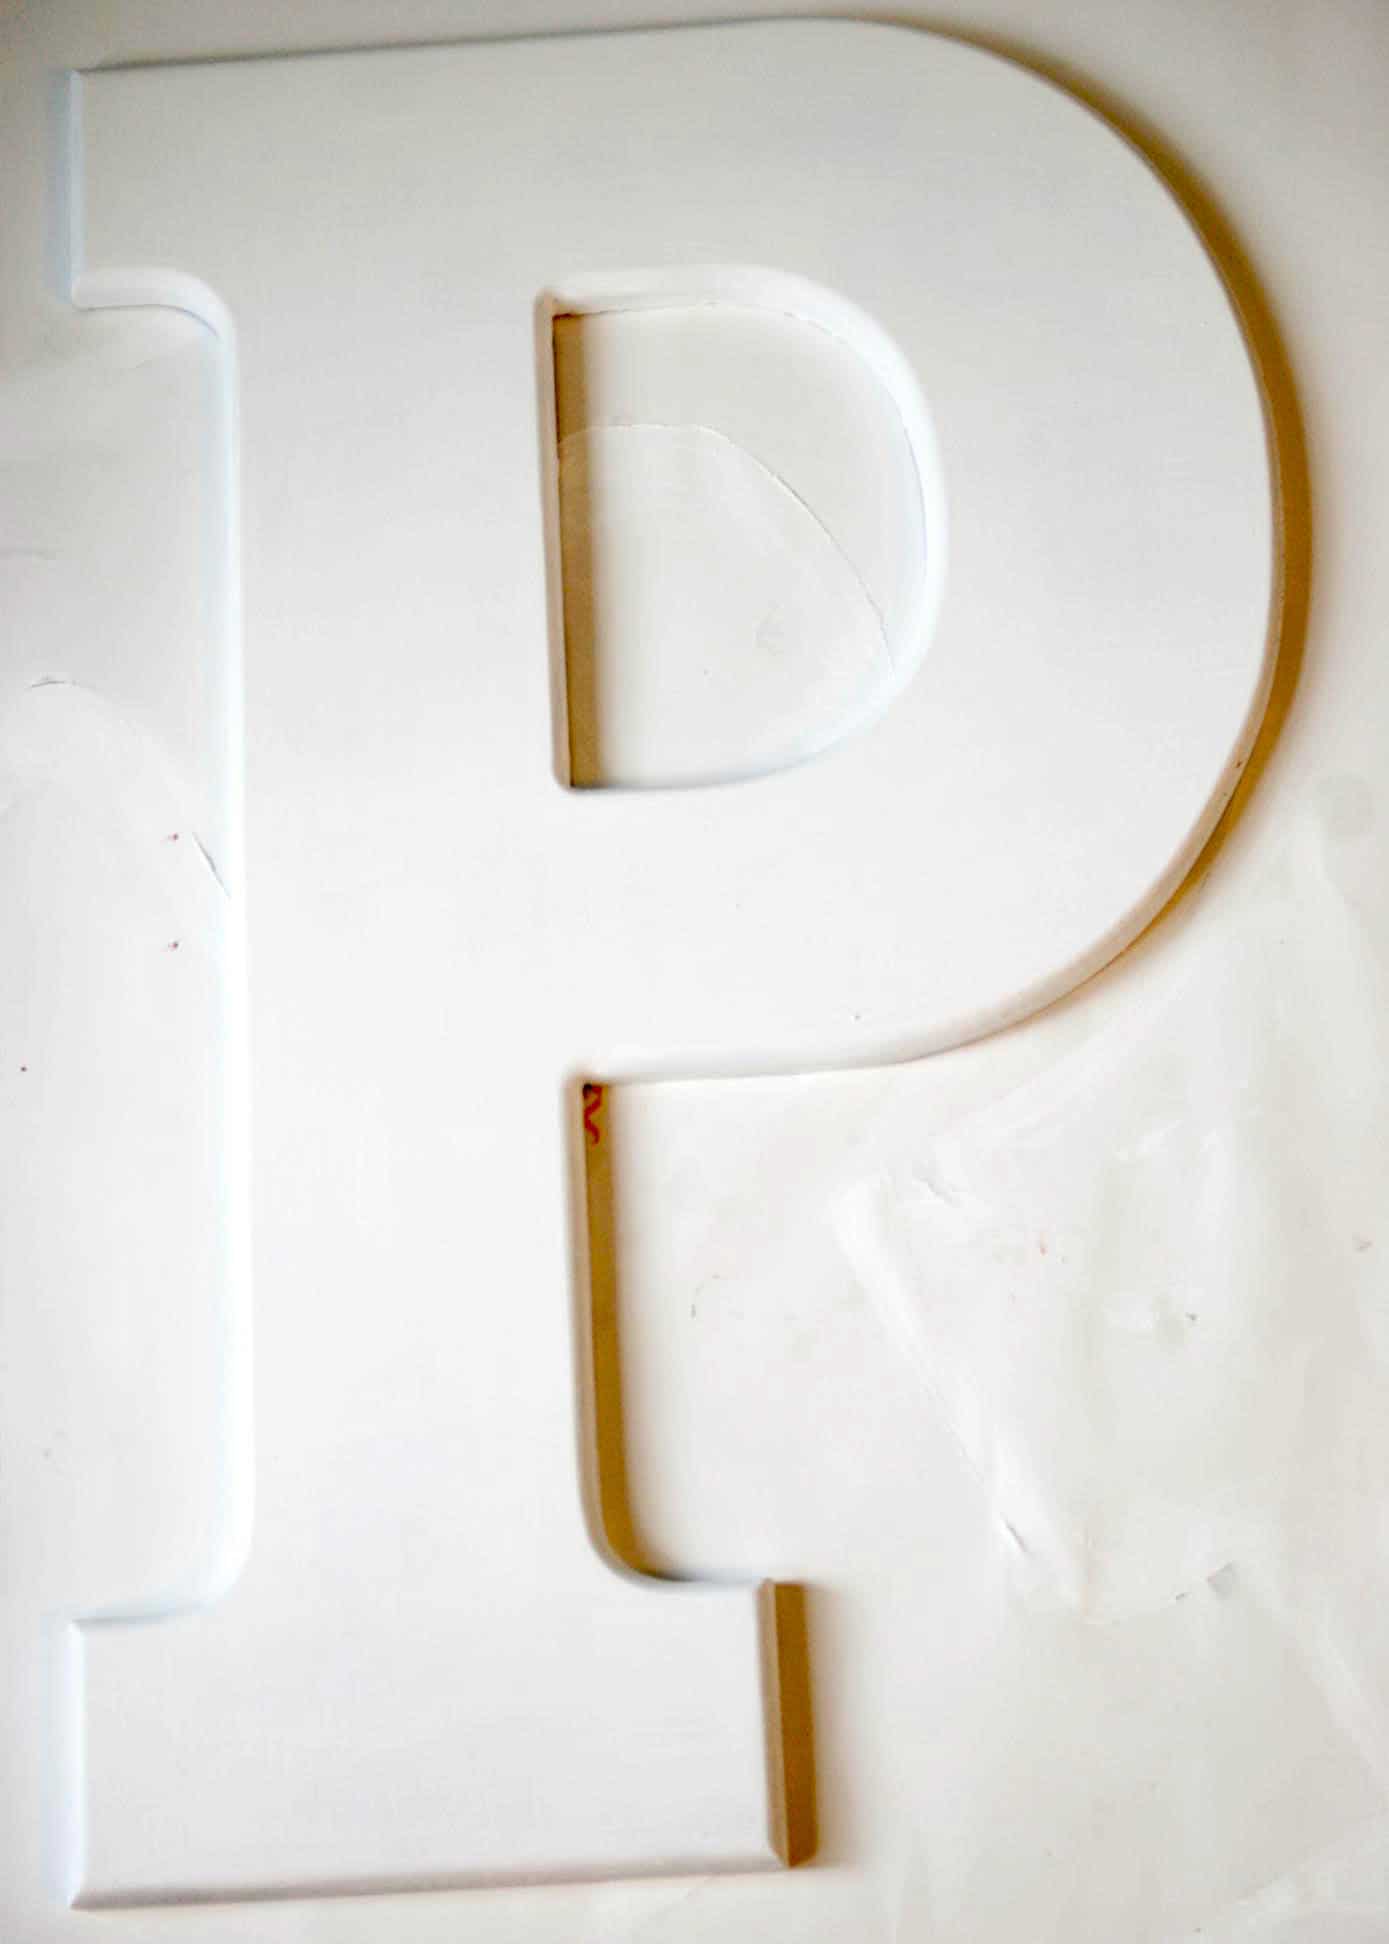
It’s hard to tell from the photos, but the letter I used is huge. My mom gave it to me and although I loved the size, I did not love the color. So I gave it a few coats of bright white. You can paint your decorative letters any color you like.
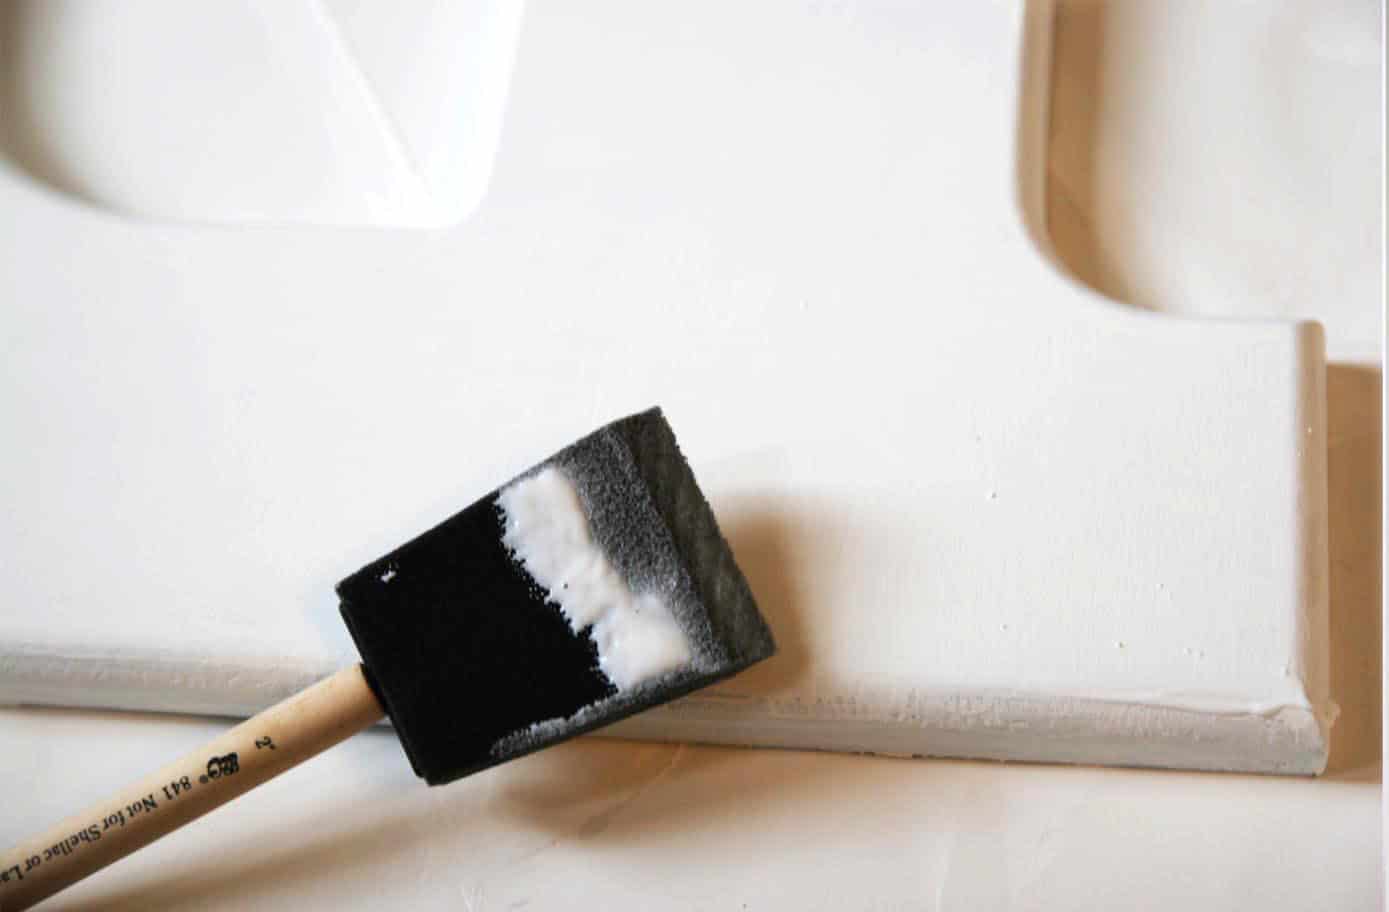
You will need to work in small sections since the Mod Podge dries so quickly. Brush some Mod Podge on a section and then begin layering on your confetti.
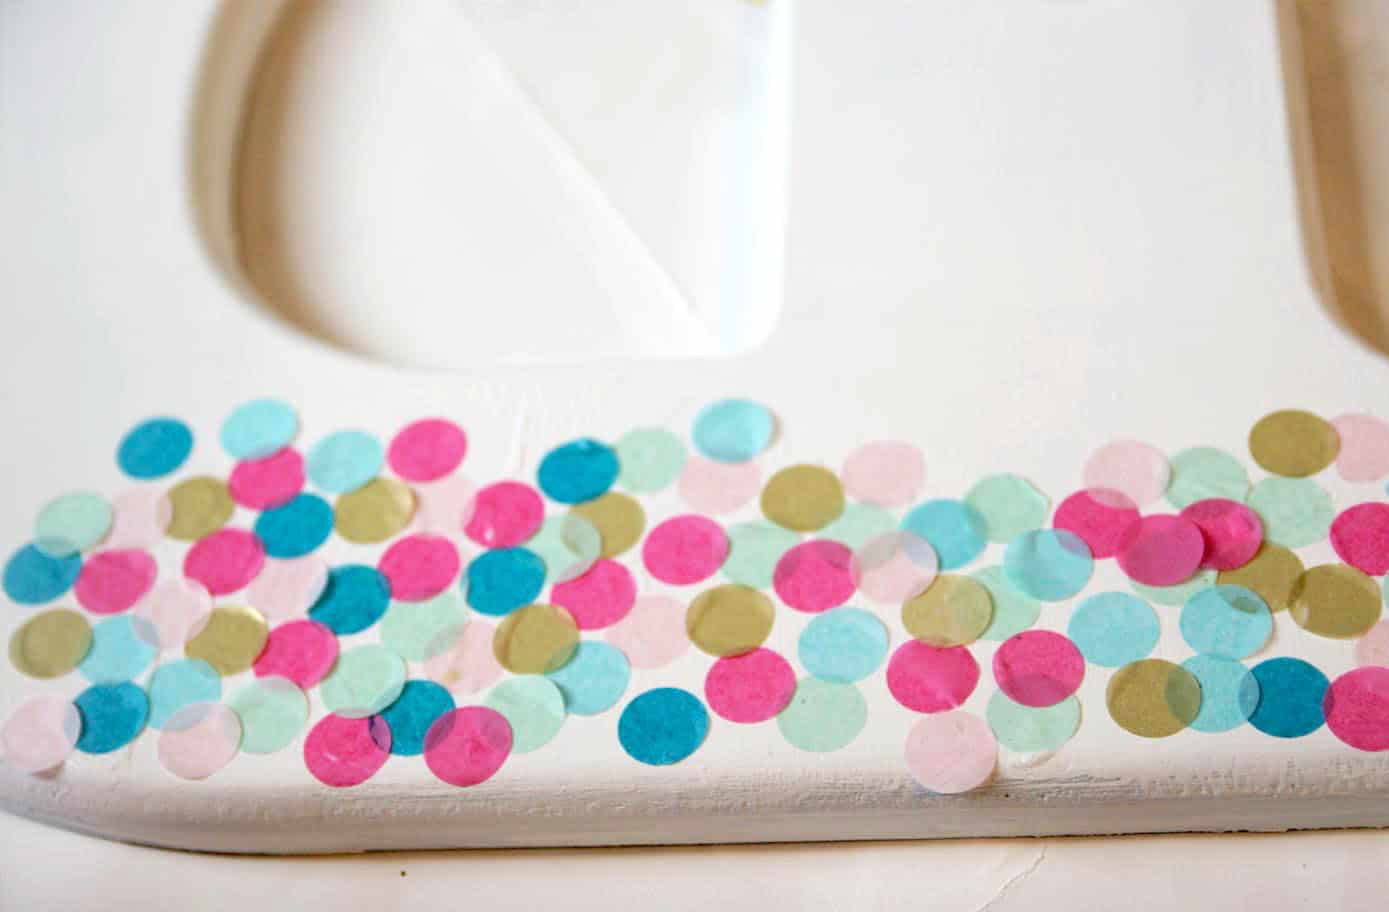
I made my own confetti by using a large dime size round punch and tissue paper.
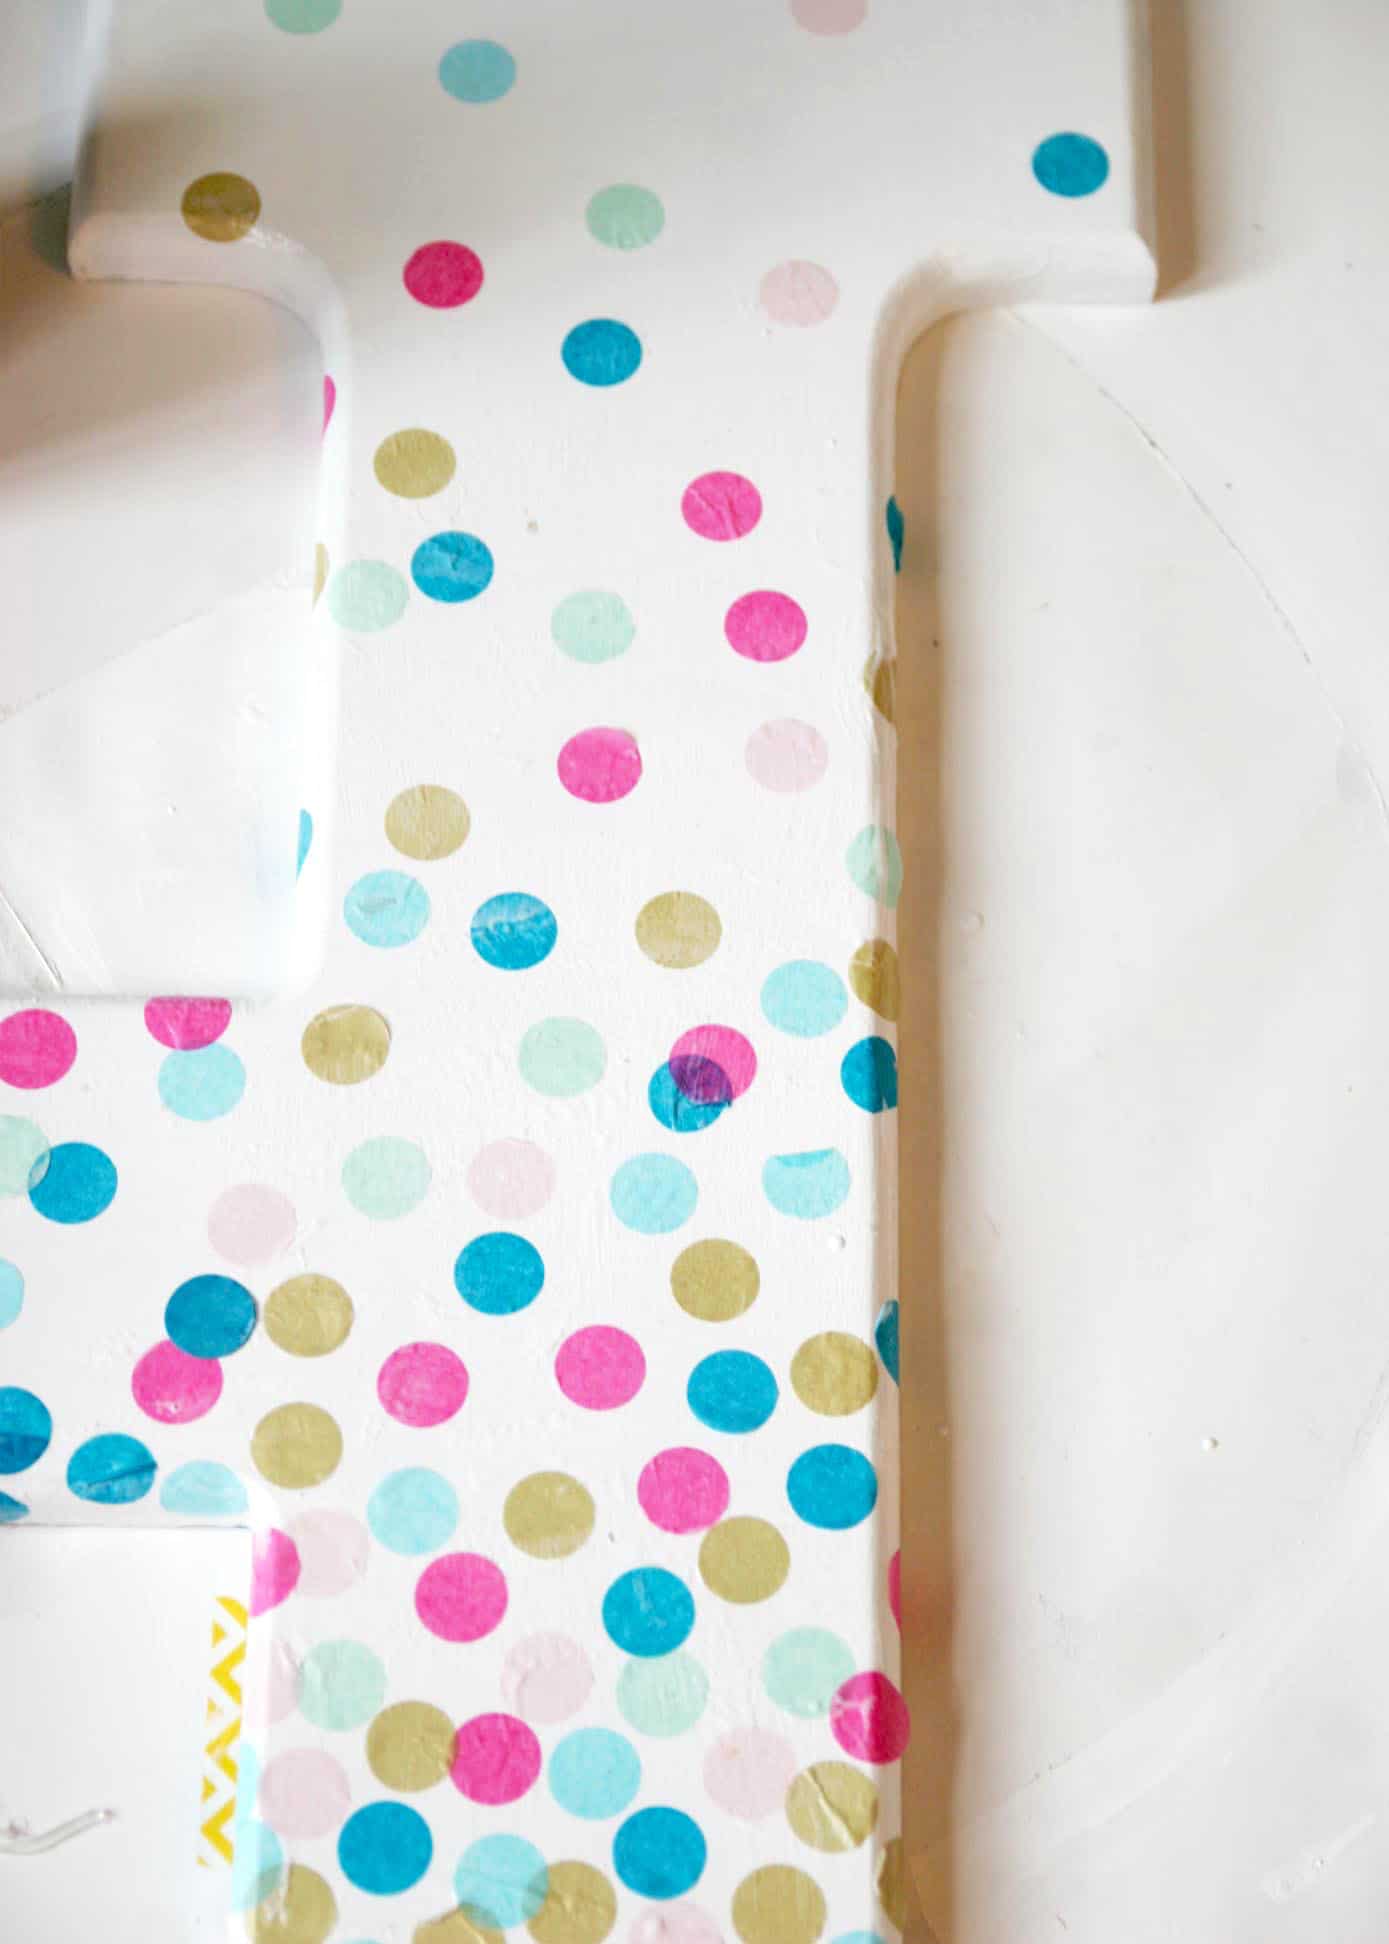
Start spacing out the confetti as you get closer to the bottom of the letter. Don’t forget to add some to the sides as well!
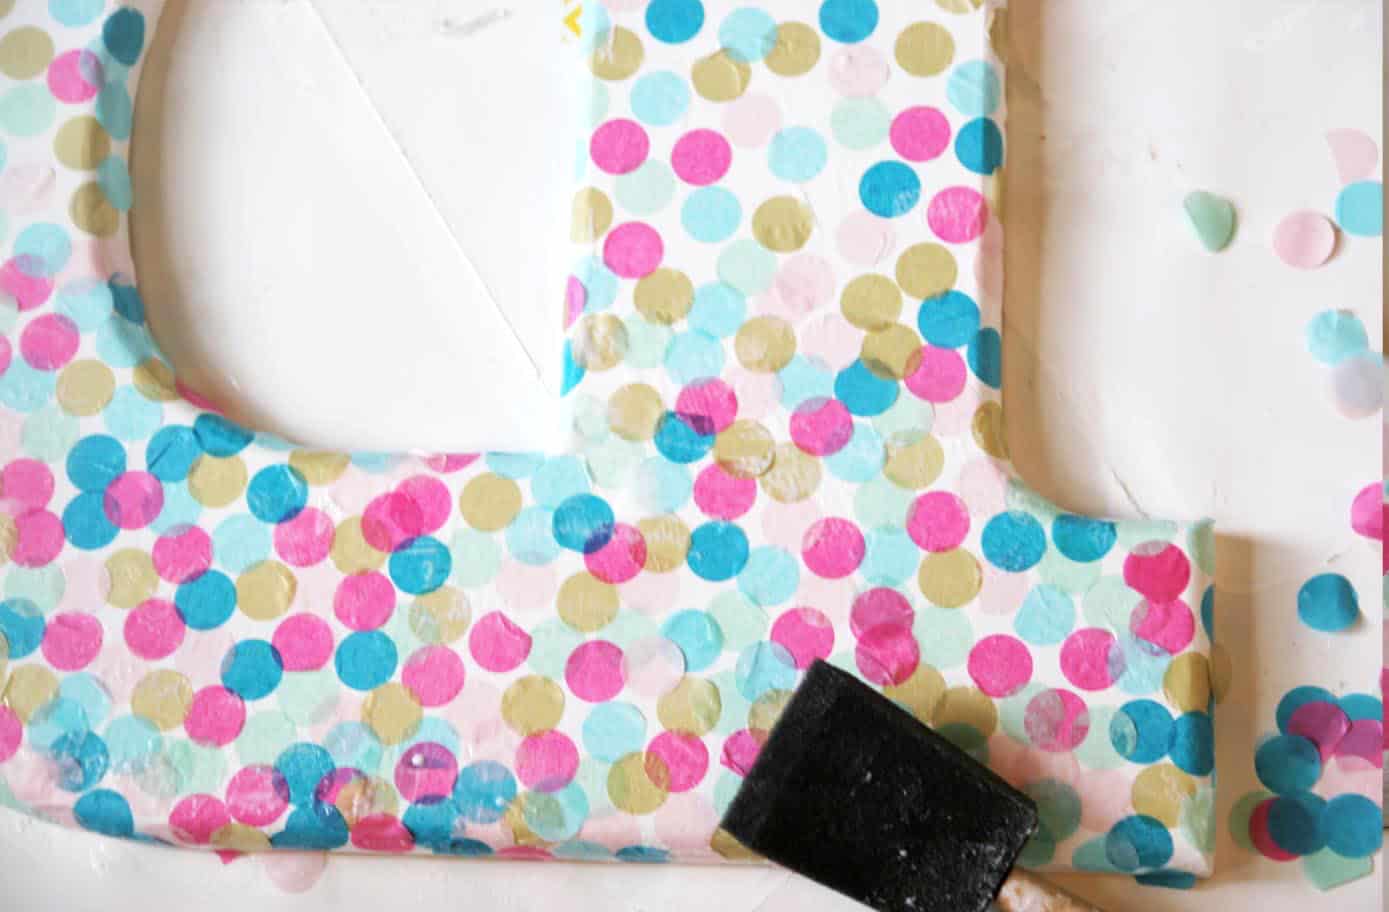
Brush on a layer of Mod Podge over the whole thing to seal it.
Hang your DIY confetti letter and enjoy! Make more decorative letters in just the same way. This letter wall decor is some of my favorite ever!

Decorate Wood Letters
Equipment
- Large Hole Punch
Materials
- Large Wooden Letter
- Mod Podge Matte
- Tissue paper
- Acrylic Paint optional
Video
Instructions
- If you need to paint your letter, do it with acrylic paint. Give several coats and let dry.
- You will need to work in small sections since the Mod Podge dries so quickly. Brush some Mod Podge on a section and then begin layering on your confetti.
- I made my own confetti by using a large dime size round punch and tissue paper.
- Start spacing out the confetti as you get closer to the bottom of the letter. Don’t forget to add some to the sides as well!
- Brush on a layer of Mod Podge over the whole thing to seal it.
- Hang the letter and enjoy (make multiples if you like!).
For another variation on this decorative letters project, try this confetti monogram letter art below!
For other letter decoration projects, try beach letters, cardboard letters, or comic book letters.


Do you think this will work if the letters are painted black? I would like to do this for Halloween.
The tissue paper is going to look terrible on black paint – if you use black paint, use scrapbook paper of a medium thickness or greater. You’ll have some texture to the letter, but otherwise you won’t be able to see the confetti.
How big is this letter. The biggest I can find is 21cm?
This letter is so cute! I want to make one for my daughter’s room!
Paige
https://www.thehappyflammily.com/
Very nice blog post/tutorial. Thanks for sharing.
This looks really pretty & interesting 🙂 Thanks for sharing with us Megan 🙂