Make these fun and easy cactus painted rocks! A cute craft that’s perfect for beginners, kids, or anyone who loves low-maintenance plants.
Skills Required: None. You don’t need to be an artist to make these adorable rocks. You’ll be painting, using paint markers, and gluing (adult supervised). This is a great project for beginners and fun for all ages!
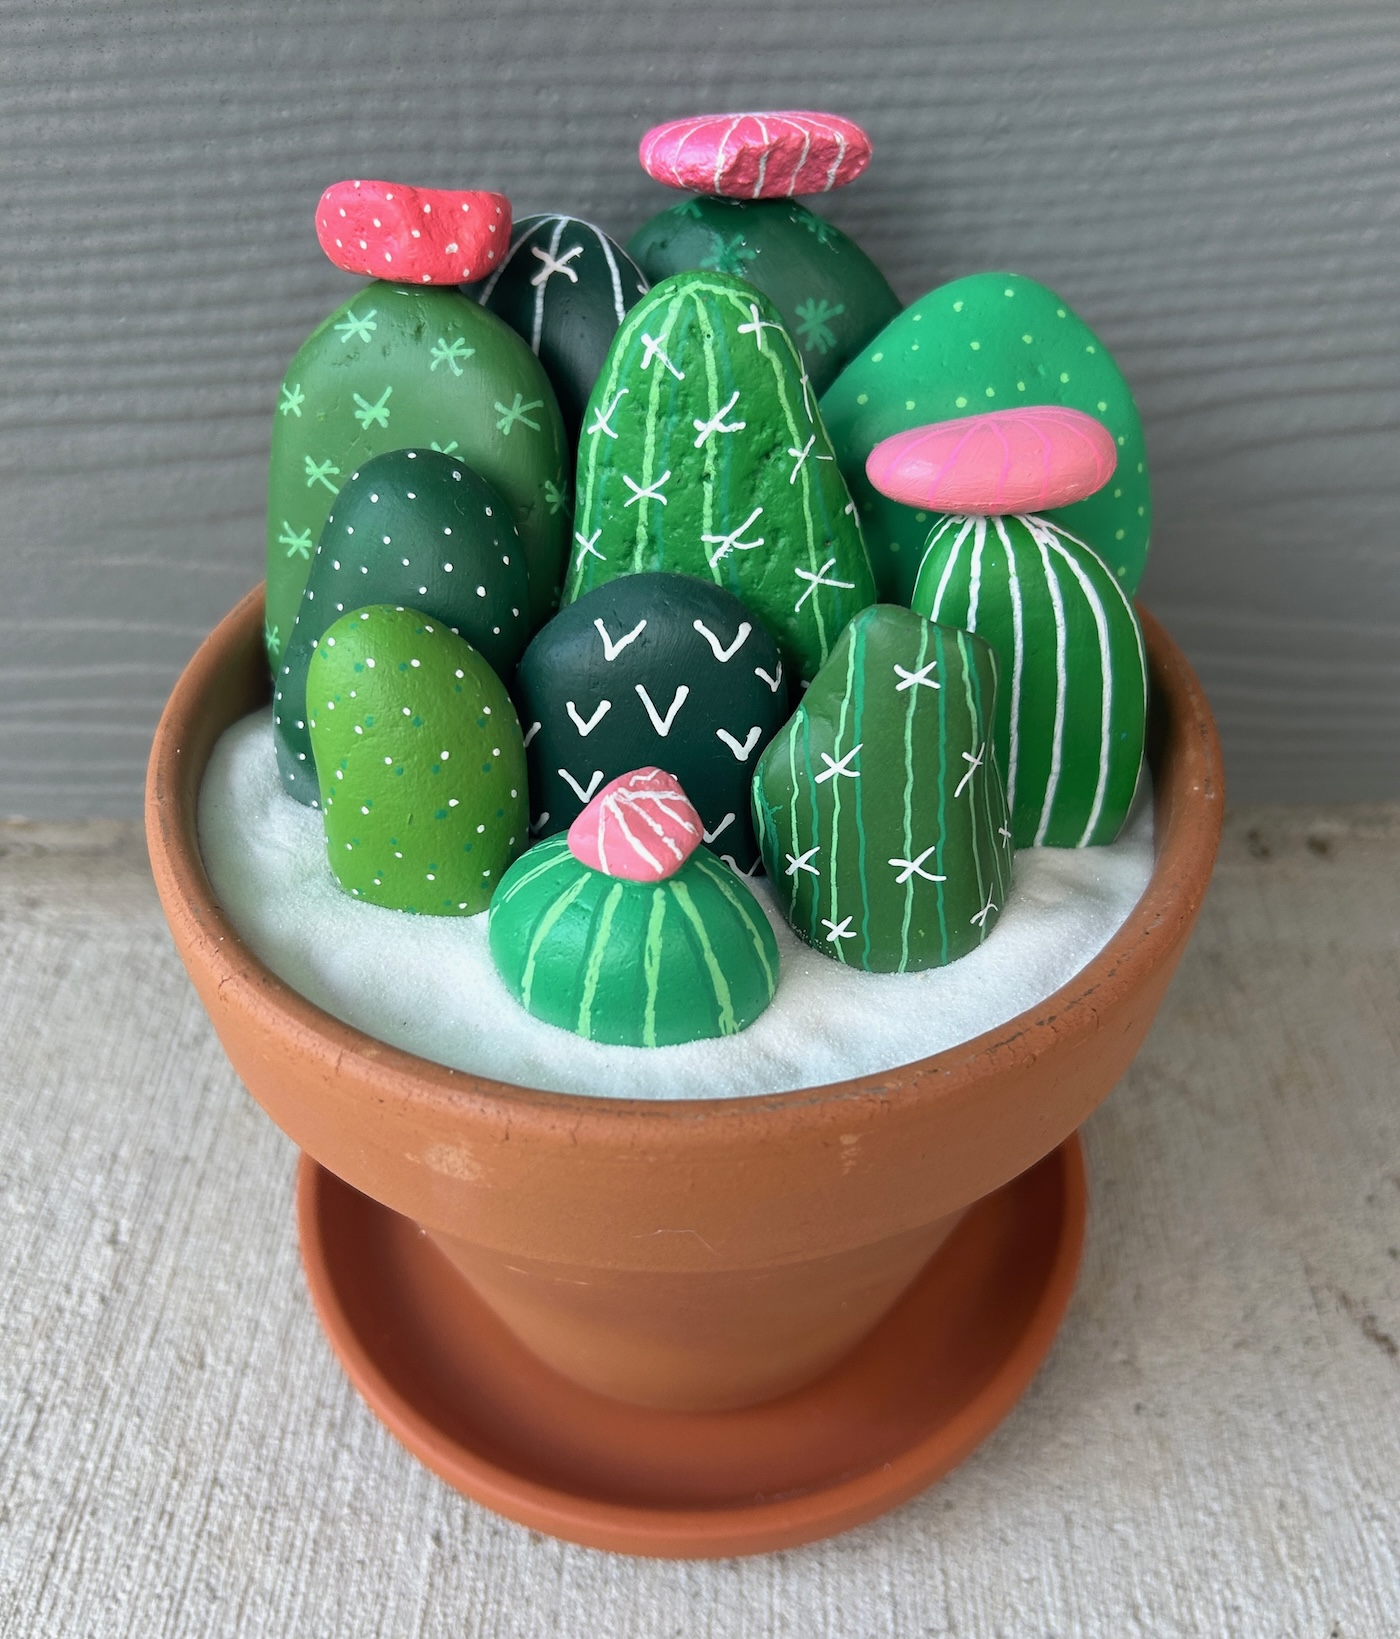
Are you ready to dive into one of the cutest rock painting trends around? Today I’m sharing my tutorial for cactus painted rocks – the kind that won’t prick your fingers. However, they will make you smile.
I might not be a hot weather person (I live in the PNW), but I really love cacti and succulents in decor. I can’t explain why – they’re just very unique looking.
Plus what other plant protects itself with spikes? I feel like that sometimes. Soft on the inside, bristle-y on the outside. I think we can all relate. Right?
Whether you’re decorating your garden, creating fun home decor, or just looking for a relaxing craft, these little succulents are the perfect way to enjoy painting stones.
This is a fun craft idea for both kids and adults. Being absolutely honest, I had *the best* time painting and making this garden. It checks all the boxes, without being creatively stressful. And the result is . . . just so dang visually pleasing!

Another benefit of this project is the mindfulness that comes along with it. You get to be out in nature while selecting the stones . . . and the painting portion is very relaxing and methodical. Like outside gardening in the dirt, there’s a peace to creating this rock garden.
And don’t worry if you make a mistake – these rocks are very forgiving. You can always repaint and try again, or just call it a “funky cactus” and roll with it. That’s part of the charm!
Before we jump into the tutorial, let’s go over a few things you need to know when starting out:
What kind of rocks should I use for cactus painting?
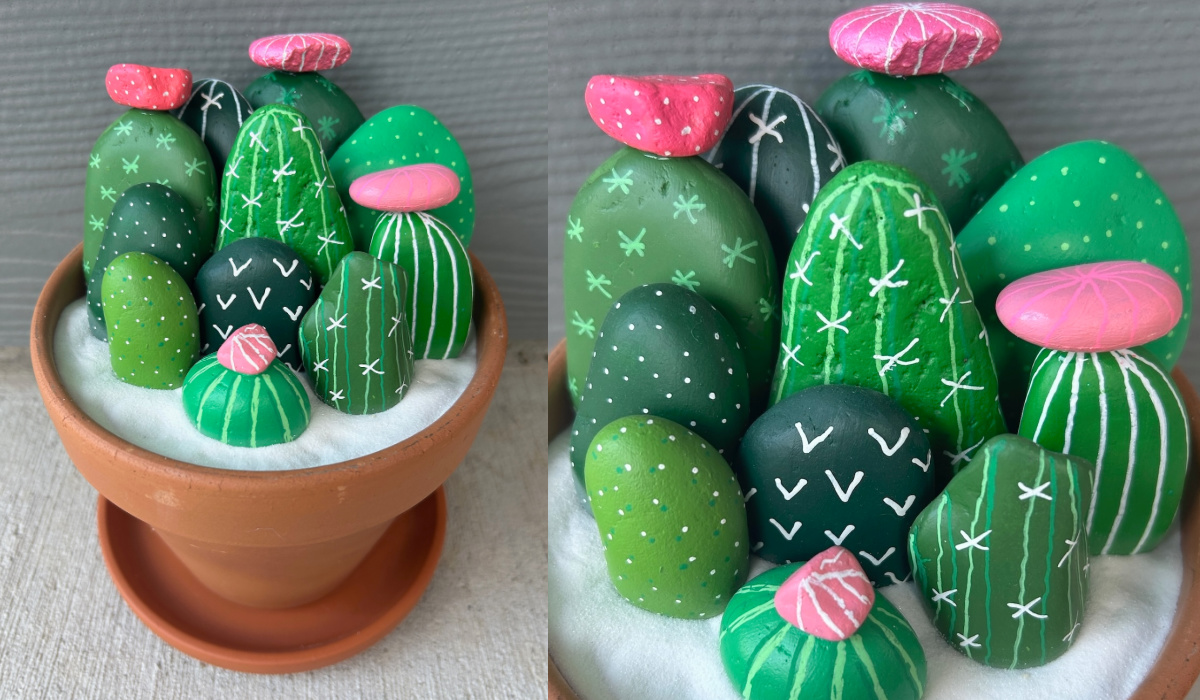
Regular cacti come in a variety of shapes and sizes, so that is what you’ll want to look for in your rocks. I tried to choose smooth stones that were somewhat flat for my largest cacti.

As you get toward the front of your garden, you can choose shorter, wider stones. That is what I did. So flat and tall towards the back, and shorter and thicker toward the front.
It always helps to look up some pictures of cacti online to inspire you!
What kind of paint is best for cactus rocks?
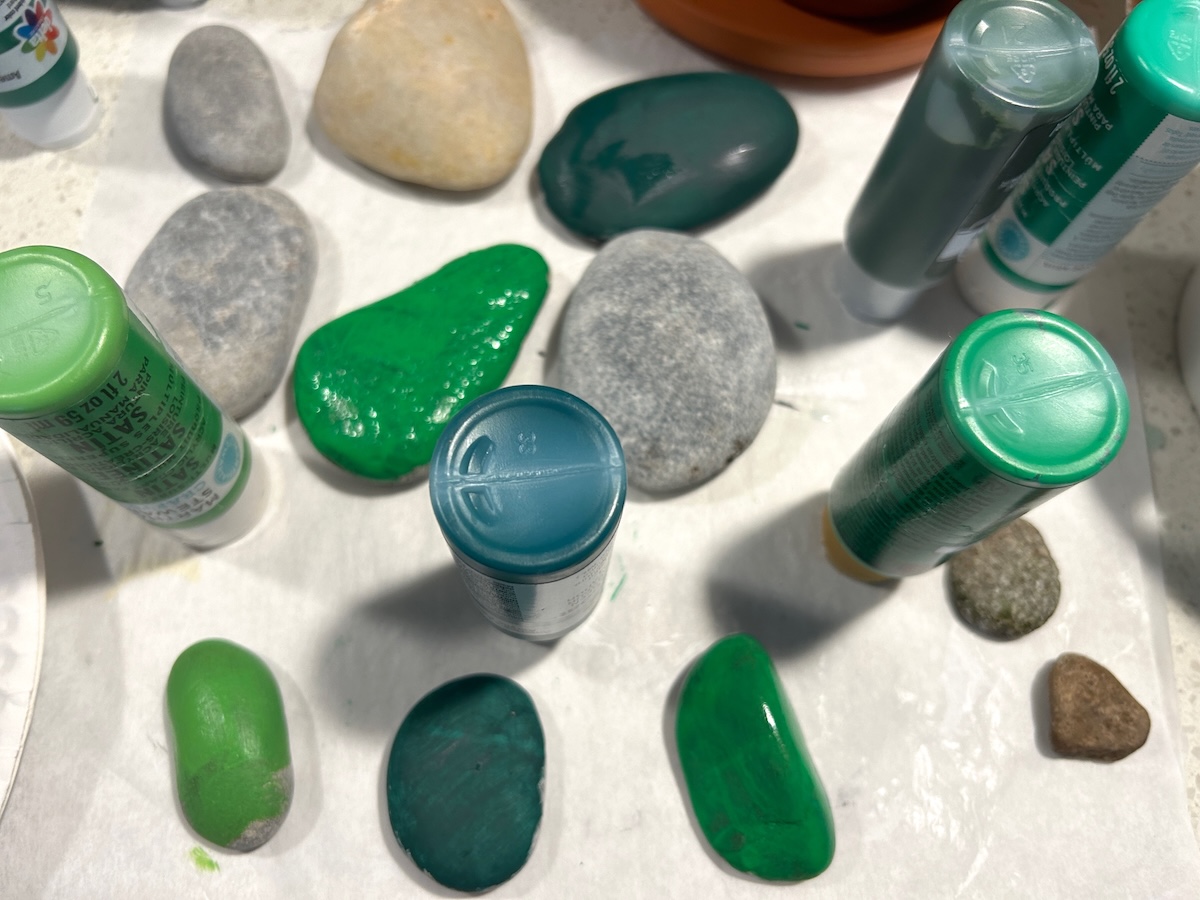
You’ll want to use an acrylic paint that’s durable and vibrant. I recommend FolkArt Multi-Surface or Apple Barrel Multi-Surface paints – they’re both great for beginners and hold up well over time.
Honestly I just used what I had in my stash. This is a great stash busting project when it comes to paint. I have *a lot* of bottles of paint with just a little bit left, so I just grabbed a bunch of greens.
The paint finish doesn’t matter because you’ll be sealing with Mod Podge at the end. The Mod Podge will even out the finish of all the various paints.
Ready to get started with your own mini rock garden? I can’t wait to show you how fun this project is! Here’s the printable tutorial:

Cactus Rock Art
Equipment
Materials
- 10-12 Rocks various sizes, shapes, and height
- 4 Pebbles small, for flowers on the cacti. These are optional
- 4-6 bottles Craft paint I used greens and pinks I already had
- 1 bottle Mod Podge Satin
- 4 Paint pens pink, green, white
- 1 Terra cotta pot
- 1 Terra cotta saucer
- 1 bottle Decorative sand white
- 1 bottle Weldbond Multi-Surface Adhesive or other glue for stone/rock
- 1 Wood clothespins
- Painter’s tape
Instructions
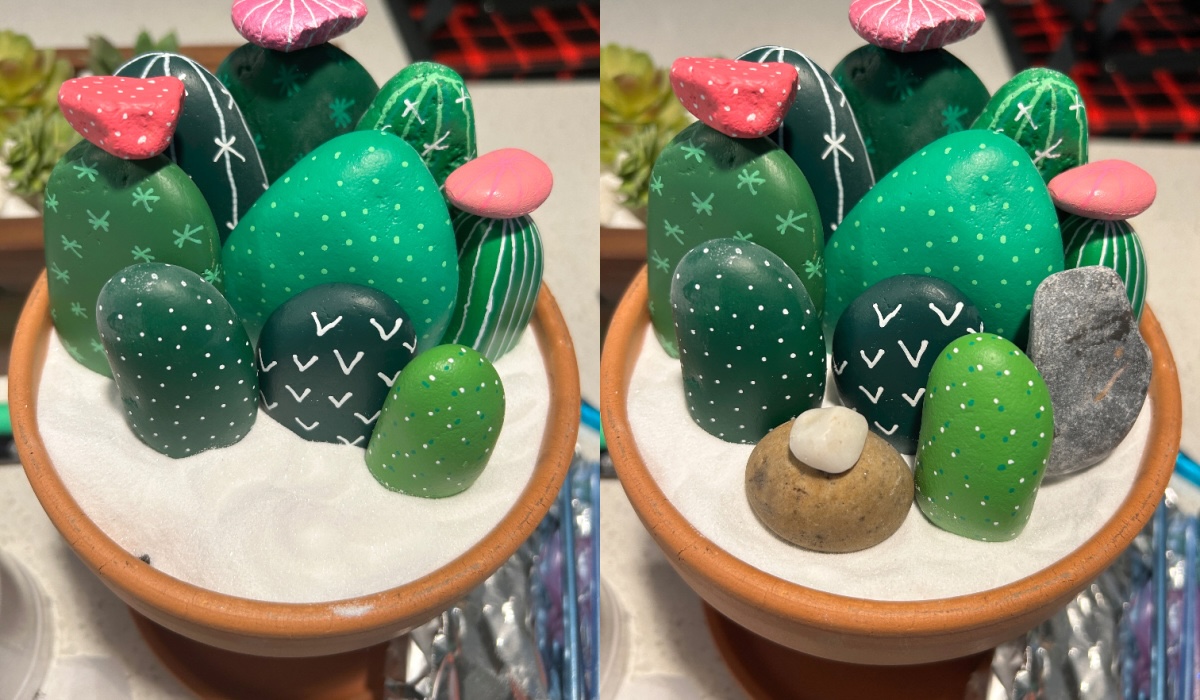
- Place your pot on your surface and start filling it. I used dirt with some stones on top that I had left over from gardening to fill my pot. At the very top, you should use dirt (or something that can hold the decorative sand). Once your pot is filled, place the rocks you’ve collected in an initial layout and take a picture with your phone. You’ll want to stagger the rocks like you would people in a family photo: tallest in the back, working down with the smallest towards the front. This might not be your final layout, but you want an idea to start.

- Once you’ve got your layout photographed, begin painting the rocks. I used six different shades of green in total. I tried to paint rocks that were next to each other in my layout with different shades of green.
- Continue painting the rocks until you have the proper coverage, and let them dry completely.

- Working one rock at a time, add "cactus accents" to each rock with paint pens. I used a combination of Xs, Vs asterisks, polka dots, and thick/thin lines. I used white, light green, and dark green paint pens.You can use my photos for inspiration – it's the combinations and colors that make your cacti. Use variety and I promise you'll be happy.

- Paint all of the rocks with Mod Podge. Let dry, paint a second layer, and let dry again.

- At this time, you can choose the small pebbles you'd like to use for your cacti's "flowers." I chose to do only four pebbles and then painted them pink using a variety of shades. This will likely require several layers. Let dry. And some paint pen accents and let dry.

- Use the stone glue to attach the flowers to the tops of the rocks of your choice. For mine, I used painter's tape to keep the pebble in place on top of the rock. Then I used a small container to keep them upright while drying. You'll need to let them dry for several hours. Once dry, carefully remove the tape.

- You're ready to set up your garden. Pour a layer of decorative sand into top of the pot and smooth out.

- Split a clothespin and insert half of it into the dirt to stabilize your largest stone at the back. I didn't glue the stone to the clothespin. Once I nested the large rock into the sand and rested it against the clothespin, it stayed there by itself.

- Add the remaining stones and brush off any sand with a dry paint brush. At this time you can add stone cacti to fill in any areas you desire. You can even paint more to fill in, as I did.
Notes

If you enjoyed this project, I’d love to hear that in the comments! I hope your garden gave you as much pleasure making it as mine did. Also check out these other posts: