Cactus Rock Art
Learn how to paint the cutest cactus garden and then seal it with Mod Podge! Plus you'll find tips for success.
Yield: 1 project
Cost: $5
Equipment
Materials
- 10-12 Rocks various sizes, shapes, and height
- 4 Pebbles small, for flowers on the cacti. These are optional
- 4-6 bottles Craft paint I used greens and pinks I already had
- 1 bottle Mod Podge Satin
- 4 Paint pens pink, green, white
- 1 Terra cotta pot
- 1 Terra cotta saucer
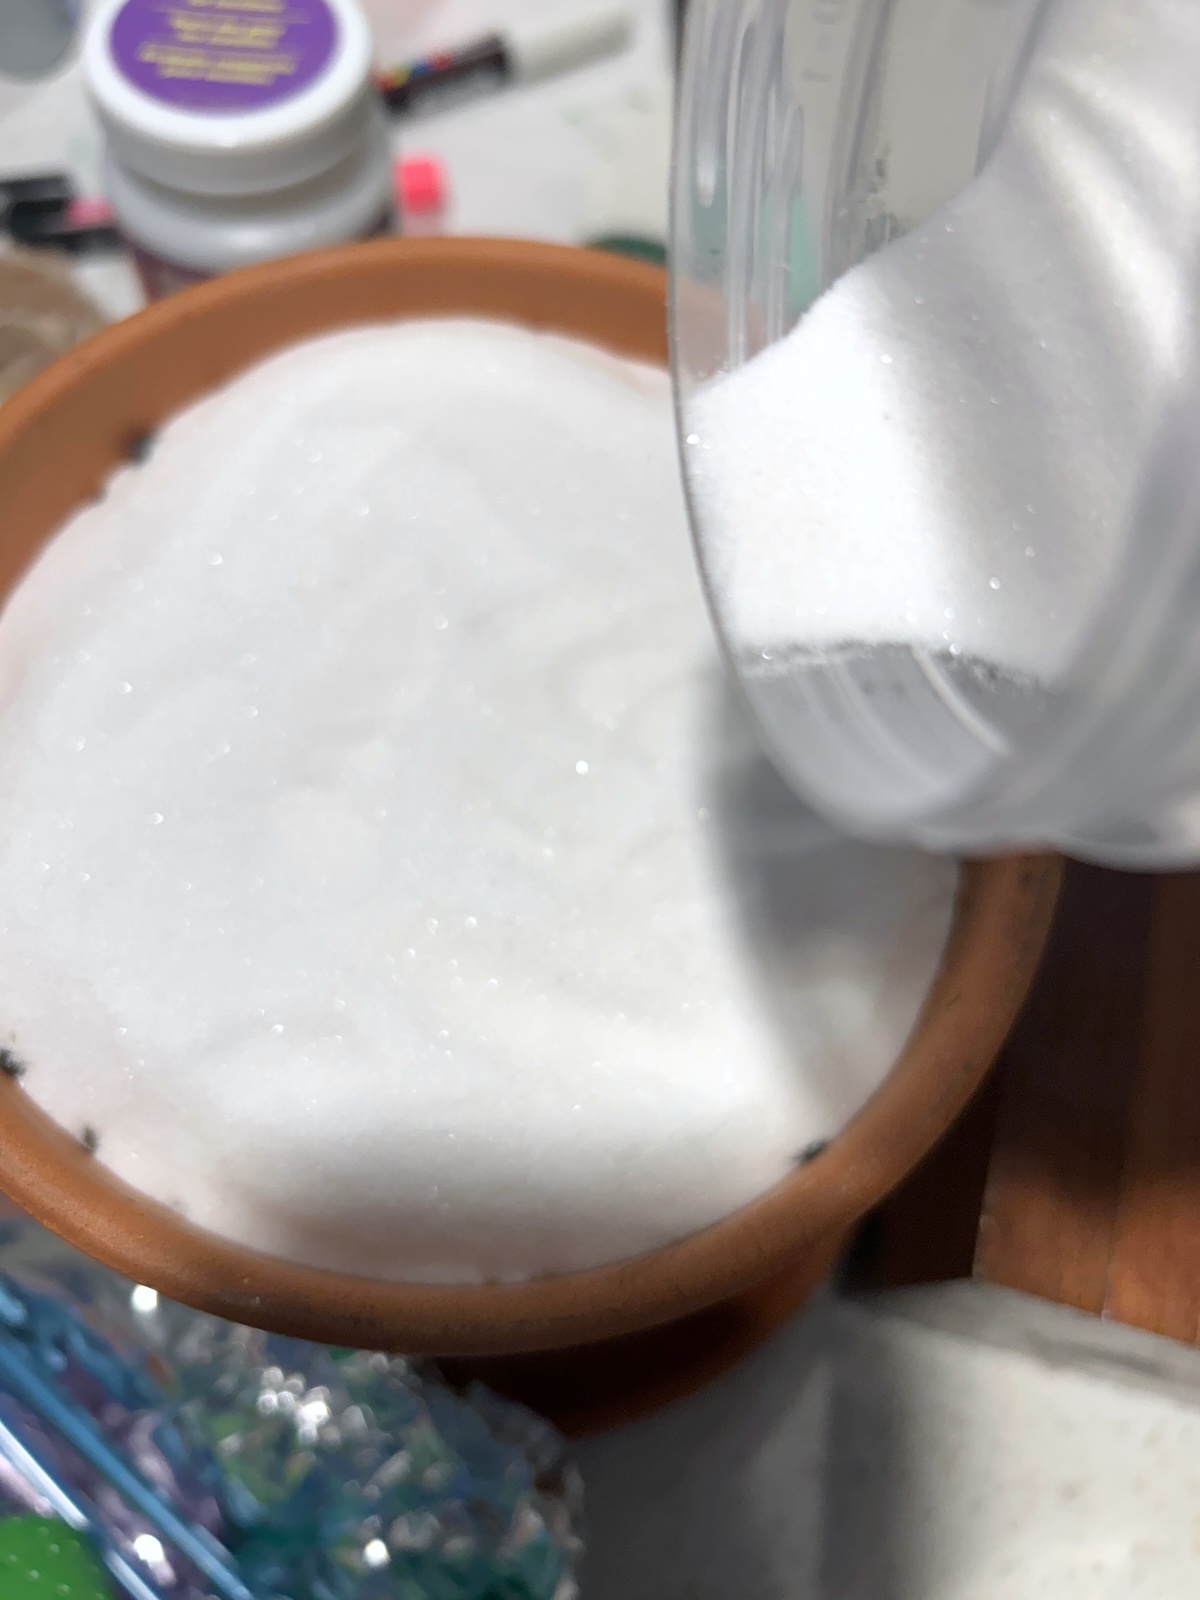
- 1 bottle Decorative sand white
- 1 bottle Weldbond Multi-Surface Adhesive or other glue for stone/rock
- 1 Wood clothespins
- Painter’s tape
Instructions
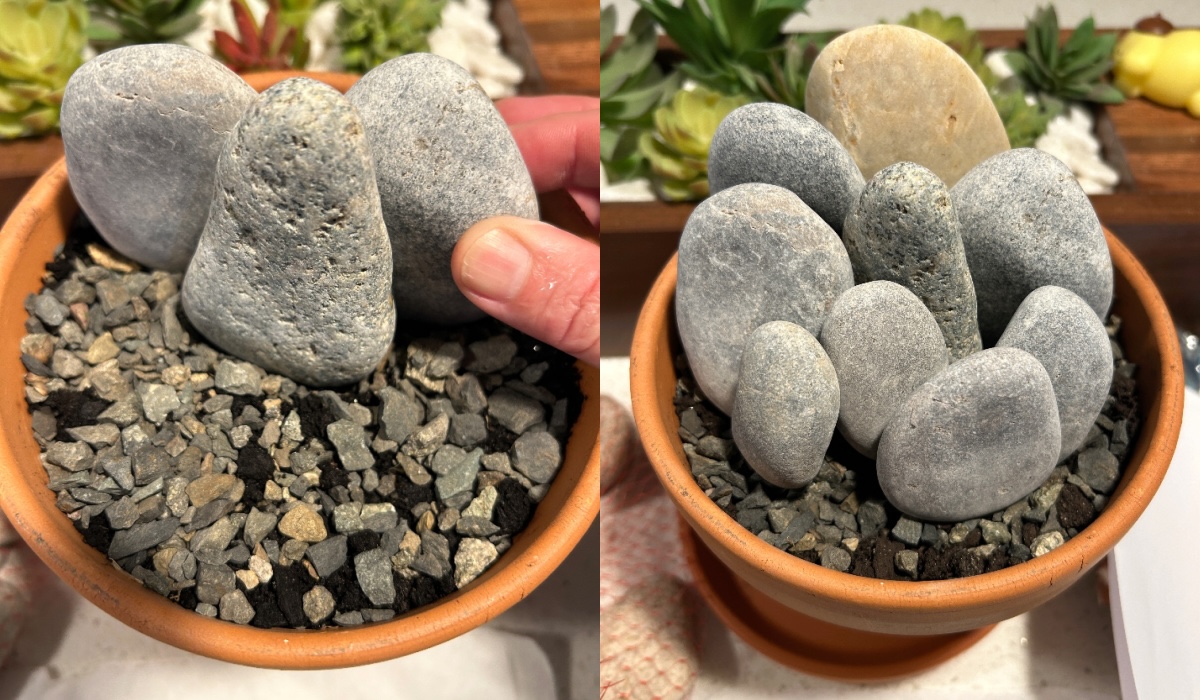
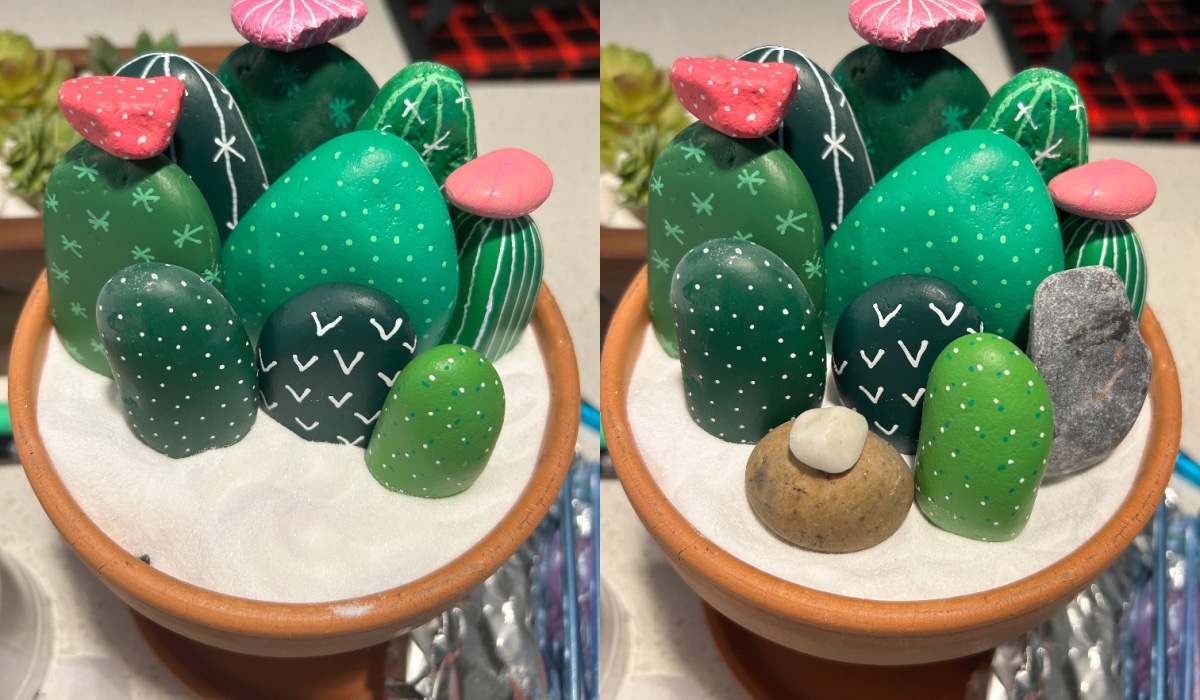
- Place your pot on your surface and start filling it. I used dirt with some stones on top that I had left over from gardening to fill my pot. At the very top, you should use dirt (or something that can hold the decorative sand). Once your pot is filled, place the rocks you’ve collected in an initial layout and take a picture with your phone. You’ll want to stagger the rocks like you would people in a family photo: tallest in the back, working down with the smallest towards the front. This might not be your final layout, but you want an idea to start.
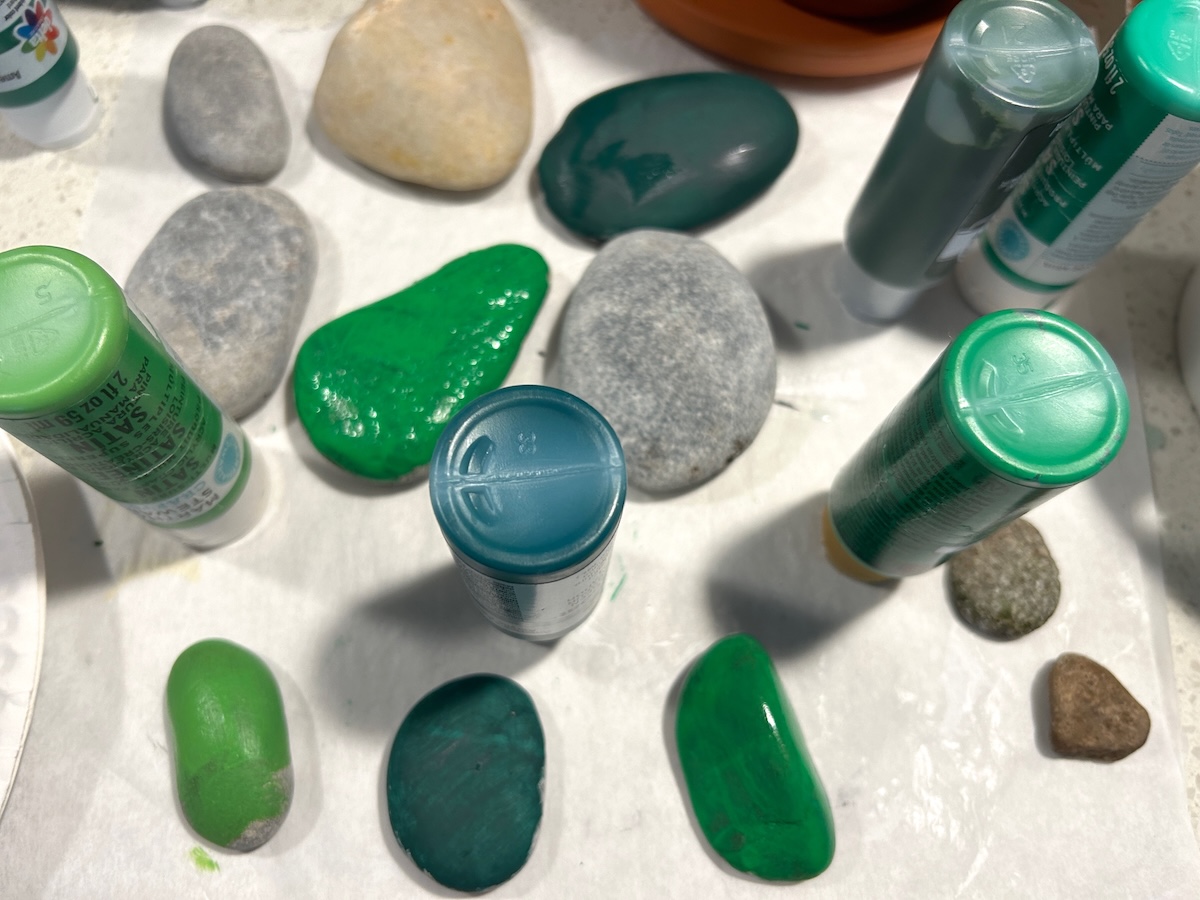
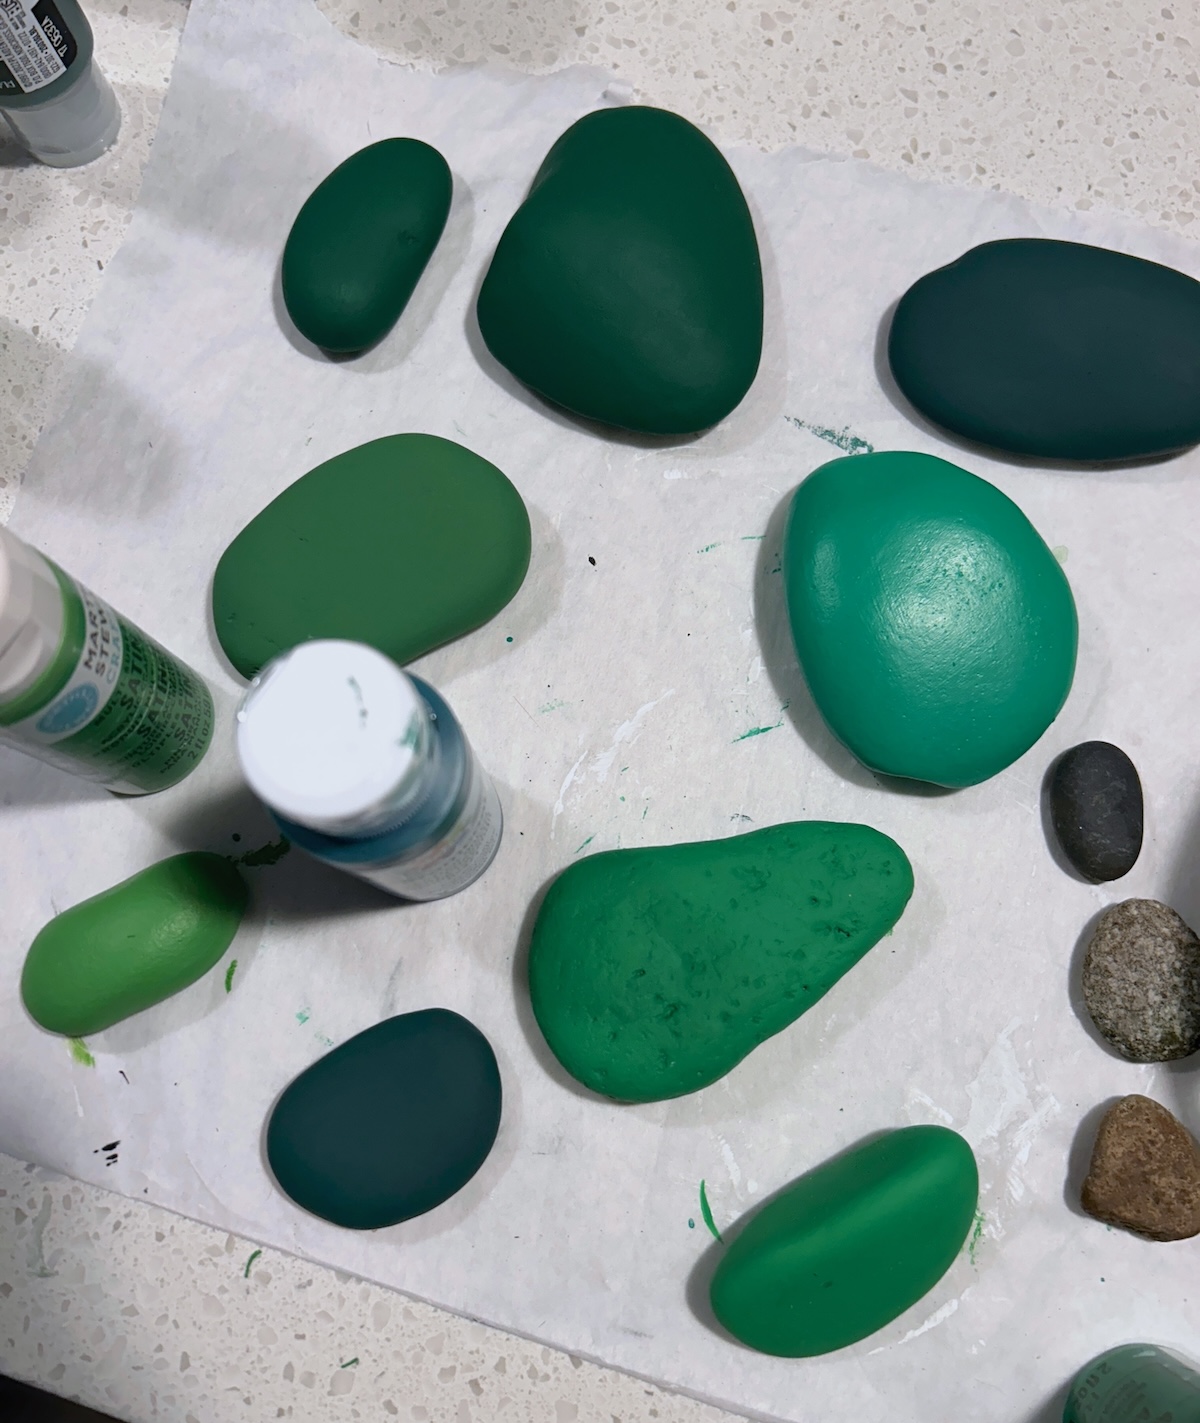
- Once you’ve got your layout photographed, begin painting the rocks. I used six different shades of green in total. I tried to paint rocks that were next to each other in my layout with different shades of green.
- Continue painting the rocks until you have the proper coverage, and let them dry completely.
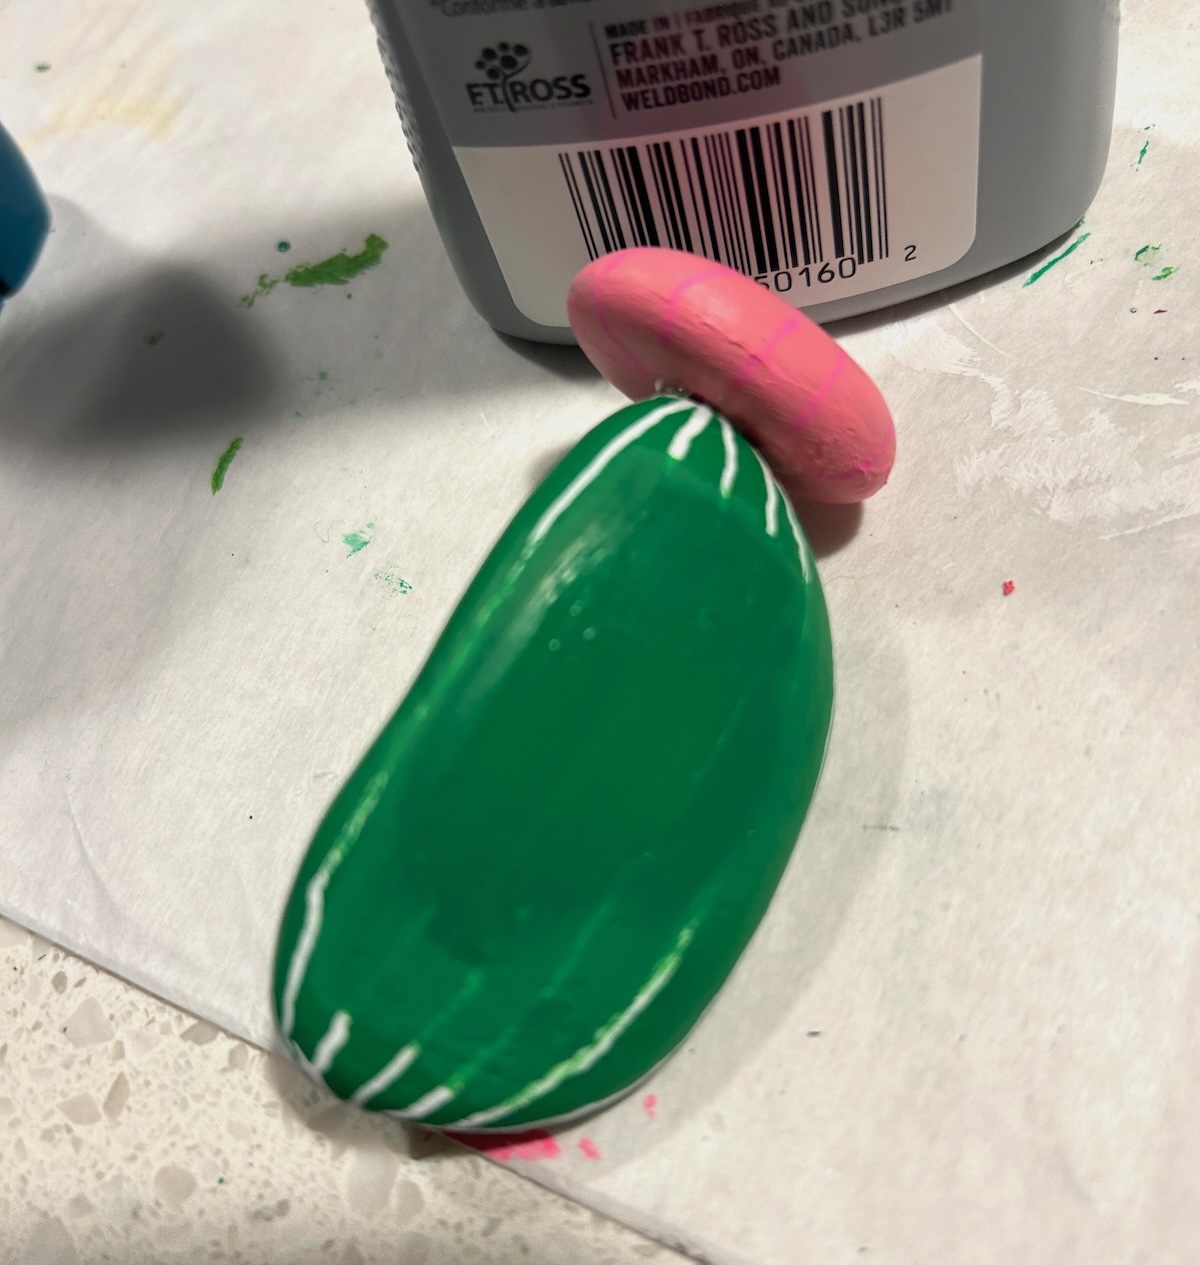
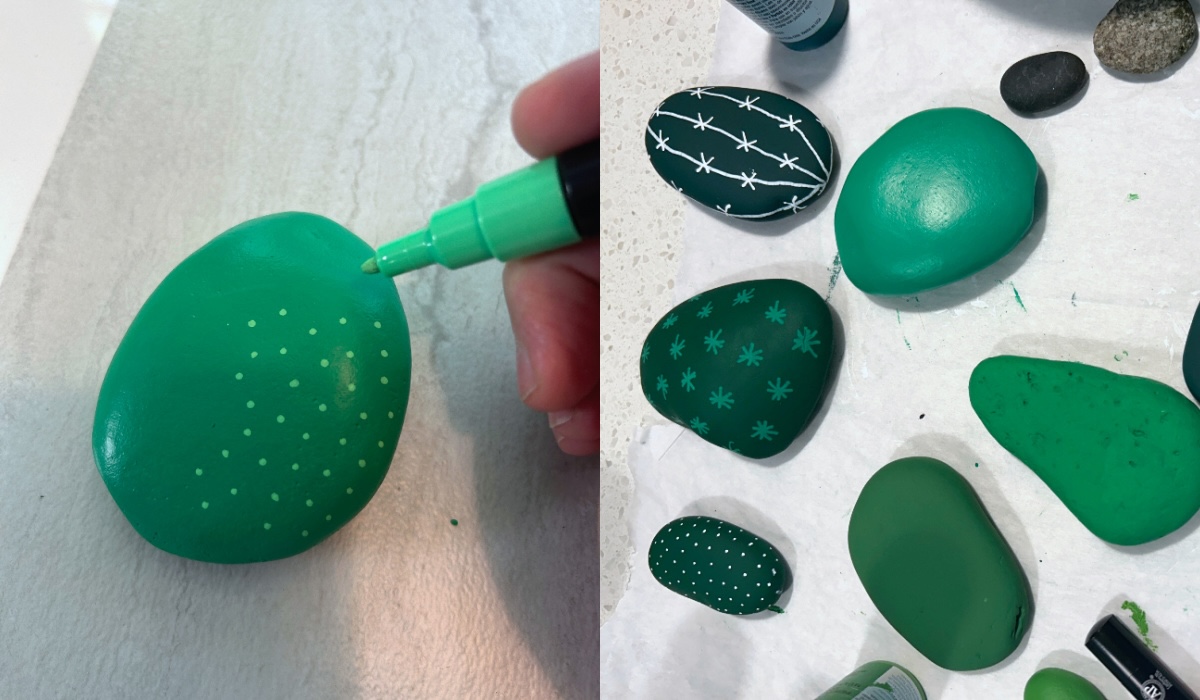
- Working one rock at a time, add "cactus accents" to each rock with paint pens. I used a combination of Xs, Vs asterisks, polka dots, and thick/thin lines. I used white, light green, and dark green paint pens.You can use my photos for inspiration - it's the combinations and colors that make your cacti. Use variety and I promise you'll be happy.
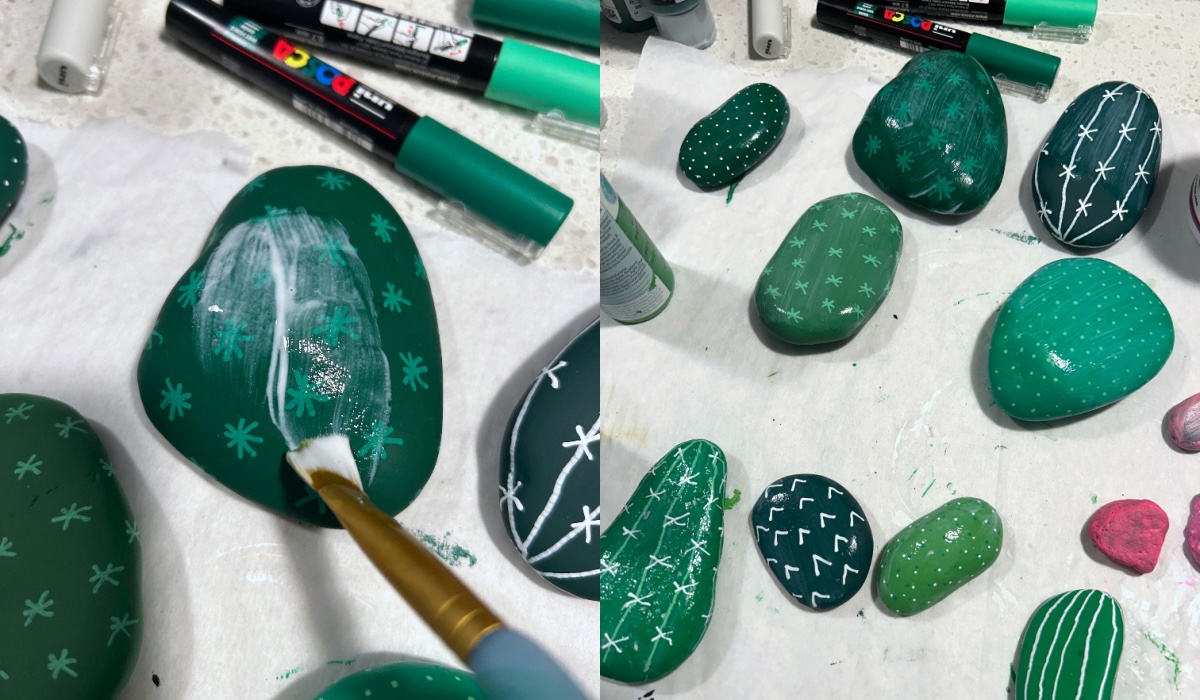
- Paint all of the rocks with Mod Podge. Let dry, paint a second layer, and let dry again.
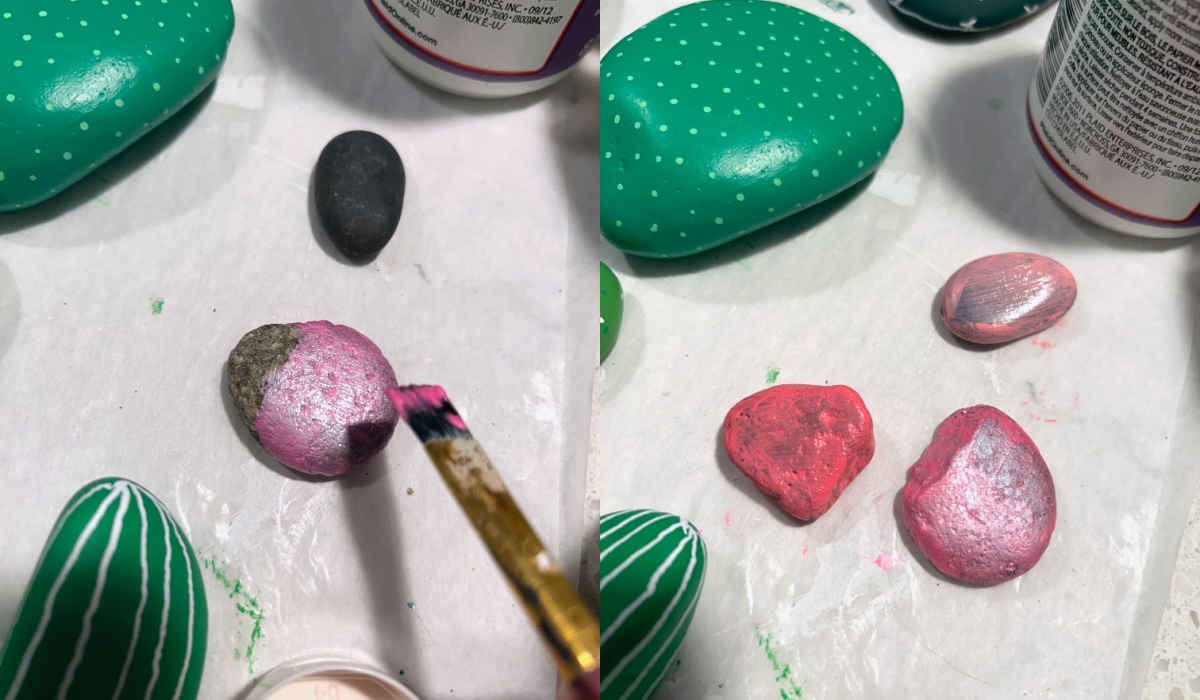
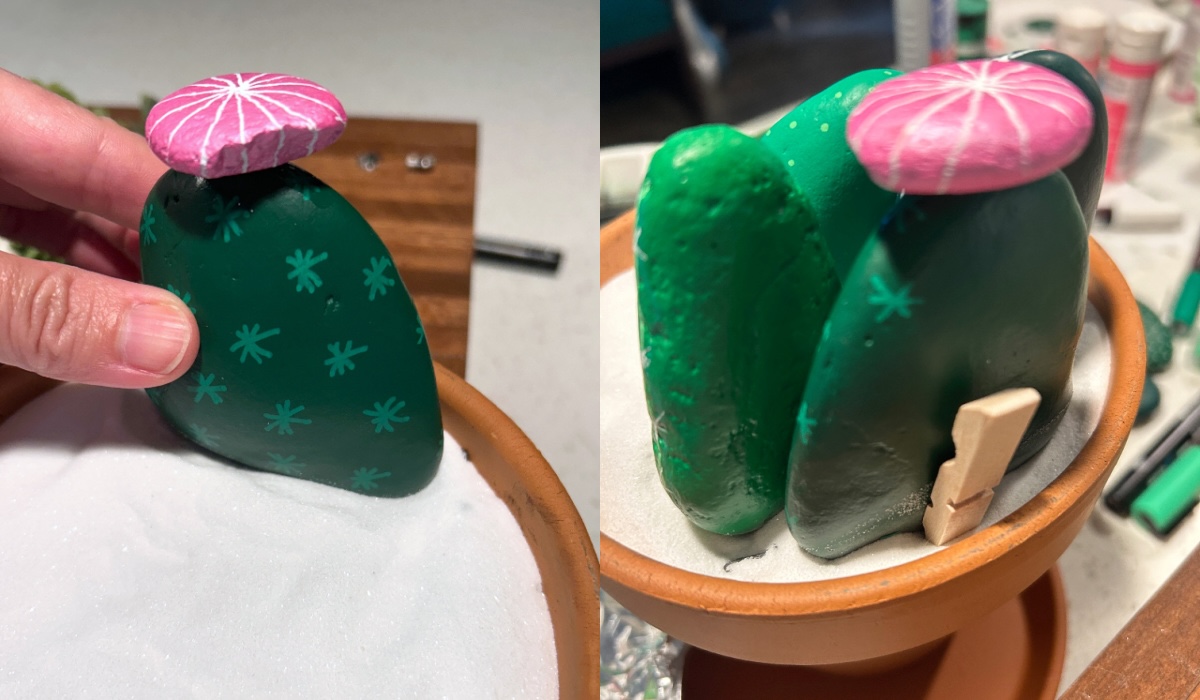
- At this time, you can choose the small pebbles you'd like to use for your cacti's "flowers." I chose to do only four pebbles and then painted them pink using a variety of shades. This will likely require several layers. Let dry. And some paint pen accents and let dry.
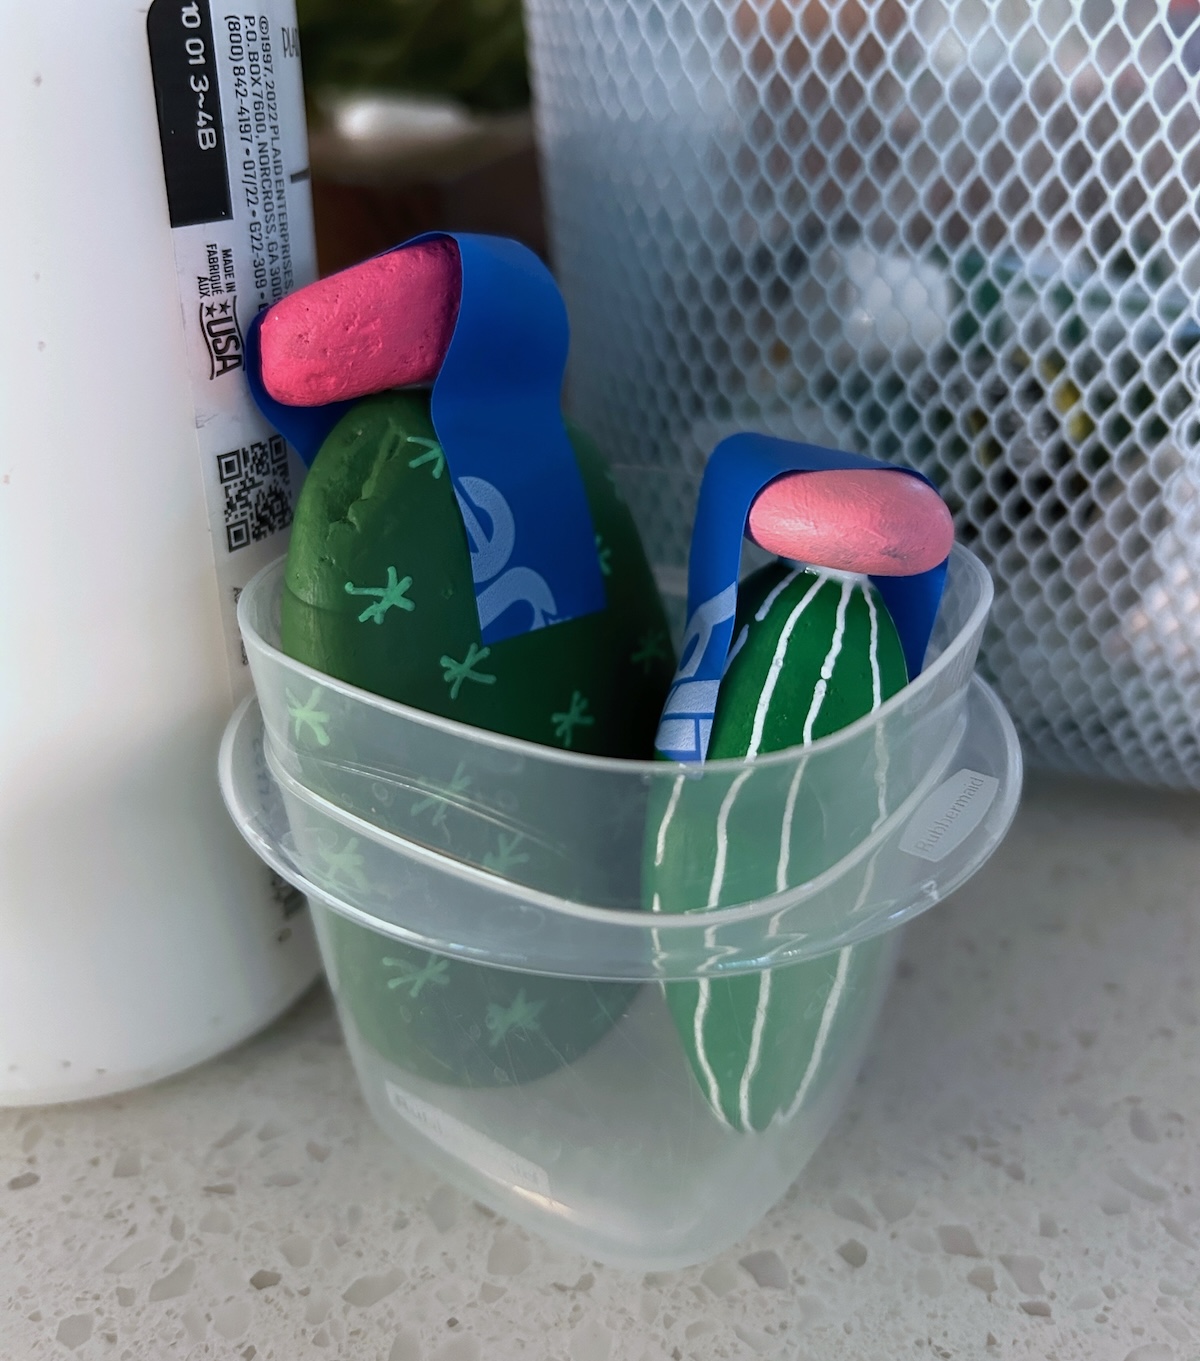
- Use the stone glue to attach the flowers to the tops of the rocks of your choice. For mine, I used painter's tape to keep the pebble in place on top of the rock. Then I used a small container to keep them upright while drying. You'll need to let them dry for several hours. Once dry, carefully remove the tape.
- You're ready to set up your garden. Pour a layer of decorative sand into top of the pot and smooth out.
- Split a clothespin and insert half of it into the dirt to stabilize your largest stone at the back. I didn't glue the stone to the clothespin. Once I nested the large rock into the sand and rested it against the clothespin, it stayed there by itself.
- Add the remaining stones and brush off any sand with a dry paint brush. At this time you can add stone cacti to fill in any areas you desire. You can even paint more to fill in, as I did.
Notes
Step 1: you can also use sand or other filler from a garden shop. Whatever you use should be able to support the rocks – which is why I used dirt, even though I don’t need it.
Step 2: don’t be afraid to mix shades of green! In nature, no two shades are exactly alike, so take advantage of that here.
Step 4: play around with your design. If you decide you want to change it, you can paint over the paint markers at any time. Let dry and start over.