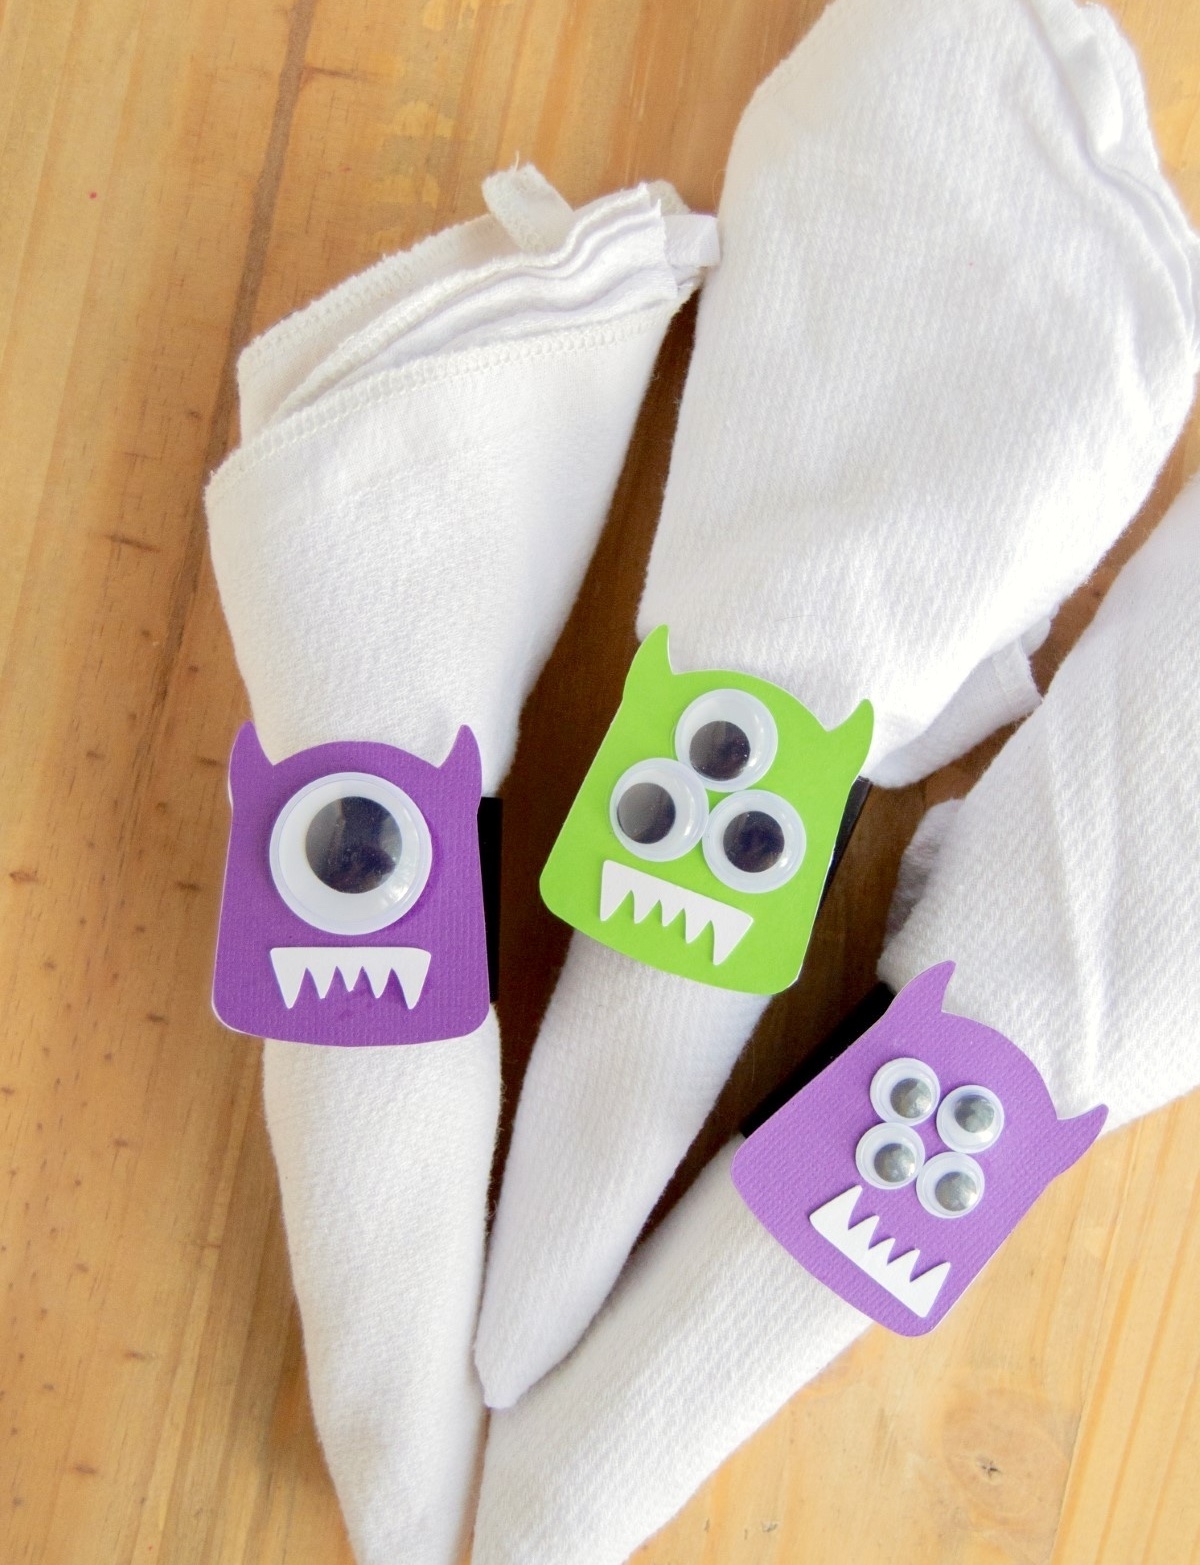
These monster themed Halloween napkin rings are fun for both adults and children to make! Perfect for a spooky soirée, holiday kids’ craft, or other fun celebration.
Skills Required: Beginner. You don’t need any prior crafting skills to do this project! You’ll be painting with acrylic paint, and adding Mod Podge. Then gluing down wiggly eyes. Even children can do this project.
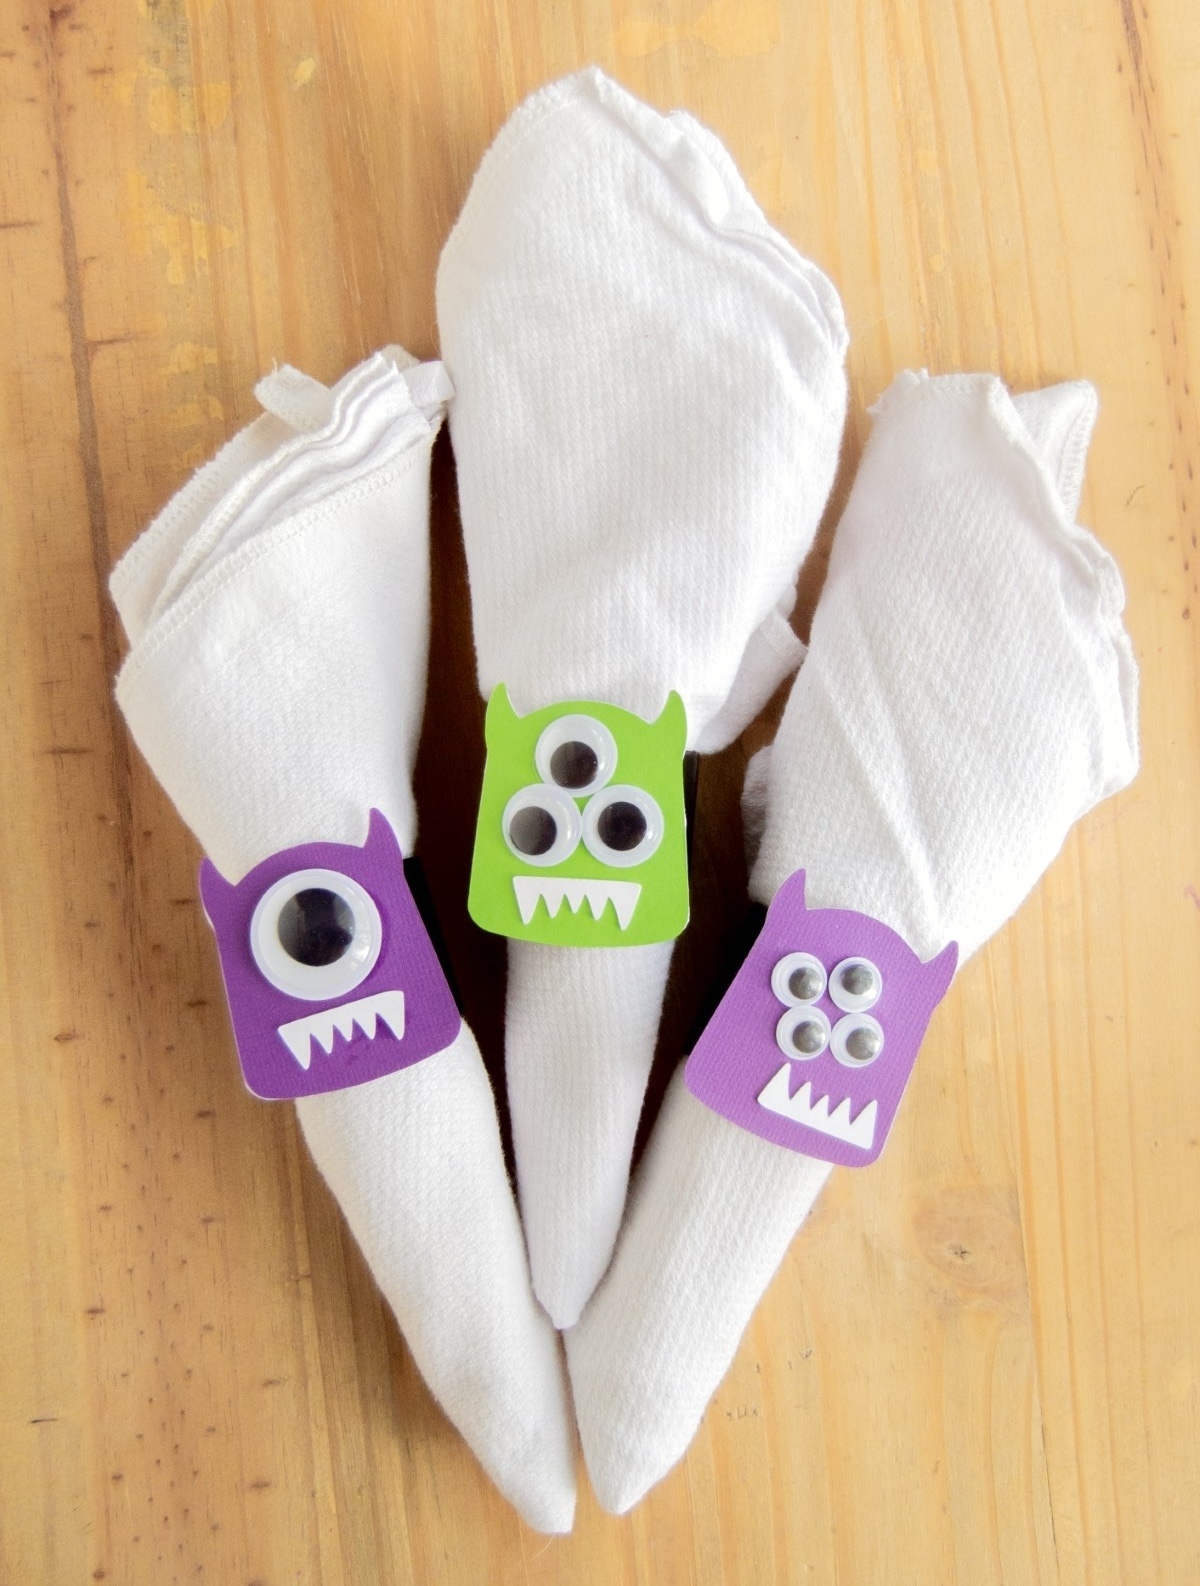
Gather around, my crafty ghouls and goblins, because it’s time to add a sprinkle of spooky fun to your Halloween dinner table with our latest DIY project: Halloween napkin rings that are monstrously delightful!
And not just any DIY napkin rings – we’re talking about adorable little monster faces that will have your guests howling with delight.
This project is perfect for all skill levels, from tiny tots to wise witches.
Before we start, let’s set the scene: It’s a chilly October evening, the kind where the leaves rustle like whispers and the moon grins down at us.
You’ve got your Halloween decorations up, the pumpkin is carved, and there’s a simmering pot of something deliciously autumnal on the stove. But wait! There’s something missing. Your table looks as bare as a haunted mansion.
Fear not, because that’s where our monstrously cute napkin rings come in!
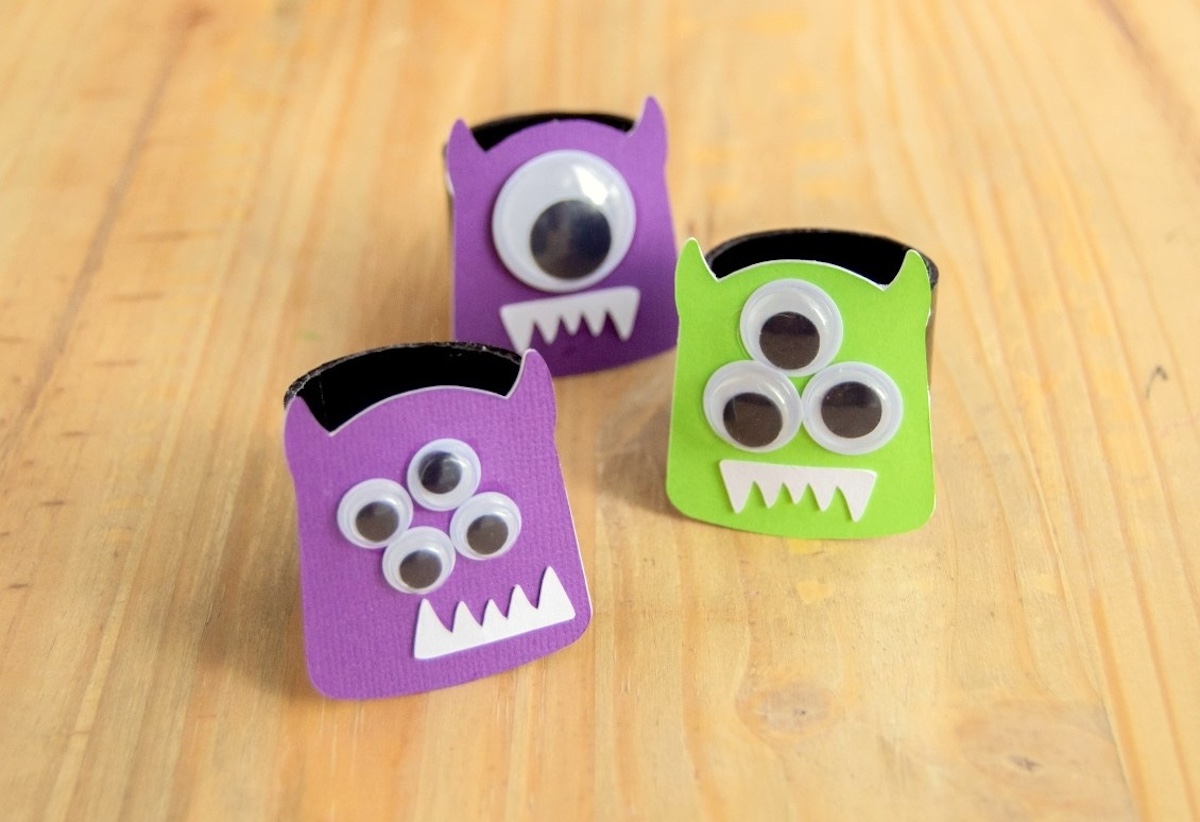
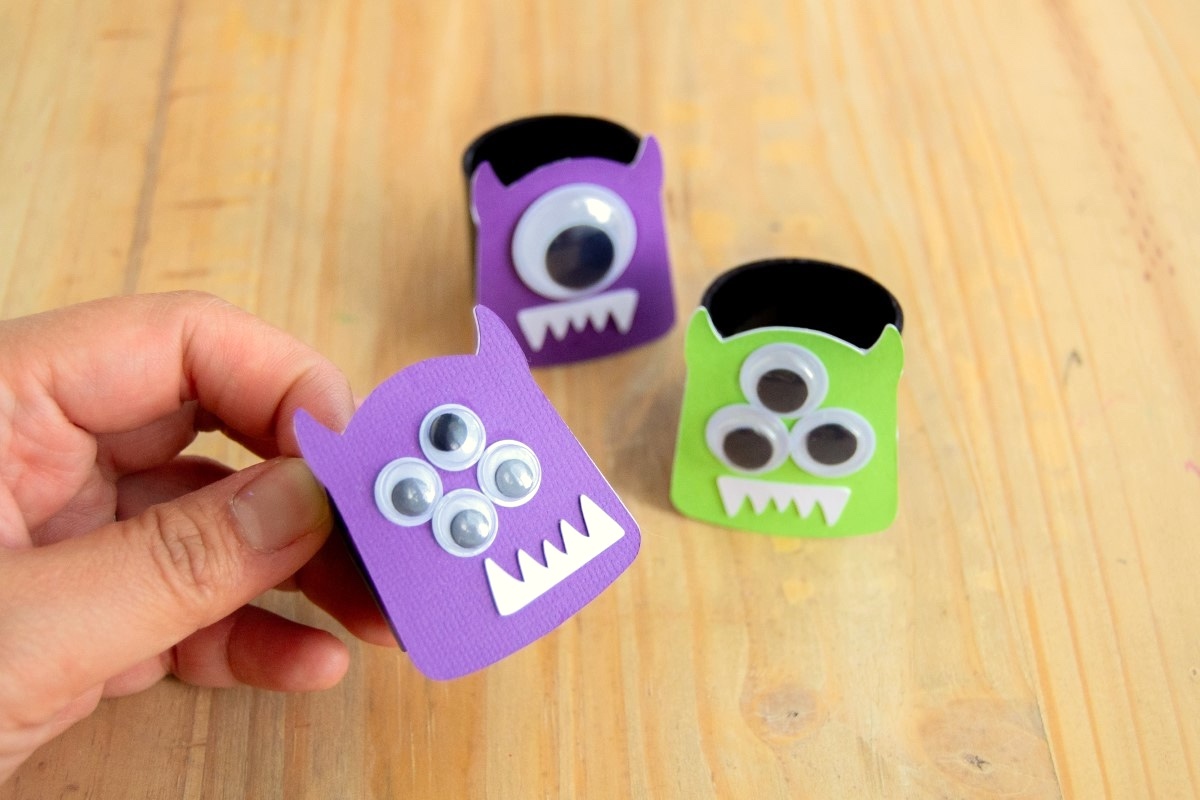
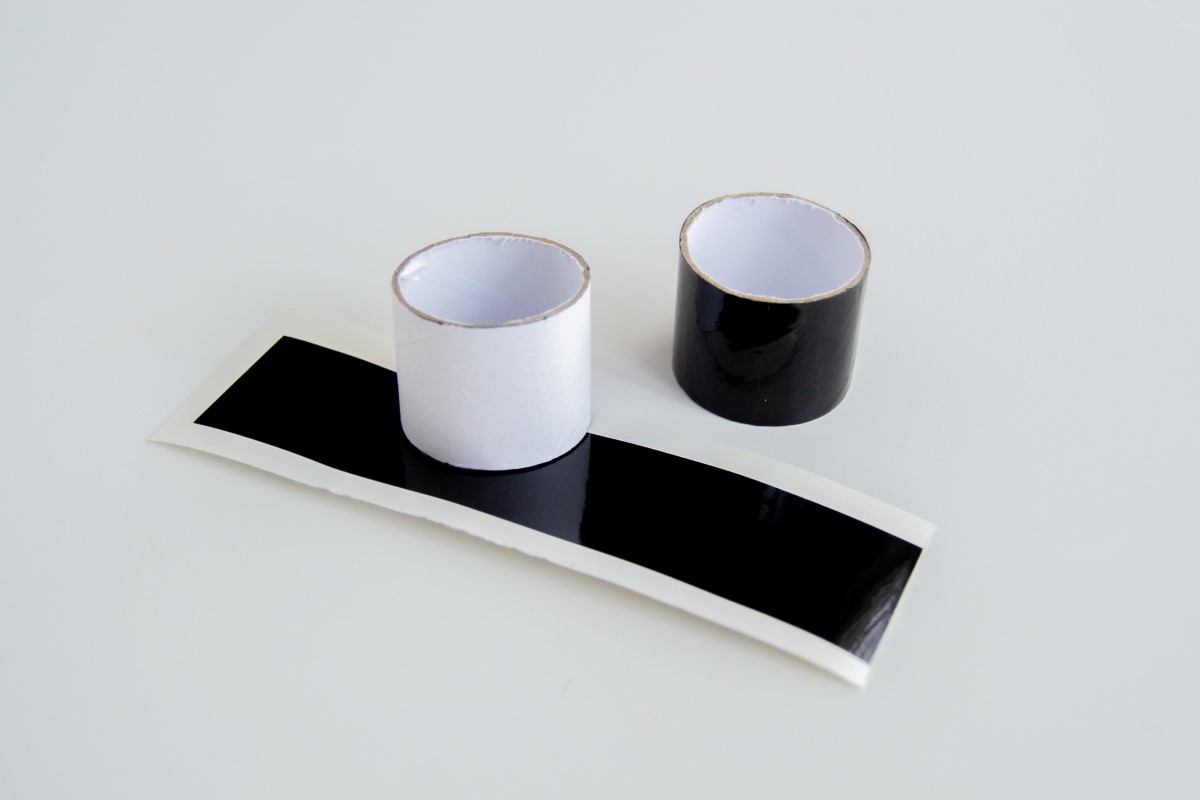
We’ll start our Halloween crafting adventure with some toilet paper rolls.
We’ll wrap our rings in vinyl, making sure they’re as neat as a vampire’s coffin. Choose any color you like – black for that classic Halloween vibe, or maybe green for a Frankenstein’s monster feel.
Once our rings are dressed to impress, we’ll unleash our creativity to bring our monster faces to life.
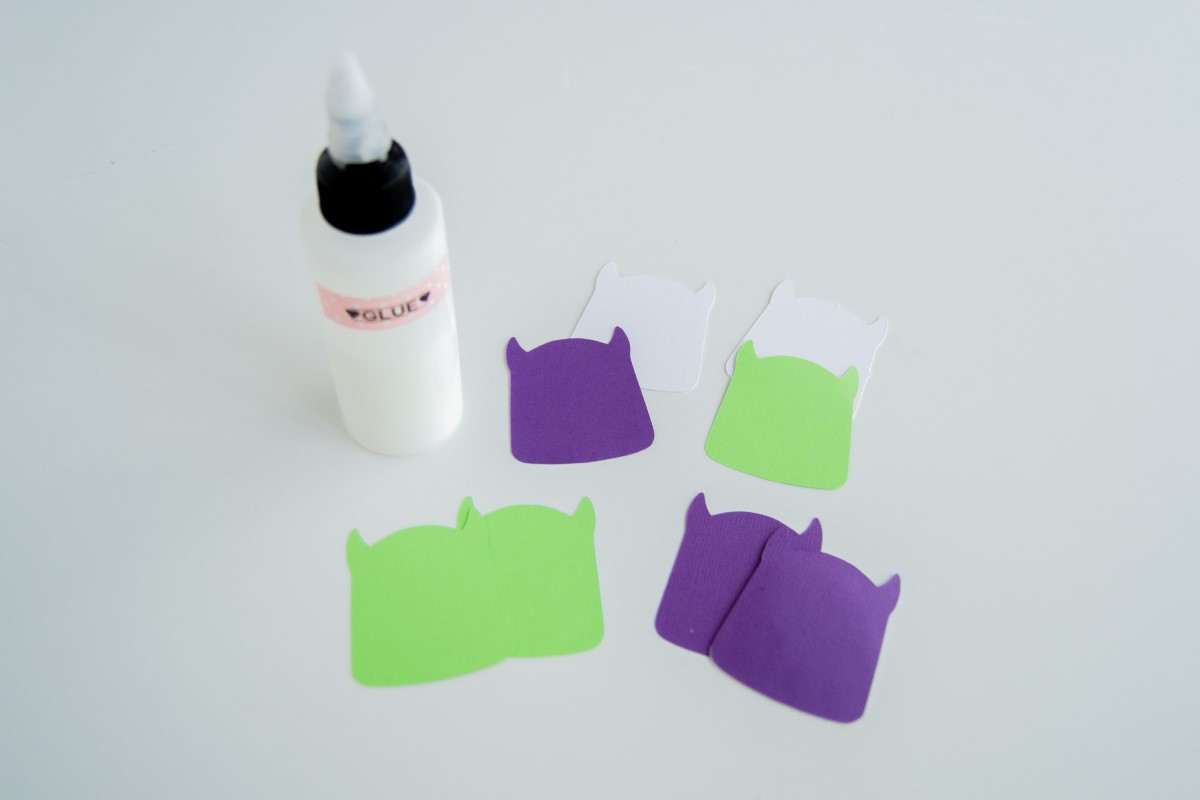
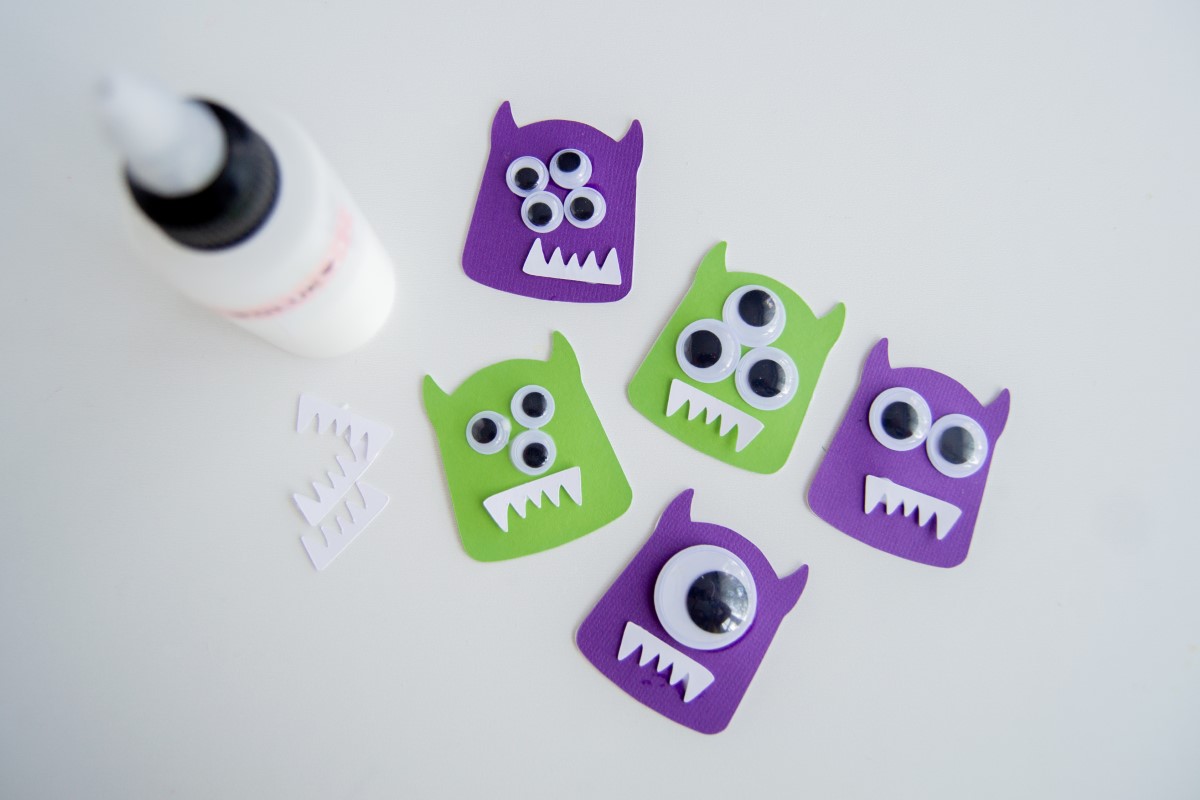
Using templates or your own monstrous imagination, we’ll cut out faces that could range from adorably goofy to spine-chillingly spooky. Googly eyes? Sharp paper teeth? The more, the merrier!
And you can include your little witches and warlocks for some family crafting fun. Assembling these faces is a blast for kids and lets them add their own touch of Halloween magic to the dinner table.
So, why settle for a boring Halloween dinner table when you can have one that’s bursting with handmade charm?
Grab your supplies, summon your inner crafting spirit, and scroll down to join me in creating these DIY Halloween napkin rings.
Trust me, your dinner guests will be dying to get their hands on them. Let’s make this Halloween dinner a night to dismember! Here’s what you’re going to need.
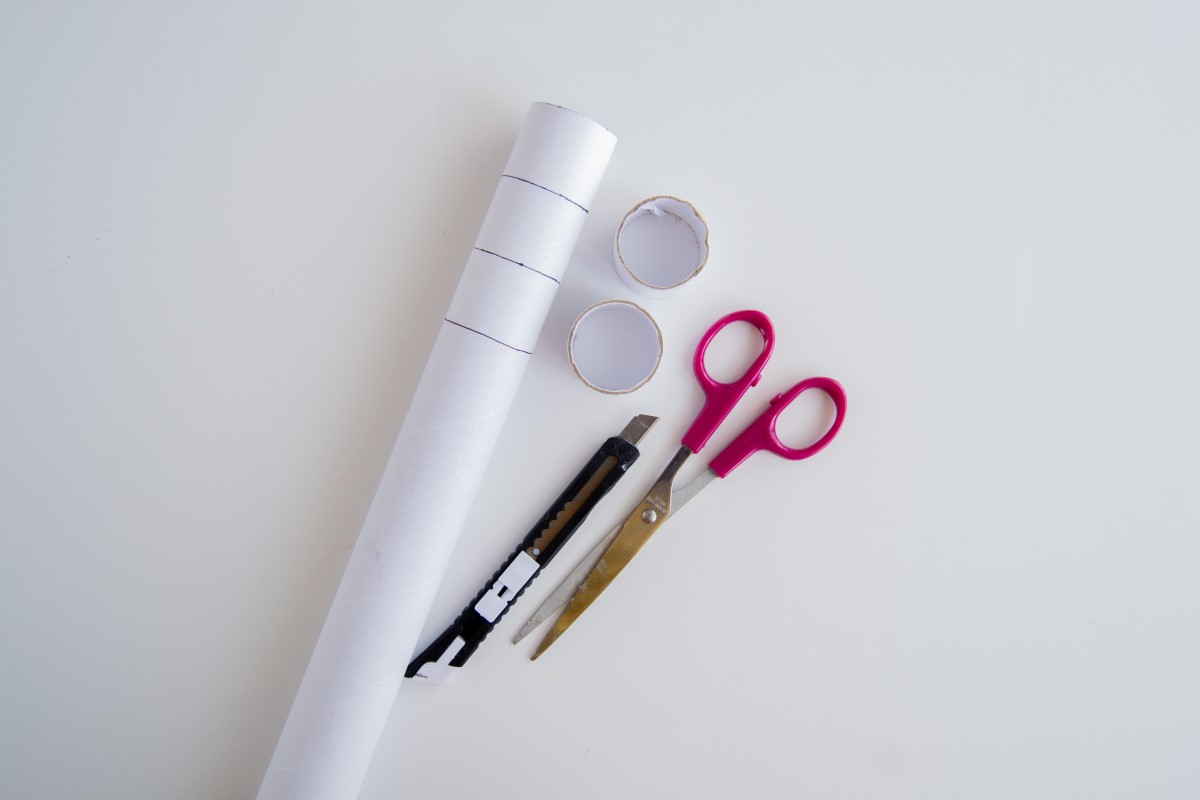
Gather These Supplies
- Paper tube roll (from paper towels or toilet paper)
- Vinyl
- Cardstock
- Googly eyes
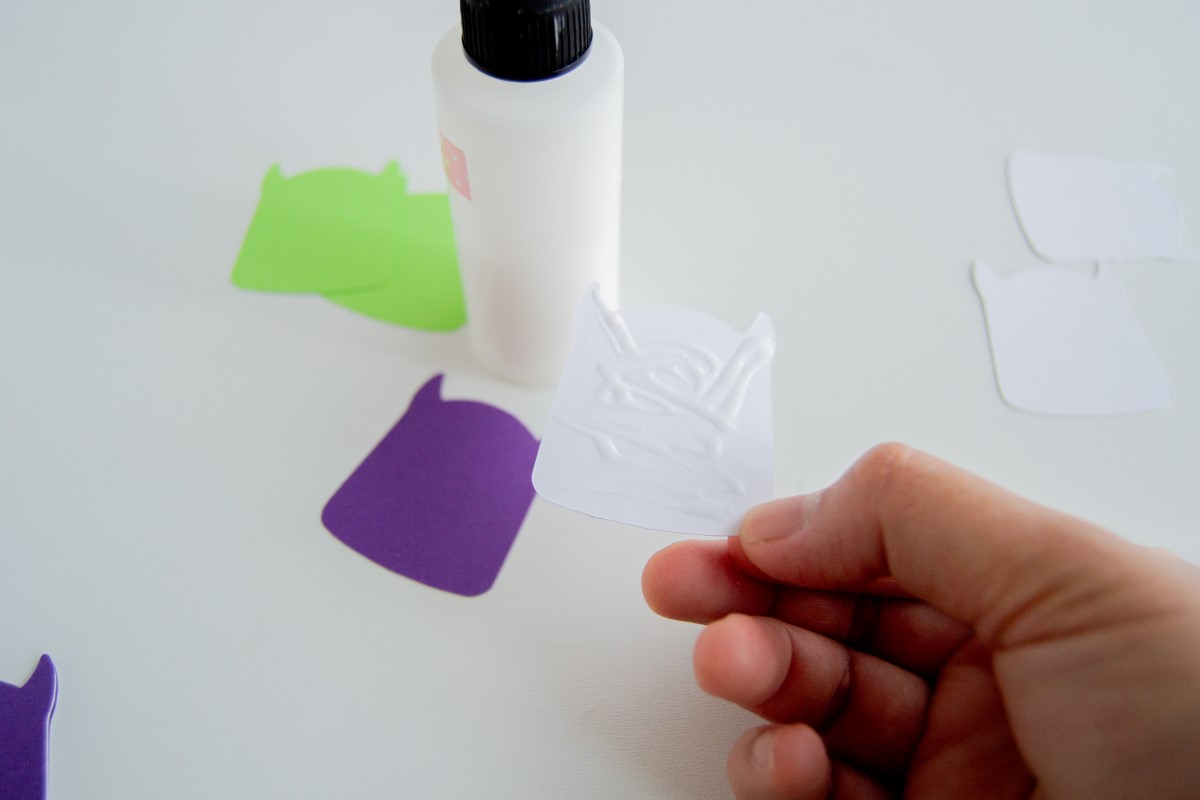
- Glue
- Scissors
- Craft knife or box cutter
- Ruler
- Pen
- Monster pattern (PNG for Die-Cutting, JPG for cutting with scissors)
- Hot glue gun
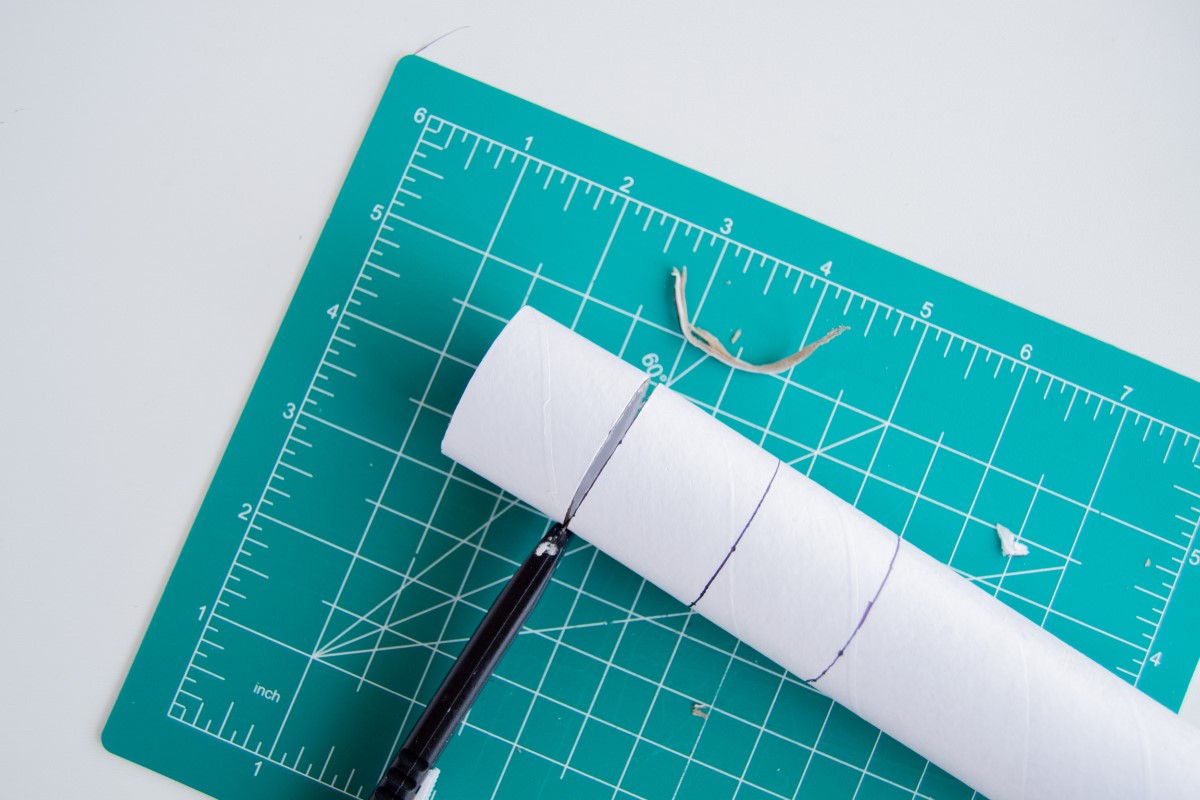
It may be helpful to cut a strip of paper with the width of your choice and use that as a guide for marking your tube.
If you don’t want to cut shapes, you can also use pre-made shapes from the craft store.
These fun Halloween napkin rings are just too cute and they were so fun to make with my daughter.
Customize them even further by adding more accessories to your monster faces such as glasses, chenille stems and more!
Get the printable how to card for these napkin rings below:

Monster Themed Napkin Rings
Equipment
- Craft knife or box cutter
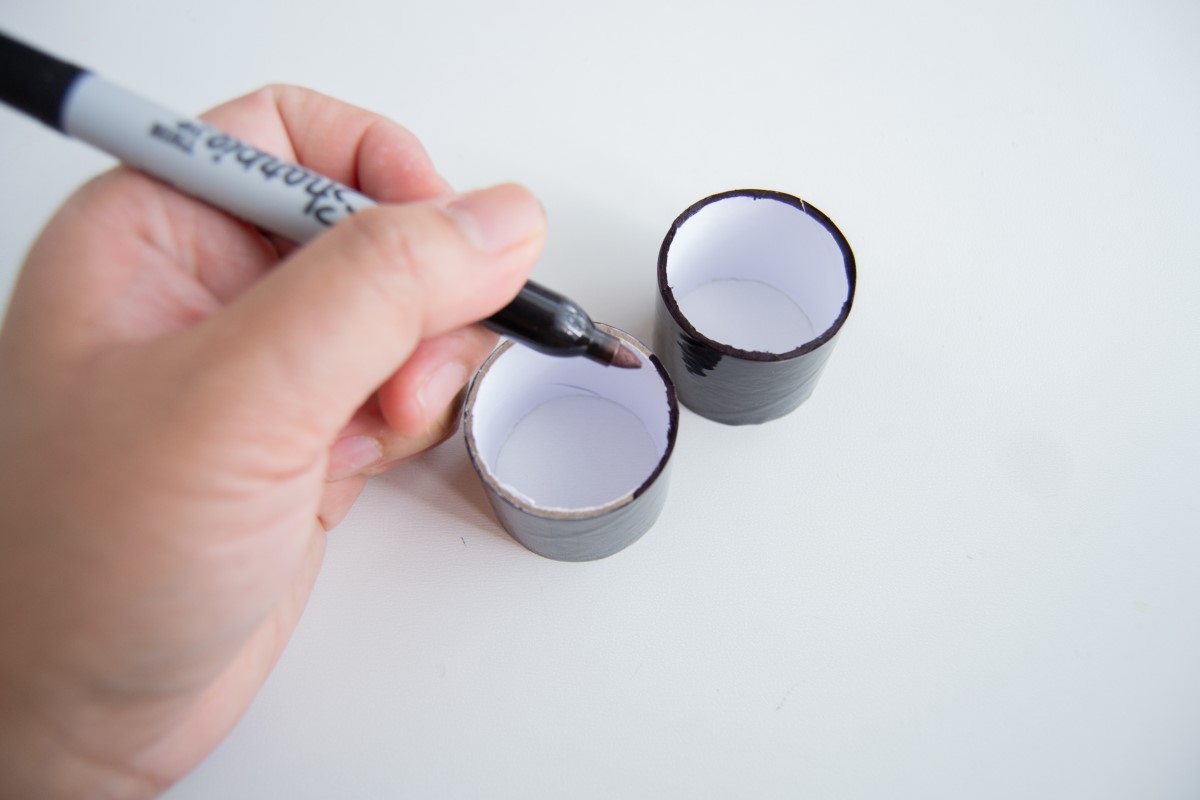
- Black marker
- Pen or pencil
Materials
- Paper tube rolls
- Vinyl
- Cardstock
- Googly eyes
- Glue
- Monster pattern
Instructions
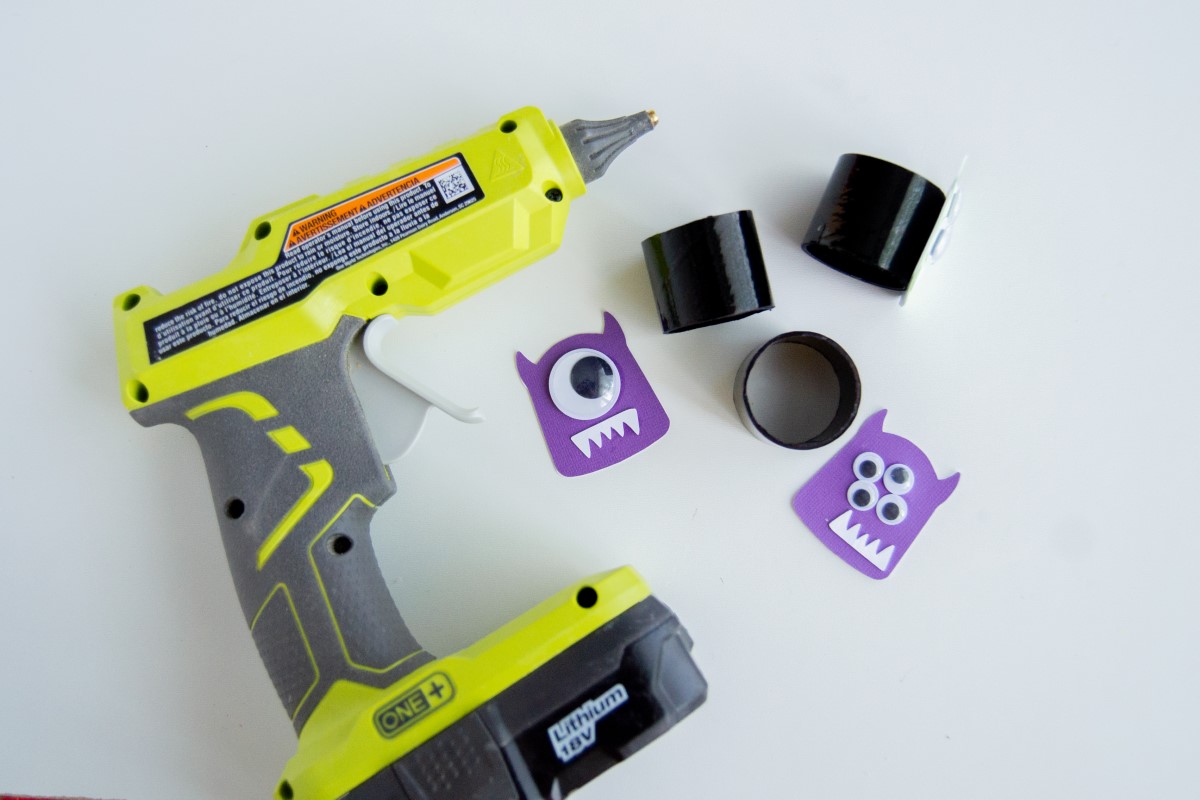
- Start by cutting your paper tube to size. Mark how wide you want each ring to be, and trace around the tube to create guidelines for cutting.
- Use a craft knife or box cutter to cut through the paper tube, making sure to cut carefully and stay within the guidelines for a clean and uniform edge.
- Cut strips of vinyl the same width as the paper tube rings to cover them.
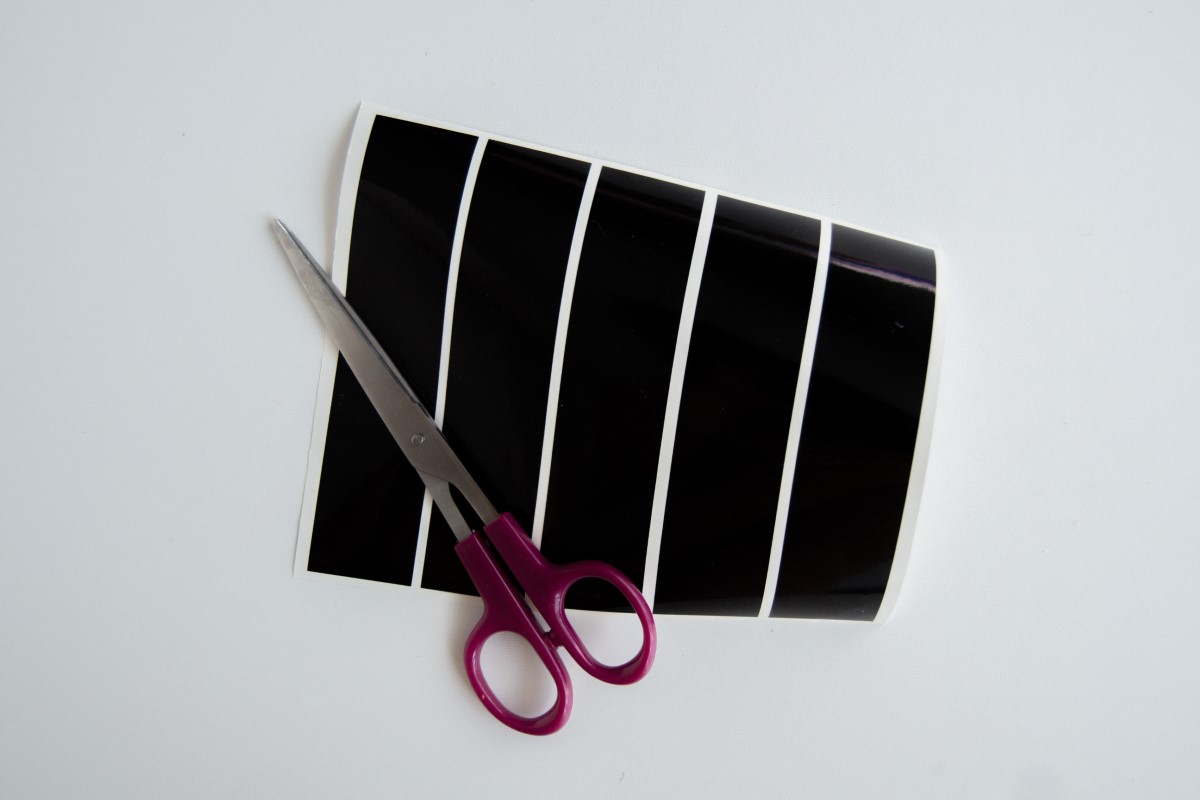
- Carefully cover the inside and outside of the paper tube with vinyl, making sure it is centered and there are no bubbles. Trim off any overhangs for a cleaner look.
- Finish the edges of your napkin ring by coloring the edges with a marker the same color of vinyl you have used.
- Cut the monster faces with a die-cutting machine or scissors. If you are cutting using a die-cutting machine, resize the image to your desired size – mine was about 2 inches high. Cut one for a front and one for a backing to make the monster face sturdier.
- Once done cutting, glue the front and the backing together and wait for that to dry.
- Use googly eyes and paper teeth to assemble your monster faces. Once you are done, leave that to dry.
- Attach the monster face to the napkin ring using hot glue. Let cure completely before using.
If you enjoyed this Halloween craft, let me know in the comments! I’d also love for you to check out these other ideas: