
Create a unique (and easy!) Christmas necklace with a candy cane design in a few easy steps! You’ll love making this and adding it to your holiday wardrobe.
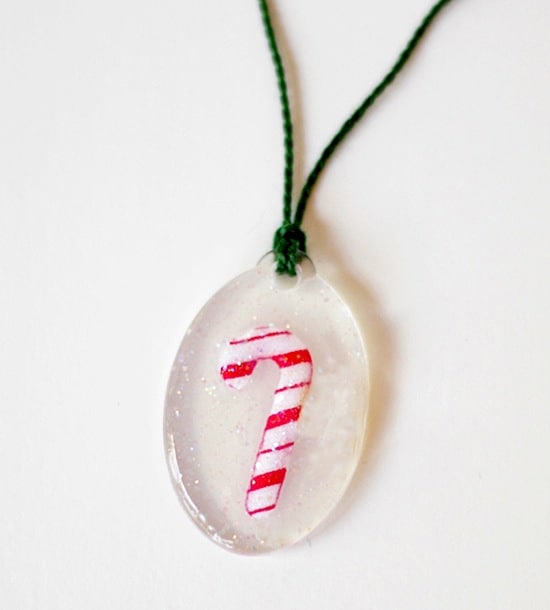
I’m Heidi from the blog Hands Occupied, and I’m very excited to be sharing a DIY Christmas candy cane necklace with you all!
For today’s project, I decided to create a jewelry tutorial with some Mod Podge products you don’t necessarily see every day around the crafty blogosphere.
I wanted my DIY necklace to be something festive now that the holiday season is upon us – but I also wanted it to be a project that wouldn’t take 20 hours to make since we’re all crazy busy in December.
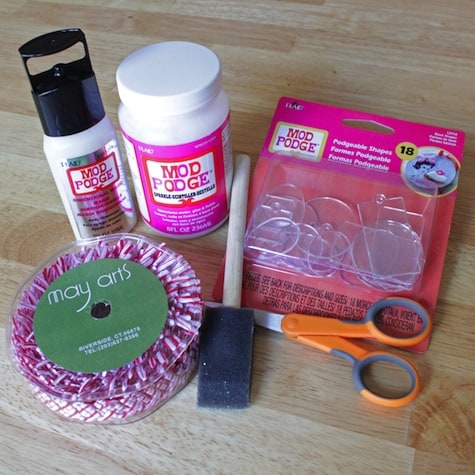
Gather These Supplies
- Clear acrylic keychain blank or similar
- Candy cane ribbon or piece of paper cut to look like a small candy cane
- Glitter Dimensional Magic
- Mod Podge Sparkle
- Embroidery floss
- Scissors
- Sponge brush
Get the printable how to card below:

DIY Christmas Necklace
Equipment
Materials
- Clear acrylic keychain blank or similar
- Candy cane ribbon
- Mod Podge Dimensional Magic
- Mod Podge Sparkle
- Embroidery floss
Instructions
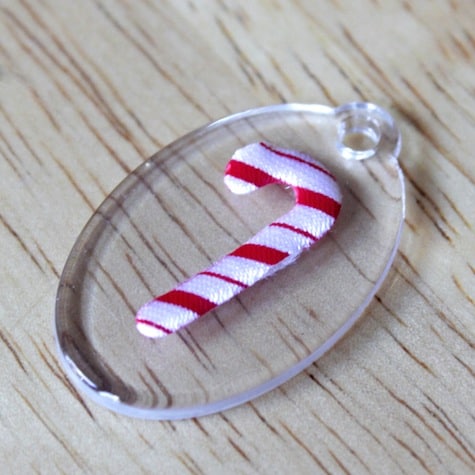
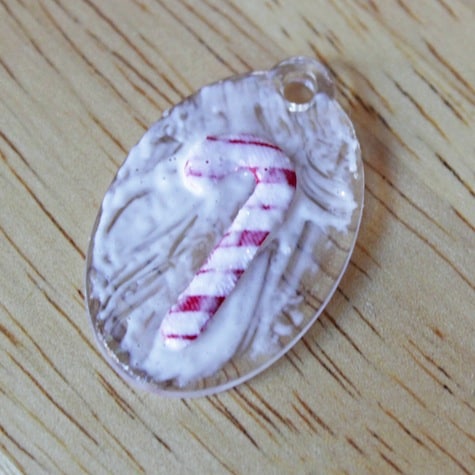
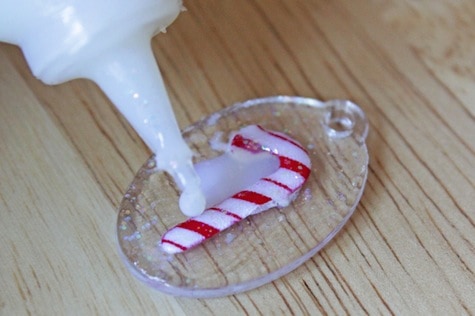
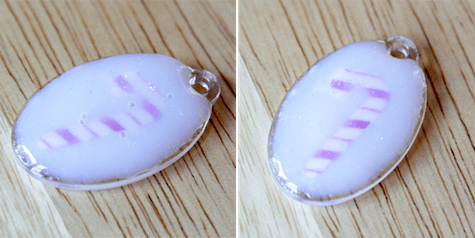
- Prep the accent piece by cutting out ribbon or scrapbook paper.

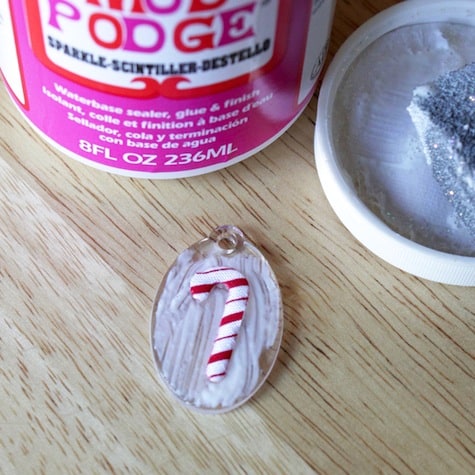
- Brush a layer of Sparkle Mod Podge onto the acrylic oval and place the accent piece down in the wet medium.
- Paint another layer of Mod Podge over the accent piece. Let dry.
- Carefully apply Dimensional Magic around and over your acrylic shape, right up to the edges, Pop any bubbles with a pin. Let dry overnight.

- String the charm on a piece of embroidery floss to finish.

Notes
Like this project? I’d love for you to check out these other Christmas crafts with Mod Podge:
Elf on the Shelf Poem & Printable • Fabric Christmas Bowl • Frosted Mason Jar Luminaries • Gnome Wood Gift Tag • Homemade Wrapping Paper • Merry Christmas Decor • Peace Wood Decor • Salt Dough Ornaments • Santa Magic Key Craft • Wood Trees with Book Pages


This is cute! I have a bottle of dimensional magic, but have not used it due to the drying times. It’s not the kids, it’s the CATS. And trying to protect things (with say, a box) only creates more feline interest. I am sure I have cat fur in the coasters I modpodged last night–and maybe footprints, but it won’t be visible. I think.
I’ve got a huge, heavy bell jar I stick on top of things. Sometimes it’ll get humid, so I just wedge a thin book underneath to let the air flow. A cat would really have to try to get past it!
My husband turned our one car garage into a room, which is now our hobby room… so all we can close it up and the kids stay out for the most part. 🙂
Love this! Very magical idea! TFS!
I would like to make these for Christmas but I want to use a photo instead of
a candy cane on the shape do you think it would be okay? Should I print the photo onto
paper first?
I think a photo would be fine!
That’s so sweet! I need to get into Dimensional Magic!
I can’t wait to try this. this is so cute.
I’ll be on the hunt for those podgeable shapes! This is too cute!
https://www.amazon.com/s/ref=as_li_ss_tl?k=mod+podge+podgeable+shapes&ref=nb_sb_noss&linkCode=sl2&tag=worofmodpod-20&linkId=e787ad9875864b9842af4866cba4e81f&language=en_US
All KINDS OF SHAPES!!! Woo Hoo! Happy Dance!
I made this……soooooo cute
the dollar stores have cake savers they are cheep and I do not trust them to carry cakes but they are good for keeping drying crafts safe.. Ya know the ones with the cake server plate and the tall cover!
How would Mod Podge work using Shrinky Dink shapes? Would the two be compatible?
Hi Ruth! Yes, I’ve used it before with Shrinky Dinks and it was fine 😀
Would this work with some thing more delicate like dried flowers?
Hi Amanda! Yes it would, you’ll just have to be very careful ;D