
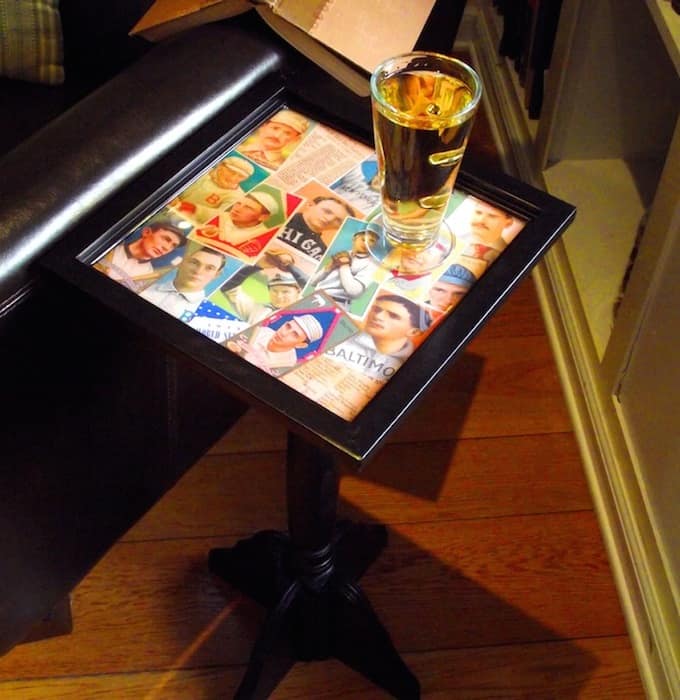
David takes on a unique furniture project: a themed baseball card table. He uses simple supplies from the hardware store – you can do it too! Use printouts or real baseball cards.
Skills Required: Intermediate. I recommend having prior crafting experience before attempting. You’ll need to use tools to assemble wood pieces as well as use epoxy.
I have the burning desire to make my own table, which is why I was really like Man Podger David’s DIY end table project this week. I’m still amazed that you can go to the hardware store and buy the supplies to make furniture.
I know that’s probably funny to some of you who are into construction, but I’m so scared to do it myself. That’s where the Man Podgers come in!
If you are like me, David’s project is going to give you the confidence to build something yourself – this is a great “beginning builder” project. Keep going to learn directly from David how to build a table.
I used to get frustrated with those people who were always doing projects made with “this old piece of wallpaper/wood/fabric/etc” they had lying around.
That was never me; but now I have become one of those people. Some would call it a late developing “hoarding syndrome.” I prefer to think of it as being committed recycler.
Anyway, my buddy wanted some baseball themed tables for his man-cave and I thought this would be a fun, affordable project to do and share.
It’s made from bits I had sort of lurking in the corners of my garage (with the spiders – seriously, it’s like a science fiction movie in there) but I assure you can do it with some very affordable parts from any big box hardware store.
Build an End Table
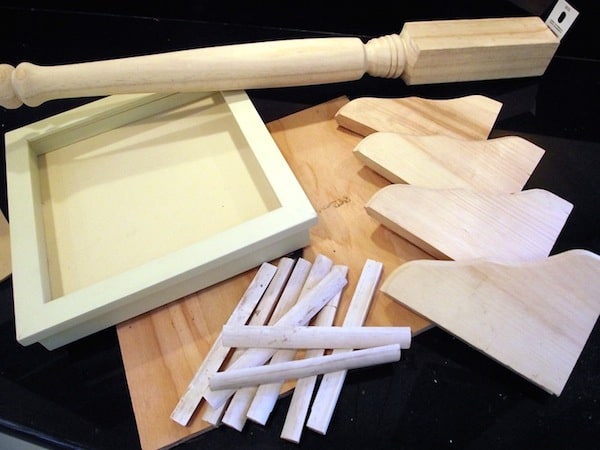
You will need:
- One table leg – mine was from the Habitat for Humanity ReSale Store (a great resource) but they come in all shapes and sizes at big box retailers
- Four (4) 7-inch wooden shelf brackets
- A picture frame – you could also use a wooden tray or anything else that appealed
- Five feet of shoe molding
- 1 piece of ¼ inch wood cut square and just a little smaller than your picture frame
- 1 piece of ½ or ¾ inch wood cut square and 2-3 inches smaller than your picture frame
- Glue (I used Gorilla Glue)
- Brad Nails (optional)
- 1 wood screw
- Sand paper
- Spray paint
- Mod Podge Gloss (I know! Surprising!)
Tools:
- Drill
- Hand Saw or Miter Saw
- Hammer
- Foam Brush
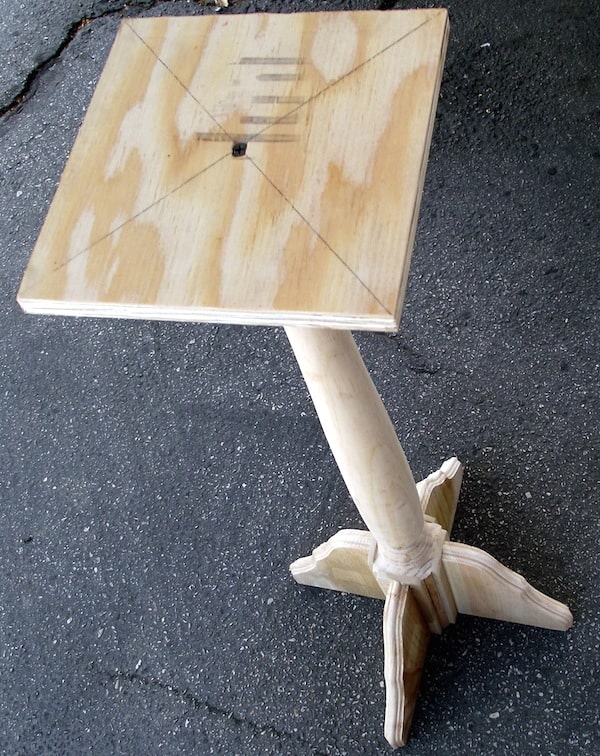
First I cut the table leg to the height I needed (they will do this for you at the hardware store if you ask nicely. It probably helps if you are prettier than I am I cut mine at home. Alone. . . . moving on).
Then I sanded all the parts of my baseball card table smooth. Next, I cut the shoe molding into eight (8) seven-inch strips and took the flimsy back out of the picture frame.
Now I was ready to attach the shoe molding to the table leg.
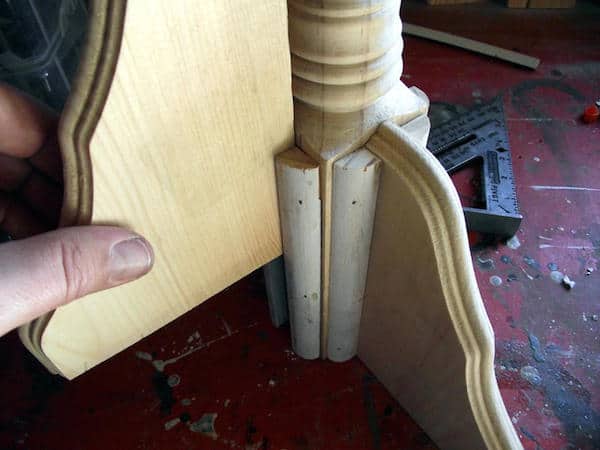
I centered a shelf bracket on base of the table leg and drew a line on either side. Then I attached shoe molding on either side of the line creating a groove. I repeated that on all four sides.
I nailed mine in place after gluing. If you just wanted to glue them, simply wrap rubber bands around the top and bottom to hold them in place while they dry.
Next I just glued the shelf brackets into the slots I’d created and wiped away any glue that squeezed out and set the whole thing aside to dry.
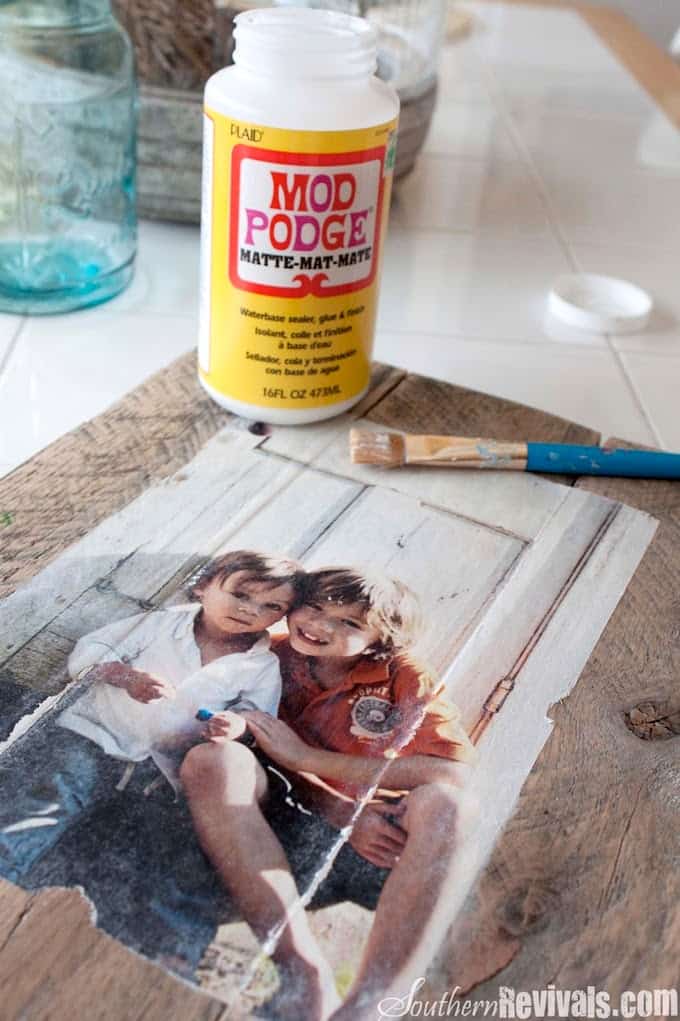
After my baseball card table dried, I painted everything (leg, the edge and one side of both pieces of wood, and the frame). A quick coat of spray primer followed by the top coat made quick work of it, and then it was time to decoupage.
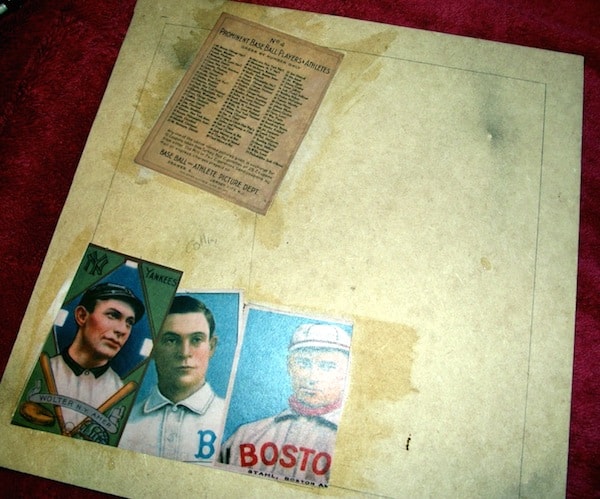
I placed the frame on the ¼ inch board and traced the inside edge so I’d know how much of the board to cover with my images You can use baseball cards, copies of baseball cards, or actual baseball cards themselves. I’ll leave that up to you.

Once the decoupage dried I attached my Mod Podged board to the picture frame with some glue and nails. My ¼ inch board had warped a little so I rested a heavy can on it to counter the warp.
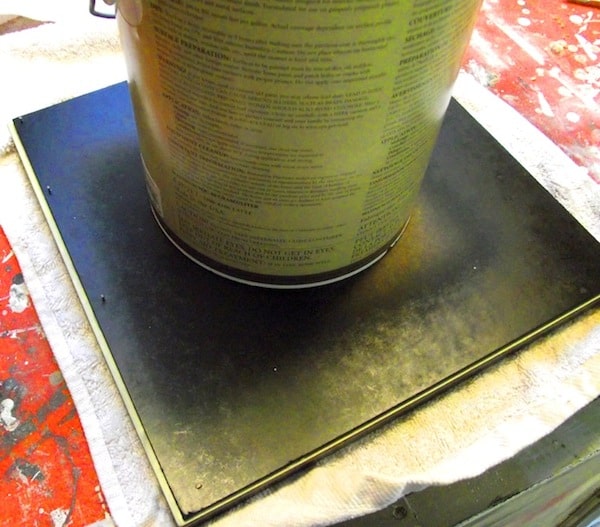
To find the exact center of my ½ inch board I drew lines from corner to corner. After that all I had to do was drill a pilot hole and attach my ½ board to the leg assembly. Make sure the wood screw is flat with the surface of the board, or just a little below it.
Attaching the leg to the picture frame was easy. I just flipped everything upside down and glued the top of the ½ board to the bottom of the picture frame. Your DIY end table is nearly complete!
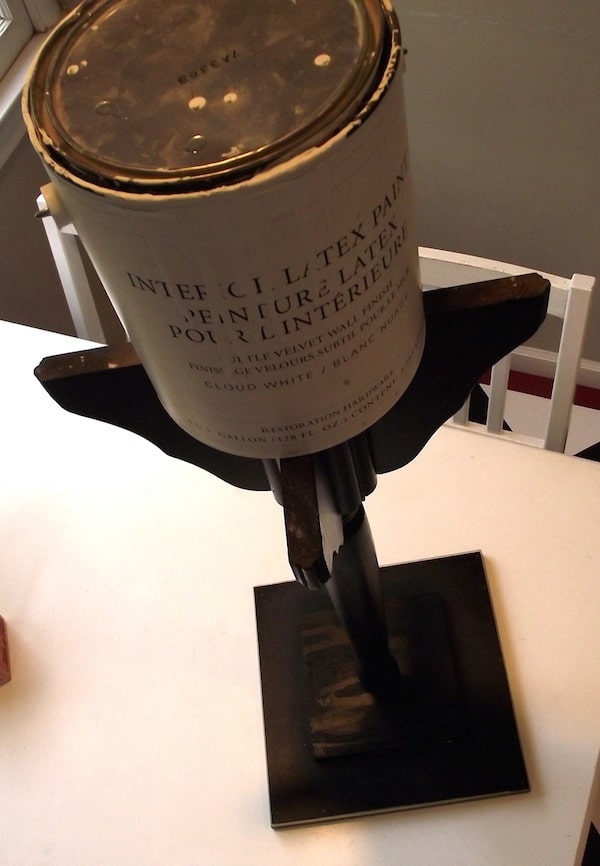
I brought back my handy paint can to hold it in place and seal the deal.
After that dried I flipped it back over and applied a sealer coat of Mod Podge over the collage surface.
OK – the final step of my baseball card table and True Confession Time:
I wanted to use Hard Coat Mod Podge for this step, but neither of my local craft stores had it. From all reports it would work beautifully at this stage.
For this table I used a product called Envirotex Lite. It is an epoxy resin (they use it on bar tops) that you need to carefully mix, pour, and let dry for several days. The resin can be messy, but it produces a solid glass-like surface.
I hope you like my Mod Podge table! I think it would make a great Father’s Day gift, don’t you? Very unique.
If I left any steps out please be sure to post your question in the comments link. I will monitor and happily respond.
For more decoupage furniture projects and home decor, I’d love for you to check out the following posts:


I loved this Amy! Featured you today 🙂 https://homeandgarden.craftgossip.com/decoupage-table-for-him/
i’m really liking this project. i’ve been looking for a little side table for a while but they are usually very expensive and of poor quality. the directions are easy to follow and make the project seem doable rather than overwhelming. good job.
(dead_vs_moldy@yahoo.com)
Looks like a project my husband might enjoy. 🙂
This is ACTUALLY really good! I like the idea! come link it to my woot woot wednesday linky party!