
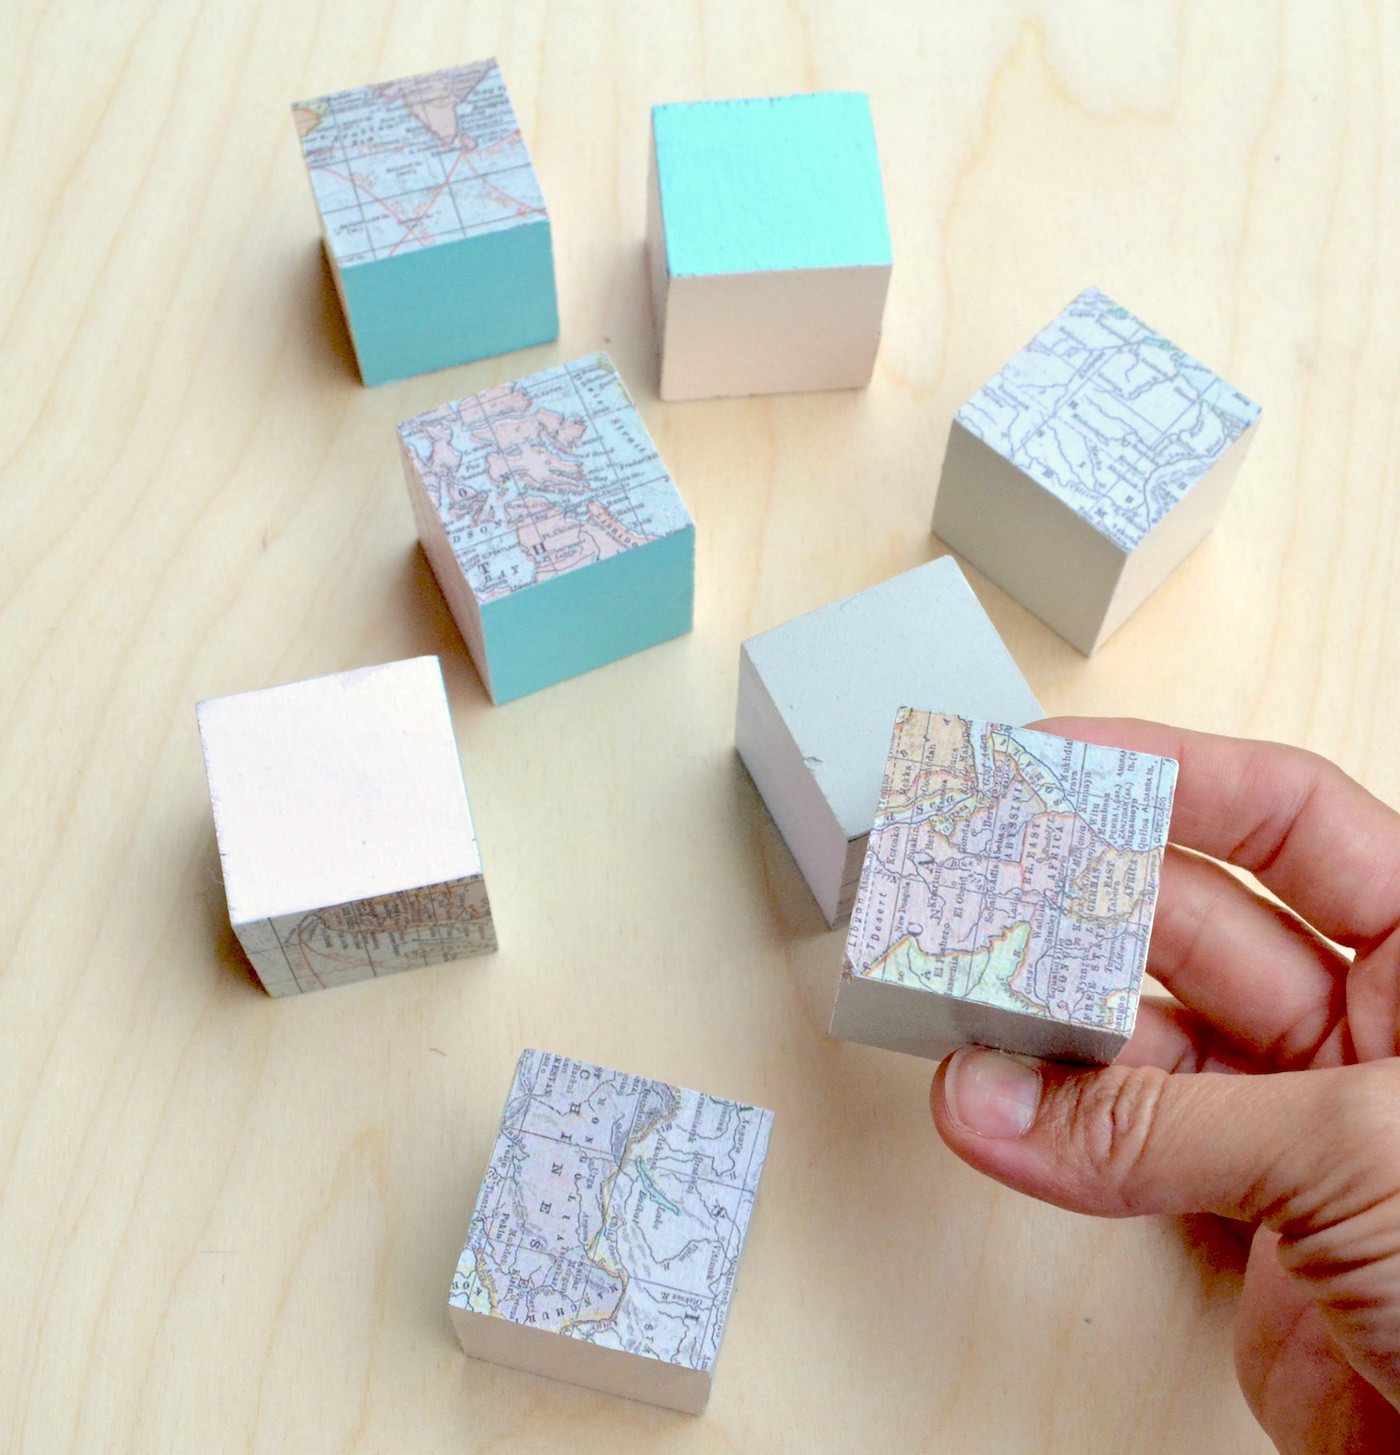
Do you love decorating wood blocks? These map blocks are such a fun Mod Podge project – perfect for a kids’ room or bookshelf!
Skills Required: None. This is a perfect beginning Mod Podge project if you’ve never done it before. You’ll cut small squares of paper and decoupage to painted wood blocks.
I’ve said before that I love Mod Podging with maps. It’s really one of my favorite things to do. Well, NBC/iVillage recently asked me to be a part of their 30 Days of HoliDIY and make some map blocks that you could give as presents.
Of course I said “where do I sign up?” They were published on the iVillage site and now I’m reproducing the tutorial here for you.
Decorate Wooden Blocks
These map blocks are VERY easy to make . . . you just have to be careful not to fill your house with them because they are so fun. It’s a definite possibility, trust me. Learn how to make them below.
Notes before you begin:
- You may want to sand your blocks with sandpaper if they aren’t smooth. Wood blocks tend to not be smooth, especially around the edges. You can use wood filler and sand if there are any holes or dents.
- I’ve been asked if these are safe for young kids who might put them in their mouth. Kind of. Mod Podge is non-toxic, but that doesn’t mean that you should let a child gnaw on the block. If a child puts a block in their mouth and you remove it, you’ll be fine. But if they sit there and chew or suck on it, they could potentially be ingesting acrylic paint and medium, paper, and wood. So that’s a no go! Basically, use these for decorative use if your child is prone to putting things in their mouth.
Ready to begin? Let’s decorate some wood blocks with maps!
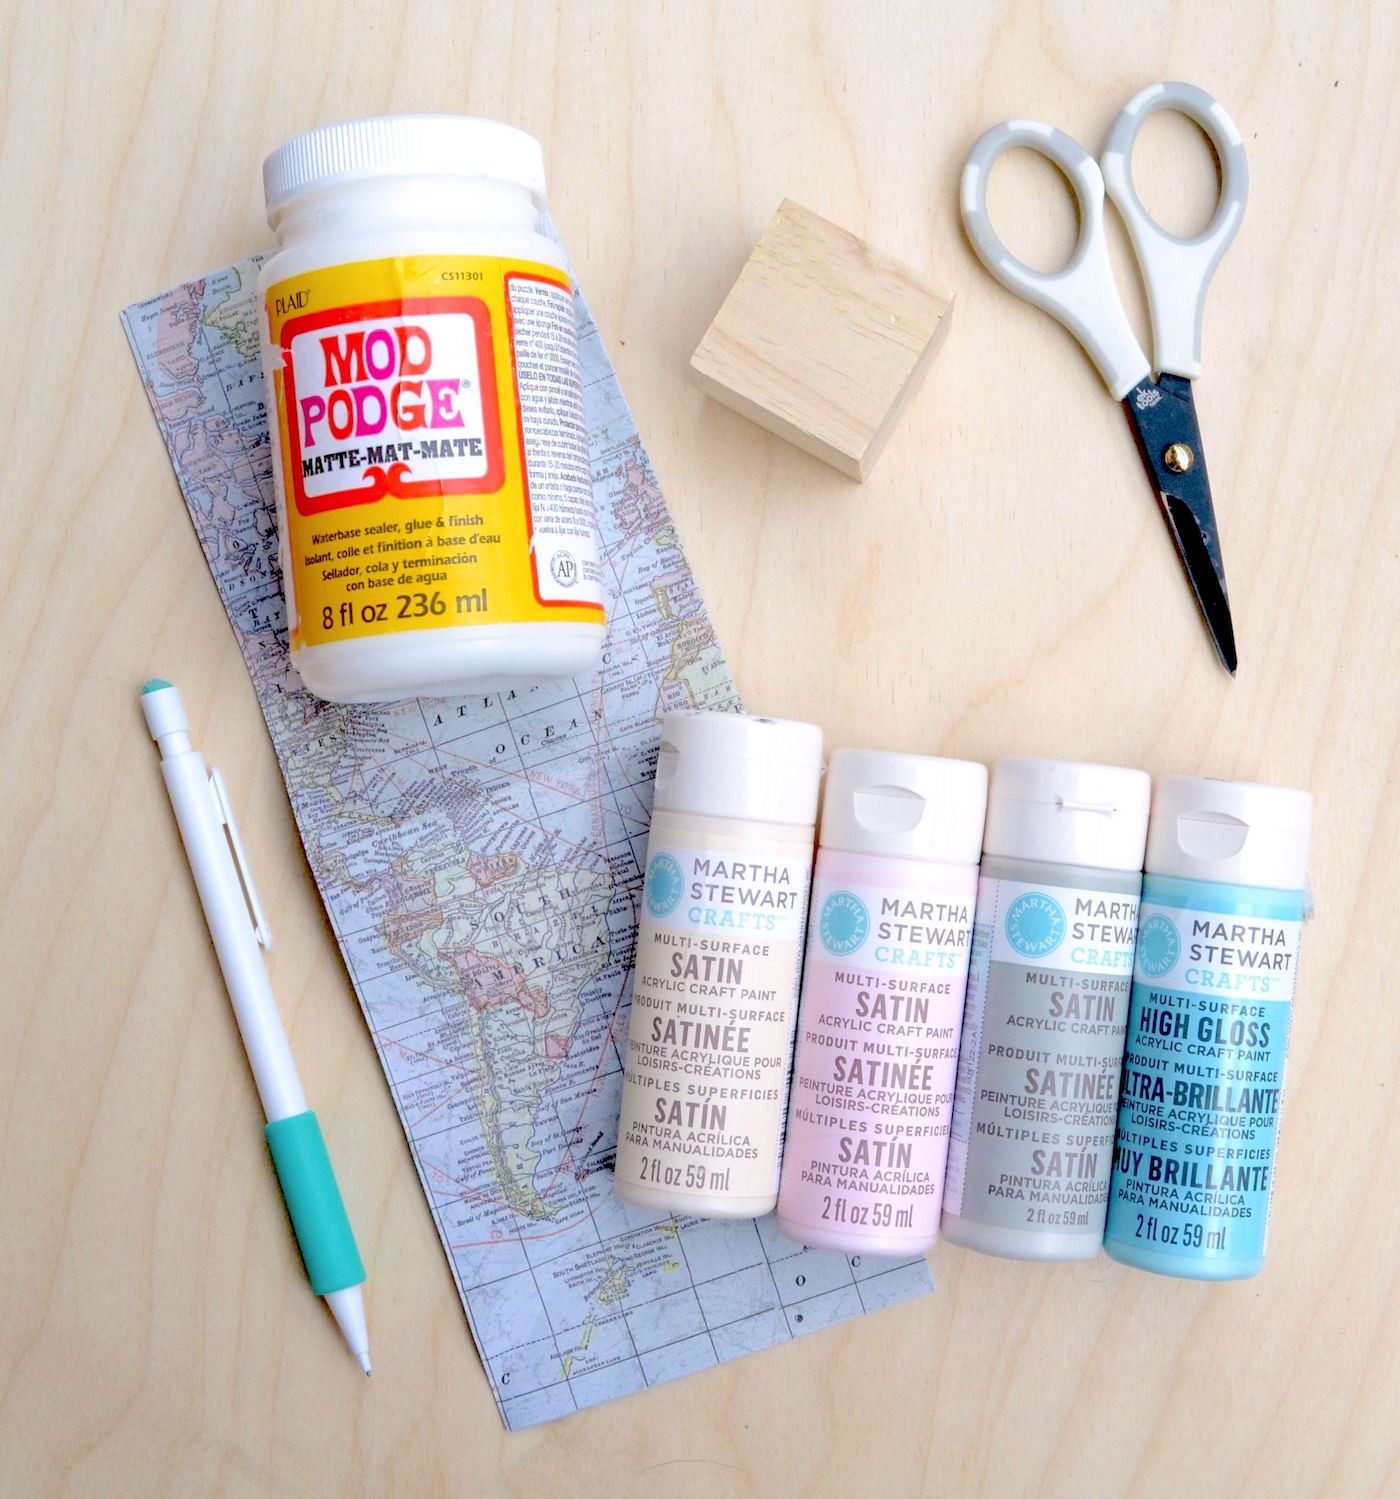
Gather These Supplies
- Wood blocks, 1.5” x 1.5” or size desired
- Mod Podge Matte
- Map printed paper or a real map
- Acrylic paint in four coordinating colors
- Paintbrush
- Scissors
- Pencil
- Sandpaper (optional)
Trace the Paper and Cut
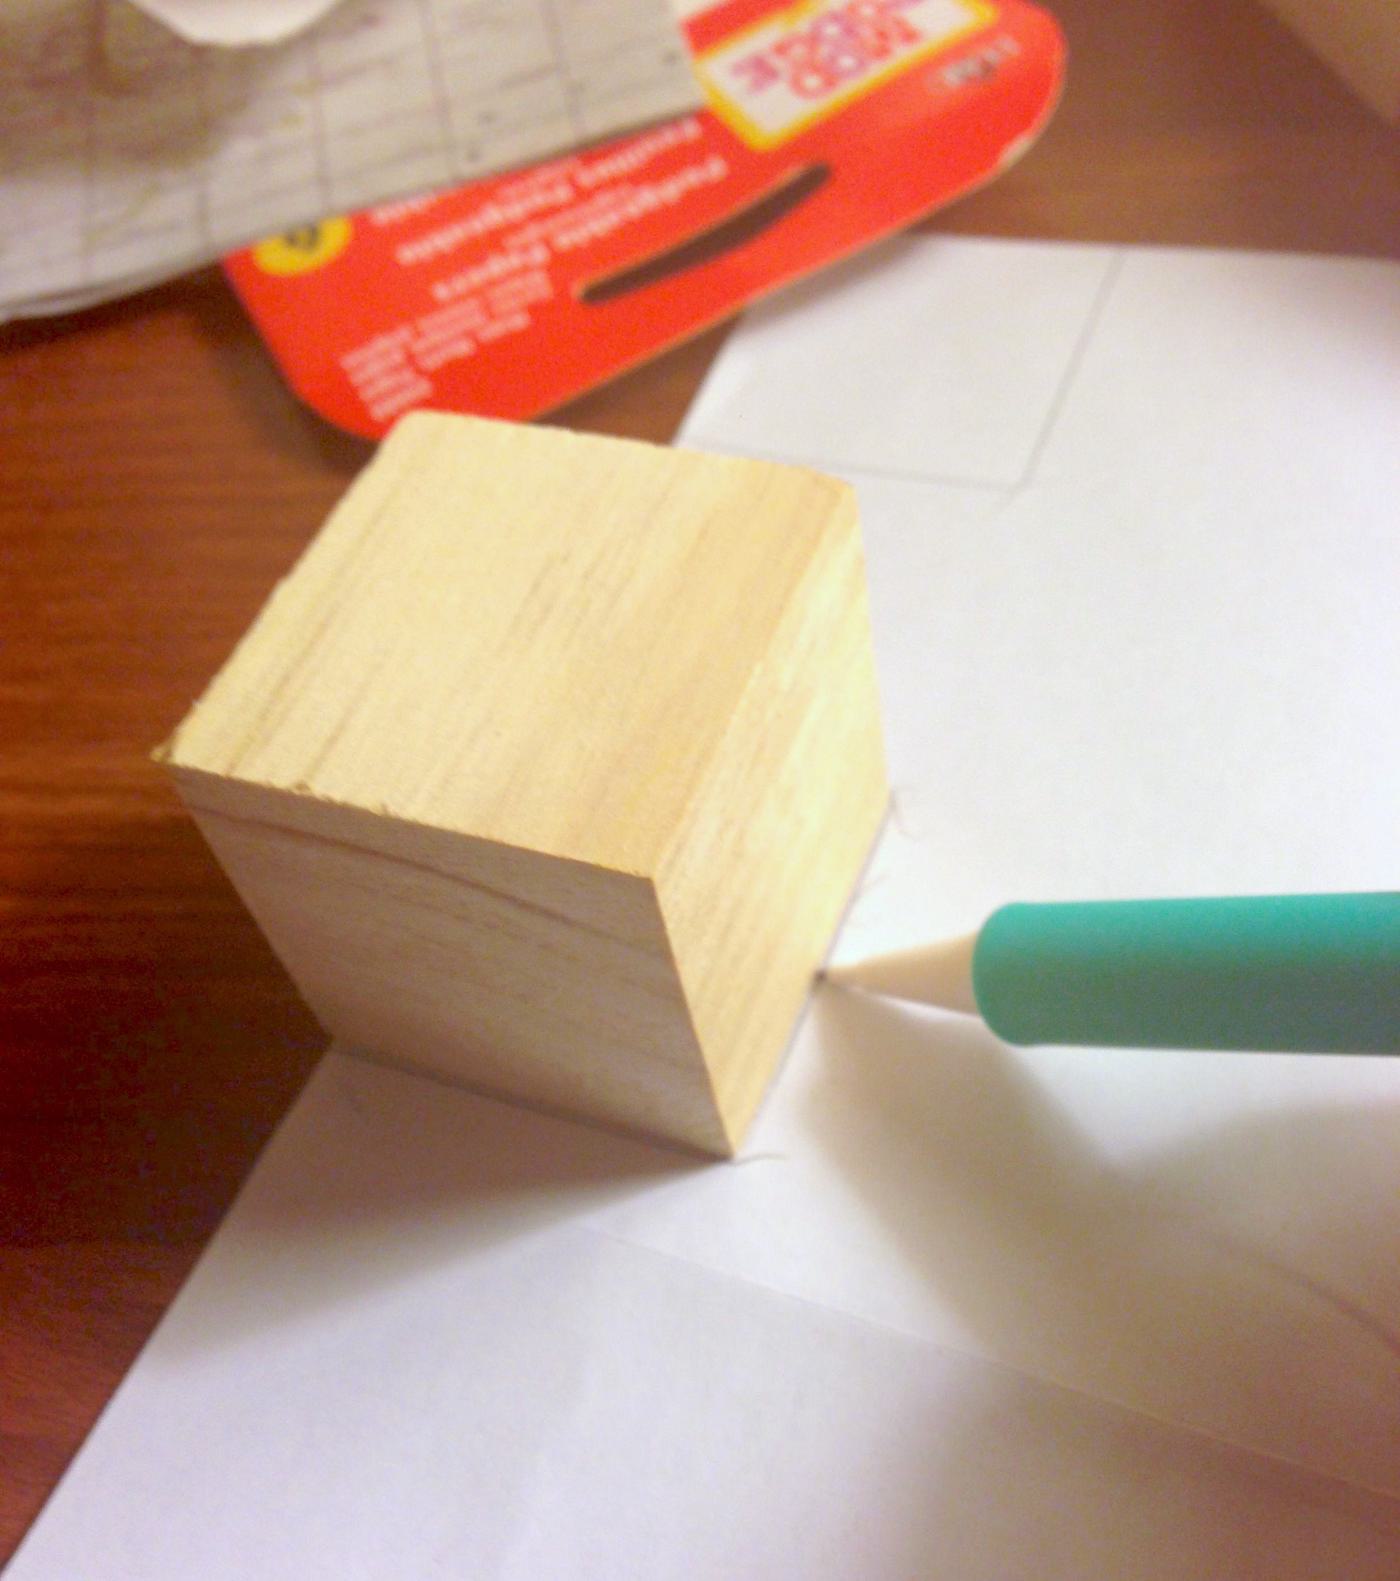
Step One: Place your wood blocks down on the back of the map paper and trace with a pencil or pen. You’ll want to cut two squares for each block. You can cut more if you like, but that’s what I used.

Step Two: Cut out all of your squares, then check for fit. If you need to, trim with scissors and then set aside.
You might want to indicate with numbers where your pieces of paper go. Because wood blocks are typically not perfectly square.
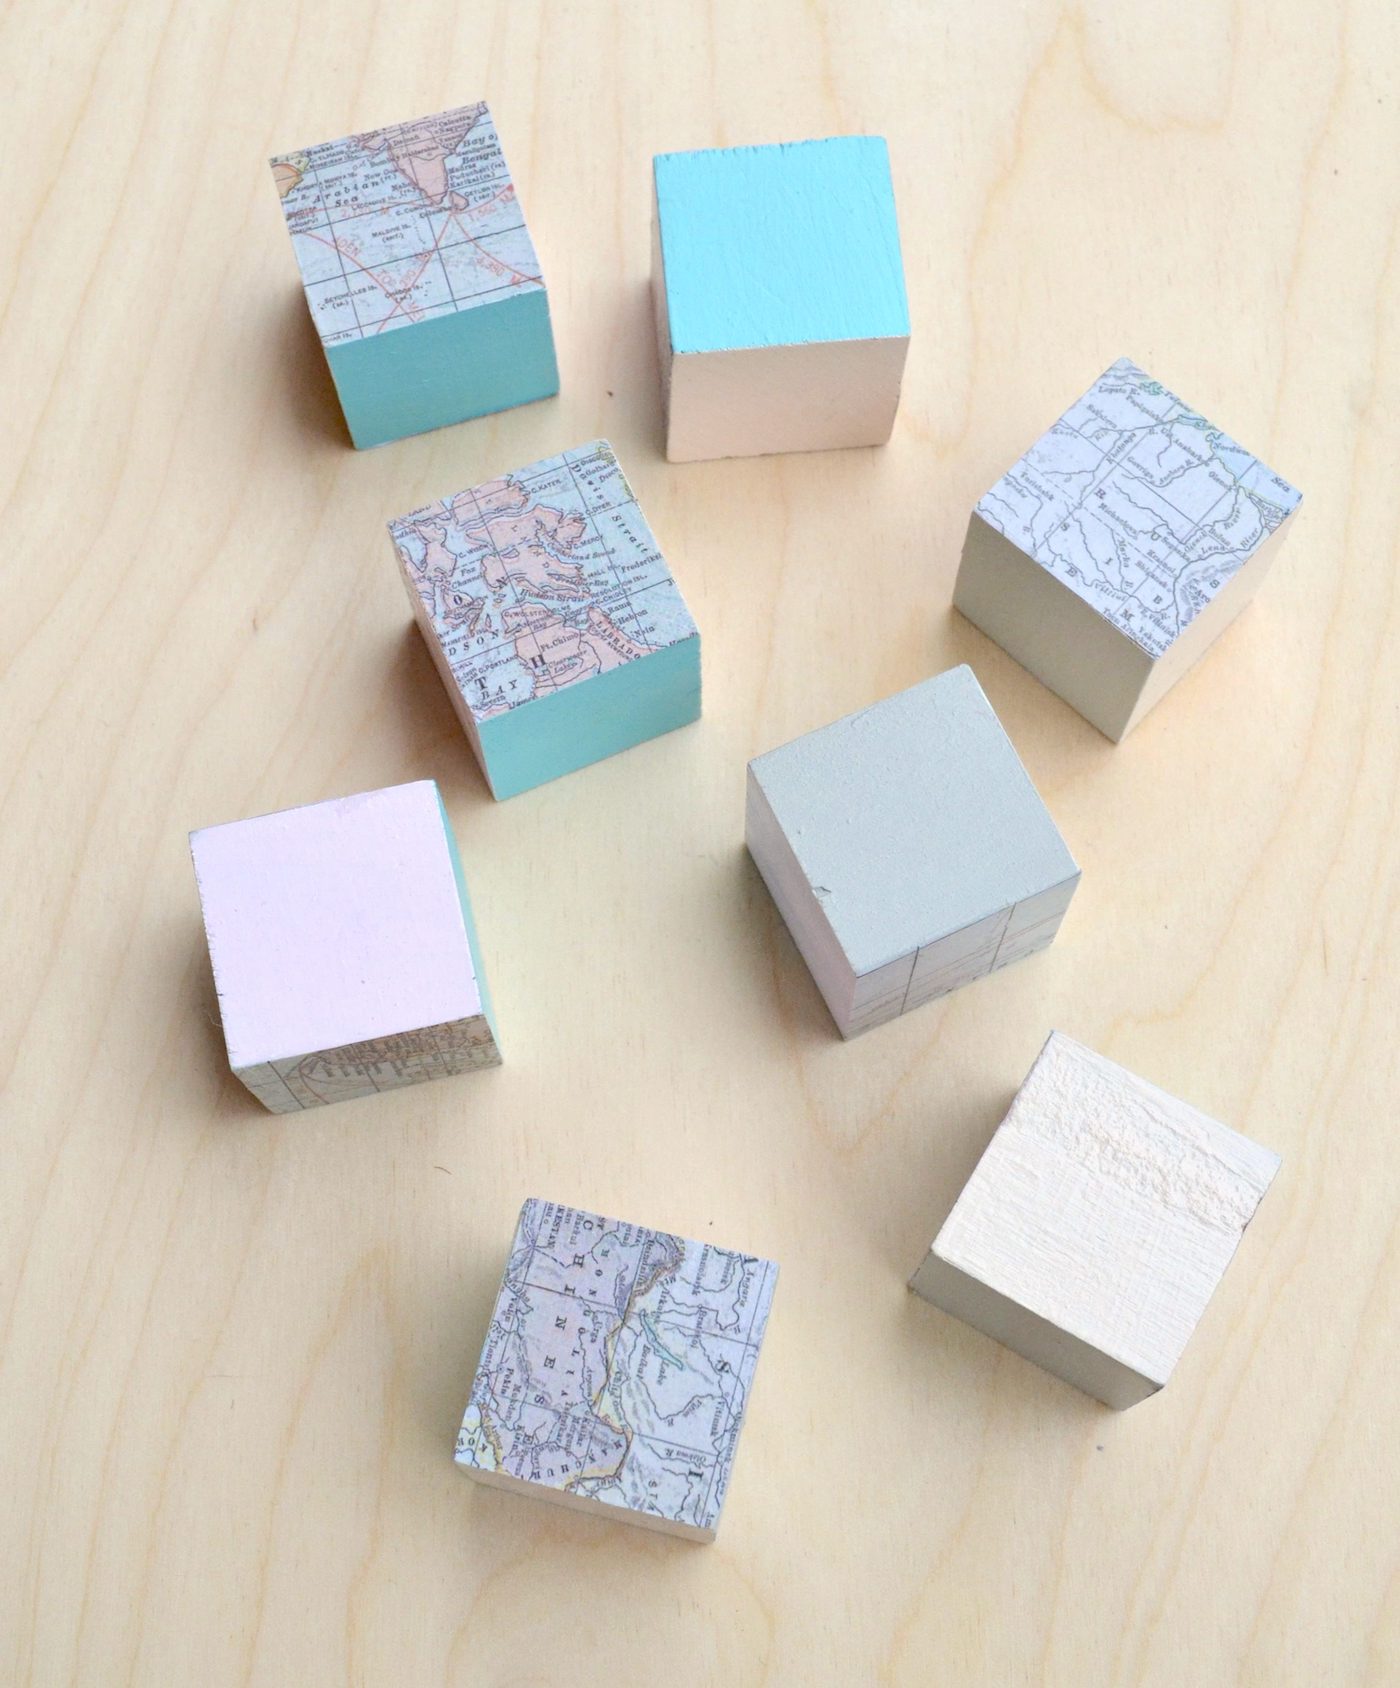
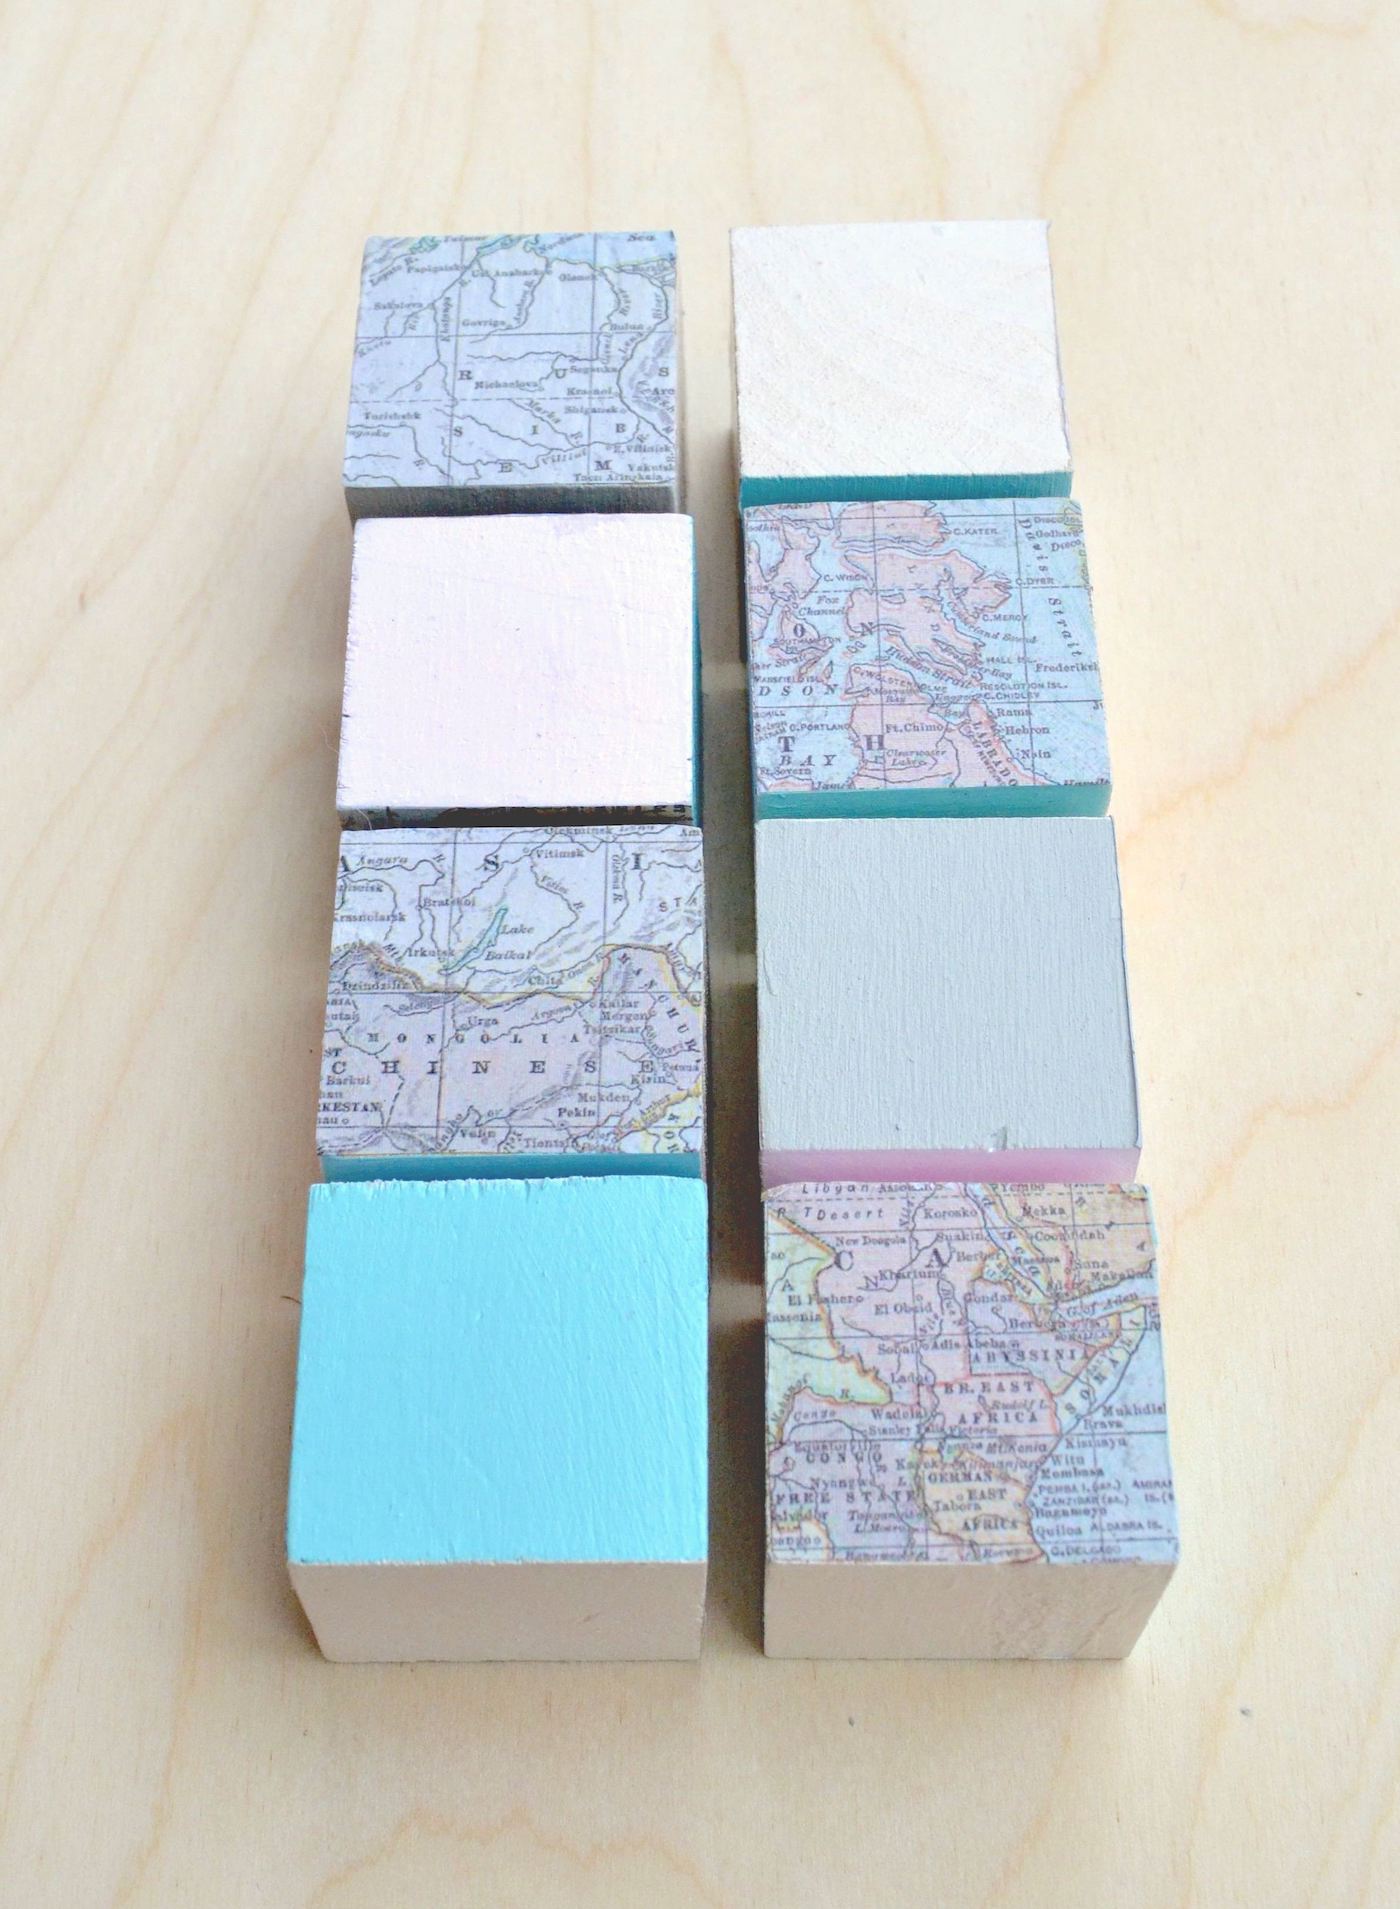
Paint the Blocks

Step Three: Paint each block with the acrylic paint of your choice. Leave two sides blank – the sides that your map pieces of going on. Repeat and let dry.
Mod Podge the Wooden Blocks
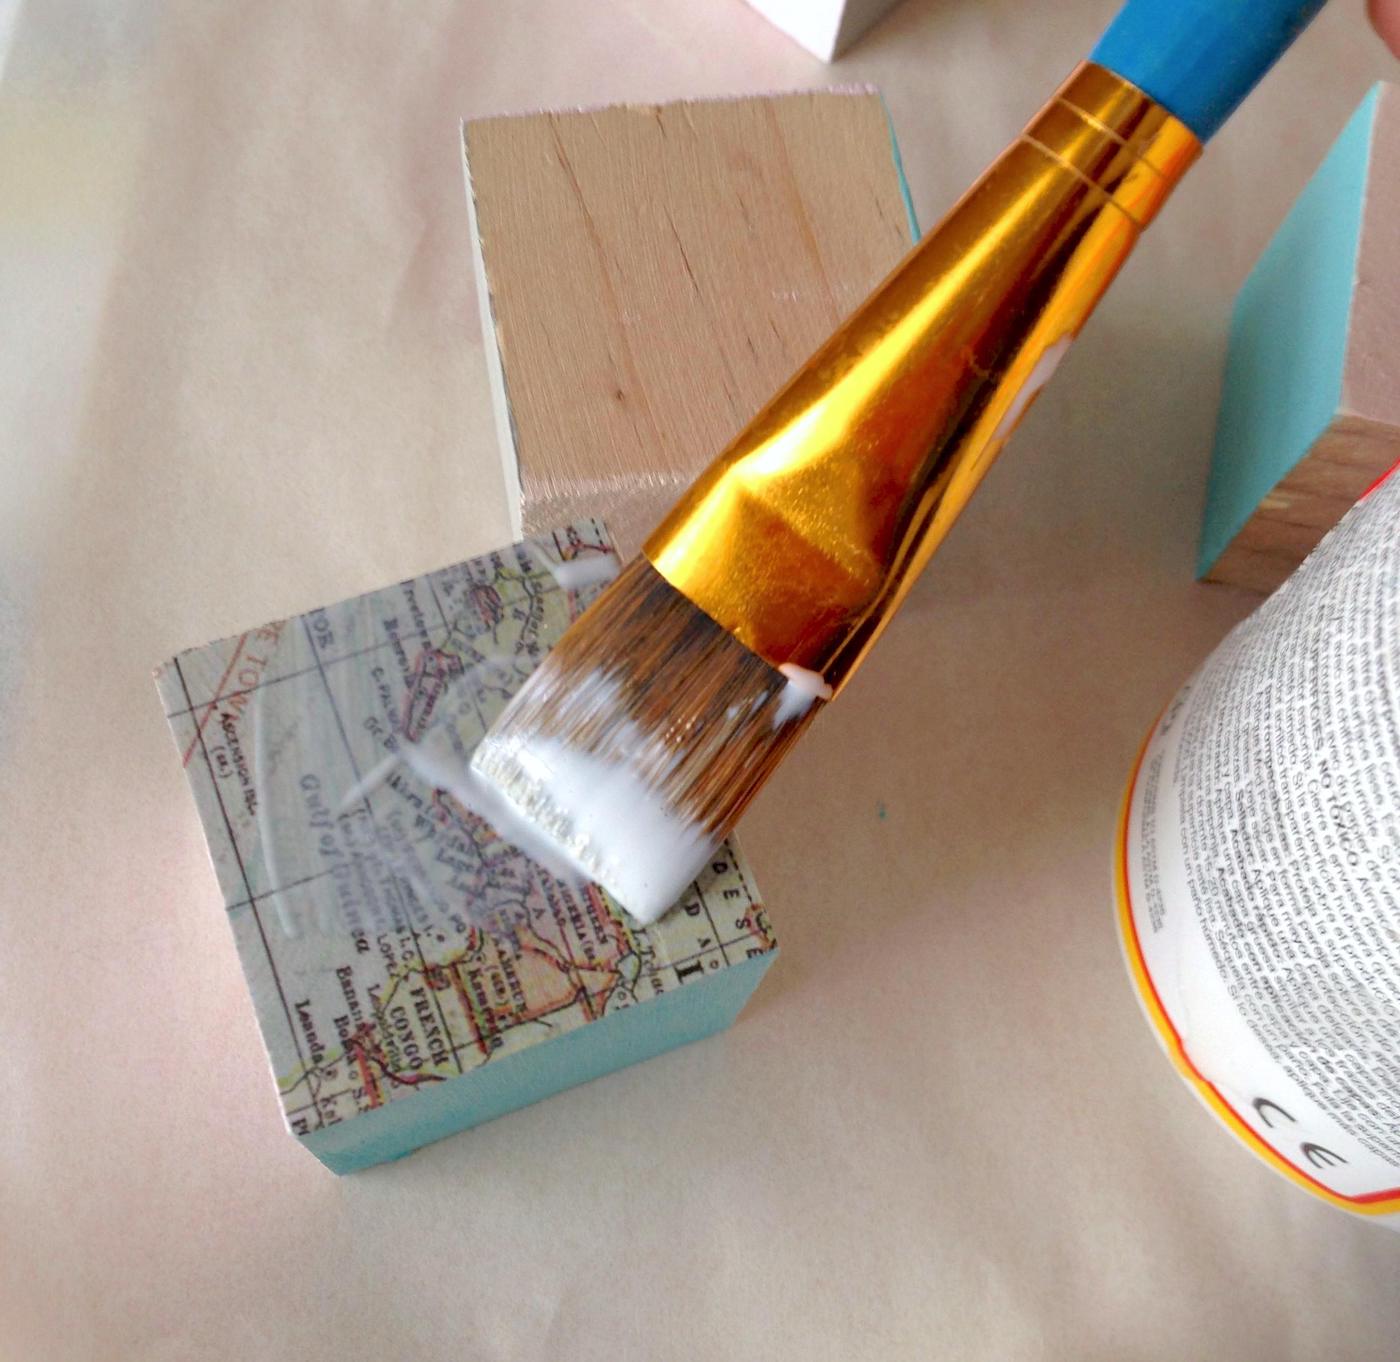
Step Four: Paint a coat of Mod Podge on one of the block sides with no paint. Quickly put a map square down and smooth out. Let dry for 15 – 20 minute and repeat with all of the blocks.
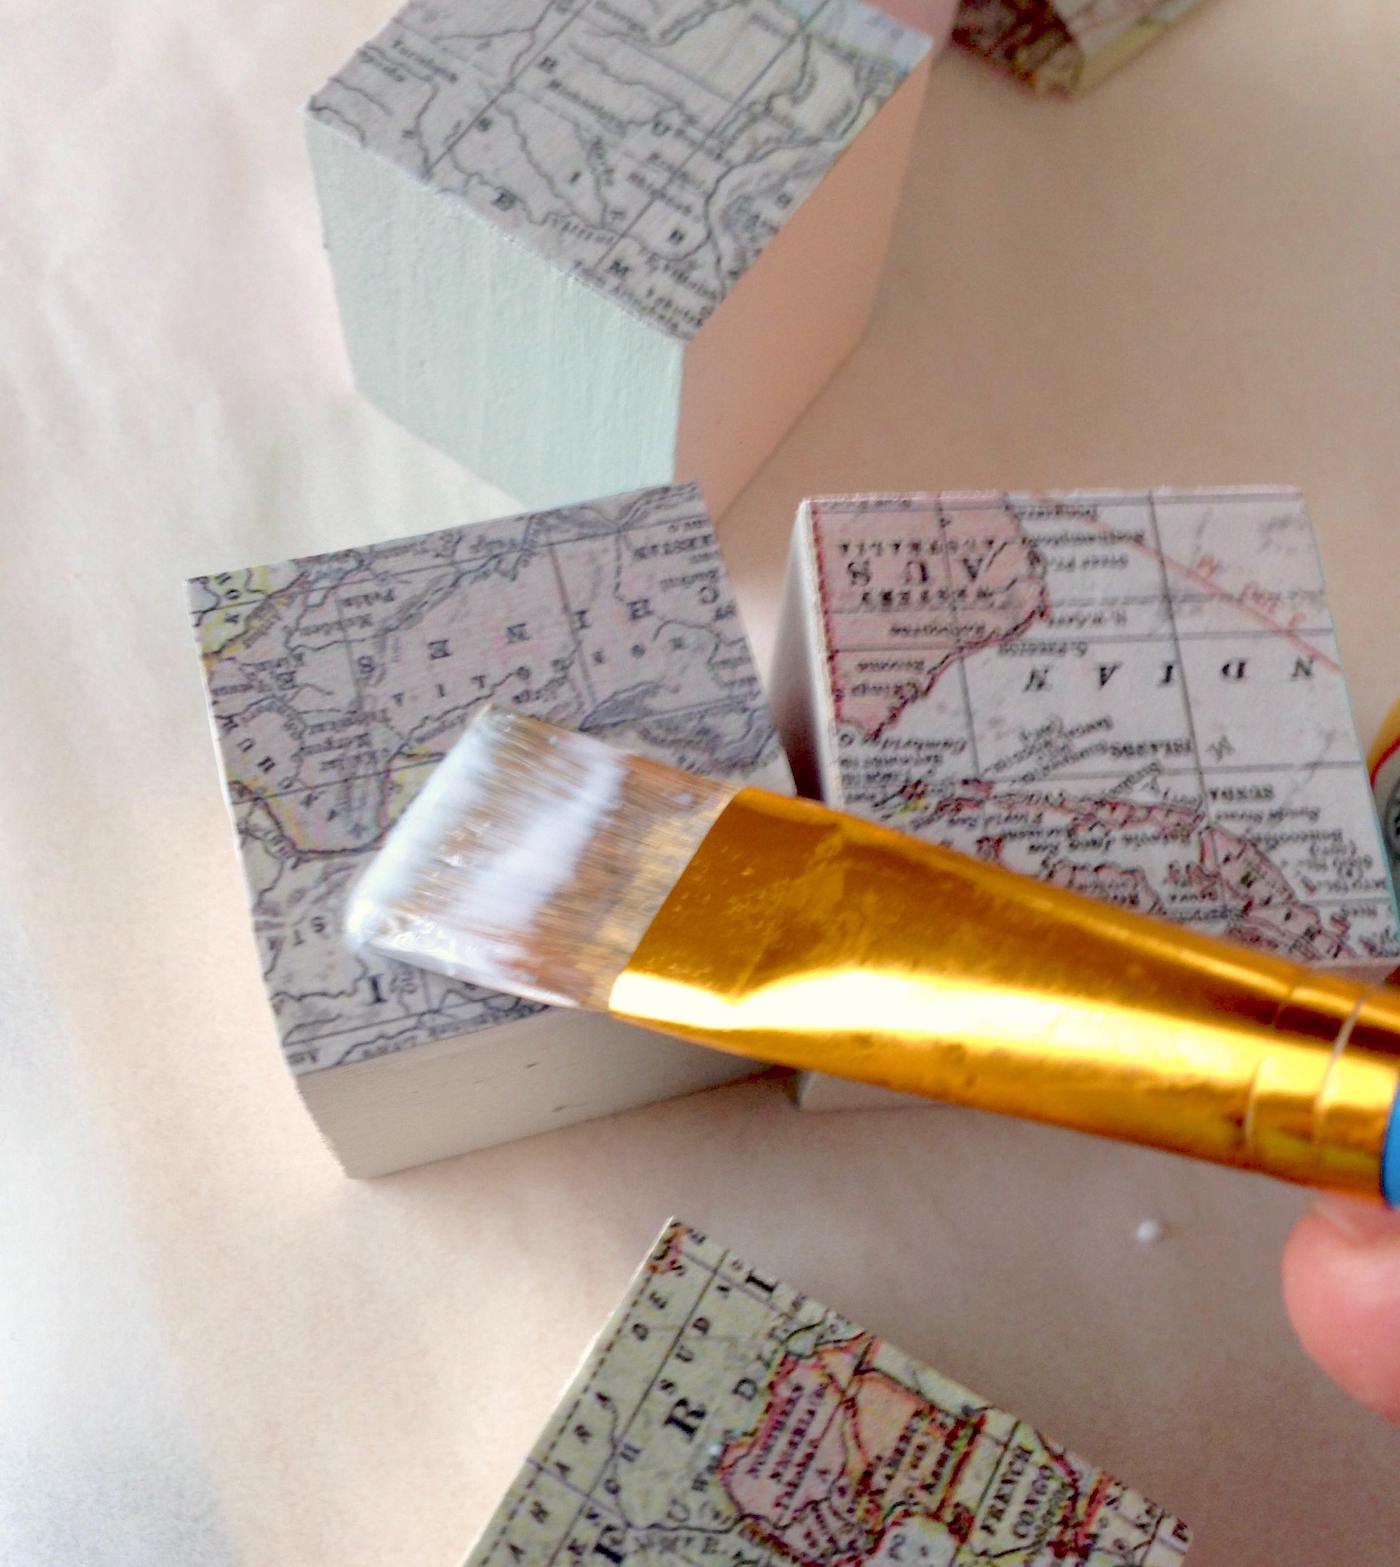
Step Five: Coat all of your blocks with Mod Podge on all six sides to seal. Let dry and repeat. Let the blocks dry completely before allowing children to play with them or using them for decoration.
If you want to stack the blocks, Mod Podge can be tacky. You’ll probably want to use a sealer, especially if you use the Gloss formula. You can use a clear spray on or brush on sealer for this purpose (like Minwax Polycrylic).
Stack them, play with them, use these wood blocks as decor. There are a lot of possibilities – and you can customize them to be your own.

Did you enjoy decorating these wood blocks? I’d love for you to check out these other ideas as well:


This is wonderful. The kids all did such a nice job fun and learn.
Rohit