
Learn how to decorate a wood pendant with a picture from a magazine – or any other scan you like! This necklace is easy and great for gifts.
Skills Required: Beginner. For this pendant you’ll be doing some basic scanning, painting, Mod Podging, and then attaching jewelry findings. If you’ve never used Dimensional Magic before, check out this guide.
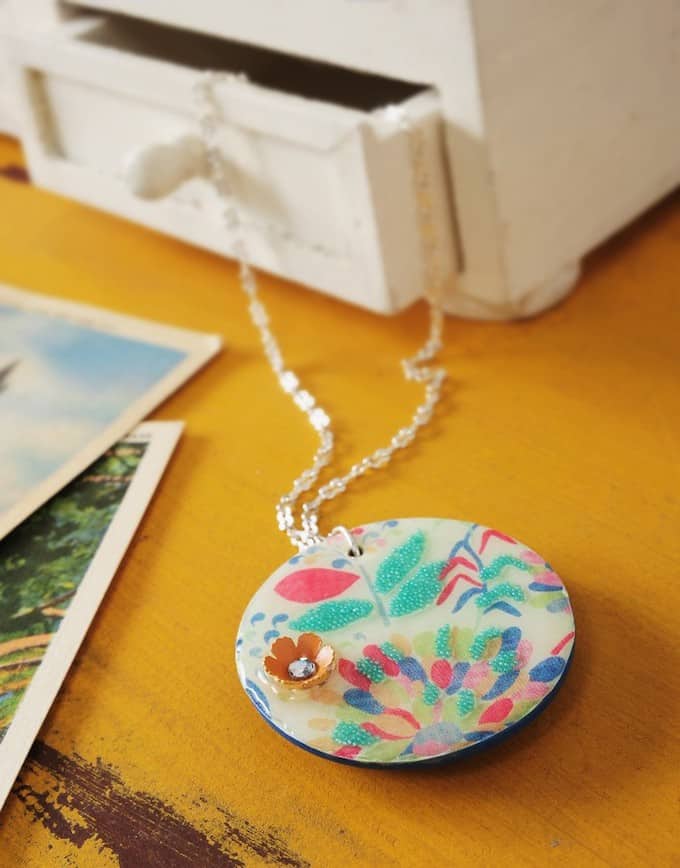
If you’re ready to learn how to decorate a wood pendant, I’m happy to share this fashion craft with you. I’m downright excited in fact.
It’s a DIY necklace that 1) uses Dimensional Magic, which is one of my favorite things in the whole world; and 2) can be personalized with any image or scrap of paper that you like.
For this particular pendant, I chose to take a copy of the cover of a recent Boden catalog which had a beautiful watercolor-like floral design on it. That became the background of my necklace. It wasn’t my catalog to cut up, so I scanned it instead.
This wood craft tutorial goes for anything you don’t want to cut up and can scan instead: photos are one of the most common things, but you can also use magazines.
But you never know when you’ll see a design that you have to have on a piece of jewelry, but you can’t take your scissors to it. In that case, here’s what you’ll do!
DIY Floral Pendant
Gather These Supplies
- Flip-Pal mobile scanner – this is the scanner I used, but any scanner will do
- Computer and printer
- Image to scan
- DIY Bangles – 2″ pendant disc (any brand will do)
- Mod Podge Gloss
- Mod Podge Dimensional Magic
- FolkArt acrylic paint – Blue Ribbon (or coordinating colors)
- Microbeads in Feldspar (optional)
- Metal flowers or other embellishments
- Jewelry making stuff – loop, chain, clasp
- Jewelry tools
- Scissors
- Pencil or pen
- Paintbrush
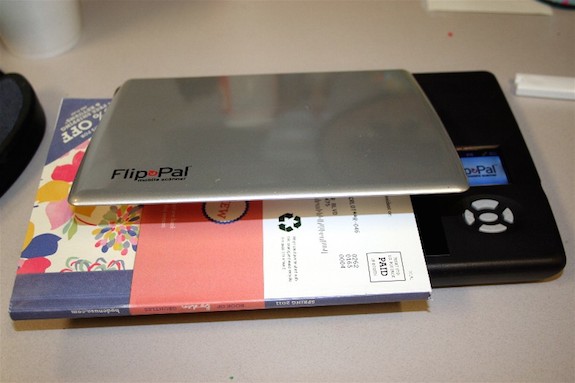
Scan your catalog on your Flip-Pal. I have a secret – I’m at work but NOT on my lunch break. Mwahahahaha! Being bad feels so good.
I love the portability of this small scanner. And it’s so small that I can cover it with a spreadsheet if someone walks up.
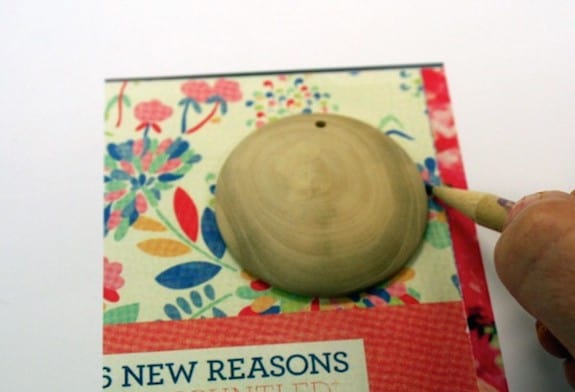
Print out the design onto a piece of copy paper. If you have a laserjet printer, you can cut out and decoupage as is.
If you have an inkjet printer, you’ll need to seal the paper with clear acrylic spray sealer before decoupaging, or it will smear. Trace your pendant flat side down onto your design.
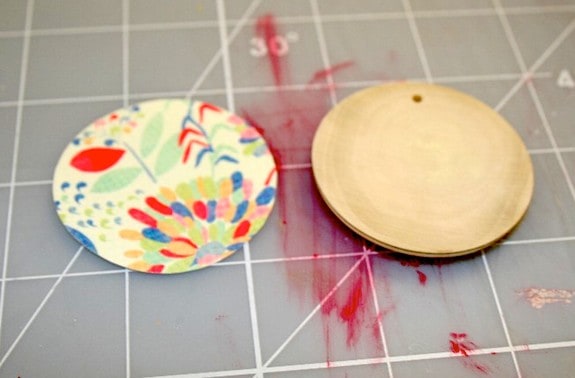
Cut the paper out and make sure that it fits your pendant. Adjust if you need to. Set the paper aside.
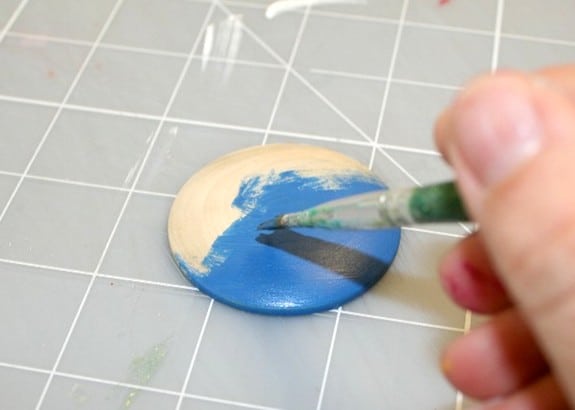
Paint your pendant with Blue Ribbon (or your coordinating color). Give several coats and allow to dry.
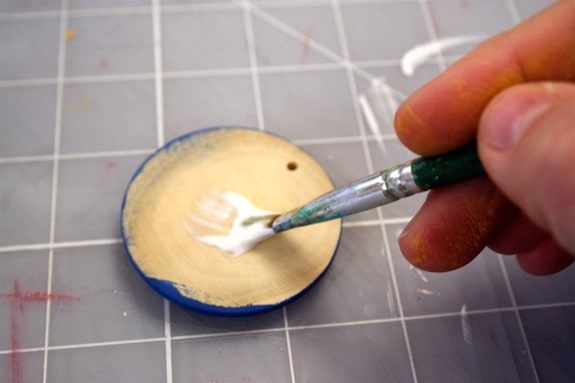
Add a medium layer of Mod Podge to the top of the pendant. Place the paper on top and smooth thoroughly. Wipe away any Mod Podge that squeezes out the sides. Let the pendant dry for 15 – 20 minutes.
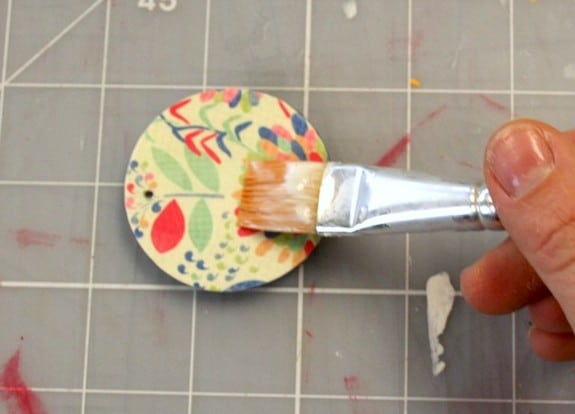
Mod Podge over the top of the paper seal. Allow to dry and then add another coat of Mod Podge. At this time I poked a hole where the pendant hole was – I used some random sharp object. I forget what, but a paper clip or pin will work.
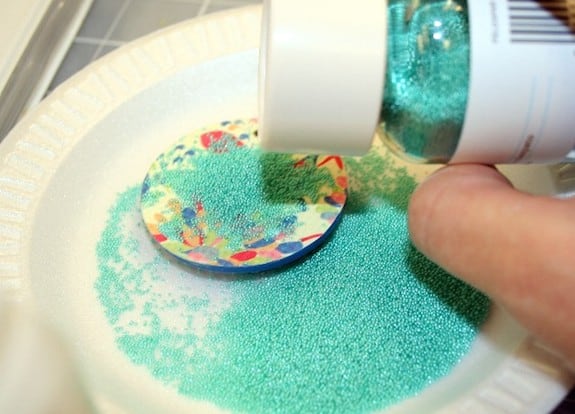
I had some coordinating Martha Stewart microbeads so I added them to give the project a little texture. Add some Mod Podge in the areas you want the beads and sprinkle directly on top (works just like glitter). Allow to dry.
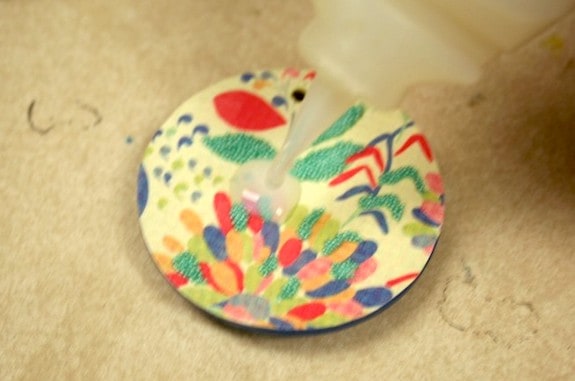
Finally, add Dimensional Magic to the top of the pendant, right over the beads. Right after I applied the DM I stuck the metal flower directly onto the pendant.
The DM will dry and it will be held in place. It takes several hours for DM to dry, so be patient – also leave it in a relatively warm area. It cracks if it’s in a cold room.
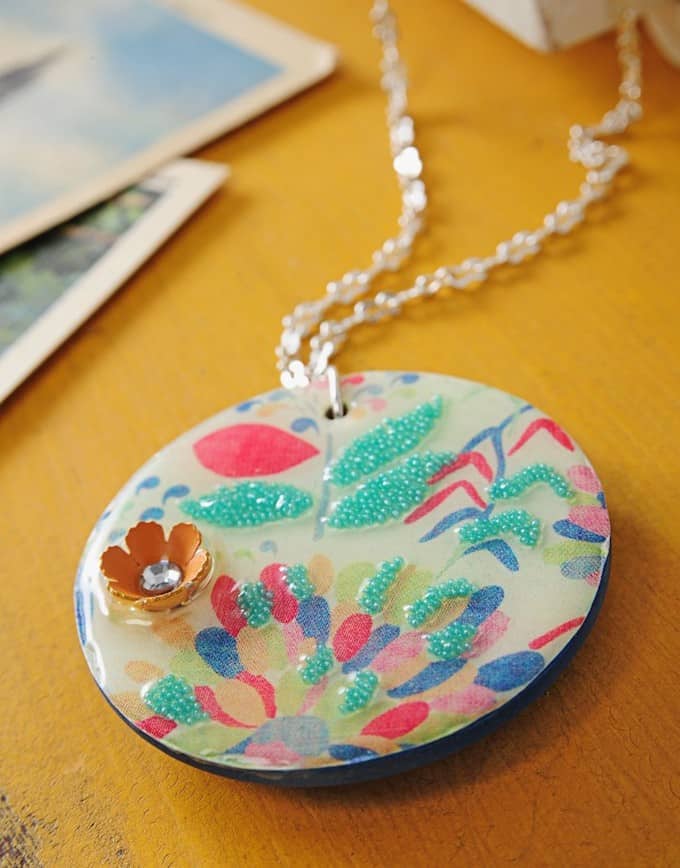
To make your wood pendant a necklace, add the jewelry findings of your choice. Or if you are like me and are completely spent from Mod Podging, a jewelry making friend to do it for you.
I’m pleased with my finished necklace, especially the texture I got with the beads and metal flowers. What do you think of my Mod Podge jewelry idea? Are you ready to decorate a wood pendant?
Are you looking for more DIY jewelry ideas – some using Dimensional Magic? Visit these easy jewelry projects! Or some of these other necklace options:


This is a great project! I’m curious tho…how do you keep the DM from dripping over the side of your pendant?
Hi Lisa! Actually DM has great surface tension . . . so as long as you don’t go crazy and get TOO close, it just stays there 😀
can you tell me what the pendant is made of? I thought a piece of wood, but not sure about the mod podge on that… thanks in Advance… Terrell
Hi Terrell! Yes, it’s a wood pendant. You can get one like that from a craft store 😀
OMG! I am a confessed newbie to Mod Podge. I saw a couple of canvas projects at a craft fair last weekend and have been DYING to do it myself. With great tips from several projects in your SUPER blog I am headed to the craft store today and will create my first Mod Podge masterpiece, a gift for my son’s preschool teacher. Can’t wait for the store to open!