
Discover how to make adorable DIY pins for kids using simple salt dough and colorful craft paint. A fun and easy project idea!
Skills Required: None. Children of any age can mix the dough, and the rest is painting and gluing.
Get ready to roll up your sleeves and sprinkle a little fun into your day with a craft that’s as enjoyable as it is easy – making DIY pins for kids with salt dough!
This craft is perfect for children and offers more than just an outlet or a boredom buster. It’s a chance to transform a rainy afternoon into a vibrant explosion of creativity and fun, all while making something truly wearable.
Salt dough might sound elementary, but you’ll be amazed at what you can create with this versatile material. It’s not just for grade school art class!
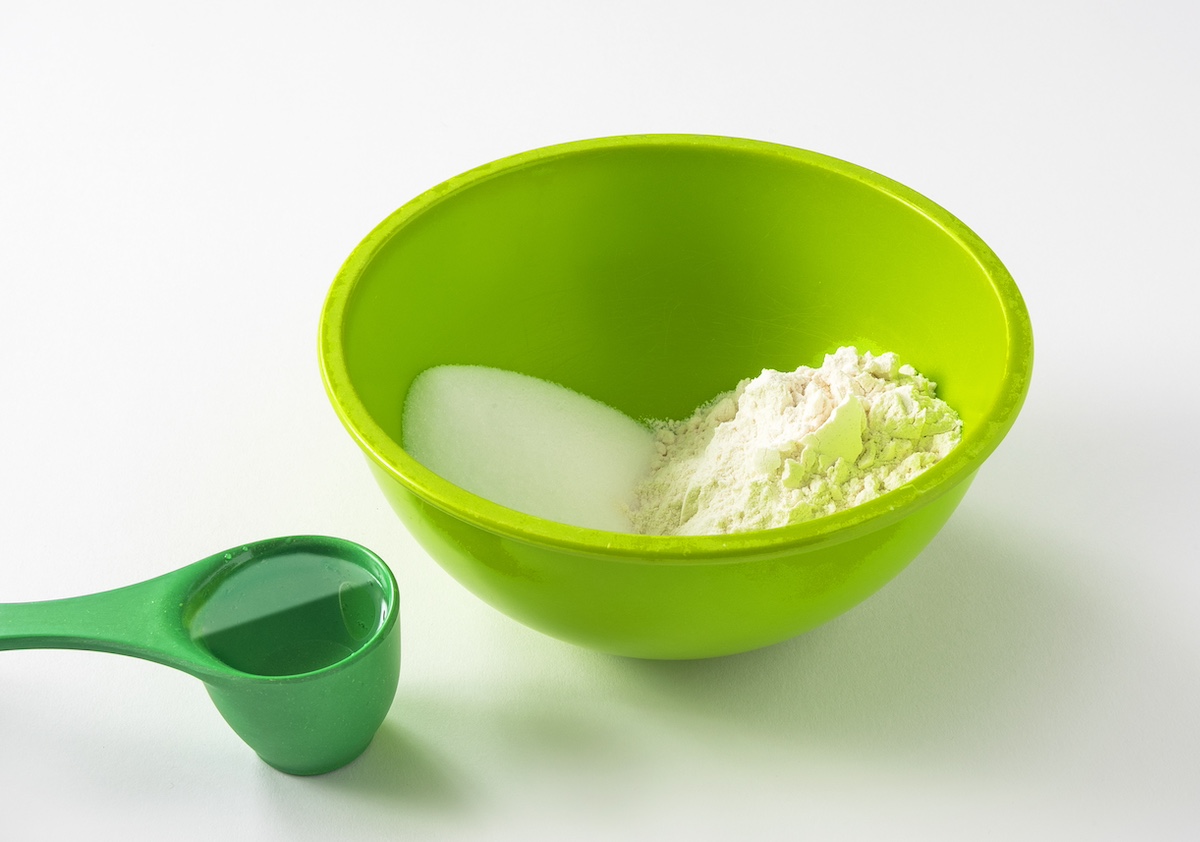
With a little imagination and some guidance from you, the dough transforms into stylish, personalized jewelry. The recipe is simple: flour, salt, and water, mixed into a dough that your kids can knead, shape, and customize.

Here’s the best part: every step of this project invites engagement. The tactile experience of kneading and shaping the dough is wonderfully grounding, offering a break from screens and a chance to focus on something tangible.
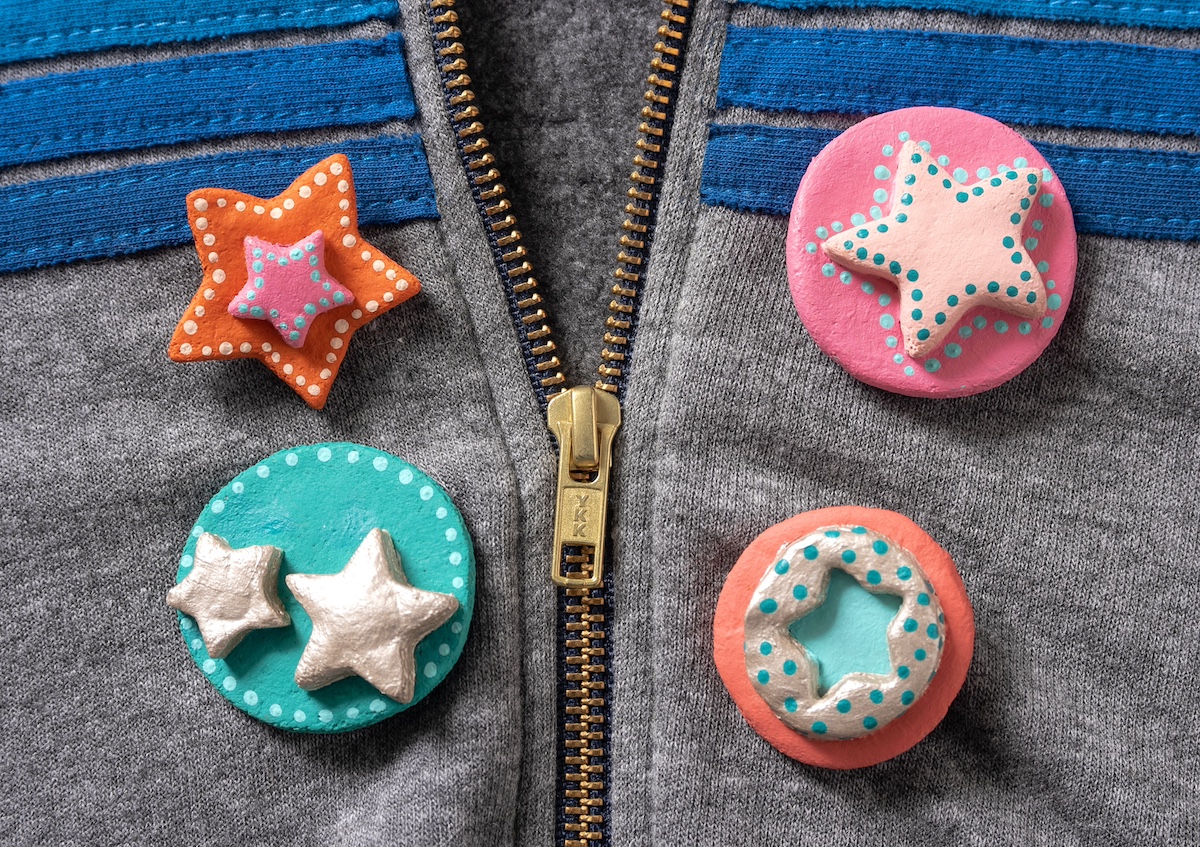
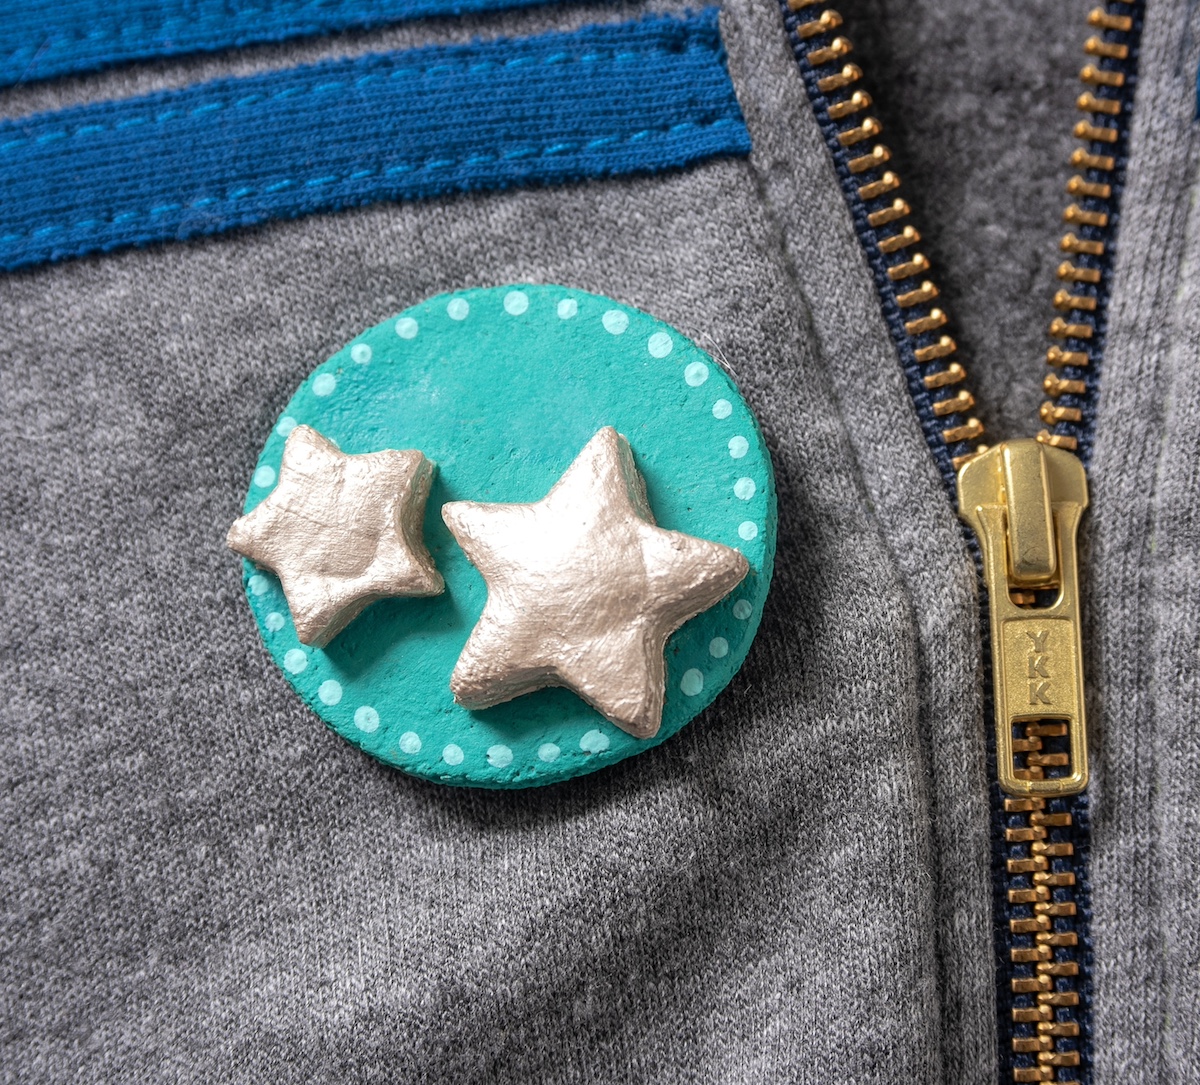
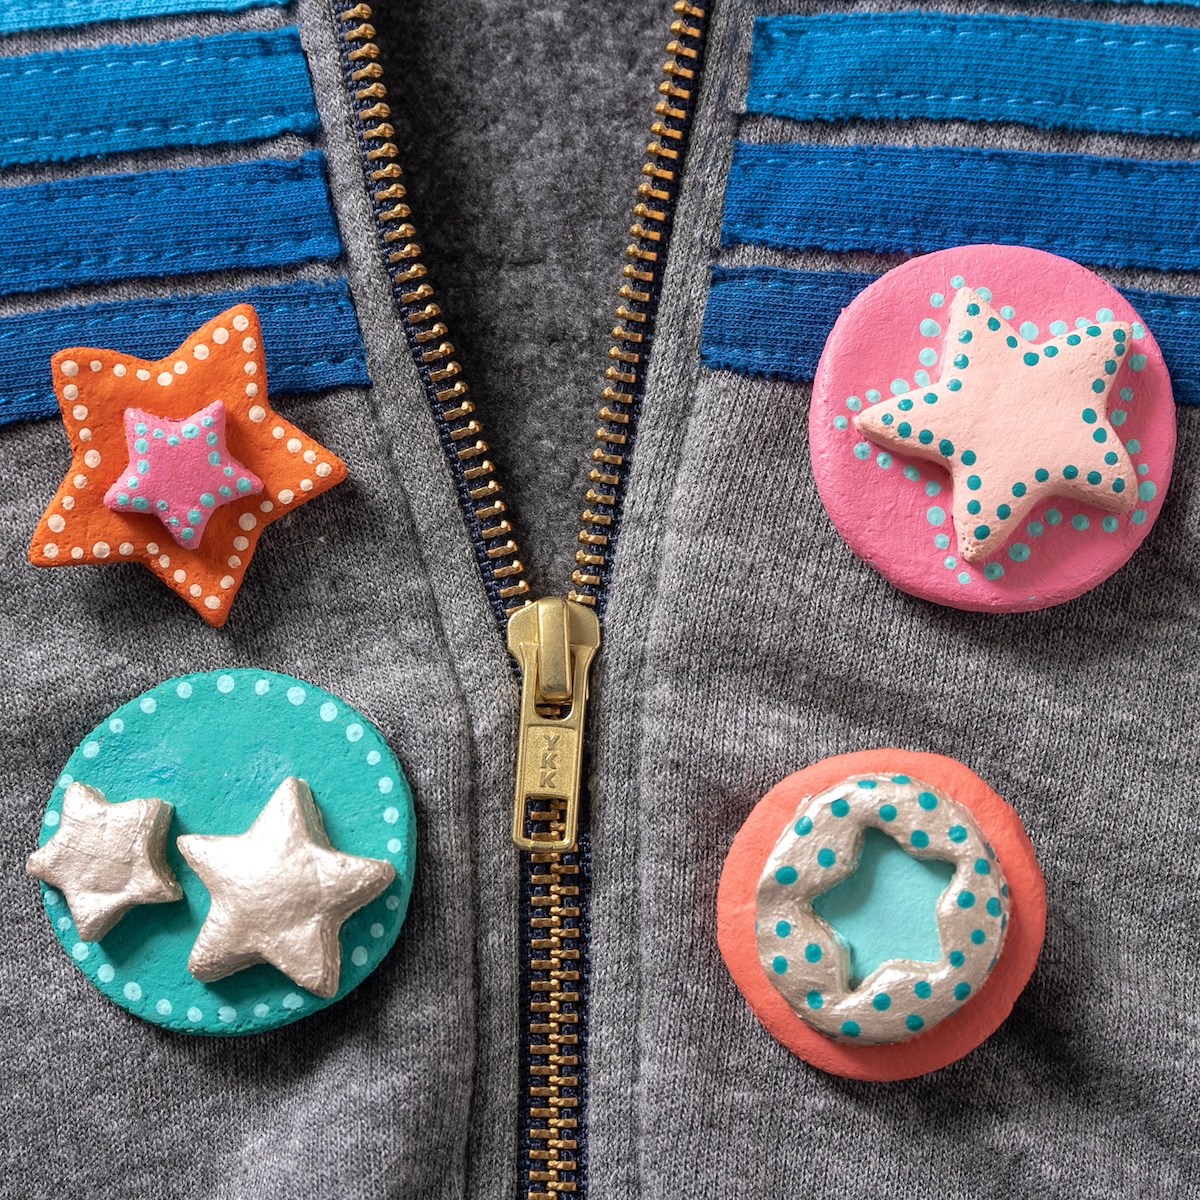
And when it comes to decorating, the sky’s the limit! Let your children unleash their inner artists as they paint their designs onto the baked dough shapes. Encourage them to experiment with colors, add details, or even embed small textures into their creations before baking.
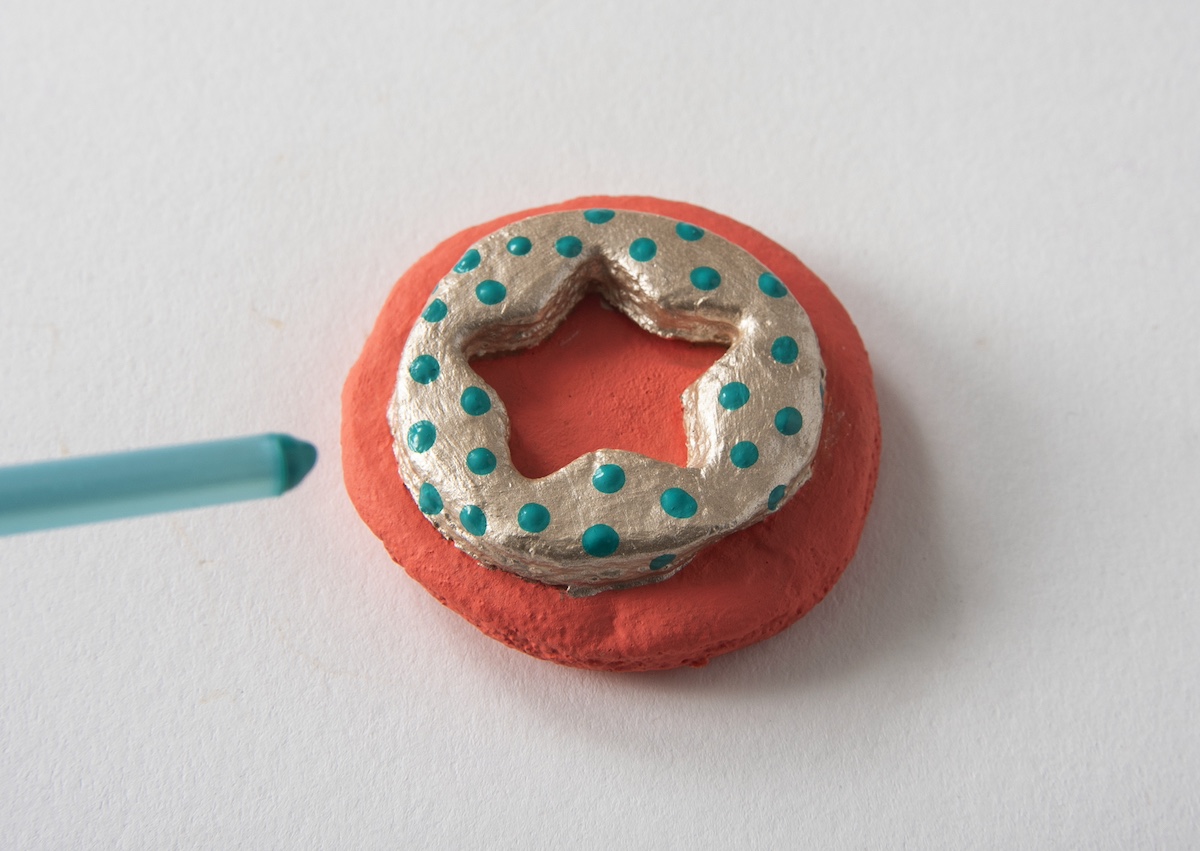
They can use the end of a paintbrush to make dots, or layer different shapes to craft something truly unique. Whether they choose vibrant colors or intricate details, these pins will surely be a hit, perfect for jazzing up a backpack or adding a homemade touch to an outfit.
So, why not make this craft day one to remember? Gather your littles around the table and let’s create not just pins, but a precious memory of making something beautiful together. It’s time to make, paint, and celebrate your very own DIY pins for kids!
Gather These Supplies
- Fork
- Acrylic paint (any colors)
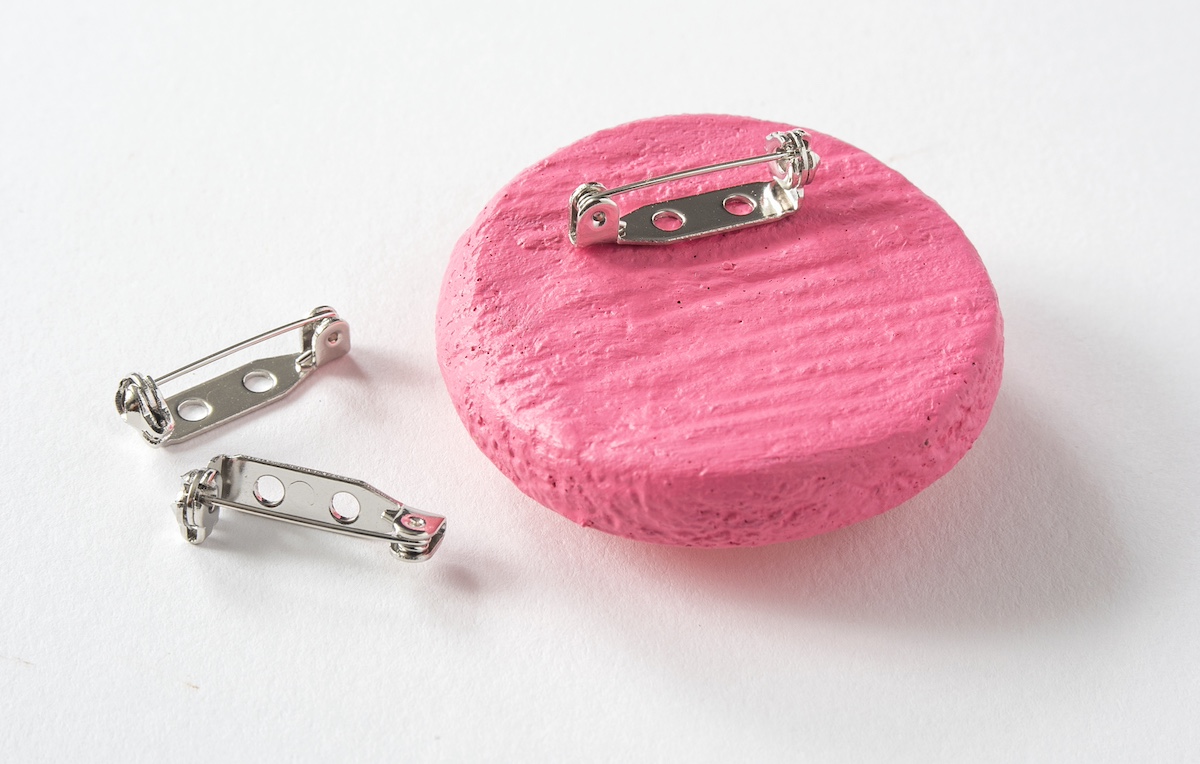
- Pin backs
- Craft glue
- Mod Podge (to seal – use Gloss, Satin, or Matte)
- Paintbrushes
- Cookie sheet
- Cookie cutters
- Rolling pin
Tips and Thoughts for This Project
Use cookie stamps or items from around your house with texture (plastic toys or blocks work great!) to create patterns on top of the dough before baking.
You won’t believe what you can make with salt dough: jewelry, ornaments, dishes, and more. It’s easy to work with and it’s nice because the ingredients are probably available in your home.
You can also add 20 to 30 drops of essential oil to your salt dough to give a relaxing scent to your pins. Lavender, sandalwood, and clary sage oils are great for this purpose.
Get the printable how to card for this project below:

DIY Pins for Kids
Equipment
- Bowl
- Fork
- Cookie sheet
- Cookie cutters
- Rolling Pin
Materials
- Acrylic paint any colors
- Pin backs
- Craft glue
- Mod Podge
Instructions
- Place the bowl on your work surface. Add the flour and salt to the bowl and combine with the fork. Add the water and stir.
- Continue mixing, and eventually the mixture will solidify enough that you can begin kneading it with your hands. If you find the dough is too dry, add a bit more water. If it's too wet, just add more flour.
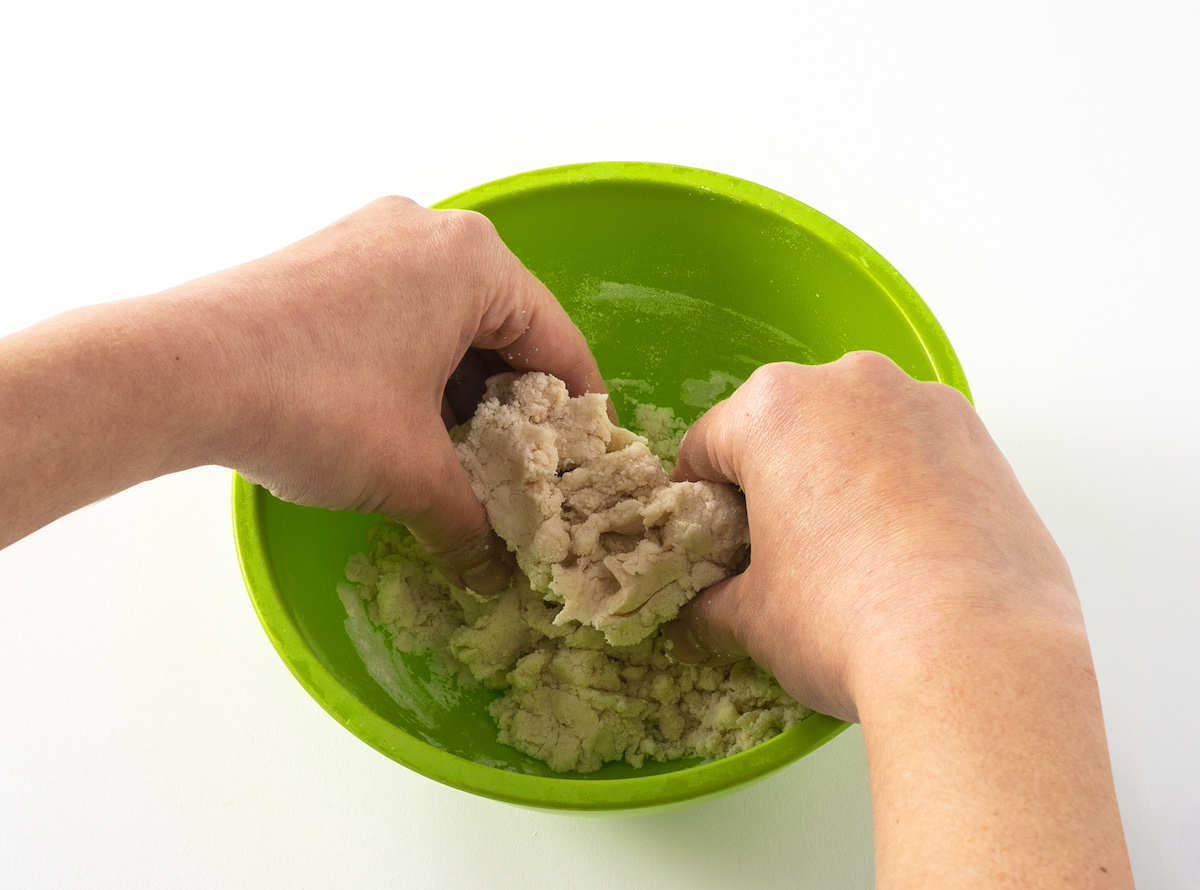
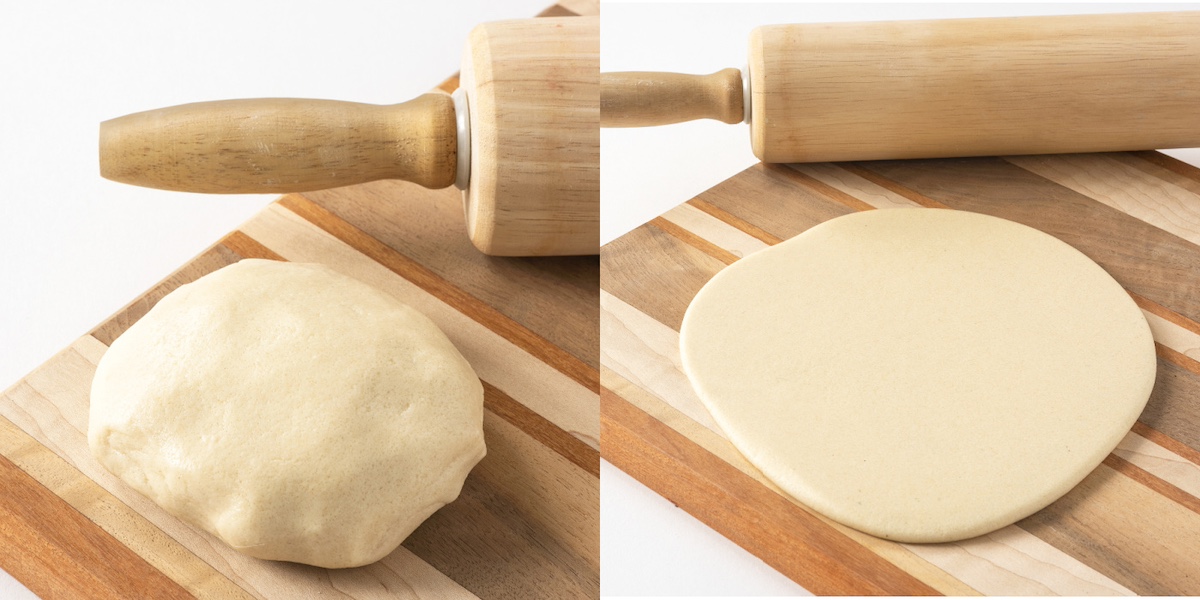
- Knead until fully combined, and then roll out the dough on your work surface with a rolling pin.
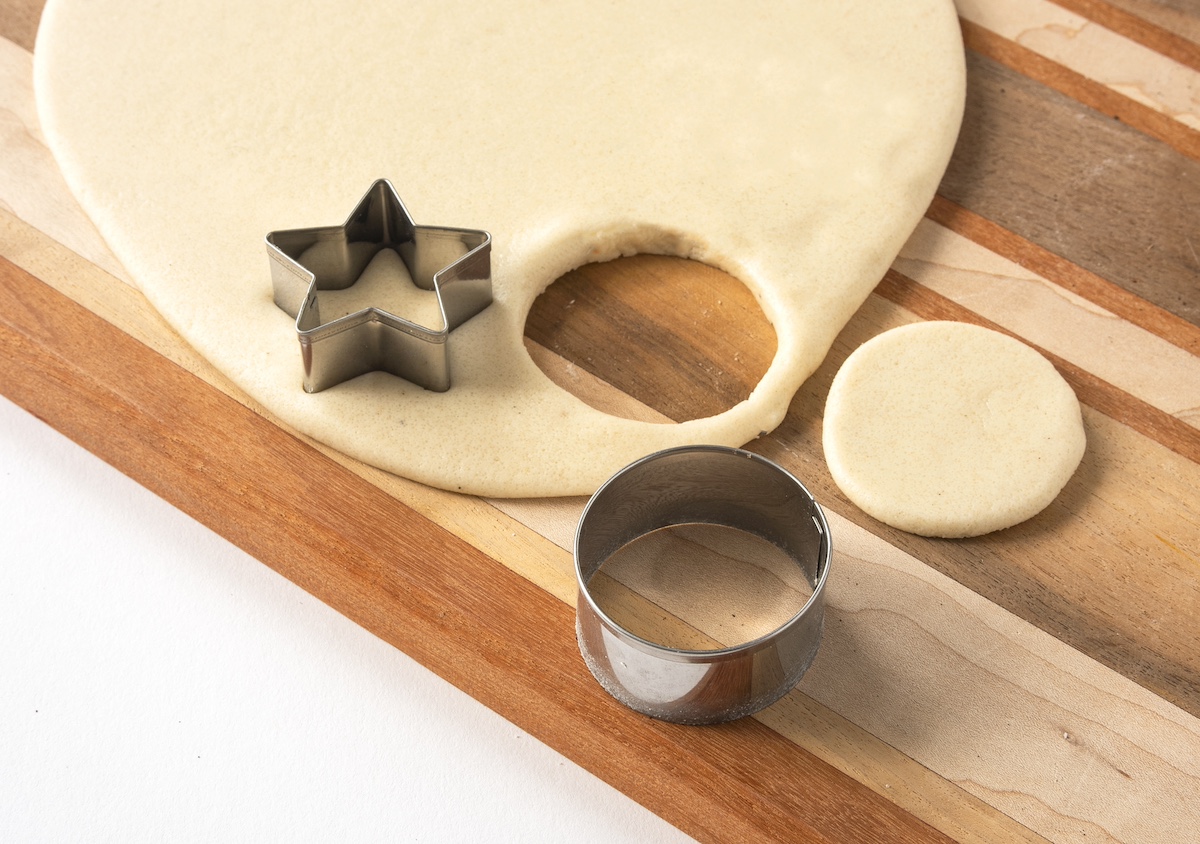
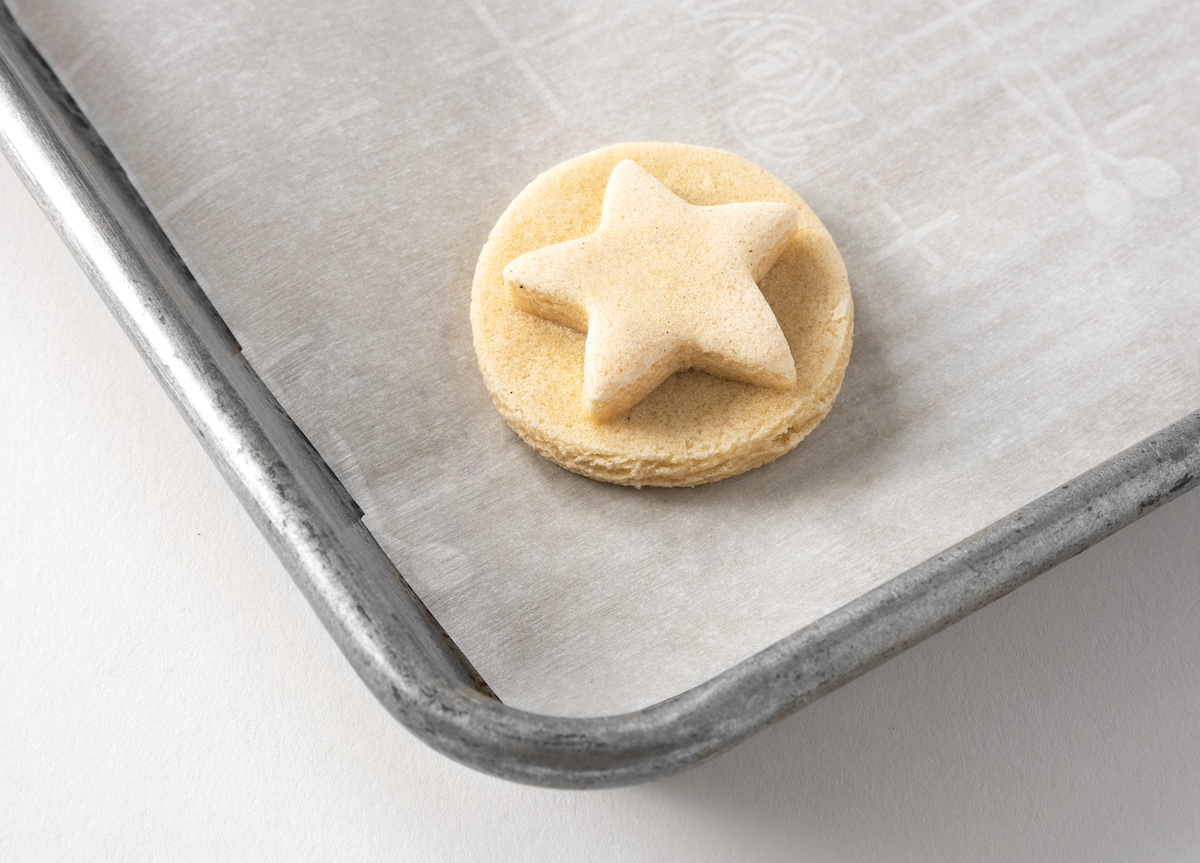
- Cut out the shapes you’d like with cookie cutters. You can also use items around the home (a pill bottle lid makes a small round shape, for example). Feel free to stack them as well.
- Place the dough shapes on a cookie sheet and into the oven at 250 degrees for 2 – 3 hours. It may take longer depending on your oven. Check every 30 minutes until done and let cool completely.
- Use the acrylic colors to paint your pins in the designs of your choice.
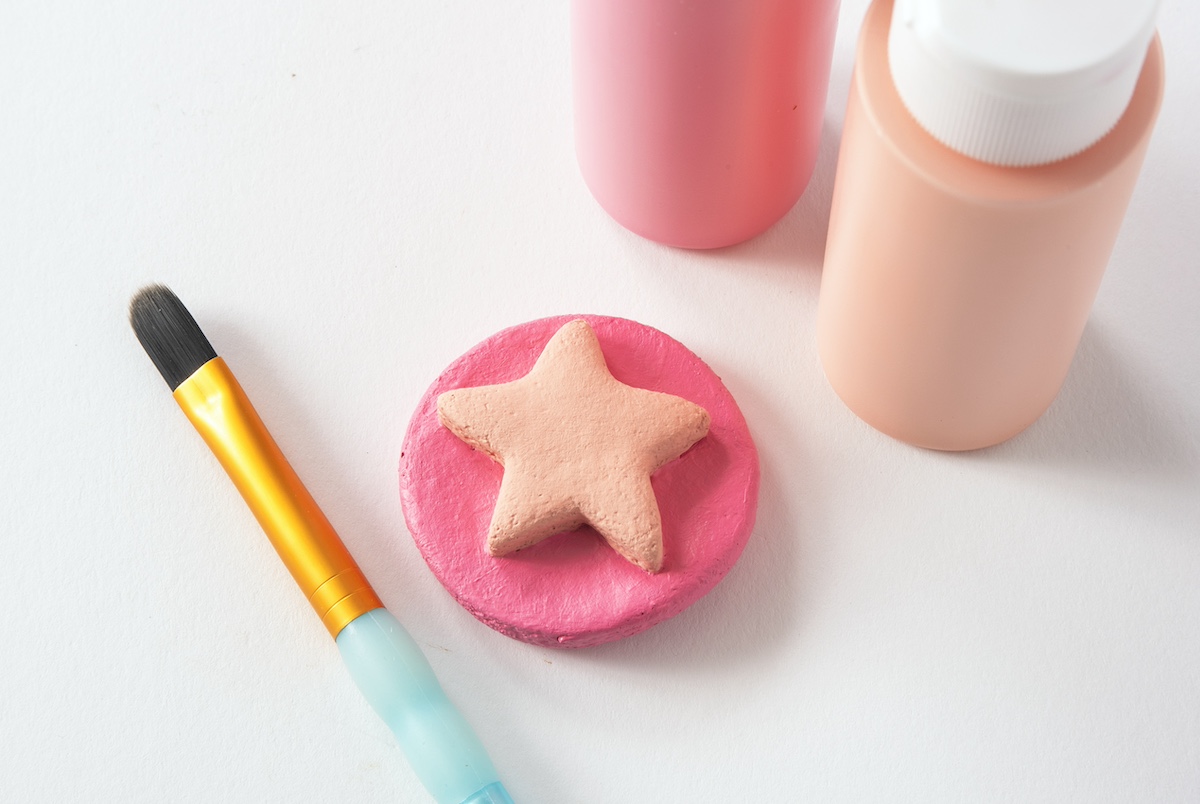
- Add dots with the end of a paintbrush as desired. Dip the end of a small paintbrush in paint, press down directly on the surface, and pull up to create a dot. Let dry. To make your pins more durable, paint a coat of decoupage medium over the top (optional).
- Flip the shapes over and add pin backs to them with craft glue. Let dry completely before wearing or gifting.
If you (and your kids) enjoyed making these pins, let me know in the comments! I’d also love for you to check out the following posts:


Thank you for sharing this project!