
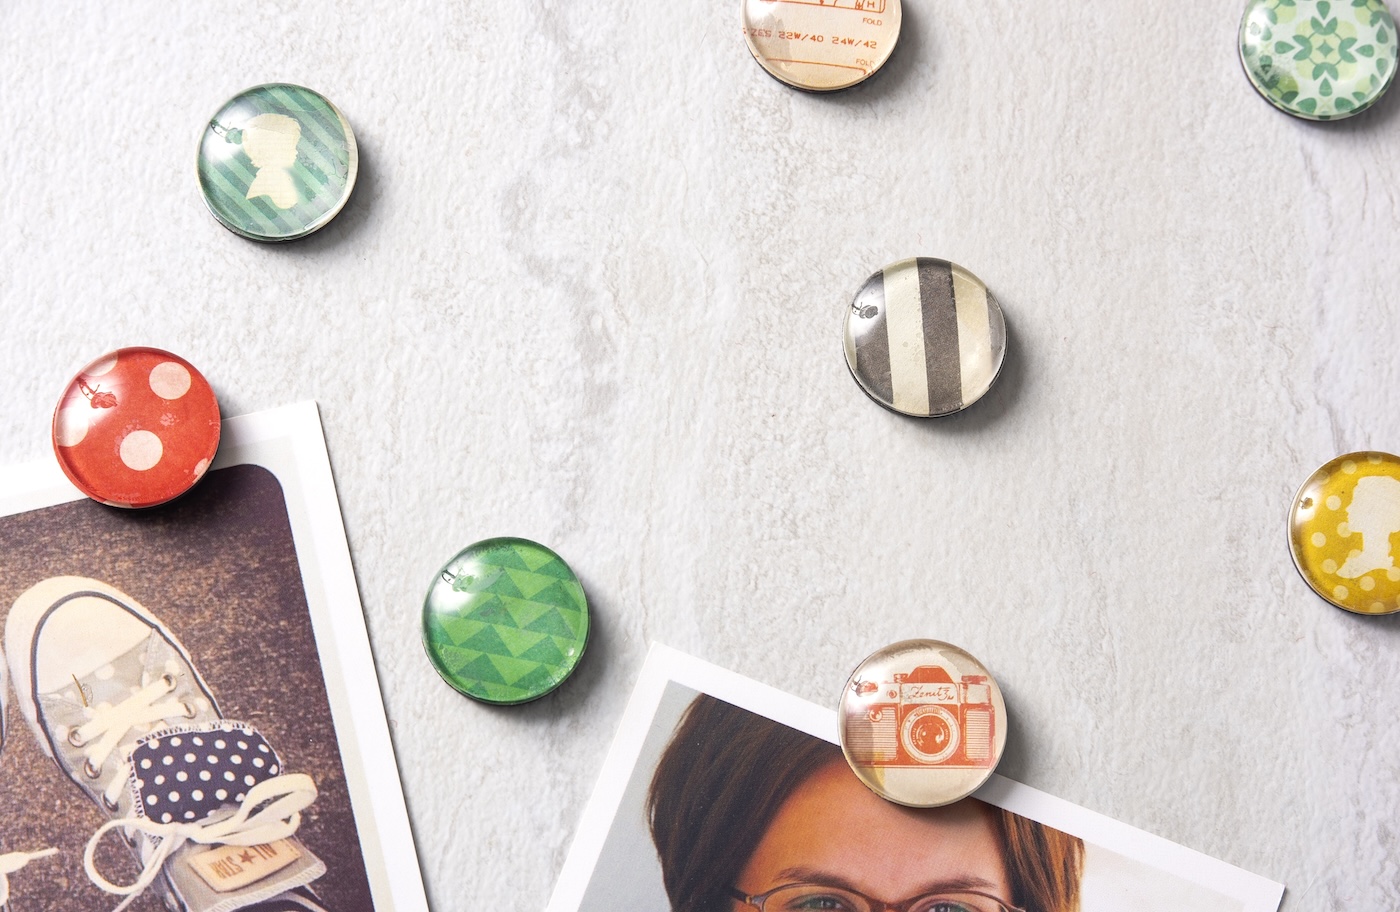
These DIY Mod Podge magnets are cute, customizable, and easy to make with scrapbook paper and glass gems! Perfect for kids’ crafts, gifts, or fridge decor.
Skills Required: None. You don’t need any prior crafting skills to make these magnets – they are simple enough for anyone to make, including children.
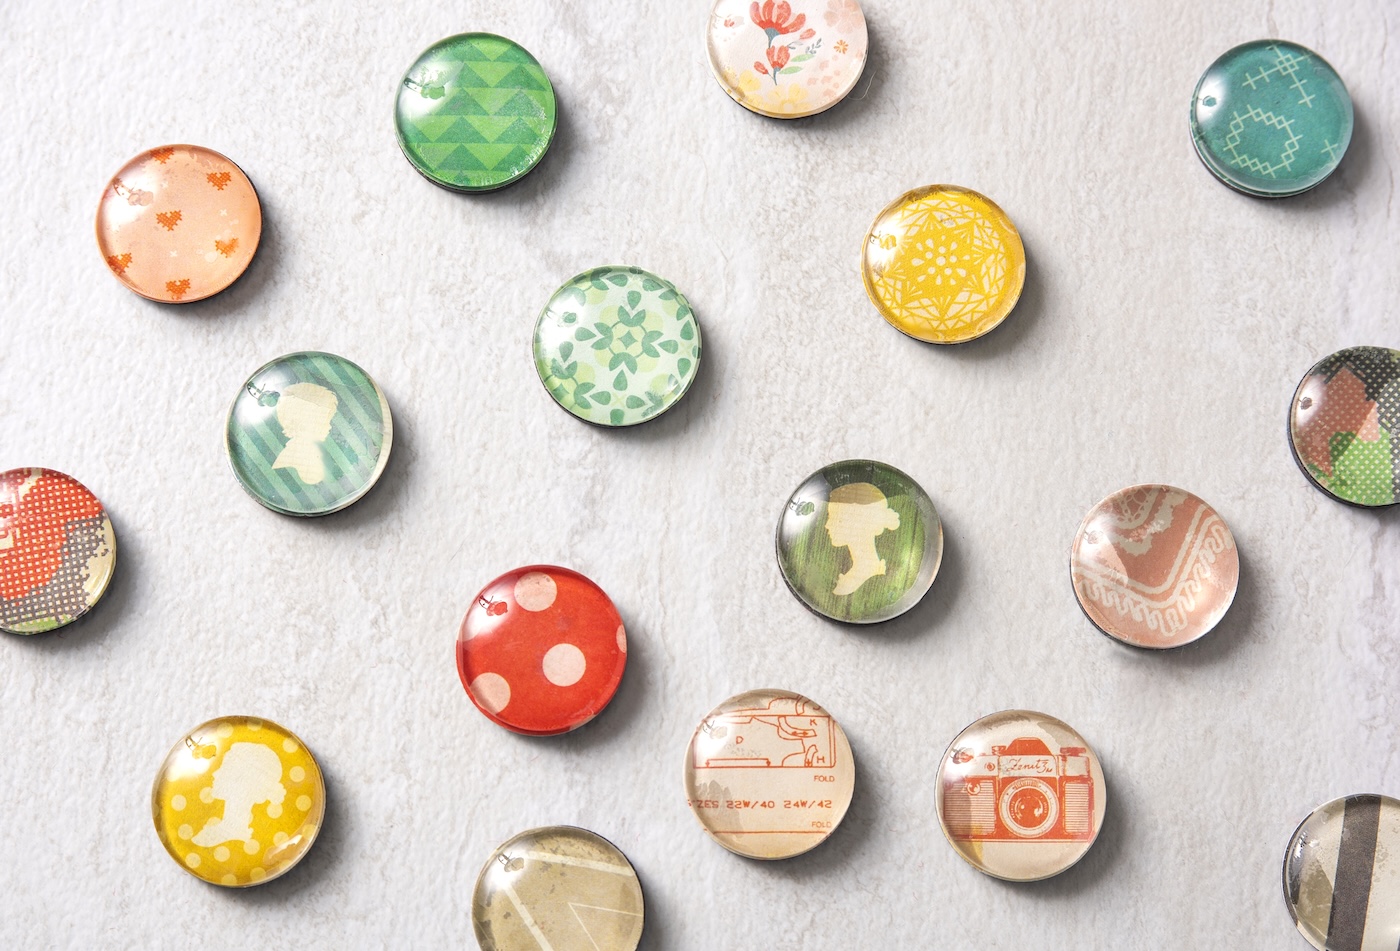
Looking for a craft that’s easy, cute, and actually useful? These DIY Mod Podge magnets are about to become your fridge’s new best friends.
Made with just a few supplies — glass gems, scrapbook paper, and Mod Podge — they’re the kind of project that checks all the boxes: beginner-friendly, budget-conscious, and totally customizable.
Why make your own magnets? Because store-bought ones are expensive, flimsy, and frankly — where’s the personality? These handmade beauties are strong enough to hold real stuff (yes, more than one piece of paper), and they double as mini works of art.

They’re great for dressing up your fridge, organizing your workspace, gifting to teachers or coworkers, or even as party favors.
Worried about the process? Don’t be!
- ✔️ Can kids make them? 100%! With a little supervision during the gluing stage, this is a great craft for all ages.
- ✔️ Will they actually stick? Yep — they’re sturdy and functional thanks to strong magnets and the right glue.
- ✔️ What kind of paper works best? Scrapbook paper is ideal, but you can also use photos, gift wrap, or even old comics for a fun twist.
- ✔️ Do I need special skills? Not a one. If you can trace a circle and brush on Mod Podge, you’re good to go.
Whether you’re making a set for your kitchen, jazzing up your home office, or crafting thoughtful handmade gifts, these Mod Podge magnets are a quick win with big payoff. Let’s get started .. . . because your fridge deserves a glow-up.
Get the printable how to card below:

Mod Podge Magnets
Equipment
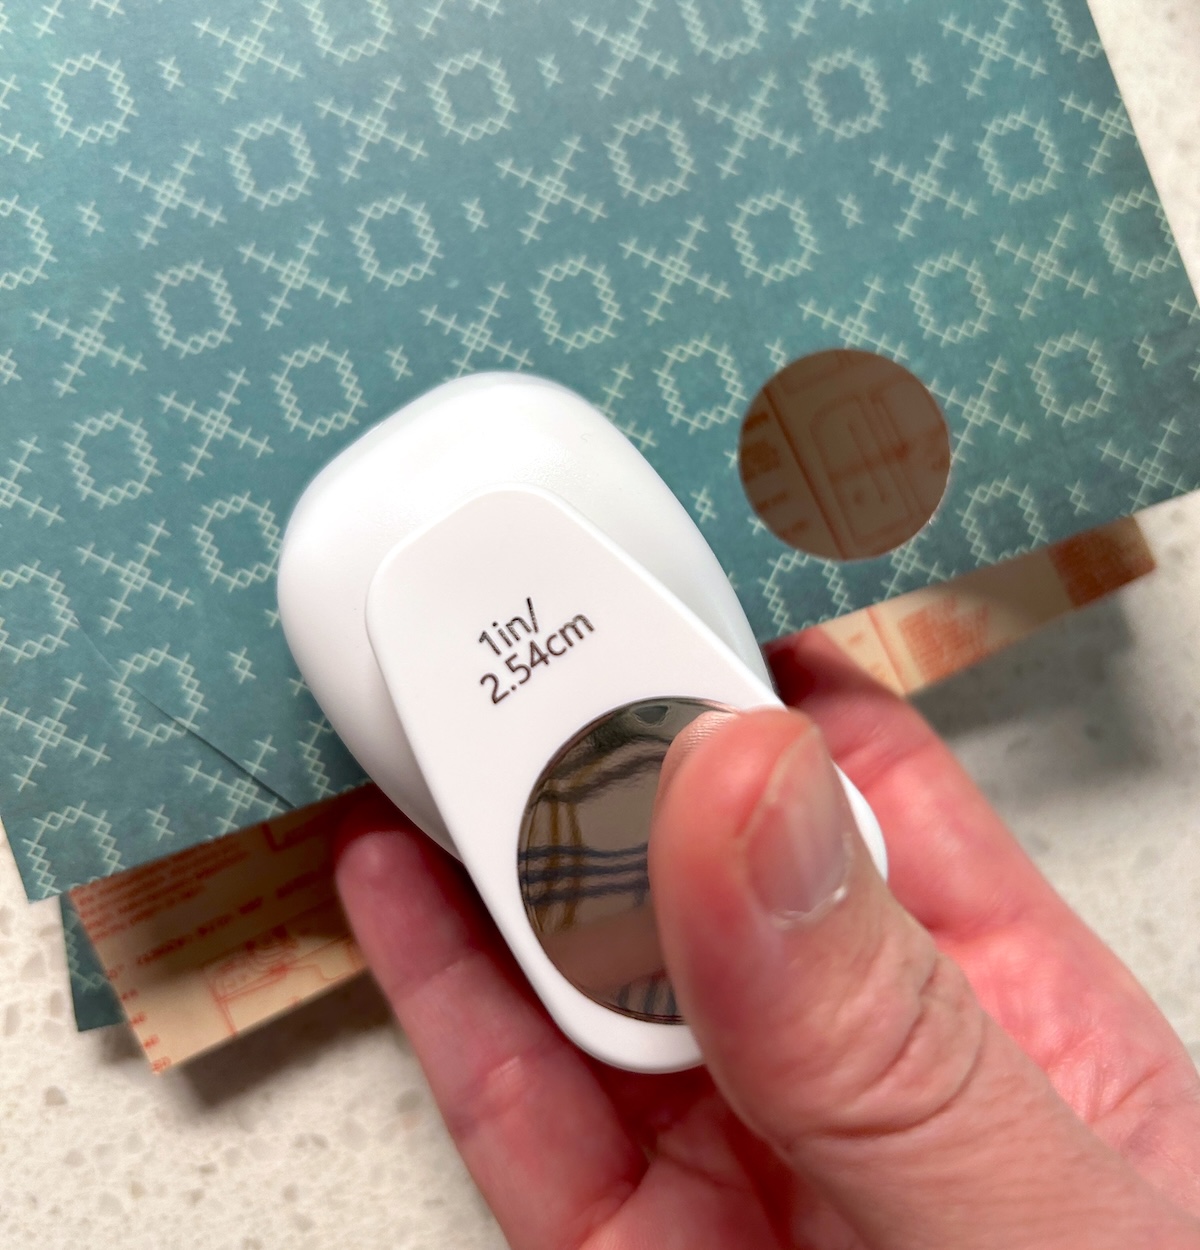
- Circle punch(es) optional – match the size of your marbles
Materials
- Mod Podge Matte
- Scrapbook paper various, coordinating patterns
- 36 Magnets
- 36 Glass marbles
- Strong craft glue or E-6000
Video
Instructions
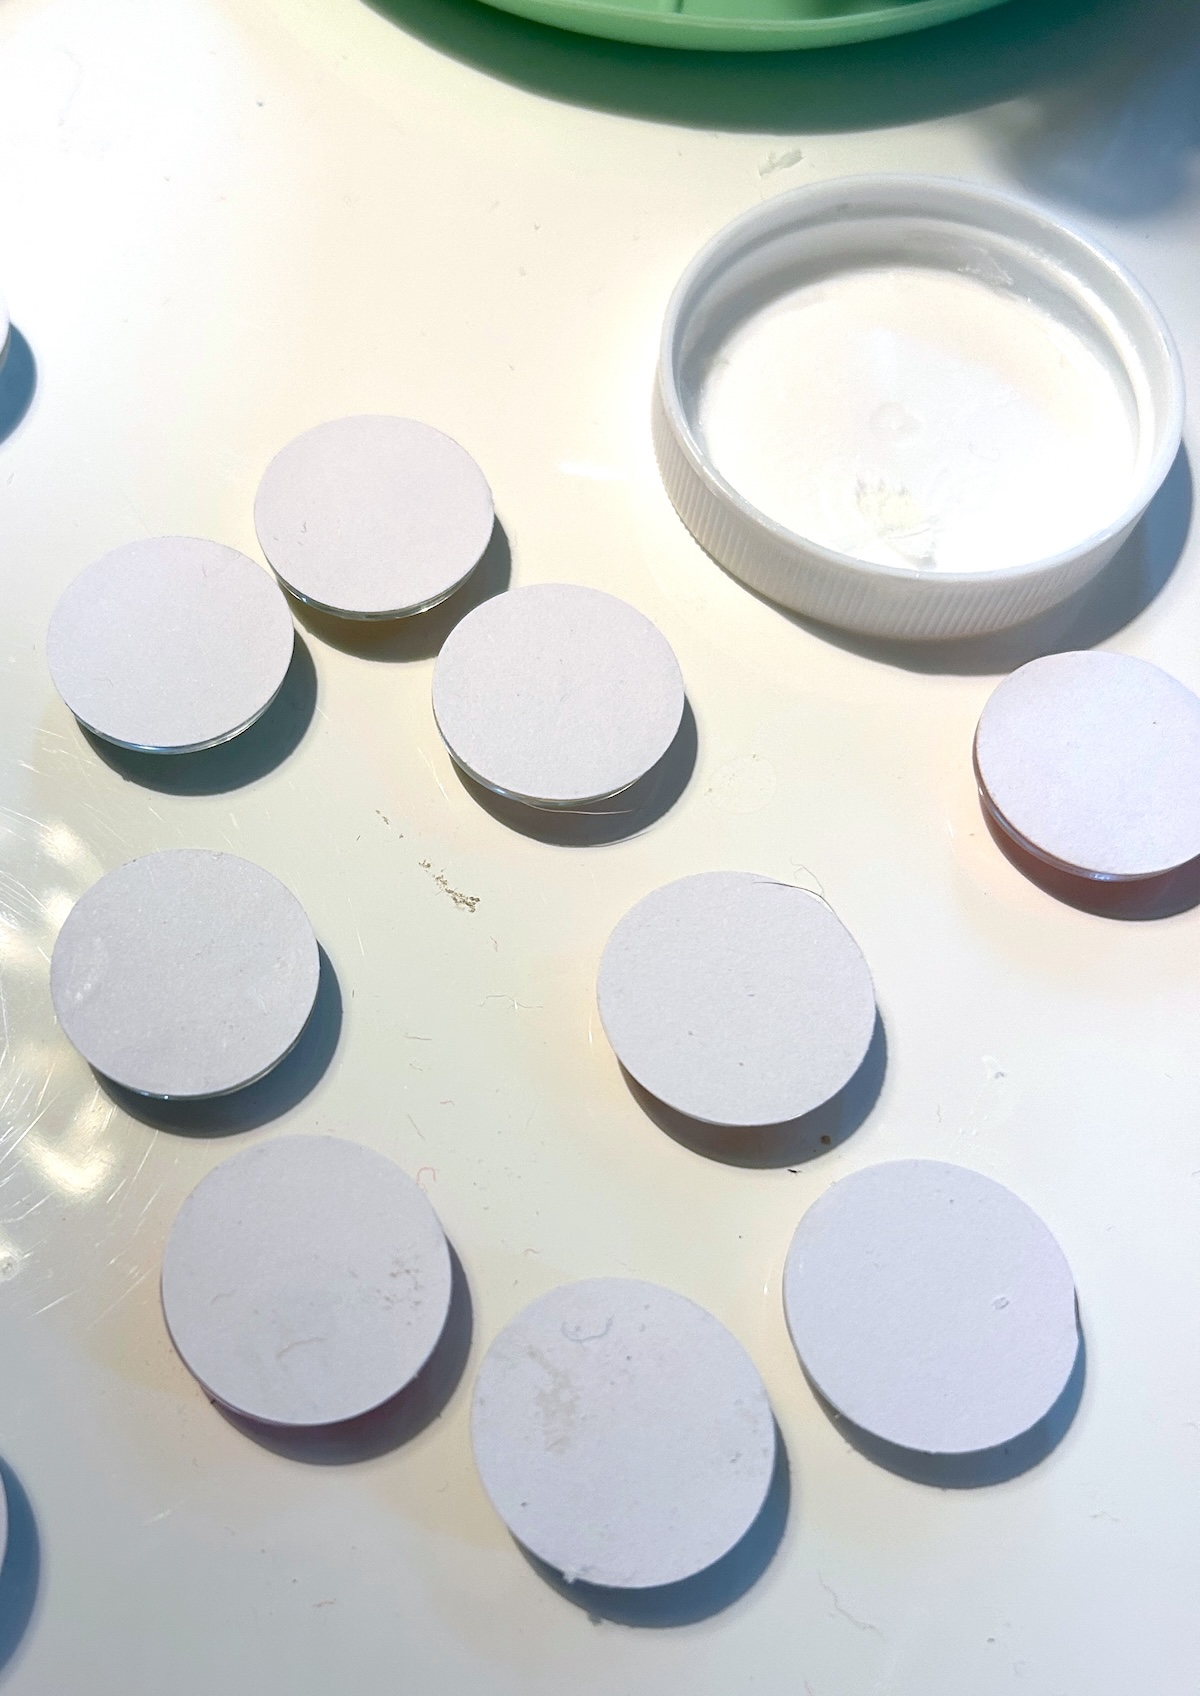
- Punch out the circles using a circle punch.
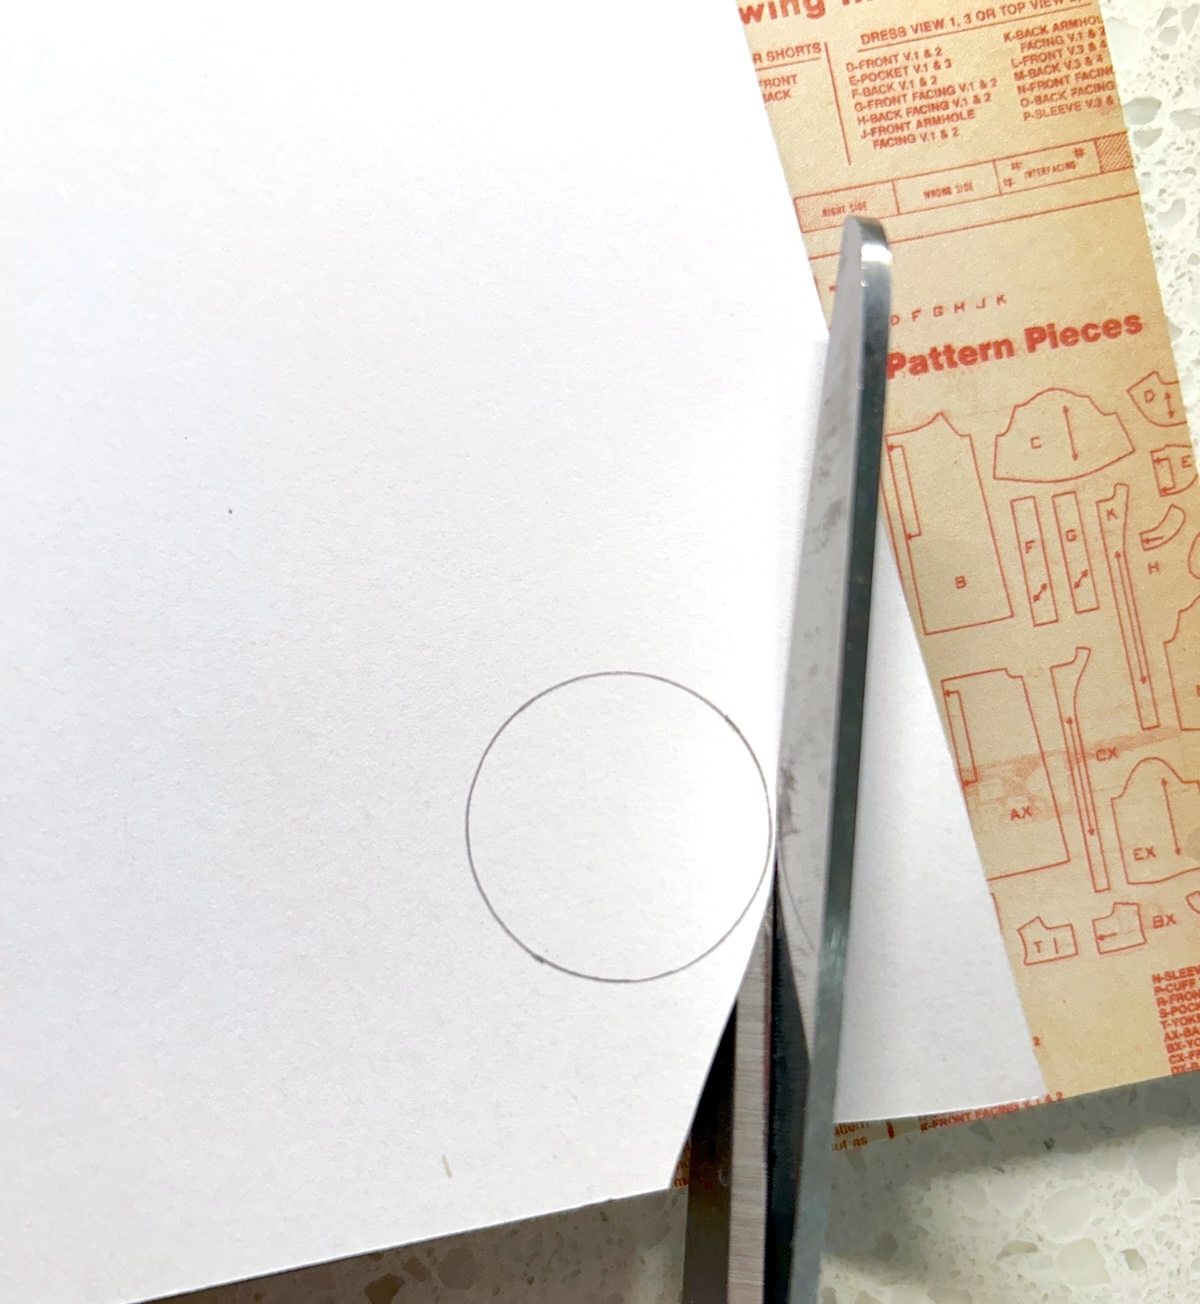
- If you don't have a circle punch, trace the magnets on the scrapbook paper and cut out with scissors.
- Paint Mod Podge on the back of the marble piece and on top of the paper with a brush.
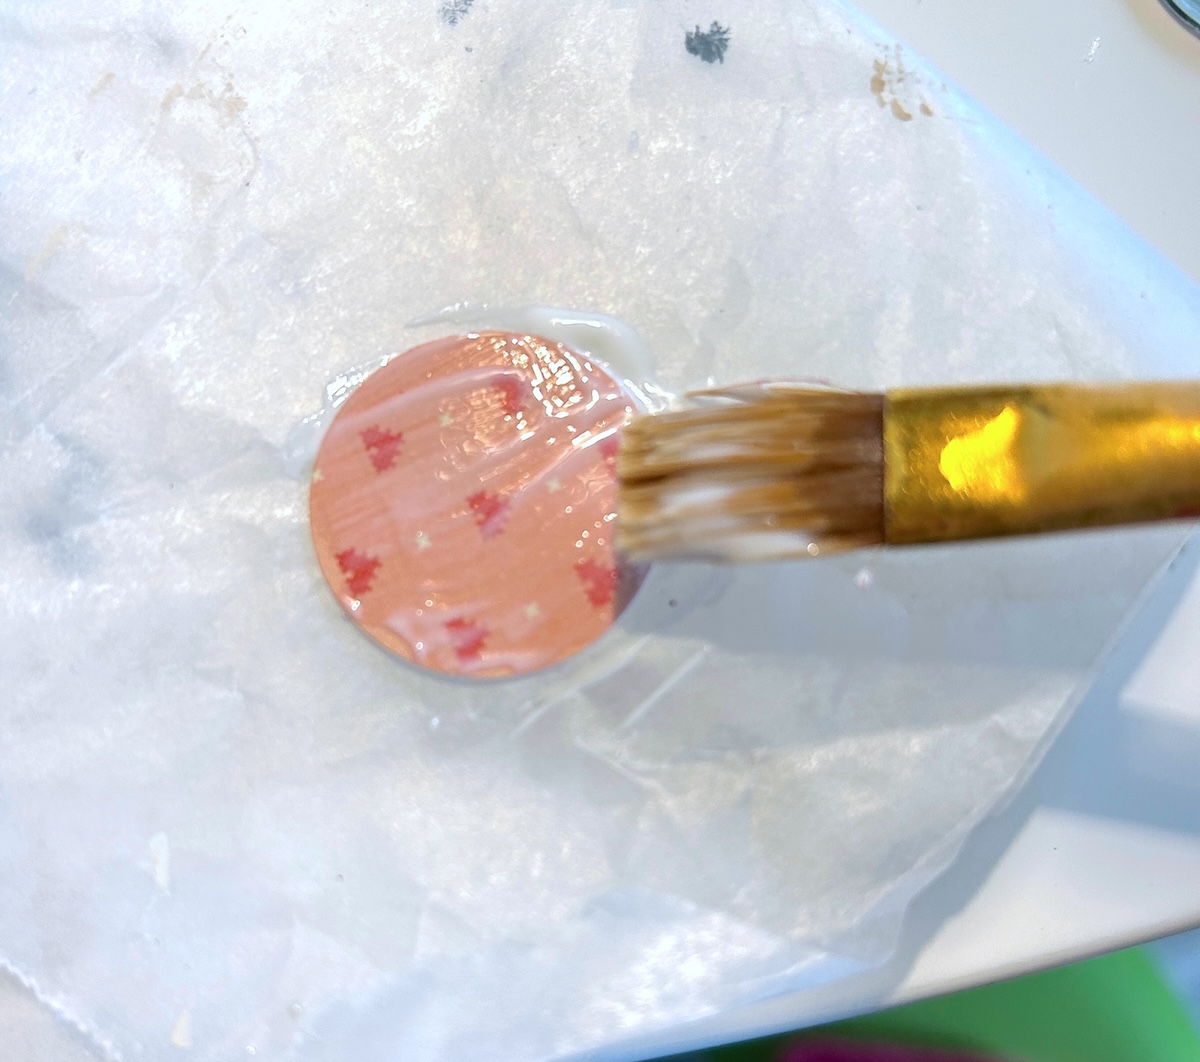
- Gently place the scrapbook paper on top and press down. Set aside. Repeat with the remaining marbles and paper. Let dry for 20 minutes.
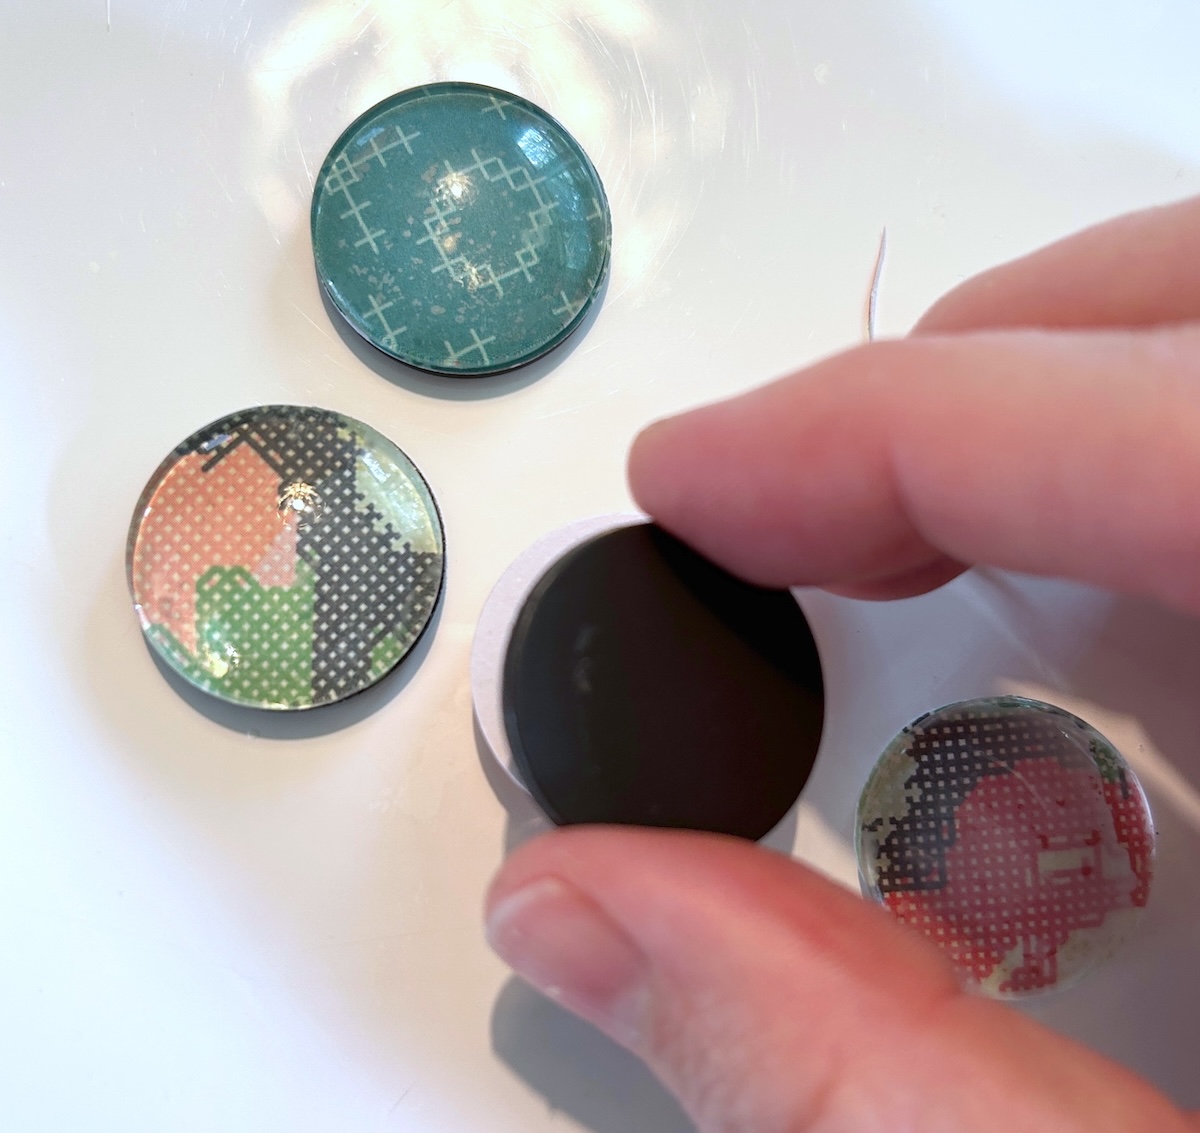
- Trim the excess paper around the edges using scissors.

- Add a dab of strong craft glue or E-6000 to the back, then firmly press on your magnet. Repeat. Let your magnets dry for several hours before using or gifting.
Notes
If you enjoyed these magnets, I’d love for you to check out these other crafts to do at home:
Bottle Cap Magnets • DIY Clipboard • Glass Photo Magnets • DIY Notebook • Glitter Mug • Make a Keychain • Mod Podge Coasters • Painted Wooden Spoons • Photo Blocks • Photo Bracelet • Photo Pillows • Travel Mug


Lovely DIY magnets. Thank you for the great tips.
I shared this article on my site.
What a great idea!! Time to revamp the fridge I think! X
so cute, thanks for share this article
These are GORGEOUS!! So simple, but so pretty!! Just what my fridge needs …
So neat! I need some Beachy magnets.Very nice
I love your cute magnets! Recently, I started making magnets, using copies of my photos–with the Silver Dimensional Magic. Try it with yours–I LOVE the hint on sparkle– Mod Podge rocks!
Hi
I tried to make this with real pictures and followed all the directions. Pictures did not bleed but the mud podge never dried inside the glass marble! I did not put that much mod podge.
It’s been two days and I can still see cloudy mod podge inside the marble.
Only the edge dried so the wet glue is stuck inside marble!!
Any ideas of what I did wrong???
Thanks!
Maria can you send me a pic amy at modpodgerocksblog dot com?
I would love to make those someday. I’m wondering where do I find the hole punch and which one can fit the clear marble before gluing with the mod podge? Thank you very much.
Hi Elizabeth! So these clear marbles are 1″ – and the punch is also a 1″ circle punch. You can get the marbles AND the punches at craft stores like Michaels! I will say that stores are having trouble keeping stuff in stock these days so #2 option is Amazon.
@Amy, Thank you very much for your help.
The mod podge bled through the scrap paper.
Hello! Mod Podge doesn’t bleed – it’s clear. So it must’ve been the ink in the paper. You need to seal printouts with the method used here: https://modpodgerocksblog.com/decoupage-onto-wood/
all these ideas are great i did all of them and when i know how to make all of them i share it to my kids