
Make stunning DIY clay earrings with this easy tutorial! Perfect for beginners, these stylish handmade earrings are fun, affordable, and customizable.
Skills Required: Beginner. You’ll make these by pressing clay into a silicone mold. It’s pretty simple, even if you’ve never made jewelry before.
Who doesn’t love a cute pair of earrings, especially when they’re handmade and totally unique? If you’re into DIY jewelry, you’re going to love this project. Today, I’m showing you how to make your own homemade clay earrings, and trust me, once you start, you won’t want to stop!
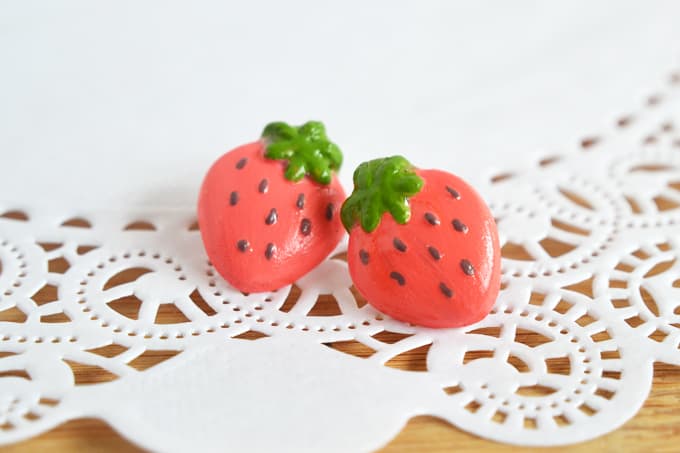
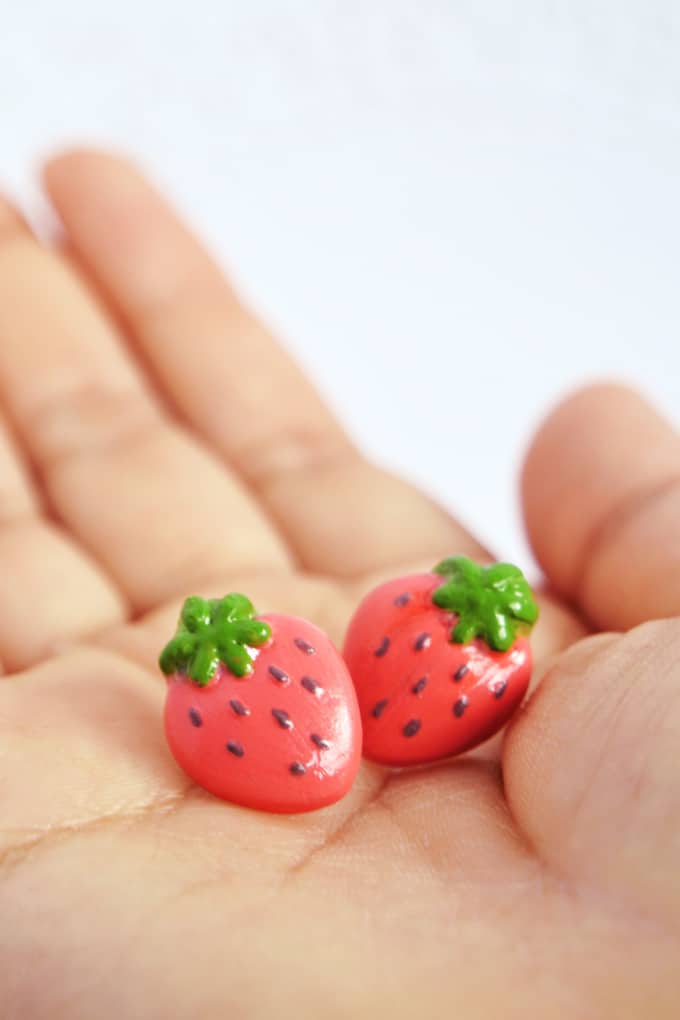
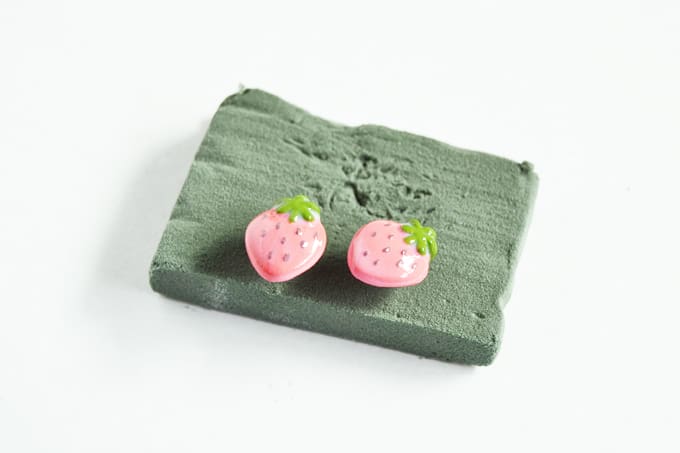
These DIY earrings are not only adorable, but they’re also super easy to customize. I went with a strawberry design because, well, it’s almost strawberry season, and I wanted something fun and fruity.
But once you get the hang of it, you can create all kinds of tiny wearable art – flowers, hearts, stars, even little animals! Whether you love bright and bold statement pieces or dainty and delicate accessories, this technique lets you make exactly what you want.
And let’s talk about gifts, because handmade jewelry makes the best presents. Got a bestie who loves quirky earrings? A teen who adores anything pink and playful? A mom who appreciates a thoughtful, handmade touch? These earrings check all the boxes.
Plus, they’re lightweight, comfortable to wear, and look like something you’d find in a trendy boutique.
Not into earrings? No problem. Turn them into cute little charms for hair accessories, necklaces, or even embellishments for your craft projects.
There are so many possibilities, and that’s what makes this craft so fun. So grab your clay, and let’s make some magic!

DIY Clay Earrings
Equipment
- X-Acto Knife or box knife
Materials
- Baby powder
- Polymer clay
- Earring posts
- Mod Podge Dimensional Magic
- Acrylic paint
- Floral foam
- E-6000
Instructions
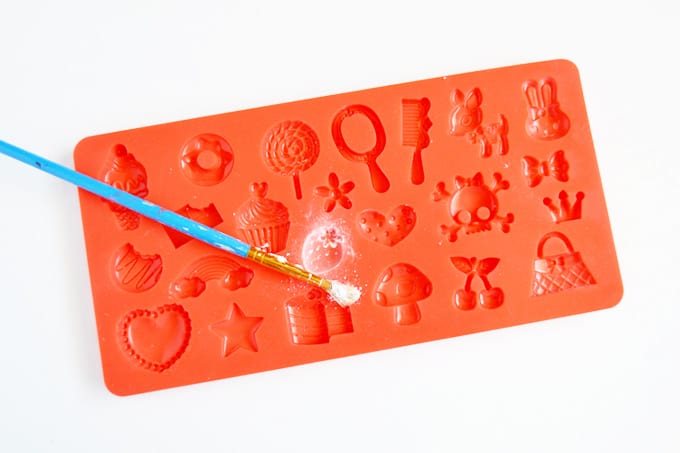
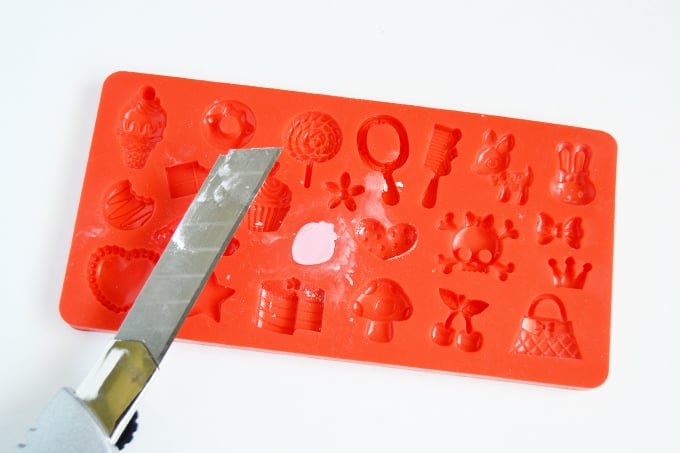
- Dust your mold with some cornstarch or baby powder. Do this so that when you press the clay down into the smaller grooves of the mold, it's easier to release. The clay won't stick to the powder.
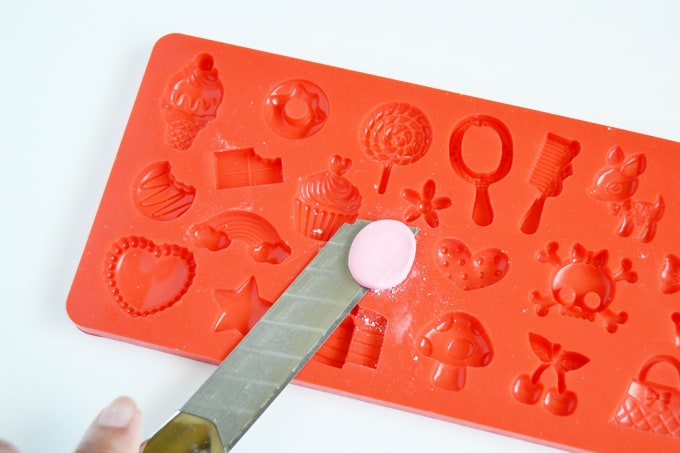
- Knead your polymer clay until it's softened and roll into a small ball. Press the ball of clay into the mold shape of your choice, forming it to the edges. Release your clay from the mold and chill in the fridge for about 20 minutes to harden.
- After hardening, put it back in the mold and use a box cutter or X-Acto knife (coated with a bit of cornstarch so it doesn't stick to the clay) and saw off the excess clay.
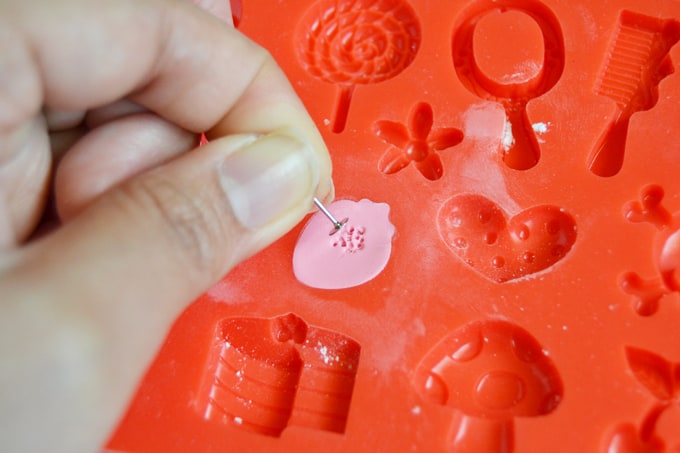
- After removing the excess clay, press your clay once again to the mold to flatten the back.
- Poke some holes on the back where you want to adhere your earring posts. The holes will allow more glue to seep in and form a better bond when you attach.
- Release the clay from the mold. Bake according to your polymer clay package's directions.
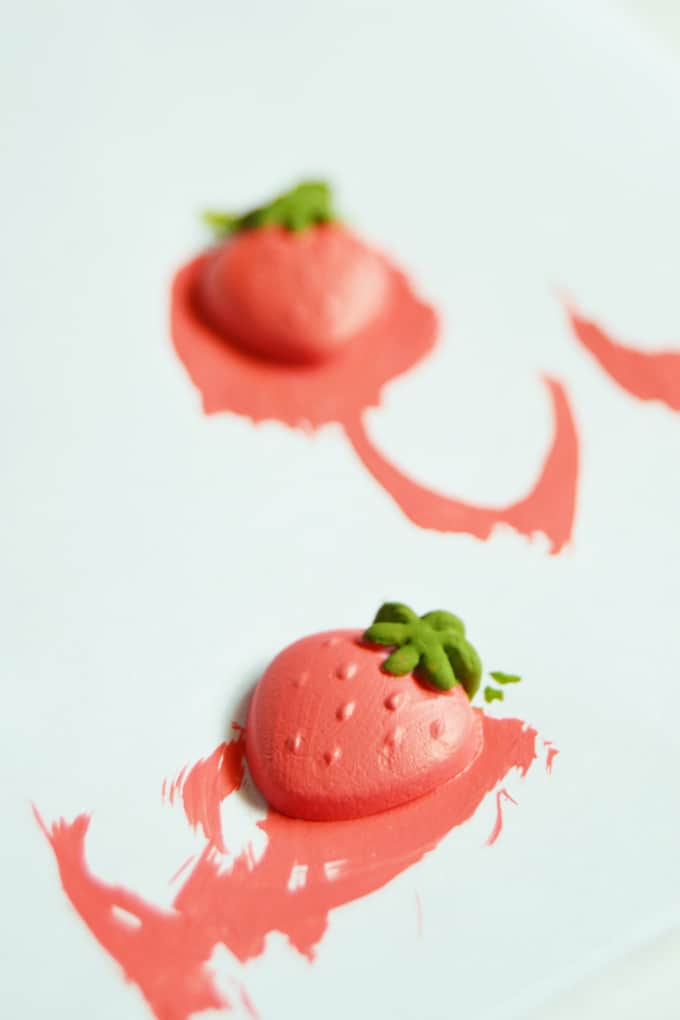
- Start painting the details of your clay shapes. Use a pin for the details. Let dry.
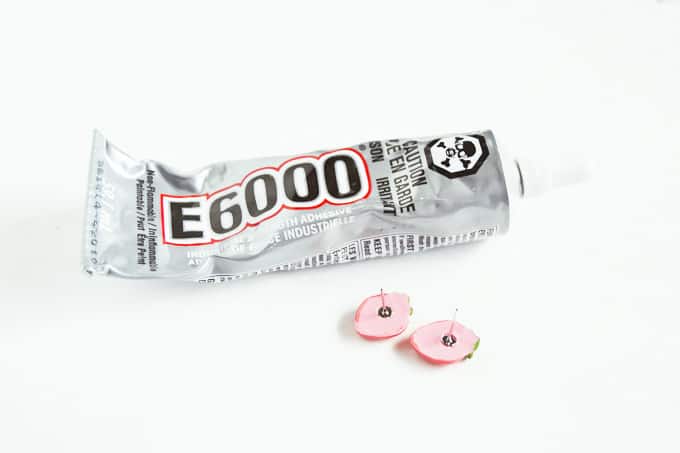
- Attach the earring posts using E-6000 or other jewelry glue. Let dry.
- Coat with Dimensional Magic and let dry for several hours to finish.
Notes
Do you love these earrings? I’d love for you to check out these other jewelry options, some with Mod Podge:
Bangle Bracelets • Clay Jewelry • Decoupage Earrings • Drop Earrings • Fabric Scrap Necklace • Hot Glue Rings • Glass Cabochons • Lace Earrings • Leaf Pendant • Paper Beads • Paper Earrings • Photo Pendant • Resin Jewelry • Shrinky Dink Jewelry • Washer Necklaces • Wood Pendant


These are adorable!