This Ballard Designs inspired DIY dress art is so easy – create your own decor in just a few minutes, with your favorite papers and Mod Podge.
Skills Required: Beginner. You’re going to use a craft knife to cut out paper and then decoupage to a canvas. It’s relatively easy even if you don’t have prior crafting experience.
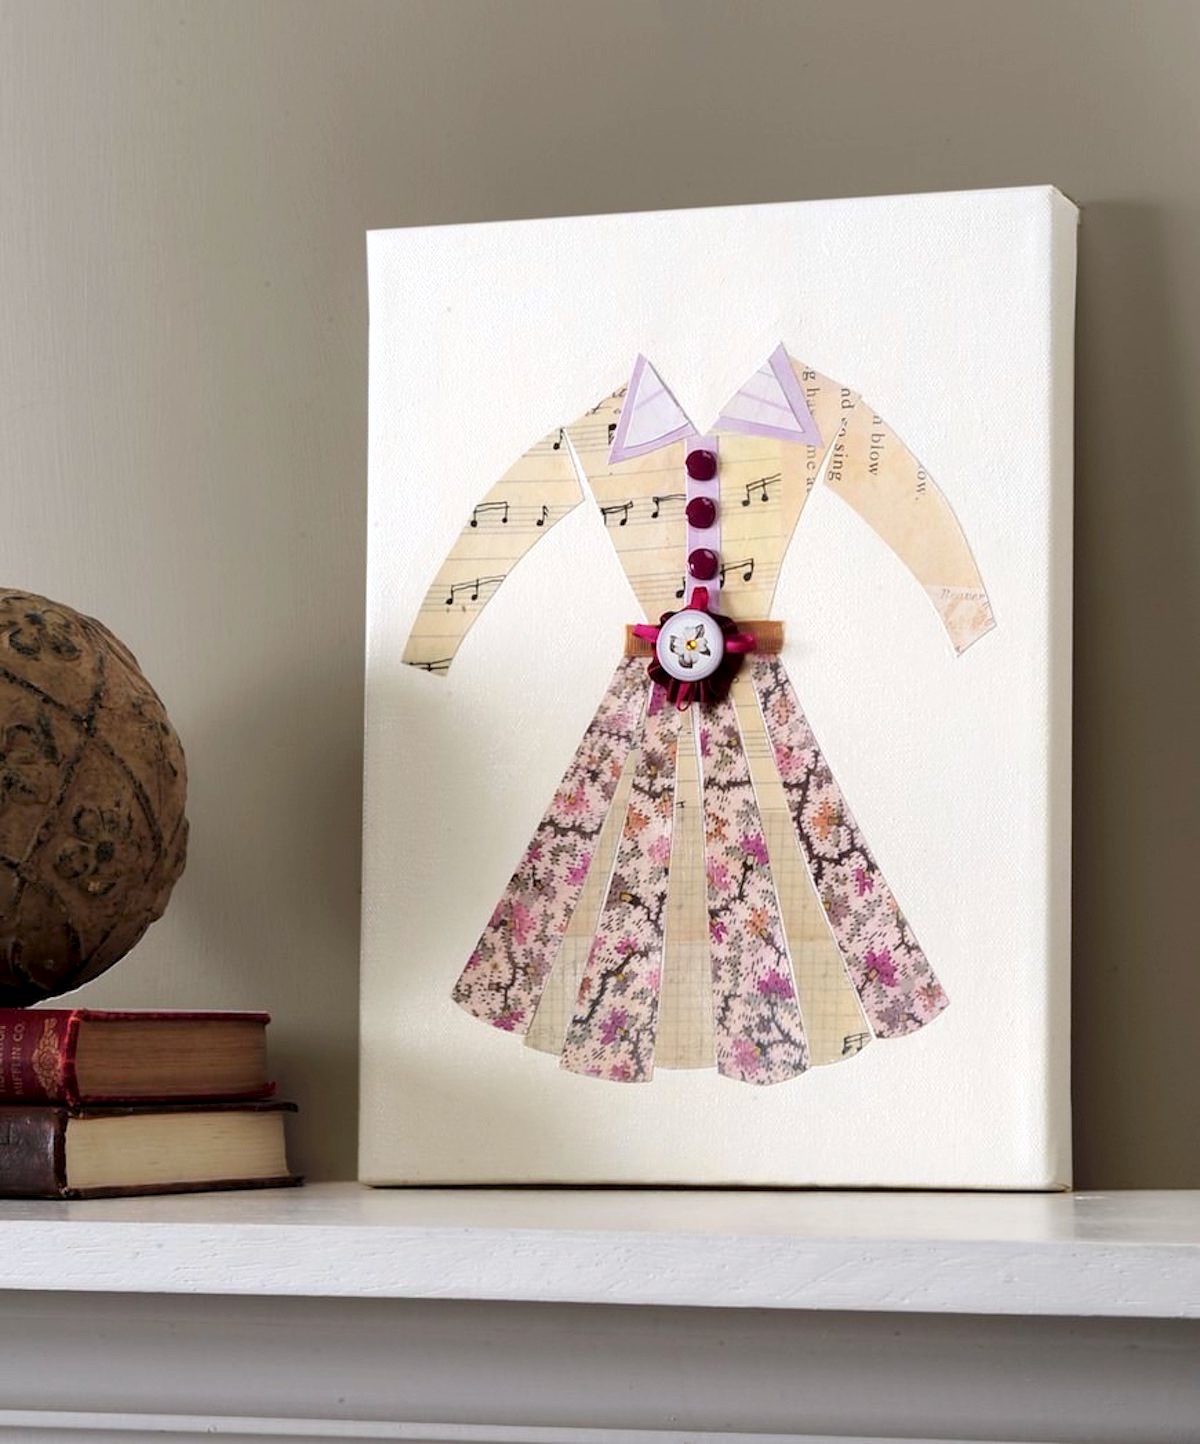
Being part of the Flip-Pal mobile scanner blog hop has encouraged me to try new things. I’m searching high and low for things to scan and decoupage because I love it. The canvas I decoupaged above is a great example.
I’ve never done a DIY knock-off before, and then I saw something so outrageously priced in a Ballard Designs catalog that I had to give it a go.
My problem was that I needed a pattern because I could tell that if I winged it, the whole project was going to go terribly wrong. I needed to do some enlarging.
You might be laughing that I need a pattern for something so simple, but that’s just how I roll. I can’t freehand stuff unless it’s my own design. One minute the drawing hand is on a straight path, the next minute it’s off in Timbuktu. Sad, huh?

See that dress above? That giclee print that retails for $299? That was my inspiration. My resulting project is not quite as big, but I didn’t want it to cover an entire wall. I just wanted to enlarge the picture enough to make a pattern. So I did.
Before I begin, here are the rules of knock-offs. You can make a knock-off for personal use only; you can’t sell or claim it as your own. Doing so would be like crossing proton streams in Ghostbusters. It would be bad. If you’d like to do your own version of this canvas idea, here’s how.
Decoupage Dress Art
Gather These Supplies
- Scanner
- Computer and printer
- Image to scan
- 9″ x 12″ canvas
- Mod Podge Satin
- Mod Podge Dimensional Magic
- FolkArt acrylic paint – Fuchsia, Parchment (or coordinating colors)
- Scrapbook paper – I used three sheets of K and Company Flora and Fauna by Brenda Walton
- Wood circles – 3 small ones for buttons
- Tape
- Craft knife and mat
- Craft glue
- Paintbrush
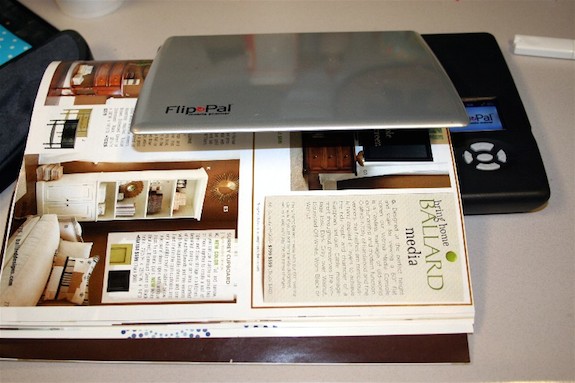
Scan the catalog on a scanner. Here’s how to blow the image up – scan at 600 dpi. Um, love this feature! I’m about to make a big pattern. What I did was save the image into my photo software, and blew it up to fit my canvas.
Just so you know, the 600 dpi setting is so great that I could have enlarged it even more. I printed two copies since I knew that I would be cutting up one, so I wanted to have a spare for an extra pieces.
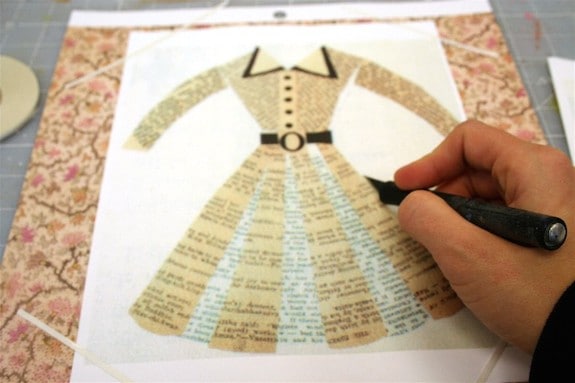
Tape your pattern down to your scrapbook paper. As you can see, I found some random skinny tape. It doesn’t matter what kind of tape you use, really. Use your craft knife to begin cutting out the pieces for your dress art, using the pattern as a template.

I used my second pattern on my coordinating piece of scrapbook paper. I cut out the sleeves and the inner folds of the dress. Set your paper pieces aside.

Paint your canvas with Parchment (or your coordinating color). Give several coats and allow to dry.

Paint your wood buttons with the Fuchsia paint. You can see that I use paint plates over and over again. I put new paint over the top of the old paint too. I feel like I’m letting you see into my laundry hamper.

Lay the design out onto the canvas. Decoupage the pieces down by spreading a medium layer of glue and then smoothing out the paper on top of it.
Repeat until all of the pieces are down, then allow to dry for 15 – 20 minutes. Mod Podge over the top to seal. Allow your dress art to dry and then add another coat of Mod Podge.
Tip: I wanted to do a bit of a different belt that then one from Ballard, so I left a gap between the top of the dress and the skirt when I Mod Podged everything down. This will obviously be covered.
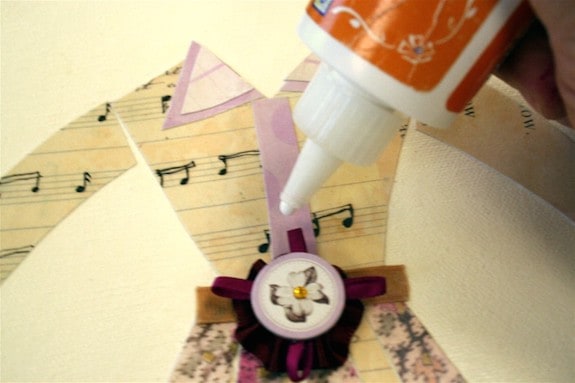
Add a ribbon belt and a coordinating embellishment for a little “flair.” Glue down the buttons as well. After a little debate, I decide to add some Dimensional Magic to the top of the buttons. It really worked to add some interest.

I love my knock-off dress art! I’m not only looking around and wondering what I can scan, but I’m looking around and wondering what I can knock-off.
If you enjoyed this project, I’d love for you to check out these other ideas:





great project….Flip Pal MUST HAVE…..
LOVE this!! I definitely need one od these little Flip-Pals!
I love the knock off. Snowed in here today. I want one of the flip-pay scanners.
This is so fun. And so much better ot have a handmade piece than an overpriced one in your home 🙂
This would be a neat way to display a favorite dress that you can no longer wear. Or, there are a few really cute dresses that Little Jo and Mini Me can no longer wear that I could cut up to make wall art. Thanks for the inspiration!
Wow what a nifty little gadget, I never heard of a flip-pal. You did a great job on the knock off. I love Mod Podge too, it is so versatile to use.
Thanks for sharing.
Oooh! I love a good knockoff. And yours is a knock out! Flip Pal… cool!
I never thought about being able to use the Flip-Pal to enlarge images. Wow! Another great reason to have one! Your project turned out great!
Sweet! I adore your style Amy! I learn something every time I visit your blog.
hi amy!
oh what a fabulous project!
i cannot wait to do this!
thank you for the inspiration!
🙂 melissa
Flip Pal is a winner, I love all the uses everyone is coming up with, things I’d never thought of before. Now all that’s needed is for me to get one lol. Thanks for sharing!
Help me out here. Flip Pal? Huh? Never heard of it. I’ll have to go google.
Love the art knock-off Amy, and thanks for pointing out the legalities too. I’ve never knocked anything off but often wondered what the rules were.
Great idea. I think I need one of these machines.
Oh Amy this is fabulous!!! That little machine is awesome too….what a neat gadget to have….and fun to use…..thank you for sharing …
That is one kewl picture and would look great in my sewing room!!
I have many ideas on how to use the scanner. Scrap booking, quilting, genelogy what fun I would have.
Wow great little machine have to save my money to get one
marlene
fab fab fab project!
Simply gorgeous!!! Would love to try out this project with my new flip-pal(crossing fingers to win).
syeda
syeda_lubabah@hotmail.com
Stunning project. I love it, now I want to do one. I have a friend who would absolutely LOVE this piece of art on her wall!!!
This is just the cutest little picture ever! Wonderful idea!! Thank you!
What a great idea !!! This would totally come in handy while sitting at the doctors office and when I feel the urge to take the magazine that has that perfect recipe 🙂 Thanks for sharing how Flip Pal works!!Cheers ~ Scrappy Vscrappyvals@hotmail.com
Nice idea! The dress is pretty, thanks for sharing it!