
Learn how to make this simple (and beautiful!) stained Give Thanks sign. Perfect for fall and the Thanksgiving holiday – with a touch of sparkle!
Skills Required. Beginner. Even if you’re a newbie crafter, you can do this project. You’ll do simple staining, cutting a stencil, painting, and Mod Podging to seal and add glitter accents.

I love working on DIY signs for the house. I have a Silhouette cutting machine and it really makes it easy for me, but you can always find great stencils at the craft store if you don’t have a cutting machine.
I decided I wanted to make a new fall sign for the house that also worked for Thanksgiving. I made a scrapbook paper fall sign last year and was really pleased with how it turned out.

So I decided on making a new give thanks sign for this year, but adding a touch of glitter! Gotta LOVE some glitter, right??! Learn how to make this DIY Thanksgiving sign below.
Gather These Supplies
- Mod Podge Matte
- Wood – any size
- Stencil or cutting machine and vinyl
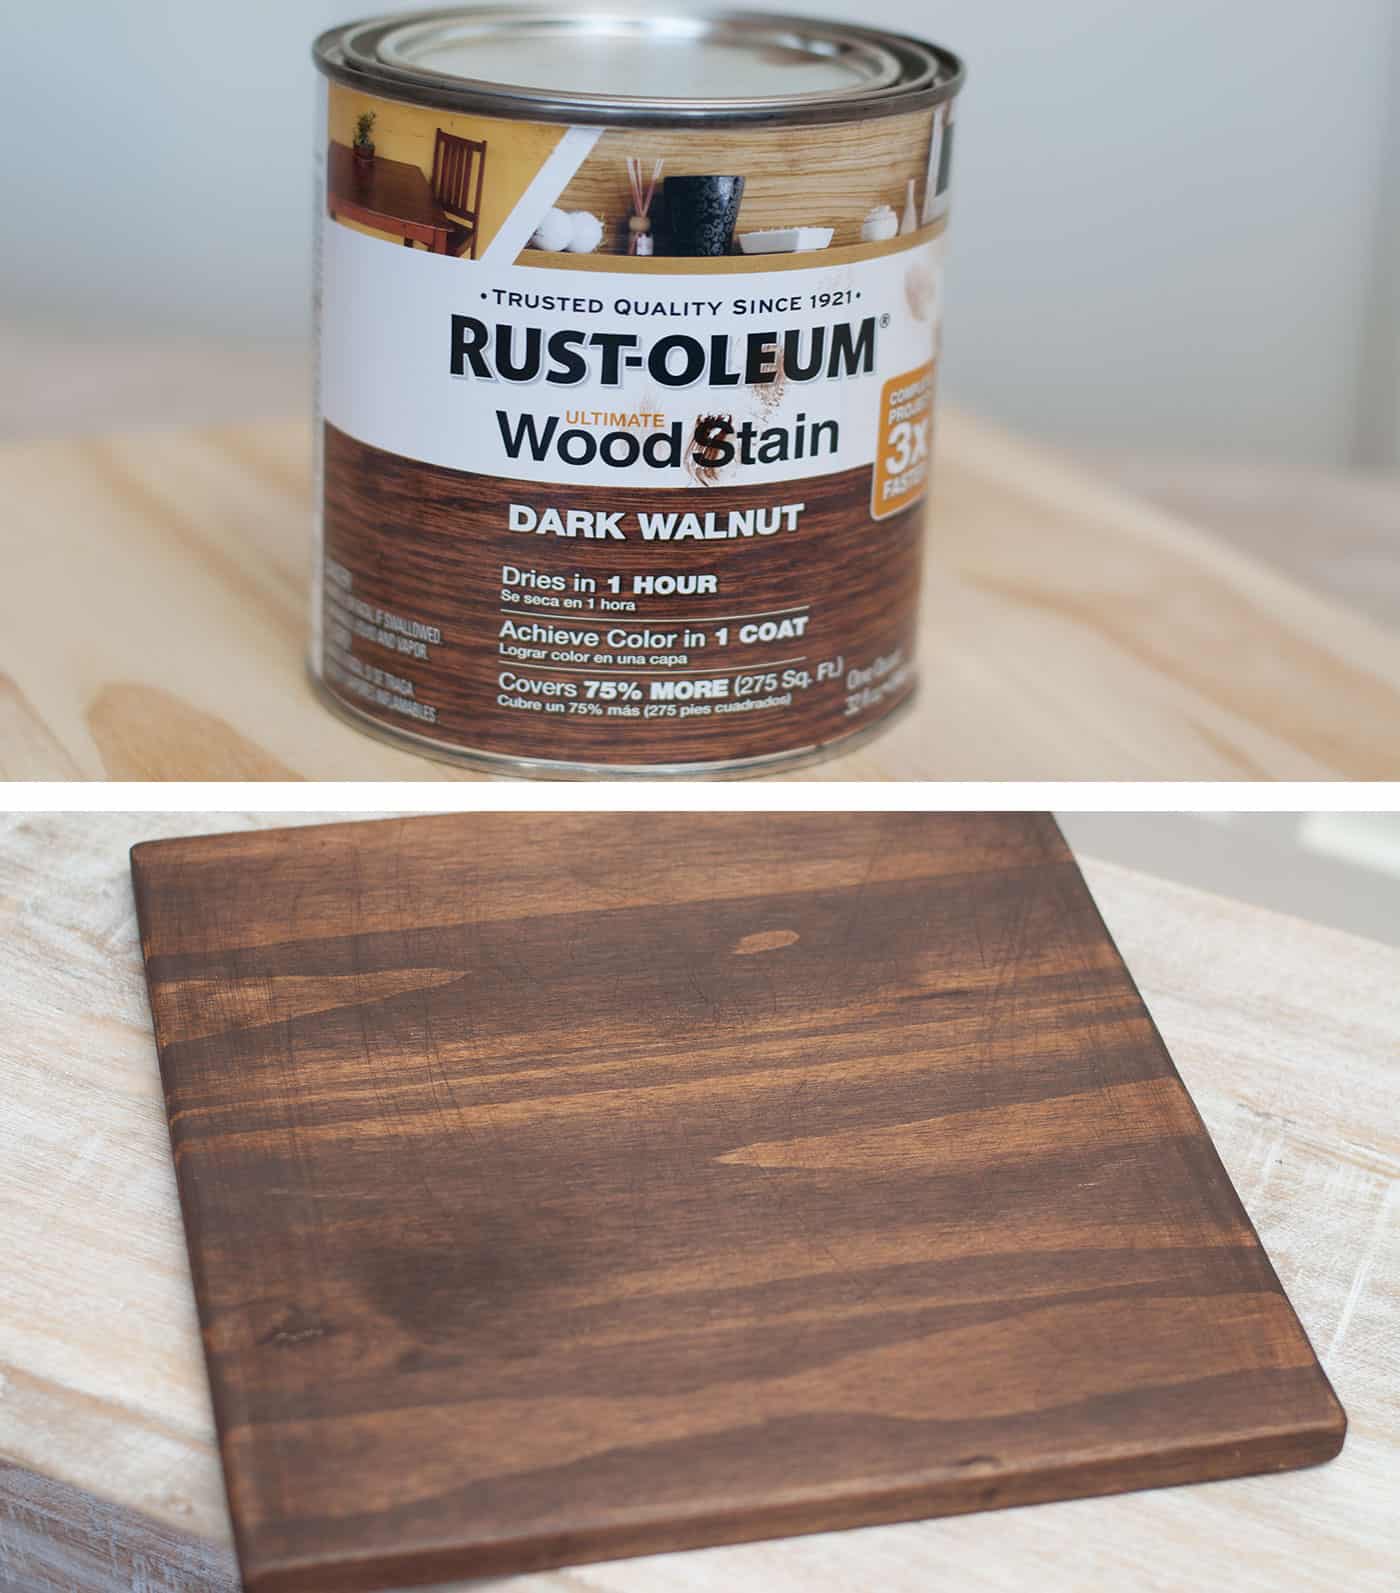
- Stain
- Sandpaper
- Paint
- Glitter
- Paintbrush
- Rags (optional)
Thanks for stopping by! I hope this give thanks sign inspires you to make one of your own. It doesn’t have to be a fall themed sign, it can be any kind of sign!
I just wanted to show how easy it is to make your own without spending a lot of money at a store.

Get the printable how to for this project below:

Give Thanks Sign
Equipment
Materials
- Mod Podge Matte
- 1 piece Wood 12" x 12"
- Cutting machine and vinyl OR a stencil
- Craft paint
- Stain
- Sandpaper
- Glitter
- Rags optional
Instructions
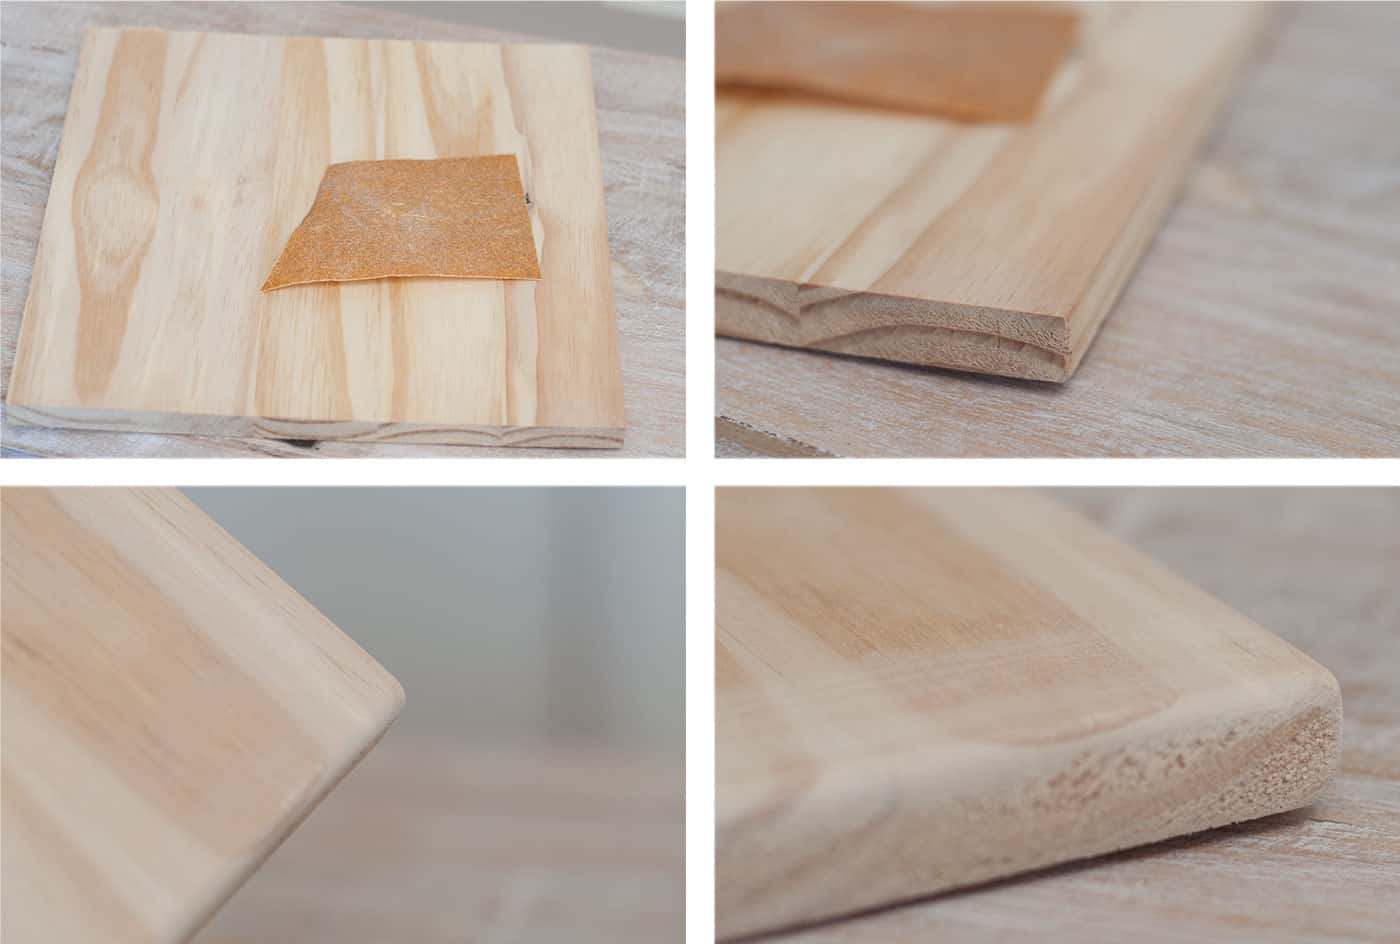
- Get a piece of wood sized 12" x 12" from your local hardware store (I have them cut it for me). Sand and round out the edges of the sign with sandpaper.
- Stain the wood using either rags or a sponge brush. Rub on until you get the desired effect and let dry. I went over the wood twice with a sponge brush. It dried in an hour.
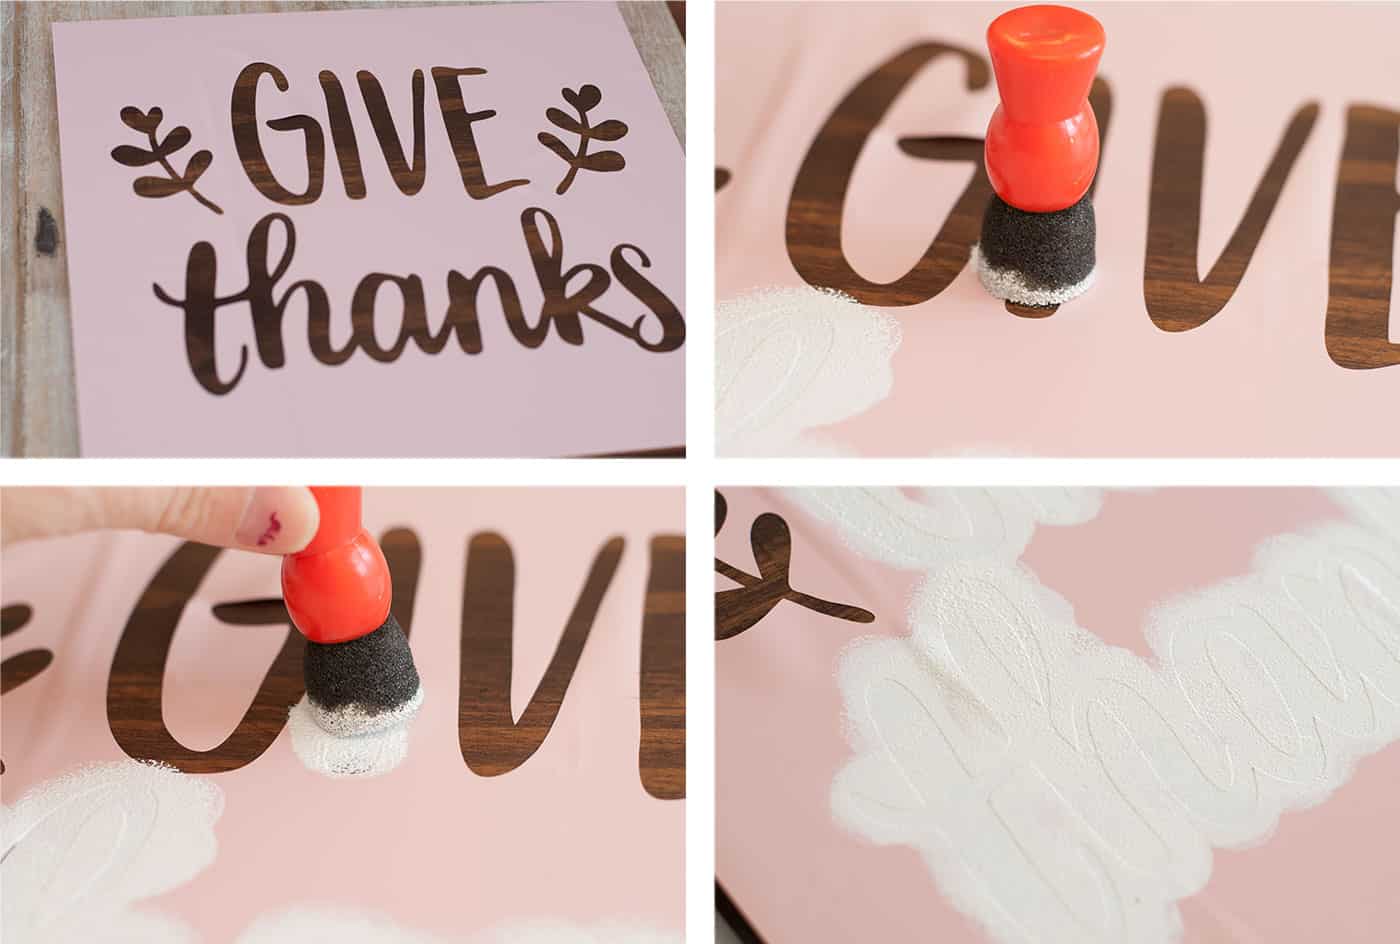
- Use your cutting machine to create a "Give Thanks" stencil out of vinyl.

- Attach the stencil to wood and smooth. Fill in the "Give Thanks" using a sponge brush and paint. Let dry.
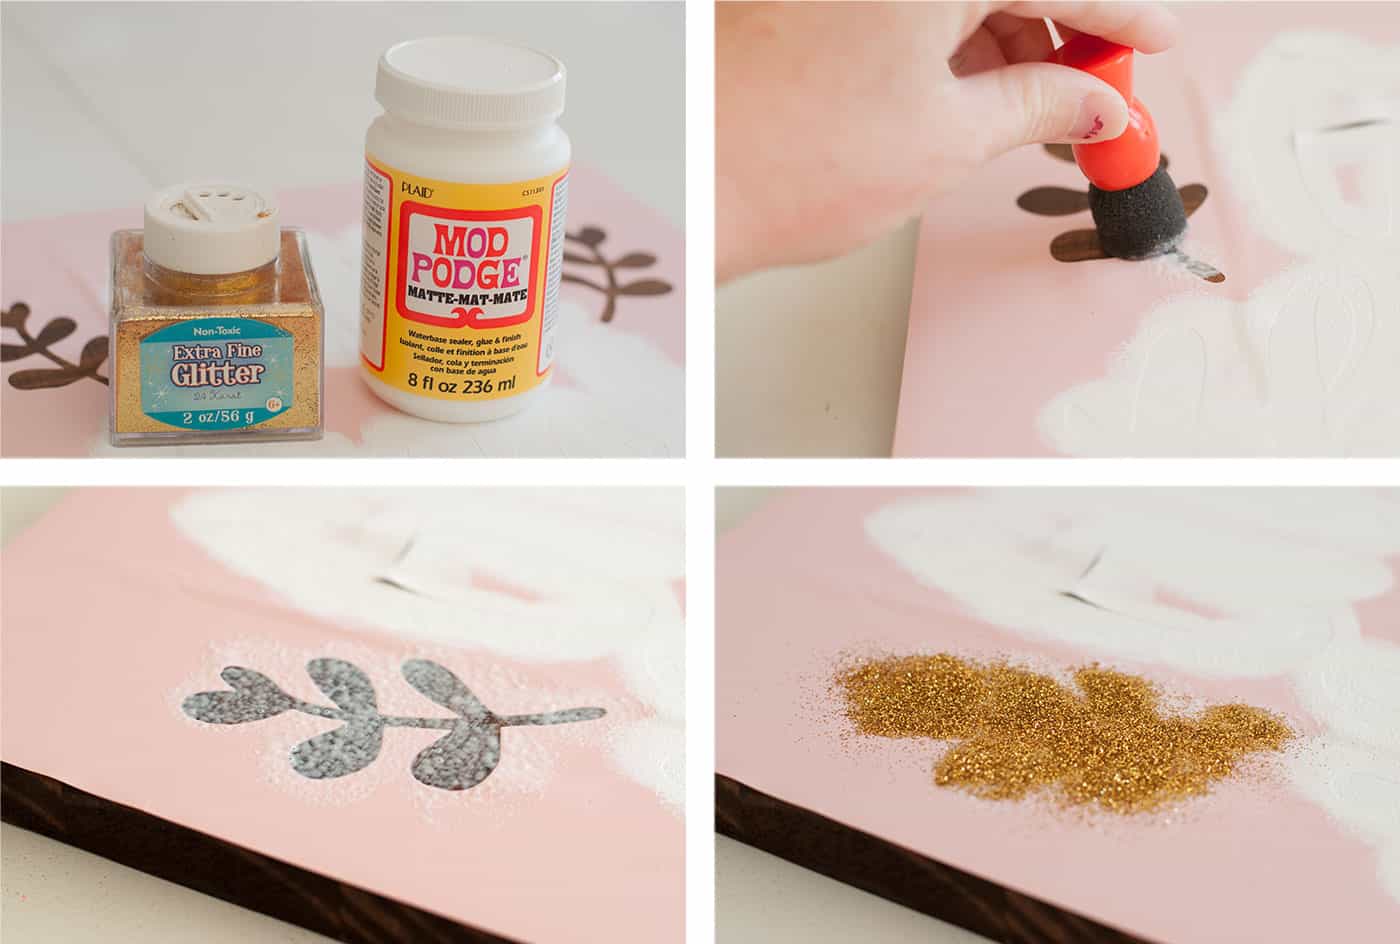
- On the accents, apply Mod Podge to the stencil with a sponge brush. Sprinkle glitter on top and let dry. Brush away the excess.
- Pull the vinyl off the wood and touch up any areas that need it. Let dry completely before displaying.

Notes
- Costs vary greatly for this project! I already had everything on hand but the wood and the graphic. Scrap wood is great for this project.
- You can always use a regular stencil to make your “give thanks” letters if you don’t have a cutting machine.
- Here is a very detailed post I did about adding the vinyl for another sign I did.
Did you enjoy this project? I’d love for you to check out these other Thanksgiving craft ideas:


So pretty! I love it!
Thank you so much!!
I’m glad I found this today. I have just enough time to make one of these before my family comes to celebrate the holiday.
Thank you. This would be great for my home Thanksgiving décor.
I love this, and like so many others want to get on it! Thanks for the sharing and amazing ideas. Just got a big restock supply of Modge Podge products tools mats and more..ready to get creative! Like the other idea listed below to with the books and chalkpaint..and the winterwonderland…
This is beautiful, so great for the Thanksgiving season.