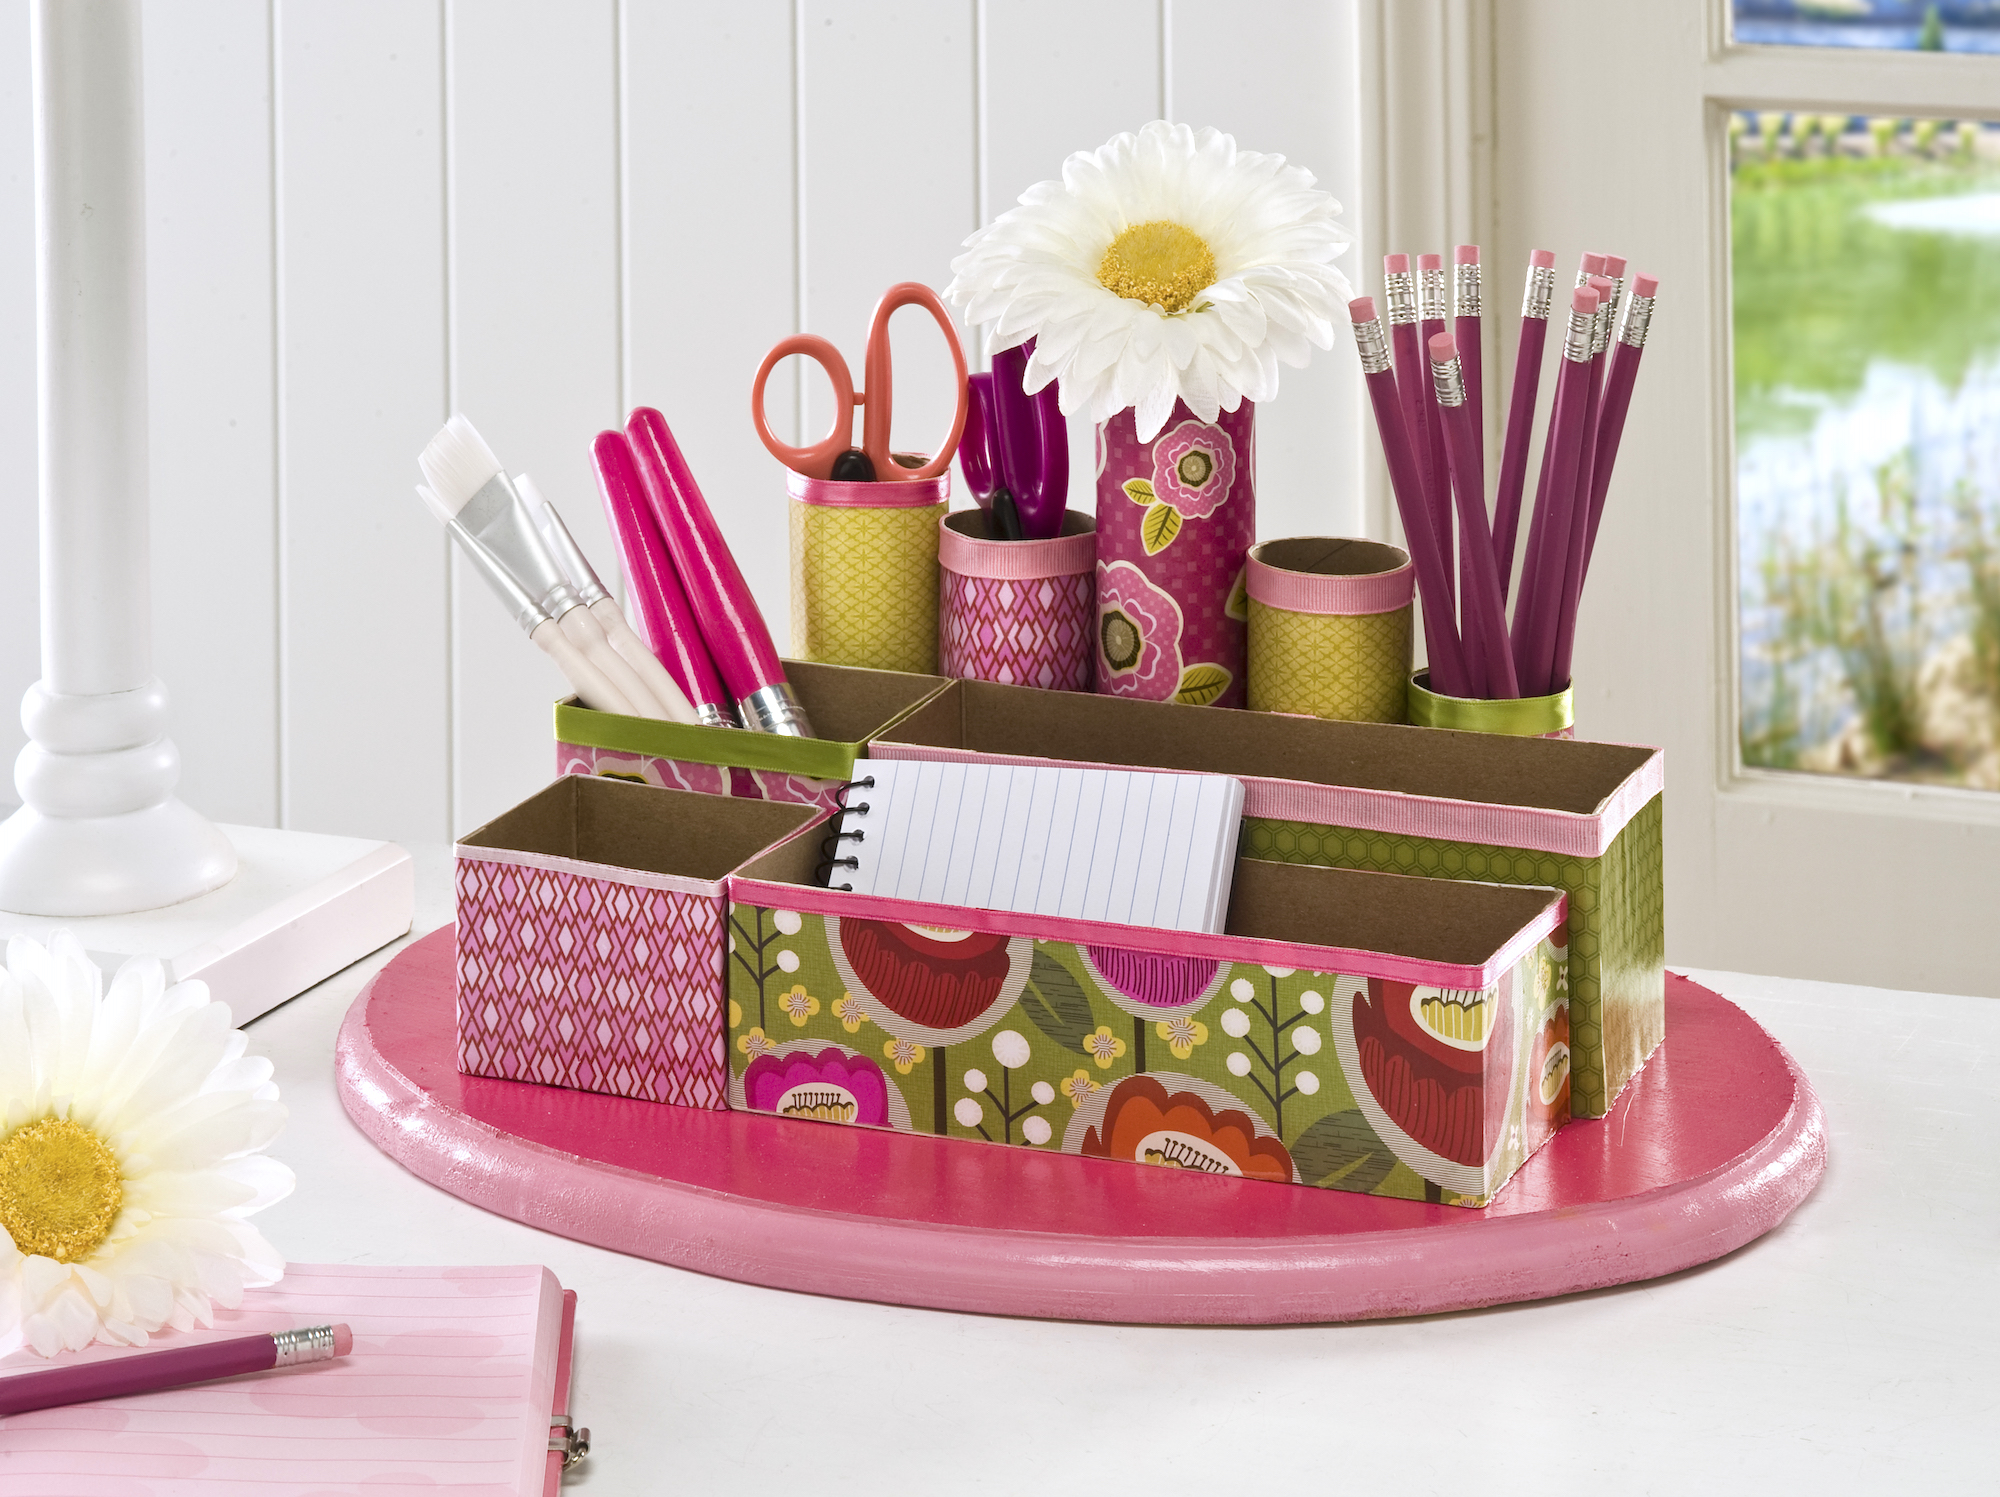
Use old cereal boxes and toilet paper rolls to create a unique DIY desk organizer! This craft organizer is perfect if you’re on a budget.
Scroll down to the bottom of the post to see a video of how to make a recycled desk organizer of your very own. You’ll also get two bonus projects in the video: a drawer organizer and a magazine holder!
I’ve been saving some cereal boxes and toilet paper/paper towel rolls for a while. I’m not just some weird hoarder – I had a purpose. A decoupage idea with Mod Podge, if you will.
My goal was to recycle these items in a Mod Podge project. I thought, if everyone else can use these items for crafts, I can too. So I challenged myself! It’s kind of fun to do that sometimes to see what you come up with.
Make a Craft Organizer
Based on what I had in my stash, I created this DIY desk organizer, aka the perfect recycled craft. I just used what was on hand so I didn’t even spend one dollar for this. You and your kids should try it for back to school!
I won’t say it’s totally free because you might have to buy some supplies . . . but you should challenge yourself to see how cheaply you can make it by rooting through the recycling bin.
Before we jump into this wood craft, I want to share some things about this desk organizer you should keep in mind while you’re making it. I hope these help!
Paper to Use
I used a few large pieces of scrapbook paper to make my desk organizer. You can use nearly any paper for this project, but you should keep a few things in mind.
You’ll want the paper to be thick enough so that you don’t see the labels from the boxes through the paper. Therefore papers like tissue paper, wrapping paper, and napkins might be too thin.
There is a way around that though. You can always paint the boxes with a white acrylic paint or primer after cutting them into the desired sizes so that the labels don’t show through. It’s an added step to paint, but it will make your craft organizer look so much better when it’s finished.

Plaques to Buy
The fun thing about this craft organizer is that you can use any size or style of wood plaque to make it! The wood plaque that I chose was an 11″ x 14″ oval that I purchased from Michaels.
I encourage you to try this in a different shape if you want to. I think even the natural wood slice would look cool for this DIY desk organizer – and you could leave it natural if you so choose.
Formula to Use
I used Mod Podge Satin for this project, but you could use Gloss, Matte, or Hard Coat. You can even add glitter here and there with a little Sparkle or Extreme Glitter Mod Podge. Give the craft organizer several coats of whatever decoupage formula you choose so that it is durable.
You want the toilet paper rolls in particular to stand up to constant putting things in and pulling things out – so I’d say use at least three coats of the formula you select.
Are you ready to make this project at home? Here’s how I made my craft organizer using Mod Podge!
Gather These Supplies
- Cereal boxes and toilet paper rolls
- Wood plaque – large enough to be the base
- Mod Podge Satin
- Acrylic paint in the colors of your choice (white is optional)
- Scrapbook paper
- Ribbon in coordinating colors
- Scissors
- Craft knife
- Craft glue
- Paintbrush
- Pen or pencil
- Ruler
- Tape
Tips and Thoughts for This Project
I had no idea how to measure the cereal box for my bins, I’m going to be honest with you. So I just cut 1/4th of the box off of the bottom and then proceeded to cut the rest of the boxes in that same manner. I knew I would have a front row and a back row, so I made the “back row” of boxes taller than the front row.
Now this is an optional step . . . but I used some white paint on the edges of my cereal boxes and tubes.
Sometimes my paper doesn’t match EXACTLY and I didn’t want the brown of the tubes or the colors of the box to show (since they didn’t match). If you are particular, you might want to do this. If not, don’t worry about it.

What do you think – are you up for making a DIY desk organizer of your own? Let me know in the comments! There’s also a printable how-to card here:
DIY Desk Organizer
Equipment
- Pen or pencil
Materials
- Cereal boxes
- Toilet paper rolls
- Wood plaque(s)
- Mod Podge Satin
- Acrylic paint colors of your choice
- Scrapbook paper
- Ribbon in coordinating colors
- Craft glue
- Tape
Video
Instructions
- Lay out the boxes and paper rolls to create the compartments for your organizer.
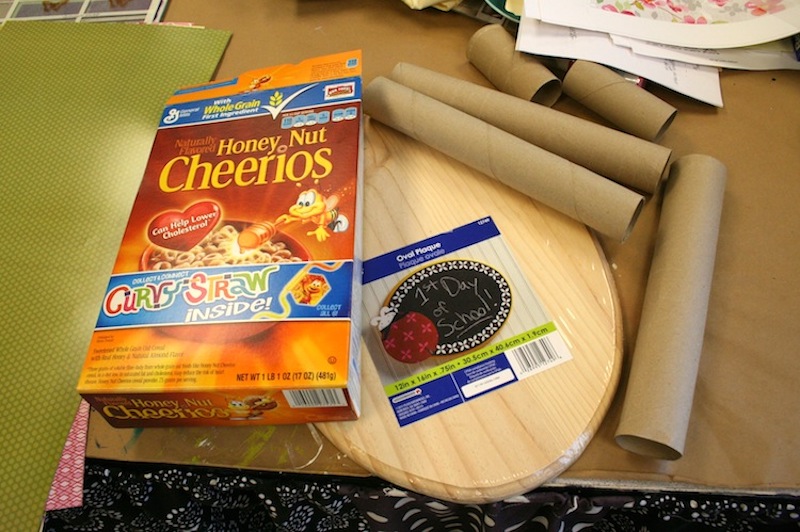
- Make the compartments by cutting the cereal boxes down and taping them on the outside. The tape will be covered by paper.
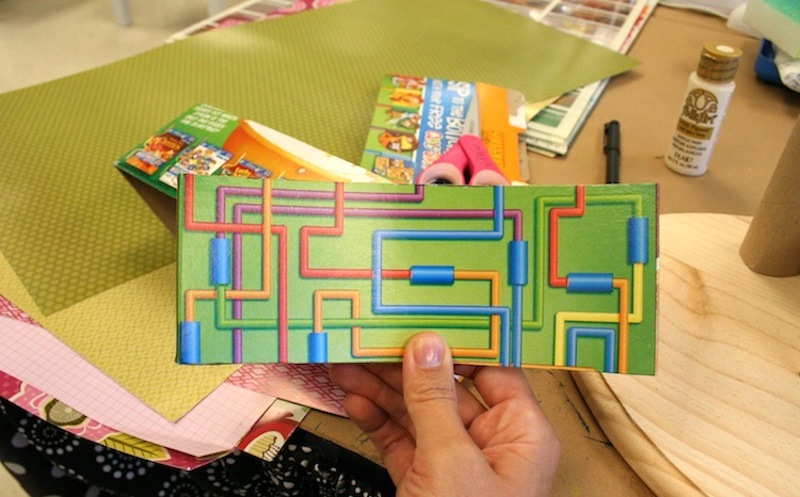
- Trim the paper tubes to different heights to add interest.
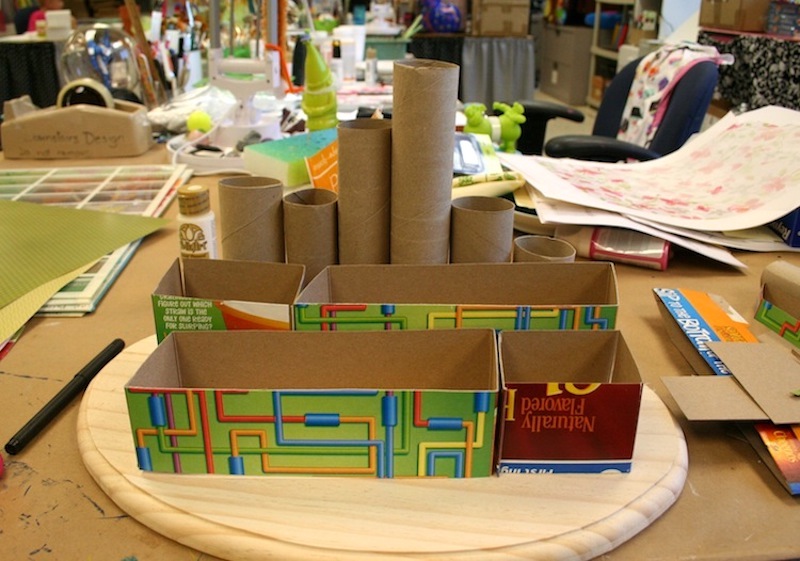
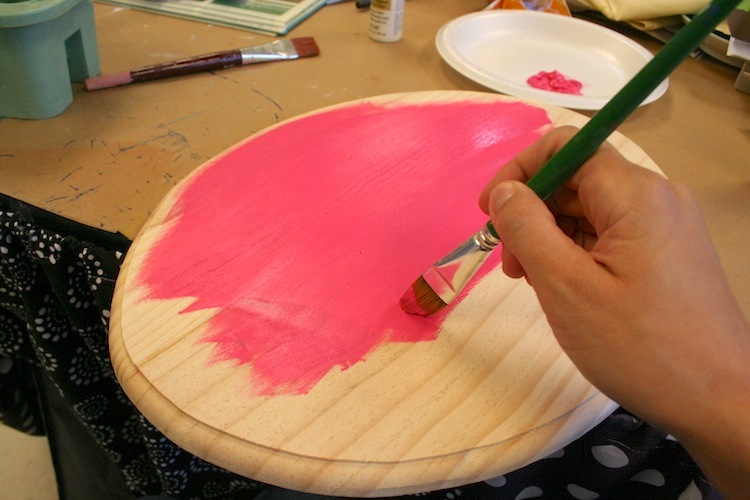
- Paint the plaque using the colors of your choice and let dry.
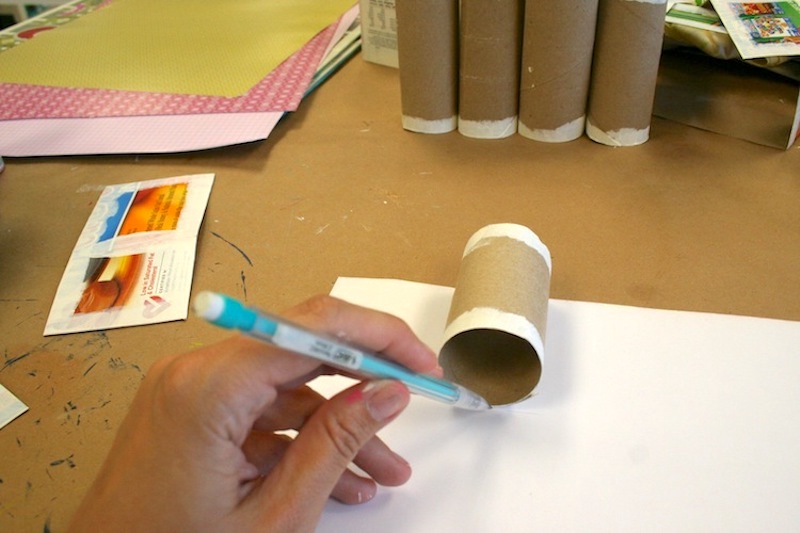
- Use a pencil or pen to trace each compartment on your scrapbook paper. For the larger compartments you might need to cut multiple sheets of paper to completely cover them.
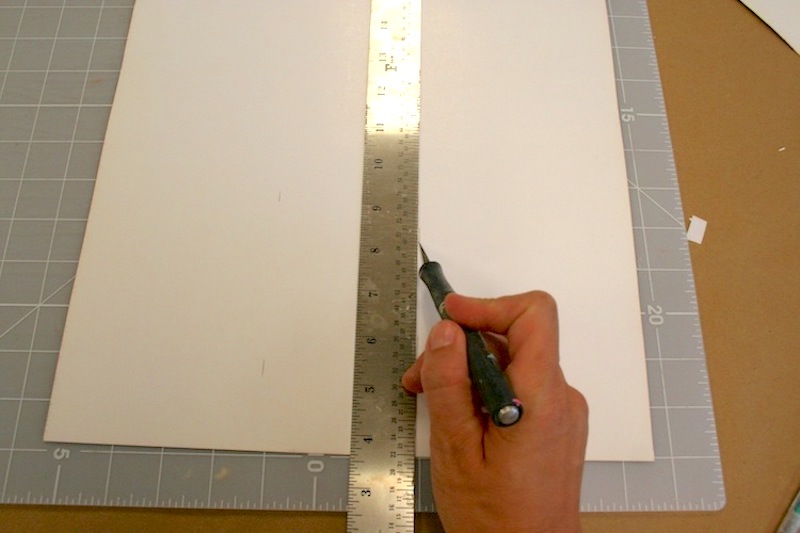
- Cut everything out using a craft knife and mat or scissors.
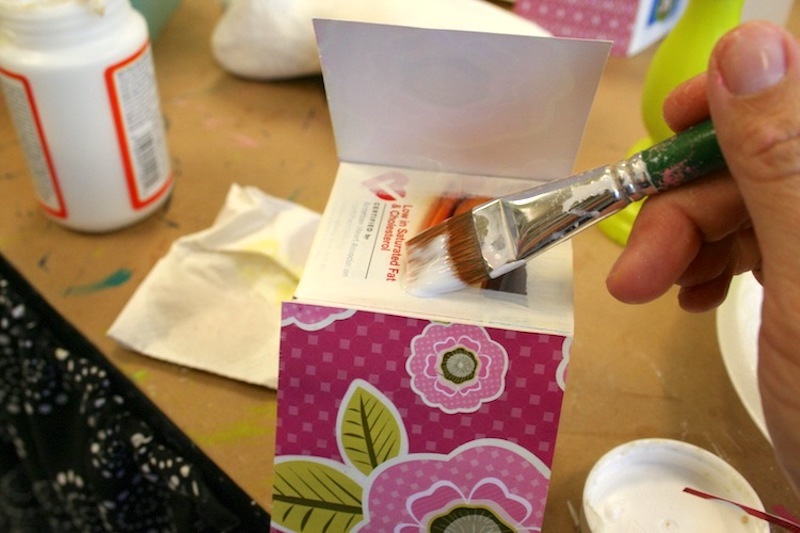
- Add Mod Podge to the backs of the paper – then proceed to decoupage your compartments with paper and Mod Podge. Work one piece at a time. Hold everything down until it sticks, smooth, and let dry 15 – 20 minutes.
- Give all compartments a top coat of Mod Podge, including the plaque.
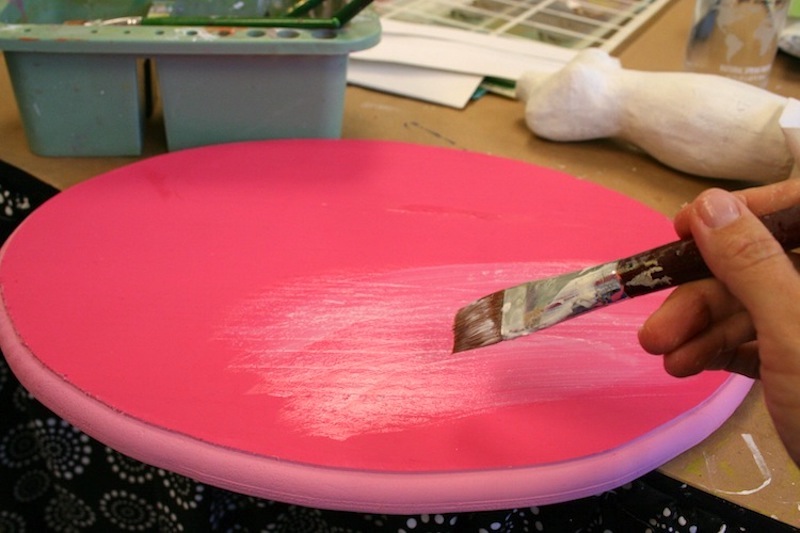
- Add ribbon to the top edge of each compartment using craft glue.
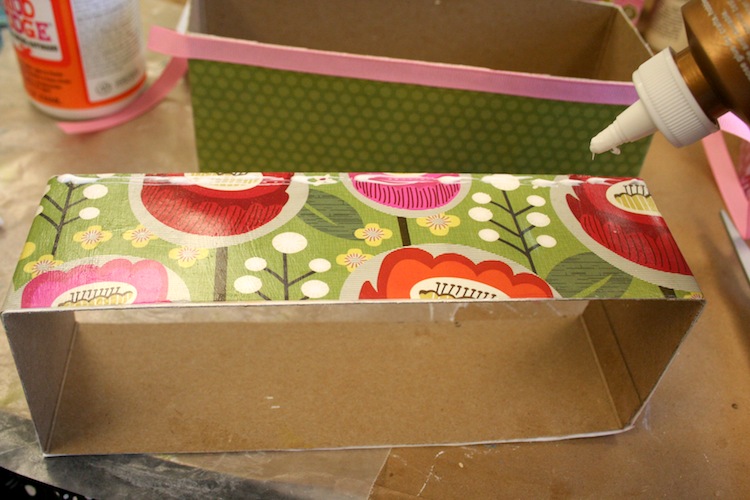
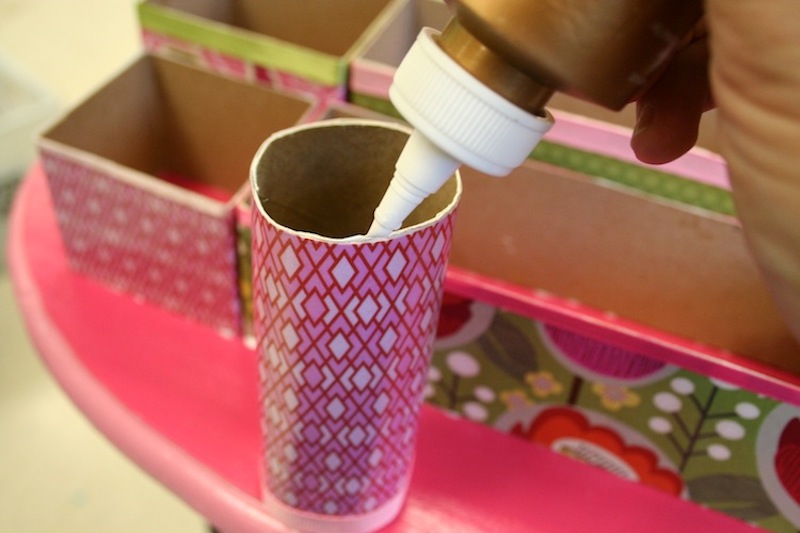
- Glue each compartment down to the plaque using craft glue. It will dry clear. Let dry 24 hours before using.
If you want to check out more recycled crafts, here are other posts that might interest you!


WOW! That is an amazing transformation. Looking at the pictures, I never would have imagined it started out as cereal boxes. Great job.
I’m reading this at work and see a beautiful deskorganiser coming 🙂 with newspaper as deco (i work at a newspaperprintplant (is that an english term) It’s really cool!!!
So cute! I didn’t know they made kids modge podge. Putting my little guy to work to corral his art supplies 🙂
My friends birthday is Saturday and she is all about the recycle repurpose, and reuse so this will make a super gift for office in her new home!!! Thanks for sharing!
Cool project! I made one similar for my scrapbook room using all different sizes of soup cans.
Sharon
I am a sucker for recycled crafts! Love it!!
This is one of my favorite projects that I have seen in a long time! It would be perfect for office gifts, graduation gifts, or for Administrative Assistants Day!
I am going to make the desk organizer. I need one and this not only meets my needs but it’s pretty too! So here’s a chance to use what I have on hand instead of what the office supply has. Thank you!
Woah, at first I thought you’d put a lazy suzan underneath!Looks so neat and pretty!
You COULD use a lazy susan if you wanted to.
Thanks for the inspiration, Amy! The Year 3 and 4 children at my school were equally inspired as you can see here http://louisehunterhandmade.blogspot.com/2013/05/crafty-kids.html
I love the castle one!
I am making one now but am just waiting on some toilet paper rolls. I had to do some patchwork with the cardboard because I ran out of actual boxes so I was taping and gluing small pieces of cardboard together. This is a great tutorial and it’s pretty simple to follow too, Thanks Amy, your design is helping me de-clutter my desk
Such a pleasant sight! love your project 😡
Great project! I’m actually going to make one to organize my makeup and brushes. Great directions too! Thank you!
I love this!
Would you stop by my blog this week and share it on Wonderful Wednesday Blog Hop?
Everyone will love this and it’s the right color for Valentine’s Day too!!!
Blessings,
Sinea
Ducks ‘n a Row
This is wonderful! Thinking of decorating with masking tape as it comes in so many colors and no muss no fuss.
Thanks for sharing!!!!
This is truly a perfect re-use-it/ recycle project. And pretty, too
Great idea. There are so many fantastic ideas to recycle.
Mod Podge is so versatile and can be used for so many things.
I’m gonna do this in bright colors for my grand babies craft table.;)
Cool
This really makes a delightful desk caddy that doesn’t require a large budget.
Just what I need for all the clutter on my desk
Very creative and colourful!
This is such a cute organizer. Finally I have something to do with the large bag of toilet paper rolls I’ve been saving forever! ?
I love the recycable aspect of this and the choice of colors is very upbeat
Brilliant job, professional looking, must try.
I really love this idea. It is a great way to recylce some of the objects around your home and create a beautiful desktop organizer that matches your decor.
Love it am trying with my grand daughter as she is my budding crafter
Looks like a great project
Great idea. Think I will try something like this to organize my craft supplies
Need one of these. Thanks for the project
This is a really neat upcycle. I love it!
Looks great and useful
What a great idea to recycle and create something useful!!
Love that it is a use of recyclable materials
Easily accomplished with a few ordinary elements. Customize your desk!
What a way to upsycle! I love the idea of using regular items and turning them into something else. I also love the idea of saving money by using your creativity. Well done!
I am making the one….Love it
I can think of many uses for an organizer like this!
So much fun upcyling things I was going to throw away. Brilliant and great fun. Great idea for art project in schools
Great way to repurpose common household items!
I love the finshed product, but I don’t usually do projects with that many steps.
Great project – going to make a few for teacher gifts also
Looks great and a useful gift
Great project… I have made these and they are great… I used a charger plate from dollar tree.. they are much less expensive than wood plaques and can be painted or use mos pudge with them also.
Its amazing and beautiful! From next to nothing!
Awesome idea!
I am going to try to make one of these! I never have quite the right holders for my pens and highlighters at work. So I will make my own!
I like the idea of covering boxes for organizing things, good idea
I do this all the time, especially like tissue boxes too pretty to throw away. Don’t need paper sometimes, just mod podge and go!
This project was really simple to accomplish.
I need to make one of these as my desk is always sorts messy.
That’s a cute idea it is just a little too much work for me or more than I want to do. I love the ideas for recycling, so I may do something on a smaller scale
Great project to recycle items from the home
Love that the items are recycled
I love this idea. It’s perfect for my desk.
This is really cute and I am always looking for ways to upcycle ?
I really like the fact that you repurposed cereal boxes toilet paper rolls that was a really good idea instead of trashing them
Awesome idea
Gives me an idea for my son’s art stuff.
Great idea to use items like cereal boxes etc to make something usable as a desk organiser
Very, very cleaver idea! I am going to make one and take just a few minutes more and paint the inside of the cut boxes, with color in paper, and down the inside of tubes. Just a thought
Love ideas to recycle things that are usually thrown away!
well now that is unique. very useful and I need one.
So easy. These are the cutest! Goes with any decor, of course.
I used an old shoebox, covered it with metallic wrapping paper, using Gloss Mod Podge. It’s perfect for store/display my crafting Con-Tac paper.
I will be making a couple of these so I can organise some of my craft stash
Super cute idea! I’m going to try it since I have two desks, I can make two!
OMG! A perfect way to use up that favorite paper I’ve been hoarding! It’s a triple whammy! I get to make space in my storage, keep the paper AND see it and enjoy it every day! I love this project so much!
Really cute idea using mostly recyclables – I like that!
love love love this. Just printed off instructions so I can make.
This appeals to me because I love to recycle/repurpose materials!
Looks great. Handy for the desk.
Great use for items that would be thrown away! It looks like a useful storage idea, but I would simplify it.
I love this. It is so easy to make something beautiful from throw away items.
I made many of desk organizers but without the piece of wood, I just used a firm piece of cardboard doubled. I made one for my make-up as well.
I love it! The organizer is a personal statement of color and idealism. Great Job!
Very interesting. I will try this as my next project. Thank you.
I definitely loved making one of these for my daughters desk. It was simple and easier than it sounded. We also made standing file holders out of old cereal boxes and Mtn Dew cube boxes. Her friends just go on and on wanting to know where she bought that stuff cause it’s so cool and colorful. She just grins and says, “we made it”. Nobody believes her and she’s not about to take it apart to show then, so she sends them here.
5 STRS
Cute easy craft you can make with almost entirely household recyclables. Clear instructions for a successful project.
This is a great way to make a customizable organizer with leftover items from other crafts and things one might otherwise throw away. Glam it up to your heart’s content!
The colors in the paper that you used were great! The organizer will be very useful in my sewing room , office, and sccrapbooking room.
Terrific idea. Made a similar project using Mod Podge glow-in-the-dark.
What a great idea. This is sustainable and adorable. I like that you can customize this to the person who will use this.
What a super cute idea for a desk organizer!
Fun, easy project & super handy
This is so fun and could be used as an organizer for so many things such as a makeup organizer.
it looks usefull
I found this project a bit fiddly to do but it looks lovely ?
What a great way to recycle items and make a useful project.
this looks so cute and great for kids to do
I love this, i have boxes of differents sizes that i could use and save some time making them
I love anything to do with office supplies, this organizer is right up my alley. I made a small one a few years back, and yes I did use mod podge. Now I can use up all those boxes etc I keep saving. Thanks
Very nice and functional! I may do this myself!
Old cereal boxes toliet paper rolls wooden design paint it. Cover with paper on the old cereal boxes and toilet used .use Matt or glaze to cover.
Innovative upcycling idea.
This was one of my first projects I ever made with my new bottle of Mod Podge. How exciting as this was about 10 years ago!! My grand-daughter loved it so much she was happy to inherit it. It is still sturdy, useful and very much in use. I think the paper needs some refreshing after 10 years! Great idea for a surprise gift
Really enjoyed presentation!
Love it so much I made a few for my coworkers who loved mine
Love this, simple cheap and effective.One could even got to town and properly mix media this!?
Great recycling project!
How easy to make this with items you have on hand!!
Really good step by step directions. Gives other mod podge products to sub
Love this idea
You’ll bring organization to my desk at last. Plus a little crafting fun in the process.
I am always savings boxes and tissue holders for grandkids, so borrowed some of them and made my own little organizers. Cute cute. Thank you
So cute! I’m a teacher, so I’m always looking for thrifty ways to spruce up my room. Definitely going to make one of these this summer.
Love this organizer as it combines my two loves – Mod Podge and up-cycling!
Cute organizer! Clear directions and pics!
So pretty and would be very helpful.
Can’t wait to try this one ?
Hope everything is better with your troubles. The desk organizer idea is awesome for us with OCD. Thank you.
Great idea, ’cause you can configure it to your personal needs, w/ the the tubes/containers, AND this is a VERY inexpensive craft DIY.
Love this design and organization ideal
Simply to do . Looks great on your desk .
Organize
Great
I love upcycling. You could even use a hard piece of cardboard that is 1/2 inch thick. I found one and covered it and use as a portable desk top.
Clever project. Looks cute and easy. Love the recycling!
Great project for the grandkids
fun video
I made this and it was so easy you have to try it. As it uses all recyclable items
I will try this!
It’s easy to make eve with children
Great instructions
So easy to do and soo inexpensive.
Simple and easy craft.
Great way to reuse !!
What a fun and creative project! It would be perfect for my Hubby’s desk!
I am trying to do some down sizing and I think this could really be helpful. Thank you
These are fun and practical ways to upcycle items that would normally end up in landfills. I like to also use the rolls from aluminum foil, wax paper and plastic wrap. They are a little narrower and much thicker than TP rolls. They are great for holding spools if ribbon, cut in half or thirds to hold paint brushes, pens etc….
I think this is really cool and most ingenious even though it is something I wouldn’t use.
What a great use of cereal boxes and toilet paper/paper towel rolls! This is adorable. The instructions are easy to follow too. Sounds like a great idea.
Great idea
Very cute and looks to be an easy project. I have done something similar before The cost on this is very low so minimum $$. Thanks!
Wonderful idea! Can’t wait to get started.
Love this project. Great way to recycle cardboard pieces.
Very cute and handy!
Looks like a great project, little curious about the stability of it after use….
The example photos show step by step the process, which helped us with our group project.
I made some of these for pencils and paint brushes.
Recycling made useful & cute.
My grandkids can make their teacher’s Christmas gifts this year!
Wow! Such an easy and uncomplicated project and so flexible, but so useful!
I can’t wait to make this! I love sprucing up my desk with color! Thank you for sharing this!
Great idea. Detailed instructions and pictures.
I love the fact that the end product gives no indication that it all started with cereal boxes and toilet rolls.
I shall be giving this a go
Really like this idea. I have a smaller one in the back of my desk that my kids made me years ago – not as pretty as this one 🙂 I will make one of these for my craft things when I get space organised for that.
LOVE the colours as well.
Great job Amy.
Marvelous idea, thank you Mod Podge
its really clear instructions and appears easy to do
Can’t wait to make this for my craft room. Just printed directions.
Brilliant
Great way to recycle item and help in a small way . plus its very pretty
A great way to recycle and make something useful. I might make a few of these…one for my clay tools and another for desk
Love that this project is so inexpensive and looks so chic and classy.
We are watching our pennies and this is a perfect idea and love the finished product! Also an excellent way to recycle
What a lovely desk organizer with just recycled cardboard boxes!!
Great idea! A nice touch would be to put your name on it to personalize it. I made a similar one with my cricut but yours is larger. The cardboard boxes are a plus.
Great idea for kids to make to suit their desk.
Excellent presentation – easy to follow and great ideas.
I made my own organizer following these steps and if it weren’t for the mod podge, it would’ve never got finished lol. I love this stuff.
This is a great organizer! Just what I need to keep my desk neat and tidy.
This is a ultimate creative use of recycled materials and the best of all this is a very useful item that won’t sit around and collect dust and add clutter
Is a very intense project.
desk organizer
I love that it can be craft organiser as well
The recycling is a fun part as well… Easy for older kids to make..
nice, now all we have to do is find the toilet paper 🙂
Nice to recycle things you sould usually toss
Such a cute organizer, and definitely worthy to give as a gift, also great to sell at garage sales or craft fairs. Thank you for the easy instructions.
Simply stunning I am going to make one for my desk…very inspiring
This would be a fun project to do with kids and teach recycling and who doesn’t need an organizer for their desk? I’m definitely looking forward to making this
Well explained.
What a great idea. A fun but practical project. The video an step by step instructions make this really easy to follow – I just need to save up some cereal boxes then I can get crafting
Great way to up cycle!
nice
Great idea and easy too!
I love how you reused the cereal boxes and toilet roll. Great idea ? ?
I think this is a great idea in such a way of 1- recycling all sorts of tubs boxes and packaging that we all seem to have and throw away
2 – I am always looking for storage and organise trinkets in various parts of the house ie toiletries in the bathroom makeup and sprays in the bedroom organizers in your kitchen or or storage for the tool age is! And although you can purchase these things in many shops and suppliers there is never the right size or box or combination that suit you to your needs plus they’re always pretty pricey these items i so this is great inexpensive way to store your individual bits and bobs and decorate it whats pleasing to your eye either as bold quirky statement feature in your room or blend it in with the style decor in whichever room you decided to de clutter so it’s not noticeable to the eye
Amazing to see how much you can do with stuff lying around the house. Definitely going to try this. Thank you.
Great idea. Fits my budget.
I made it and use it all the time
Very very cool! Well explained too.
I never would have come up with this on my own. I love how you were able to recycle so many things.
Organised Chaos! that is what my craft room looks like. This is a wonderful craft idea for me to get organised. thanks
This is a great idea. It works perfect. Love my new desk organizer
Great idea to make with the grandkids as well as being useful
This looks like an amazing project and I cant wait to try it out! Thank you!
Love finding a project that I can make using the recyclables I have been saving for 3 years now.
Attractive, Very nice!
Love it!! Organizing and recycling in one project!!
I love this you’re so creative it’s a “10” for sure
Love this Project!
Looks like a fun and easy project
This is an easy way to accomplish several things at the same time. You not only are recycling in a good way, you are up cycling in a great way to give yourself added storage. It’s a win for everyone. Love the colors and Mod Podge is my go to for everything from covering storage boxes, furniture makeovers, adding decor to frames and the list goes on. And best of all, it costs very little time and money and adds so much storage to just about any space in your home. Love it!
Can’t wait to make my desk organizer
Perfect for a home office
If you are like me – I like change . This project is perfect if you redecorate with the seasons.
Being a crafter-this allowed me to change my office look without a huge investment.
I love this simple yet beautiful way to organize my home that also helps to keep our planet a little bit cleaner
What a wonderful project!
Clever project using paper household items. Lots of possibilities!
loved every minute of this tutorial. now waiting to finish the cereal box hahaha
cute and looks really cute
Fun, simple, and useful.
Wonderfulnd cheap way to make a desk set in my favorite colors.
This tutorial shows just how much can be done with so little! Who would have known this could be created with cereal boxes and cardboard tubes? So creative.
Wow! Would never have thought to use cereal boxes. This is a super cute idea. Gonna try one for soon.
This is a great idea. Who wouldn’t love to be better organized on their desk. I’m going to give this a try, soon. TY
Cool project!
Just what I am looking for in my sewing/craft room. Very handy and fun to make.
Great use of everyday items
Loved the idea and am saving my boxes to try it!
The step by step made it understandable and easy. The video is a great tool in itself!
Love the idea and the upcycling of cereal boxes. Looks really nice. Will definitely make this one for my granddaughter’s craft supplies.
Great idea, hard to believe it was created with cereal boxes and tp rolls!
I have done other things with cereal boxes because of the idea given for this DIY.
Great idea. I think I’ll use this idea for my sewing room supplies.
I loved the easy way this organizer has been made and put together. Definitely going to make one for my desk at work
I love this handy organizer & will make at least 2 for my craft room.
Koi foud step by step very helpful
What a cheerful item to have on your desk! I gotta learn how to ModPodge!
another great idea – so glad all you guys did this for us
Looks great, wish I had a desk to put it on!
Great fun and easy
Brilliant! Awesome idea, perfect for office and craft room storage!
adorable!
Love this idea
Love the finishing good touches. I like things strong and those finishing details really help the overall look
Clear direction, easy to follow great idea.
Since kids in Washington State are off school for 6 weeks this is a great project to help then get their desk organized.
I have done some these things individually, but together this is beautiful and I like to recycle items.
What a pretty desk organizer – I love your choice of paper! The instructions are great with all the pictures and options for making it my own.
excellent project
This is an excellent idea. The possibilities are endless .
I love to reuse / recycle, and this is a great way to do that!
i have been looking for this! it’s customizable and doable!
I like the use of different shapes and color palette
Simple and completely original for each desk set!
I was going to buy a desk organizer but now that I can easily make one with materials I already have at home I will make it! The instructions are detailed and very easy to follow and I can customize the colors and design to blend with my decor! Fabulous project!
Amazing project looking forward to making with my little granddaughter thankyou for all your ideas and showing us all these projects.
This is such a fun, creative and great way to use your recyclables. A very useful project to help keep you organized! Love it!!!
This is a great idea to keep items out of the land fill and at the same time have an inexpensive, very tailored desk organizer!!! I may submit something similar in our county fair’s recycled category!!!
great Idea
I love this project!
This is super attractive, and what a bonus when you compare your recycling pennies to the prices of desk organizers.
I like decorating my cubicle for the different seasons. Making your own allows you to use any color you want.
Love this & I’m definitely making it. Thanks.
This is an awesome reuse of these items. And it’s great that you can customize it to your liking. I am definitely going to make one or two.
I love this idea!
love this ..gonna start saving stuff to make this
I tried something similar, but this is an even better idea! Thanks so much for sharing! You rock!
4 star
Very creative. Well done!
I’m definitely going to make this! Thank you for your consise explanation and efficient way you set things out to make it so simple for everyone. Love your blog!
Very practical and inexpensive
Very detailed tutorial thanks for sharing.
5 Stars
pretty easy and useful.
Awesome project ! I plan to use this to reinforce the idea of reusing products we already have have home instead of sending them to the landfill. Thanks !!
This would make a great gift!
Great idea
Using this idea for my painting supplies.
An adorable and easy to make project.
Awesome project!
great idea and so simple looks great
This is a clever usage of cardboard boxes that would ordinarily be discarded.
Awesome! Love it!
easy to fallow ans easy to afford. we make all kinds of cardbord crafts here. this is awesome.
YES – been wanting to do this for a long time. I would put it on a turntable, too.
Amazing …cheap materials into expensive looking product
Just use any old cereal boxes or crisp tubes toilet roll tubes it’s suprising what you can make
I have made this and using at my home too
this is an awesome idea for storage as well as for the use of recycling products
Well, that is a cool project! It’s great because you can customize it really easily!
What a super way to recycle!
Looks beautiful, think I might try it
Love it
I don’t get it… it says to “scroll down to the video” but theirs no video whatsoever! I’ve tried this site on 2 different PCs, 1 mobile phone, and 1 laptop. Has it been removed or something? Or was this click-bait? Either way it’s not worth it.
Not clickbait! Video is also here: https://www.youtube.com/watch?v=P6hiYh9KlEw