Learn how to make a magazine bowl from a stack of old magazines! This recycled craft is fun and easy – and the tutorial comes with a lid.
Skills Required: Beginner. You’ll need to be able to use a craft knife with a ruler, fold paper, and then add Mod Podge to seal.
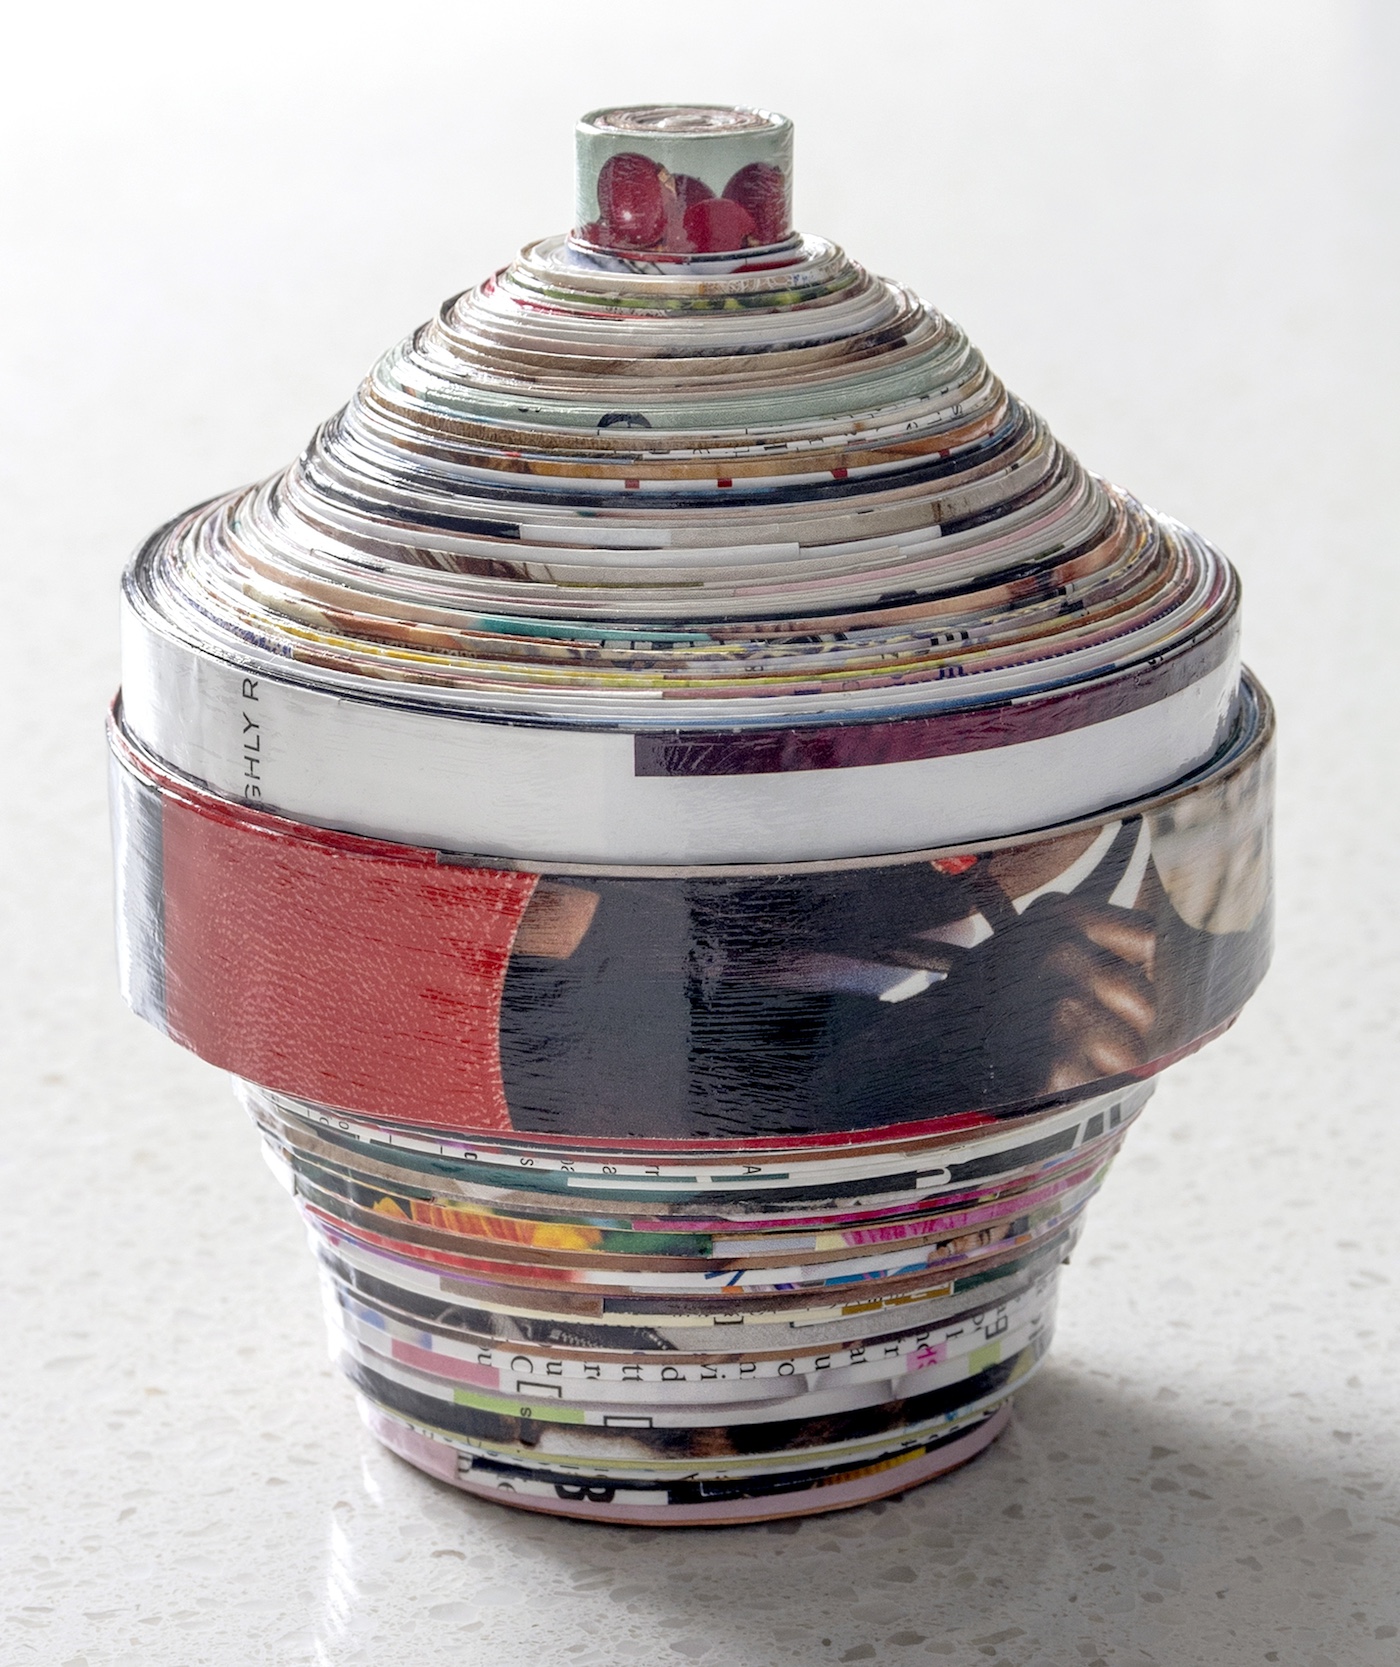
Are you looking for that unique, beautiful handmade gift that will make a big splash without breaking your bank account?
Look no further. Crafts made with magazine pages are the way to go. Yep! You can make a magazine bowl with those catalogs you get in the mail. Fun, right?
We’ve made bowls out of some pretty fun things around here – confetti, fabric, doilies, and even faux leaves.
The fact that I hadn’t done it out of magazines yet? I would be remiss as a Mod Podge blogger if I didn’t do this project.
I love recycled crafts, and the idea of using magazines in a decoupage craft is very appealing. I have tried magazines in jewelry crafts, collages, on candle holders, and on lampshades.
It was time to try the elusive magazine bowl.
Not only is it a bowl, but this little container also has an adorable lid. And what does it cost? Nothing but your time, a stack of old magazines, and some Mod Podge.
Magazine Bowl in Four Parts
You’re going to make this craft at home in four parts:
- Bowl base
- Main part of bowl
- Lid handle
- Main part of lid
One thing you should know about this project is that it takes several hours to make – like all day. None of what you’ll be doing is hard at all. If you can fold paper, you can make this bowl.
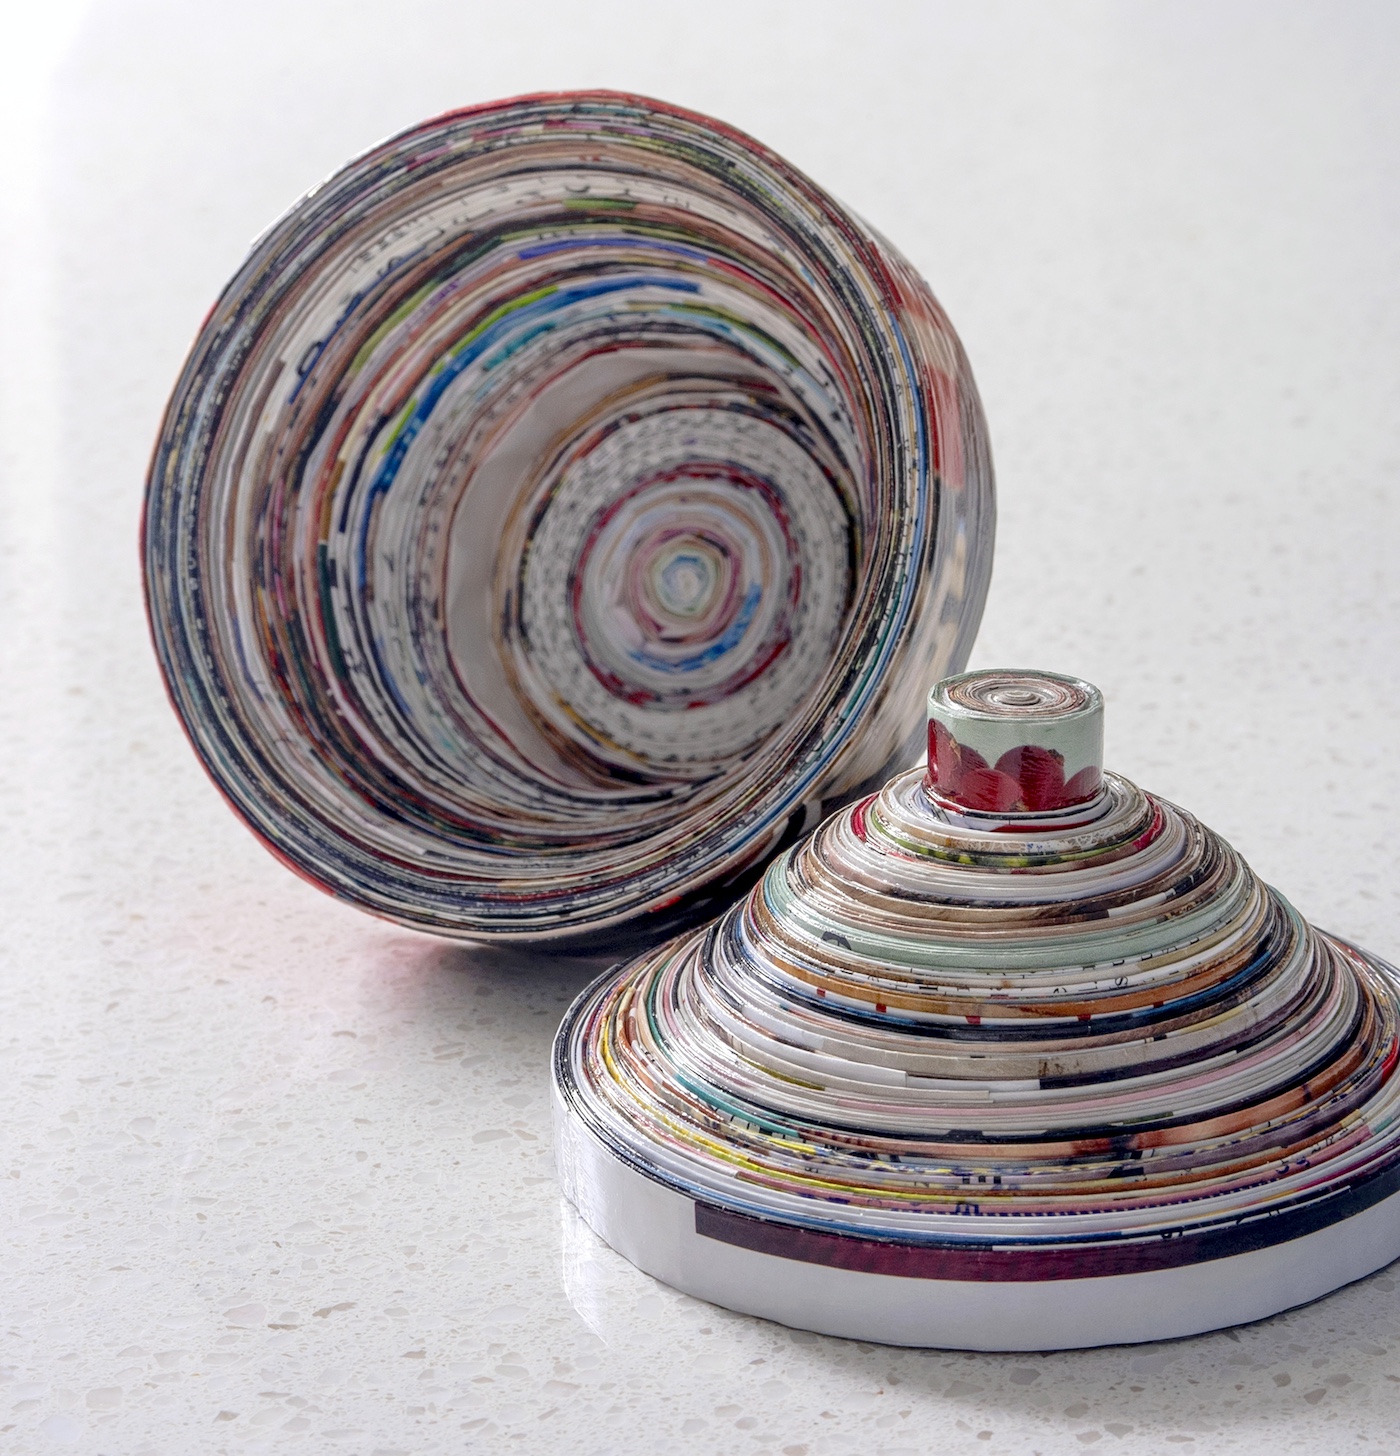
However you should prepare for it to take awhile, as each layer of the bowl is simply a folded page of a magazine. As you can imagine, it takes several of those layers to make an entire bowl.
Why do it then? The results are really worth it. A bowl made of magazines is cool when you see it in person, especially when it’s sealed with Mod Podge.
I want to try several styles of this bowl, but started with a basic, small vessel. Here’s how it’s made.
Gather These Supplies
- Old magazines
- Craft glue
- Bone folder (optional)
- Mod Podge – I used Hard Coat for added strength
- Craft knife and ruler or paper cutter
- Cutting mat
Tips and Thoughts for This Project
You might be wondering why I didn’t cut 2-inch pieces and fold those over. Because 3-inch pieces bulk up the bowl faster! This magazine bowl takes some time, so I tried to speed things up where I could.
I used Mod Podge Gloss on this project, but I did have some Hard Coat on hand . . . so I decided to use it for my finishing coat.
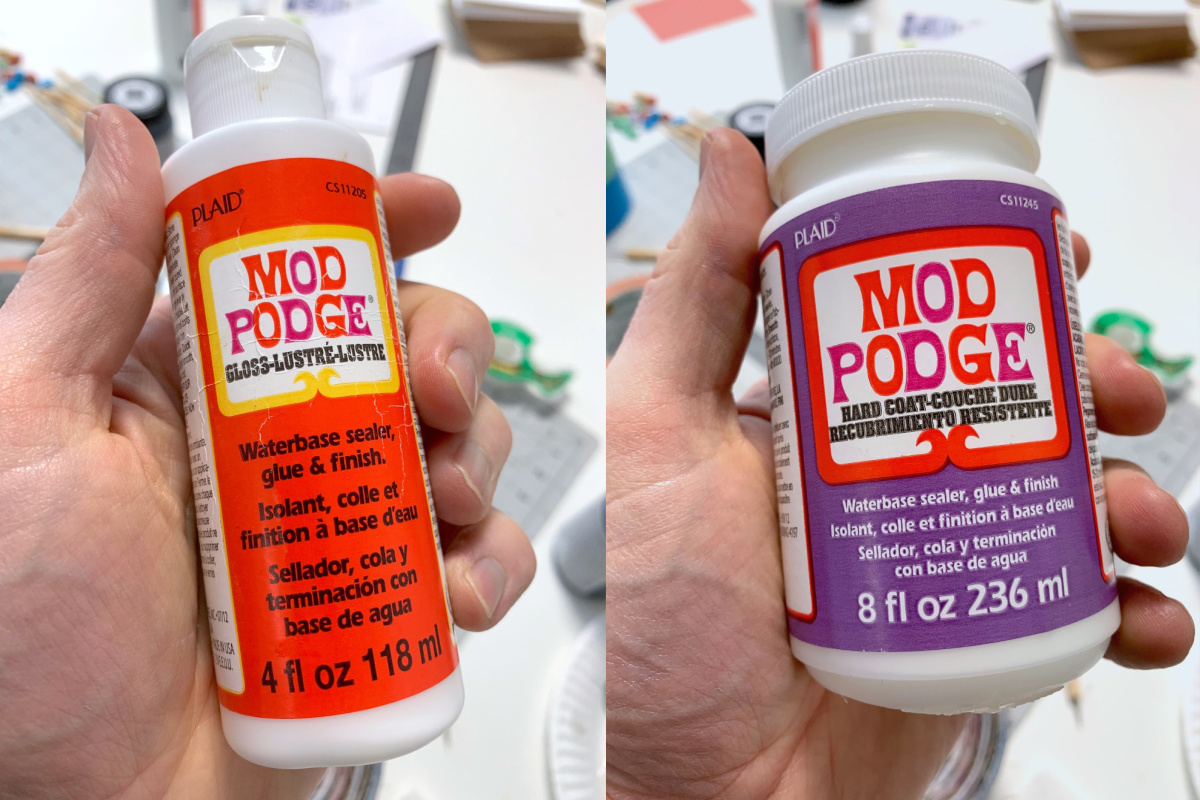
This magazine bowl is just going to be for display, but why not make it a little more durable just in case.
I painted a few coats of Hard Coat on both the lid and the base and let them dry separately. What I like about the Hard Coat is that it’s not as tacky as Gloss, so it takes the edge off.
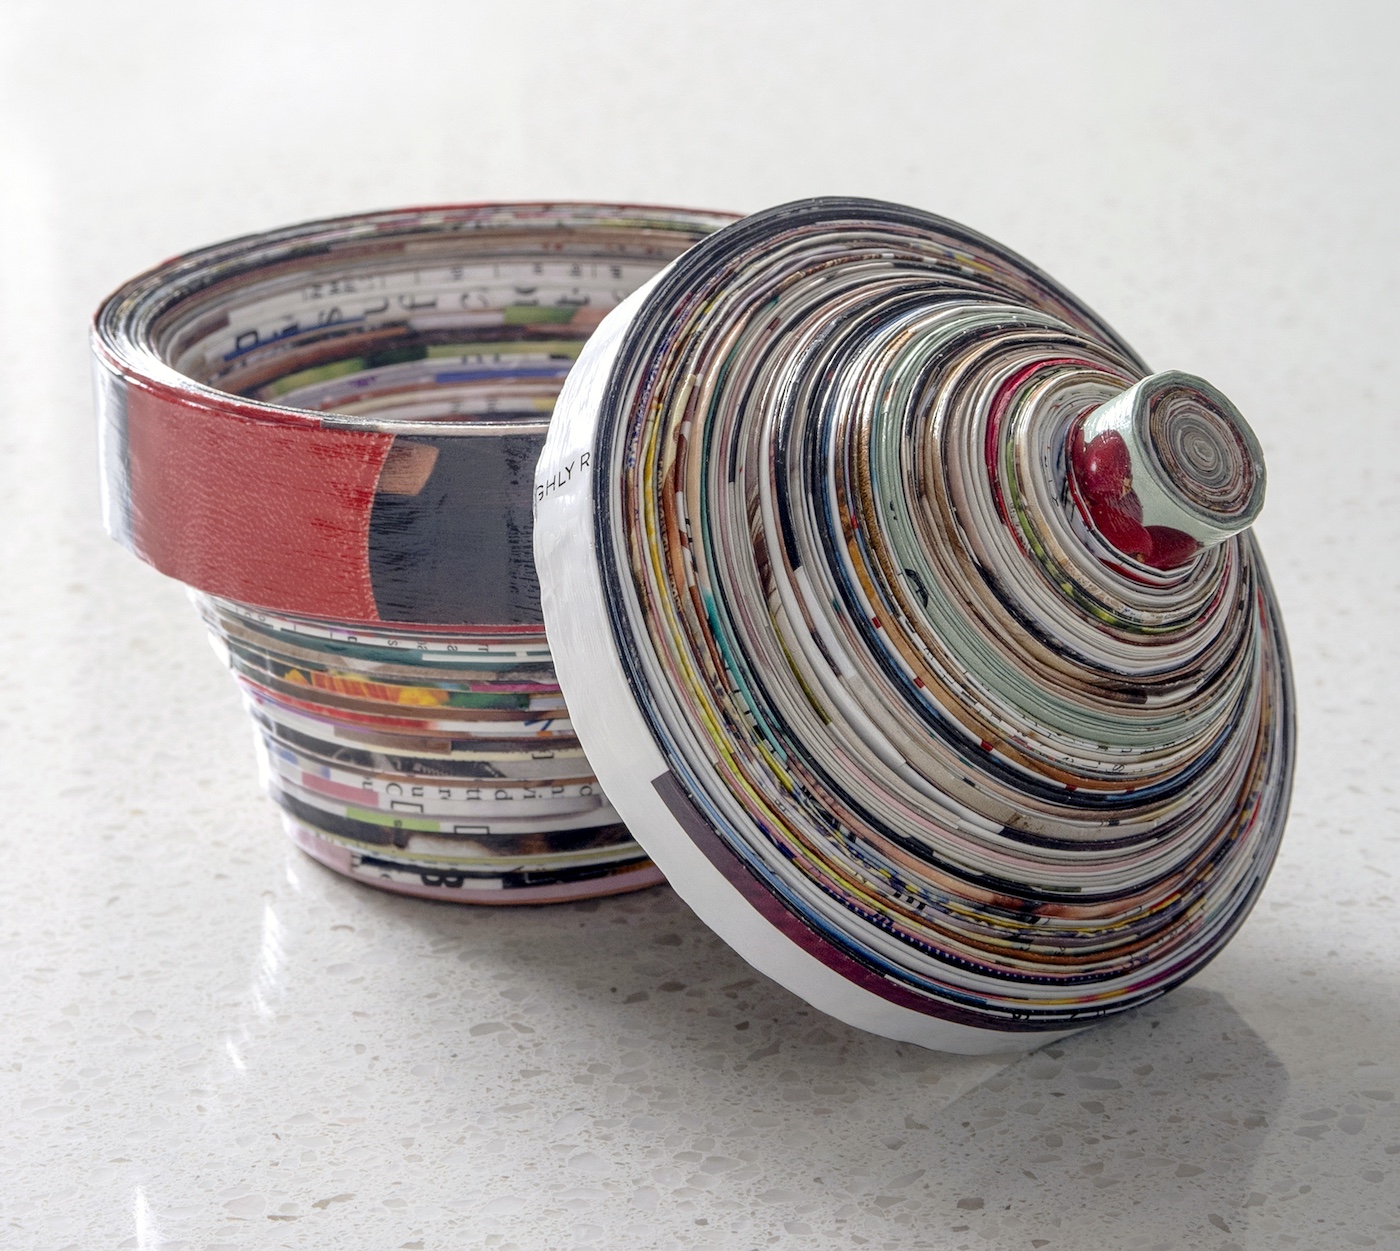
Get the printable how to for this project below:
Magazine Bowl
Equipment
- Bone folder
- Craft knife and ruler
- Cutting mat
Materials
- Old magazines – lots of them!
- Craft glue
- Mod Podge I recommend Hard Coat
Instructions
Bowl Base
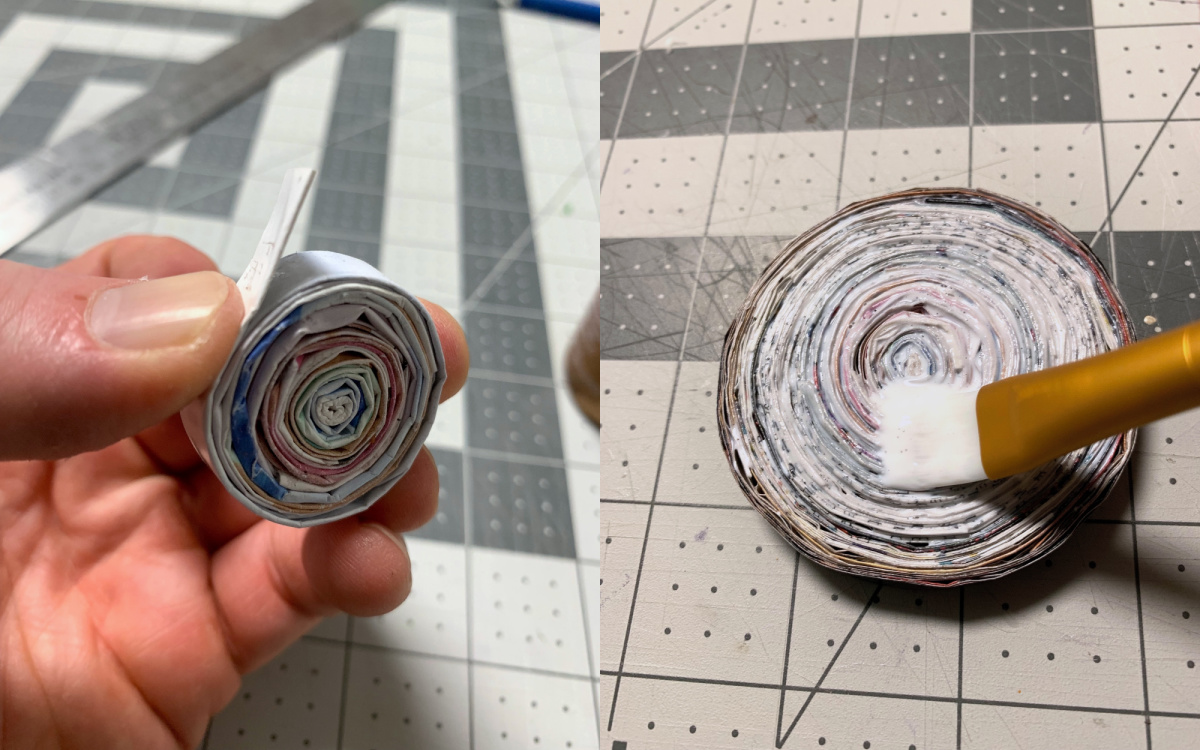
- You'll start by making the base of the bowl. Use your craft knife and ruler to cut 1.5" strip of magazine. Fold in half. Each magazine page (approximately 8 1/2 x 11") will give you about five strips for this.
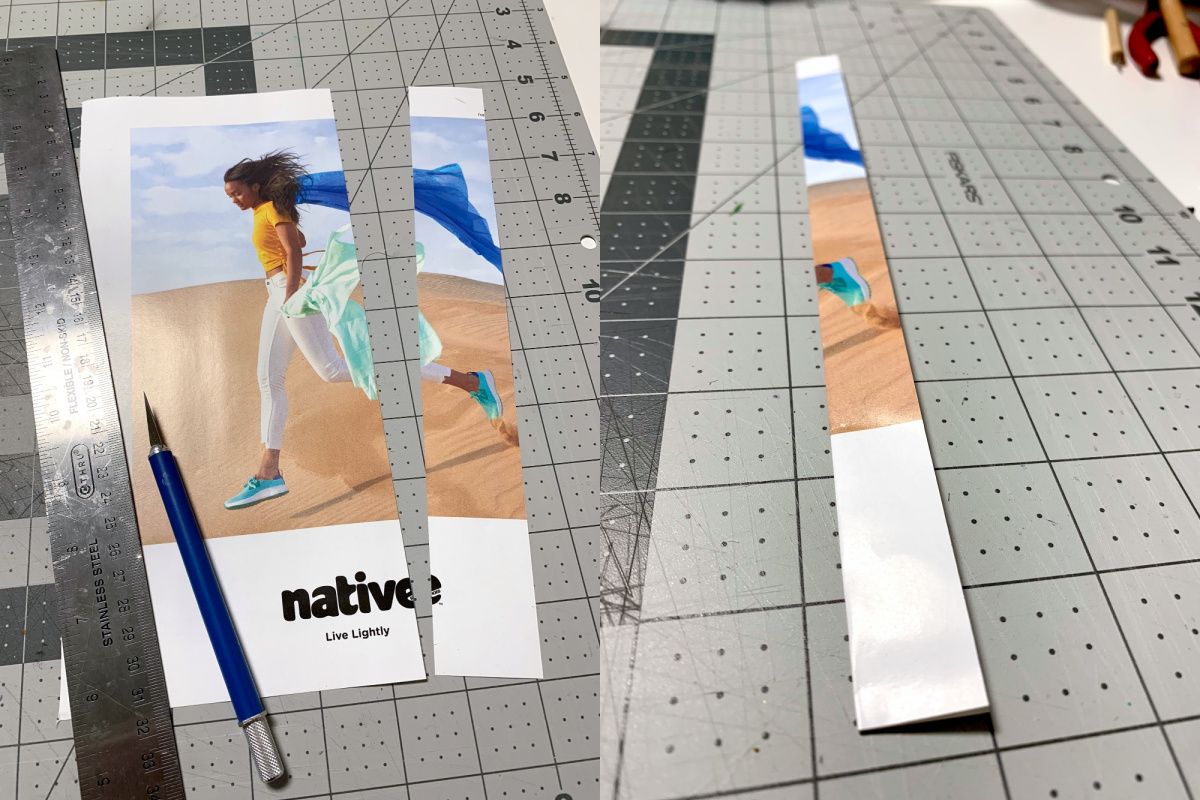
- Open the strip up and place a dab of craft glue on each end and in the middle. Smooth and then fold again. Your strip will be 3/8" wide (.375).
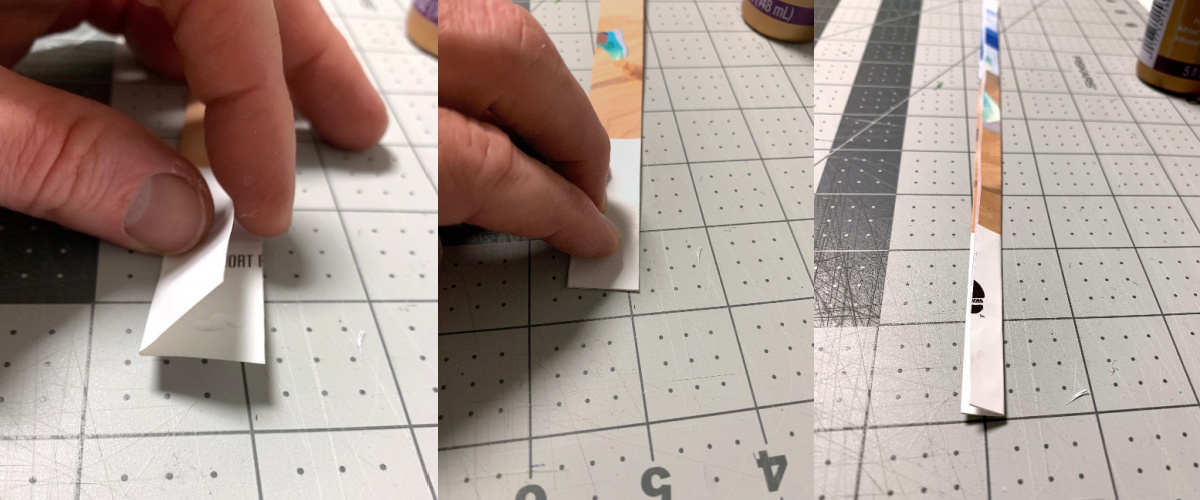
- Continue to make strips in the same manner, and start gluing them together with craft glue, overlapping end to end.
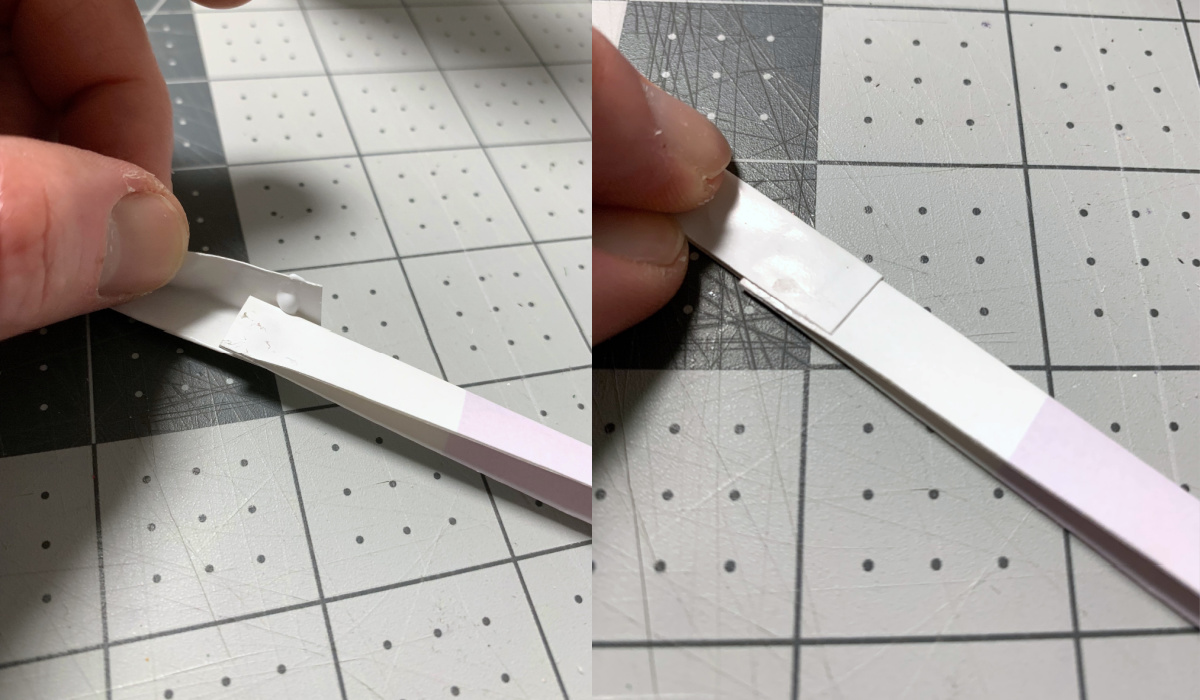
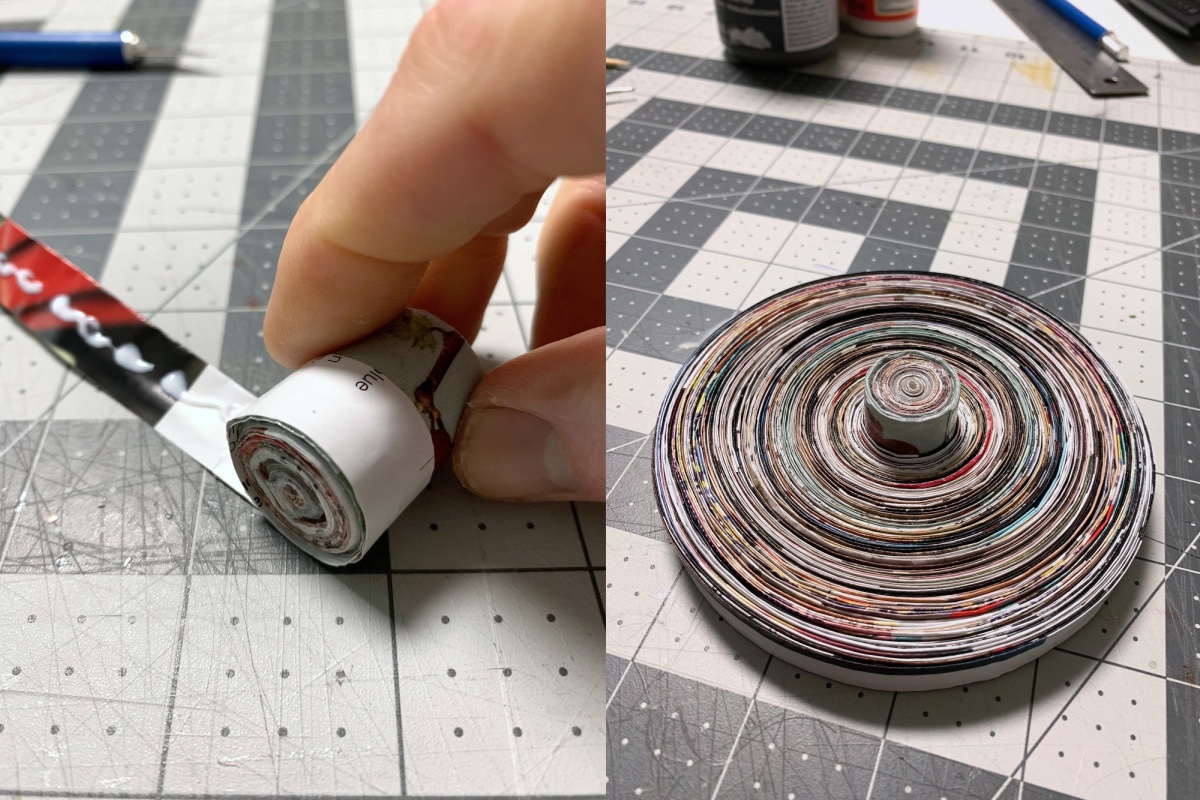
- One you have a good amount of length, start coiling the strips to make the base. Add craft glue as you go to keep the pages in place.
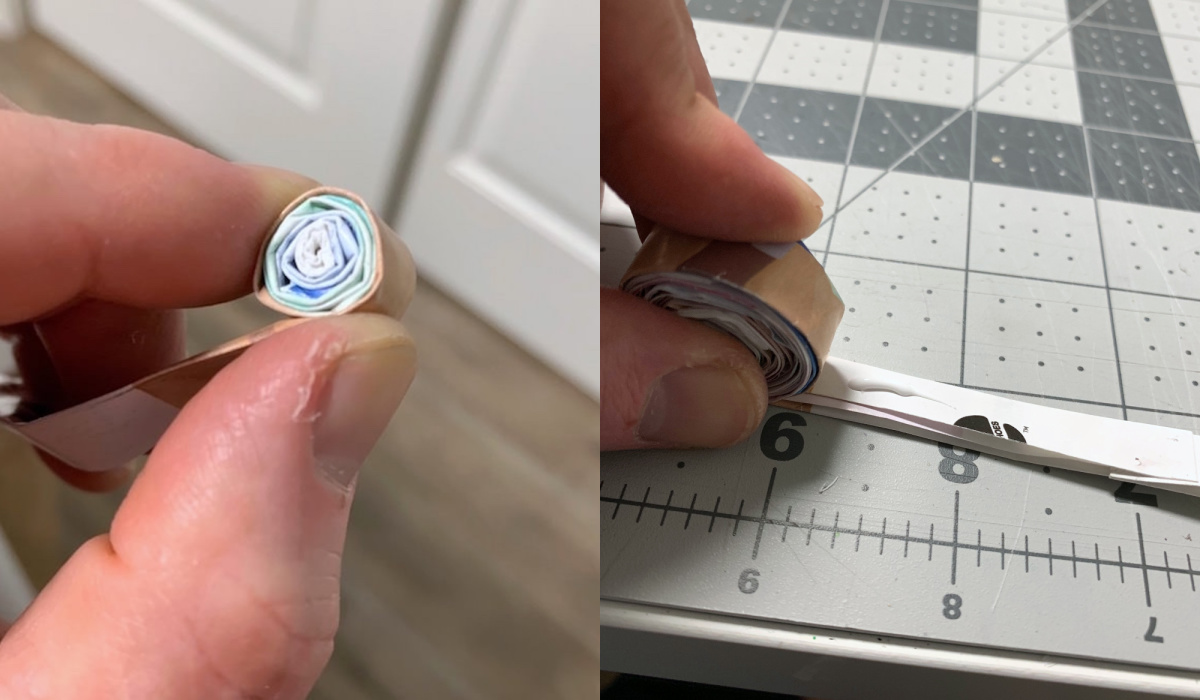
- Once the base is approximately 2 3/4 – 3" in diameter, seal with a coat of Mod Podge. Let dry, then flip over and repeat on the other side. Let dry.
Bowl Body
- For the main body of the bowl, start by cut 3-inch strips out of the magazine pages. Fold then over twice, into 1-inch pieces.
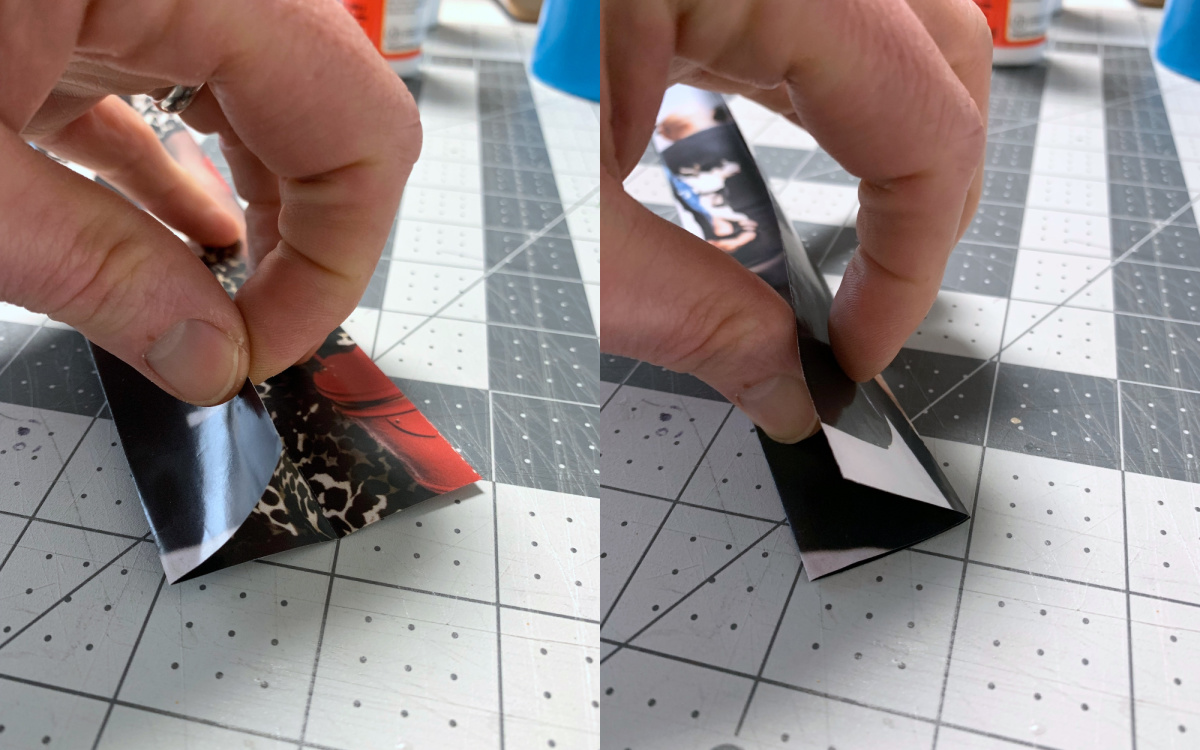
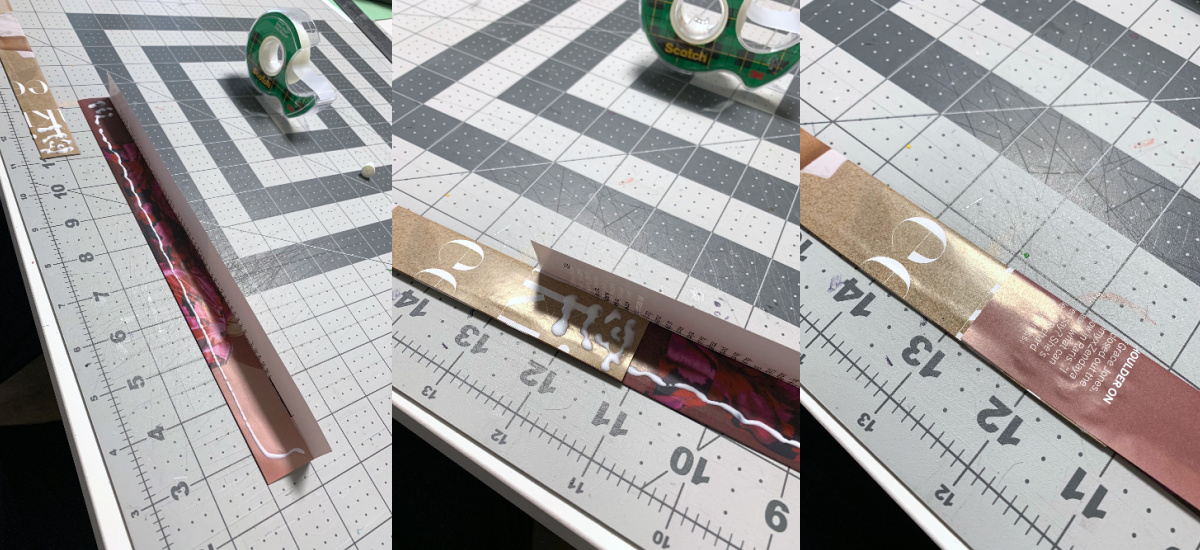
- Add glue to the first piece and smooth. Then continue making and folding pieces, using glue to attach pieces together at each end.
- It's very helpful, as you're creating strips, to use a large paint or Mod Podge bottle to wind up the strips. Then you can unwind them as you attach them to the base, which you're going to do next.
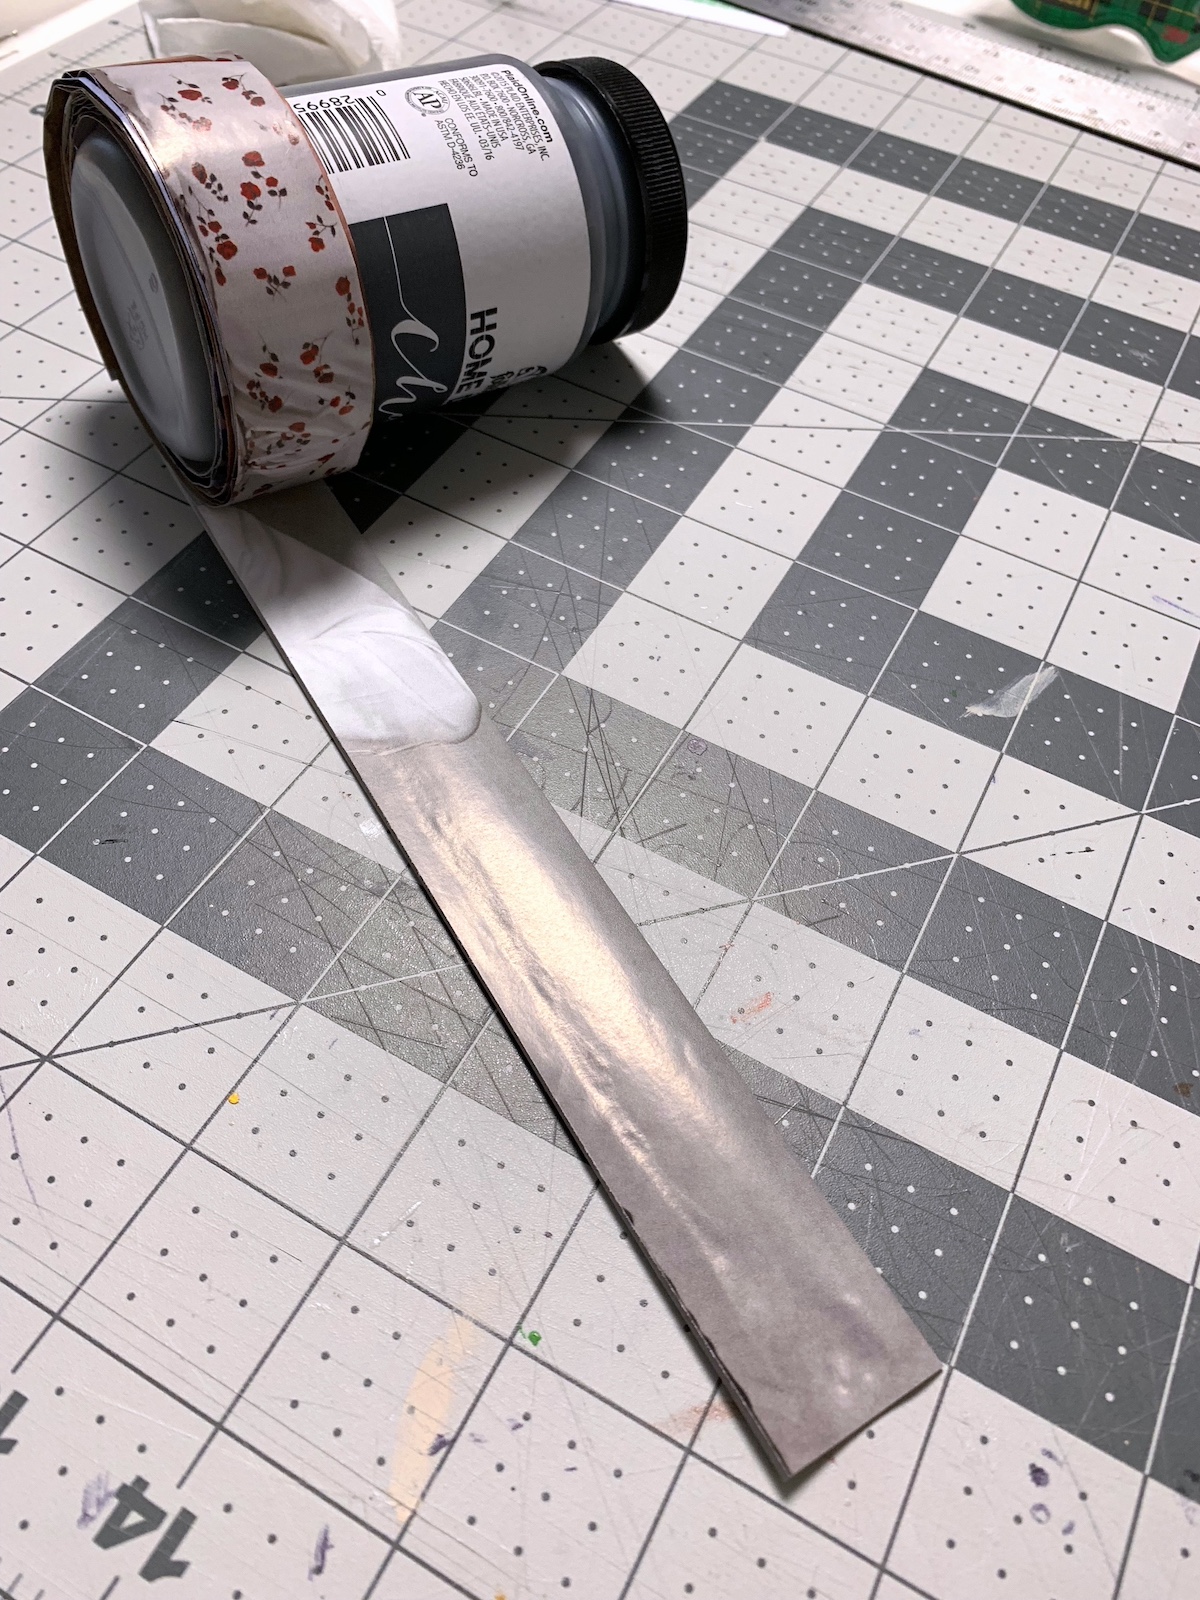
- Attach the magazine coil to the base. Place the bowl base on your work surface and add craft glue, then wrap around the base piece. You only want to use enough glue to attach the coil to the base; you will NOT continue using the glue as you wrap.
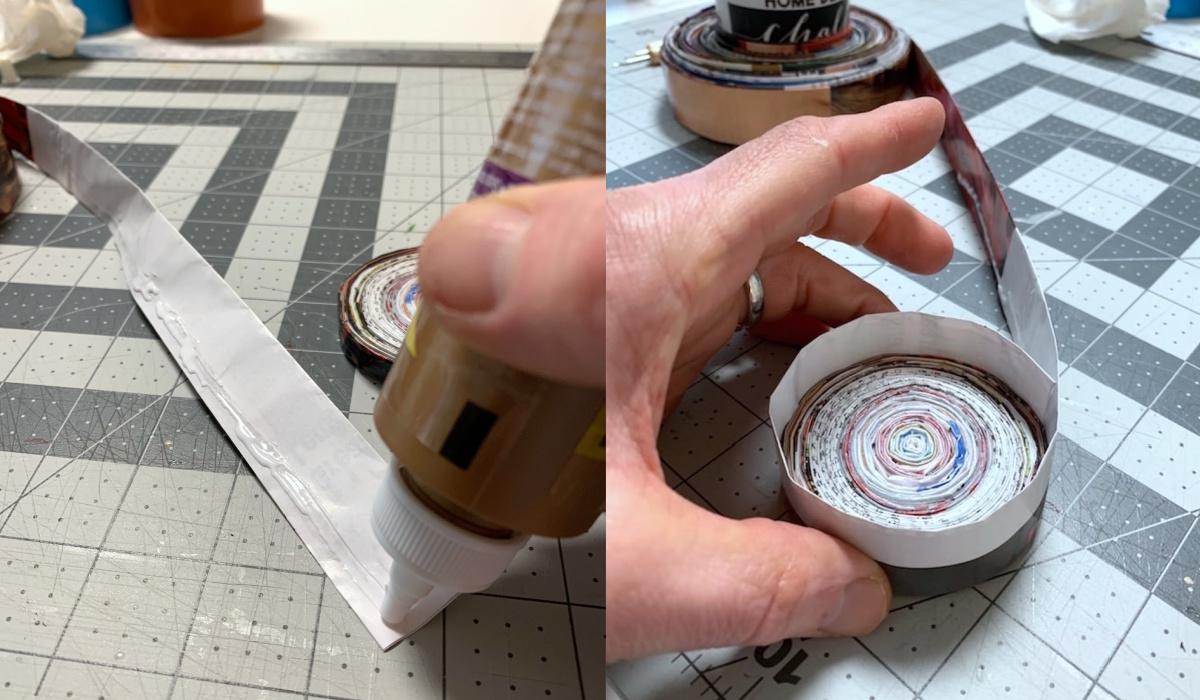
- Continue wrapping (not using glue), somewhat tightly (but not too tight). Coil until you've reached the width of the bowl you want.
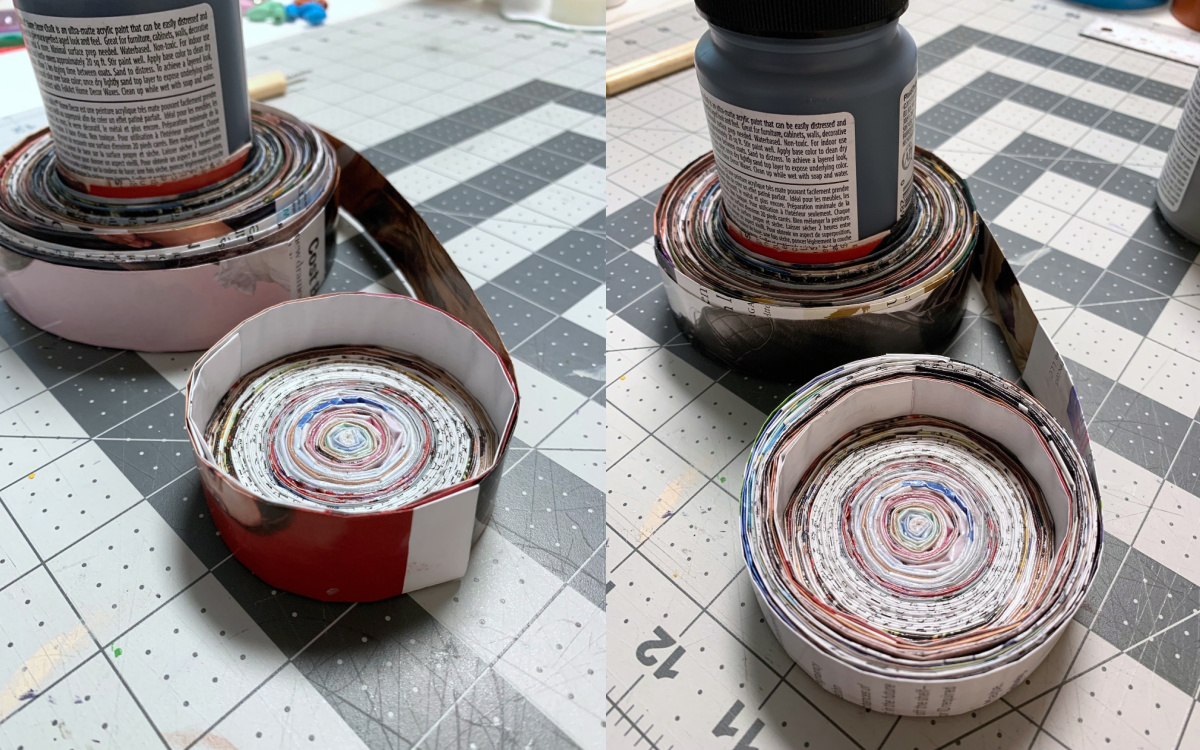
- Once you reach the width you desire, glue about 2 inches of the end only with craft glue. Let dry.
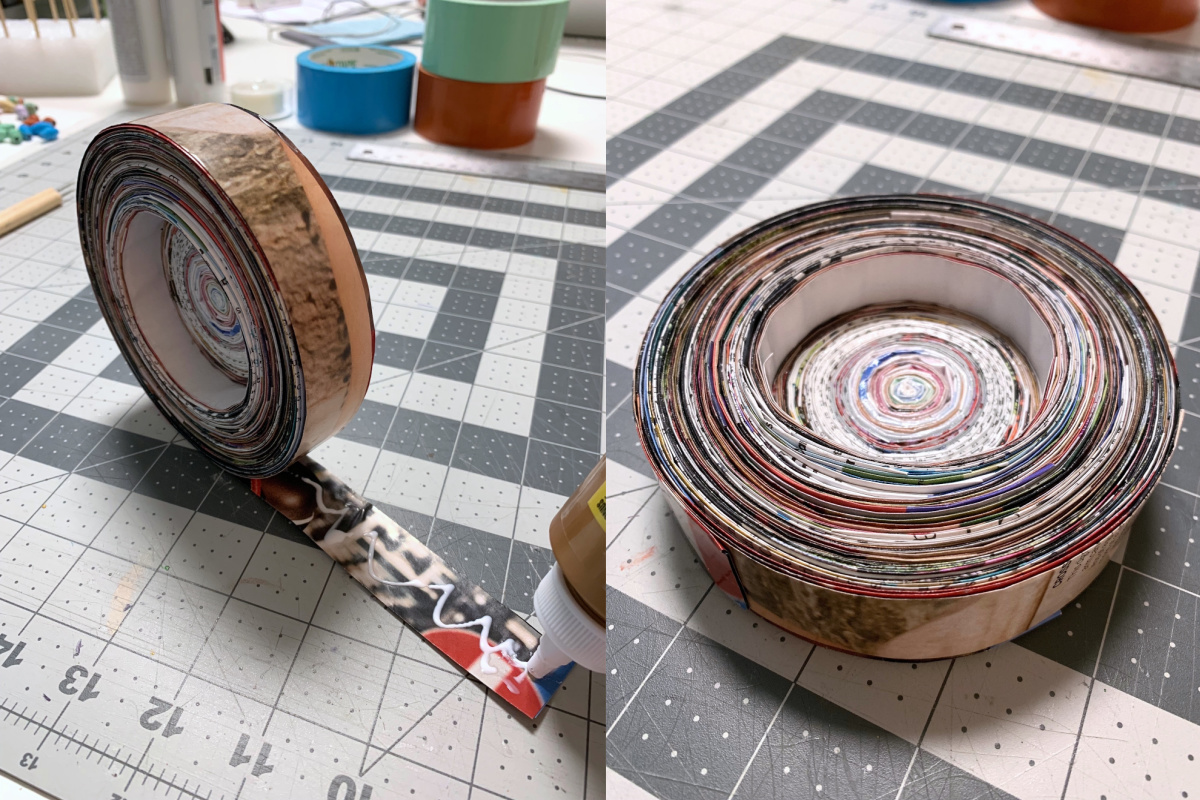
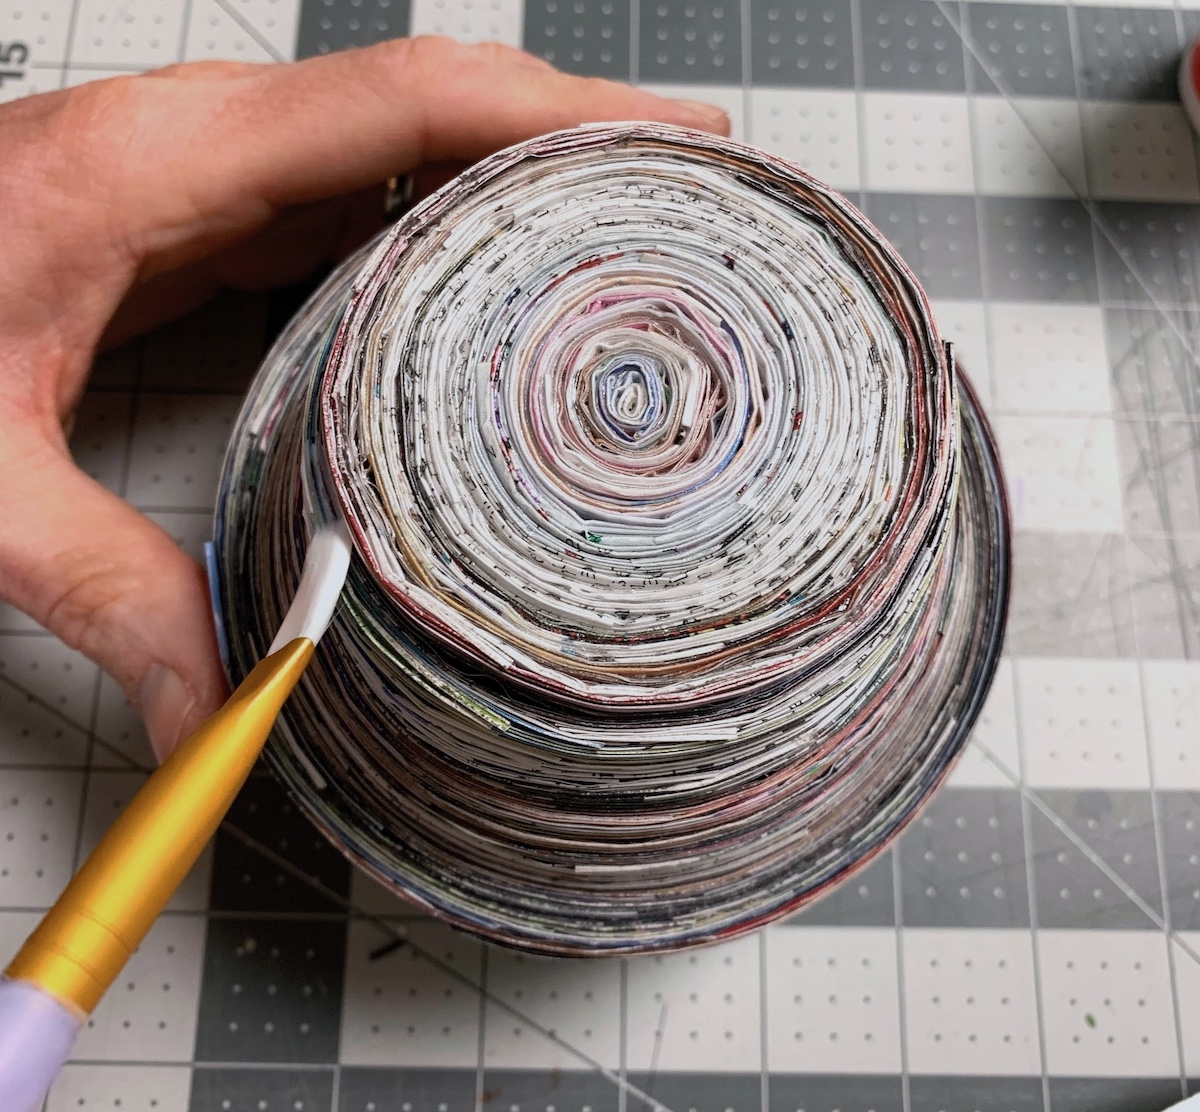
- Push out the bottom of the bowl to expand it, accordion the magazine strips, and form your bowl shape. You can adjust. When you have the shape you like, add a layer of Mod Podge and let dry.
Handle and Lid
- For the handle, you're going to cut 2-inch strips out of the magazines and glue together just as you did with the base and the body. Simply roll the strips together, making a 1" long knob. When you reach the end, use a dab of craft glue. Let dry and then seal with Mod Podge.
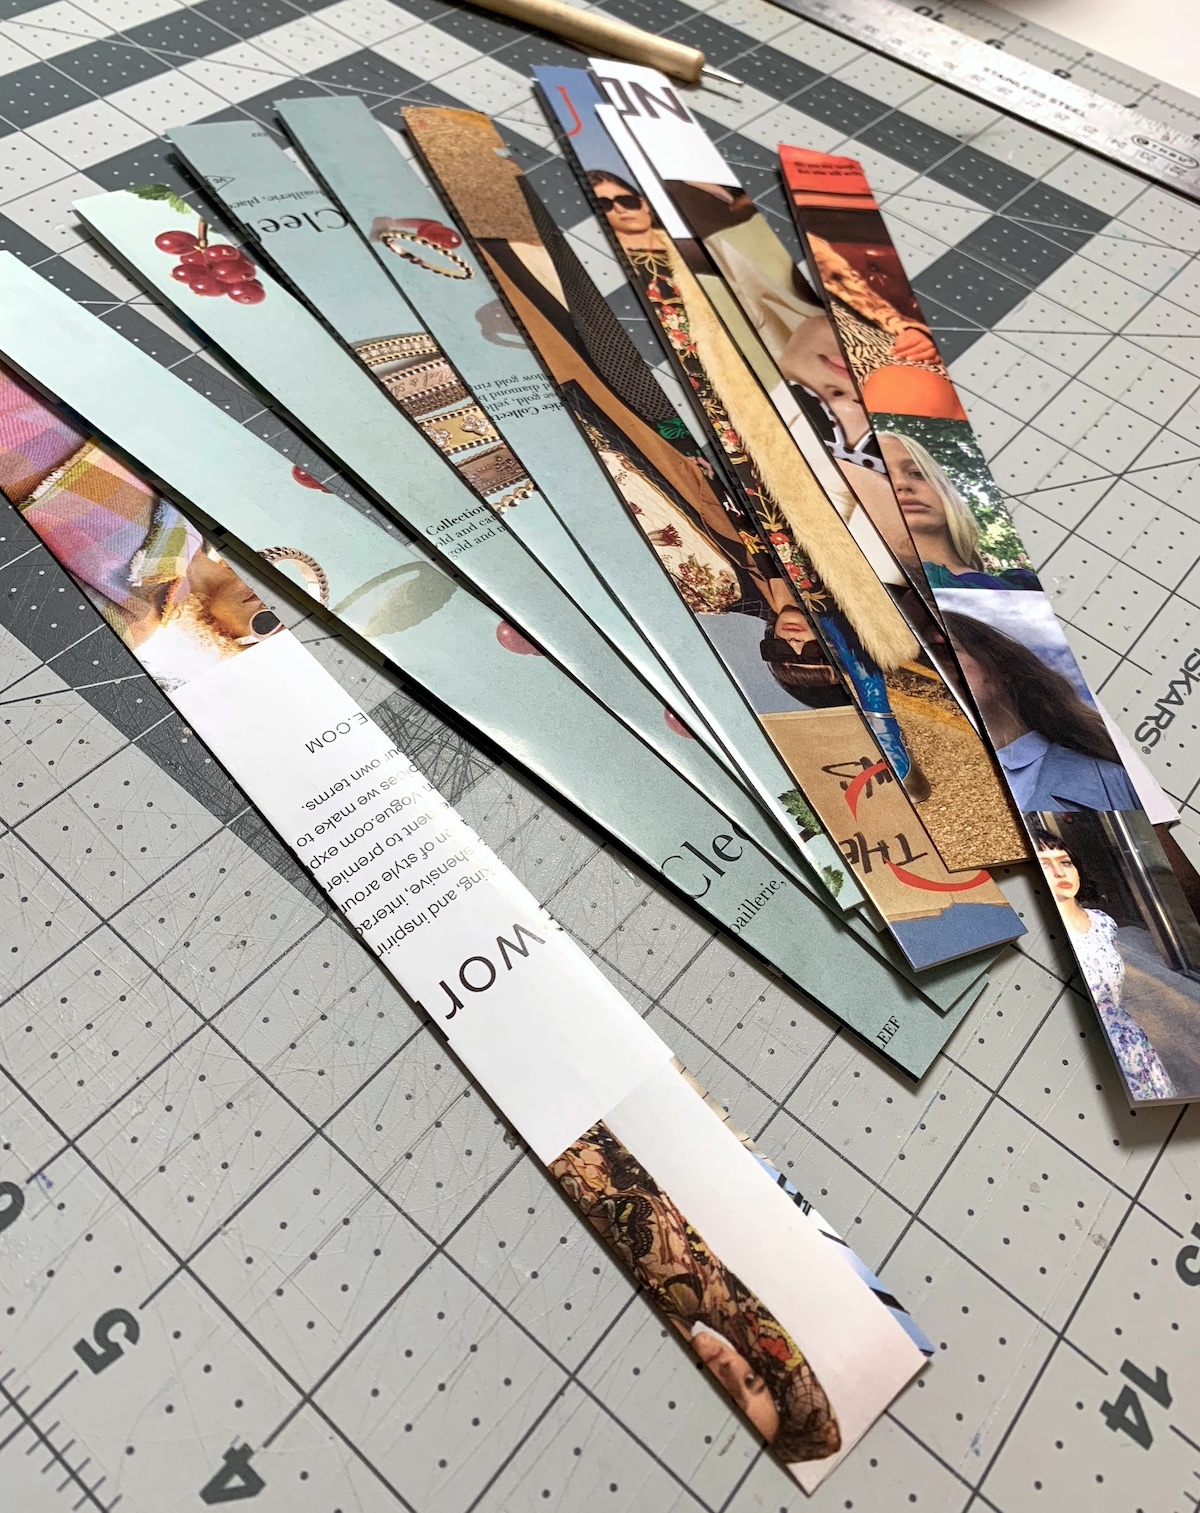
- To make the lid, you'll want to use 1-inch strips folded in half – so 1/2-inch strips. You don't need the lid to be as tall as the base. Cut several strips and start gluing them together end to end until the knob is dry.
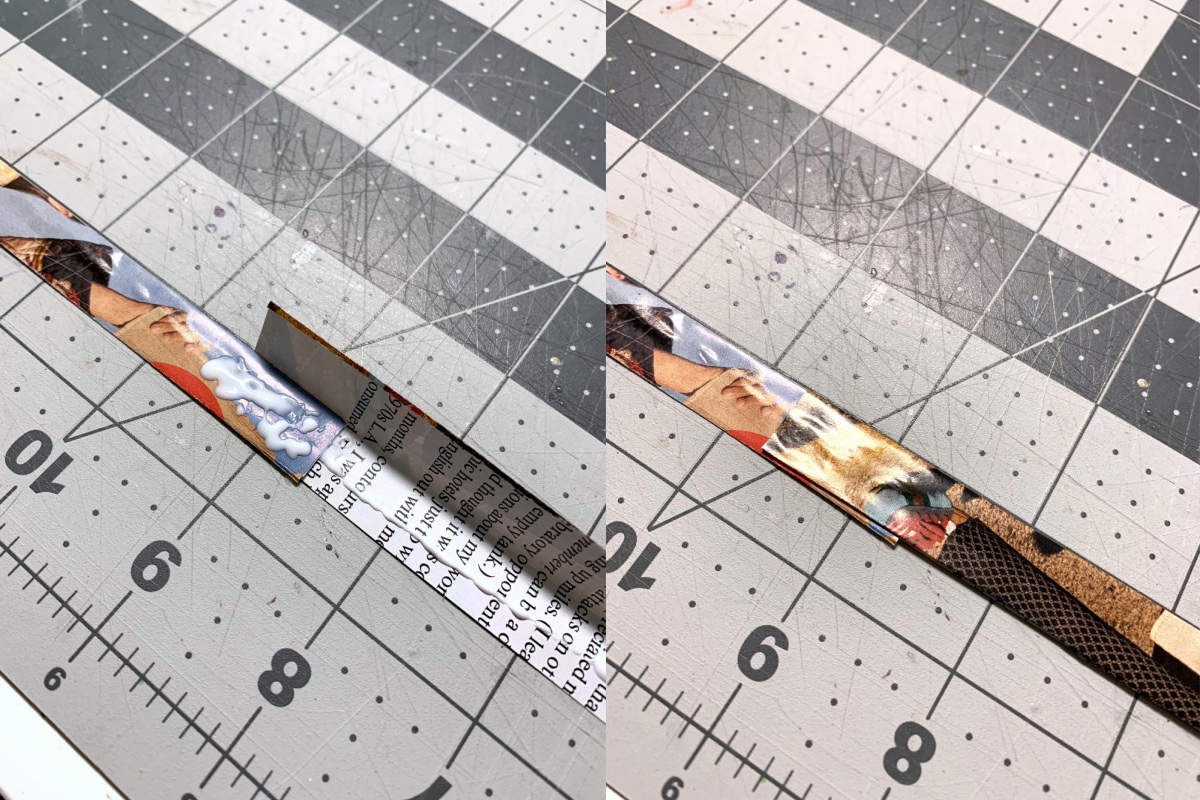
- Place a dab of glue on the knob and start rolling the 1/2-inch strips around it until the lid is approximately the same diameter as the bowl base. Attach the end with glue and let dry. Remember – you only want to use glue when you're first wrapping the 1/2-inch strips and then at the very end, because you're going to accordion out the lid.
- Push the lid out like an accordion with your thumbs until the lid is the height that you like. Seal with Mod Podge and let dry.
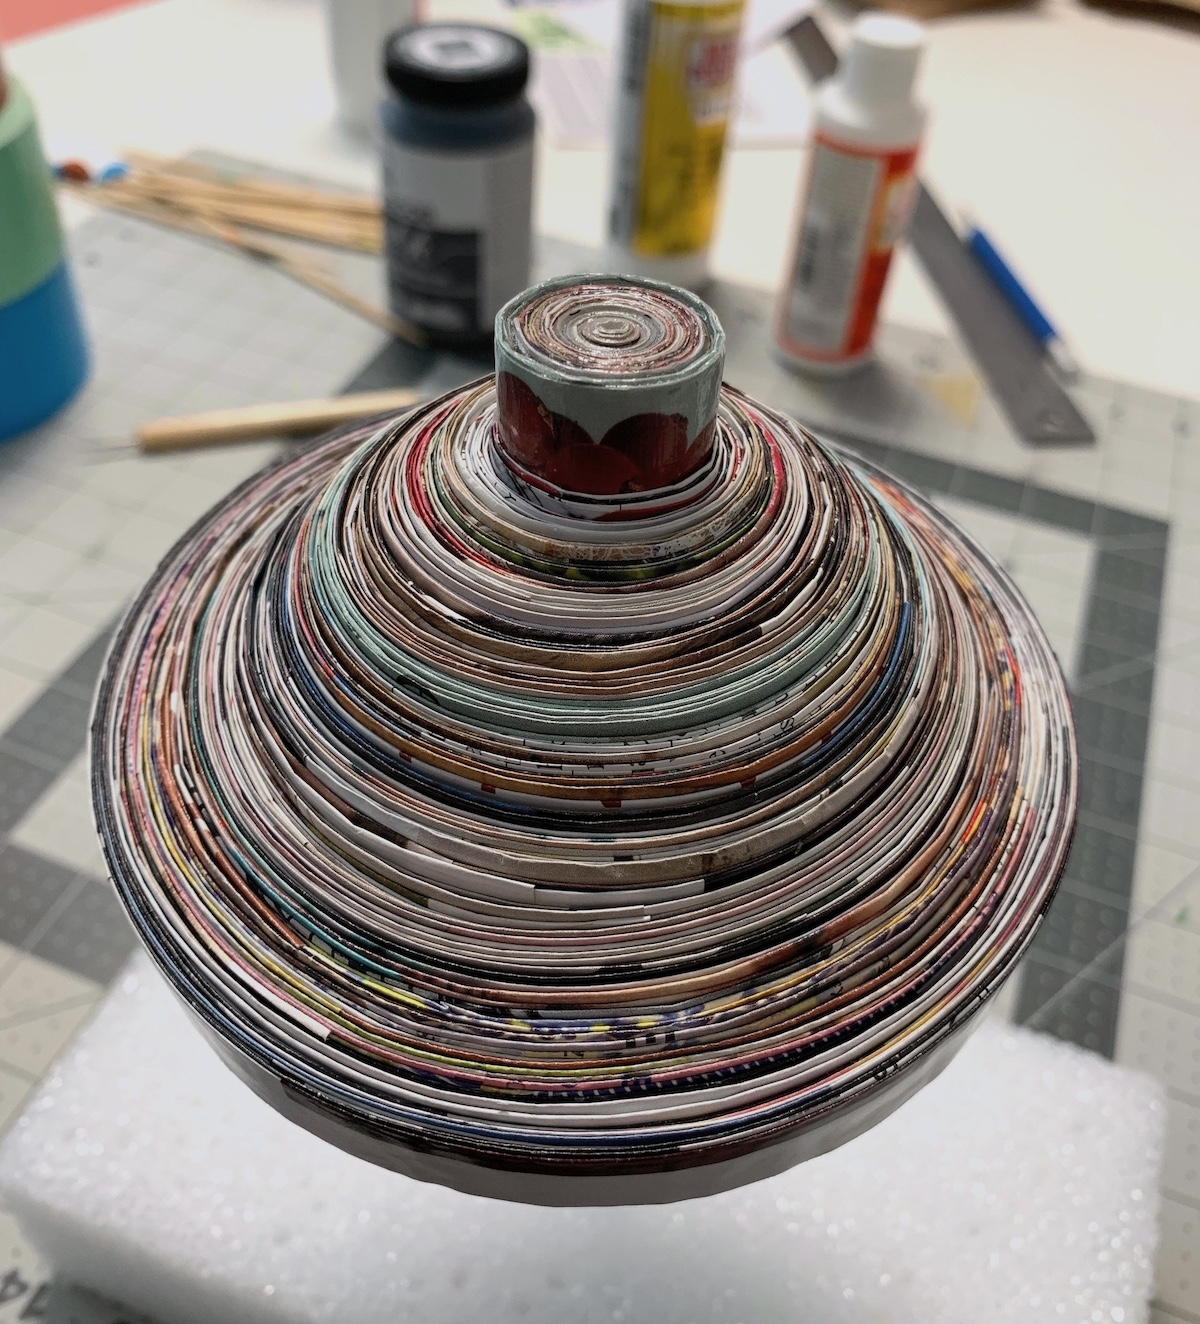
- To finish, paint a few additional coats of Mod Podge on both the lid and the base, letting dry between coats.
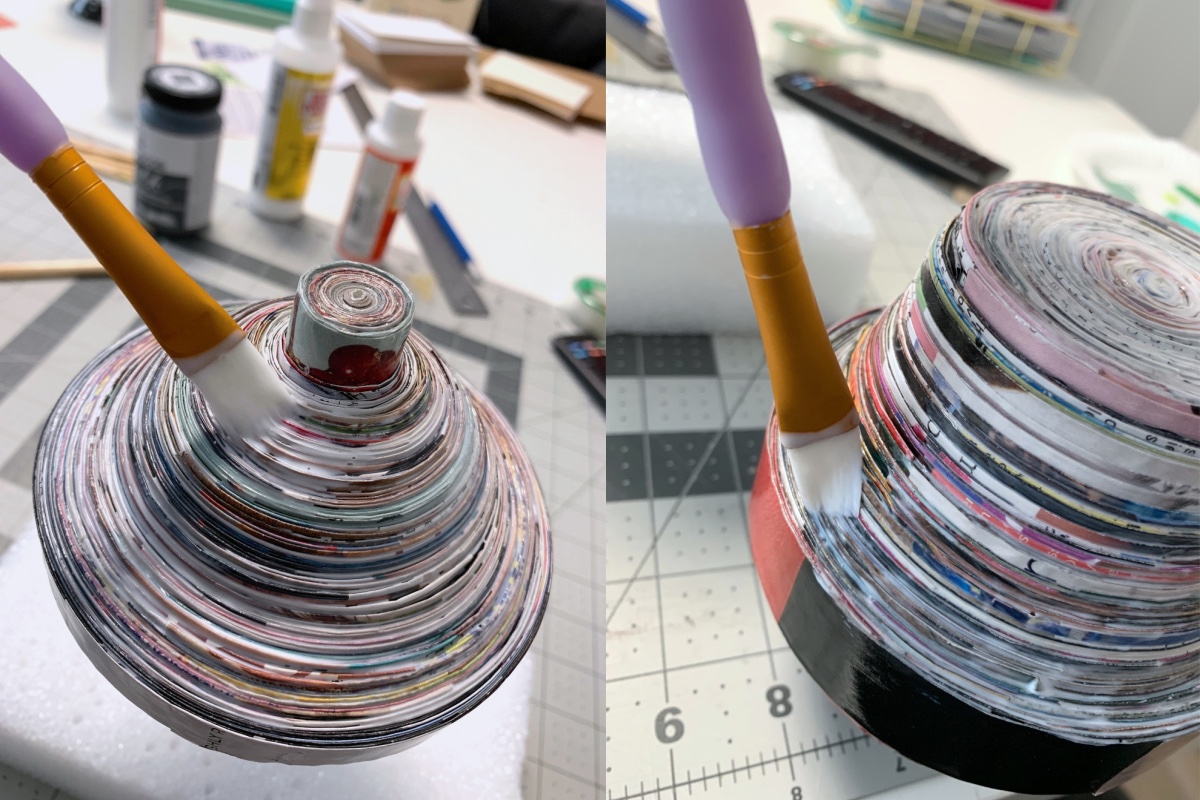
I am so excited about this dish. I think I will put spare change it there, or maybe earrings. What would you put in your magazine bowl? Let me know in the comments!




Yippie! Thanks for the love, Amy.
Amy,
Firstly, I’ve been a follower for a long time of yours – big fan, but haven’t commented much – if at all. I even follow you through twitter as well. Yesterday I saw where you were about to start chatting about crafterminds. I had no idea about this site (how did I miss this??). You replied to me (mindboggld) and sent me a link to the site so I could see how to better my blog and gain more readers. I just wanted to say thanks for taking the time and pointing me in the right direction. While it’s all so overwhelming, I am going to make a serious “go” at blogging. I was only sharing with friends and family for the most part, so I never really concerned myself with it. But I like sharing ideas and thoughts and creative sparks, so I’m ready to make a better “go” at it. Anyways – all this to just say thanks. 🙂
OH! And I like the magazine bowls! So thanks for sharing the link to Johnnie 🙂 Would make a great Christmas gift filled with home made candies and an embroidered tea towel! 😀
OK, so, How long does this bowl take to make?
Oh, and Amy I gave our favorite medium, Mod Podge, a plug on my post today. Go see!
This is so creative! I have seen some stuff like this in stores but I’m excited to head over and check the tutorial out.
I’d have never thought something like this was possible – and so simple! I showed it to my husband and he loved it. he did say he had a feeling he would be roped into helping with the cutting and folding. LOL! It’s a family craft! I’m doing this!
I can’t wait to do this bowl..I am so excited!!
Thank you!!
Pleasure! I hope it turns out great!
Love this! Making one currently for my dad for Father’s Day! Think it will be a good little container to keep all of his guitar picks in. 😁
I participate as acaregiver with my Art Therapist at the Cancer Pavilion. We were assigned Magazine Bowl as a project. I enjoyed the visual art and the elements elements of value of color.