
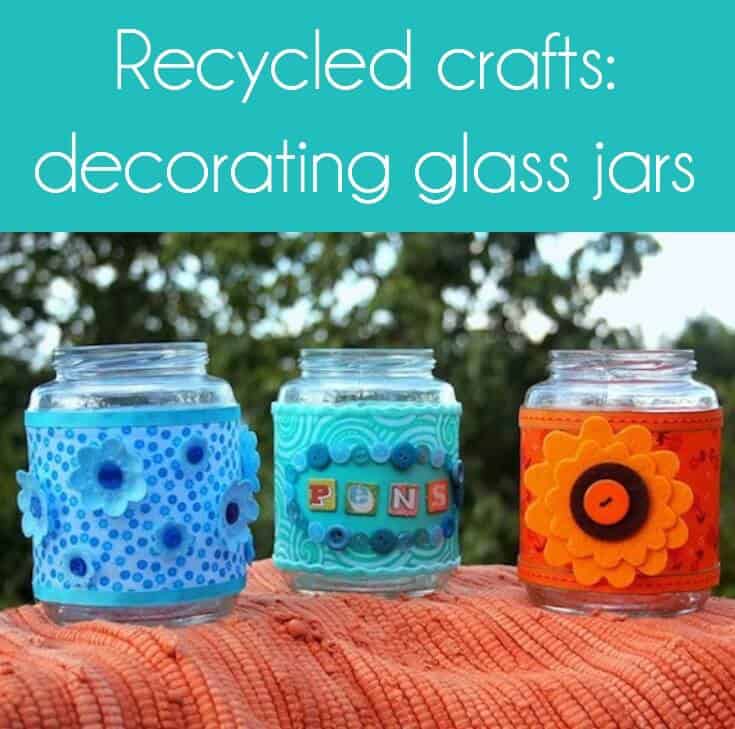
Recycled crafts are so fun and I love the cost (free)! You’ll be decorating glass jars with fabric scraps and embellishments – very easy.
Skills Required: None. This is a great beginner Mod Podge craft. You’ll be applying fabric to jars with Mod Podge, and wrinkles are easily avoided.
I’ve done a lot of Mod Podge projects, and decorating glass jars is one of my favorites! Recycled crafts are SO FUN. I really like to make crafty organization projects, I think because I lack organization in my own life. It’s hard for us crafters, right? Creative and organized don’t always mix!
To celebrate back to school as well as the crazy crafter in all of us, I’ve whipped up these “stuff” jars. These are made with pickle jars, but you can apply the same concept to baby food jars or other small glass containers for the same results.
Using baby food jars would make it a great craft idea for kids, and a great introduction to the world of reusing surfaces.
Which reminds me, I forgot to mention the best thing about this fabric project – it was free! I recycled the jars, and had the rest in my stash. How did I make this craft at home? Learn below!
Decorate Glass Jars
Gather These Supplies
- Pickle Jars – 3 large, recycled
- Mod Podge Gloss
- Fabric scraps – I had 3 fat quarters in my stash
- Ribbon – each jar needs about 20″
- Felt Flowers
- Buttons
- Craft Glue
- Chipboard letters
- Scrapbook paper
- Flat paint brush
- Scissors or cutting mat and wheel
- Tape measure and pencil
- Wax paper or something to protect your table
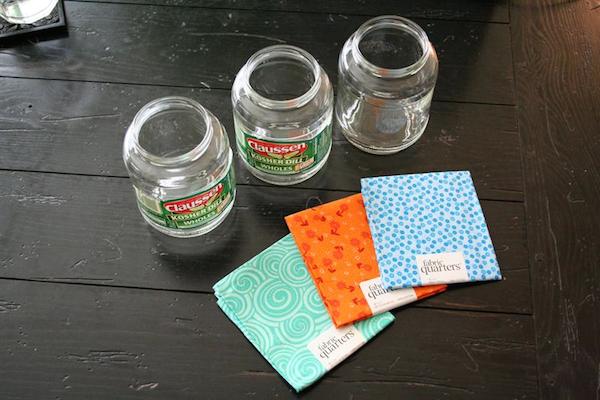
Start with these lovely supplies for decorating glass jars. First, soak the jars in water to get the labels off (additional sticker removal methods). This is why I love recycled crafts. I didn’t have to pay anything for the jars!
You will want to prepare the fabric. I cut some oversized pieces of fabric out of the fat quarters. Then wash and dry the fabric (do not use fabric softener) in your next load of laundry.
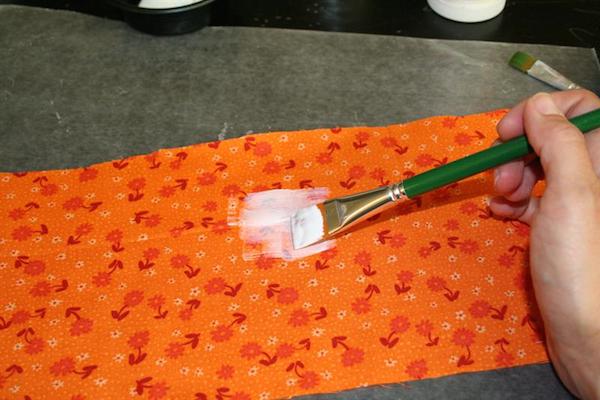
Iron and then lay out on a covered work surface. Wax paper is preferable for covering your table.
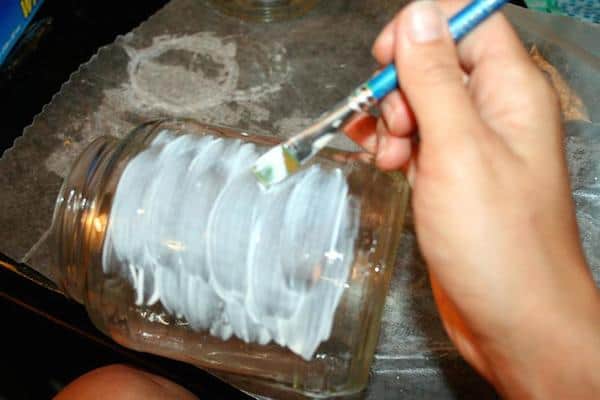
Using a brush, paint a light coat of Mod Podge Gloss onto your fabric. Allow to dry. This will allow you to cut the fabric like paper without frayed edges.
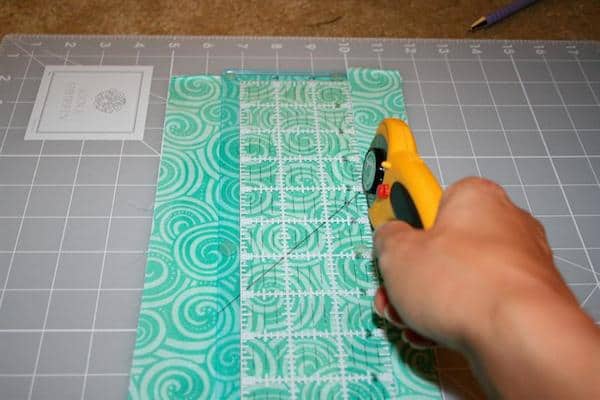
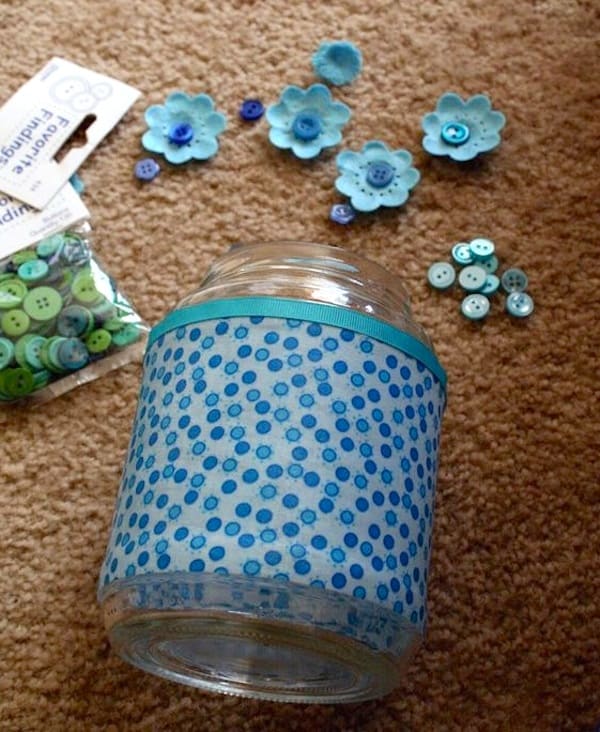
Time to trim the fabric to fit the jars. I have a cutting wheel and mat, but if you don’t just measure and then do it with your scissors. Make sure you leave about 1/2″ extra so that the fabric can overlap in the back.
Time to decoupage! You are going to apply the fabric, but first you need to lay down a Mod Podge base. Paint a few inches of Mod Podge at a time.
You’ll need to smooth the fabric around the jar, smoothing and applying Mod Podge a few inches at a time. Make sure that you add a little more Mod Podge at the seam in the back.
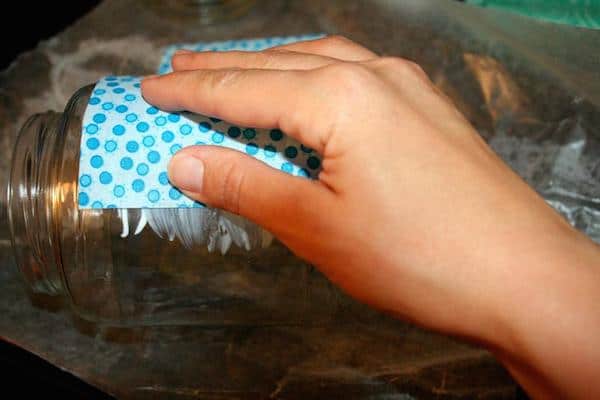
Smooth everything with your fingers and then allow to dry for about an hour.
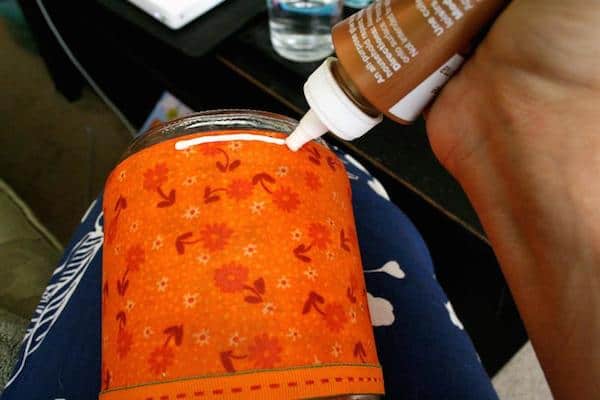
After the jars are dry, add the ribbon at the top and bottom. I used the craft glue to apply. It was really easy because pickle jars have a ridge (at least these did), and that is where the ribbon sat. Make sure to seam the ribbon in the same place that you did the fabric. You now know where the back of the jar is.
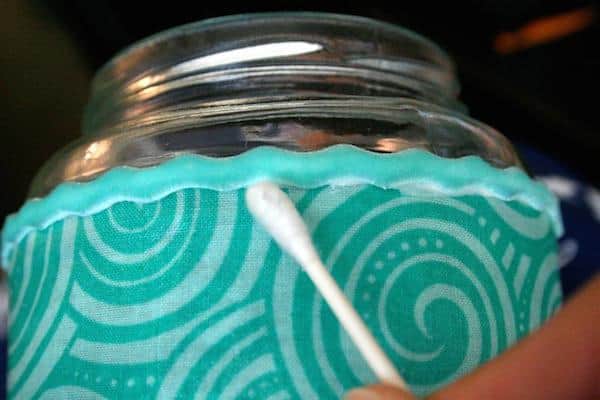
Clean up any craft glue that comes out of under the ribbon with a cotton swab. Doing it with your finger will smear it everywhere (can you tell I tried that?).
The last part of decorating glass jars is easy. Break out your stash and plan what you are going to do. I had some felt flowers and buttons, so I laid everything out and kept switching buttons until I was happy. Attach everything with craft glue or decoupage down. Let dry before using.
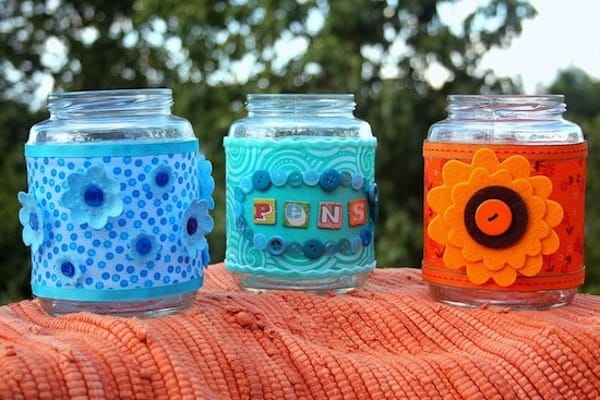
Here’s what I used to embellish each jar:
- Blue Jar – blue grosgrain ribbon, eight felt flowers, eight blue buttons
- Seafoam Jar – seafoam velvet ribbon, small scrap of coordinating paper (Mod Podged behind the letters), chipboard letters spelling “Pens”, 24 coordinating buttons
- Orange Jar – orange grosgrain ribbon with a green edge, large felt flower piece attached with craft glue
I’m so happy with my recycled jars. I want to make one of them for everything in my apartment. They are so fun! Would you try decorating jars?
If you like decorating glass jars, check out these other ideas from some of my friends!


I’ve been volunteering at the assisted living my mom is at and I love love crafts and probably have a small Michael’s in my house!! I’ve been looking for ideas and after searching for a couple days for a few hours I found this site and OMG it’s perfect!!! I’m so excited!! I’m gonna try one of these fabric crafts this Friday with the group. Thank you!!! Now I just got to find all that I need. lol 😂